
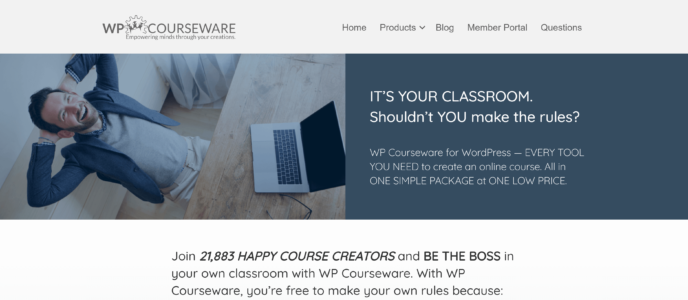
WP Courseware Review: How Good Is It?
- By
- Last updated:
- 5 Comments
Selling online courses is a great way to make a living, and course building plugins for WordPress allow you to design, sell and run courses within the WordPress framework. In this WP Courseware review, I’ll analyze the original WordPress course building plugin to determine how effective it is.
To help you to decide whether or not WP Courseware is right for you, I’ll explore:
- what to look for in a course building plugin
- WP Courseware features
- how to use WP Courseware
- pricing
- pros and cons
- the overall quality
- which businesses can benefit most from WP Courseware.
By the end of this review, you’ll know if this is the ideal course building plugin for you.
Let’s dive in…
Table of Contents
What to look for in a course building plugin
Before you choose a plugin, you need to know what features are essential to the type of course you want to run.
There are several features you may want:
Course builder
As you may expect, the most important thing to consider here is the course builder. You want to be able to build your courses easily with no prior experience in code. You should also be able to customize every aspect of the course — from the lessons to the welcome emails and completion certificates.
Quiz builder
Another important aspect of many courses is testing. The best course builder plugins allow you to create quizzes with multiple answer formats, pagination, time limits and pass requirements. Quizzes should also be easily attached to lessons.
Content dripping
This feature is what allows you to determine how often students receive new lessons. For example, you may choose to release one lesson per week, or decide that students only receive new lessons when they complete old ones.
Content expiration
This is the ability to make certain content unavailable after a specified date or period of time. In some instances, you may also be able to choose a user action to trigger the disappearance of specific content.
Forums
One powerful way to build engagement with your courses is by creating a community component. Some plugins offer built-in forum capacity, while others do this through integration with plugins such as bbPress.
Email capabilities
Email is the best way to ensure every lesson reaches your students. Some plugins have this capability built in, whereas others may send emails through integrations with popular email marketing tools.
Subscriptions
The best course building plugins for WordPress allow you to create subscriptions with recurring payments. This is a great way to build a steady income around people who want access to all of your courses.
Memberships
Another great way to monetize your courses is to sell them with memberships. Some course building plugins have this capability built in, while others do it through integration with plugins such as MemberPress.
Coupons
Coupons are a fantastic way to sway audience members who are on the fence about your products, or to reward loyal customers. Look for a course building plugin that allows you to create unlimited coupons. You should also be able to choose between a dollar amount and a percentage discount, and set the precise amount customers will save.
Payment processing
If you already have a preferred payment processor, look for a membership plugin that’s compatible with it. You also want to give your customers the ability to choose their preferred payment option.
Ease of use
The best course building plugins make it easy to design courses, with no need for code. Look for a plugin with a straightforward course building process, so you can focus on the important thing: Creating effective lessons.
Support and documentation
If you do run into trouble, you want to be able to get answers quickly, so look for a plugin that promises extensive documentation and fast customer service response times. You can often find the most accurate information about the quality of customer service by reading user reviews.
Cost
The final factor to consider when choosing a course building plugin is the cost. What is the dollar amount you’ll be charged upon signup? Is this an annual fee, or can you gain long-term savings with a lifetime membership? How does the cost compare with other plugins with similar features? While the features themselves are the most important thing, these questions should also factor into your decision making.
WP Courseware Review
Features
In this review, I’ll look at the Teacher plan of WP Courseware, which offers the following features:
- Licenses for two sites
- Drag-and-drop course builder
- Quiz maker
- Gradebooks
- Capacity for multiple instructors
- Unlimited, highly customizable coupons
- Unlimited courses
- Content dripping
- Ability to create paid subscription options
- Payment via PayPal and Stripe
- Integrations with ecommerce and membership plugins
WP Courseware Review: How the Plugin Works
How to Install WP Courseware on Your WordPress Site
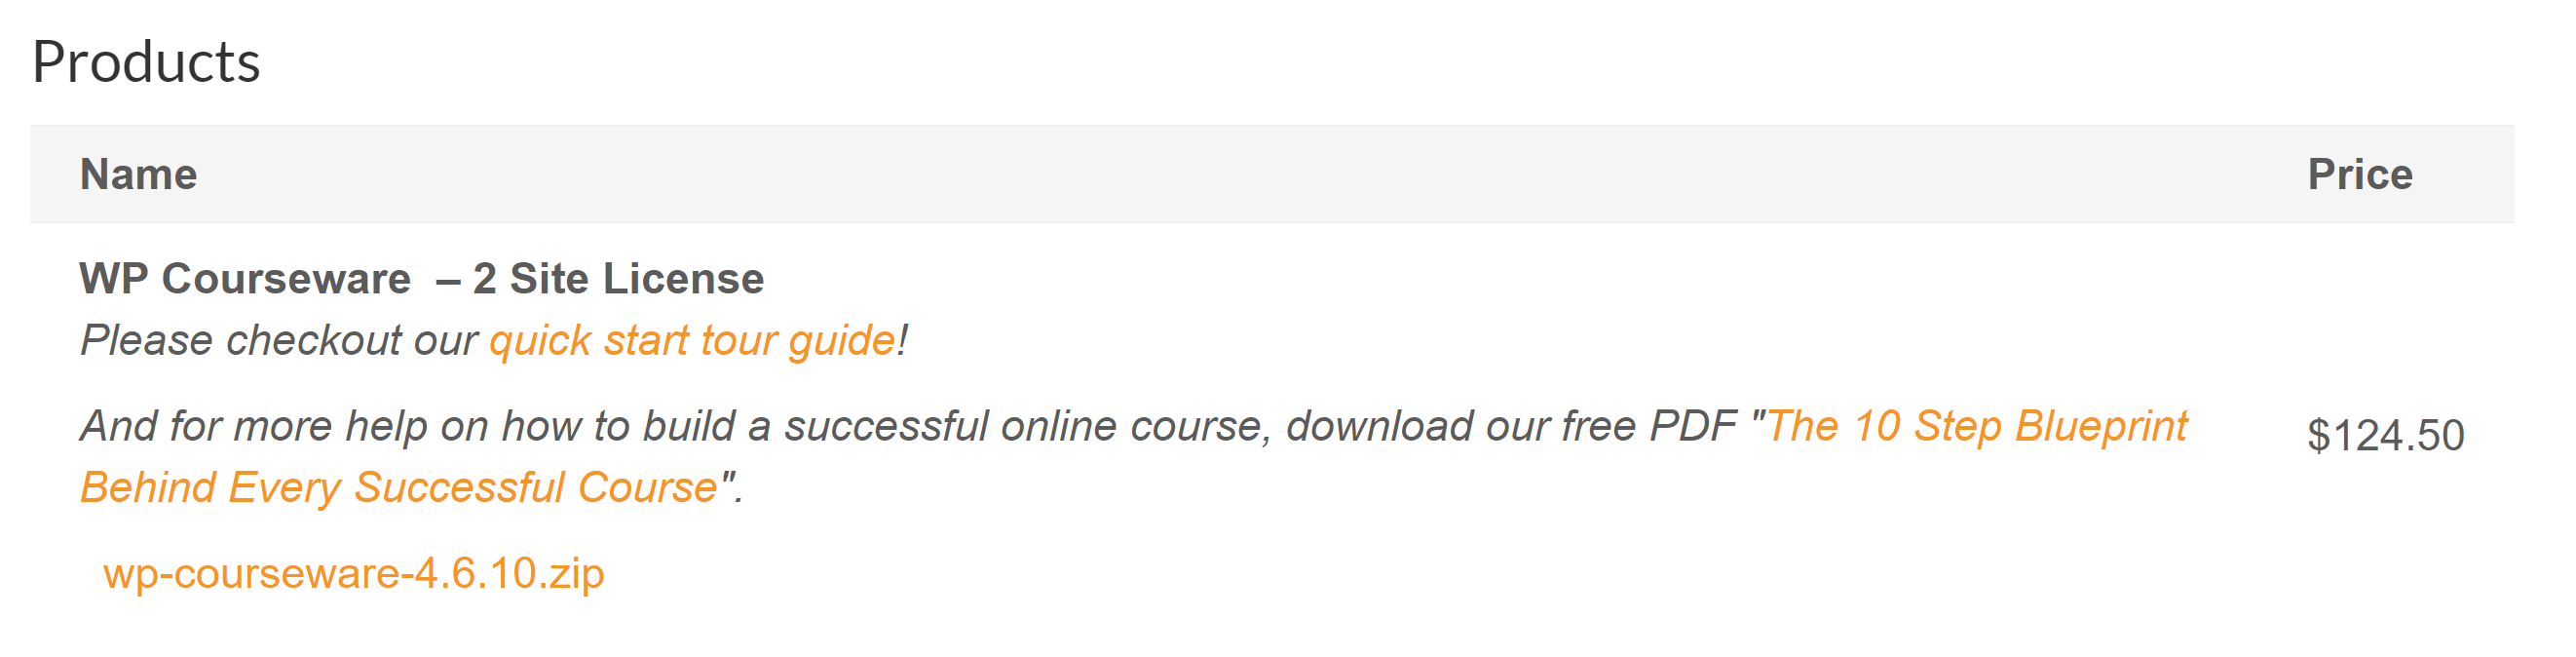
To get started, you first need to sign up for the plan you want. The signup process is simple, requiring only payment and some basic account details. Payment can be done through PayPal or credit card.
Once the payment is processed, you’ll be taken to a payment information page, where you can see information about your payment, download your plugin and access your API key. You’ll also receive a copy of this information in your email.
Scroll to the bottom of the page to grab your plugin, which will be downloaded as a ZIP file.
In a separate tab, go to your WordPress dashboard. Navigate to ‘Plugins > Add New’ and you’ll be taken to a page where you can search the WordPress plugin library. Click the ‘Upload Plugin’ button at the top of the page.
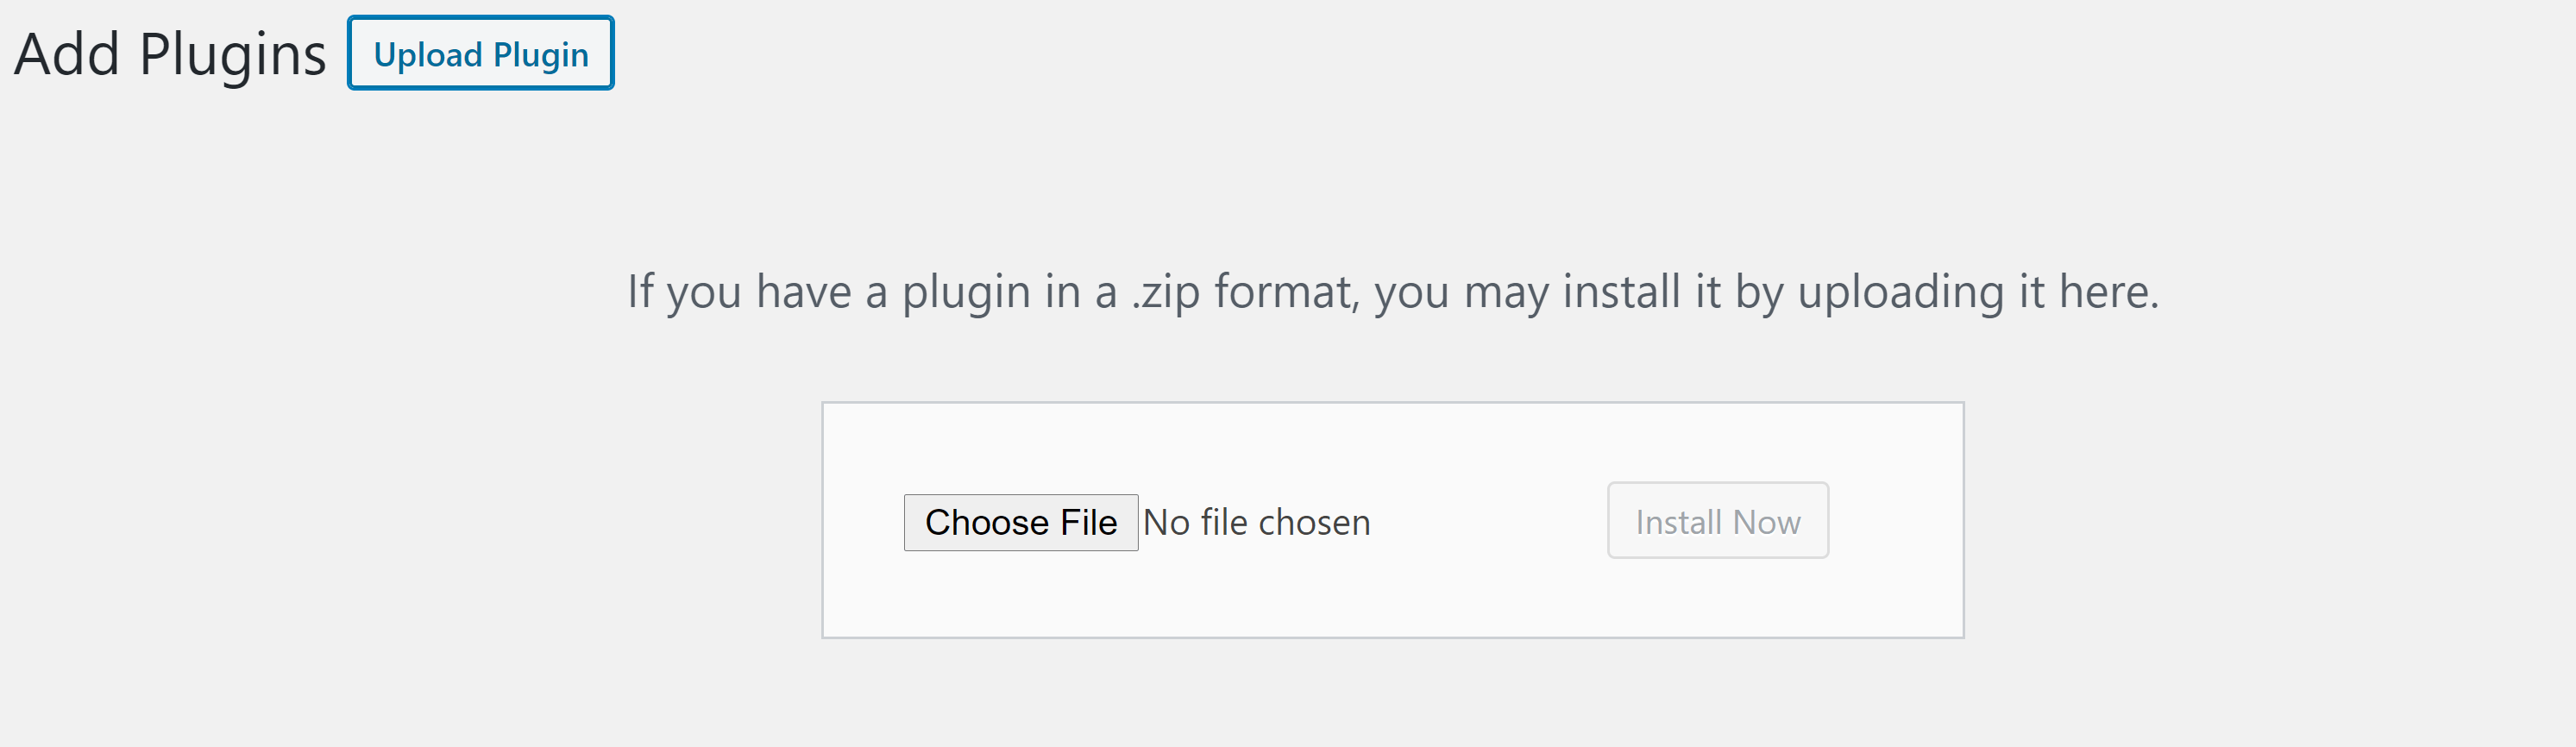
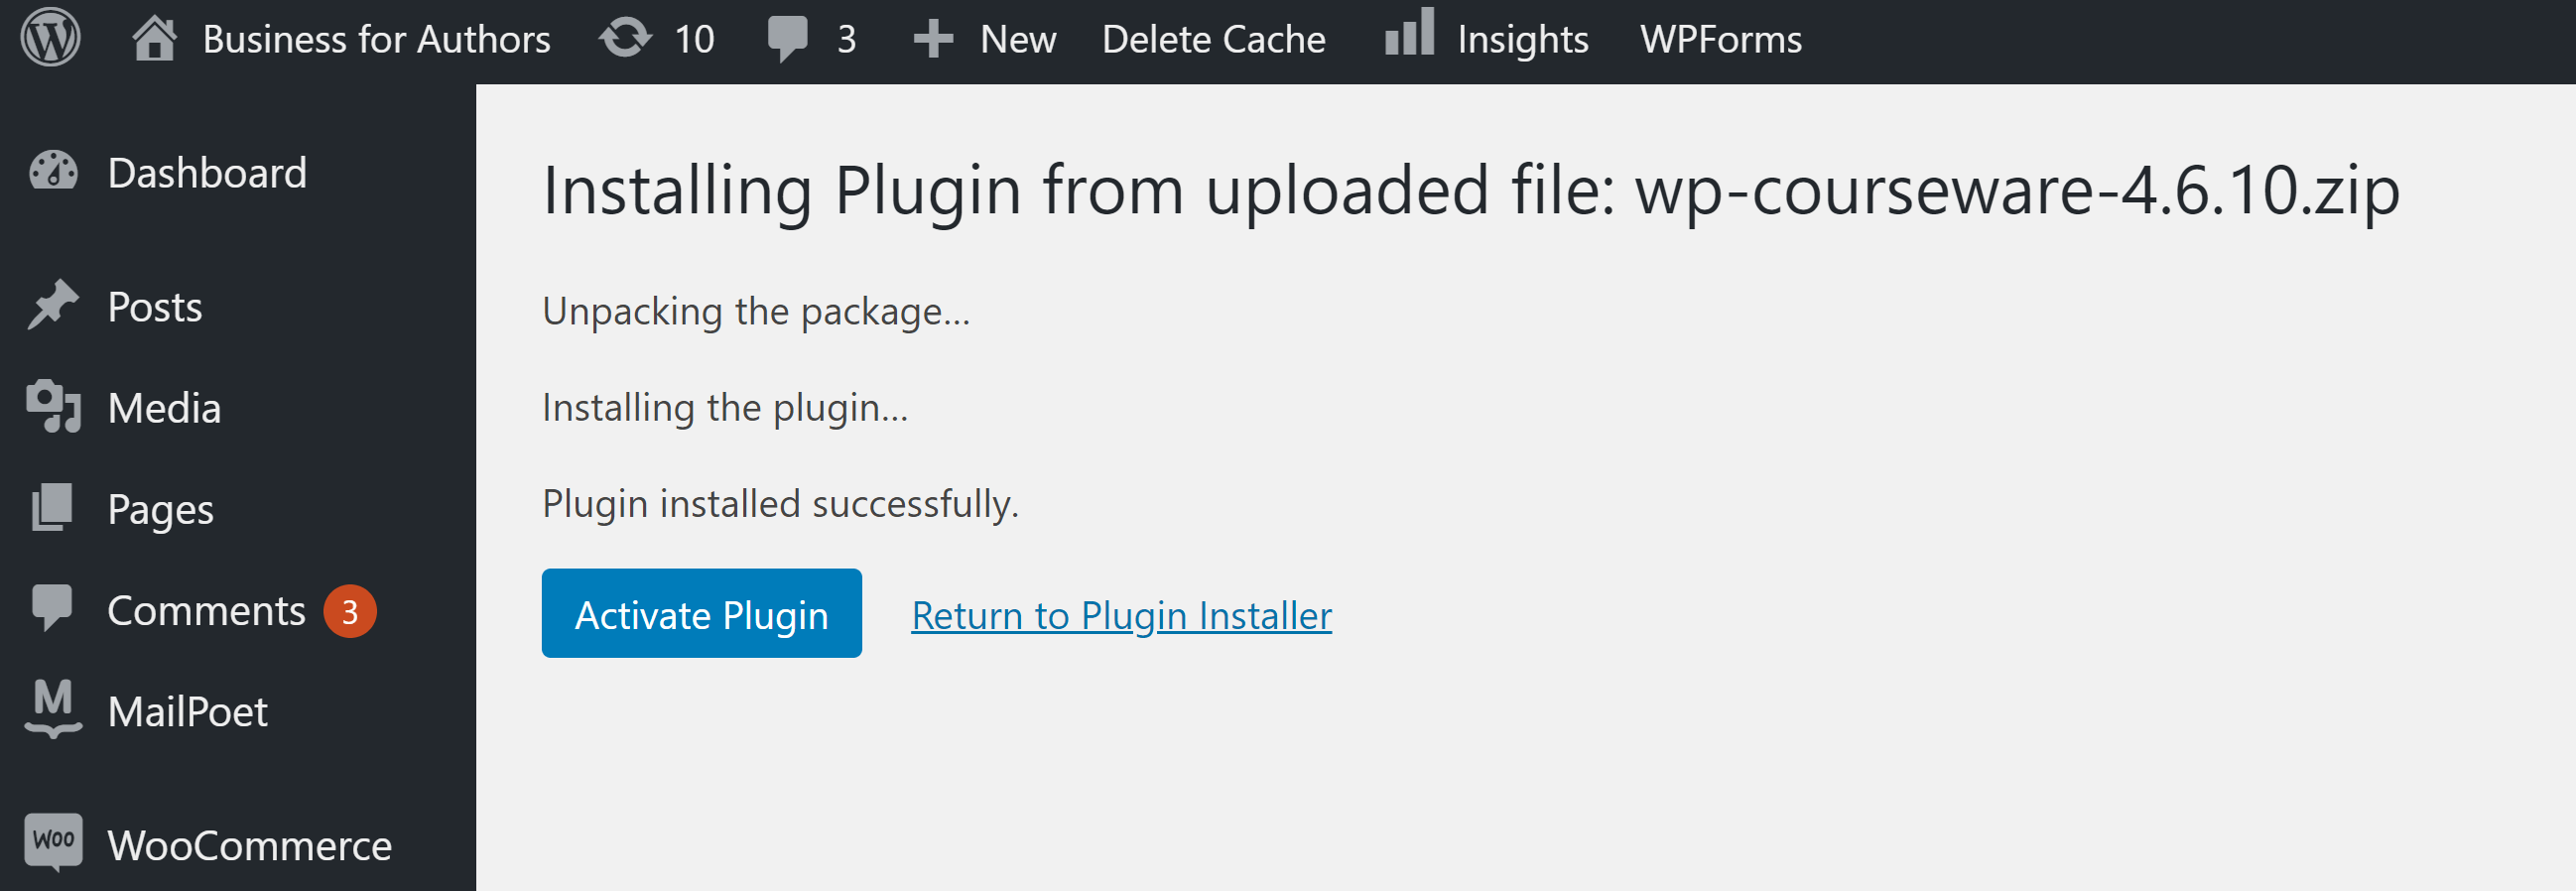
A box will appear, prompting you to choose a file. You can drag and drop the downloaded file into this box or search for it manually. Either way, WordPress will automatically unpack it. When the process is complete, you’ll be prompted to activate the plugin.
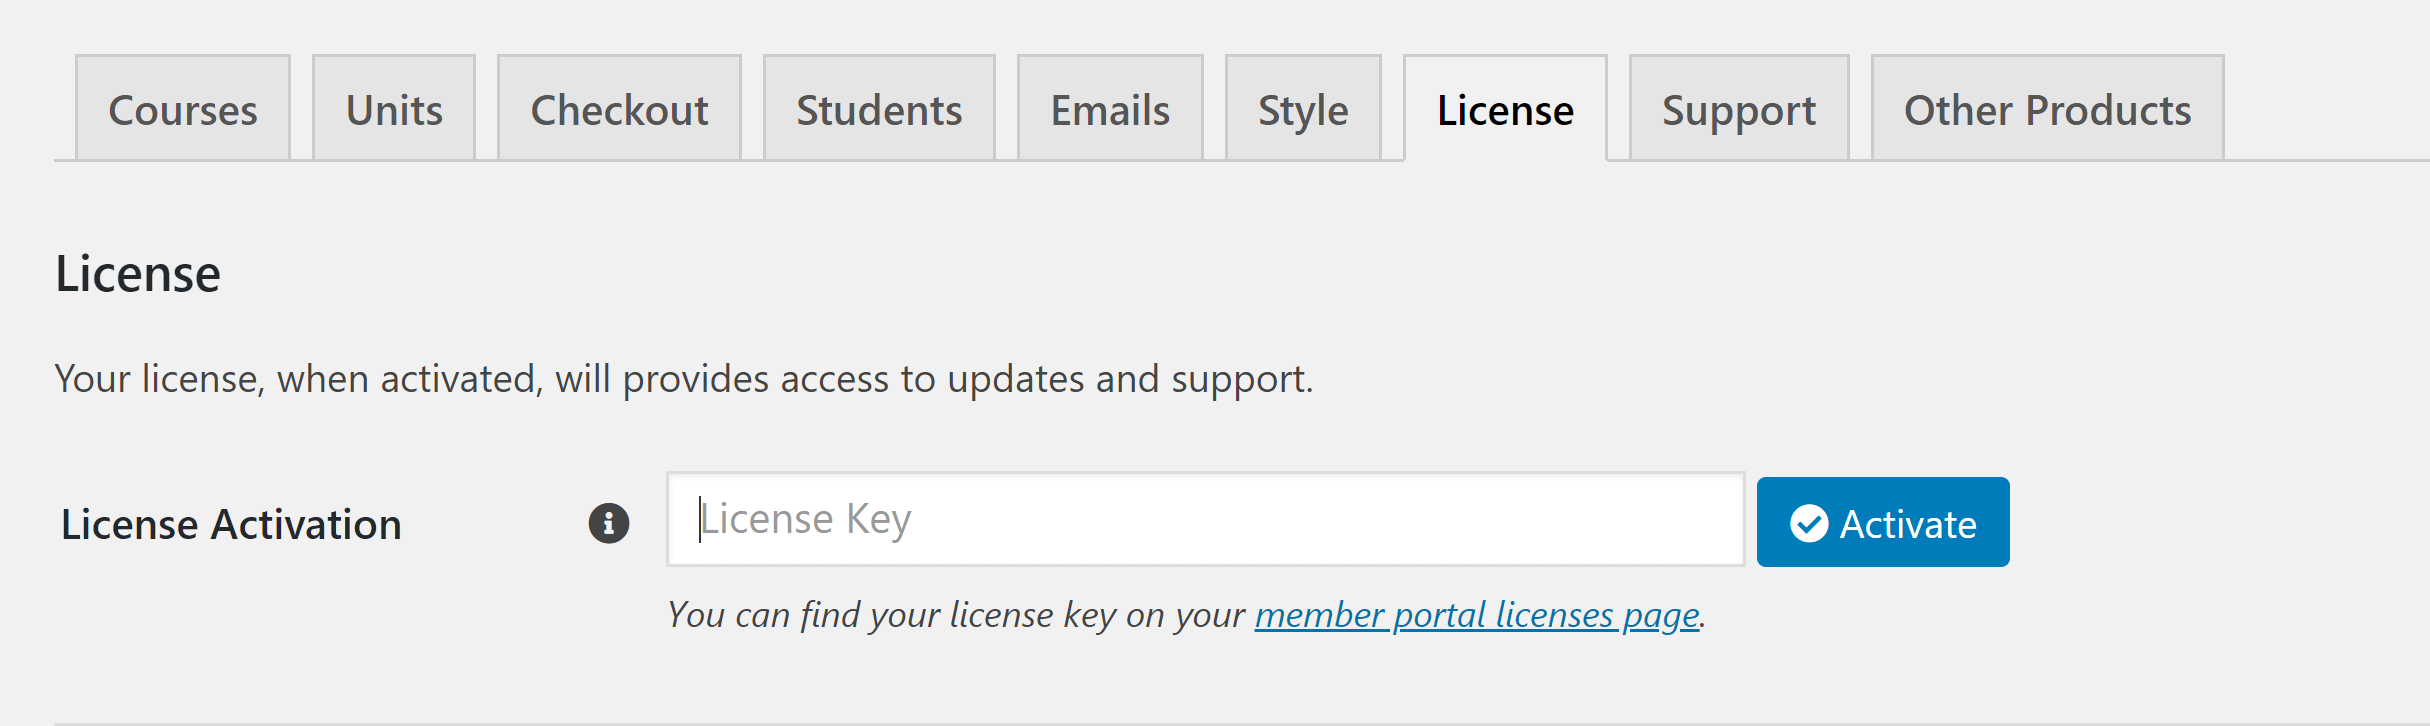
The final thing you’ll need to do is connect the plugin to your WP Courseware account. To do this, go to the ‘Settings’ area of WP Courseware. Copy and paste your API key from your payment information page into the box provided here to ensure your plugin automatically receives updates.
How to Connect a Payment Gateway
The ‘Settings’ area of WP Courseware is also where you can connect payment gateways to the plugin. Click on the ‘checkout’ tab, which will lead you to an area where you can edit several aspects of the checkout experience:
- Checkout pages
- The currency your courses are priced in
- Payment gateways
- Tax collection
- Coupons
- Checkout process
- Privacy policy display
Click ‘Payment gateways’ to view a page where you can add payment options; click the ‘Configure’ button for the payment gateway you wish to connect.
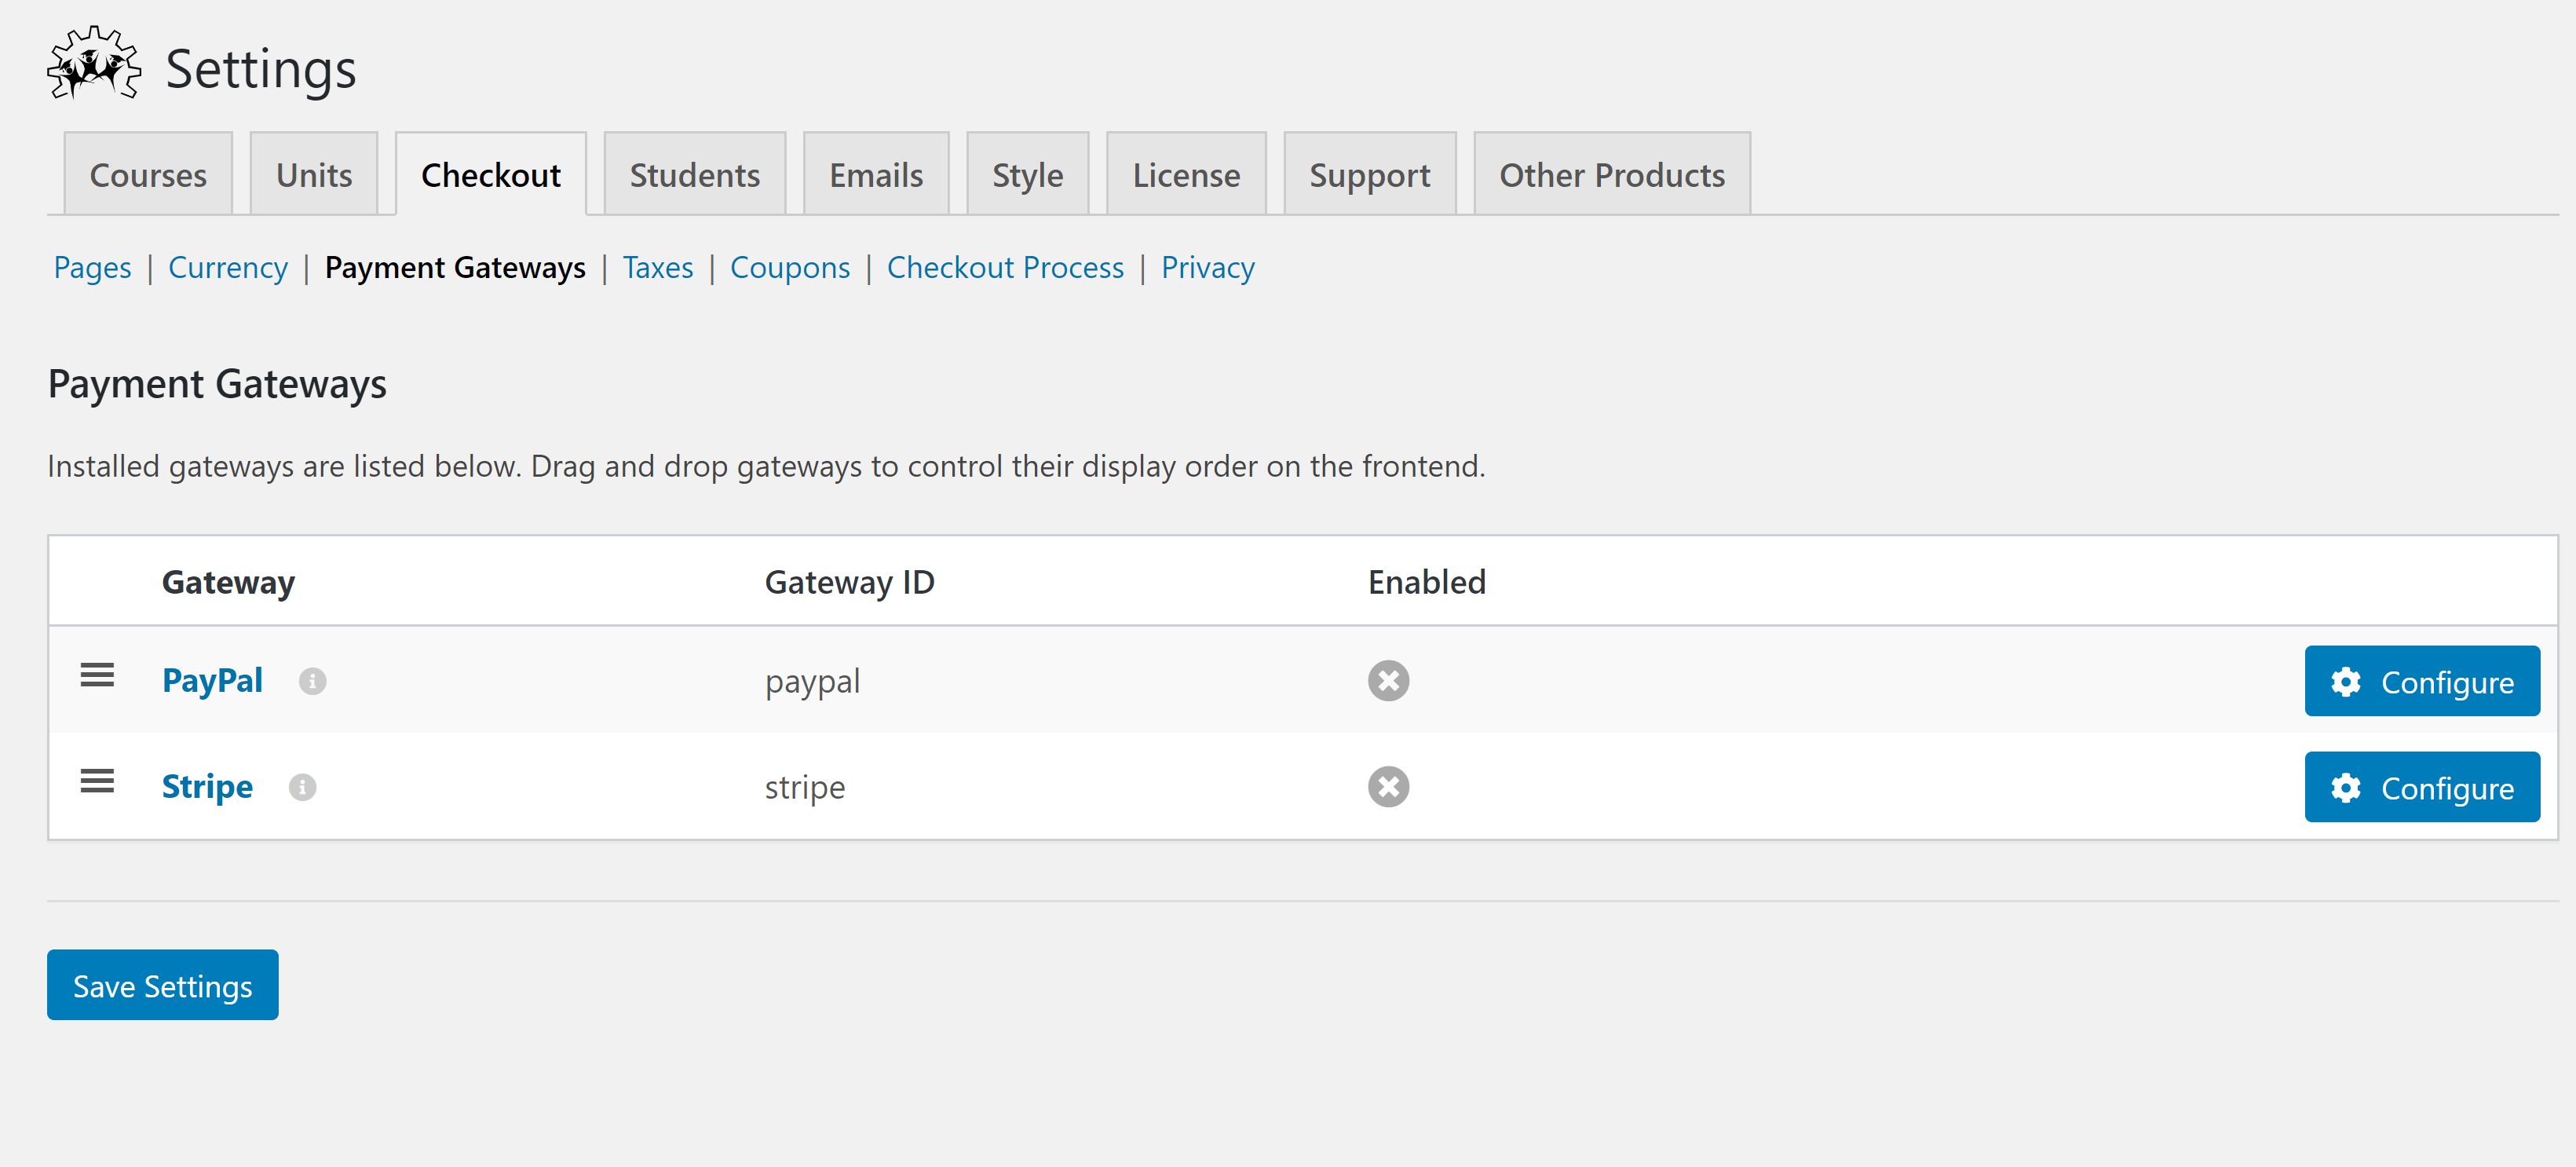
You’ll then be asked to fill in some account information. The precise information required varies depending on the payment gateway.
How to Create a Course
With the payment gateway in place, the next step is to look at how the course builder works.
To get started, go to the ‘Courses’ area of WP Courseware, which will take you to an area where you’ll eventually be able to manage all of your courses. For now, click the ‘Add New’ button at the top of the page.

This will take you to the course builder. The first time you show up here, a series of information boxes will show you key components of the builder, which is a nice touch for users who may be intimidated by the sheer number of features.
The course builder itself is directly under the title area. Here, you can add, edit and change the order of modules. I’ll talk more about how to create course modules in a bit, but, for now, scroll down the page to the ‘Course Settings’ area.
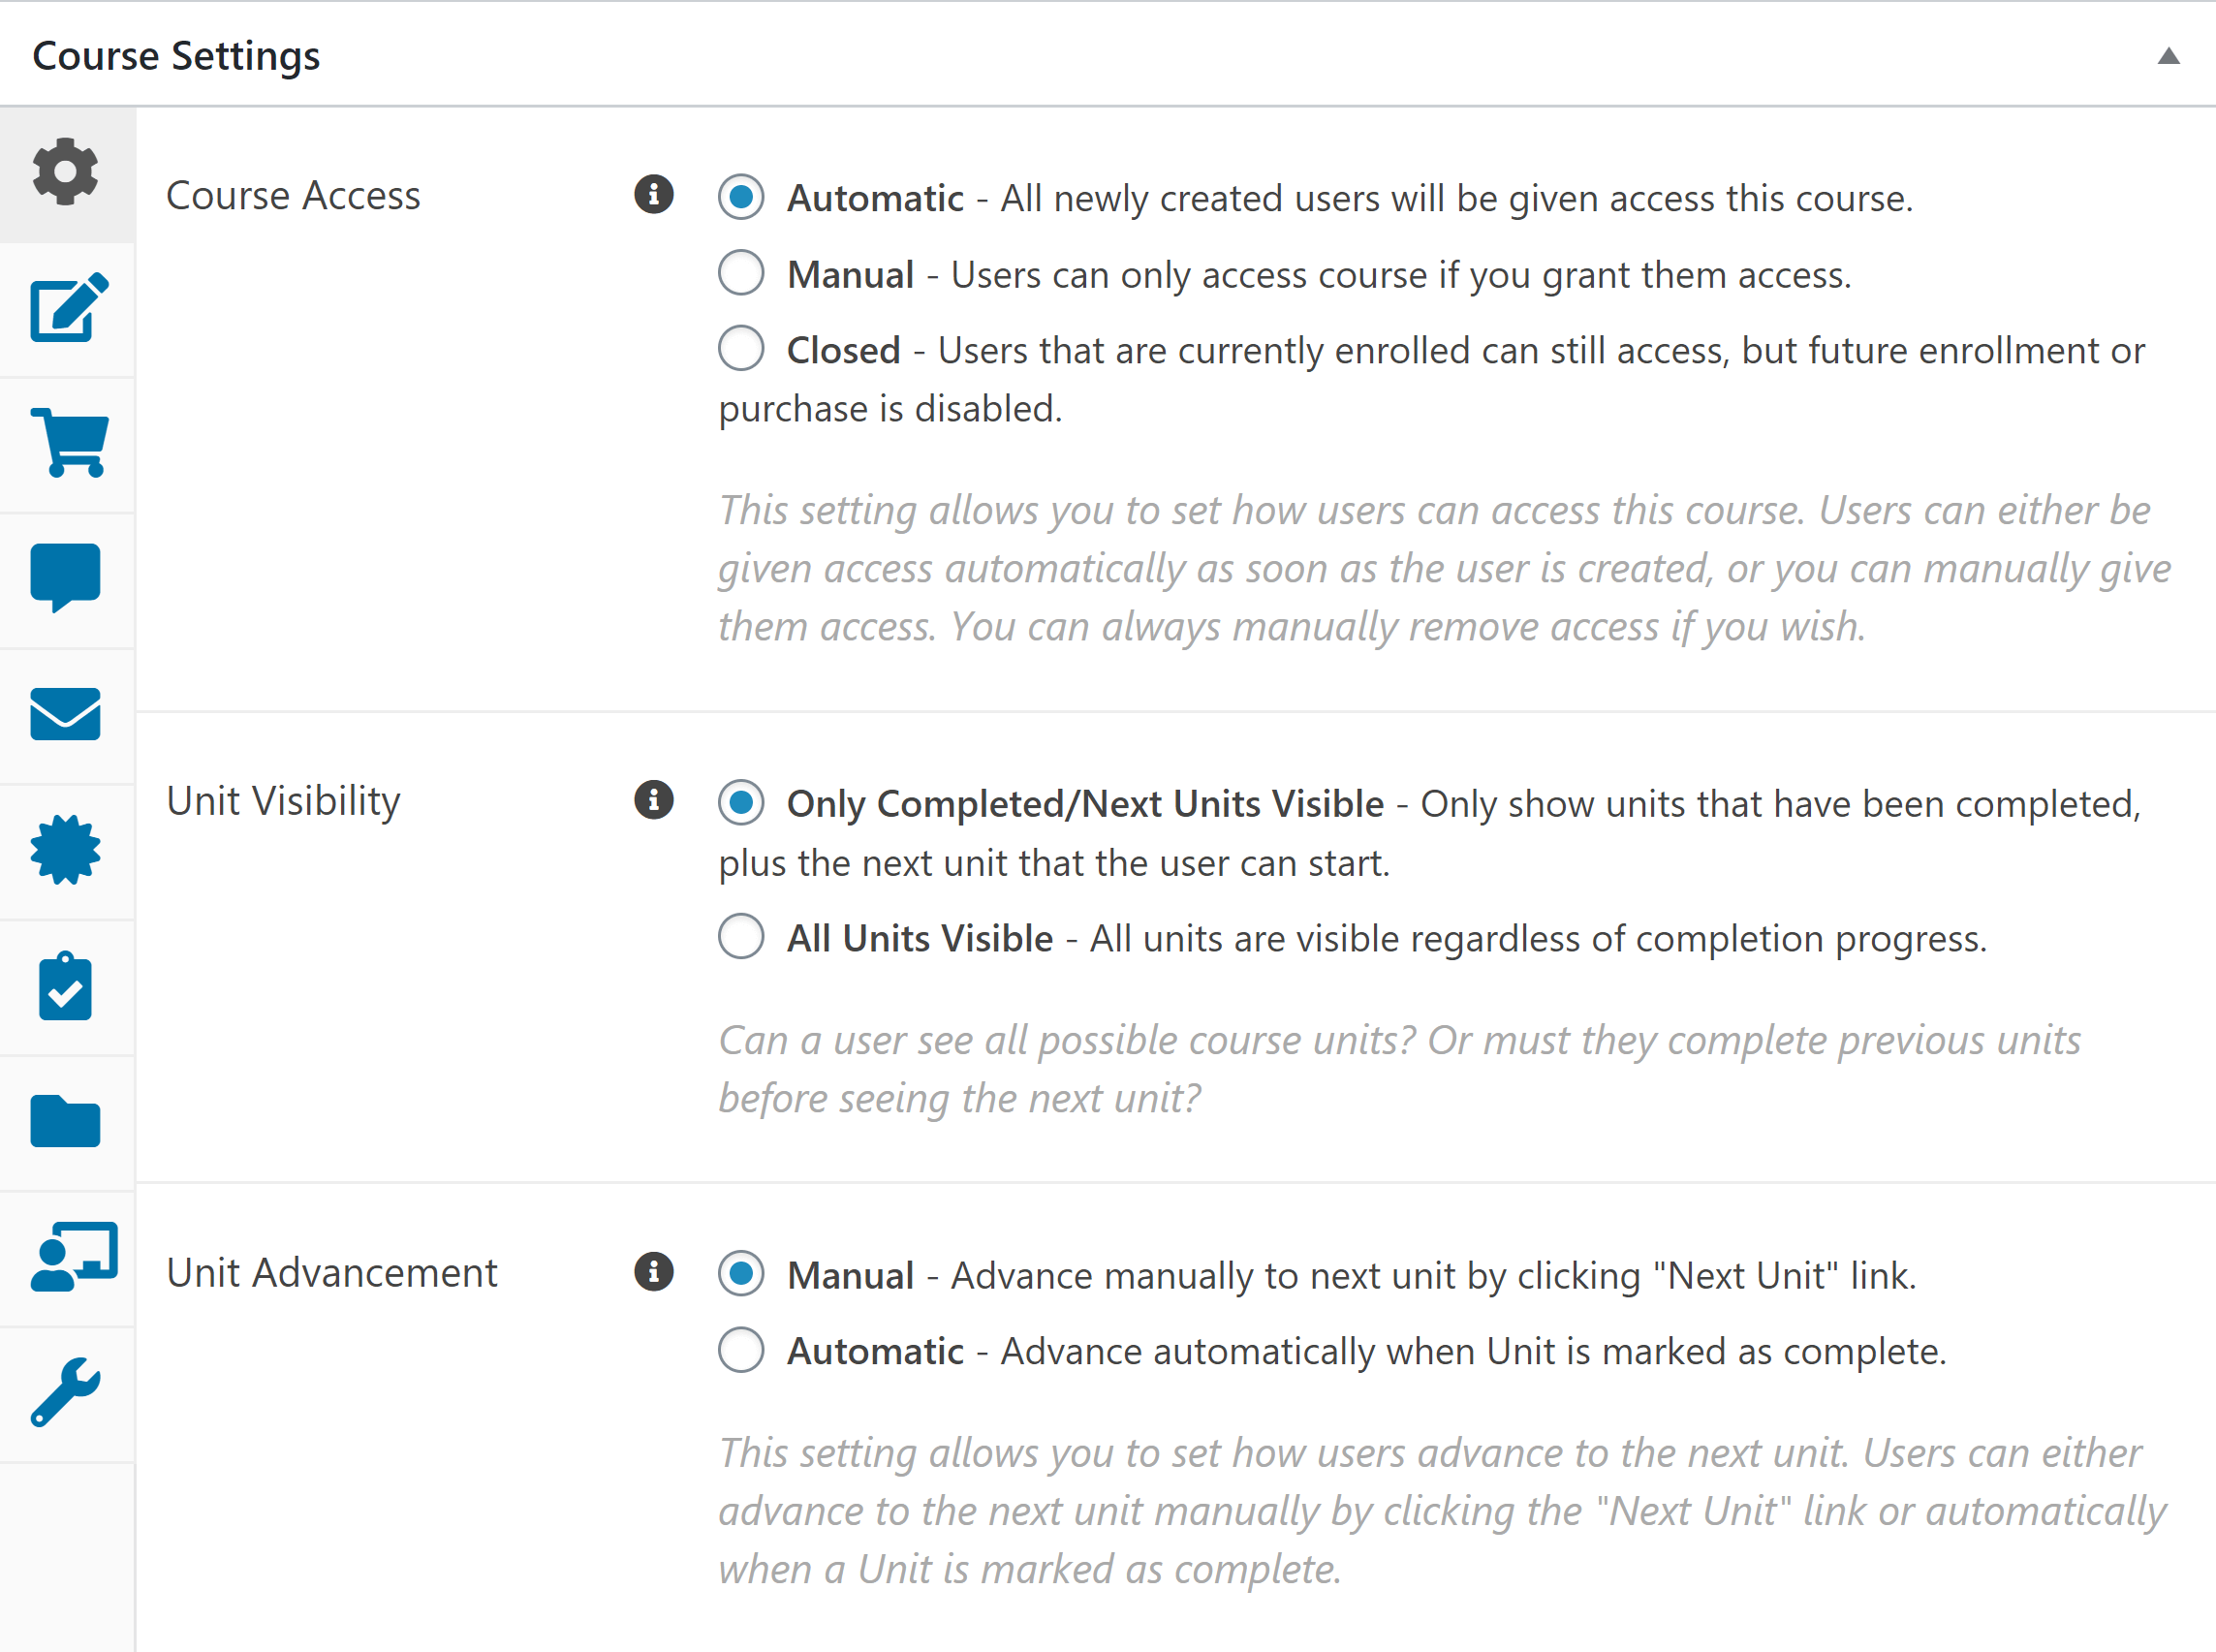
You can modify several aspects of the course here:
- Permissions: Who can access the class, when units become visible to them and how students advance through units.
- Course description: What the sales page says about the course. This section uses the WordPress classic editor, allowing you to format your course description pages as you would any other part of your site.
- Payments: Choose between a one-time payment or monthly payments and select the price. You can also choose to make the course free.
- Course messages: The messages your students will receive throughout the course. This includes welcome messages, unit completion messages and more.
- Course emails: This is where you can choose the email address and name that appear in the ‘From’ area of course emails. You can also edit certain course-related emails here, such as the ‘Course Complete’ email.
- Certification: This is where you decide whether or not students gain a certificate upon completion of the course.
- Course prerequisites: You can require students to finish other courses before starting this one.
- Course bundles: This setting allows you to sell related courses together in a bundle.
- Instructor: The WordPress user who’s responsible for managing this course.
- Bulk grant access or progress reset: These options allow you to make changes to all students’ access to the course.
Once you’ve configured the basics, you can move on to creating your first module.
How to Create a Module
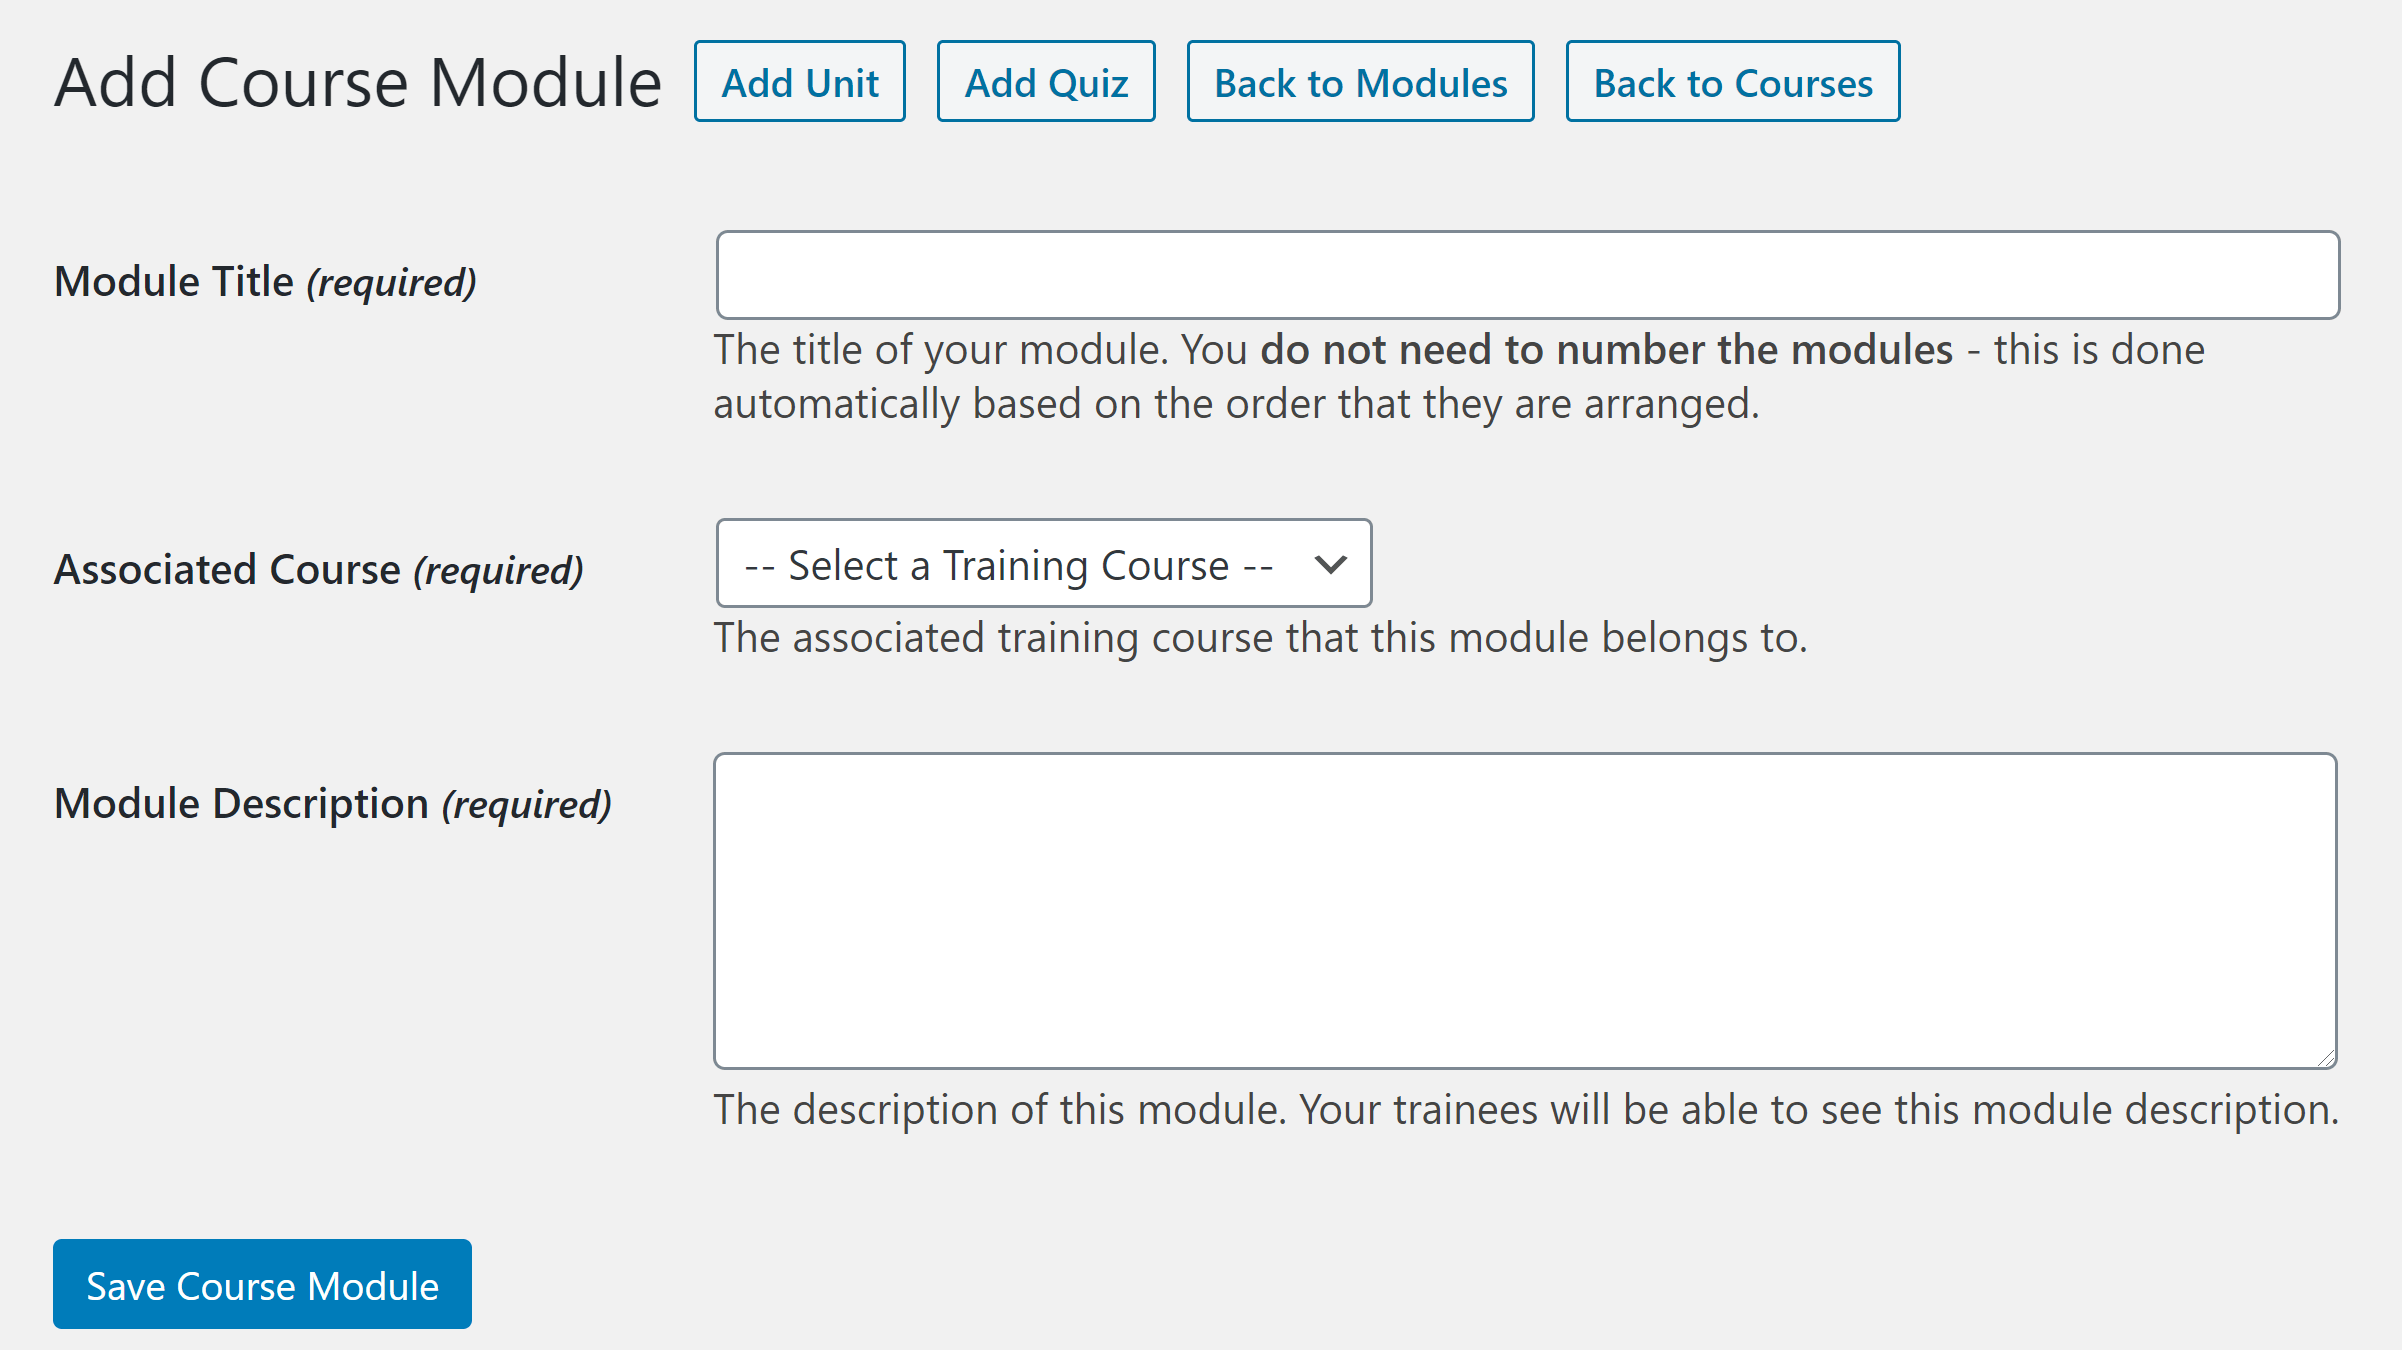
Now, scroll back up to the Course Builder and click the ‘Add Module’ button.

This will open a box with text areas for the module title and description. The rich text editor allows you to fully format the description.
Once you’ve added a module, you’ll be prompted to add a unit. Clicking the ‘Add Unit’ button will make another editor appear. You can create a new unit directly within this tool or click ‘Add an Existing Unit’ — I’ll talk a little more about the separate unit builder in the next section.

From here, you can add a quiz. You can create the title and description of the quiz within the course builder, but you must go to the separate quiz builder to create the questions.
You can also create modules by going to the ‘Modules’ area and clicking the ‘Add New’ button at the top of the page. This will direct you to an area where you can title a module, assign it to a course and give it a description. You can also click the ‘Add Unit’ and ‘Add Quiz’ buttons along the top of the page to open their respective editors.
The Unit Editor
To access the unit editor, go to the ‘Units’ area of WP Courseware. You’ll be taken to a page where you can view all of your existing units. Click the ‘Add New’ button at the top of the page.

The unit editor is almost identical to the regular WordPress block editor — with a couple of extra options:
- Unit template — templates can be used to give all units within a specific course a cohesive look.
- Unit content drip — this determines when content in this unit becomes available to students.
- Teaser/preview — this option lets you publish the unit publicly as a teaser for your course.
You can also access the unit editor by clicking the ‘Add Unit’ button in the module editor.
The Quiz Editor
The quiz editor was one of the most impressive things I discovered during my WP Courseware review. You can access it in a couple of ways:
- Go to the ‘Quizzes’ area of WP Courseware and click the ‘Add New’ button at the top of the page.
- In the module editor, click the ‘Add Quiz’ button at the top of the page.
Both of these routes will lead you to a page where you can name your quiz, give it a short description and choose a quiz type. Choose a quiz type and click the ‘Save All Quiz Settings & Questions’ button at the bottom of the page to create your quiz.
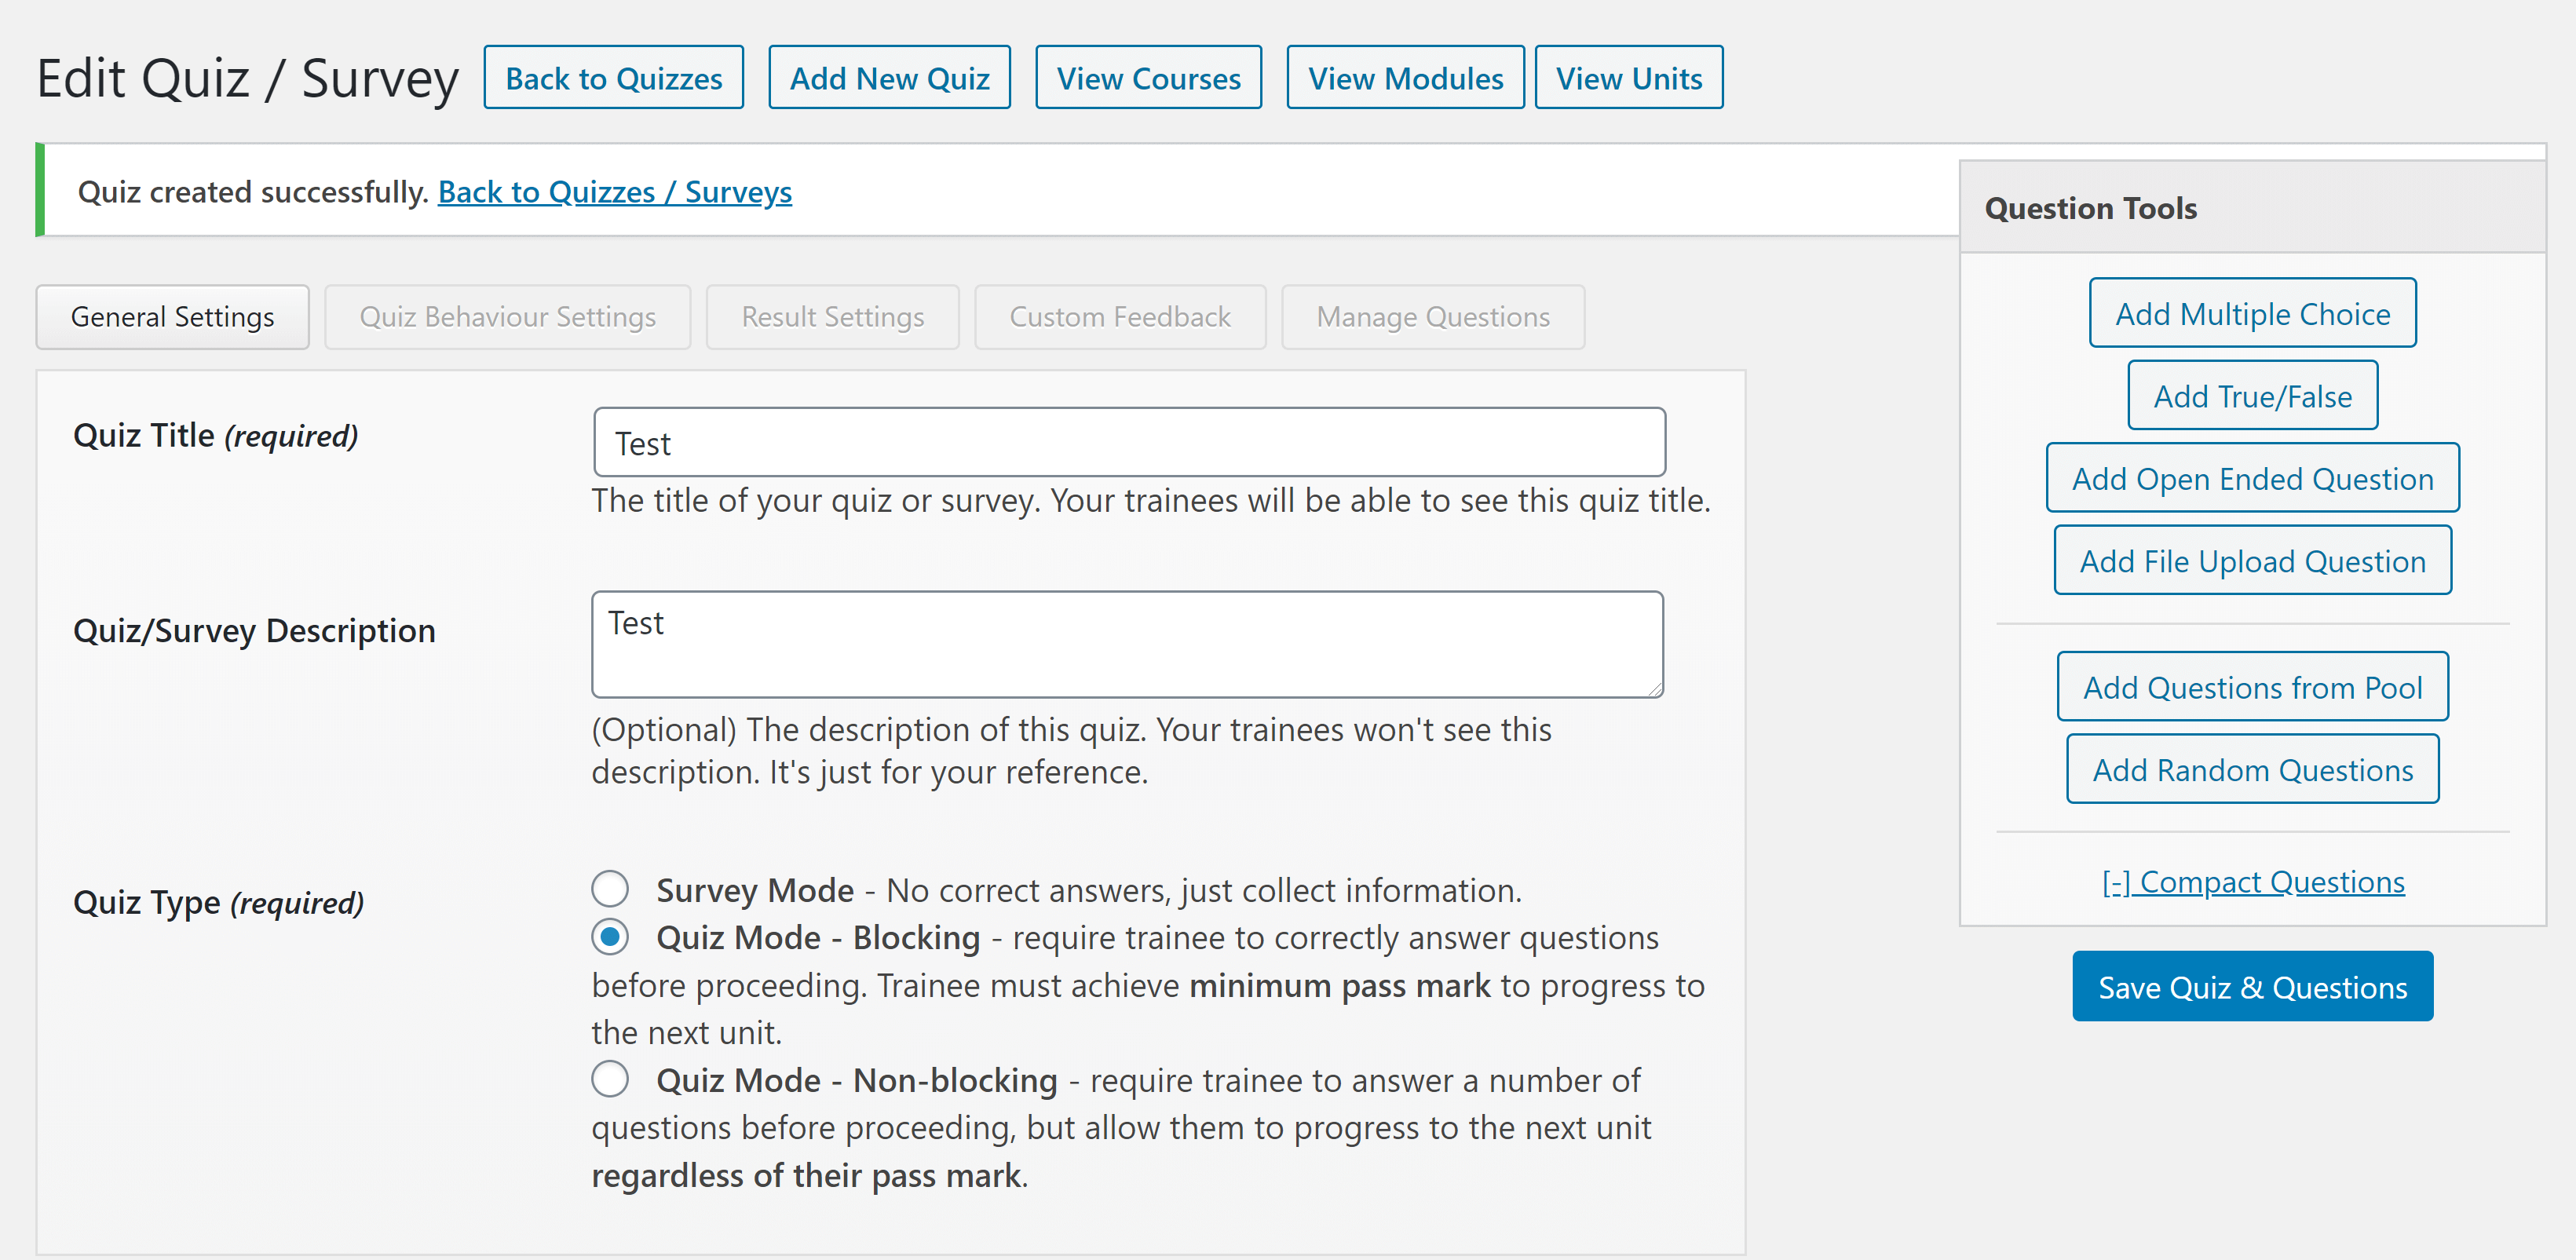
This unlocks the ability to add questions, including multiple choice, true/false, open-ended and file upload questions. There is no limit to the number.
You’ll also note a row of buttons above the quiz editor. These take you to areas where you can customize a variety of settings:
- Quiz behavior — this is where you can edit things such as what mark is required to pass the test, how many attempts students get and whether or not there’s a time limit.
- Results — these settings determine how results are displayed. You can also choose to let students download their results.
- Feedback messages — this allows you to leave custom feedback for students who provide certain answers.
- Question management — here, you can edit existing questions and choose the order they appear in.
Once you’re satisfied with the questions and related settings, you can press the ‘Save All Quiz Settings & Questions’ to save the details.
Integrations
WP Courseware offers integrations with a variety of other plugins. Some of these are baked right into the code, such as compatibility with Bloom and bbPress; others are activated by downloading free integration plugins from the WordPress.org library. These are divided into four categories:
- Membership and ecommerce plugins — these integrations connect with plugins such as WooCommerce and MemberPress.
- Page builders and themes — WP Courseware is compatible with the WPBakery Page Builder and OptimizePress.
- Email marketing tools — at this time, the only email marketing integration offered is with ConvertKit.
- Third-party add-ons — these add a wide range of functionality, such as gamification, and you can use these tools to boost student engagement.
Pricing
WP Courseware offers three plans:
- Teacher: Available for $124.50 a year (normally $249 a year), it allows use of all WP Courseware features on up to two sites.
- Professor: Available for $149.50 a year (normally $299 a year), it includes licenses for up to ten sites.
- Guru: Available for $199.50 a year (normally $399 a year), it allows use of all WP Courseware features on up to 25 sites.
This pricing structure is notable because there’s no restriction of features on the lowest tier. If you buy any WP Courseware plan, you get full access to the plugin.
Pros
- Easy-to-use course builder.
- Highly customizable quizzes.
- Ability to customize every aspect of a course, including welcome messages and other internal communications.
- Content dripping.
- Capacity for paid subscriptions.
- Unlimited coupon creation.
- Integrations with a variety of other plugins.
- Lots of documentation, including a series of emails to members about how to build a successful course.
Cons
- Limited ability to customize user registration forms and profiles.
- No built-in forum capacity.
- While building a course within WordPress is easy, importing course content from another source could get tedious.
The Verdict
I had a pleasant experience working with WP Courseware; the plugin makes it easy to create a course without leaving the WordPress dashboard or using a single line of code. The documentation was plentiful and easy to follow, and included several resources on course building in general, as well as how to use WP Courseware. The pricing is also quite reasonable, especially when you factor in the multiple site licenses.
With all of these benefits, the lack of customization options for things such as user registration forms seems like a fair trade. The one thing that did really disappoint me, though, was the lack of built-in forums.
All in all, I’d recommend WP Courseware to anyone who wants to build and sell online courses without a strong community component. If the community aspect is important to you, however, you may want to consider an alternative such as LearnDash or LifterLMS.
Used/using WP Courseware? Thoughts?
Related Posts:
By
TOP DEALS


Leave a Reply
All comments are held for moderation. We'll only publish comments that are on topic and adhere to our Commenting Policy.
Not sure why the comment about support was so harsh. I’ve had a great experience with the plugin and support team. They are very responsive and the plugin is constantly updated.
very very disappointed to Fly plugin …… a very poor response from the support ticket….. say no to fuuuccckk fly plugin…..
I moved my course from Kajabi to WP Courseware to simplify my life… less sites to deal with because I am not techy. I am a bit disappointed in the features.
I can’t see when last a student logged in. There is no community or forum , the forms are clunky, unappealing from a marketing perspective, and ugly to use. It takes a lot of effort to work with them.
Thankfully it can be linked to the store with WooCommerce and MailChimp. Have to maximize MailChimp to make this work decently.
Lynette
I guess I didn’t realize that I was stepping down from classy to ordinary. It makes email marketing hard.
Thanks for this comment Lynette. I’m currently developing an online course using LearnDash, and while the features are pretty amazing I sometimes feel like it’s overkill for what I’m trying to accomplish. However, your comment has me thinking I should stick it out.
I am currently with Learndash and thinking to change to WPCourses for simplicity and this comment made me stay.
I was originally with kajabi and haven’t been disappointed with the appearance of LD. Much more ‘techy’ obviously but no loss of sophisticated appearance etc.