
LearnDash vs WP Courseware: Which is the Best WordPress LMS Plugin?
- By
- Last updated:
- 5 Comments
So, you’ve got an idea for a course — maybe even an outline and some lessons built. But what’s the best tool for putting that course up for sale on your WordPress site? In this LearnDash vs WP Courseware review, I’ll compare two of the top course building plugins to help you to determine the best choice.
Let’s get started!
Table of Contents
What to Look for in a Course Building Plugin
Course building plugins, also referred to as learning management systems, must offer a robust set of features to help you to build and sell courses. I’ve compiled a list of features to look for below.
Some of these features, such as content dripping, are essential to the function of most courses, while others, such as forums, may not be as important to the course you’re working on. Consider this list carefully and decide what’s most important to you, as this may impact your thoughts in deciding between LearnDash and WP Courseware.
Course Builder
The core of any learning management system is its course builder. You want a system that’s easy to use, highly flexible and well documented — and the best of these plugins make it possible to build courses without writing a single line of code.
Quiz Builder
Quizzes are an important part of many courses. You should be able to create quizzes with a variety of question types and control how grading works — including the percentage of questions people must answer correctly to pass.
Content Dripping
This is the practice of sending content out at specified intervals. You should be able to set this as a time interval, such as one week, or as something triggered by an action, such as a student completing a quiz.
Content Expiration
This revokes access to content after a specific interval of time or after a trigger action is completed.
Memberships
Memberships allow people to access some or all of your courses through a member account. Some course building plugins offer membership creation as a built-in features, while others accomplish it through integrations with plugins such as MemberPress.
Subscriptions
Another great way to monetize courses is through recurring subscriptions, which is a great option for people who want access to future content but may not want to sign up for a membership.
Email Capabilities
There are two layers to this:
- Sending: The best learning management system plugins will email course content directly to students. Some also offer integrations with email marketing services.
- Customization: You want to be able to customize every aspect of your students’ experience. This should include the ability to customize the emails they receive when they start your course, make progress and complete your course.
Coupons
Discounts are a great way to sway potential students or reward existing ones. You want to be able to customize the type of discount, amount saved, and how people can activate the coupon.
Payment Gateways
Most course building plugins are only compatible with two or three payment processing systems. Some may offer additional payment gateways with higher membership tiers. If you have a preferred payment system, make sure the plugin you purchase is compatible with it.
Ease of Use
I already discussed this in relation to the course builder, but it’s worth mentioning on its own. You shouldn’t have to take a course to understand your learning management system.
Support
There are two aspects of support to consider:
- Updates: You want to automatically receive all plugin updates.
- Customer service: Customer service should be easy to reach and quick to respond.
Cost
The final ‘feature’ to consider is cost. You want to consider both what you’re willing to pay and how the plugin you’re considering stacks up against the competition. It’s also important to note that most course building plugins require annual membership fees, so you must consider lifetime cost as well as immediate cost.
LearnDash Review
Features
The following features are available on the LearnDash Basic plan:
- One site license
- Ability to accept payments through PayPal
- Unlimited courses
- Unlimited users
- Course content protection
- Membership program creation
- Content dripping
- Advanced quiz builder
- Grading and academic reports
- Certificates and badges
- Email notification capacity
- Integrations with bbPress, Course Grid, Easy Digital Download and more
How to Use LearnDash
Getting LearnDash Set up on Your WordPress Site
The first step to building courses with LearnDash is signing up for the plan you want — you can pay with PayPal or a credit card. Once your payment is complete, you’ll be taken to a page where you can download your plugin, and you’ll also find a link to an online ‘Getting Started Guide’ at the bottom of the page.
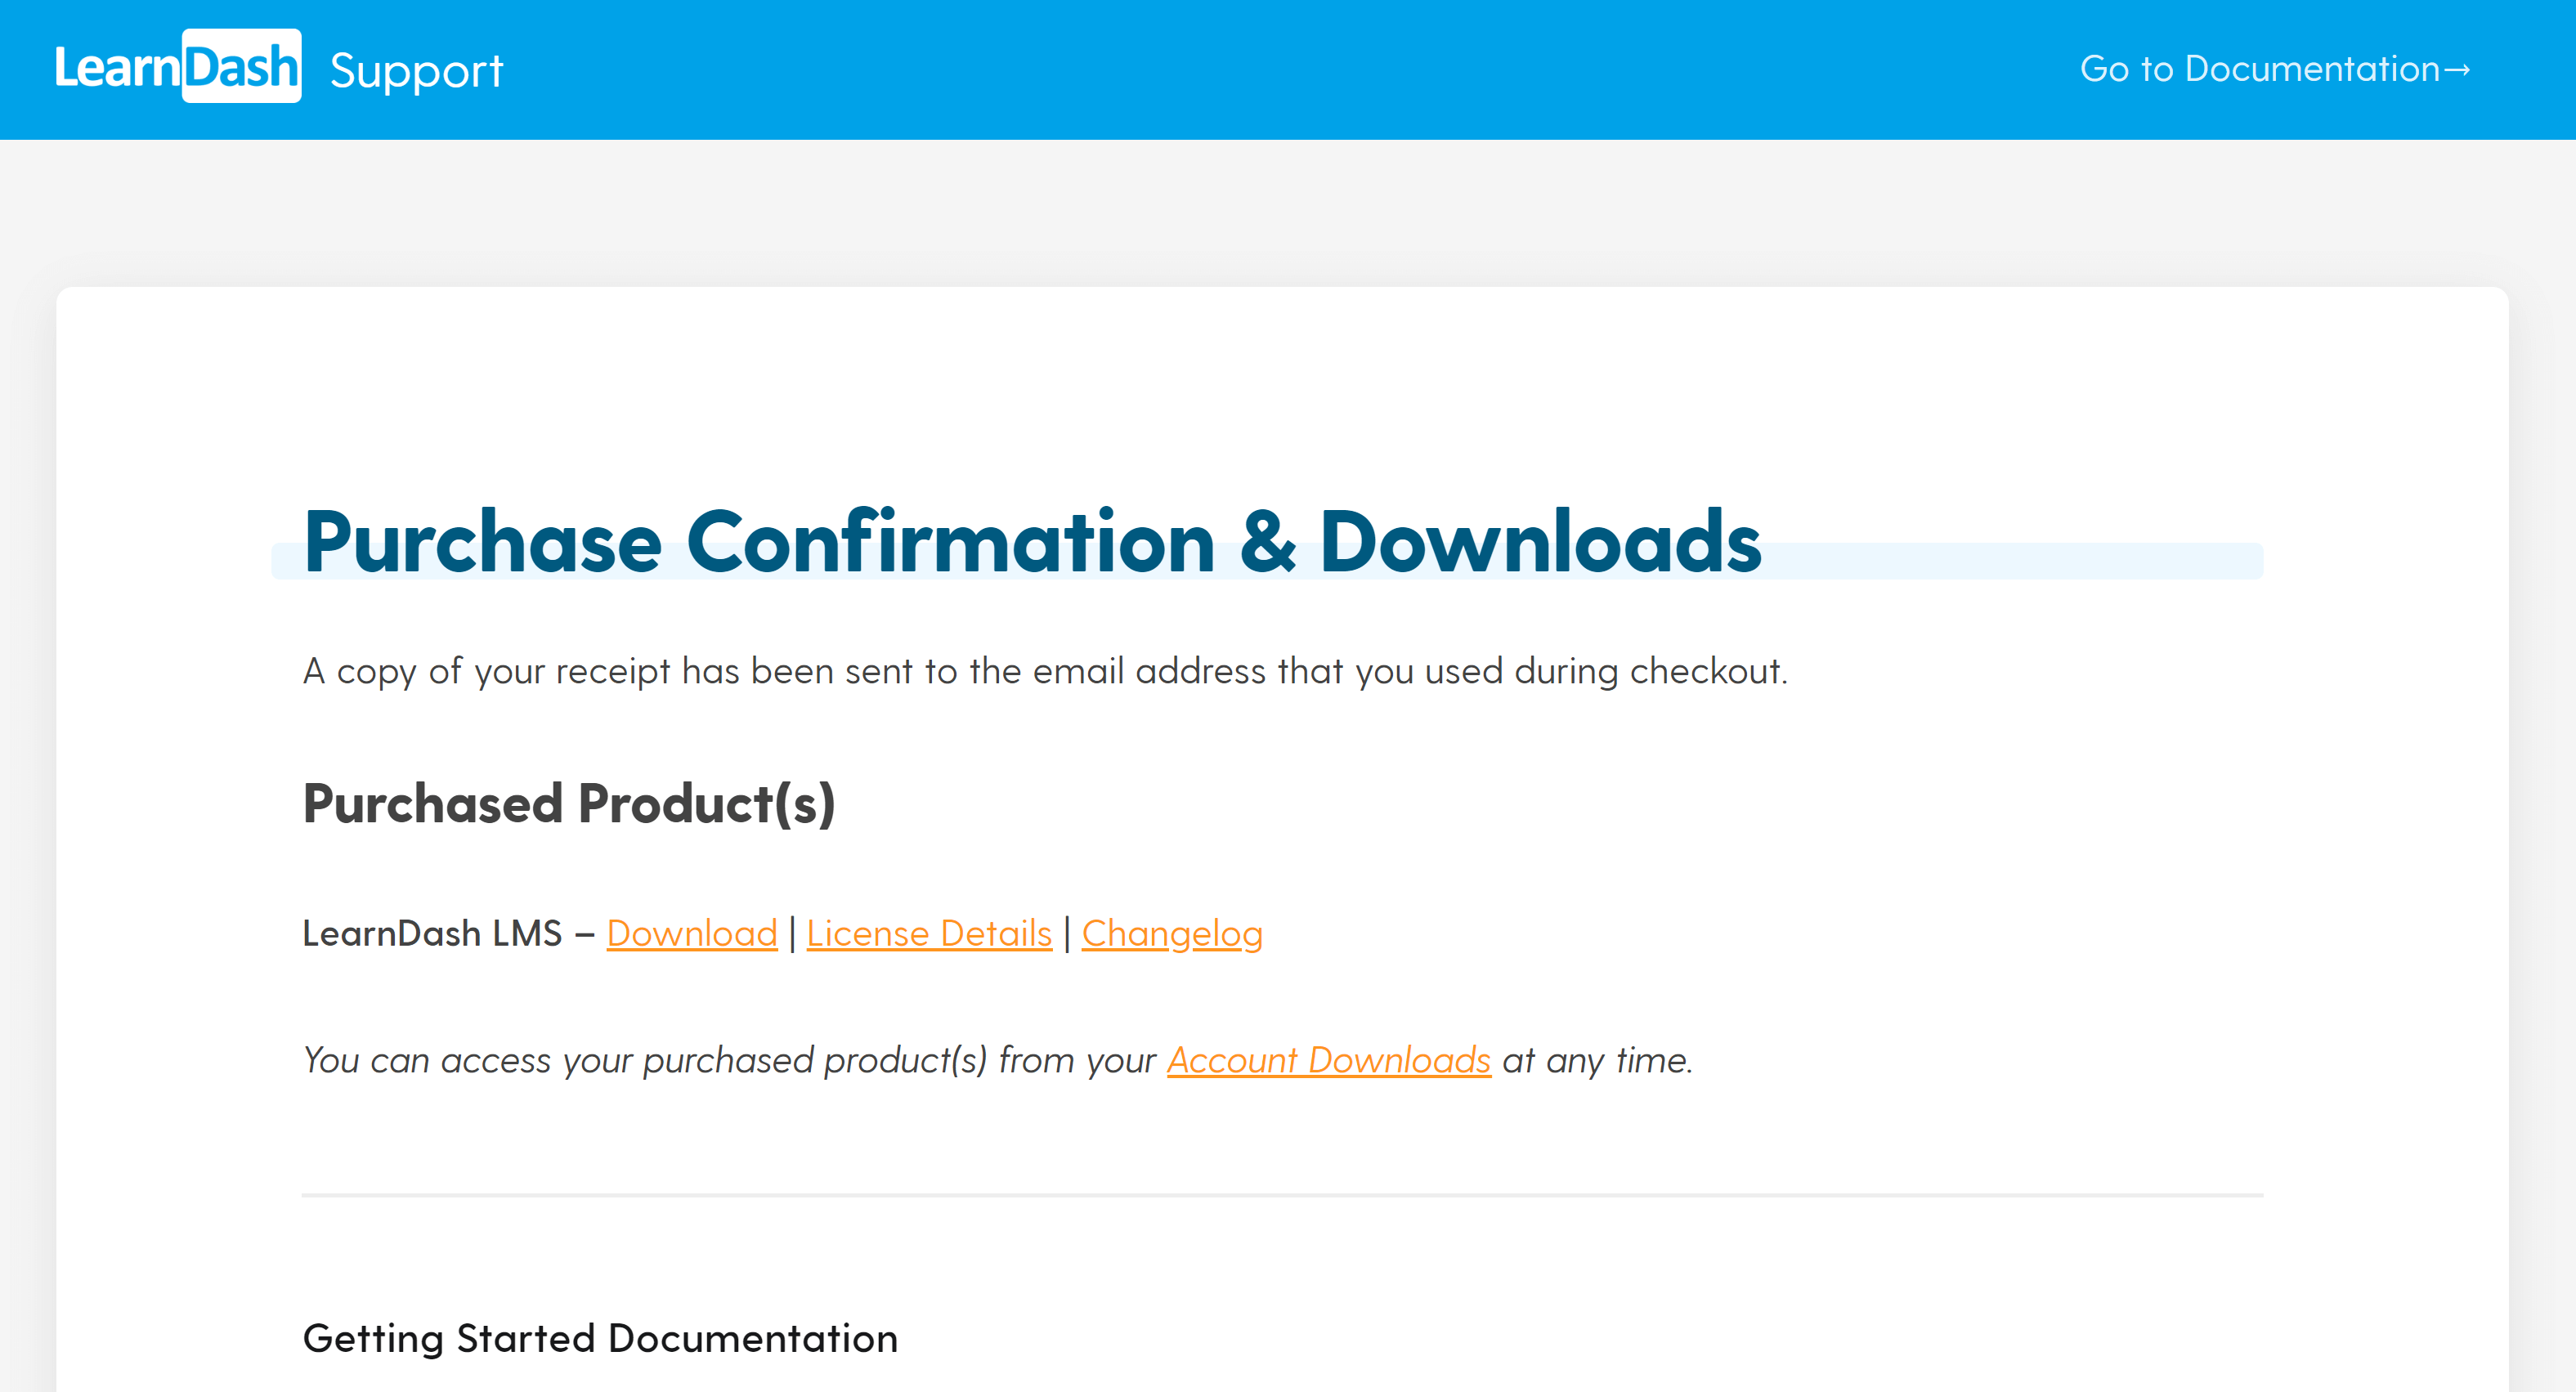
Click ‘Download’ to receive your plugin as a .ZIP folder.
Now, go to the ‘Plugins’ area of your WordPress dashboard and click ‘Add New’ at the top of the page, which will open a box that you can drag and drop the plugin file into. You can also click the ‘Choose file’ button to manually search your computer for the file.
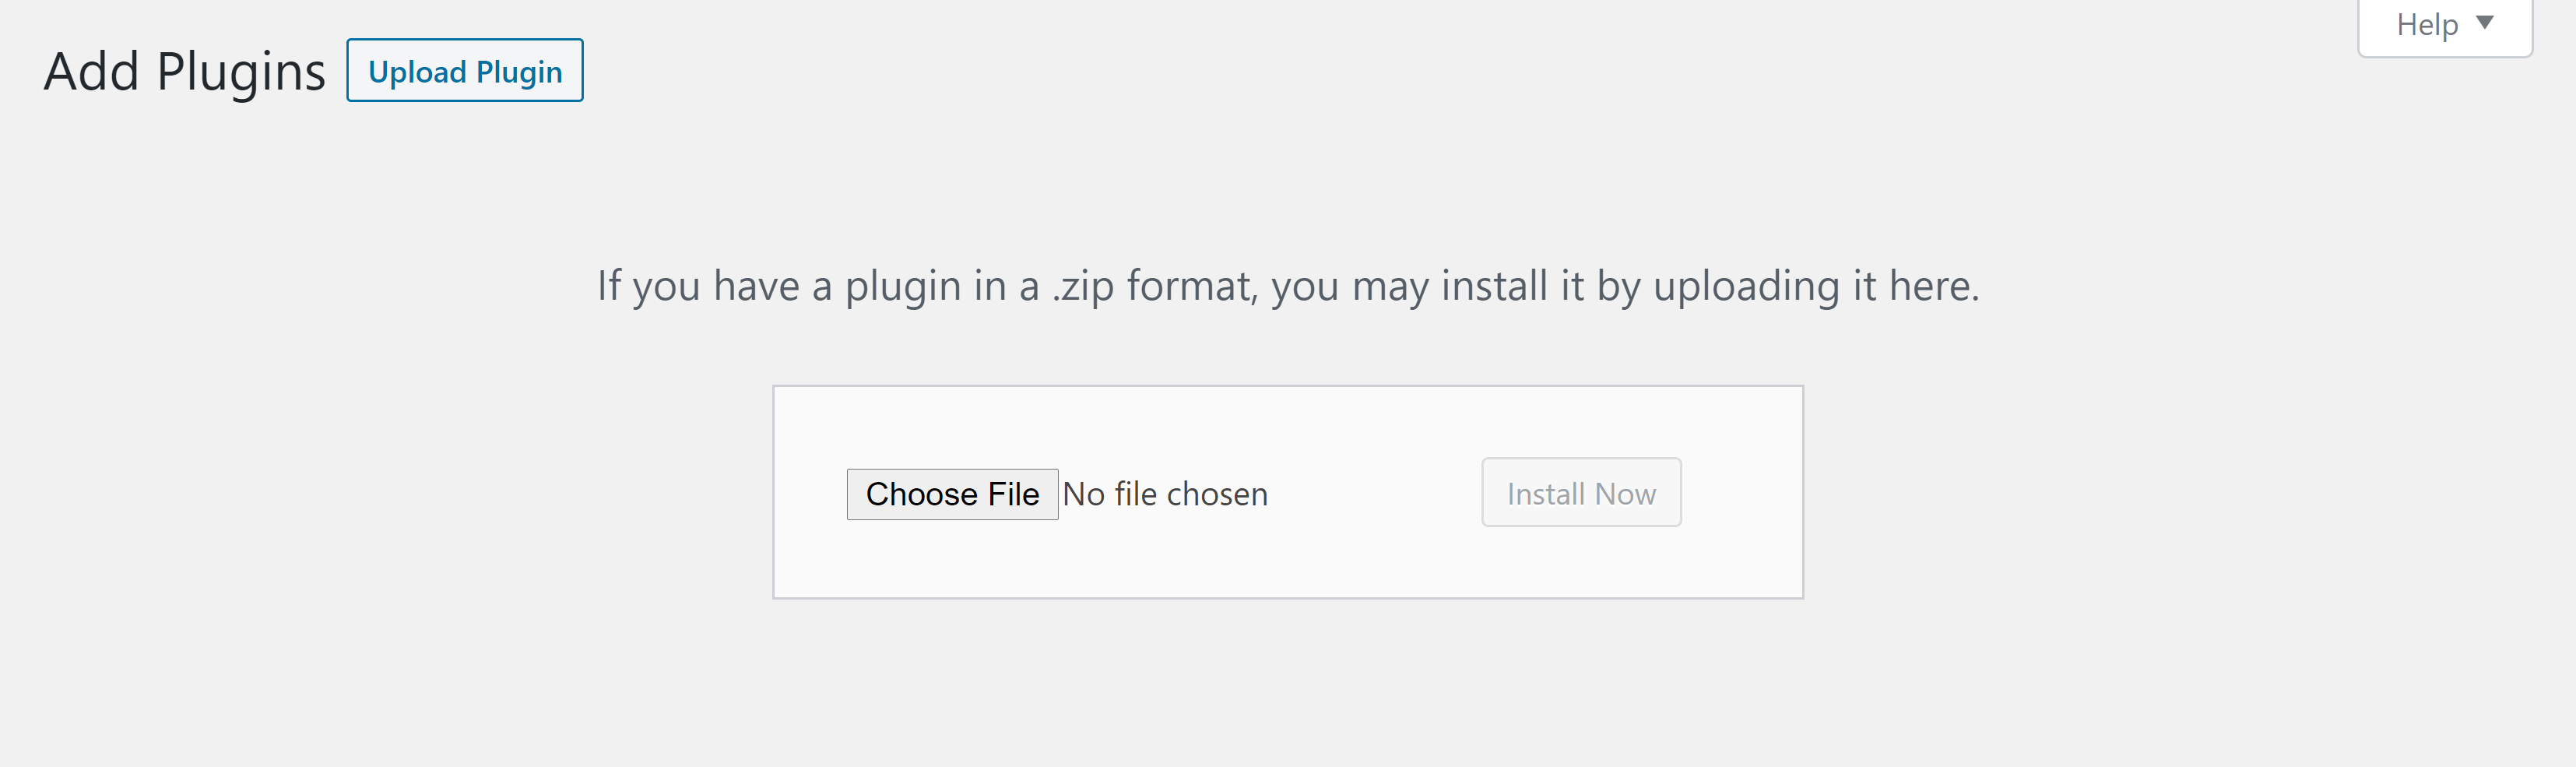
When you’ve selected the right file, click ‘Install Now’, and WordPress will unpack the plugin and prompt you to activate it.
Upon activation, LearnDash offers to launch the LearnDash Bootcamp. Clicking on this takes you to a page where you can enter your license key — you can find this information in your email or on your LearnDash purchase page (where you got the download link).
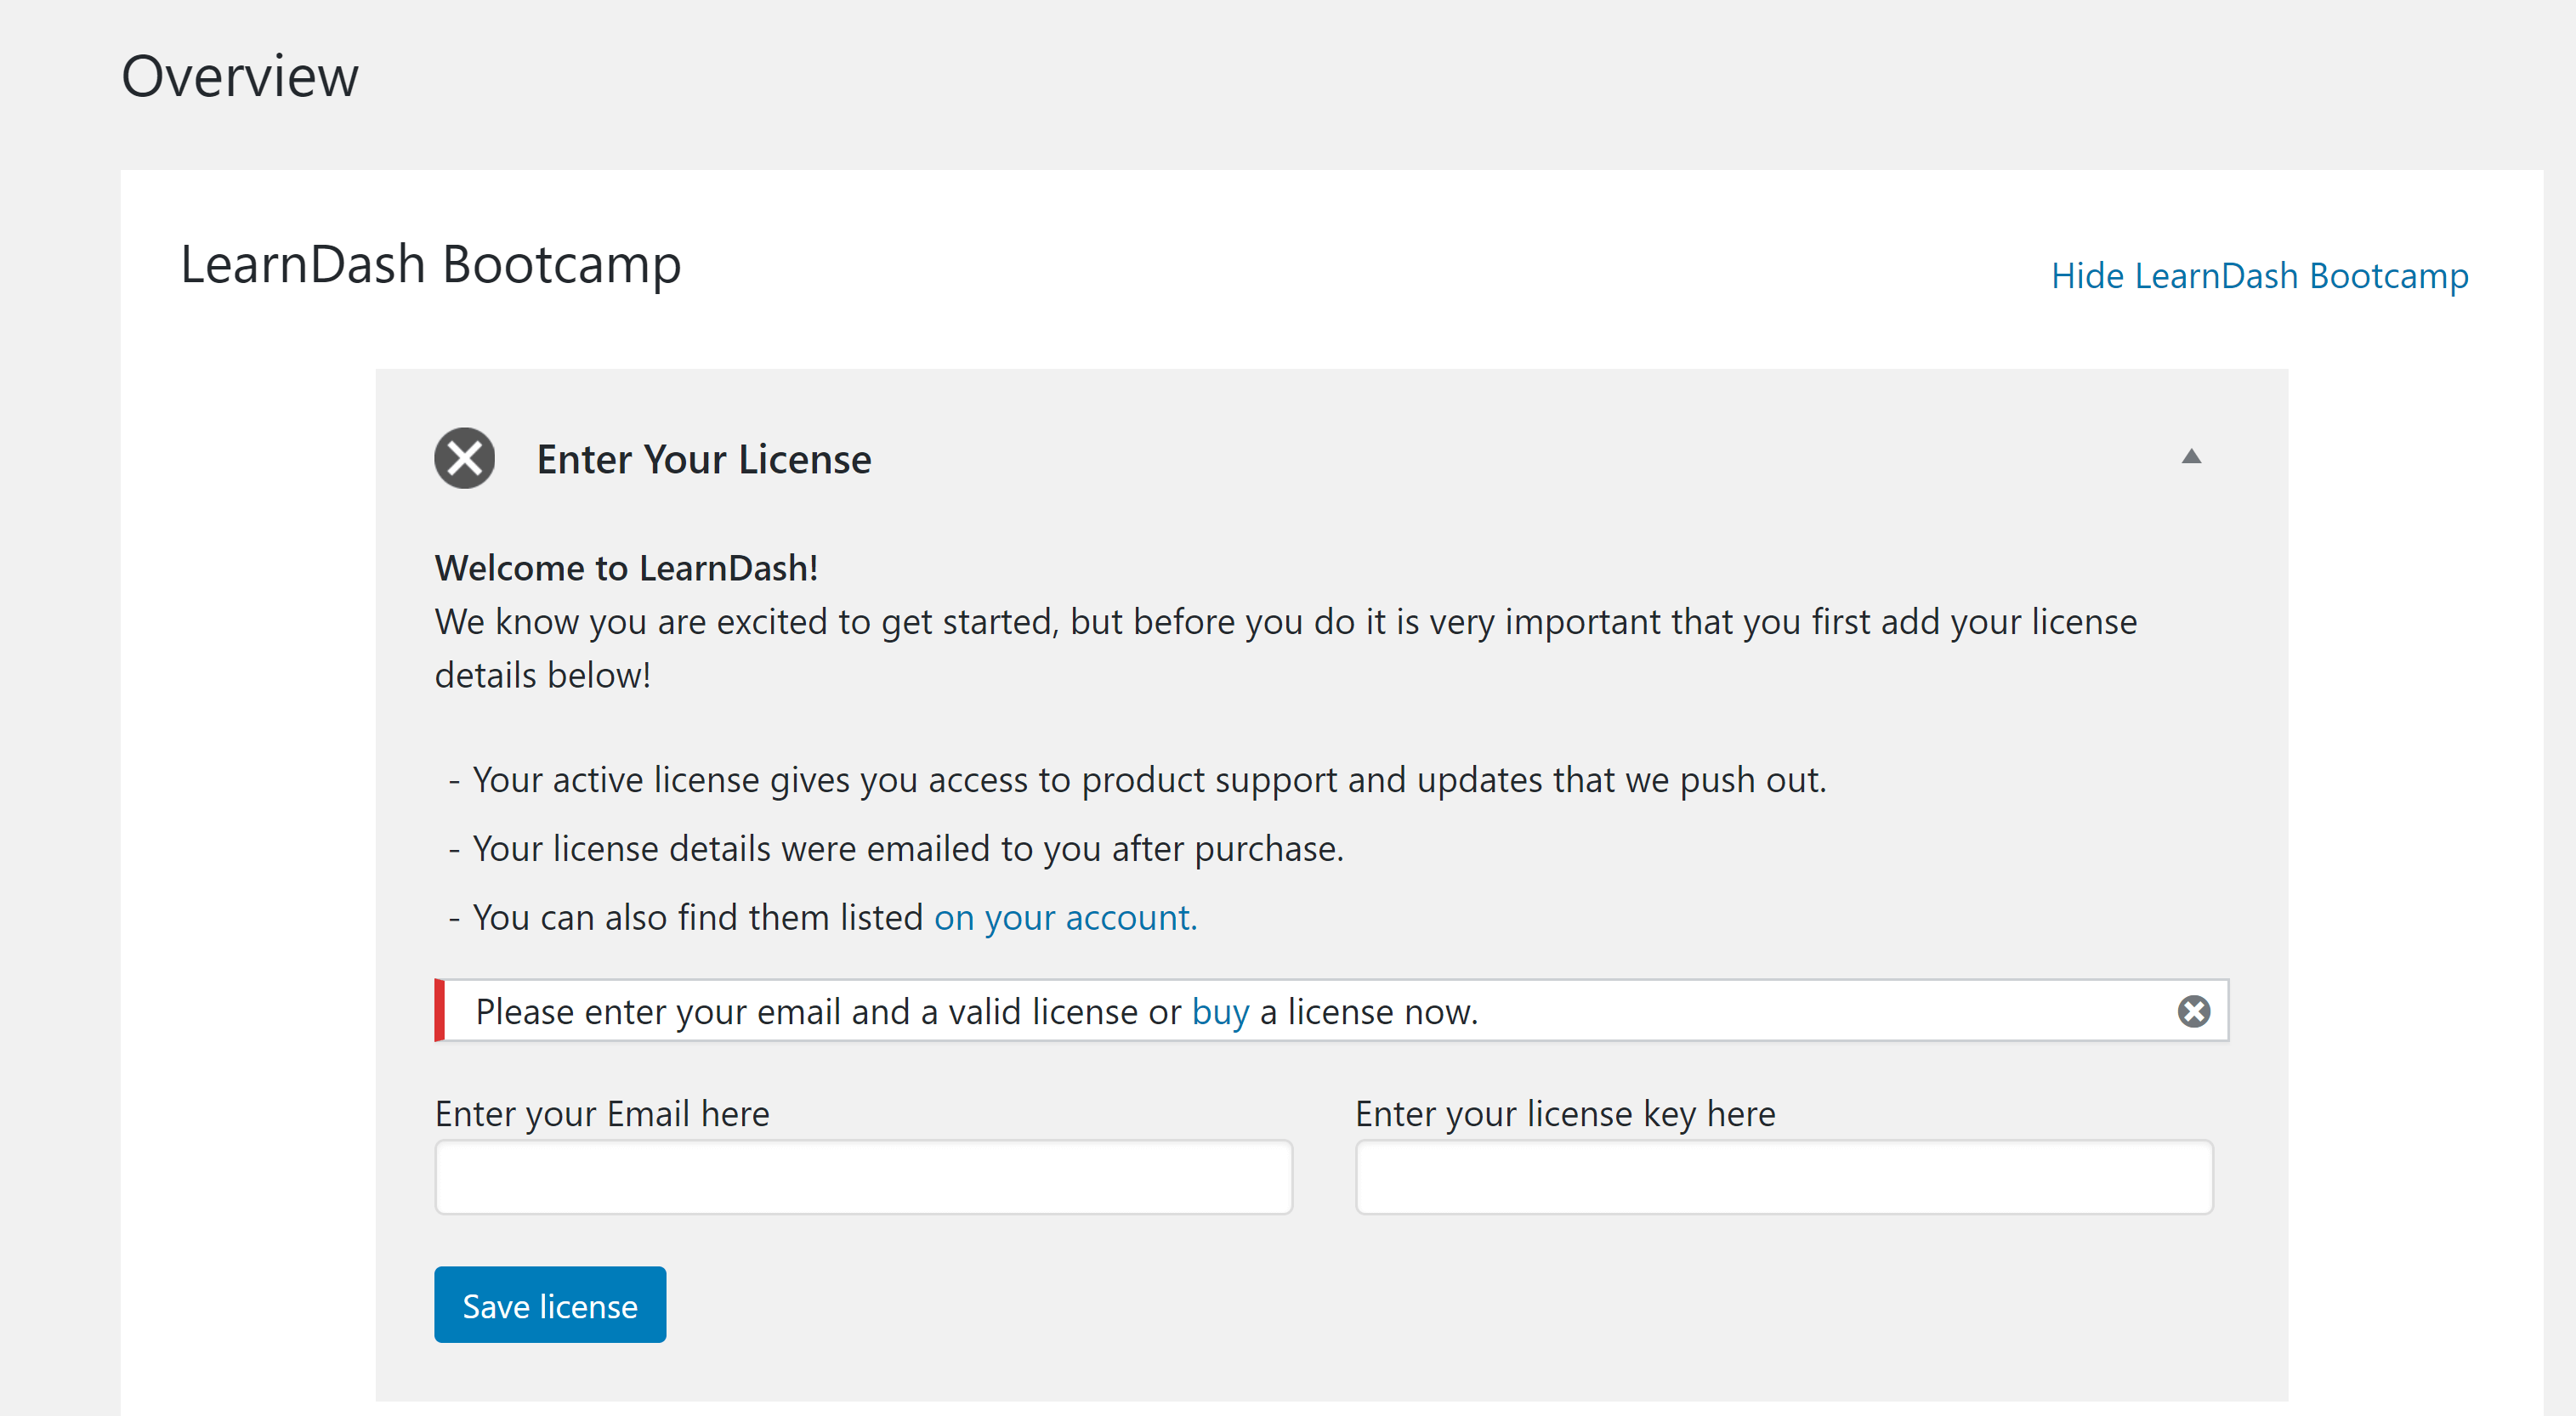
Saving your license key gives you access to all of the LearnDash Bootcamp modules. These are short videos that walk you through a variety of LearnDash functions, and are a great resource for users who are new to course building plugins.
Setting up Payment Processing
With the plugin activated, the next step is to connect LearnDash with a payment processor, which is where LearnDash most obviously falls short in the comparison with WP Courseware, as base functionality only allows you to connect with PayPal. To do so, go to the ‘Settings’ area of LearnDash and click the ‘PayPal Settings’ link near the top of the page.
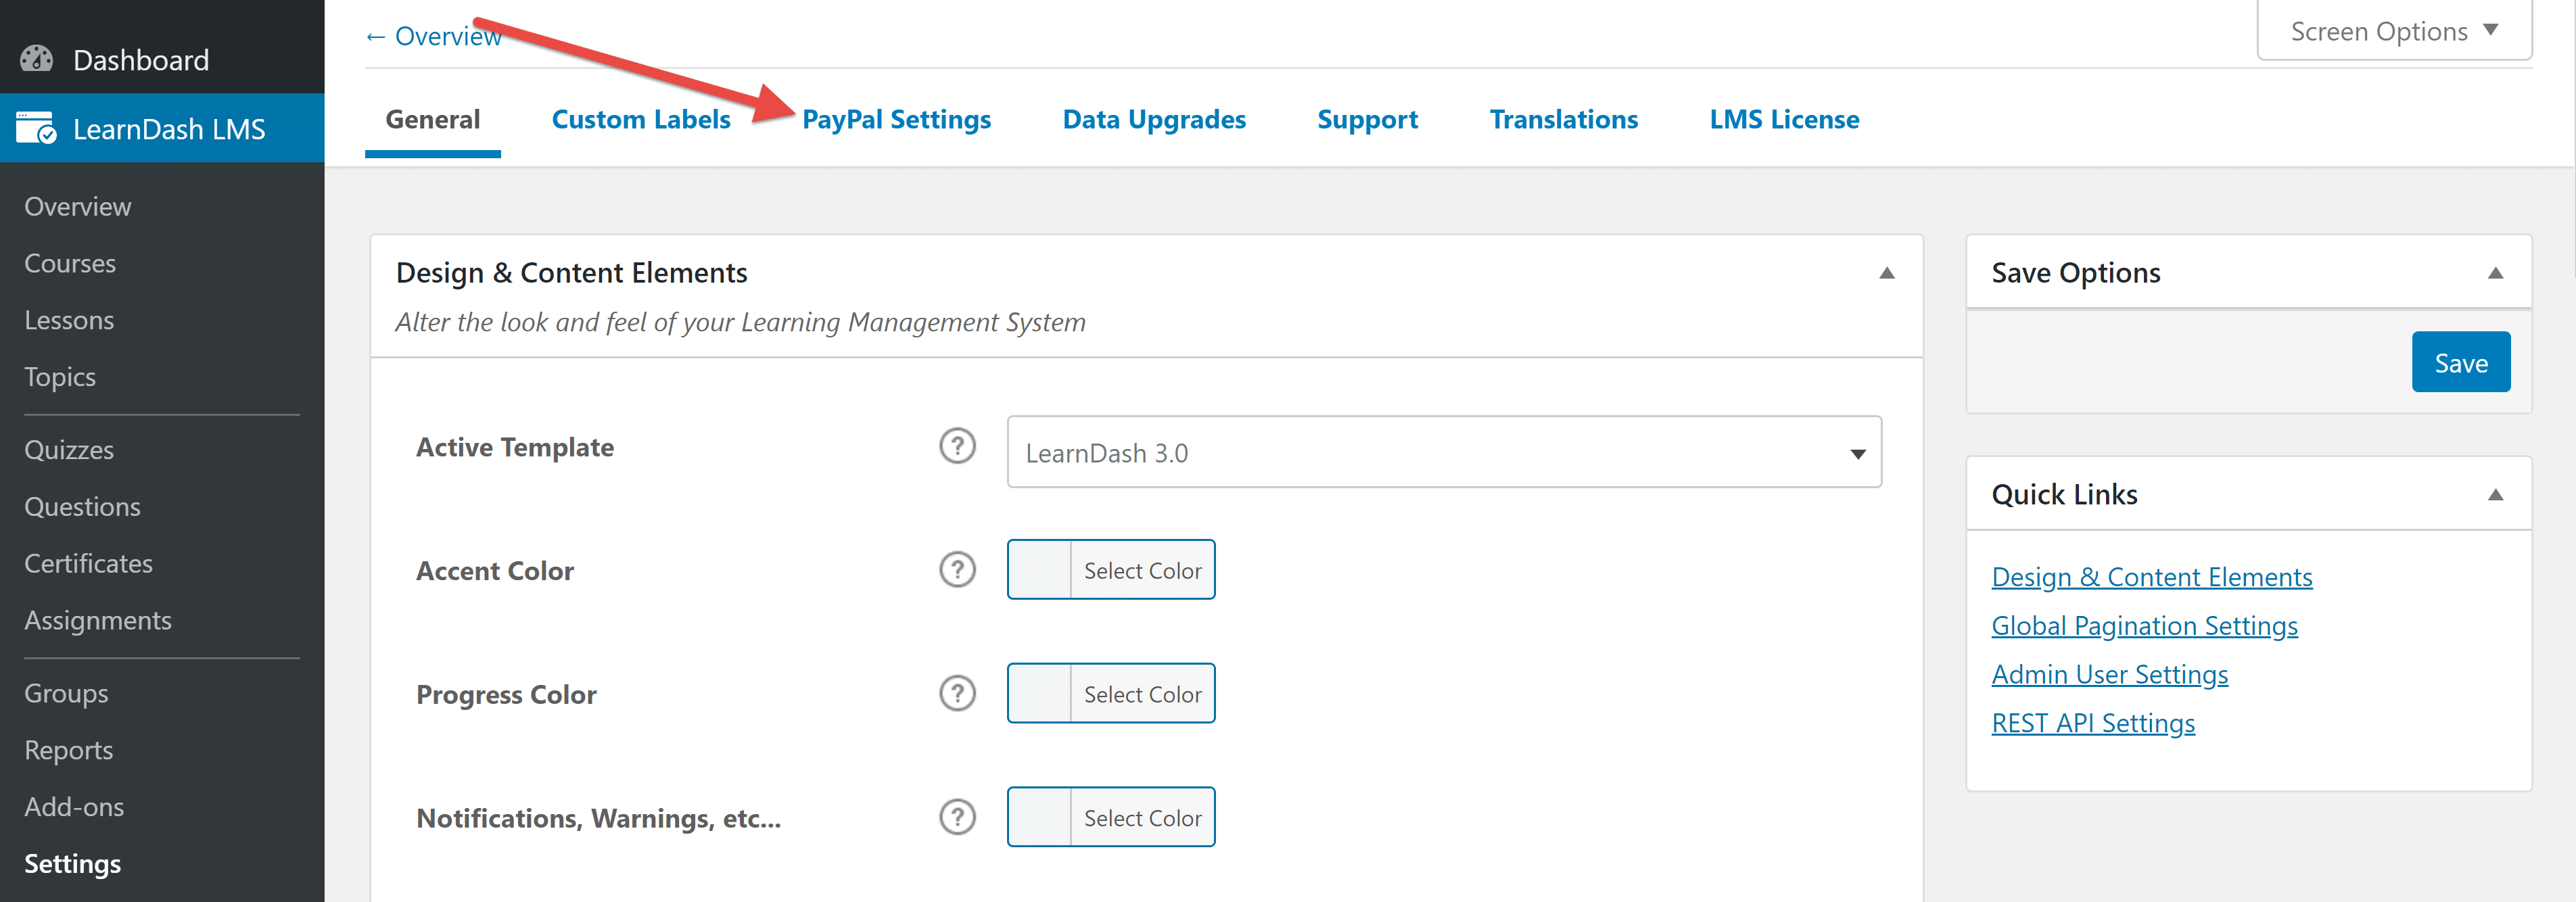
This will take you to a page where you can enter your PayPal email and specify your country and currency. You can also specify the URLs users will be taken to upon completing various actions.

At the bottom of the page, you’ll find a checkbox asking if you want to use PayPal Sandbox. This option allows you to use mock transactions to verify everything is working correctly.

When you’re satisfied with all of these settings, scroll back up the page and click ‘Save’.
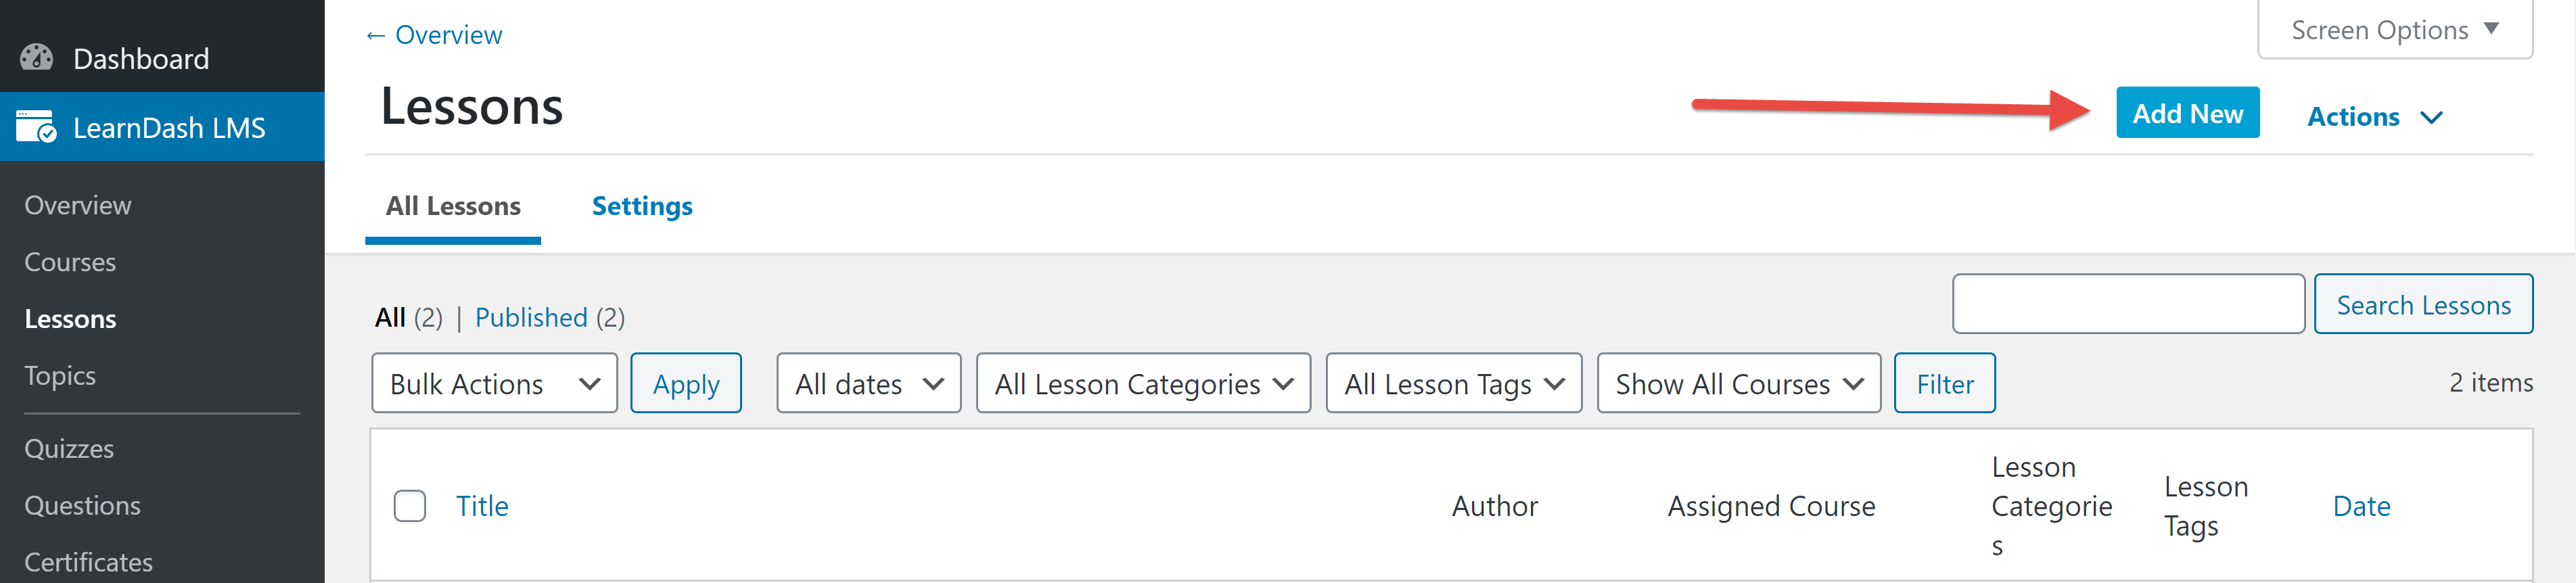
Creating a Lesson
Now you’ve activated LearnDash and connected it to PayPal, it’s time to start building your first course. The best way to do this is to build lessons and quizzes first, then compile them into a course with the course builder.
To get started, navigate to the ‘Lessons’ area of LearnDash and click on the ‘Add New’ button in the top right corner.
This opens the main page of the lesson editor, which looks a lot like your regular WordPress editor. This allows you to format the lesson’s content the same way you would format any other WordPress page.
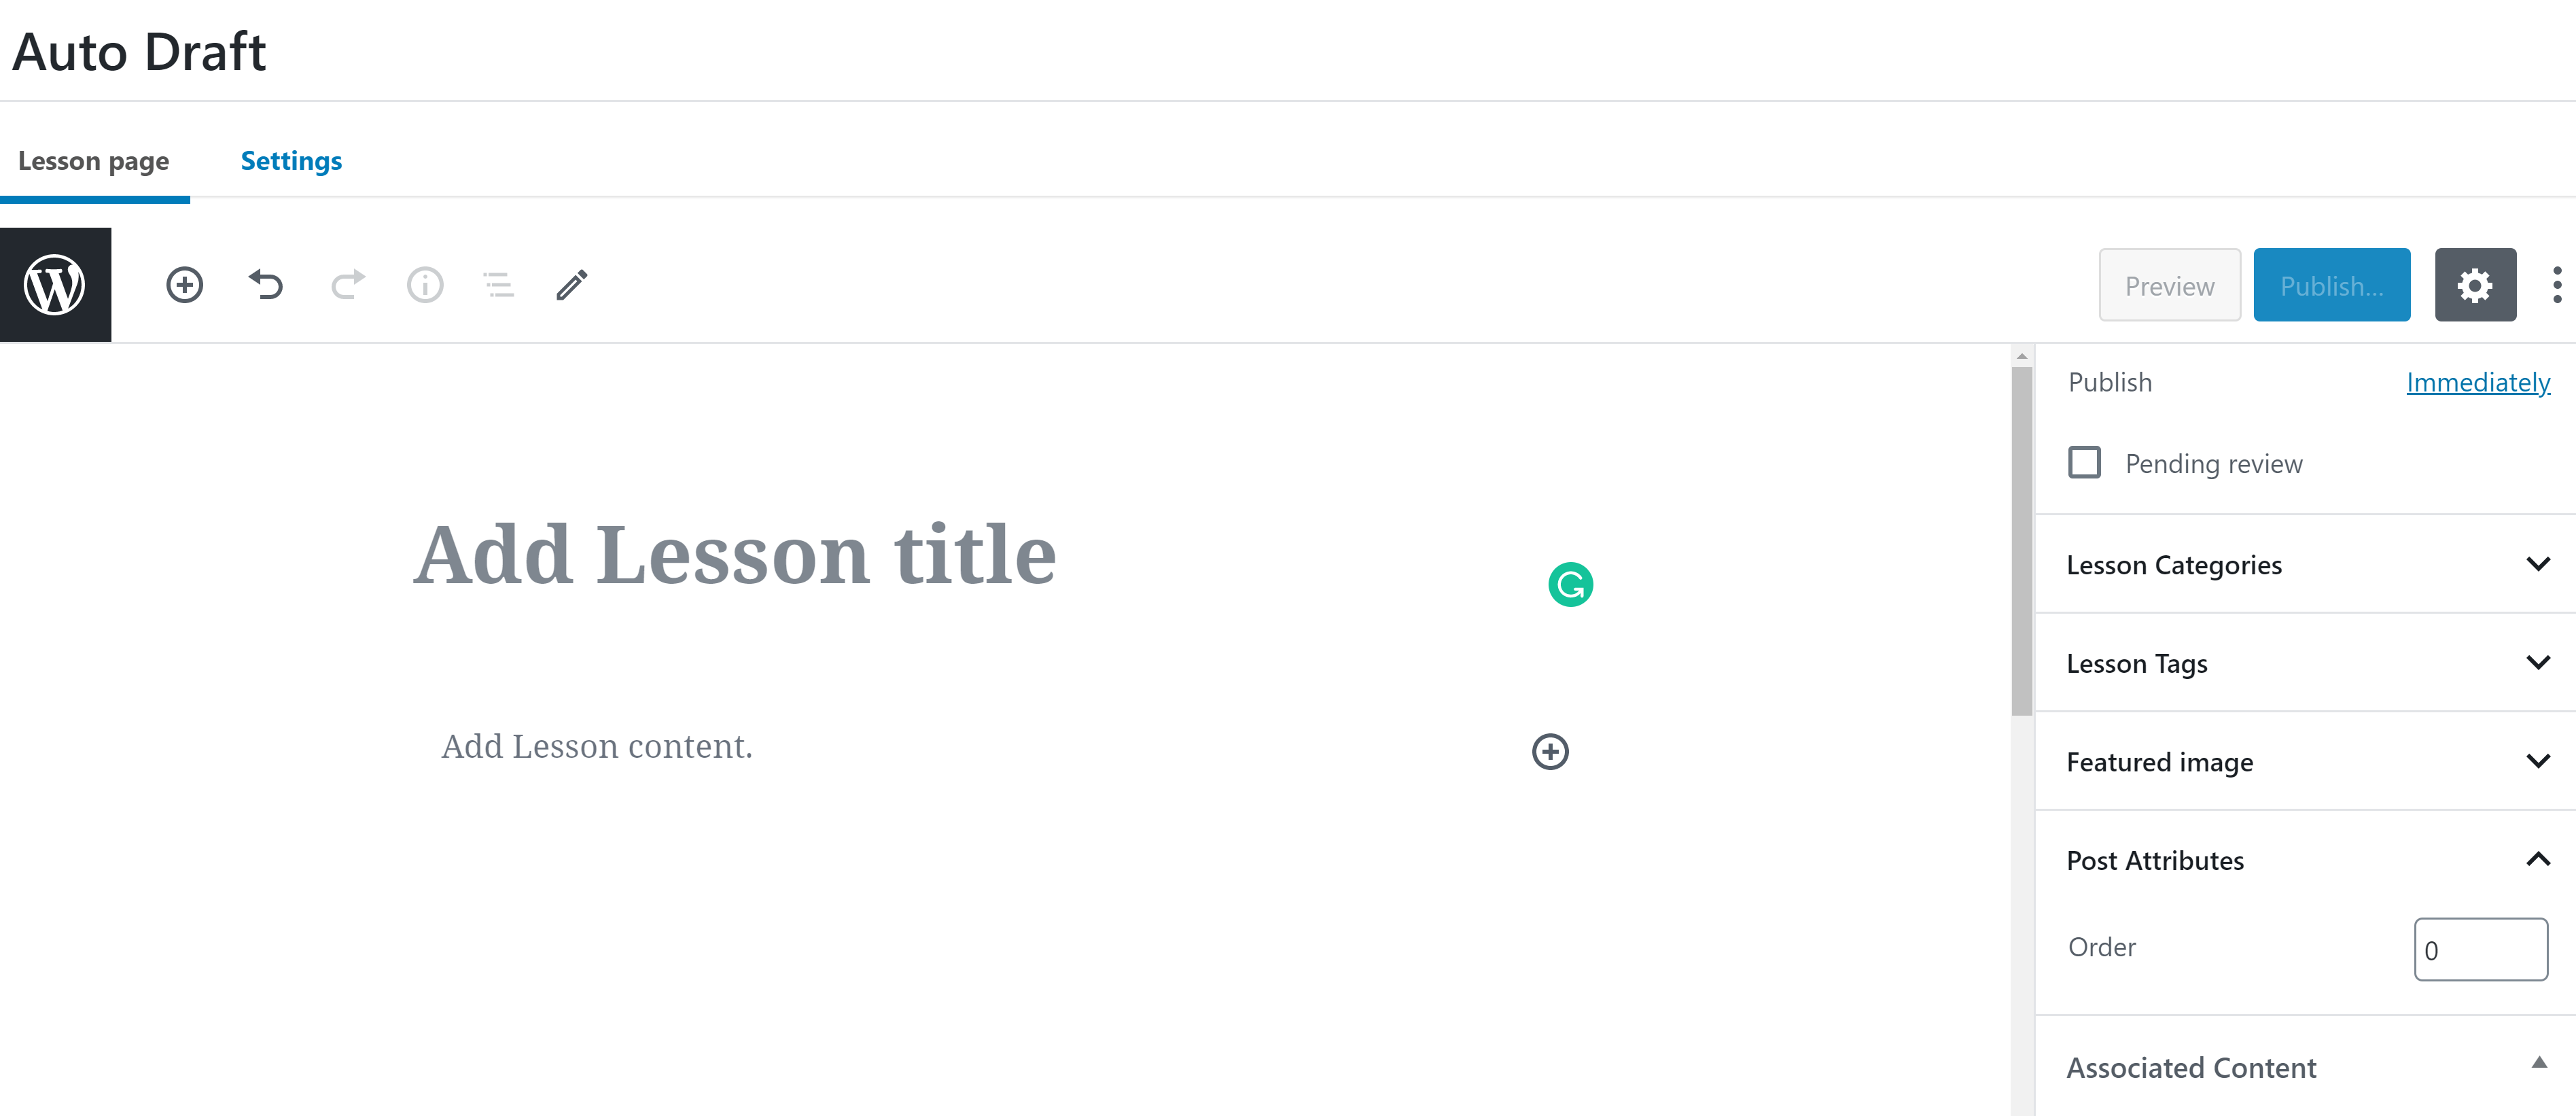
The main difference is the ‘Settings’ link above the editor. Click on this to reach a page where you can customize several things about the lesson:
- Lesson materials — display all support materials related to a lesson for students.
- Video progression — make it mandatory for students to watch videos to completion to progress to the next lesson.
- Assignment uploads — choose to accept assignment uploads in a variety of formats. You can also choose to use LearnDash’s automatic grading or to manually grade all assignments.
- Lesson access — what course the lesson is associated with and when it becomes available to students. You can also choose whether or not to make the lesson available to potential students as a sample.
Once you’re happy with these settings, click the ‘Publish’ button at the top of the screen.
Creating a Quiz
The second core component of your course is the quizzes. To create your first quiz, go to the ‘Quizzes’ area of LearnDash and click on either the ‘Add Your First Quiz’ button in the center of the screen or the ‘Add New’ button in the top right corner. This will open the quiz editor.
Like the lesson builder, this will take you to a modified version of the regular WordPress editor, where you can enter the title and description of your quiz. The description can be formatted like any other WordPress page.
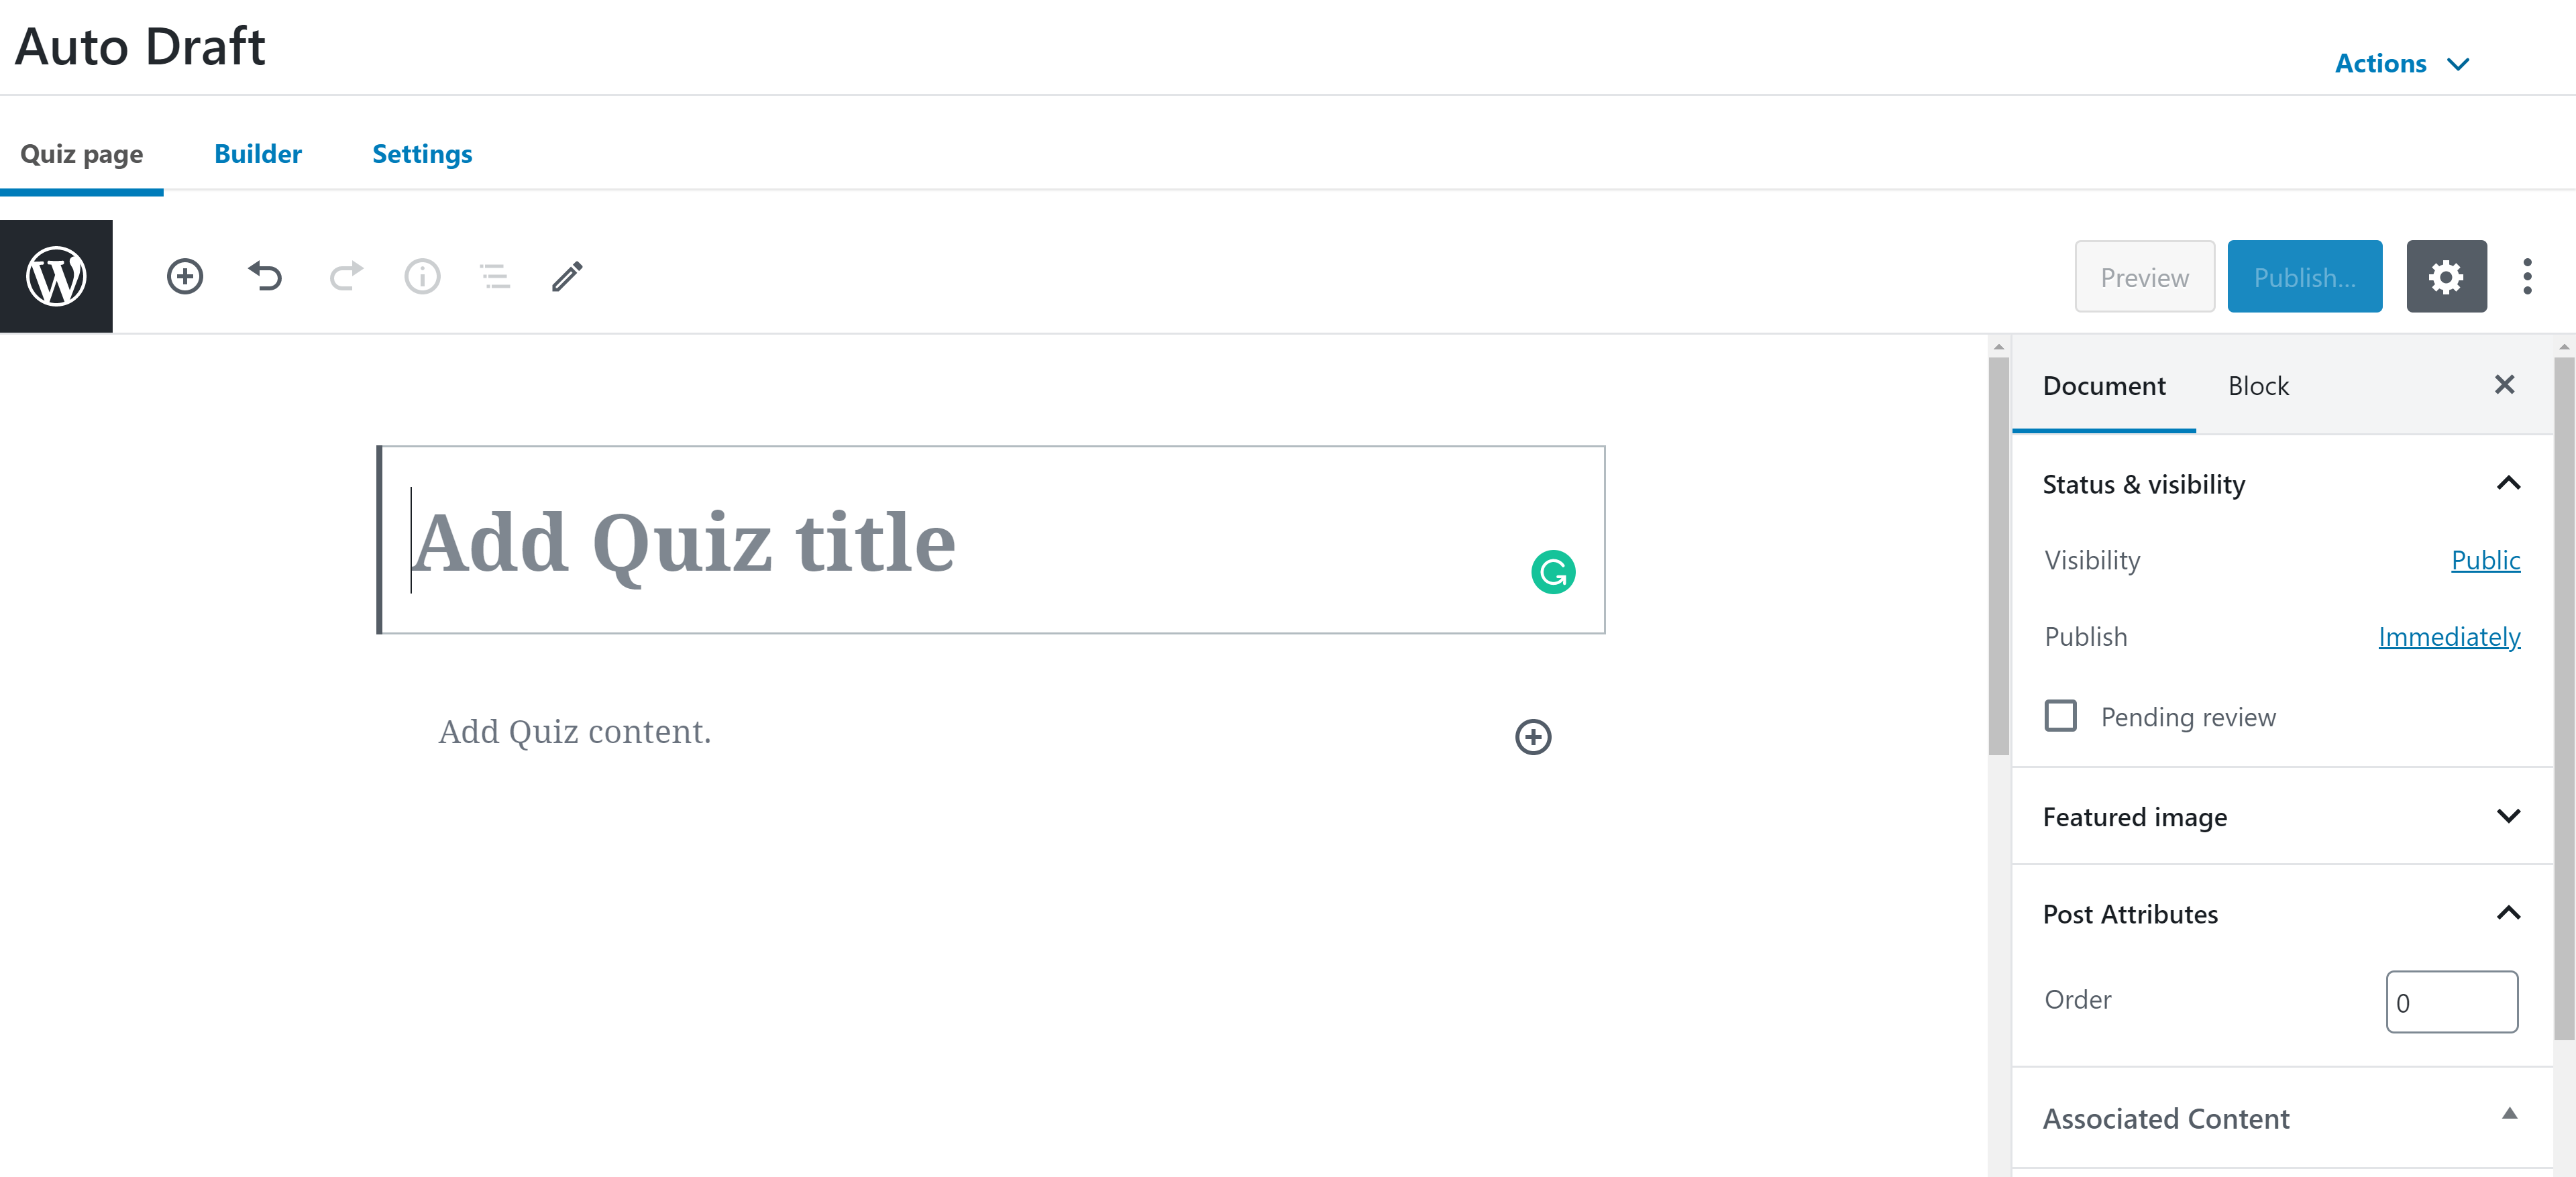
When you’re satisfied with the description, click the ‘Builder’ link at the top of the editor — this will take you to a page where you can create and organize questions.
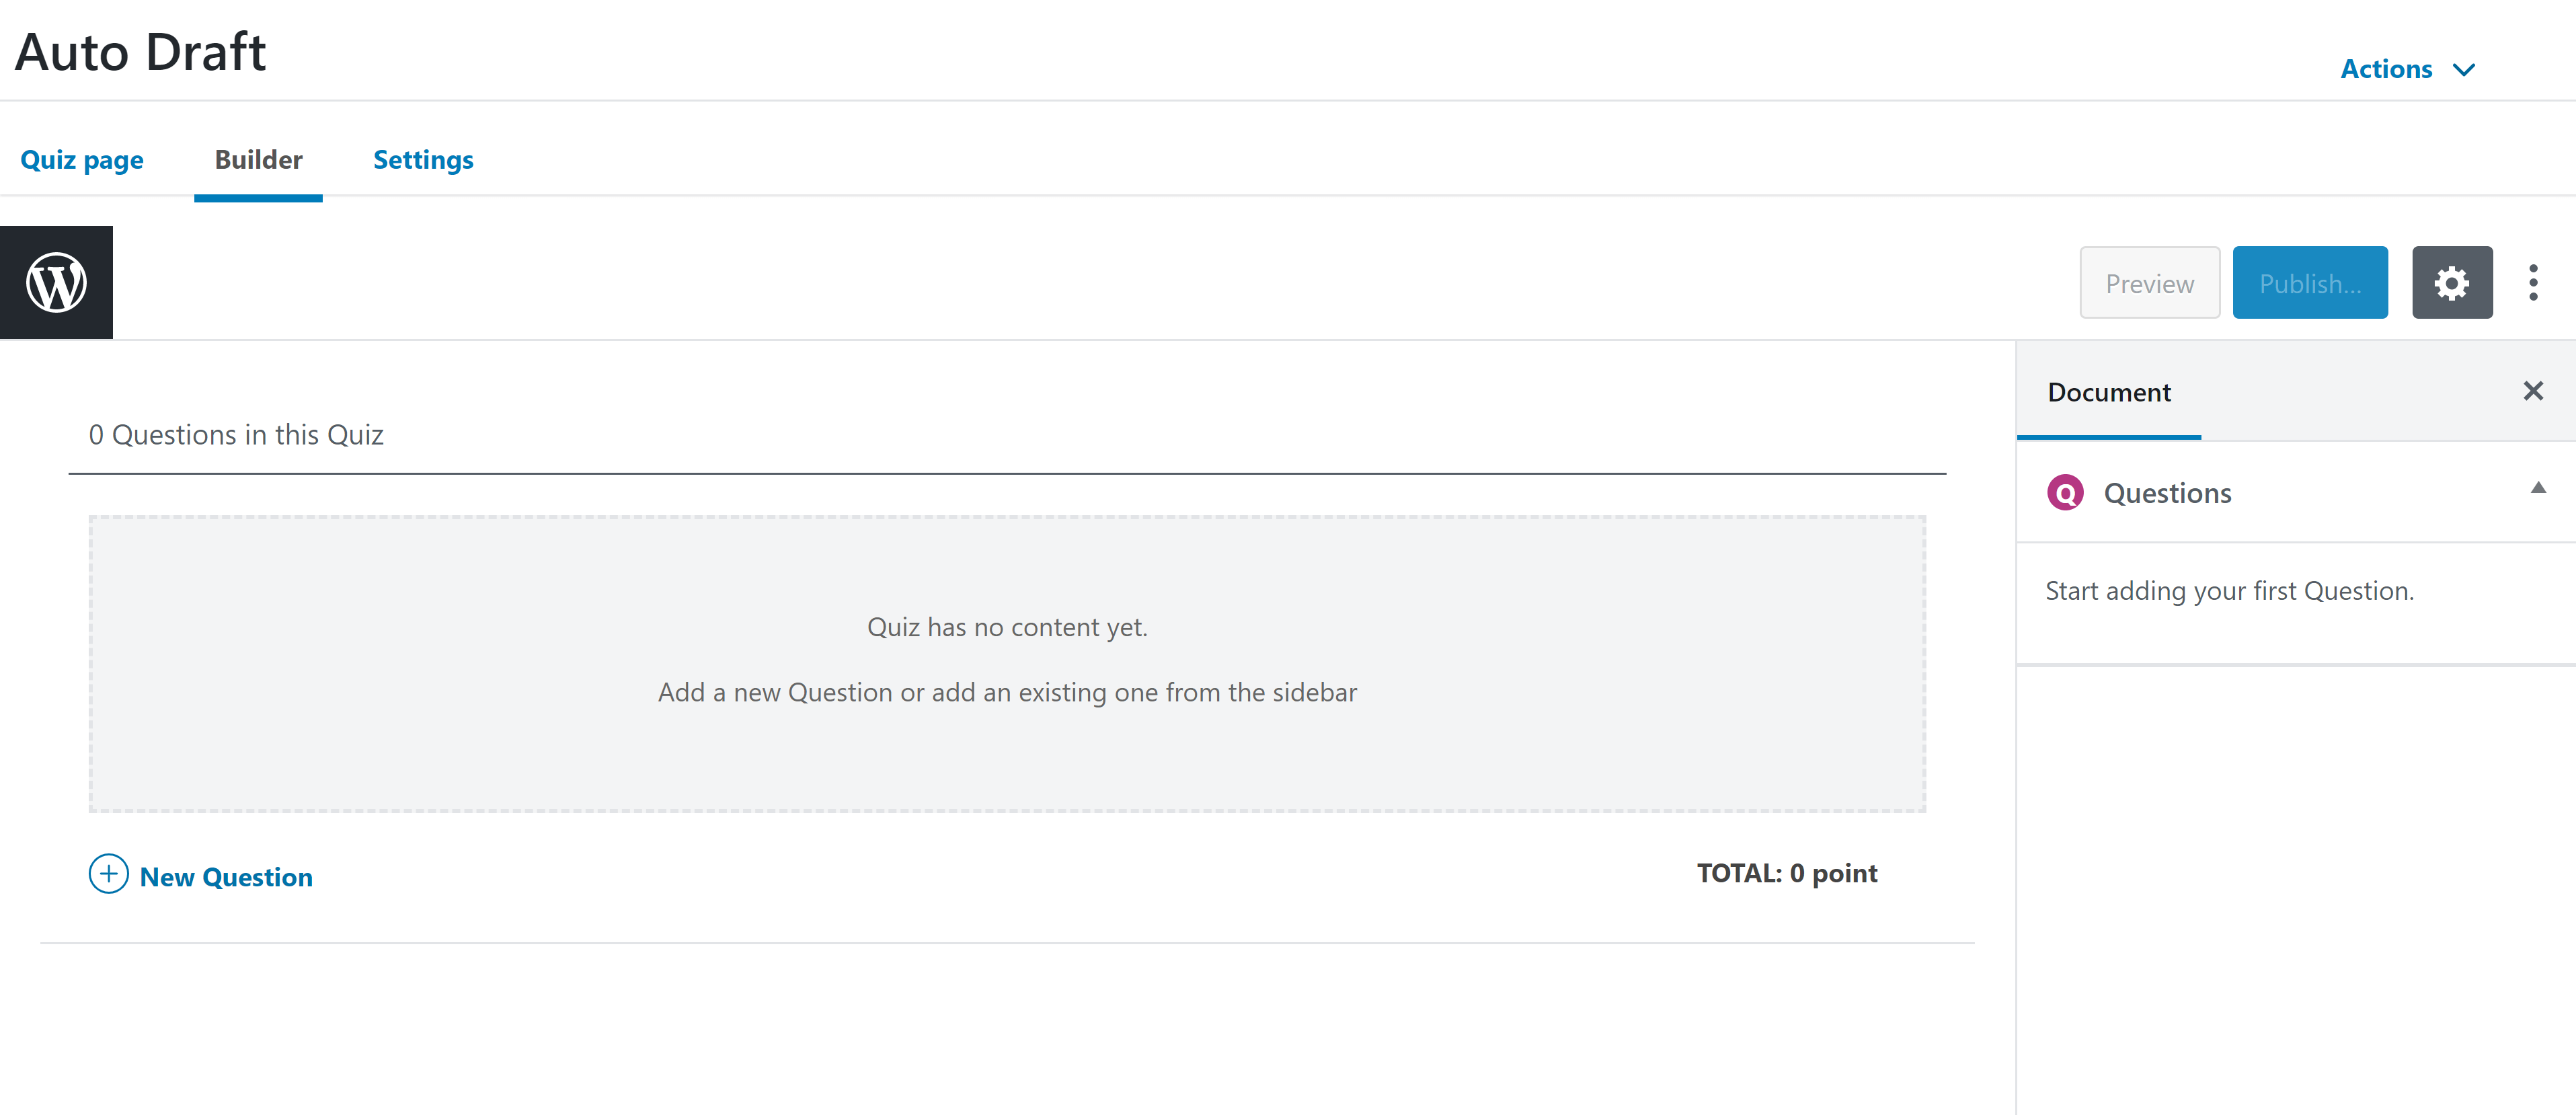
Click the ‘New Question’ button at the bottom of the quiz editor to open a box where you can type in your question. Enter the question and click ‘Add Question’, and a box containing your question will appear in the quiz editor.

This box also lets you configure a few key aspects of your question:
- Question type — choose between single choice, multiple choice, essay answer and more.
- Answer — fill in the correct answer.
- Score — decide how many points this question is worth.
- Messages — customize the messages students receive for correct or incorrect answers.
When you’re done with your first question, click the ‘^’ in the top right corner of the question box. This will minimize it so only the question itself is visible, giving you a less cluttered workspace. The quiz editor also uses drag-and-drop functionality to let you reorder questions.
Next, go to the ‘Settings’ area. Here, you can add the quiz to an existing course or lesson, set prerequisites, and choose who has access to the quiz. You can also specify the passing score, restrict the number of retakes and set a time limit.
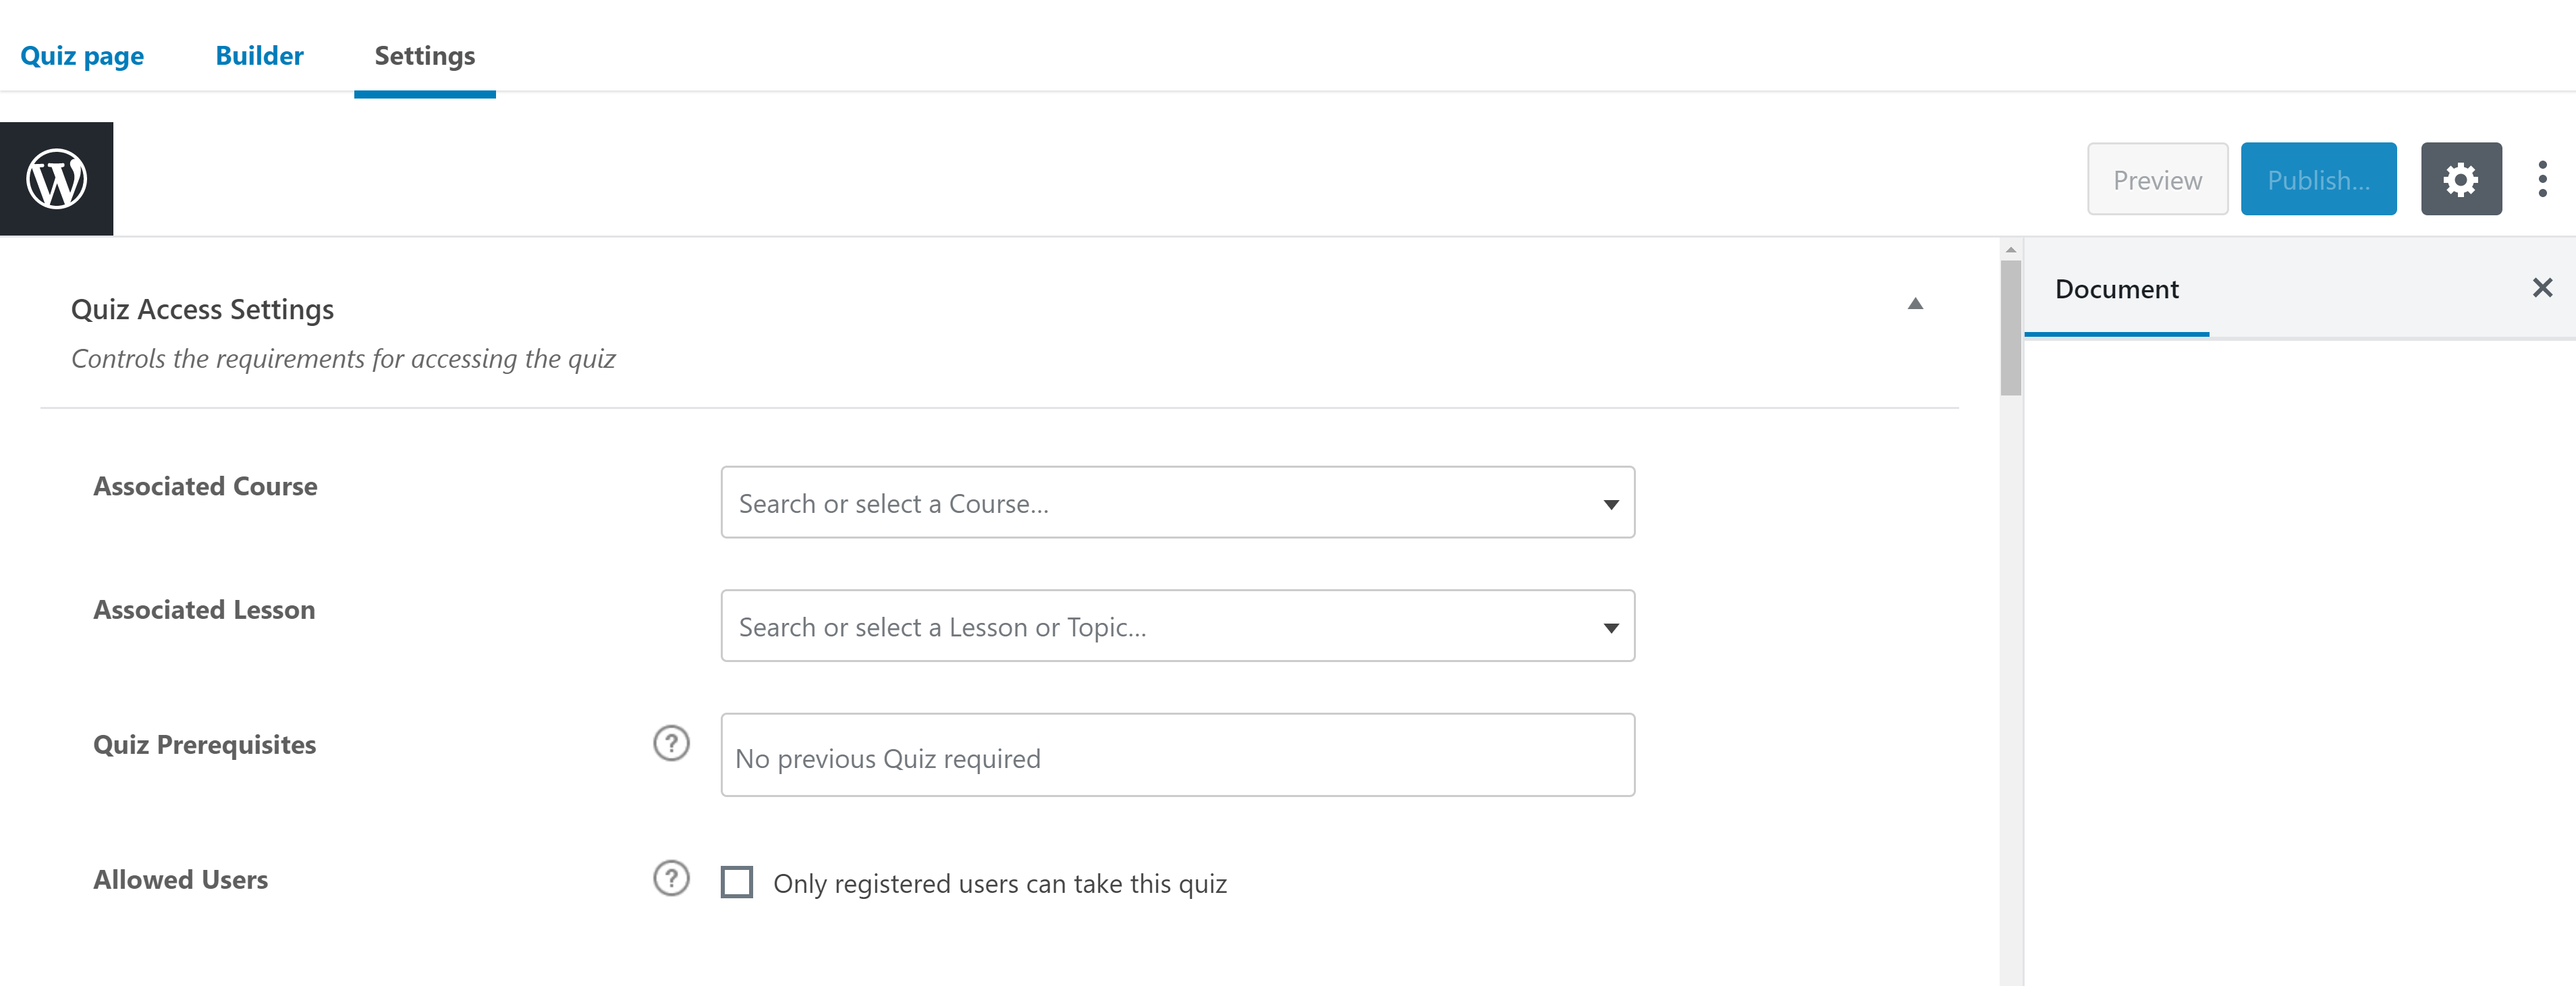
Further down the page, you can customize how the quiz is displayed and what the results page looks like. This lets you fully shape students’ experience.
When you’re satisfied with all of these settings, click the ‘Publish’ button in the top right corner of the editor.
Creating a Course
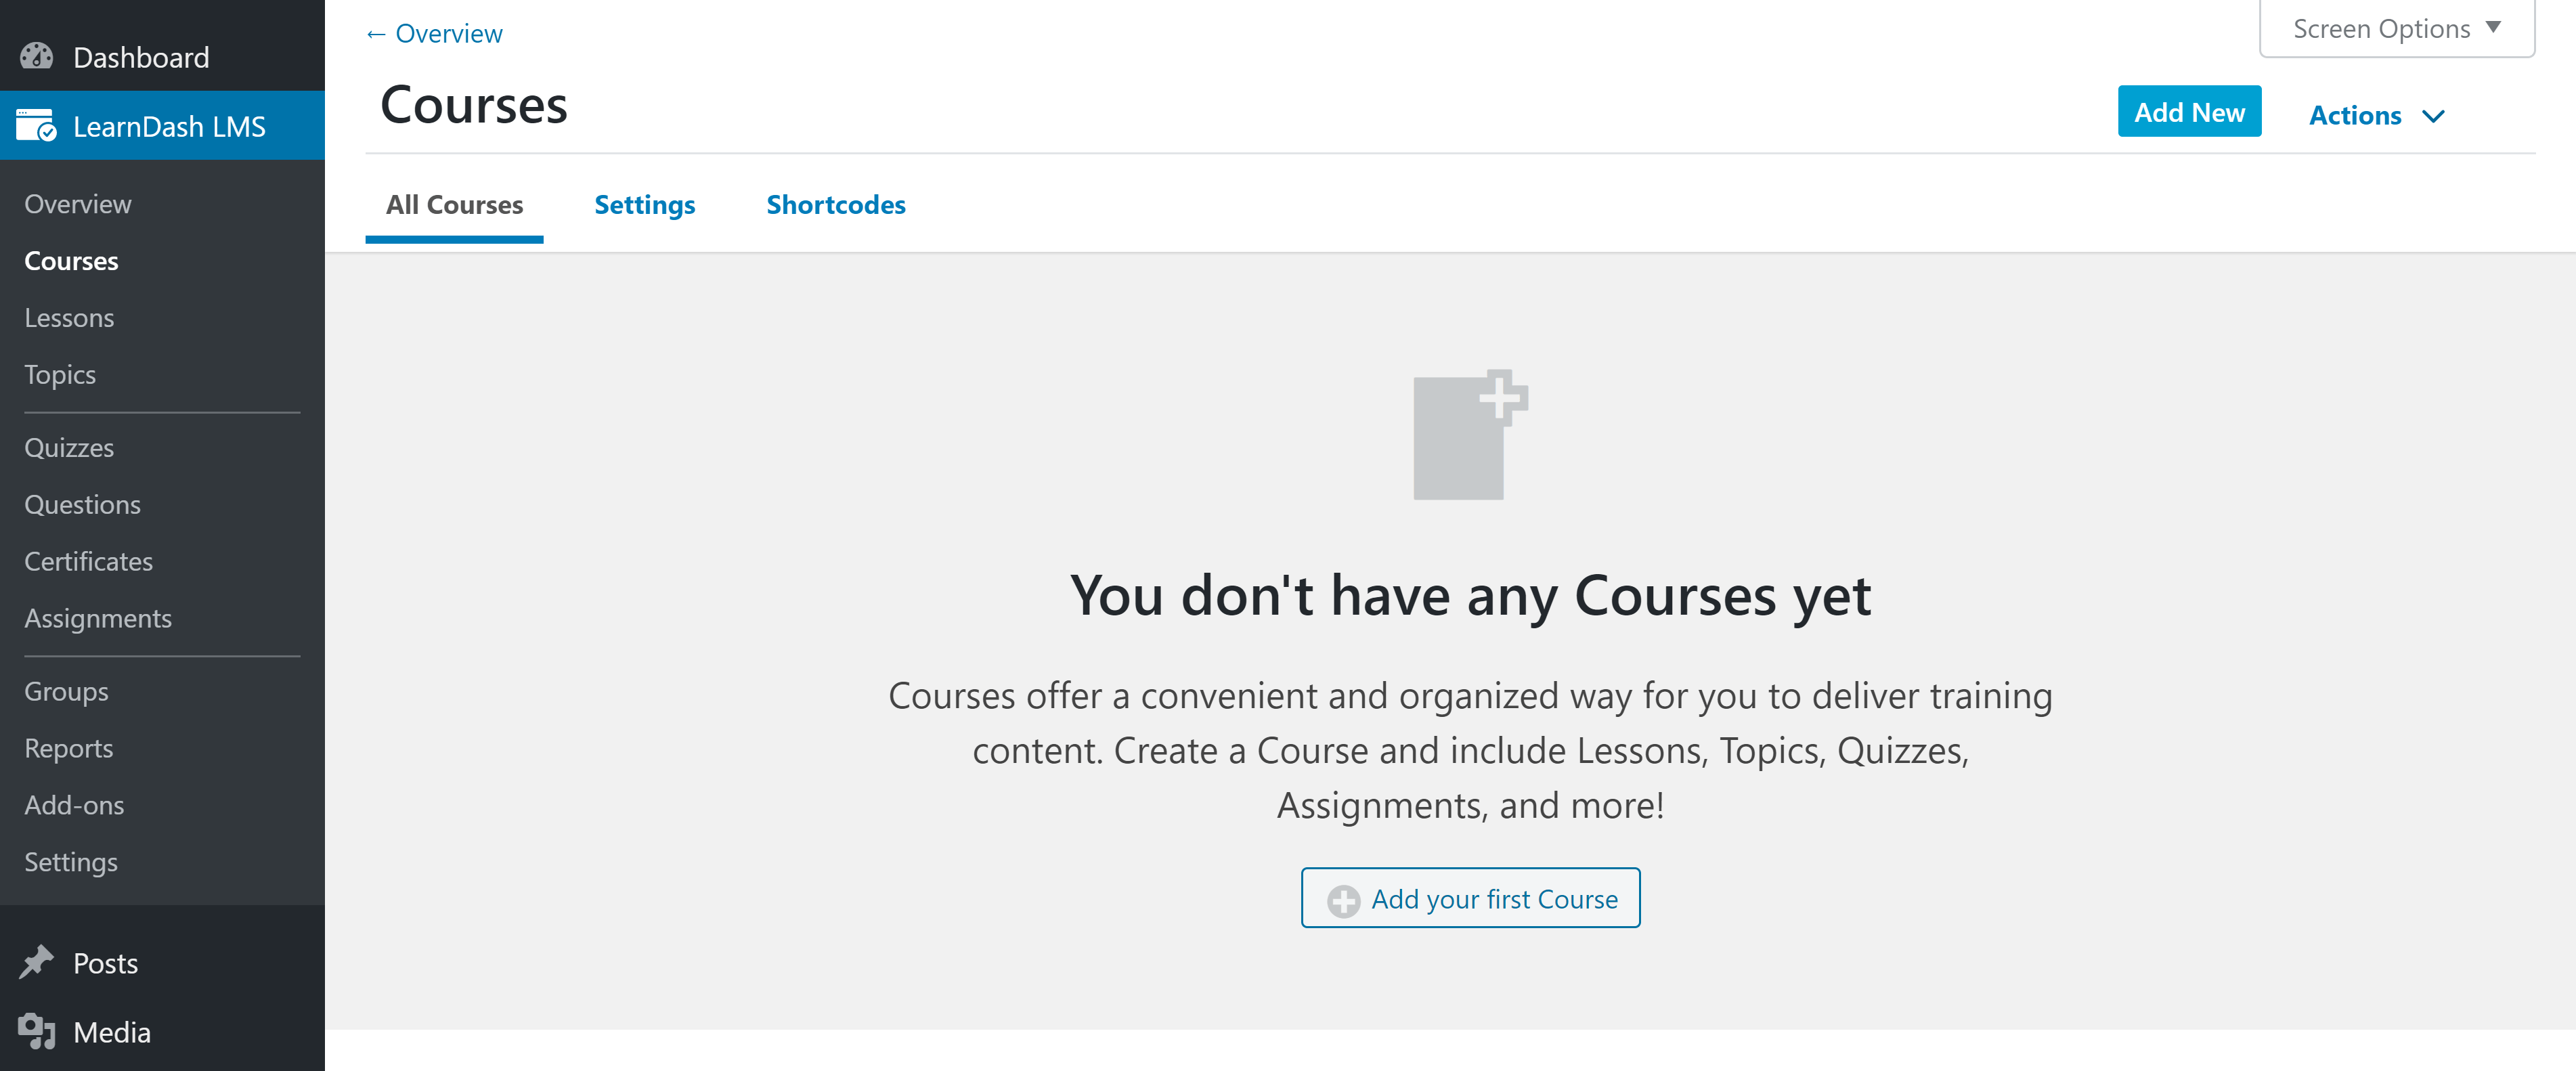
Now, go to the ‘Courses’ area of LearnDash. You’ll eventually be able to view information about all of your courses in this area, but, for now, click the ‘Add Your First Course’ button near the center of the screen or the ‘Add New’ button in the top right corner.
This will take you to the course page editor, where you can choose how the course is displayed on your site. This is essentially the regular WordPress editor.
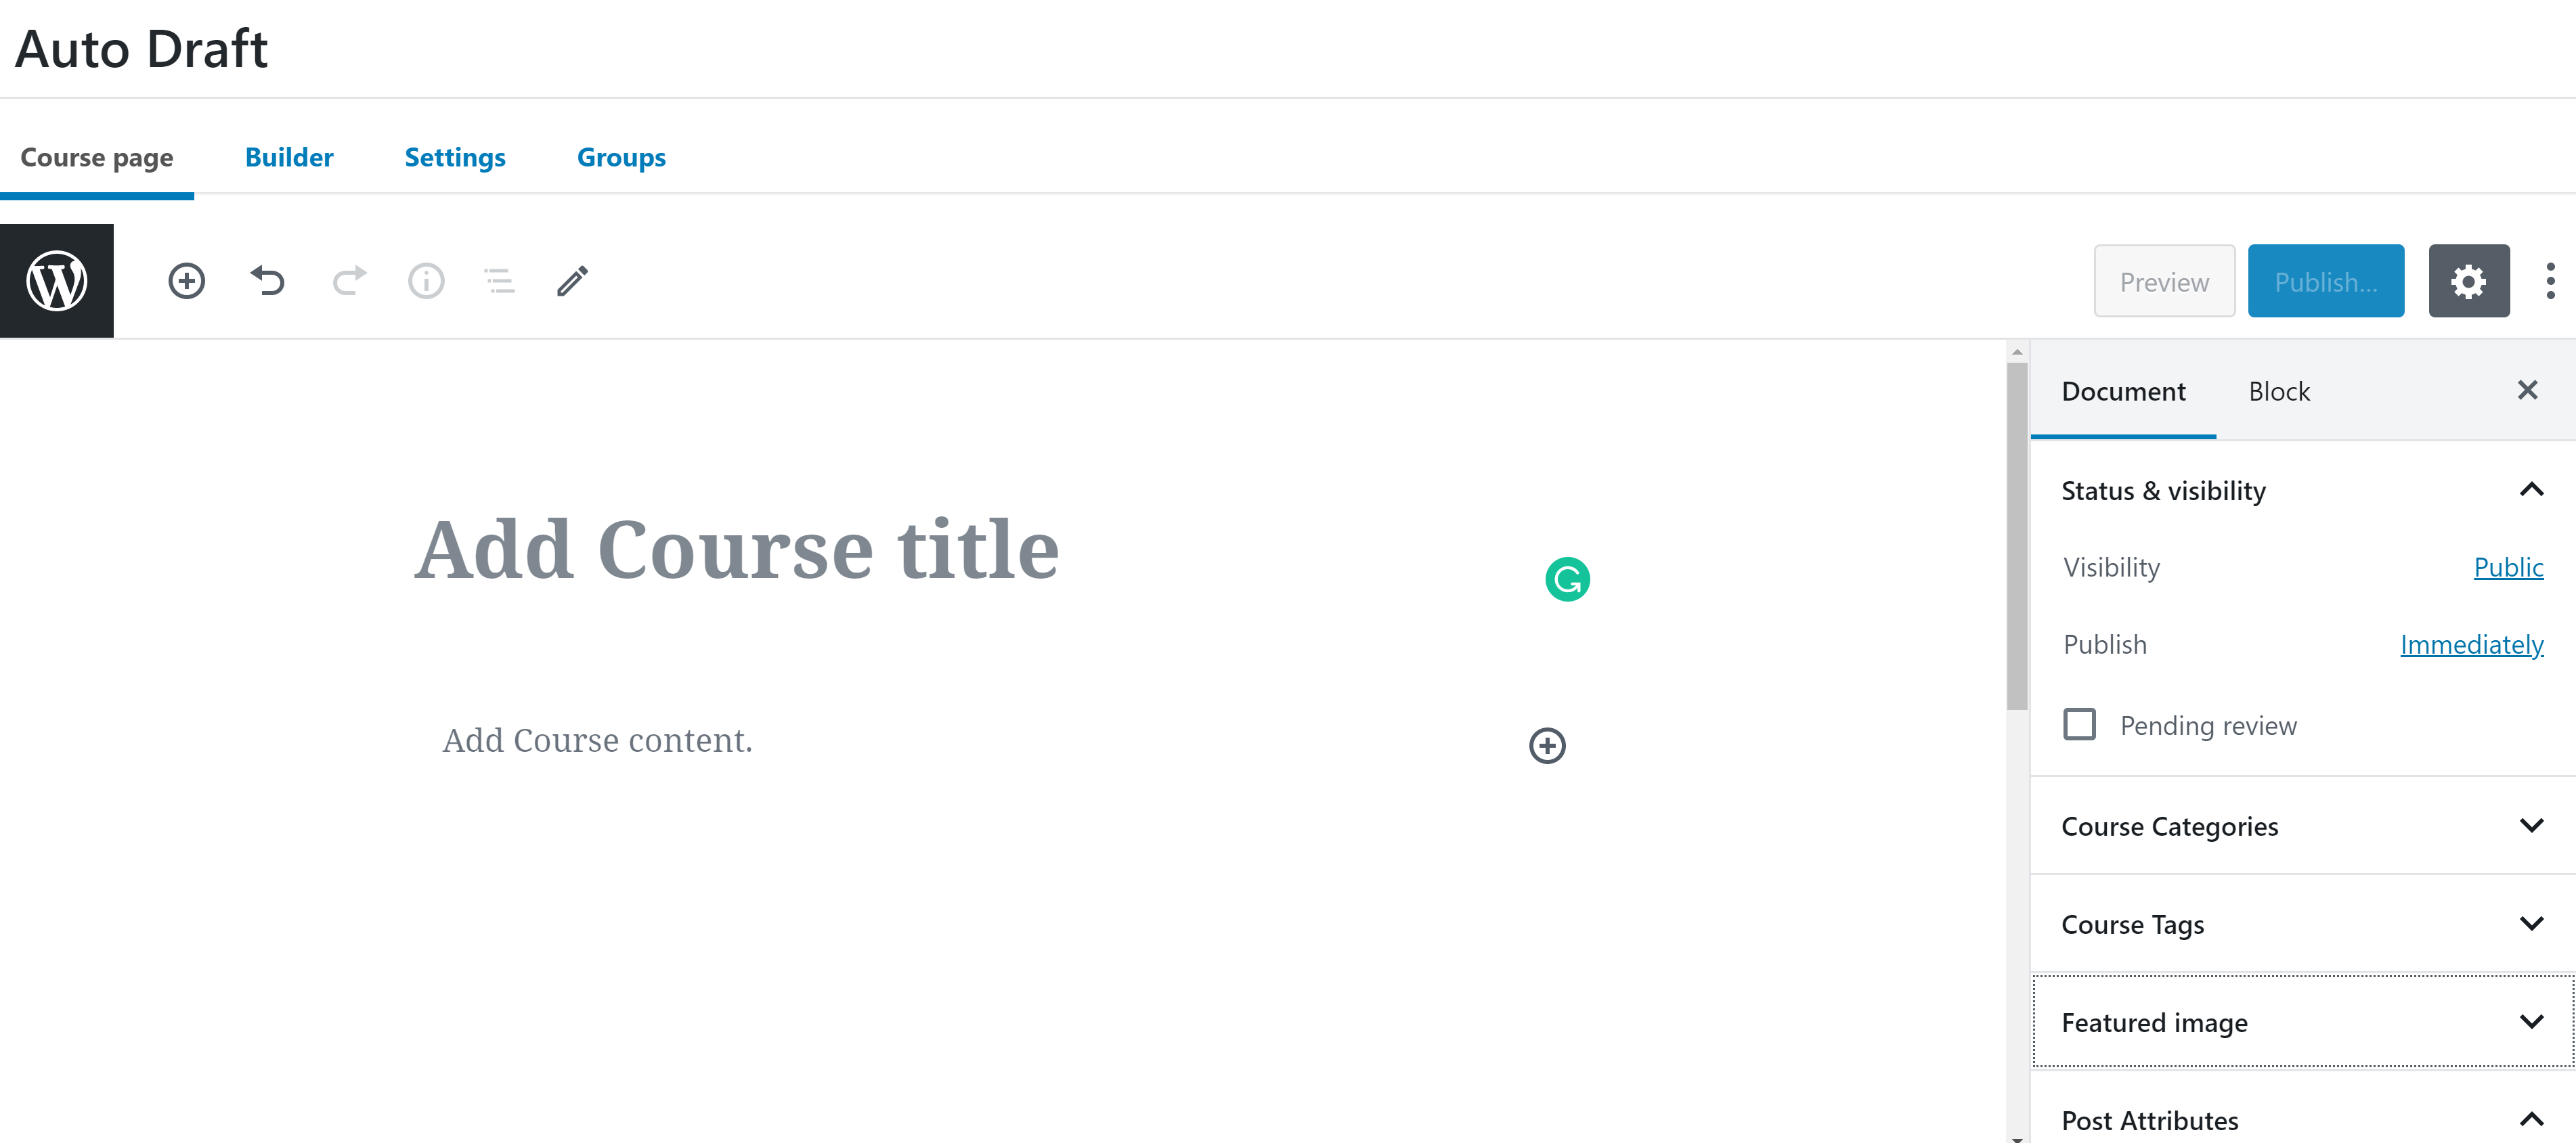
Once you’re happy with the title and description of the course, click the ‘Builder’ link at the top of the editor to be taken to a page where you can add lessons to your course. You can also divide the course into sections by clicking the ‘New Section Heading’ link.
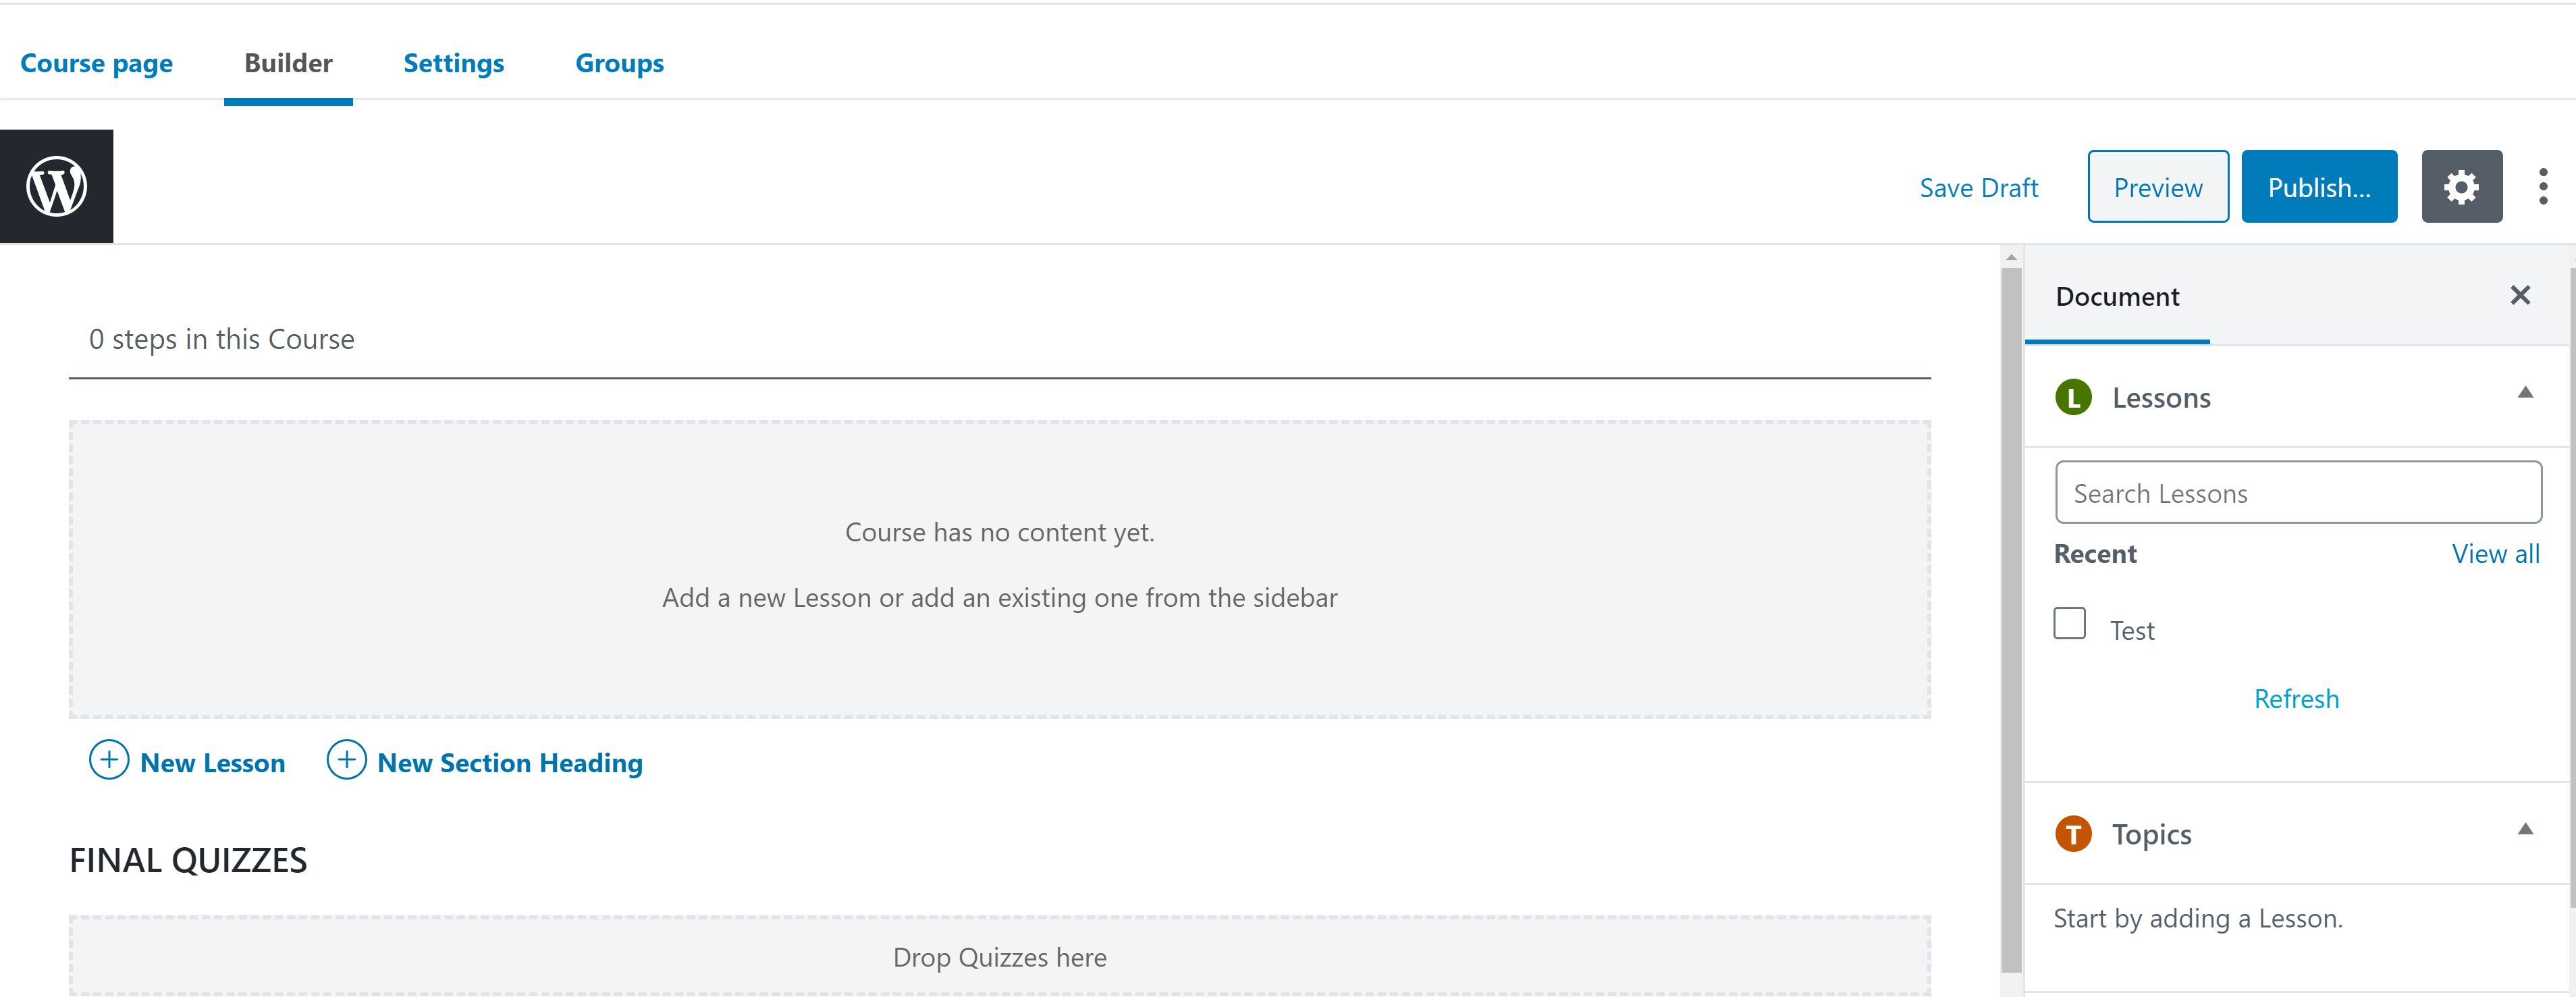
There are two ways to add lessons to your course:
- Click the ‘New Lesson’ link and type a lesson title into the box that appears.
- Select a lesson from the sidebar and click ‘Add’.
You can use the editor’s drag-and-drop functionality to change the order of units, and you can also add quizzes between lessons.
The LearnDash course builder also features a section for Final Quizzes. As one may expect, these tests will automatically occur at the end of the course you’re working on. You can add quizzes from the sidebar or by clicking the ‘New Quiz’ link at the bottom of the page and typing in a title.
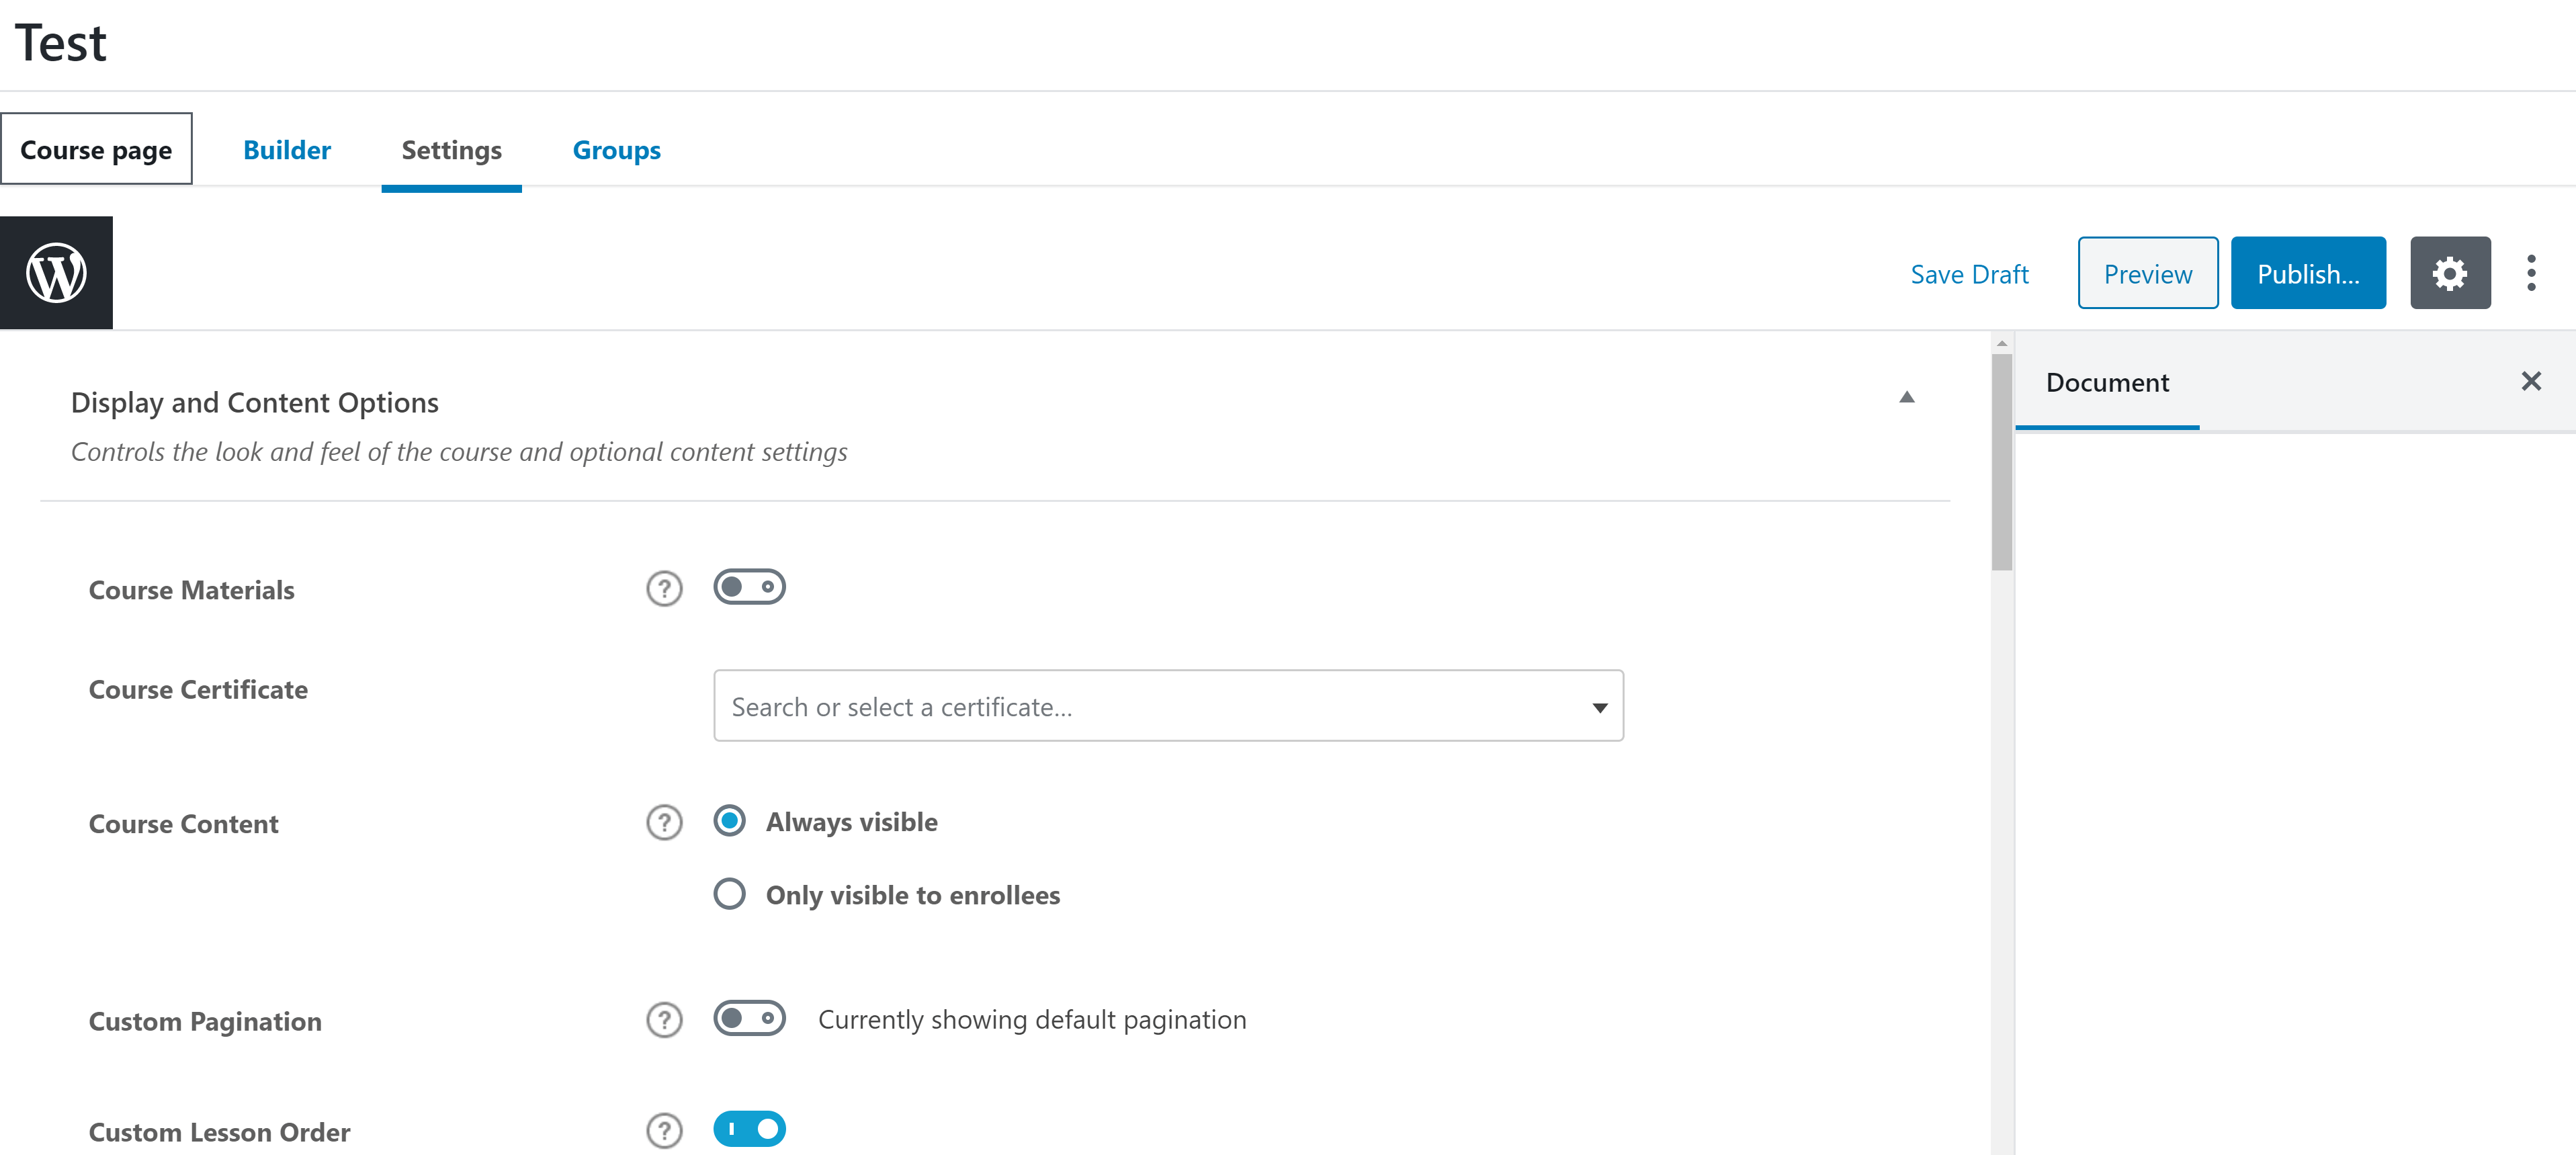
When you’re satisfied with the placement of your lessons and quizzes, click the ‘Settings’ link at the top of the page. You’ll be taken to a page where you can customize a wide variety of settings, such as who can see the course, how the course appears to students and the pricing structure.
When you’ve finished configuring the settings, click the publish button in the top right corner of the editor. There’s also a ‘Groups’ area in the builder, but this is irrelevant until you have students.
Add-ons and Integrations
LearnDash offers a wide variety of add-ons to increase its functionality and combine it with tools you’re already using. Some of the most notable integrations offered by add-ons are Stripe, Elementor, bbPress and WooCommerce. You can see the complete list by navigating to the ‘Add-ons’ section of LearnDash in your WordPress admin area.
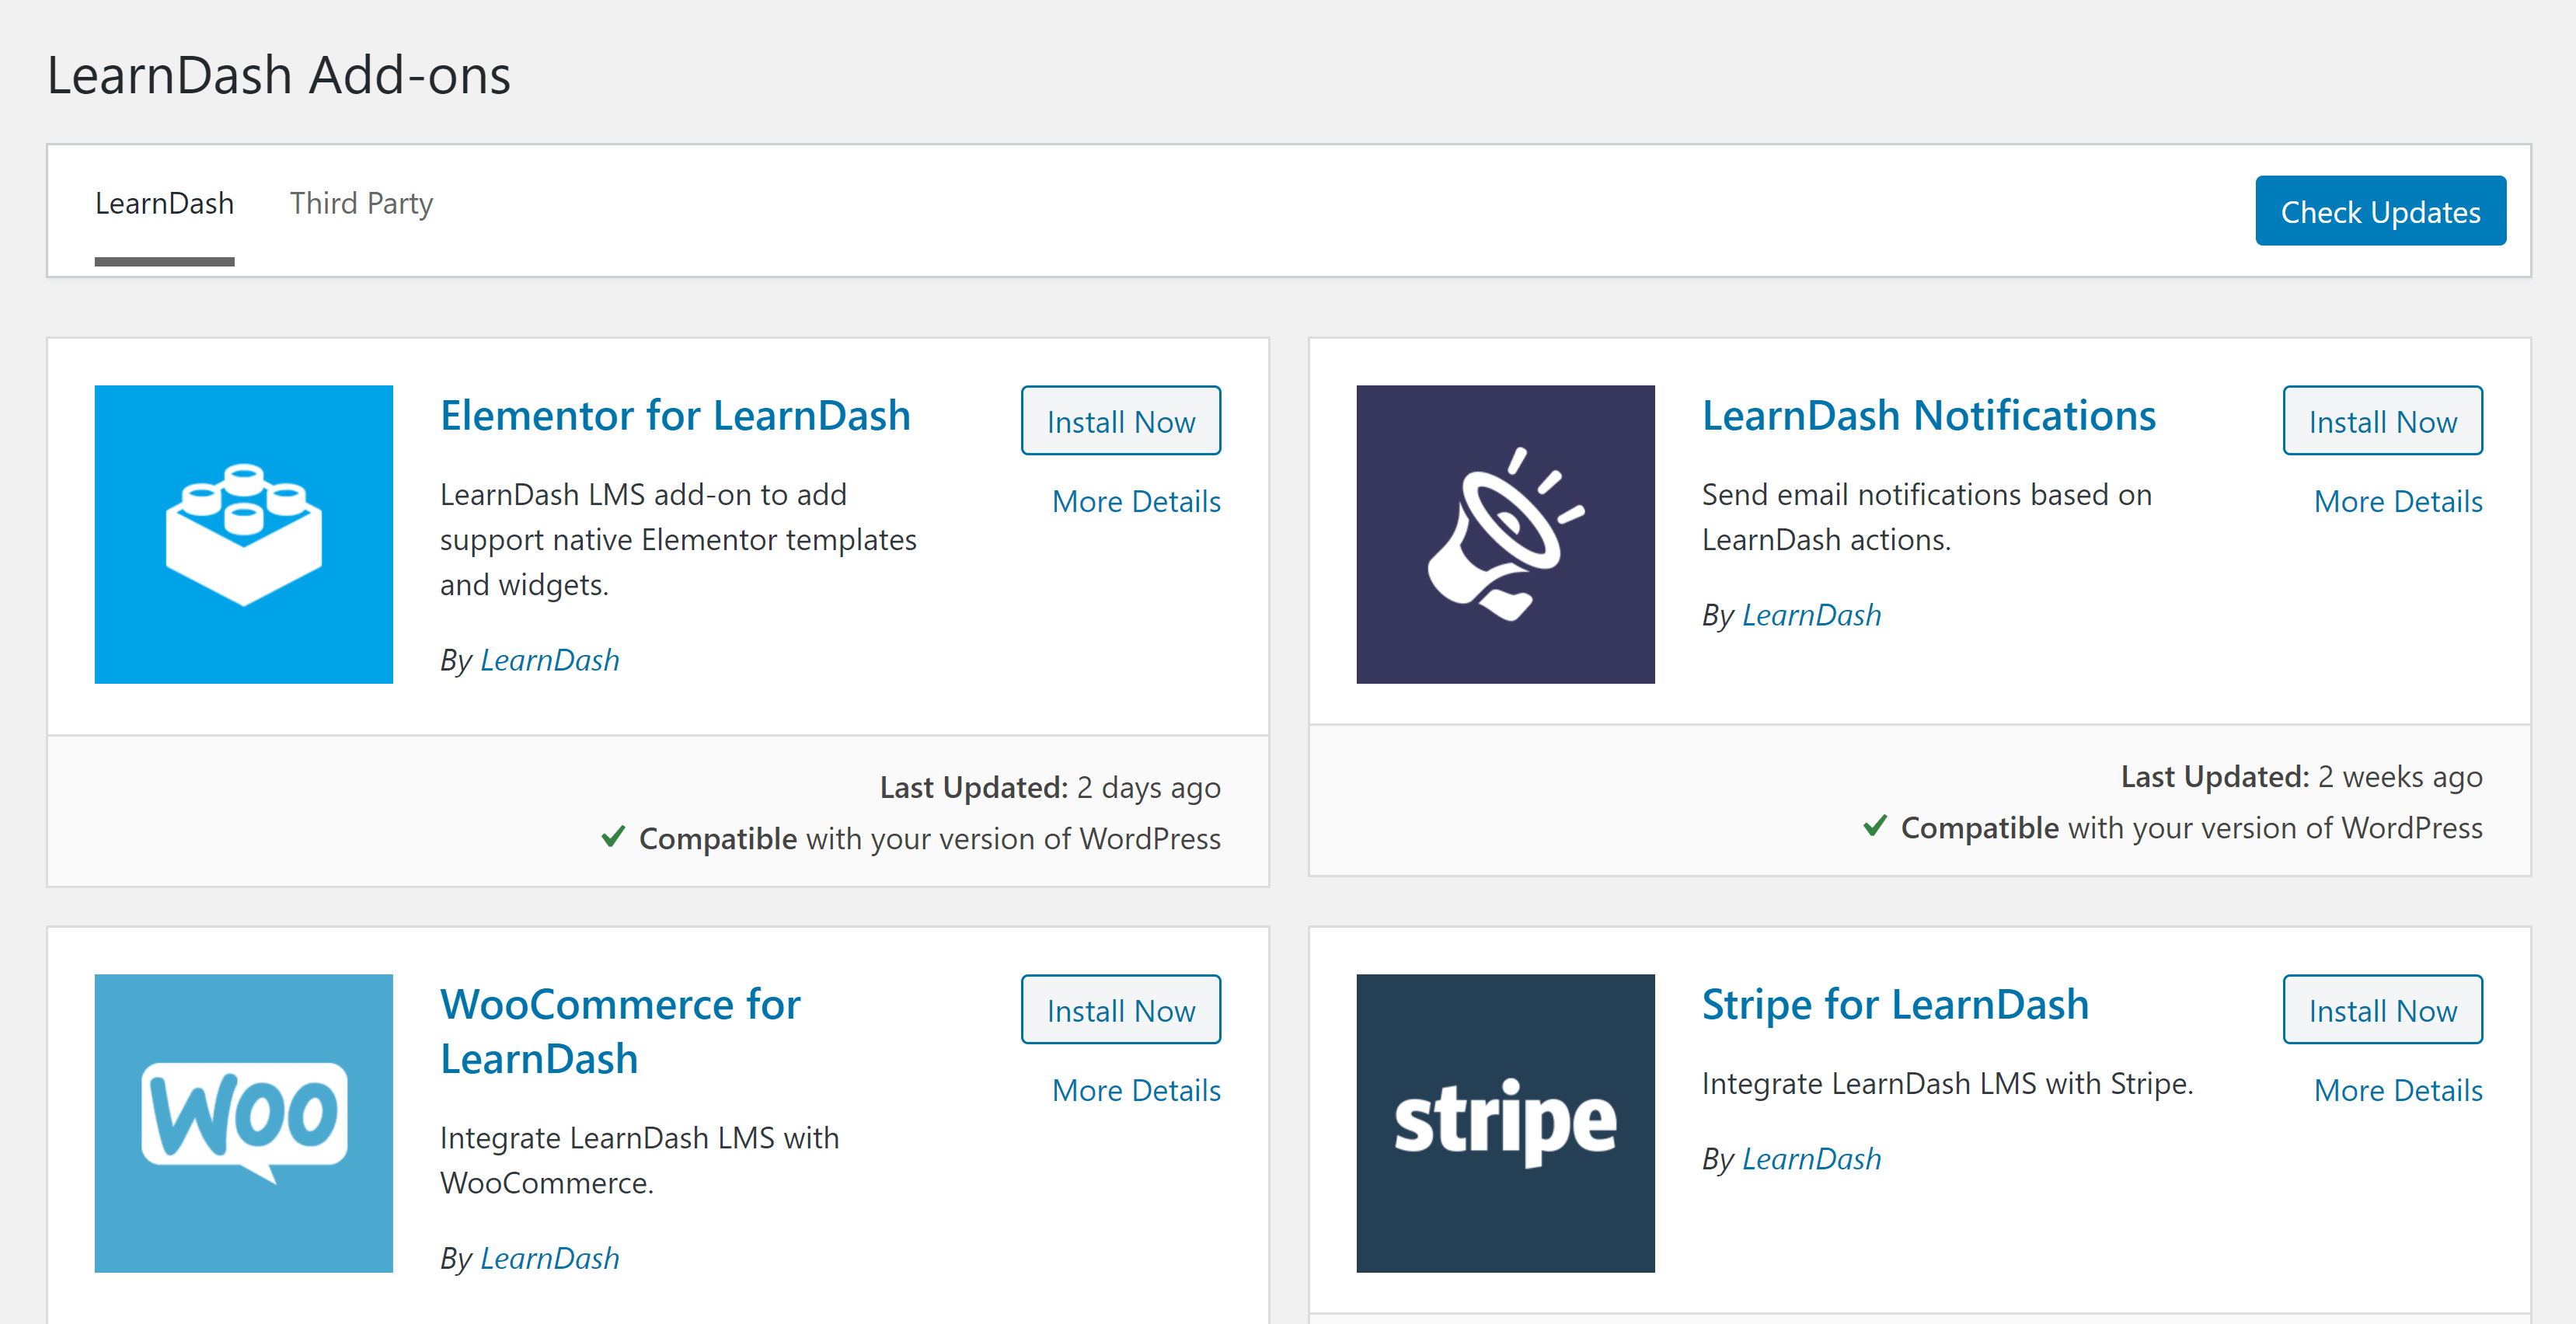
To use a specific add-on, simply click the ‘Install Now’ button beside its name, which will install the plugin and prompt you to activate it. The whole process takes less than a minute for most add-ons.
Pricing
LearnDash offers three plans:
- Basic: Available for $159 a year (regular $199 a year). This is the plan I looked at for the LearnDash review portion of this article.
- Plus: Available for $189 a year (regular $229 a year). Comes with all of the features of Basic across up to ten site licenses. Also provides advanced reporting through the LearnDash ProPanel.
- Pro: Available for $329 a year (regular $369 a year). Includes all features of the Pro plan for up to 25 sites.
Overall Thoughts
Working with LearnDash is a pleasant experience. I find the lesson, quiz, and course builders all quite intuitive, while the documentation is extensive and easy to follow. Free add-ons make it possible to extend the functionality to include things such as the ability to sell courses as WooCommerce products.
There are, however, a couple of notable drawbacks to LearnDash. The first is that compatibility with Stripe is an add-on — not built into the plugin itself.
The second notable drawback is the inability to customize most of the emails your students receive. This can make for a less-immersive experience overall.
WP Courseware Review
Features
The Teacher plan of WP Courseware comes with the following features:
- Two site licenses
- Unlimited courses
- Unlimited users
- Code-free course builder
- Advanced quiz editor
- Content dripping
- Ability to create paid subscriptions
- Ability to create membership programs
- Capacity for multiple instructors
- Payment with PayPal or Stripe
- Integrations with a variety of marketing plugins
How to Use WP Courseware
Getting WP Courseware Set up on Your WordPress Site
The first step in the WP Courseware review part of my research was to sign up for one of its plans. This is a simple process — all they require is payment and a few basic details, such as your email address, to create an account.
When the payment is processed, you’ll be directed to a payment information page where you can view the details of your invoice. Scroll to the bottom of this page for a download link, which will give you the plugin as a .ZIP folder.

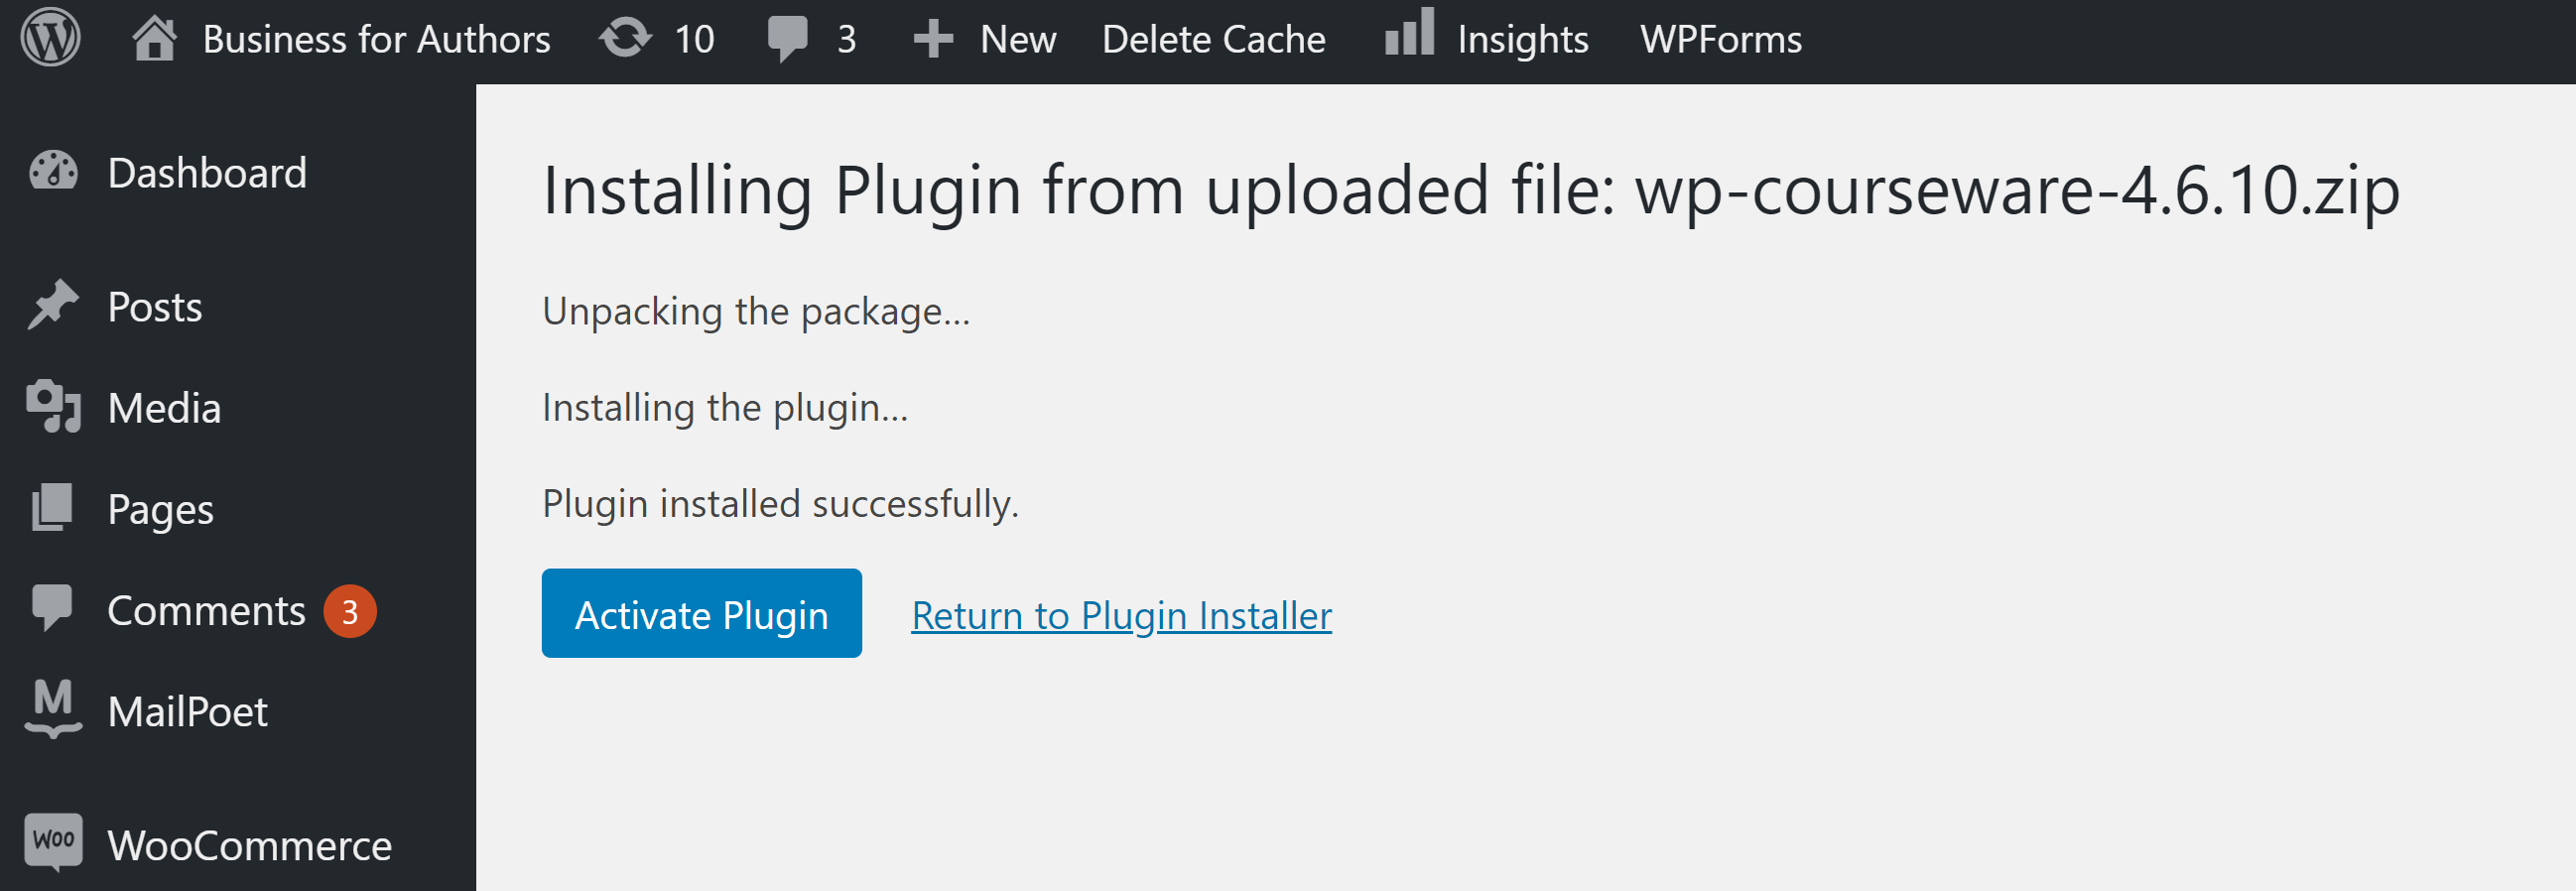
In a second tab, open your WordPress dashboard and navigate to ‘Plugins > Add New’. This will take you to the WordPress plugin database. Click the ‘Upload Plugin’ button at the top of the page, then drag the WP Courseware file into the box that appears.
The plugin will automatically be unpacked, and, once the process is complete, you’ll be asked to activate WP Courseware. Click ‘Activate’ to be returned to the Plugins area of WordPress.
From here, go to the ‘Settings’ area of WP Courseware and navigate to the ‘License’ tab, where you’ll see an area to enter your API Key. You can find this key on your payment details page or in the copy of the receipt emailed to you upon completion of your purchase.
Connecting to a Payment Gateway
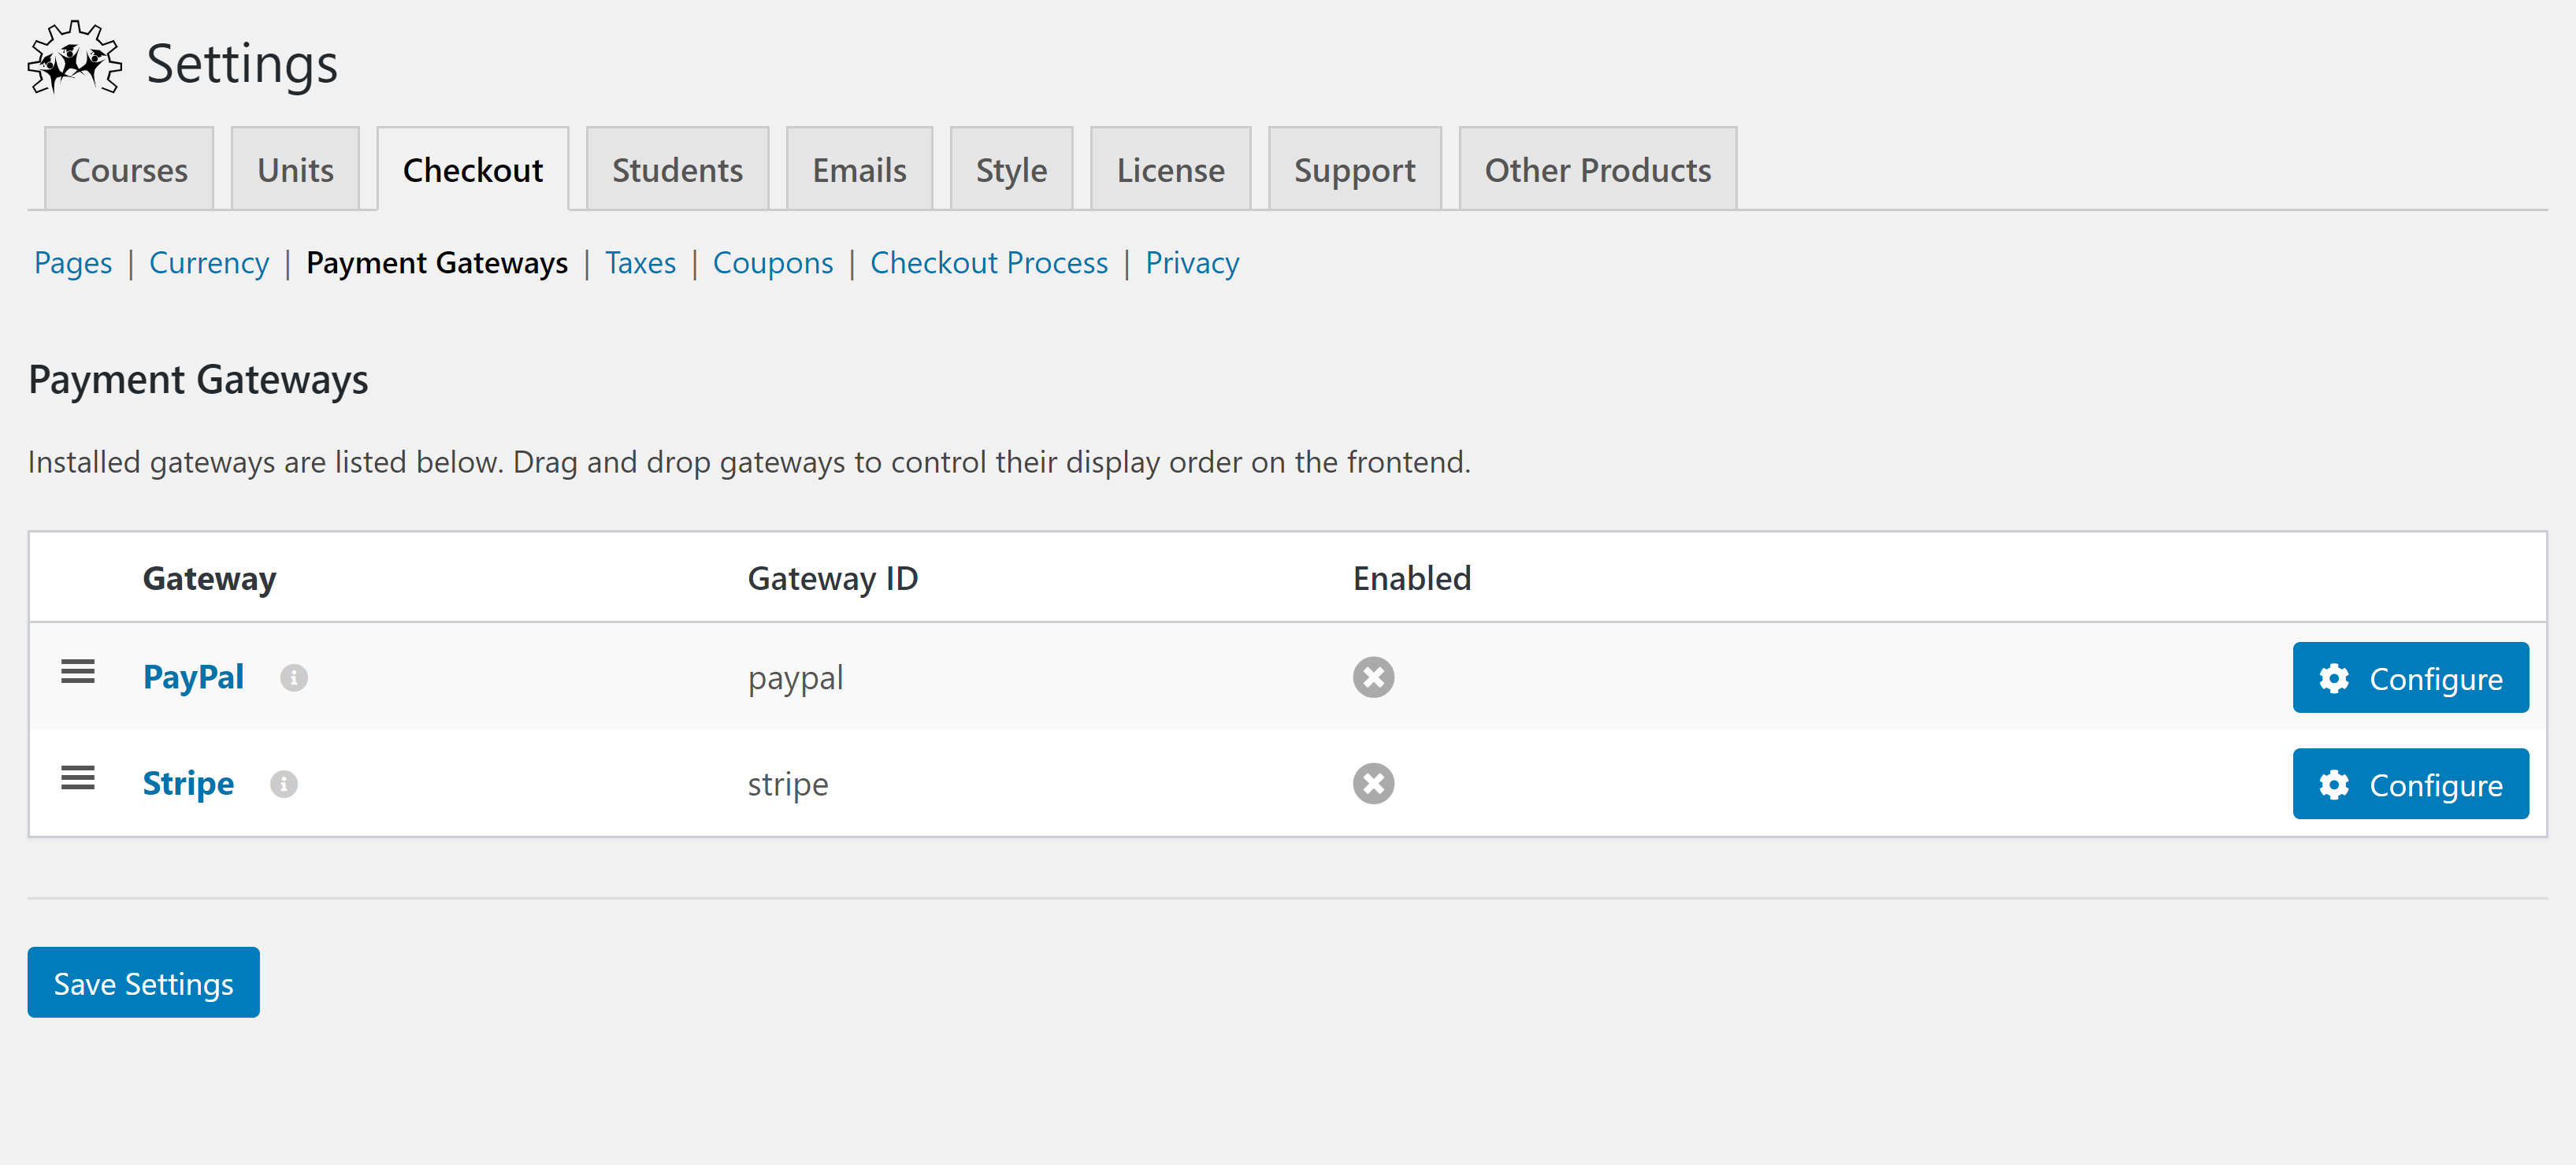
You can also connect WP Courseware to a payment gateway while you’re in the Settings area. Navigate to the ‘Checkout’ tab to reach an area where you can modify a variety of settings related to the payment process, and click the ‘Payment Gateways’ link.

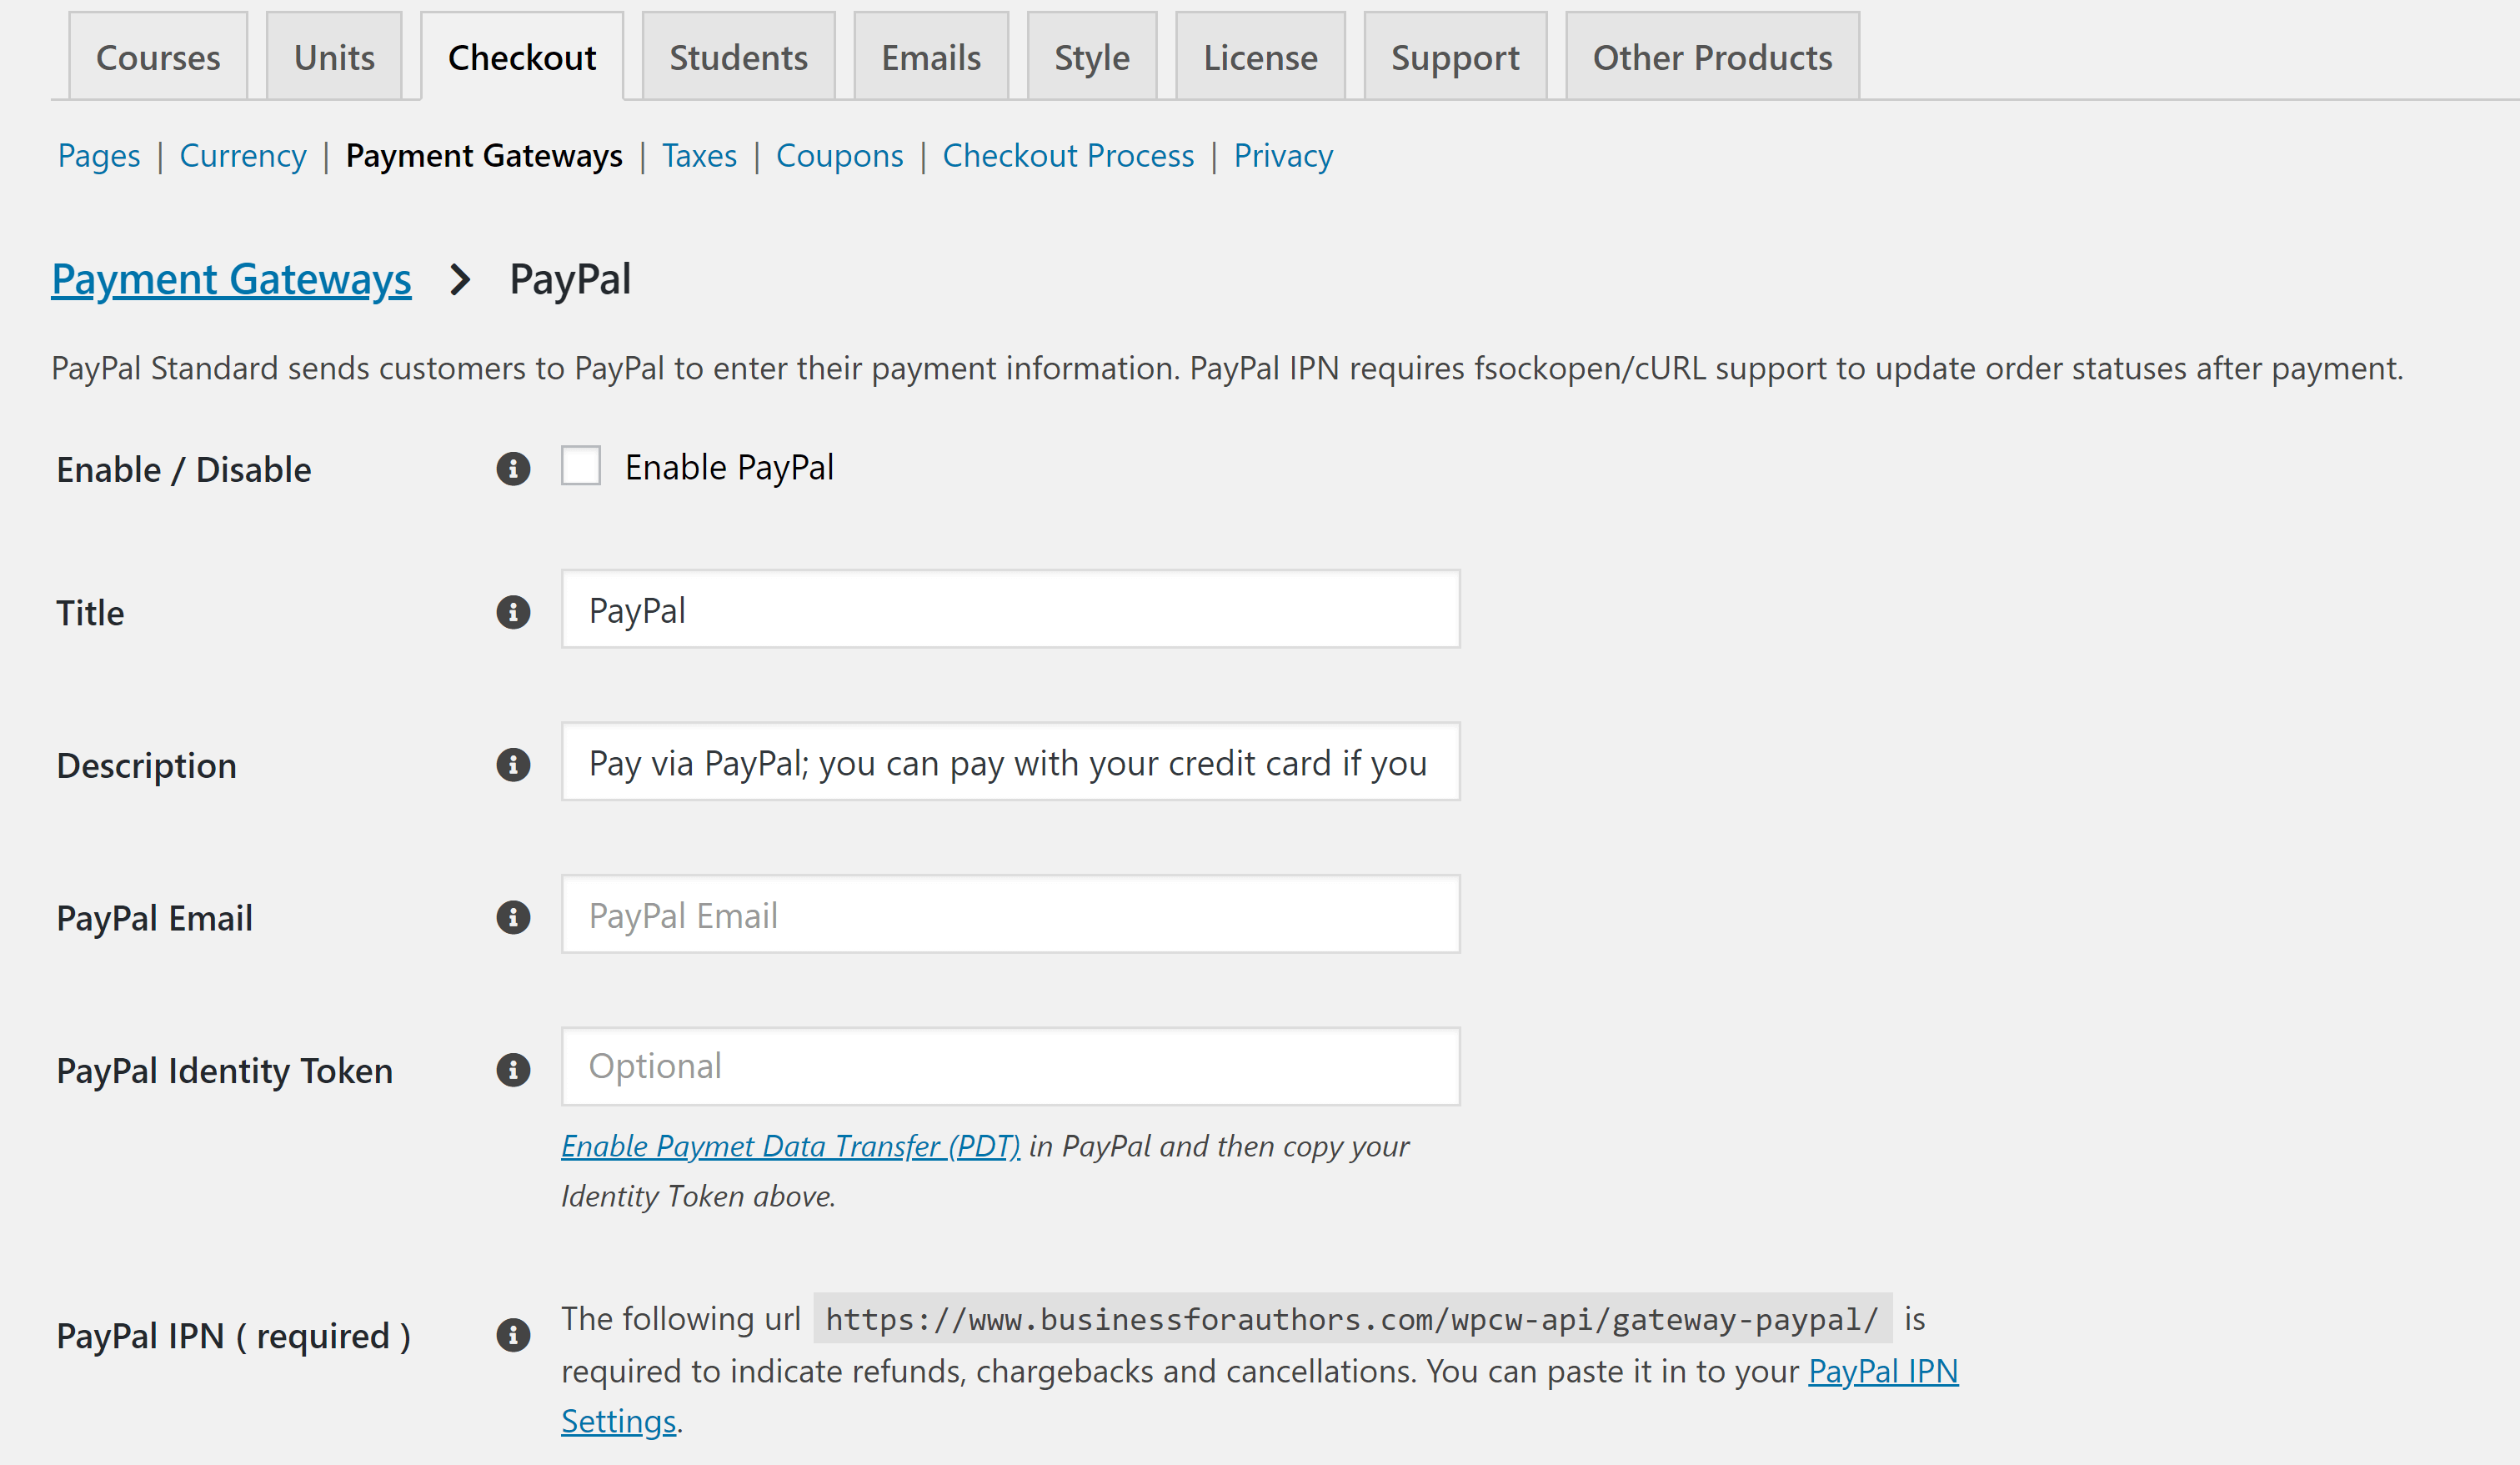
This will take you to a page where you can select the payment processor you want to use. WP Courseware has built-in compatibility with PayPal and Stripe.
The information WP Courseware requires varies based on the platform you choose, but is quite extensive. Here’s a look at just some of the information you’ll need to connect the plugin to PayPal:
Creating a Course
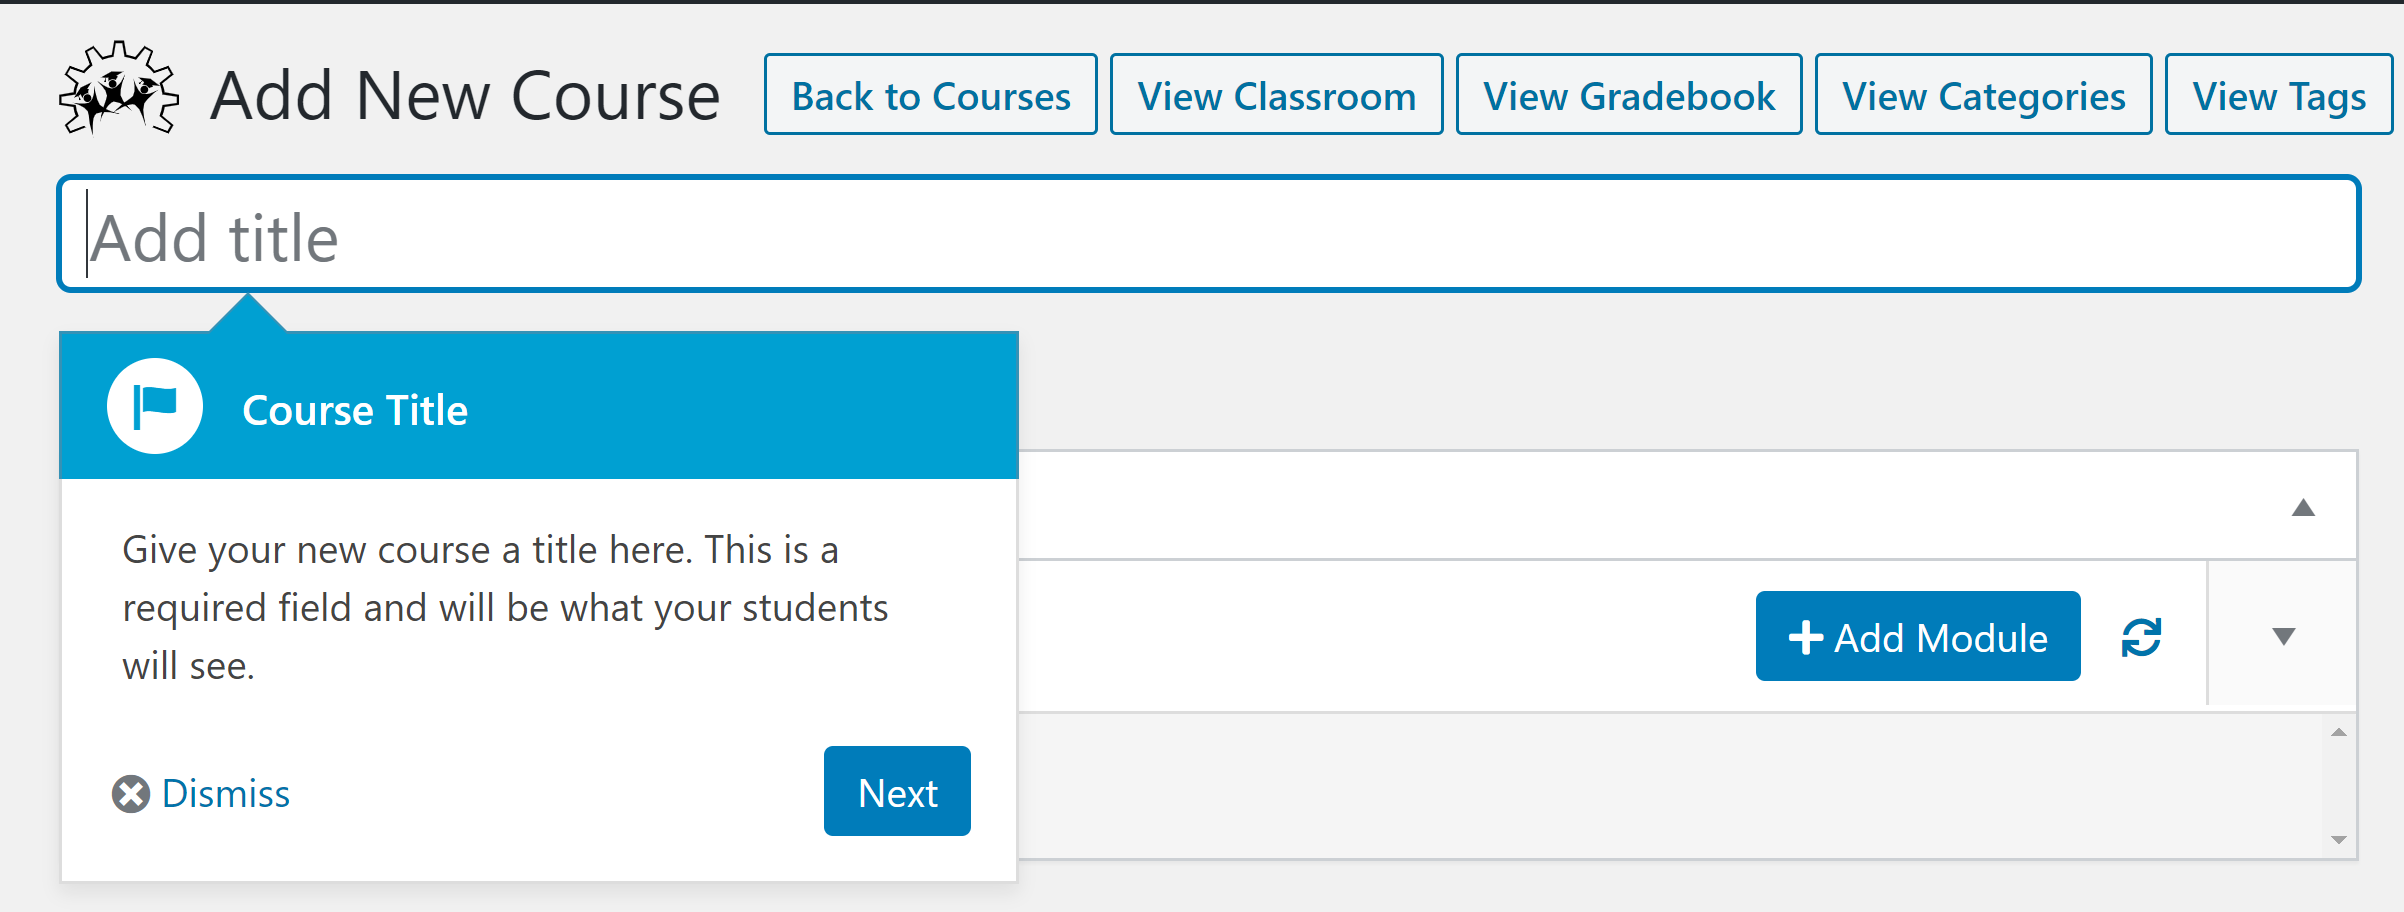
The WP Courseware course builder uses a top-down approach. To get started, navigate to the ‘Courses’ area of WP Courseware and click the ‘Add New’ button at the top of this page, which will take you to the course editor.
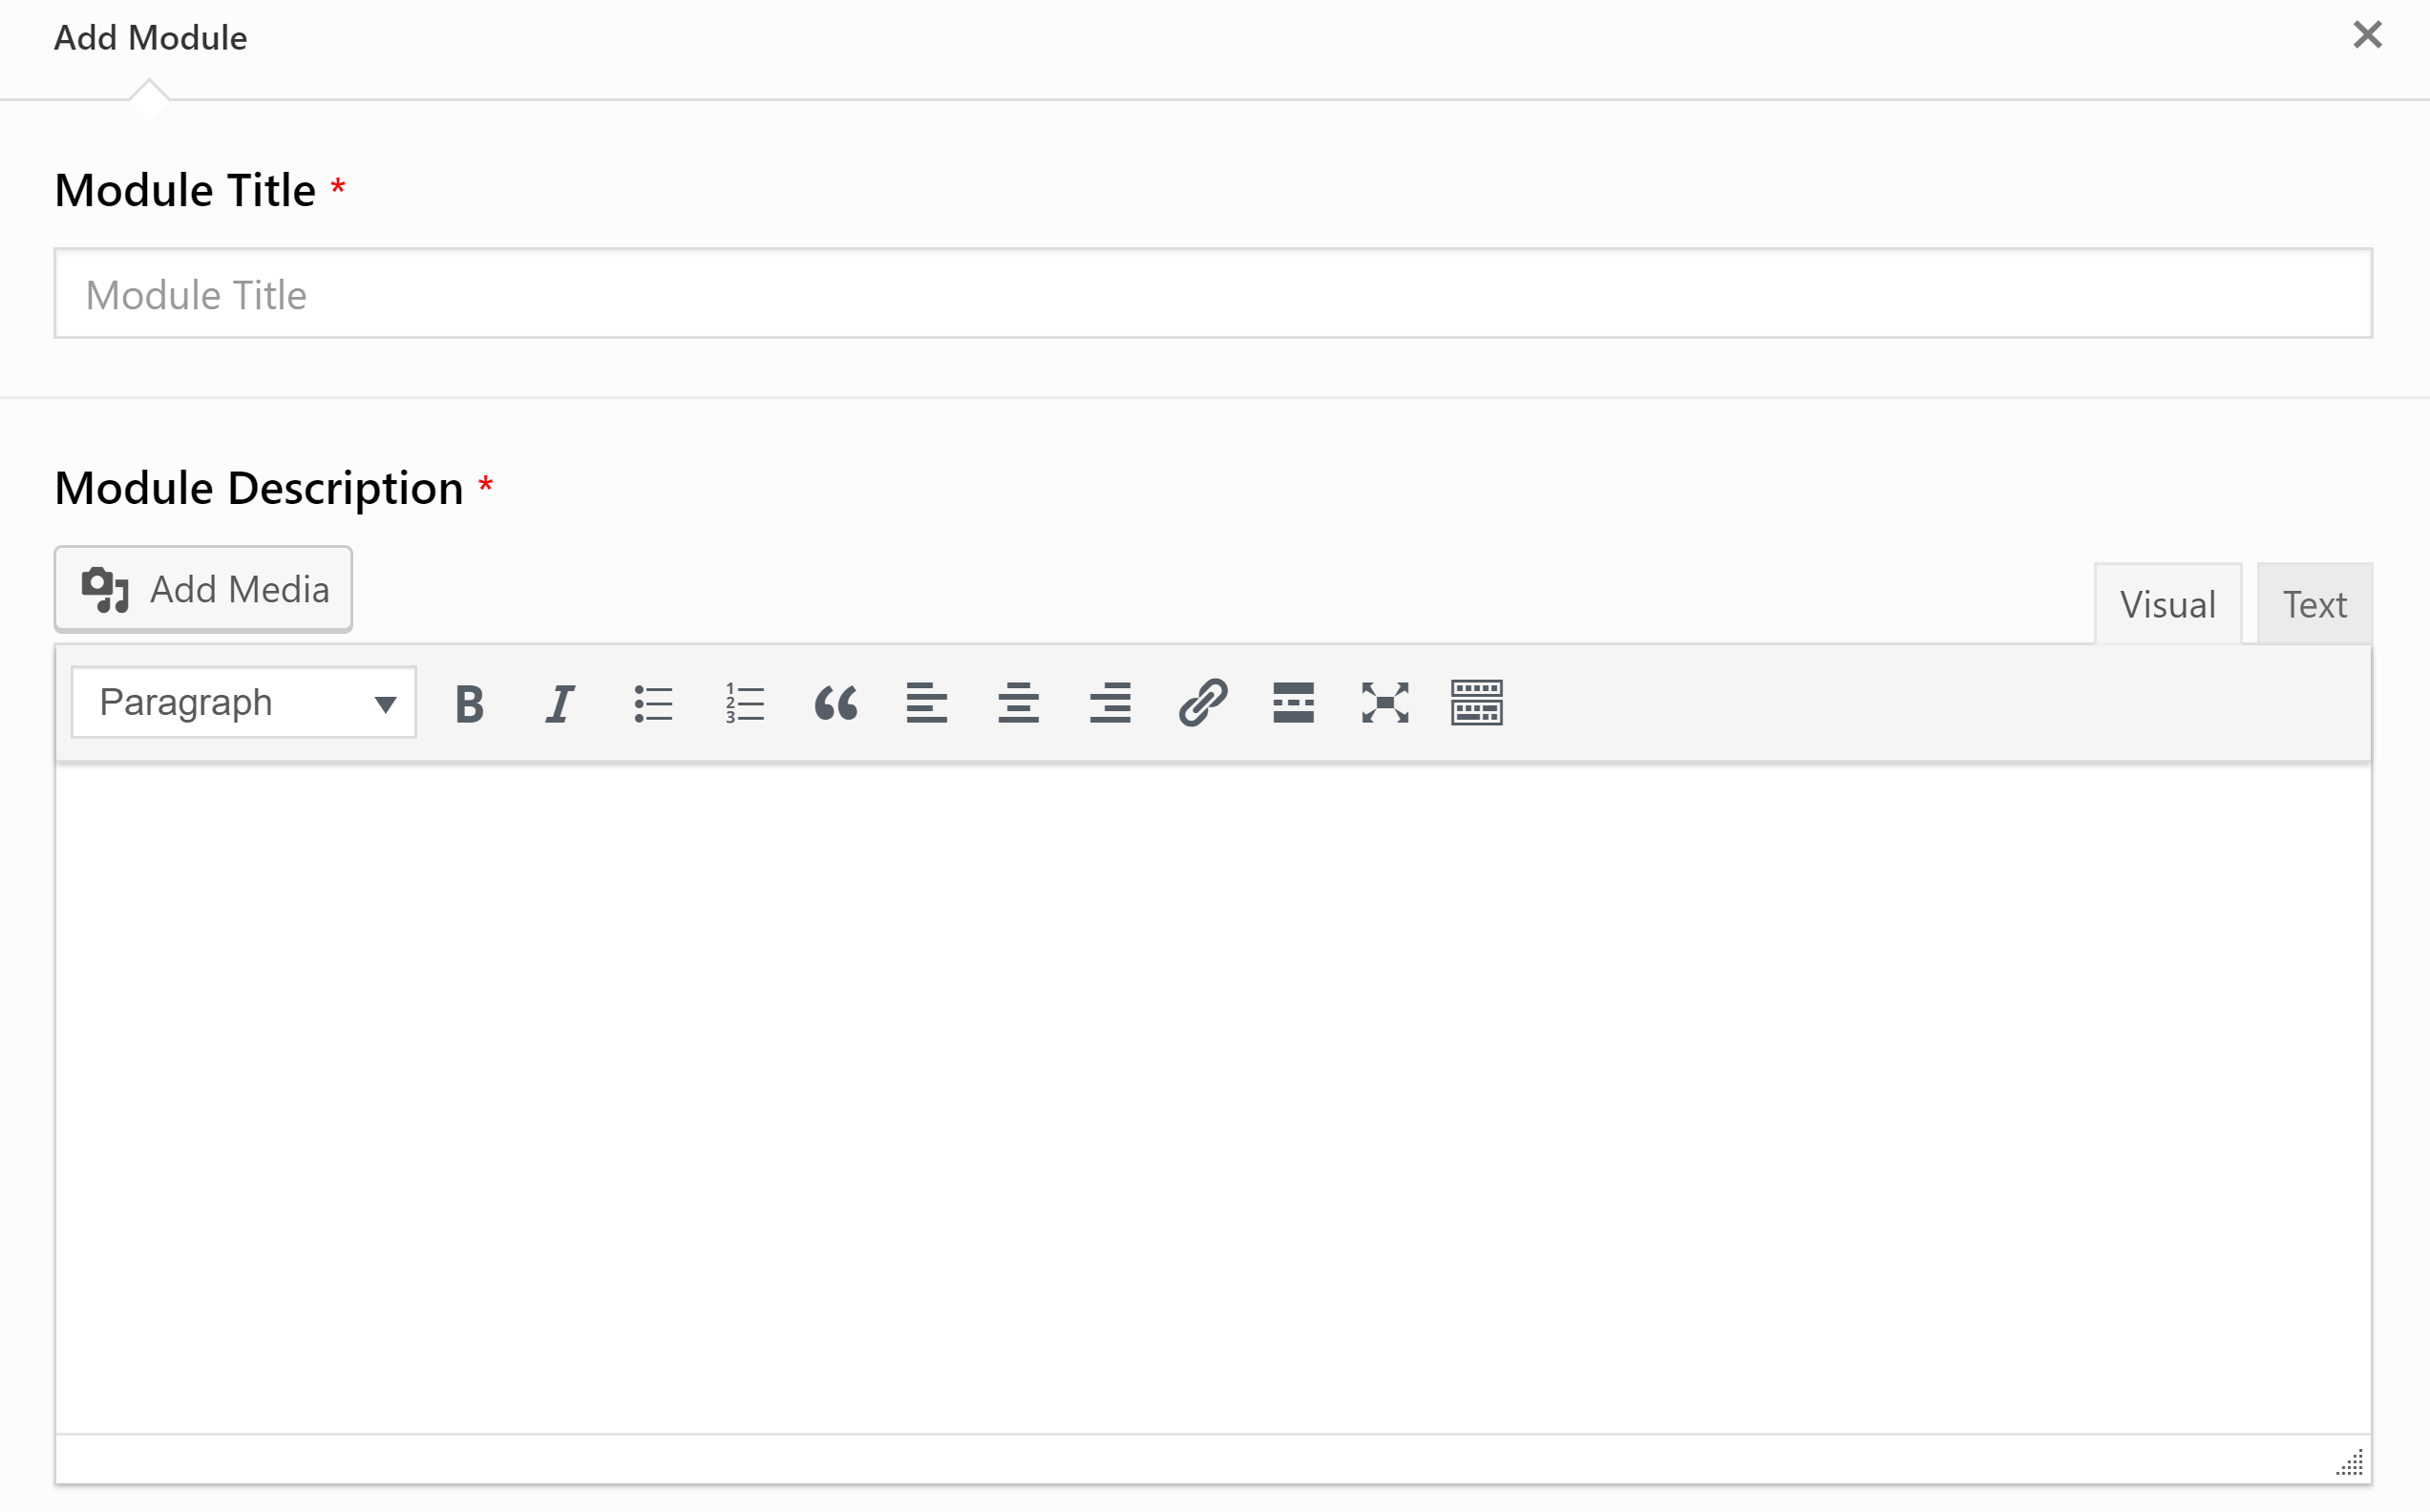
Directly below the title area is the course builder. Click ‘Add Module’ to make a box appear with spaces for the title module and description. These use WordPress blogging technology, so you can format the module description like you would format any other page.
Next, click ‘Add Lesson’, which will open an editor where you can enter content for the lesson. Again, this editor allows you to format the content the same way you’d format other WordPress pages.
You can also add quizzes here, but you can only edit the title and description of a quiz on this page. To do more, you’ll need to go to the quiz editor, which I’ll discuss a little further on in this review.
The course builder uses drag-and-drop functionality to let you change the order of lessons or modules at any time during this process.
Course Settings
The settings area of the course editor is divided into several sections:
- Who can access the course, how they gain access to the course, and how they advance from one unit to the next.
- Course description: This is entered through a rich text formatter, allowing you to add HTML and CSS as you wish.
- Payments: Whether the course is free, paid with a one-time fee or purchased through a subscription. You can also set the exact price of the course here.
- Course messages: Customize the emails your students receive when they finish units, complete the course and more.
- Course emails: Select the name and email address your lessons are marked as being sent from. You can also specify a separate email address to receive notifications related to this course.
- Certification: Choose to offer certificates to students who complete the course. You can also customize some aspects of what the course certificates will look like.
- Course prerequisites: Select courses students must have previously taken to enroll in this course.
- Course bundles: Choose to sell this course in a group with others.
- Instructor: The person responsible for teaching the course.
- Bulk access/reset: Change the access or recorded progress of all students in a course.
Module Editor
You can also create modules by going to the ‘Modules’ area of WP Courseware and clicking the ‘Add New’ button at the top of the page. This will take you to a page where you can title the module, assign it to a course and create a description for it. A module cannot exist without being assigned to a course.
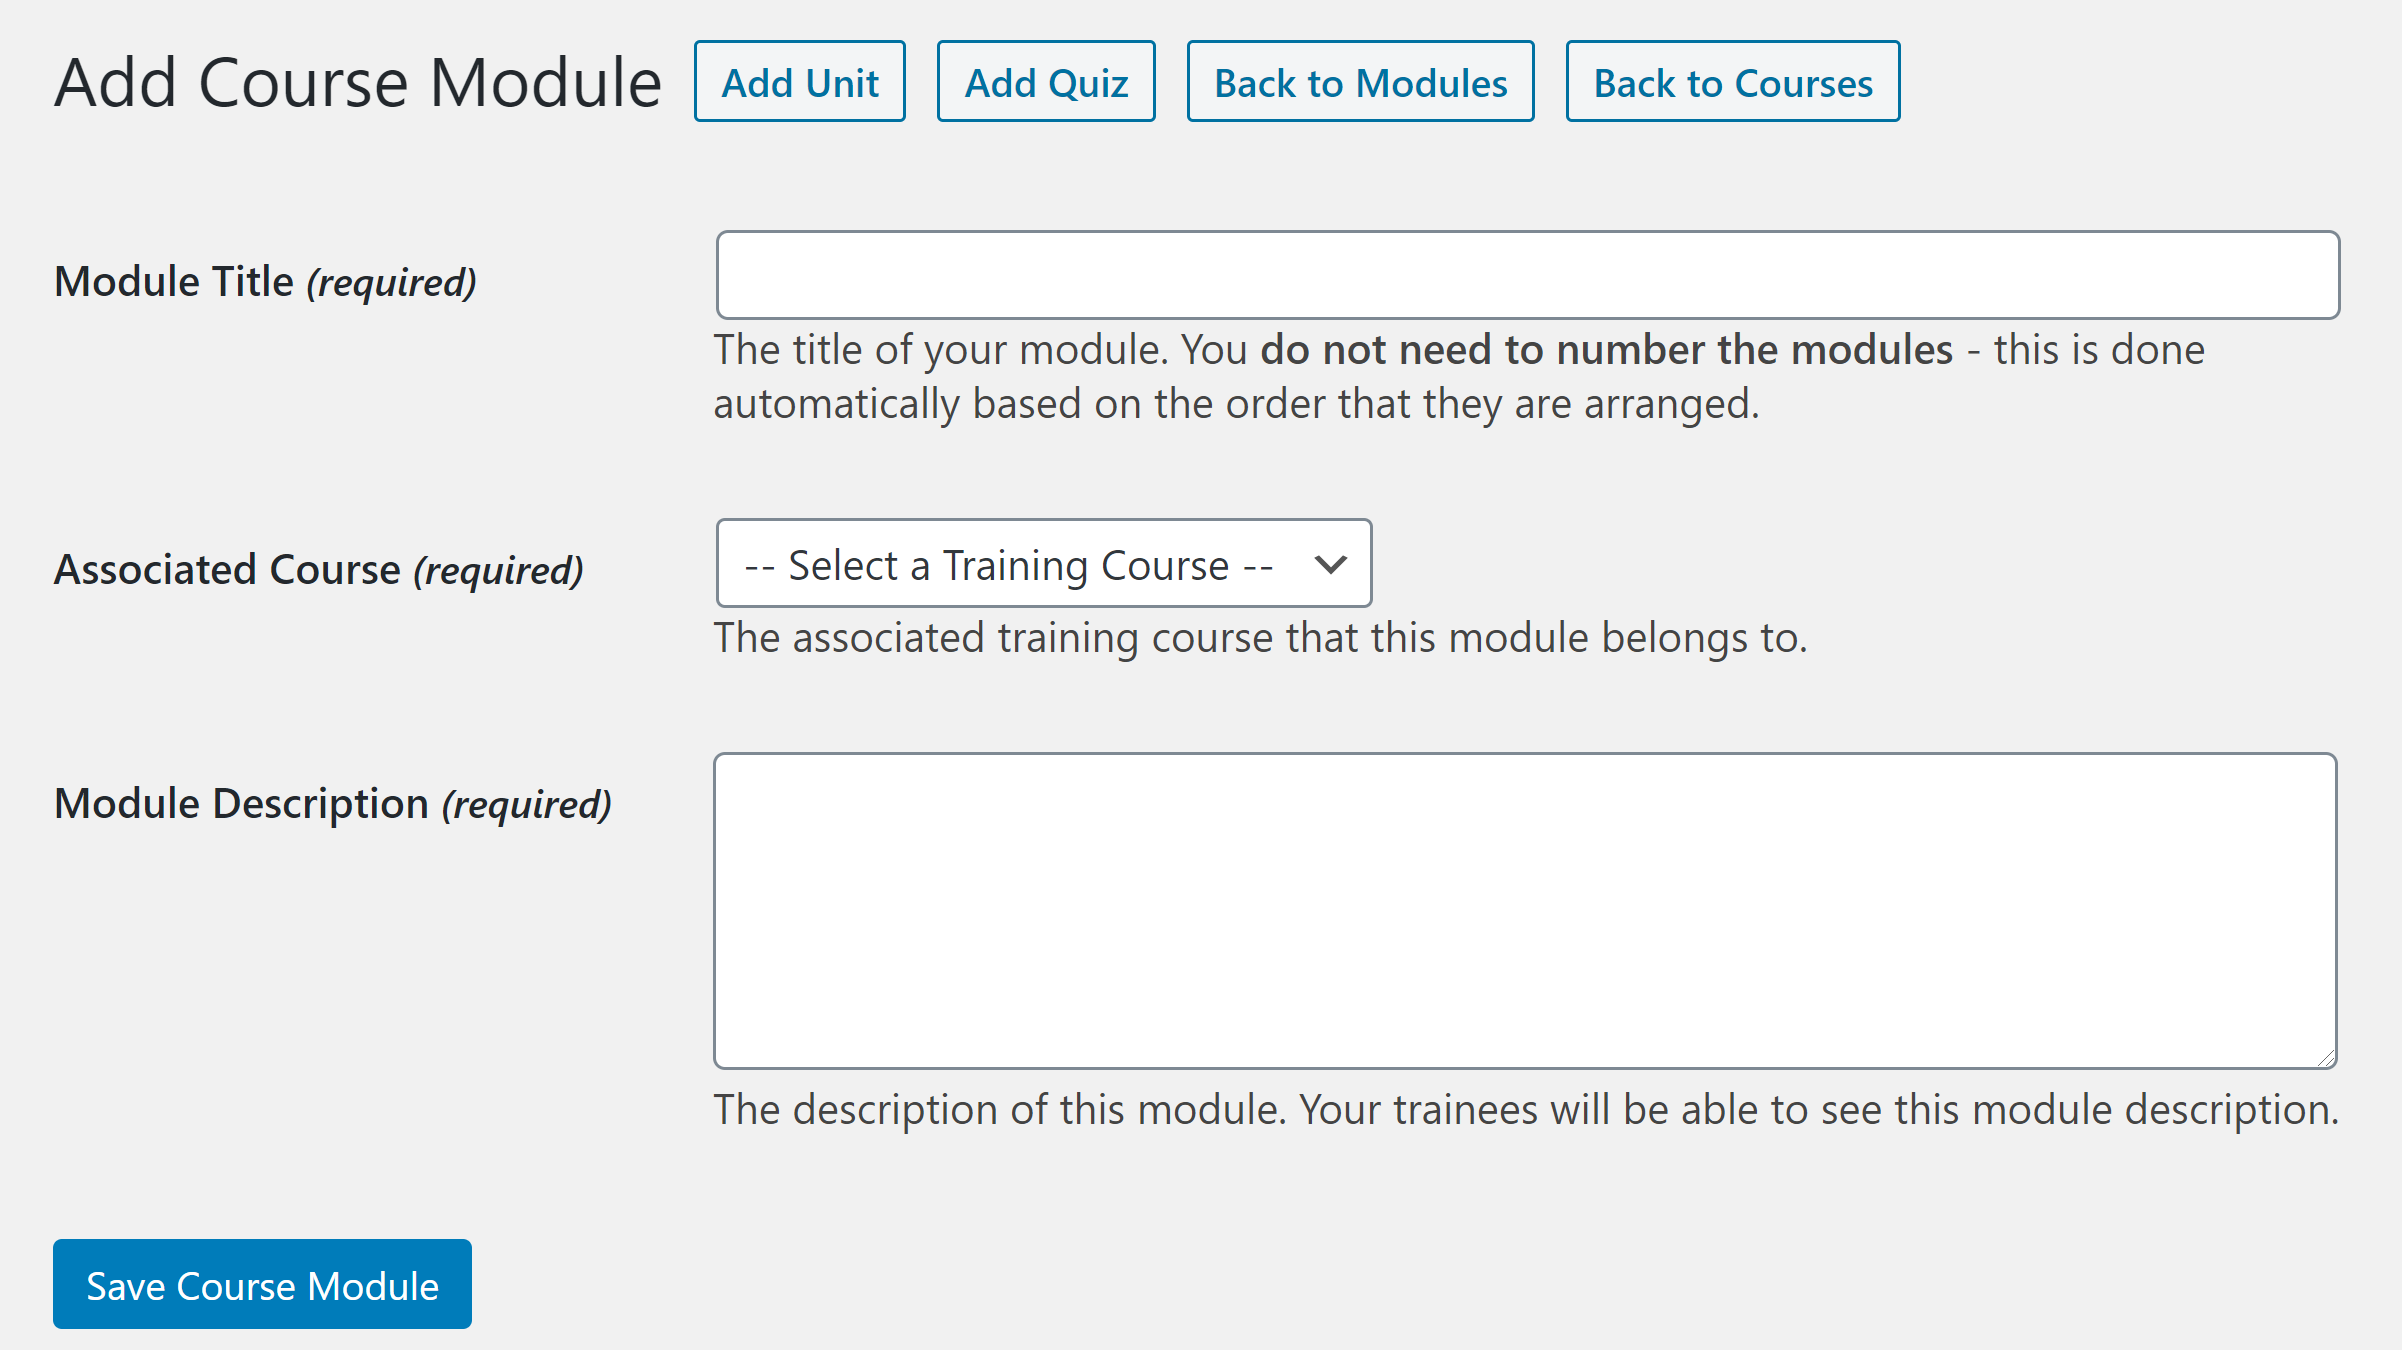
The ‘Add Unit’ and ‘Add Quiz’ buttons will take you to the appropriate editors.
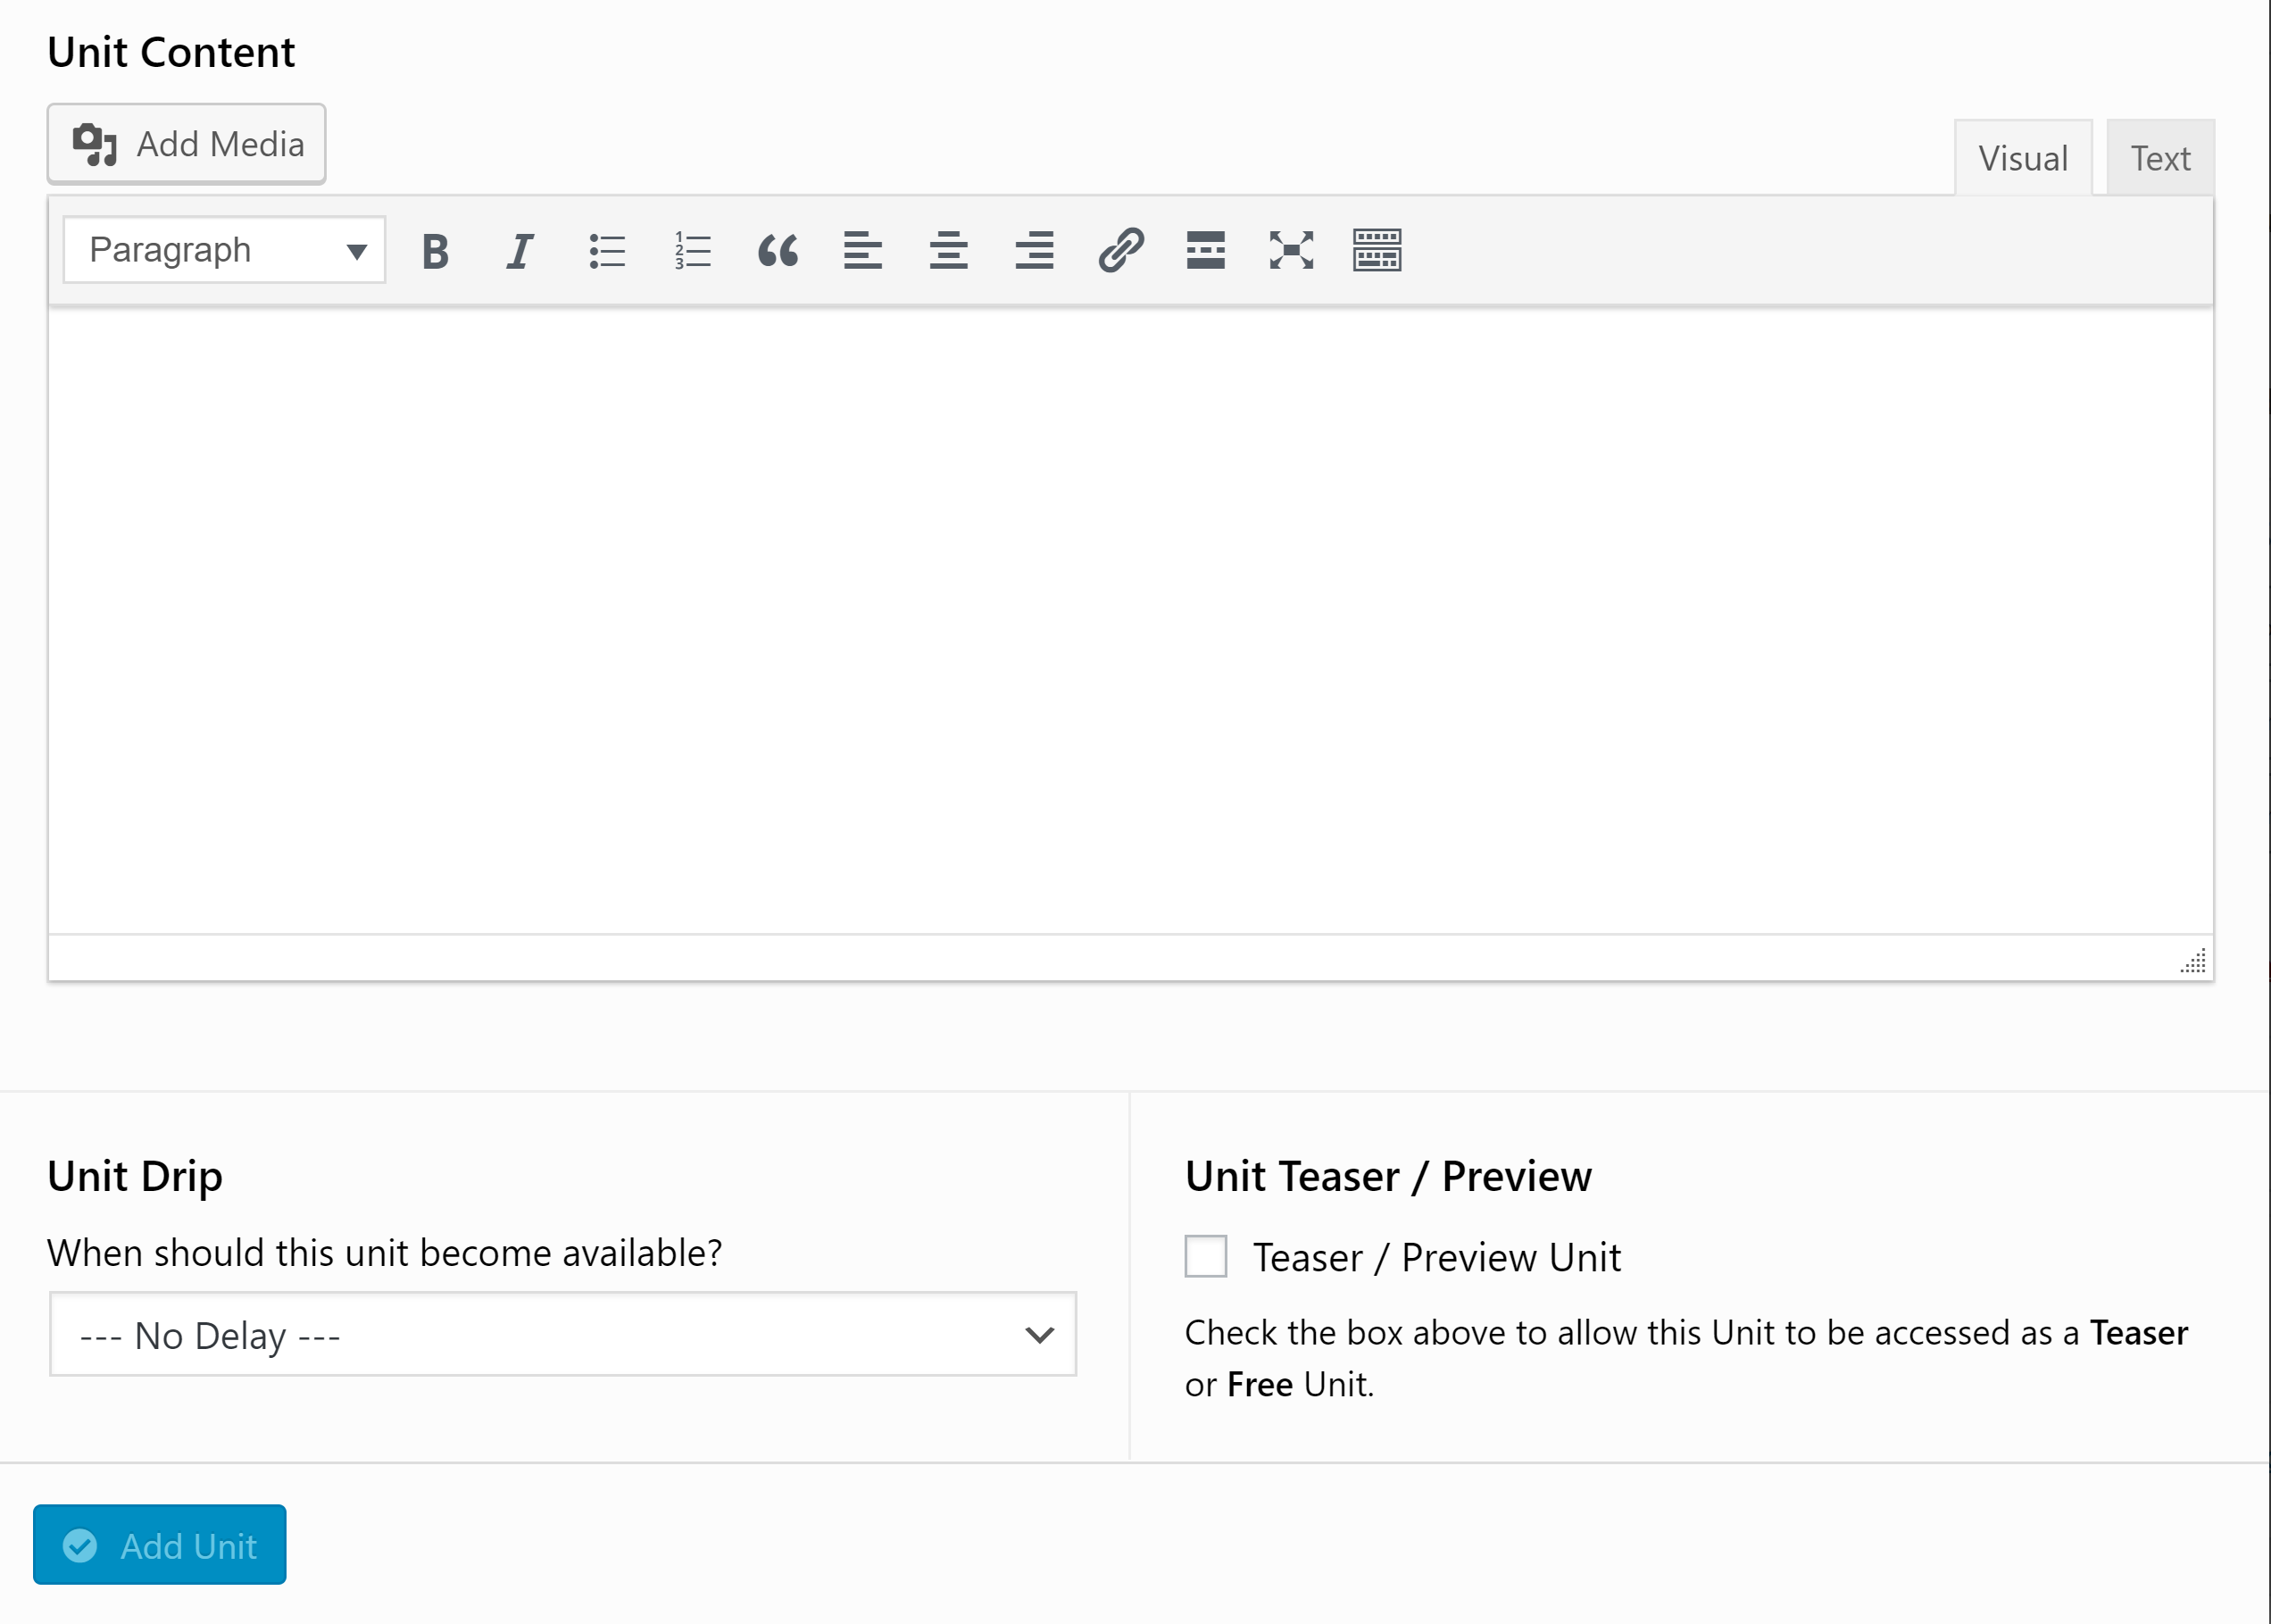
Unit Editor
To access the unit editor, go to the ‘Units’ area of WP Courseware and click the ‘Add New’ button at the top of the page. This will open the unit editor, which looks a lot like the regular WordPress editor:

The unit editor also lets you specify content dripping settings, use a unit template (a great way to give your course a cohesive look) and/or make this unit freely available as a preview for the course.
Quiz Editor
The next step in my research of LearnDash vs WP Courseware was to explore the quiz editor. You can access this by going to the ‘Quizzes’ section of the plugin, which will take you to a page where you can view any quizzes you’ve created in the course builder.

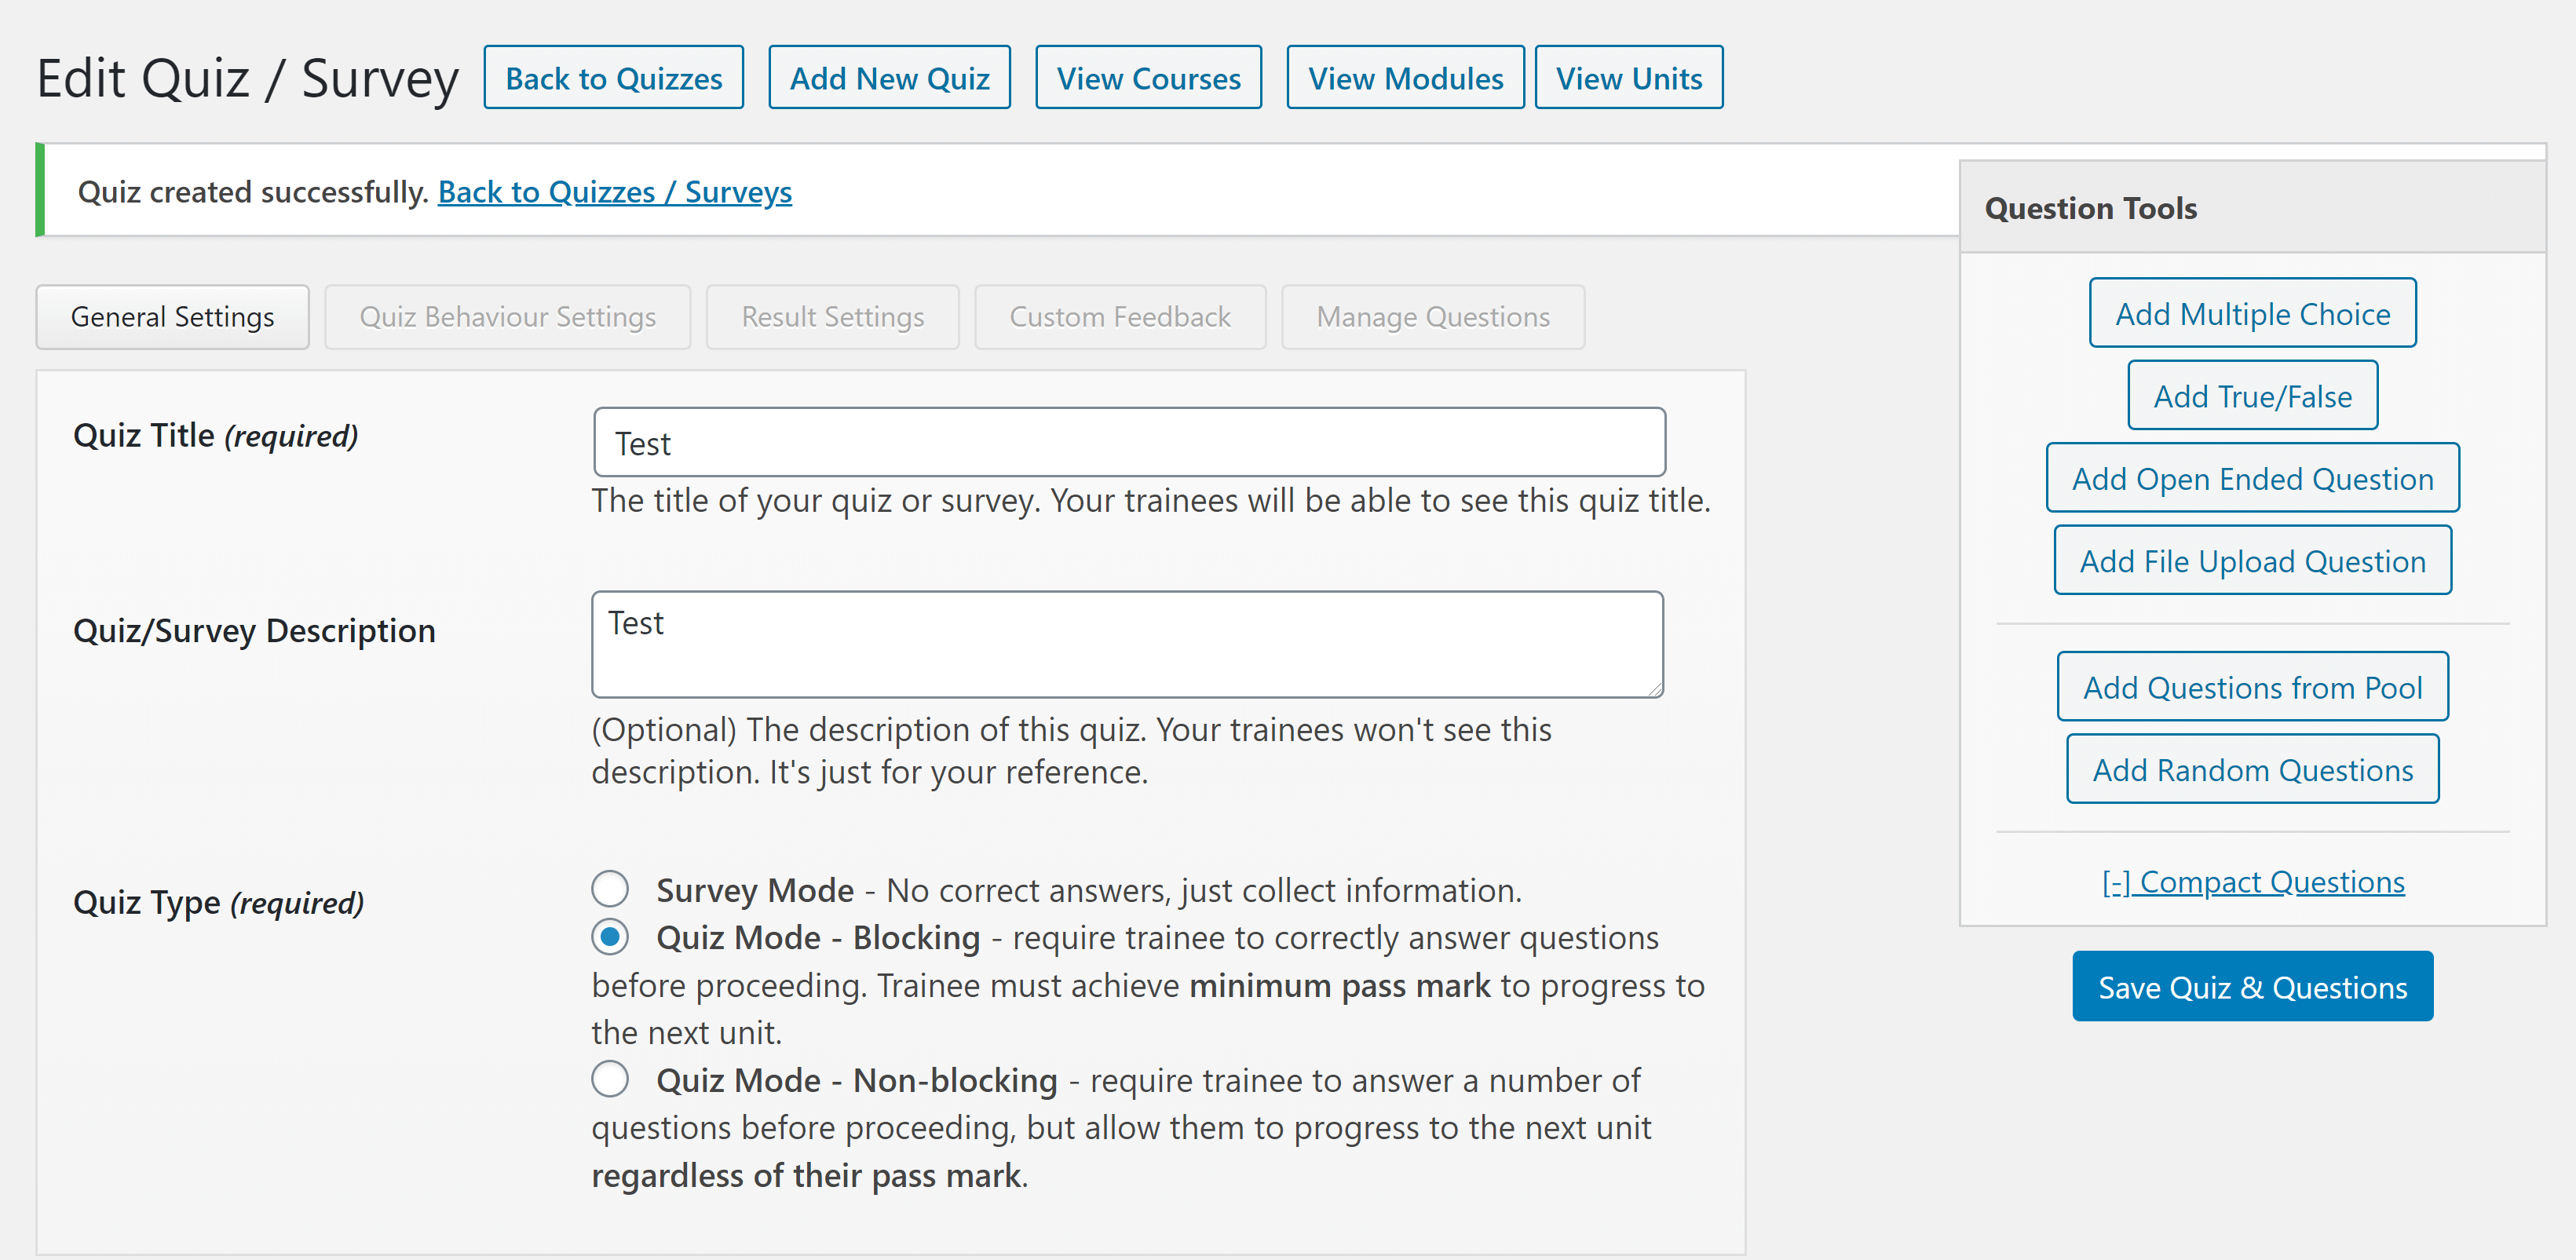
Click on the title of a quiz or press the ‘Add New’ button at the top of the page to reach the quiz editor.
The first page of this editor has space for a title and description. There’s also an area where you can choose between three types of quiz:
- Survey — there are no right answers; this quiz exists purely to collect information.
- Quiz Mode, Blocking — requires students to answer questions correctly, achieving a specified passing mark to move on.
- Quiz Mode, Non-blocking — requires students to answer a specified number of questions to proceed, but does not require them to get a certain number of answers right.
Save the quiz with this setting in place and a box will appear with buttons letting you create various types of questions. You can have any combination of multiple choice, true/false, open-ended and file upload questions.
A series of buttons across the top of the quiz editor will take you to screens where you can modify a variety of settings:
- Quiz behavior — what mark students must receive to pass, how many times students can attempt this quiz and whether or not they have a time limit.
- Results — how quiz results are displayed. You can also opt to let students download their quiz results.
- Feedback messages — configure custom messages to be displayed when students answer questions in specific ways.
- Question management — modify the order the questions appear in.
When you’re happy with these settings, click ‘Save All Quiz Settings & Questions’.
Integrations
WP Courseware offers built-in compatibility with a wide range of plugins, including Bloom, bbPress and WP Live Chat, as well as add-on integrations with a variety of membership and marketing plugins.
Most WP Courseware integrations can be downloaded as free plugins from the WordPress.org library.
Pricing
WP Courseware offers three pricing plans:
- Teacher: Available for $124.50 a year (regular $249 a year). Allows use of all features on up to two sites.
- Professor: Available for $149.50 a year (regular $299 a year). Allows use of all features on up to ten sites.
- Guru: Available for $199.50 a year (regular $399 a year). Allows use of all features on up to 25 sites.
All plans come with access to automated updates and customer support.
Overall Thoughts
WP Courseware is a sophisticated course building plugin that requires absolutely no coding experience. You can customize almost every aspect of courses created with this plugin, including the messages people receive when they complete your courses.
Another thing I like about WP Courseware is the documentation it offers isn’t solely based around the plugin. It also offers a variety of resources on successful course building in general, which are great for people who are teaching for the first time.
There are, however, some small drawbacks to WP Courseware. First, there’s no customization available for users. Second, the interface is somewhat clunkier than the LearnDash interface.
Last, but certainly not least, WP Courseware lacks built-in forum technology — meaning you’ll have to download it in combination with bbPress if you want to have forums connected to your courses.
LearnDash vs WP Courseware: Similarities
Both LearnDash and WP Courseware allow you to do the following things:
- Build courses in WordPress without using a single line of code.
- Create quizzes and specify what percentage of correct answers students need to progress.
- Choose when students receive new course materials through content dripping.
- Charge for courses as a one-time fee or a recurring subscription.
- Connect with other popular WordPress tools, such as bbPress, to increase functionality.
- Create membership programs.
They also both feature comprehensive, easily accessible documentation.
LearnDash vs WP Courseware: Differences
- WP Courseware allows you to customize some emails related to individual courses.
- LearnDash offers more controls on how students are able to interact with specific lessons.
- WP Courseware offers two site licenses with the basic account.
- LearnDash offers a simpler method for connecting to PayPal.
- WP Courseware has built-in compatibility with Stripe, whereas LearnDash only has compatibility with Stripe through an add-on.
- WP Courseware uses a top-down approach that may be less intuitive for some users.
LearnDash vs WP Courseware: The Verdict
LearnDash and WP Courseware are both excellent course building plugins. This means the best choice for you is the one most suited to the type of course you’re building, your personal work style and integration with your business as a whole.
To help you to determine the best option for you, I’m going to break this verdict down into three categories:
- Ease of use
- Variety of functions
- Value
This should help you to make your final decision.
Ease of Use
Both plugins are easy to use, but LearnDash is the clear winner here. The LearnDash Bootcamp walks you through everything you need to do to create a course, and can be accessed at any time simply by clicking ‘LearnDash LMS’ in the sidebar of your WordPress dashboard. This makes the whole experience feel more welcoming.
I also found the LearnDash approach of building lessons, then quizzes, then courses more intuitive than the top-down approach of WP Courseware. This, and the simplicity of dividing your course with section titles rather than having separate pages for module descriptions, appealed to my minimalist style.
Variety of Functions
If we’re looking at the base plugins, WP Courseware has a slight advantage thanks to its built-in capability with Stripe. However, there is a free add-on to make LearnDash compatible with Stripe, and LearnDas has a slightly higher number of add-ons.
Value
In terms of pricing, LearnDash and WP Courseware are pretty similar. For most users, this means they have roughly the same value.
However, WP Courseware has one clear advantage: you can use it on multiple sites, even at the lowest tier plan. This means that users who want to sell courses on multiple websites can get more value out of WP Courseware.
Overall
All in all, I think LearnDash will be the winner for most business owners. The only reason to choose WP Courseware is for the ability to use it on multiple sites when signed up for the lowest-tier plan.
Used/using either of these two plugins? Thoughts?
Related Posts:
By
TOP DEALS


Leave a Reply
All comments are held for moderation. We'll only publish comments that are on topic and adhere to our Commenting Policy.
Hi Dianna,
I am looking at a landing page for students which only has quizzes (organised by courses perhaps but all quizzes in one page). Ideally in a post card grid format. This seems possible in Learndash but WP Courseware does not have this feature.
For my purpose, WP Courseware has a powerful feature. Adding multiple tags to a question. It also has built in feature to import questions from excel. With Learndash I will have to pay for an add on that costs as much as Learndash itself.
Hi Dianna,
You’re right the membership feature is really new to WP Courseware. I haven’t tried or studied it yet, but it surely is a nice extra.
My remark about the instructors needs some clarification. WP Courseware has the instructor rol, with a limit of 1 instructor per course. It also has Classrooms which have all students of a course in it.
An instructor can create and edit course content, change its settings, add and remove students and view students’ progress and scores. The only other user role able to do these things is an administrator.
LearnDash has a different set up. Beside the usual WP user roles, LearnDash has a Group Leader’s role. This role can be assigned to multiple users. There are Groups too. Each Group can have several courses assigned to it and each Group can have multiple Group Leaders. A Group Leader can be assigned to more than 1 group. They can publish and edit courses, view and download reports and manage students. Their capabilities can be set to basic or advanced.
Any WP author on a site can edit and create a course I think.
LearnDash provides much more flexibility over course- and student management with this structure than WP Course does, should you have a need for it.
For a small business selling courses directly to students, WP Courseware is fine and considerably less expensive I think.
I hope this helps understanding what I meant!
Regards, Elisabeth
Hi Elisabeth! Thanks for the clarification on the thing about multiple instructors and groups, it helped me understand your earlier comment.
Hi Dianna, thanks for this informative article! It really helps getting a better understanding of both LMS packages and which one would be most suited to use.
I did notice something that I think needs some clarification. You mention the LearnDash Course Grid Add on as an option to create memberships. But this is not the case. It can do many things, but as far as I can see it does not have an option for memberships. Please see this LD support doc: https://www.learndash.com/support/docs/add-ons/course-grid/
WP Courseware now has membership software integrated in the LMS itself.
A major draw back of WP Courseware can be the restriction of only one instructor per course.
Thanks again, regards, Elisabeth
Hi Elisabeth!
First, let me say that I’m glad you enjoyed the article.
Second, thanks for pointing out the Course Grid error. You’re totally right, and I can’t believe I missed that!
Third, on your notes for WP Courseware – the WP Courseware membership capability seems to be quite new, added after this article was written. That’s an awesome feature and we’ll have to mention it when this article is updated next. I’m a little confused about your comment regarding instructors though, since as far as I can tell (looking through both the plugin and the help center) LearnDash also only allows one instructor for each course. Can you point me to where you found information about having multiple instructors?