
MemberPress vs WP Courseware – WordPress Memberships/Course Plugins Compared
- By
- Last updated:
- Leave your thoughts
Do you feel like you have something valuable to teach? And do you want to do that by running courses on your WordPress website? In this guide to MemberPress vs WP Courseware, I’ll review two popular plugins that allow you to do just that.
MemberPress is a plugin that allows you to create a membership program or paid subscriptions, and you can use these tools to sell courses you’ve already created.
WP Courseware is a plugin that enables you to build courses inside WordPress — you can then sell those courses as products or subscriptions.
This article will help you to determine which plugin best fits your needs by exploring the following:
- What to look for in a membership plugin
- How MemberPress works
- How WP Courseware works
- Similarities between the two plugins
- Differences between the two plugins
- MemberPress vs WP Courseware: The verdict
By the end of this article, you should have a good idea of which plugin is most suited to your needs.
Table of Contents
What to Look for in a Plugin for Running Courses
At its most basic, a membership plugin is a tool that allows you to lock website content away from the public. However, there are several additional features worth looking for:
Content Dripping
Content dripping is the practice of releasing content to members over a period of time. For example, if you sell courses, you might release class modules to members on a weekly basis.
Content Expiration
This feature allows you to set a date when members will no longer be able to access certain content.
Community Creation
Some membership plugins allow you to create forums. This can be done in a couple of ways:
- Built-in tech: These plugins allow you to create forums without any additional downloads.
- Integration: These plugins integrate with forum plugins, such as bbPress.
Membership Levels
The best membership plugins allow you to create an unlimited number of membership levels. You should be able to fully customize the price, description and permissions of each level. Some plugins also allow you to set a free or discounted trial period for membership levels.
Subscription Capability
Some membership plugins also allow you to create paid content subscriptions that don’t require a membership.
Membership Management
Members should be able to pause, cancel or change their membership level at any time.
Course Support
If your goal is to sell courses, you want to consider what features are available to support that. Does the plugin have a course builder? A quiz builder? Gradebooks? Does the plugin itself email course materials to students, or do you need to do this through an integration?
Coupons
Coupons are a great way to get people who are on the fence to make a purchase — look for a plugin that allows you to create unlimited coupons. You should also be able to customize coupons in a few key ways:
- Choose whether the coupon provides a percentage discount or reduces the price by a specific number of dollars.
- Determine how much of a discount the coupon provides.
- Add an expiration date.
- Make the discount only available to certain types of people.
Email Marketing Integration
The best membership plugins offer integration with a variety of email marketing services. This allows you to run content dripping campaigns via email.
Ecommerce Integration
Ecommerce integration allows you to sell locked content, such as course modules, as products. Look for a plugin that integrates with WooCommerce or your preferred ecommerce technology.
Payment Gateways
Many plugins are only compatible with one or two payment systems. Others restrict the use of certain payment gateways to top-tier plans. Choose a plugin that’s compatible with your preferred system of processing payments.
Form Customization
This feature allows you to customize registration, login and checkout forms. Some plugins may also allow users to customize their user profiles.
Ease of Use
Creating members-only content people actually want to pay for is a challenge in and of itself — you shouldn’t also be struggling to understand your membership plugin.
Documentation and Support
A membership plugin should be easy to use, but these are still complex plugins with lots of features. There should be clear, easily accessible documentation. You should also be able to access high-quality support if you run into trouble.
Cost
All right, this one isn’t technically a ‘feature’, but it is important to consider. What are you able to pay for a plugin? Are you willing to pay an annual fee, or are you determined to find a plugin with a lifetime purchase option? Is there any wiggle room in this for a plugin with the right features? Know what you’re willing to spend going in.
MemberPress Review
Features
The Basic plan of MemberPress comes with the following features:
- Easy setup
- Unlimited membership levels
- Unlimited subscription types
- Content dripping
- Content expiration
- Fully customizable permissions for all content types
- Subscription and membership management available to users
- Customizable coupons
- Detailed analytics
- Integrations with a variety of email marketing services
- Integrations with a variety of plugins to expand functionality, including bbPress
- Easy connection to PayPal Standard, PayPal Express Checkout, and Stripe
- Comprehensive documentation; full user manual becomes available upon setup
How to Use MemberPress
Getting MemberPress to Work on Your WordPress Site
The first step to getting started with MemberPress is to choose the plan you want. Signing up is simple: Just make your first payment and enter your email address. Payment can be made through credit card or PayPal — whatever’s most convenient for you.
When you’ve paid, the site will direct you to answer some questions about your business.
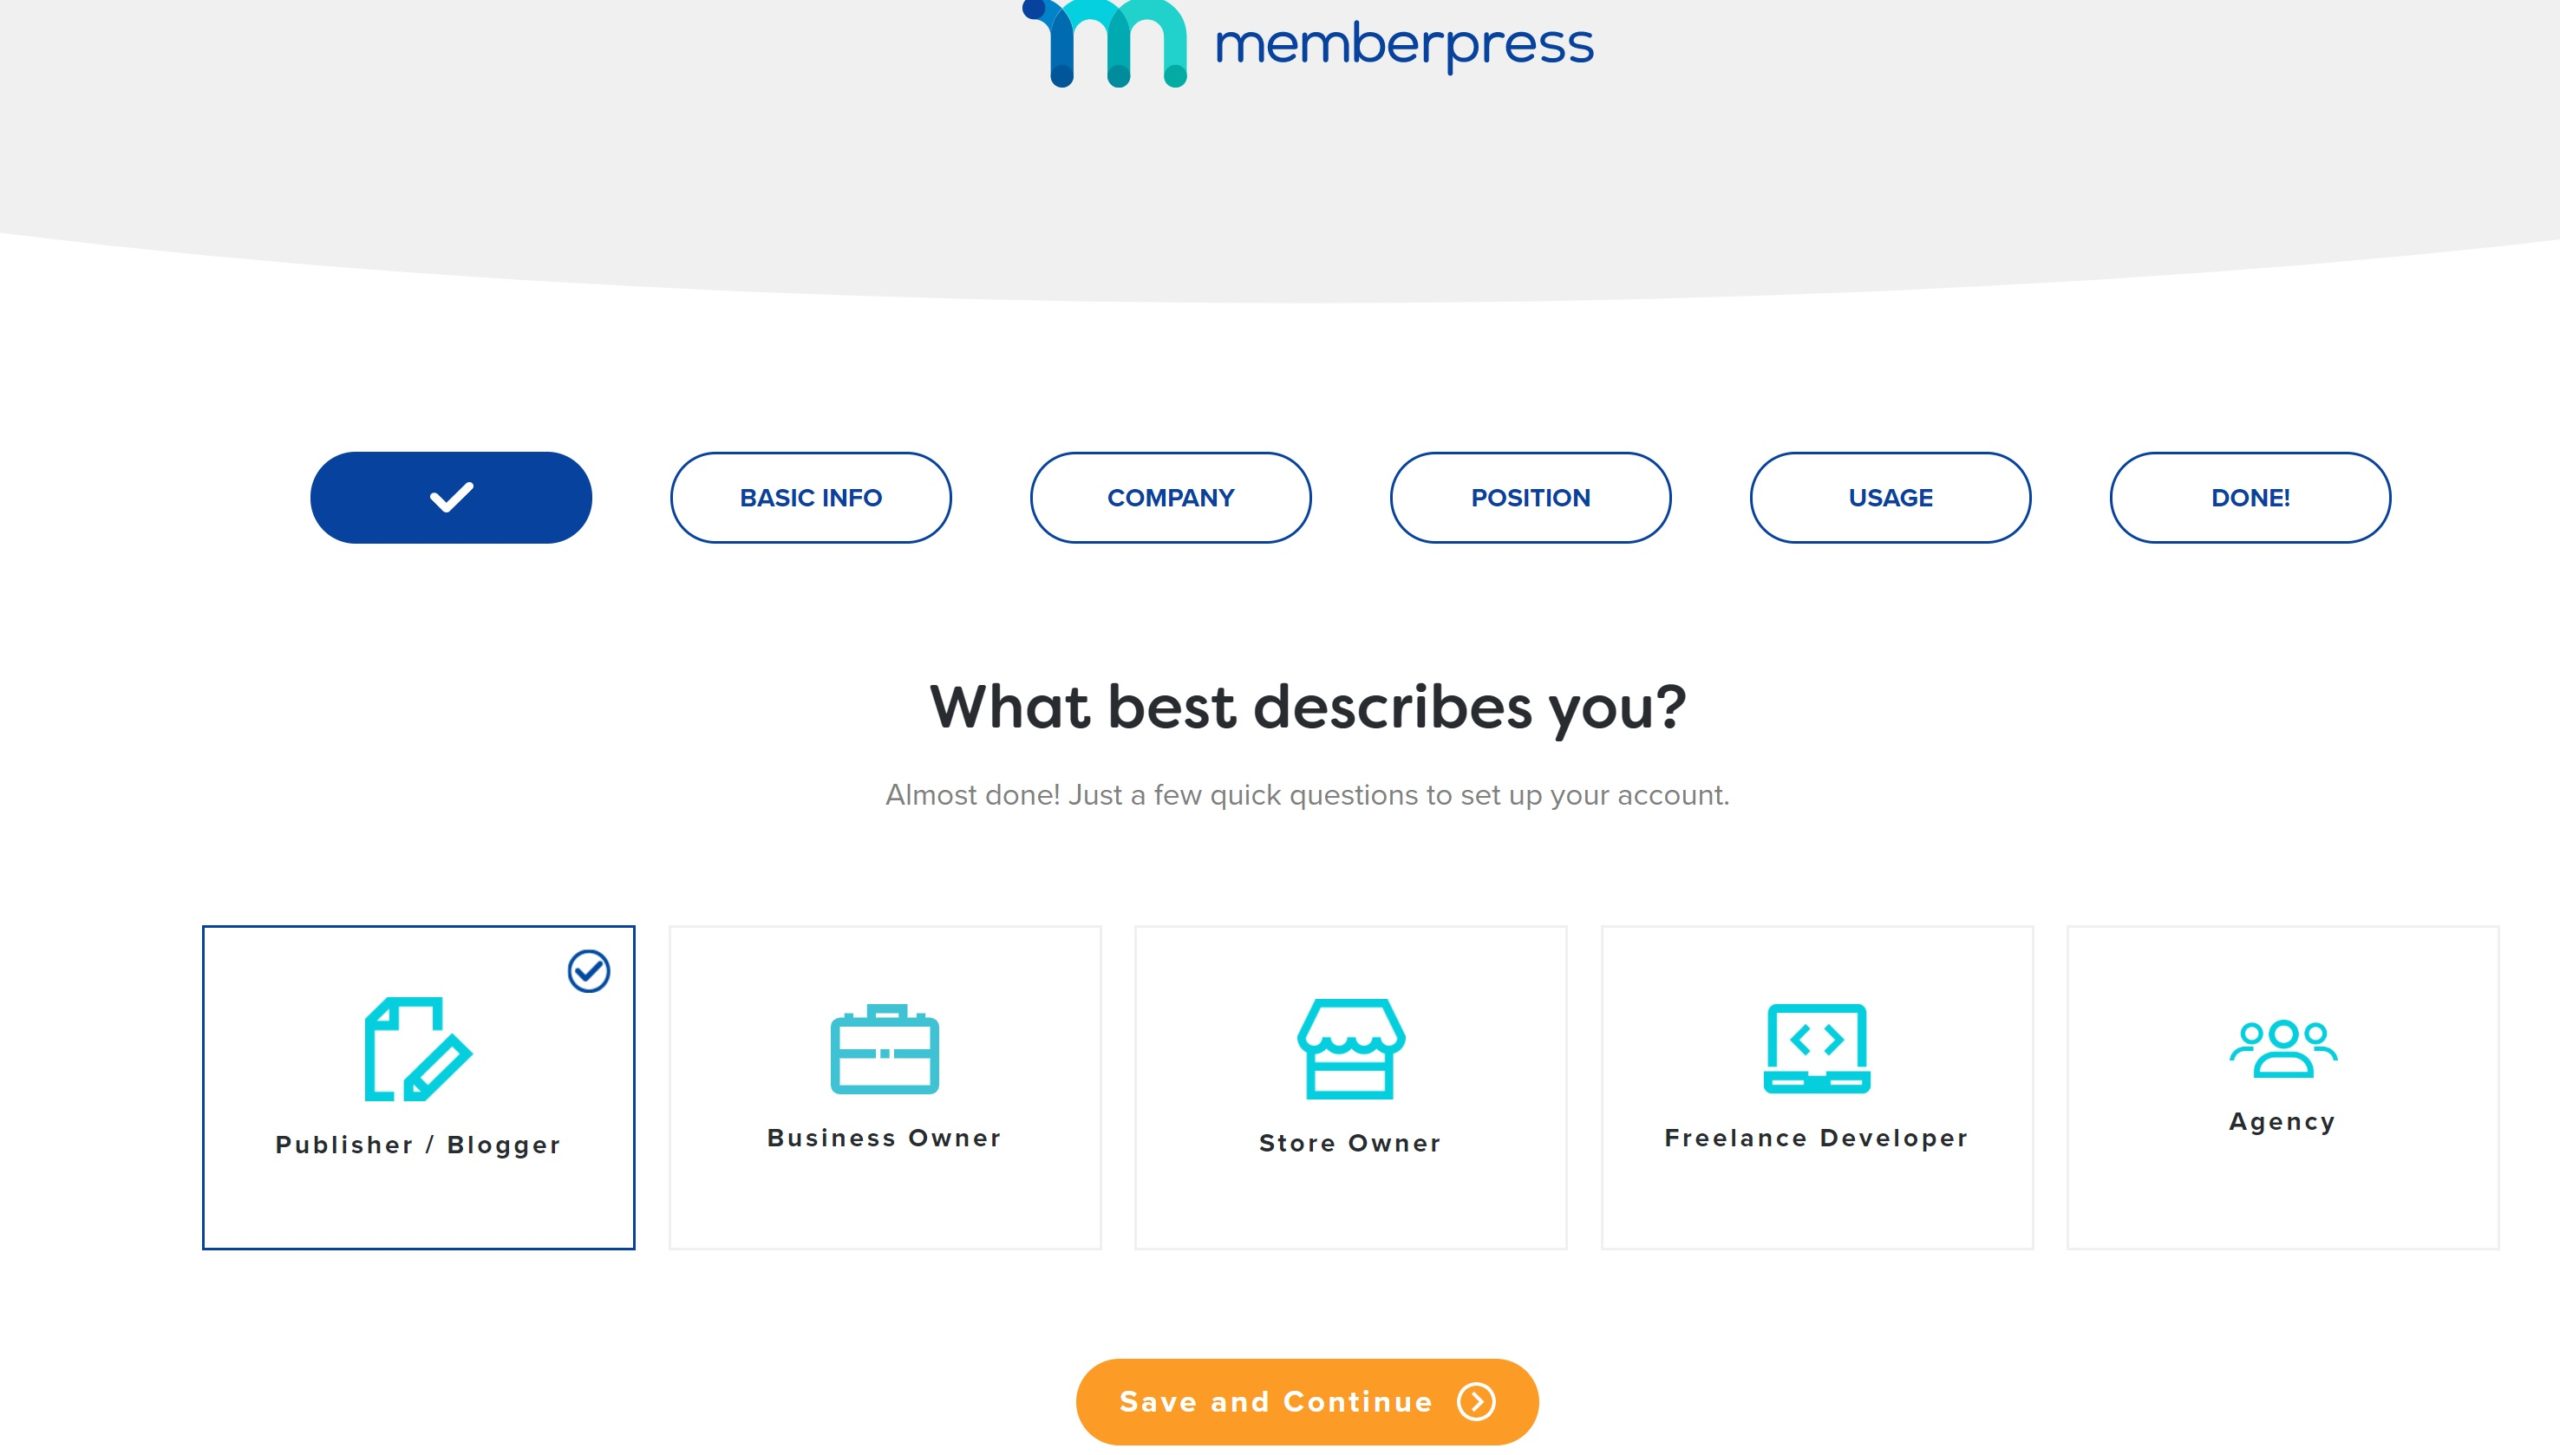
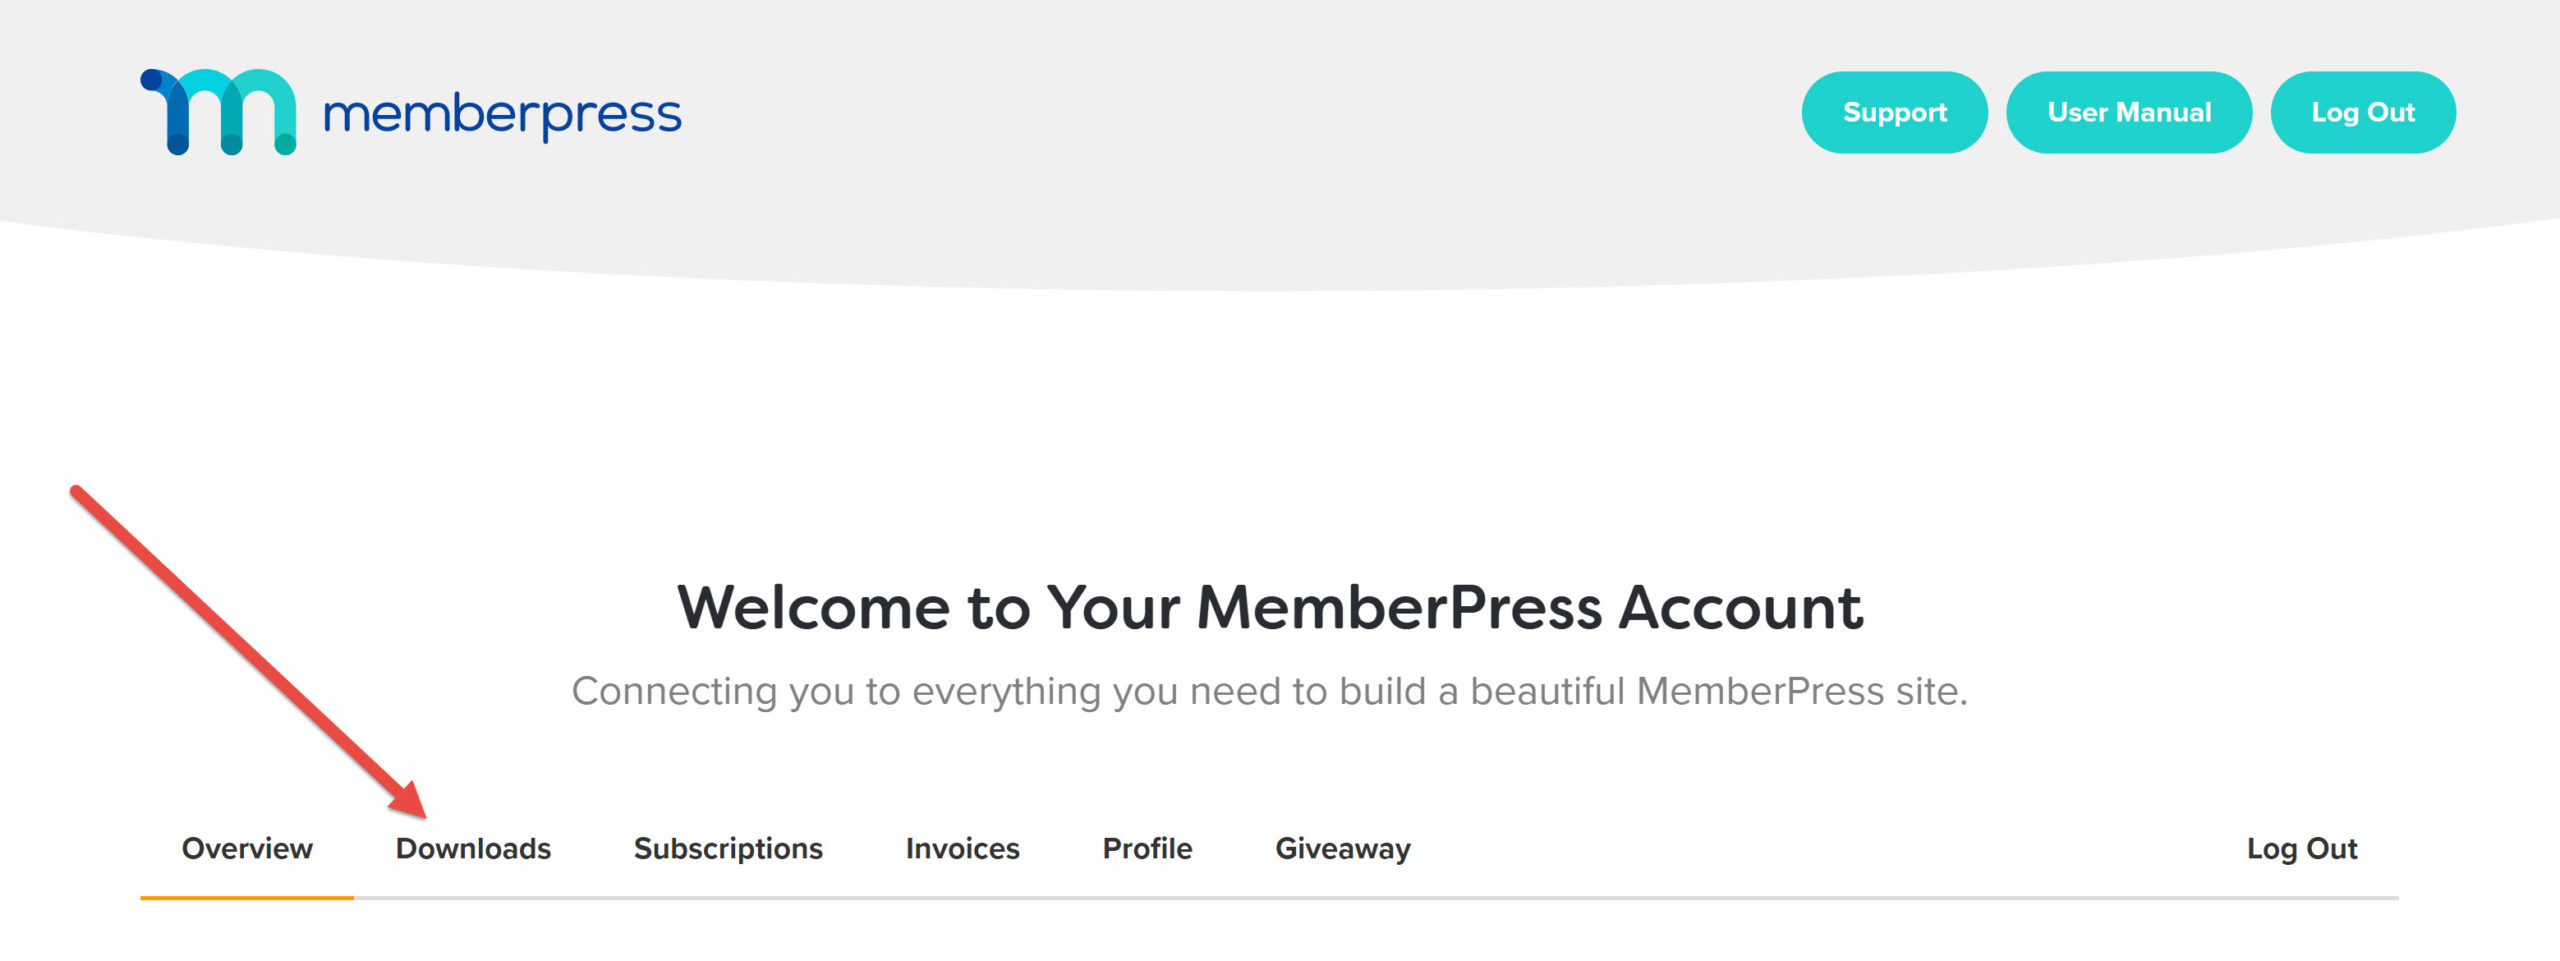
When you complete these questions, you’ll be directed to the MemberPress account dashboard, where you can view and manage billing information, change your plan and download the plugin.
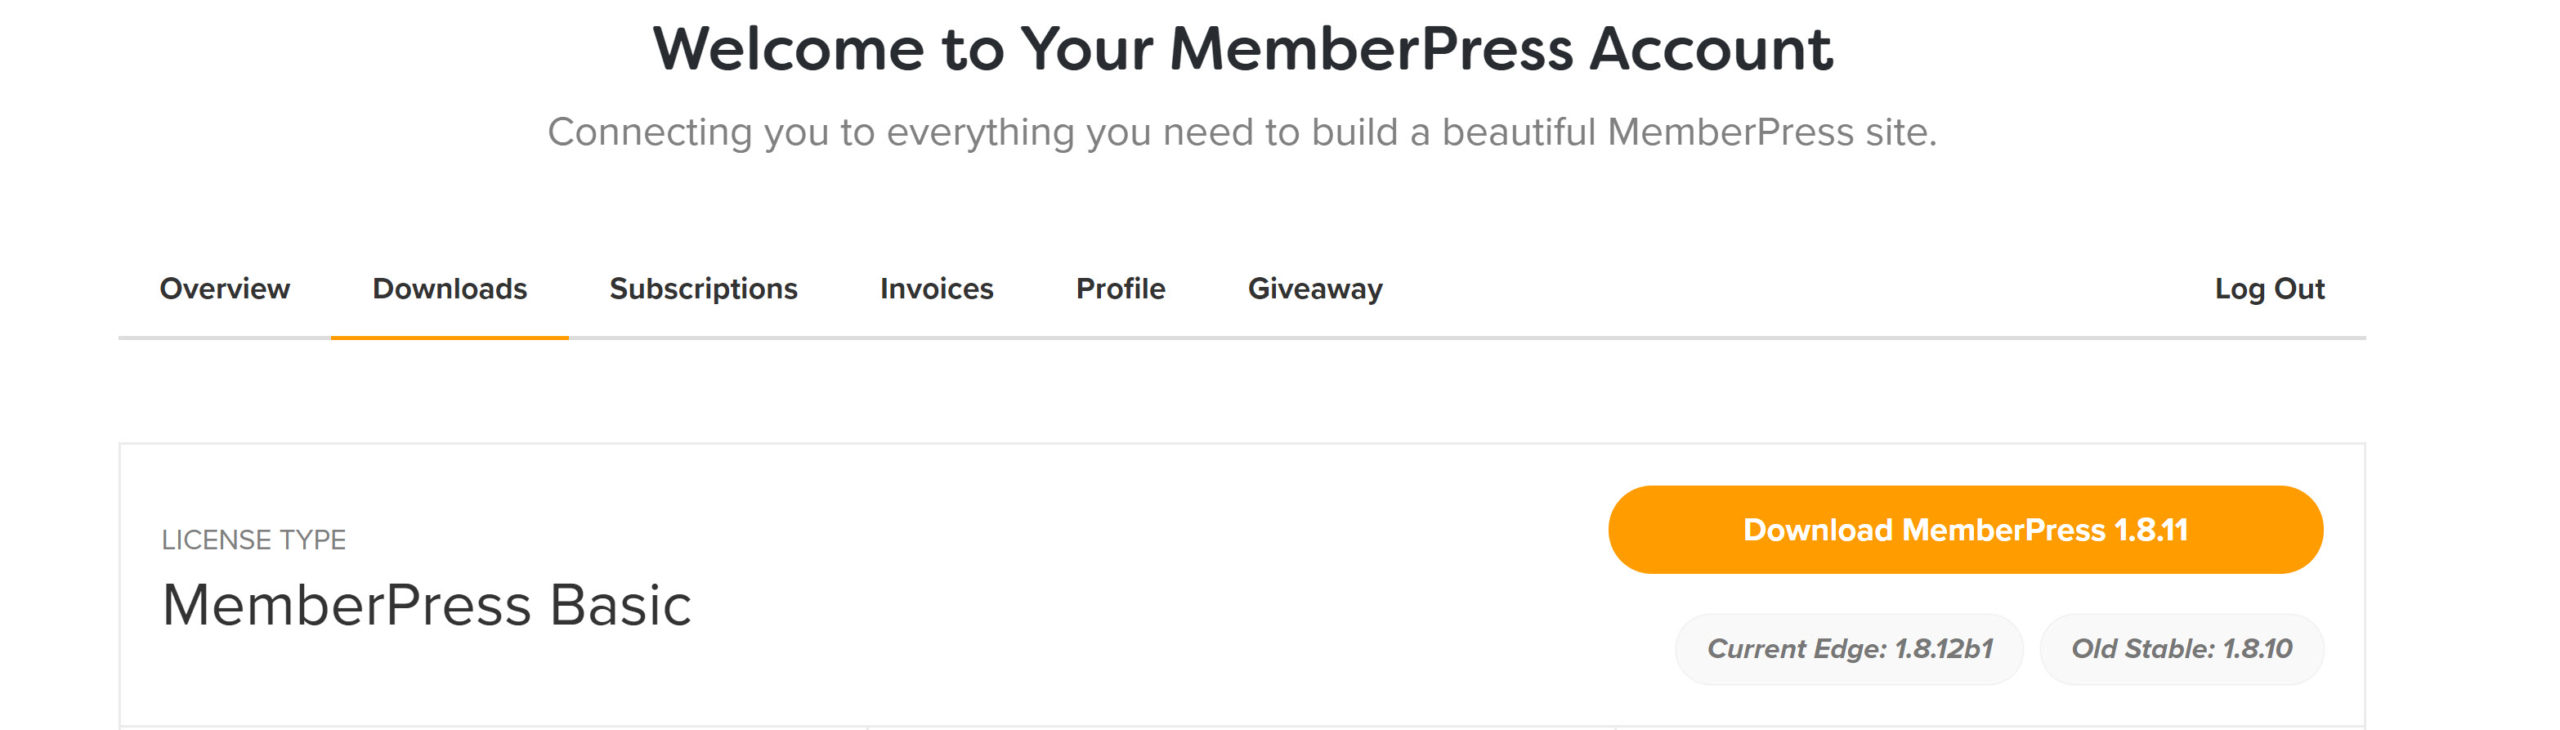
To grab the plugin, click on the ‘Downloads’ tab.
On this page, click the orange ‘Download’ plugin to grab your copy of MemberPress.
Next, launch your WordPress admin panel in a separate tab and go to ‘Plugins > Add New’. Here, you’ll be given the option to search for plugins in the WordPress database or to upload one of your own. Choose the ‘Upload Plugin’ option at the top of the screen.

A box will appear with instructions for you to choose a file from your computer. Select the MemberPress ZIP file and WordPress will automatically install it. When the process is complete, you’ll be prompted to activate the plugin, which will make it accessible in your WordPress dashboard.
To complete the activation, go to the ‘Settings’ area of MemberPress. Copy and paste the license key from your MemberPress dashboard into the box provided on this page — doing this ensures your plugin will automatically receive updates.
Connecting a Payment Gateway
You can also connect a payment gateway on the ‘Settings’ page of MemberPress. To do this, go to the ‘Payments’ tab and click on the blue ‘+’ that appears.
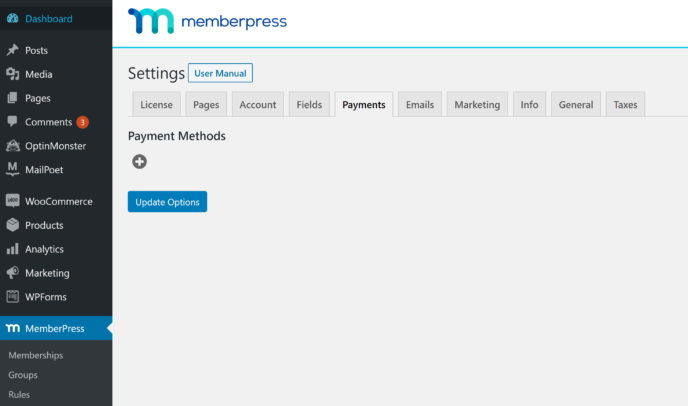
MemberPress will then prompt you to fill in details about the payment option you’re creating — you can select offline payment, PayPal Standard, PayPal Express Checkout or Stripe. The precise details you need vary based on the platform.
When you’ve entered all of the correct information, click the ‘Update’ button at the top of the page to permanently connect the payment gateway.
Create Your First Membership Level
Membership levels are one of the biggest factors to consider in the debate of MemberPress vs WP Courseware. To create your first membership level, click on the ‘MemberPress’ link in your sidebar, which will take you to a page where you can manage your membership levels. Press the ‘Add new’ button at the top of the page to go to the membership editor.
The first section of the membership editor features areas where you can enter a title and description. The description editor is similar to the regular WordPress editor, allowing you to format the page as you would any other.
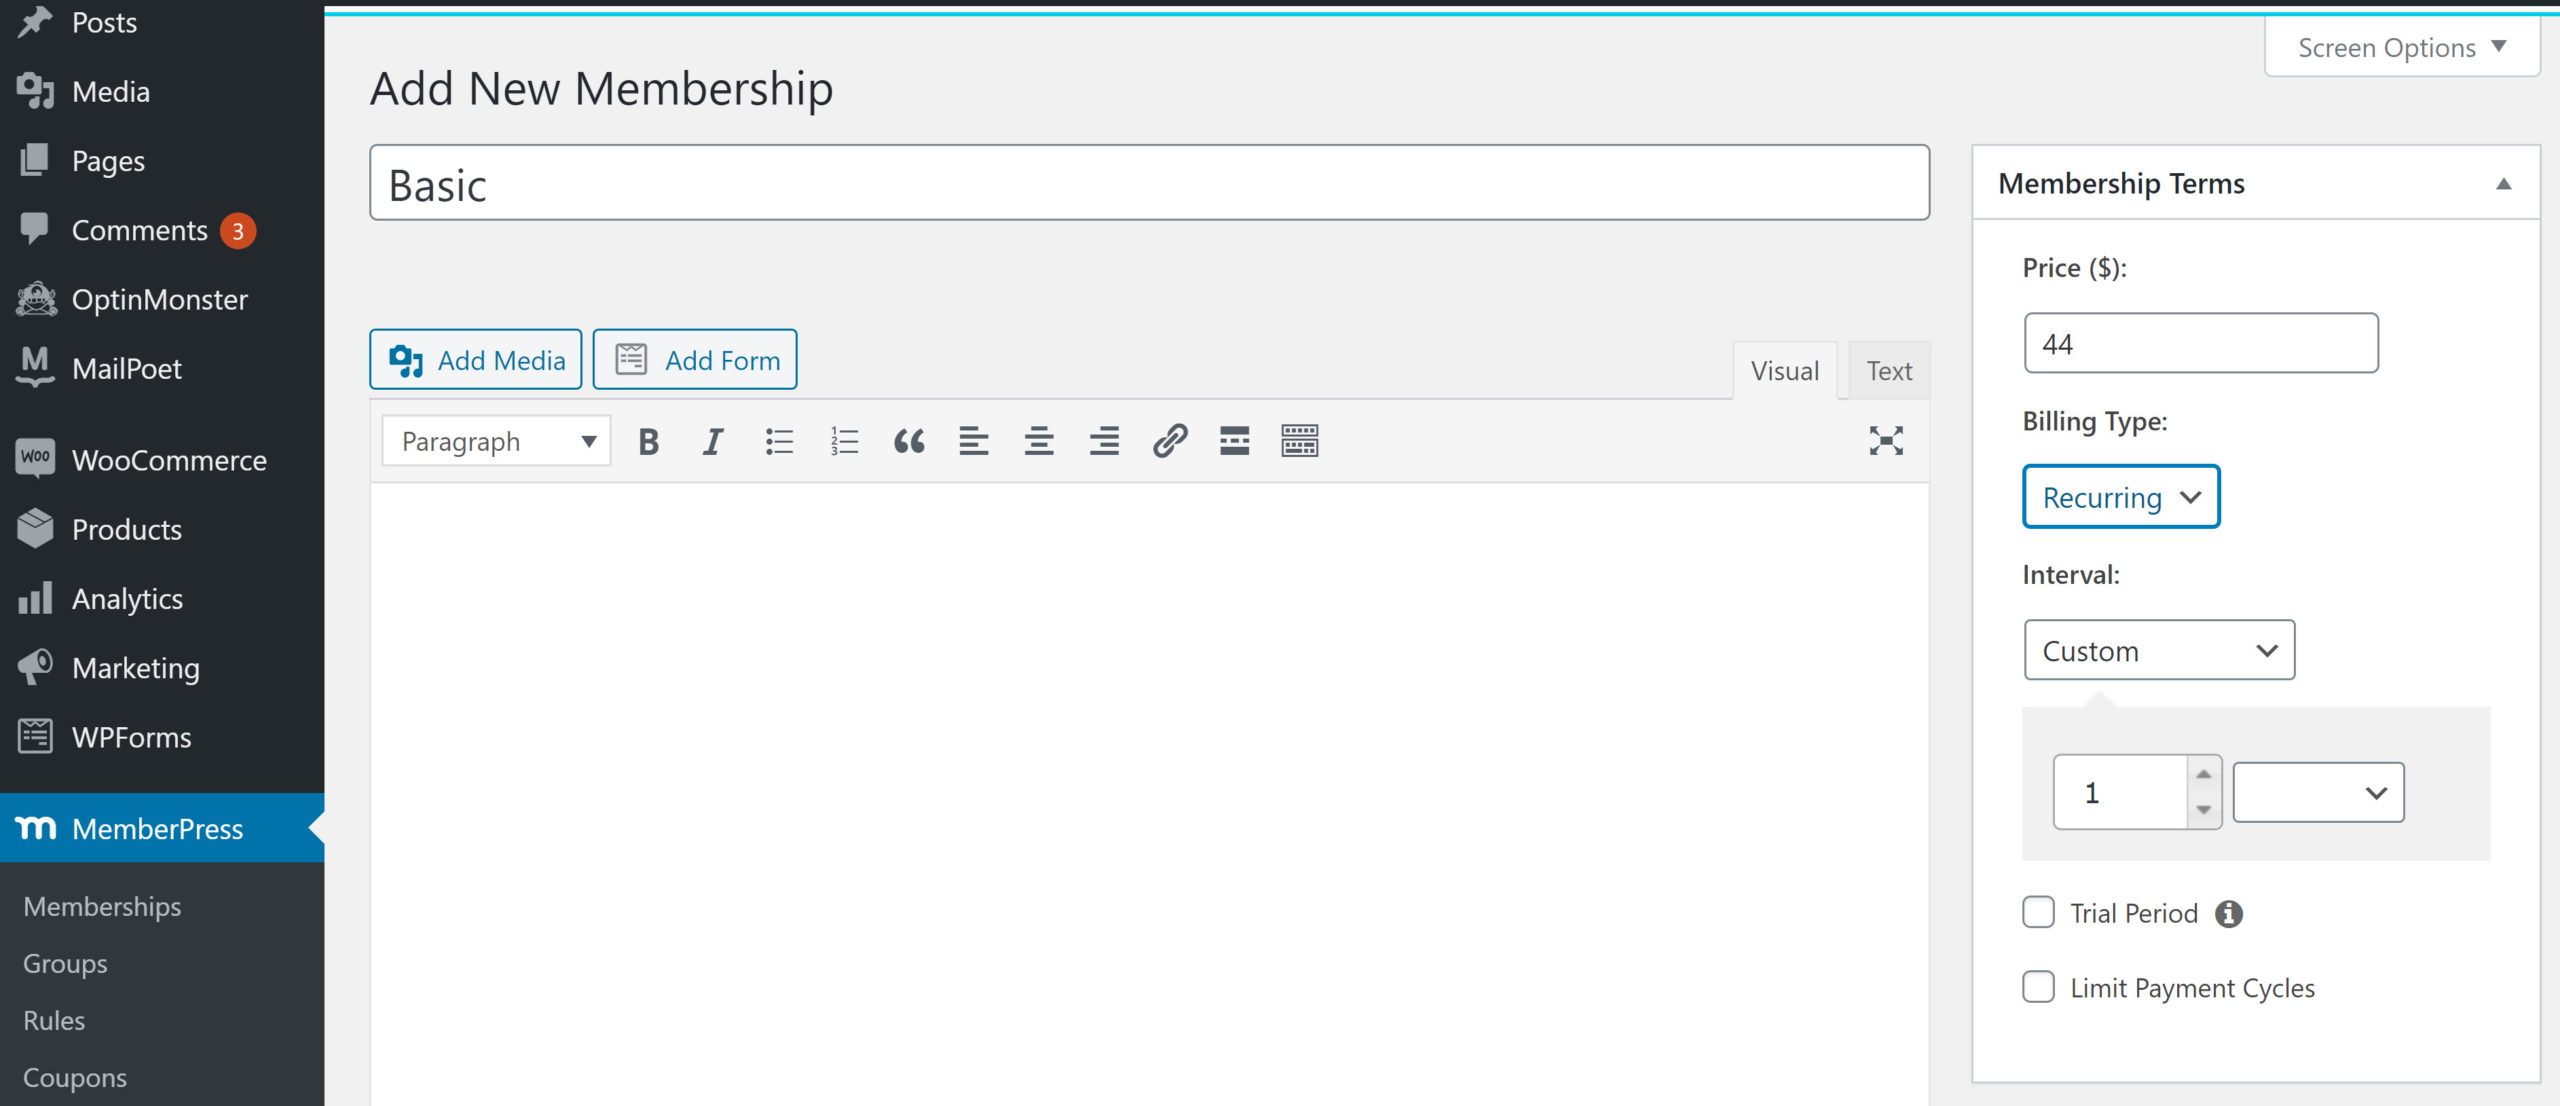
Membership terms are set in the right sidebar. You must enter the desired price for this membership level first. MemberPress will then allow you to choose between a one-time payment and recurring payments.
Choosing recurring payments unlocks further customization options:
- Payment intervals: Weekly, monthly, every three months, every six months, or annual.
- Free or paid trial period: Set a precise cost for the trial and choose how many days the trial will run for.
When you’re satisfied with the membership terms for this level, scroll down to the ‘Membership Options’ area. You can use this area to customize several aspects of the user experience at this level, such as the precise welcome email they receive.
Edit these settings to your satisfaction, then click the ‘Publish’ button in the sidebar to launch this membership level.
Creating Content Rules
The next stage of setting up MemberPress is creating content rules. To do this, go to the ‘Rules’ section of MemberPress and click on the ‘Add new’ button near the top of the page. This will direct you to the rule editor. Here, you can choose a name for the rule, select the content you wish to protect and specify who will be able to access this content.
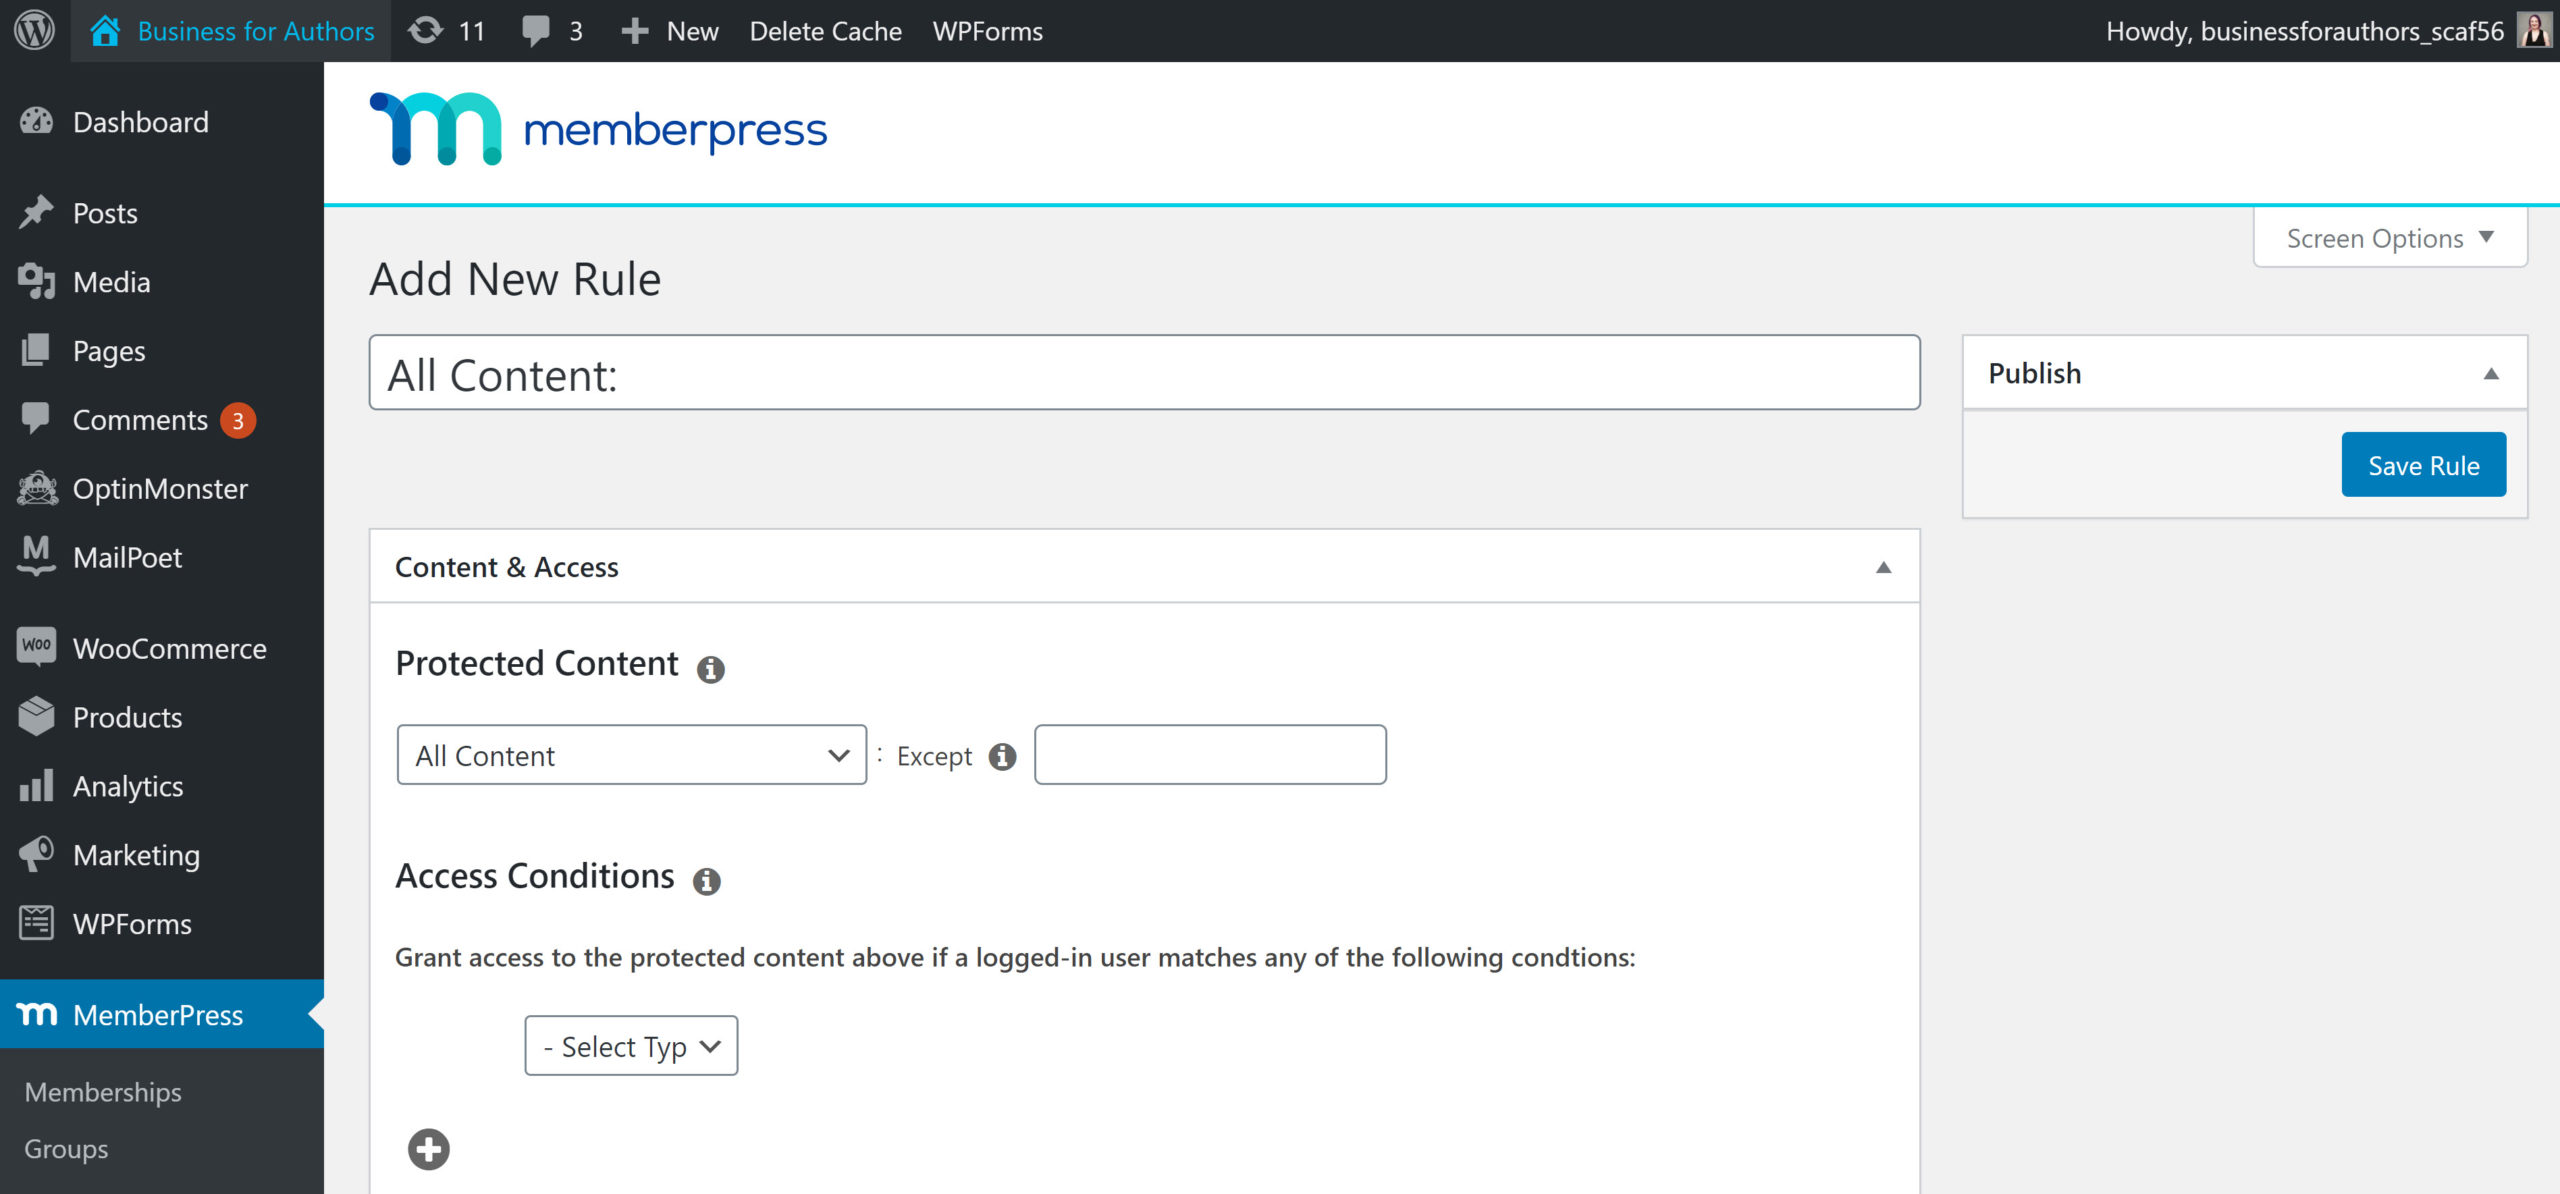
Scroll further down to find checkboxes for content dripping or expiration. If you enable one of these options, you’ll be asked to choose what triggers the event. MemberPress will also require you to specify time between the triggering event and the appearance/expiration of this content.
When you’re happy with the parameters of your new rule, scroll back up the page and click ‘Save Rule’ in the right sidebar. The rule will immediately go into action.
Add-ons and Integrations
One of the important things to consider in the debate of MemberPress vs WP Courseware is the variety of built-in integrations and one-click add-ons offered by MemberPress.
Integrations included with the Basic MemberPress plan connect the plugin to a variety of email marketing tools.
Add-ons are integrations you must manually enable, and include integrations with a wider range of email marketing tools and other plugins. Some of the plugins MemberPress can connect to are bbPress, MonsterInsights and the Beaver Builder.
Higher tier MemberPress plans feature a wider variety of add-ons.
Analytics
These show how people are interacting with your membership programs. To access your analytics, go to the ‘Reporting’ section of MemberPress. Here, you can view information on memberships and transactions.
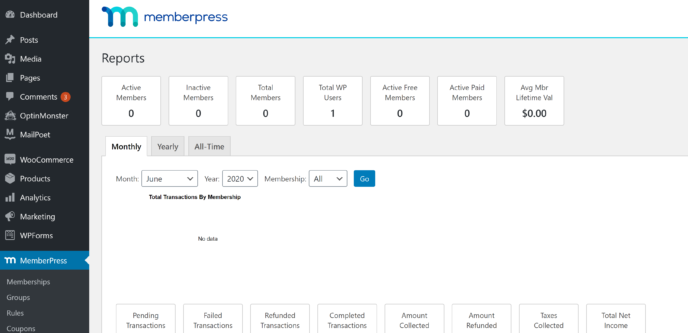
Further down the screen, you can view a line graph displaying various types of transactions.
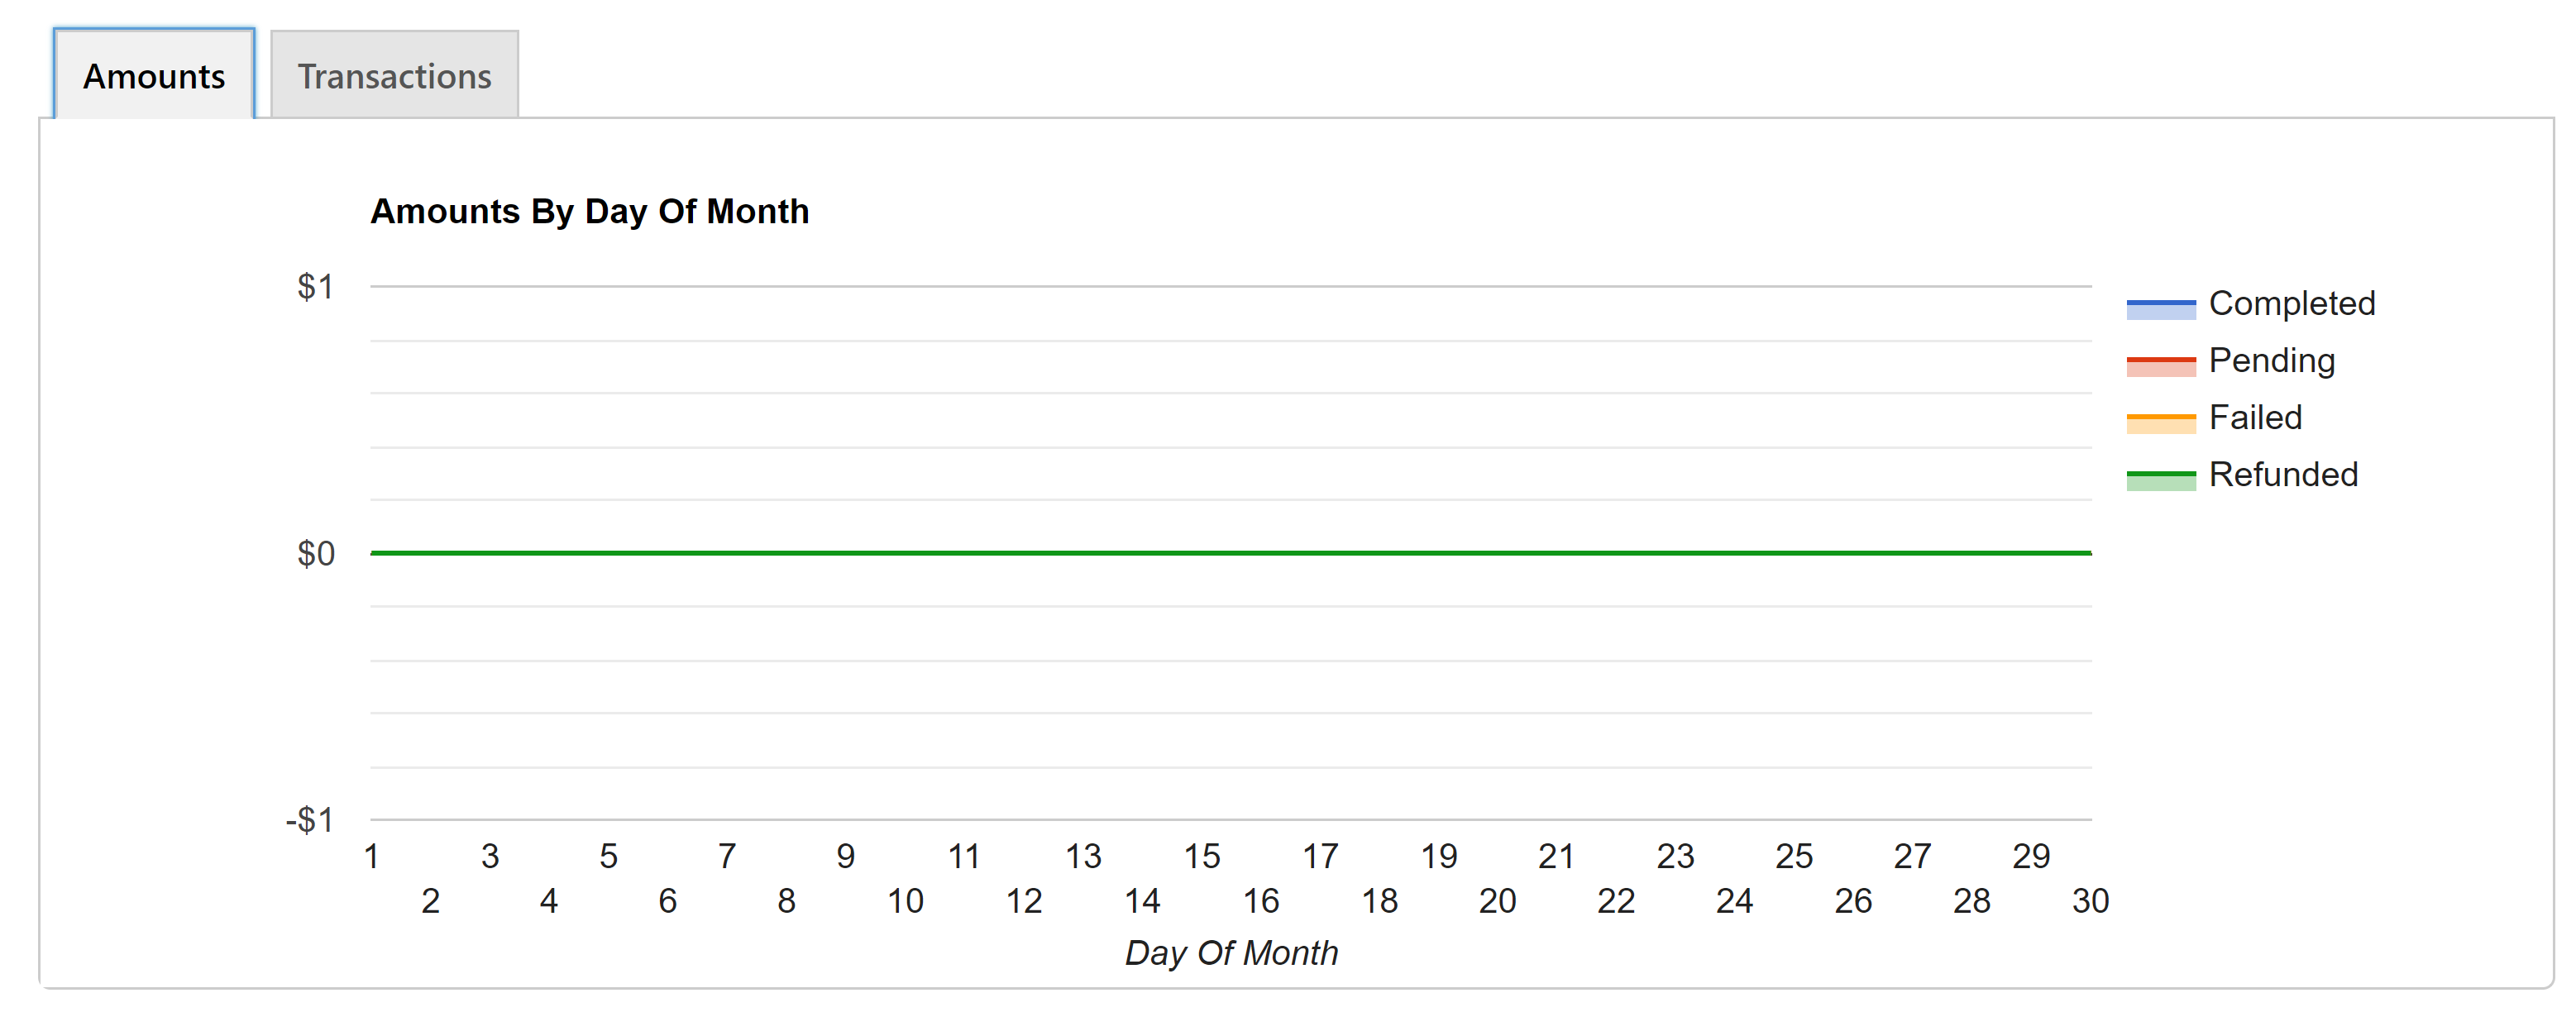
All of this information is recorded in real time.
You can also access more detailed analytics by installing MonsterInsights and integrating the two plugins.
Pricing
The Basic MemberPress plan, which we’ve discussed in this article, is $149 for the first year and renews at $249 a year. There are also two other plans on offer:
- Plus: Available for $249 for the first year; renews at $399 a year. Includes all features of the Basic plan for two sites. You’ll also gain the ability to use Authorize.net, sell corporate (bulk) accounts, and use an additional ten integrations.
- Pro: Available for $349 for the first year; renews at $549 a year. Includes all features from the Plus plan for up to five sites, as well as a variety of exclusive add-ons. You’ll also get the Affiliate Royale plugin, which allows you to create an affiliate marketing program.
There’s no lifetime purchase option at this time.
Overall Thoughts on MemberPress
MemberPress is quite easy to use and comes with most of the features I’d want from a membership plugin, although one thing I wish it could do is customize forms. The plugin also lacks forum creation capabilities, although it does offer integration with bbPress.
The biggest drawback of MemberPress, though, is the long-term cost. The plugin renews at a higher rate, and there’s no lifetime purchase option, which can make it quite expensive to maintain. In terms of MemberPress vs WP Courseware, MemberPress is a significantly more expensive plugin.
WP Courseware Review
Features
The WP Courseware Teacher plan gains access to all of the features of WP Courseware, including:
- Two-site licenses
- Drag-and-drop course builder
- Gradebooks
- Powerful quiz maker
- Ability to bring on multiple instructors
- Unlimited, highly customizable coupons
- Unlimited courses
- Content dripping
- Unlimited subscriptions and students
- Payment via PayPal and Stripe
- Integrations with ecommerce and membership plugins
How to Use WP Courseware
Getting WP Courseware installed on Your WordPress Site
The process for installing WP Courseware is quite similar to the setup process for MemberPress. First, you must sign up for the plan you want — you’ll be asked to fill in some basic registration info (username, password, email address) and provide payment, which can be done through either PayPal or with a credit card.
Once your payment is complete, WP Courseware will take you to a page with payment details where you can download your invoice.
At the bottom of the page, you’ll find resources to help you to get started with WP Courseware, including a video tutorial and a PDF on how to build successful courses.
Directly below these resources, there’ll be a link to the WP Courseware ZIP folder — click on this link to download the plugin.

Open your WordPress admin panel in a new tab and select ‘Plugins > Add New’. Press the ‘Upload Plugin’ button near the top of the page, click on the ‘Choose a file’ button that appears, and find and open the appropriate ZIP folder. You can also drag and drop the file into the appropriate box.
Press ‘Install’ and WordPress will automatically install the plugin. When the process is complete, you’ll be prompted to activate it.
Now, go to the ‘Settings’ area of WP Courseware, enter your license key (found in your receipt) in the box provided and click ‘Activate’. This ensures you’ll receive any automated updates and full access to WP Courseware support.
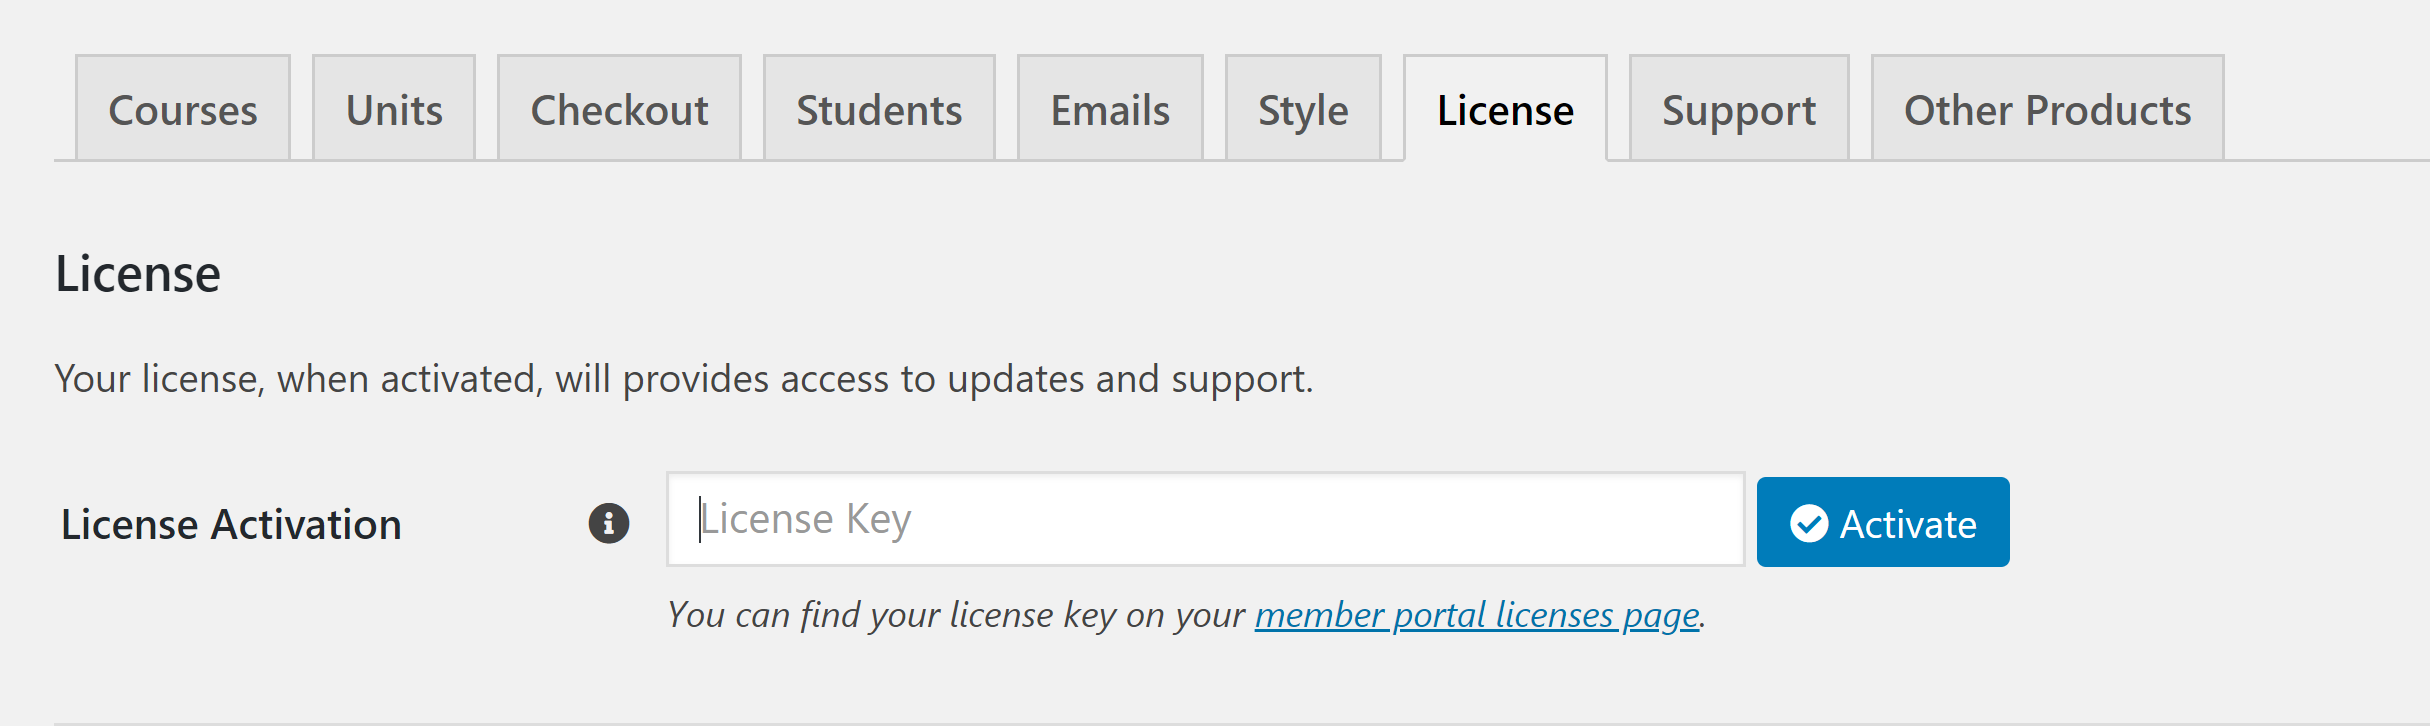
Directly below this, you can also choose whether or not to allow WP Courseware to anonymously track app data from your site.
Connecting a Payment Gateway
While you’re in the Settings area, you’ll also want to set up your first payment gateway. To do this, navigate to the ‘Checkout’ tab. This will take you to a page where you can choose specific checkout pages, and there are also links to pages where you can adjust other options. Click the ‘Payment Gateways’ link.
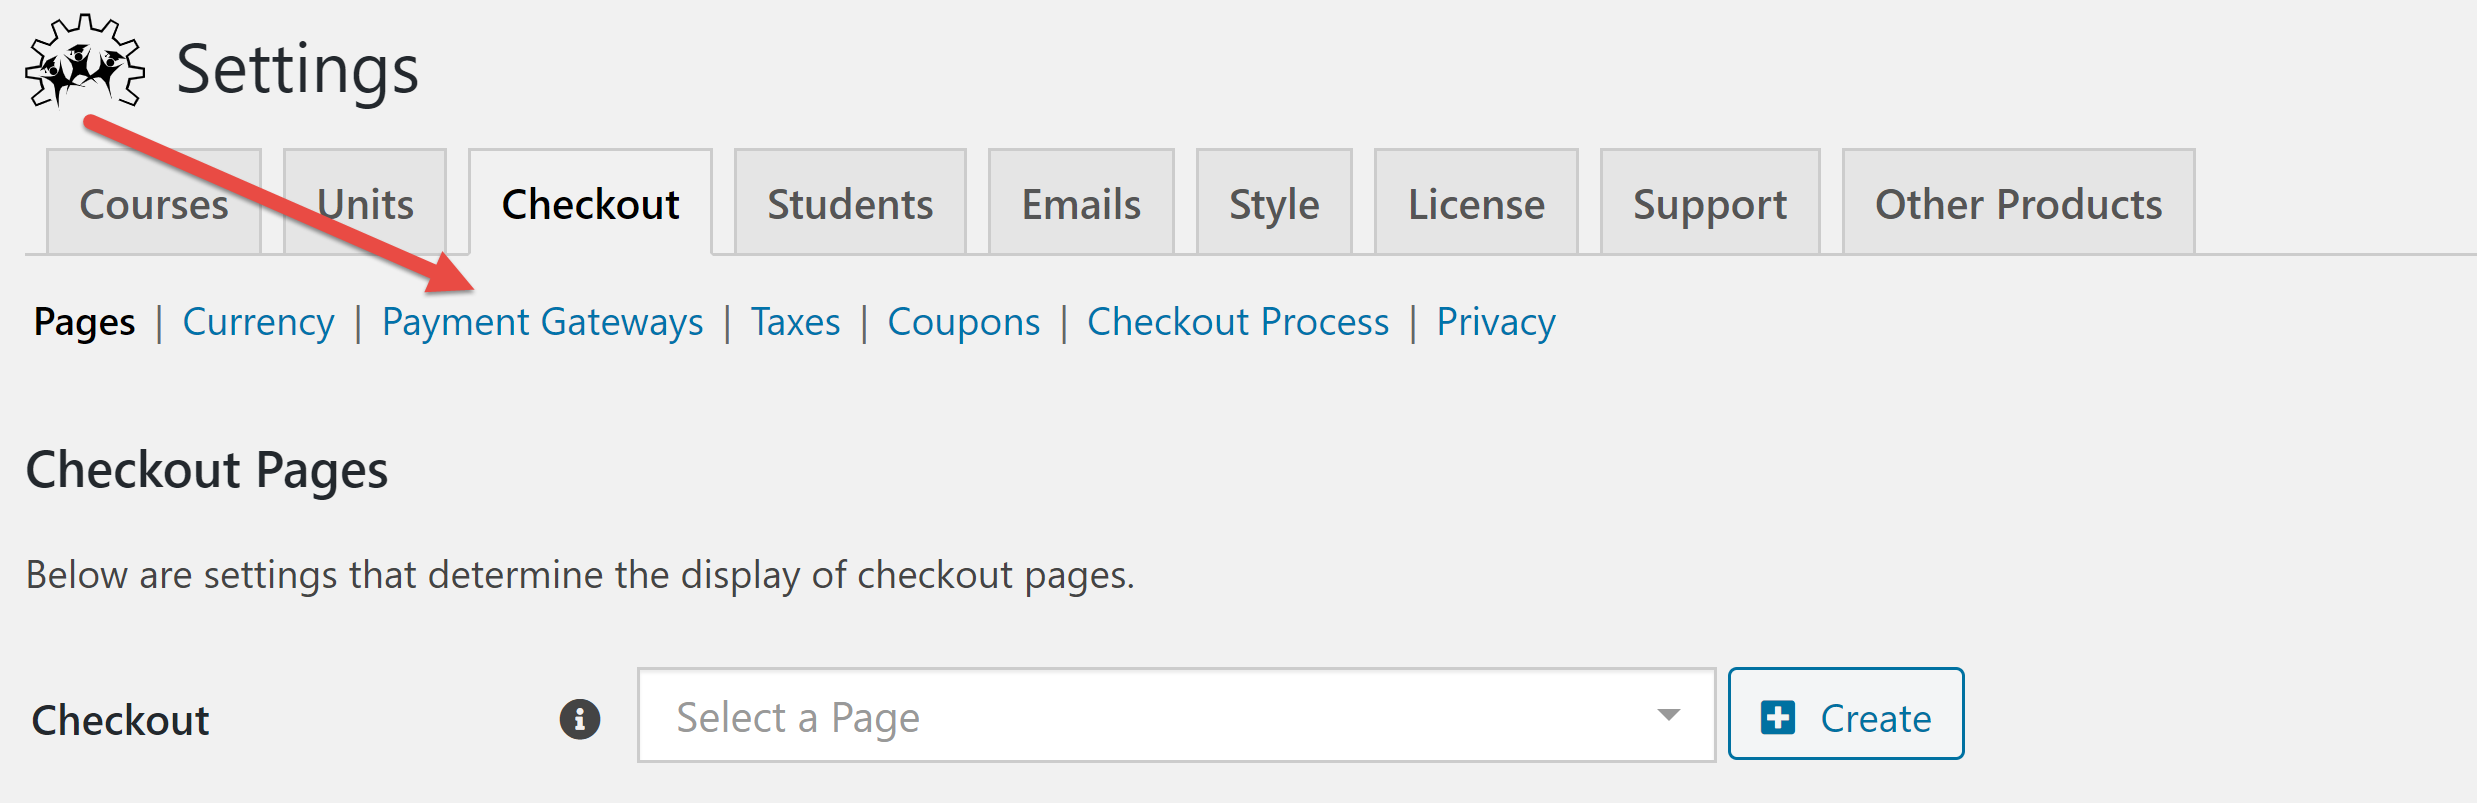
This will take you to a page listing the available options. Click on the ‘Configure’ button for the gateway you want to activate.
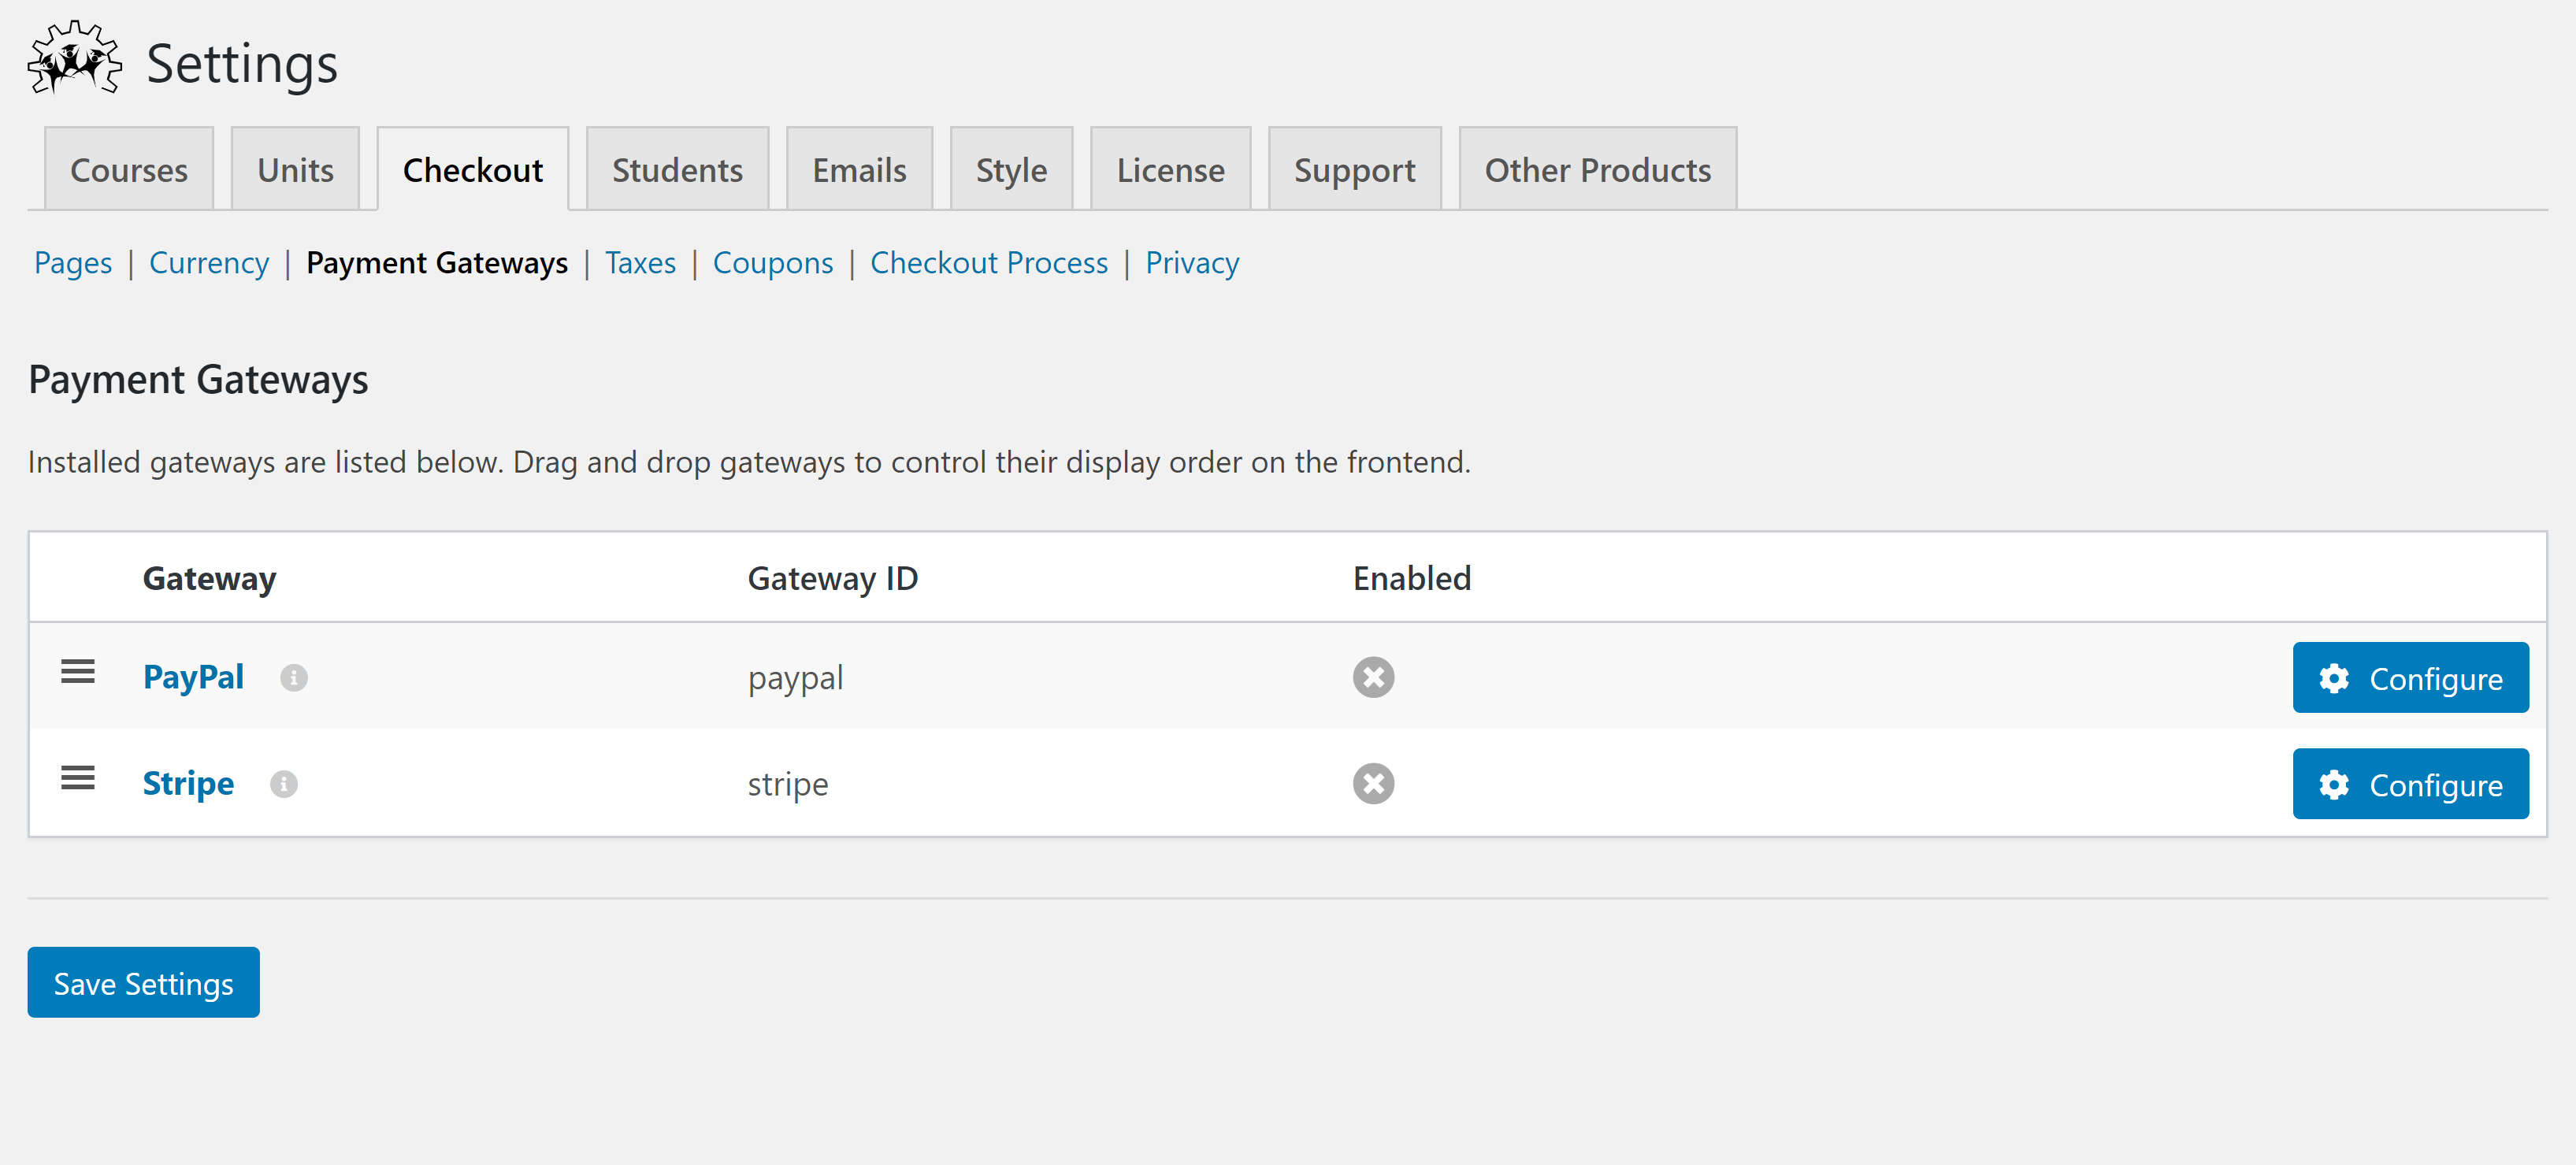
You’ll then be asked to fill in the configuration information. Again, the required information varies based on the payment gateway.
Creating a Course
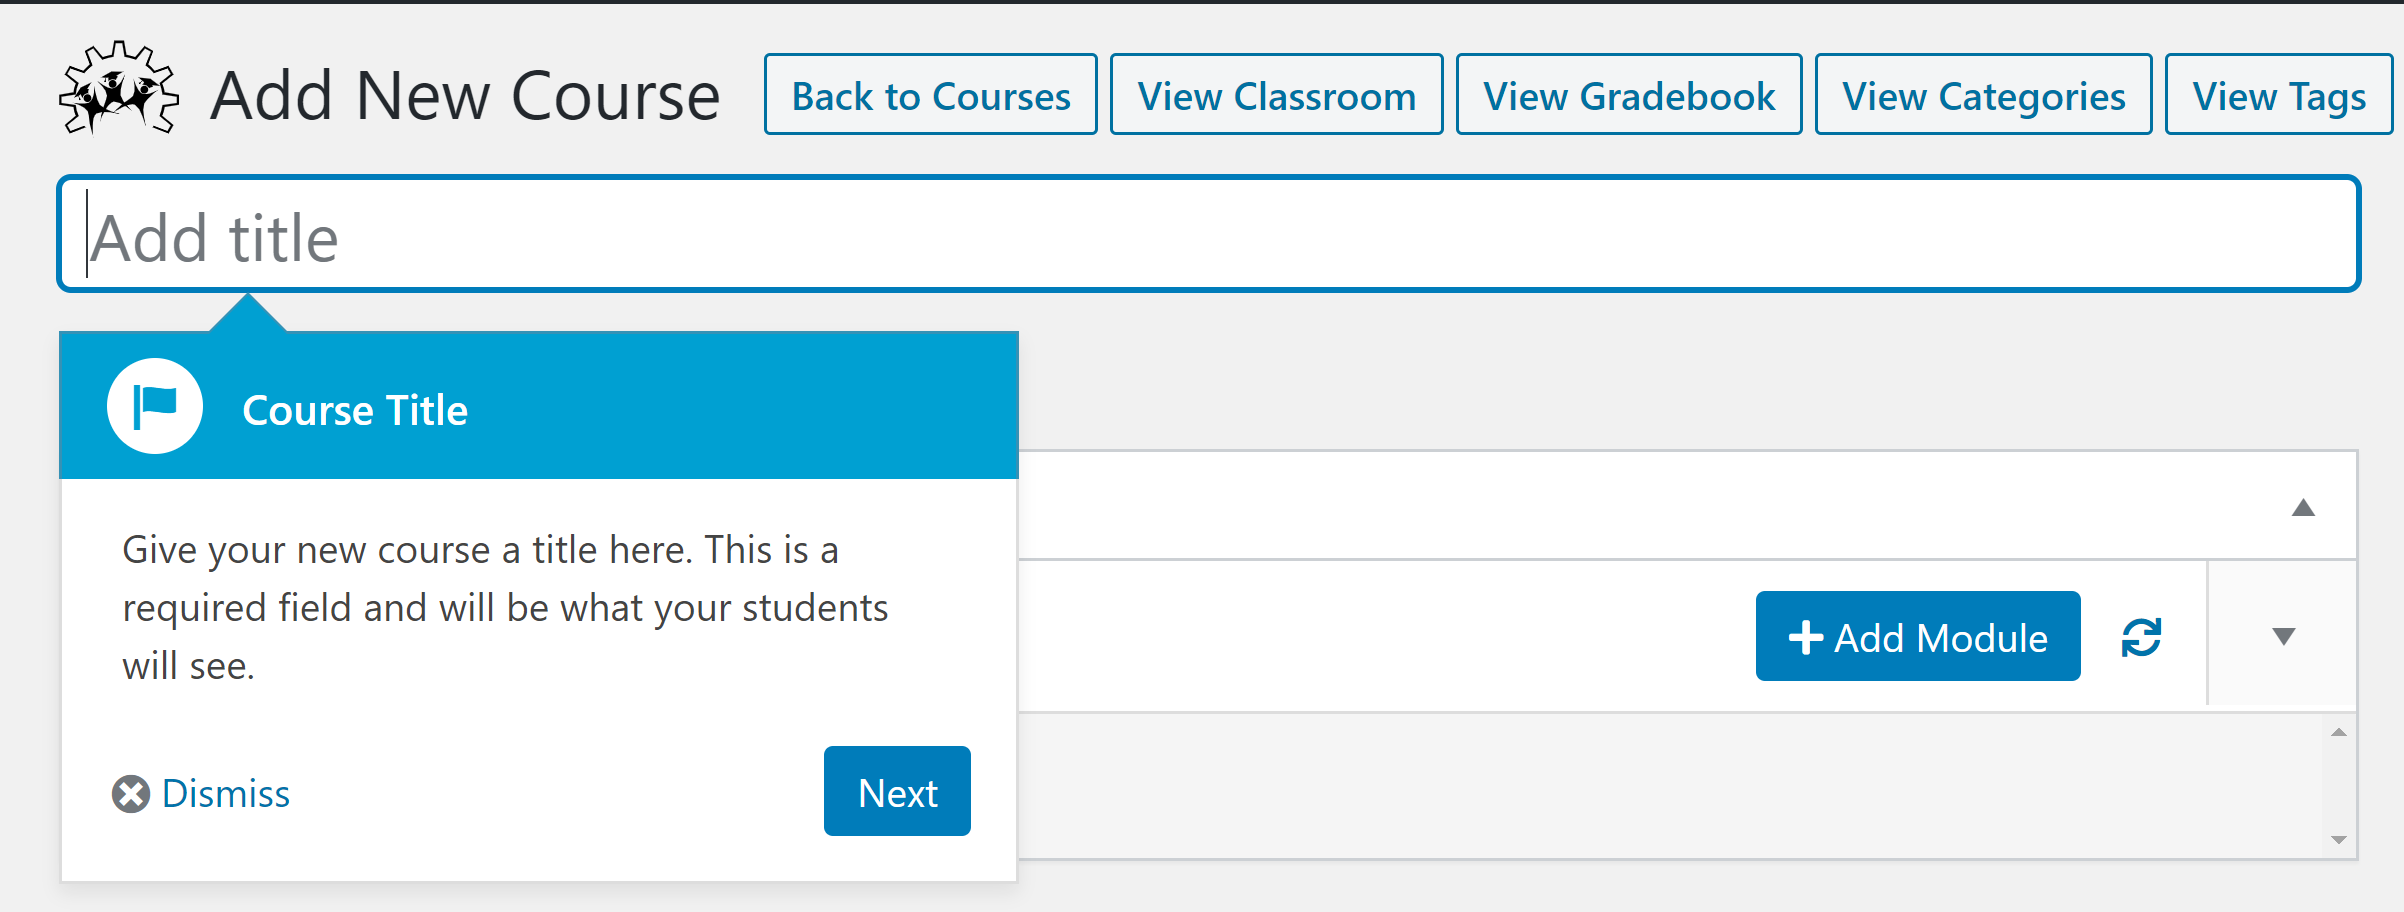
Course creation is one of those things that really stands out about MemberPress vs WP Courseware. To get started, go to the ‘Courses’ page of WP Courseware and click the ‘Add New’ button at the top of the page.

This will take you to the course builder. The first time you come here, you’ll have the option to go through a tutorial showing you where essential parts of the course builder are. This is a nice touch for people who are intimidated by the scope of WP Courseware.
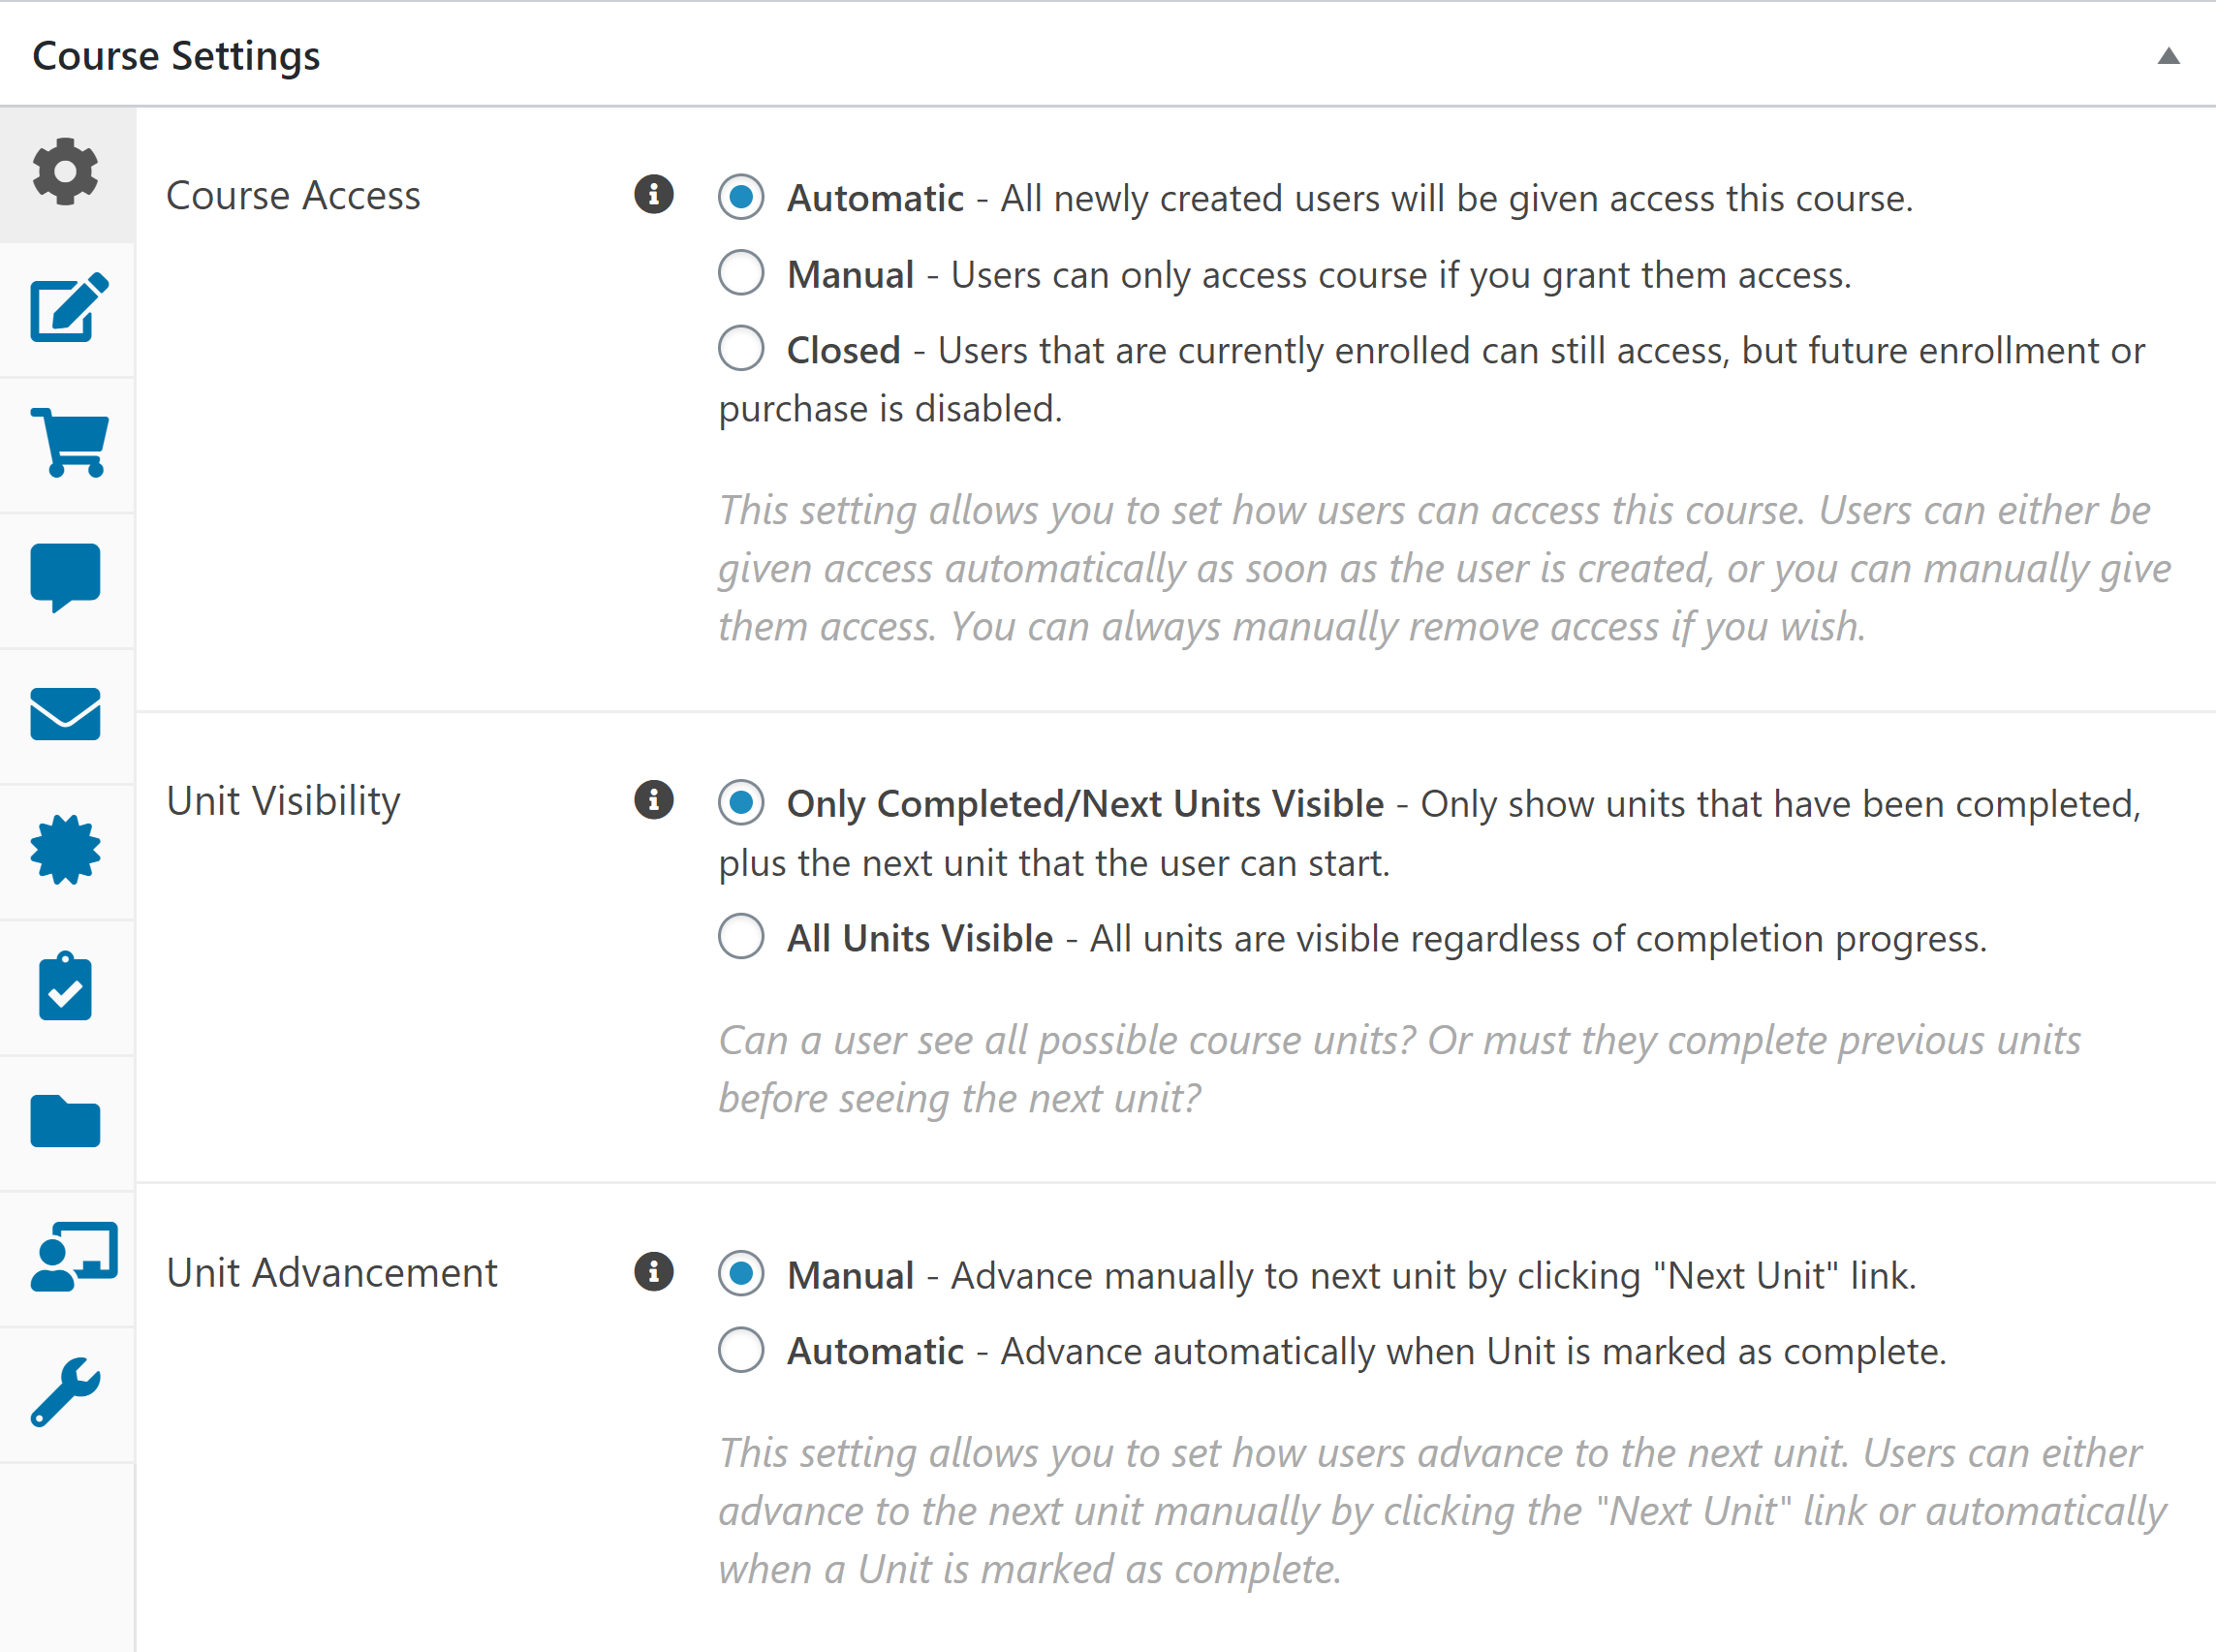
Directly below the title area, you’ll see an area where you can add modules. Since you haven’t created any modules yet, scroll down the page to the settings area. This is where you can adjust a variety of course settings:
- Access: Who can access the course, when units become visible to them, and how students advance from one unit to the next.
- Description: The description of your course, it uses WordPress blogging technology to allow for custom formatting.
- Payment type: Whether the course is free, available with one-time purchase, or available as a subscription. You can only choose one payment type for each course.
- Site messages: Messages students will see on your site at various times, such as when they complete a unit.
- Emails: This is where you toggle the email address people will receive course emails from. You can also customize various email messages here, such as the course completion message.
- Certificates: You can use this section to enable certification.
- Course prerequisites: This allows you to set required courses people must take before they take the course you’re currently creating.
- Course bundles: This allows you to bundle courses for sale as a package.
- Instructor: By default, you’ll be the instructor for all courses, but you can also specify a different user.
- Bulk actions: Here, you can make the course immediately available to all users or just to your administrative team. You can also reset all users on the course, so they must start from the beginning.
When you’re satisfied with all of these settings, you can scroll back up the page and click the ‘Publish’ button in the sidebar.
Creating a Module
There are two ways to create modules. The first way is to create the module directly in the course builder. You can do this by clicking the ‘Add Module’ button below the title bar, which will open a box where you can enter a module title and description.

You can then click on the module title to be taken to the module editor — if you choose this route, skip the next paragraph.
The second option is to go to the ‘Modules’ section of your WP Courseware and click the ‘Add New’ button at the top of the page. This will take you to a page where you can enter the module title and description.
You must also select the course the module will be part of here. You cannot create a module without a designated course.
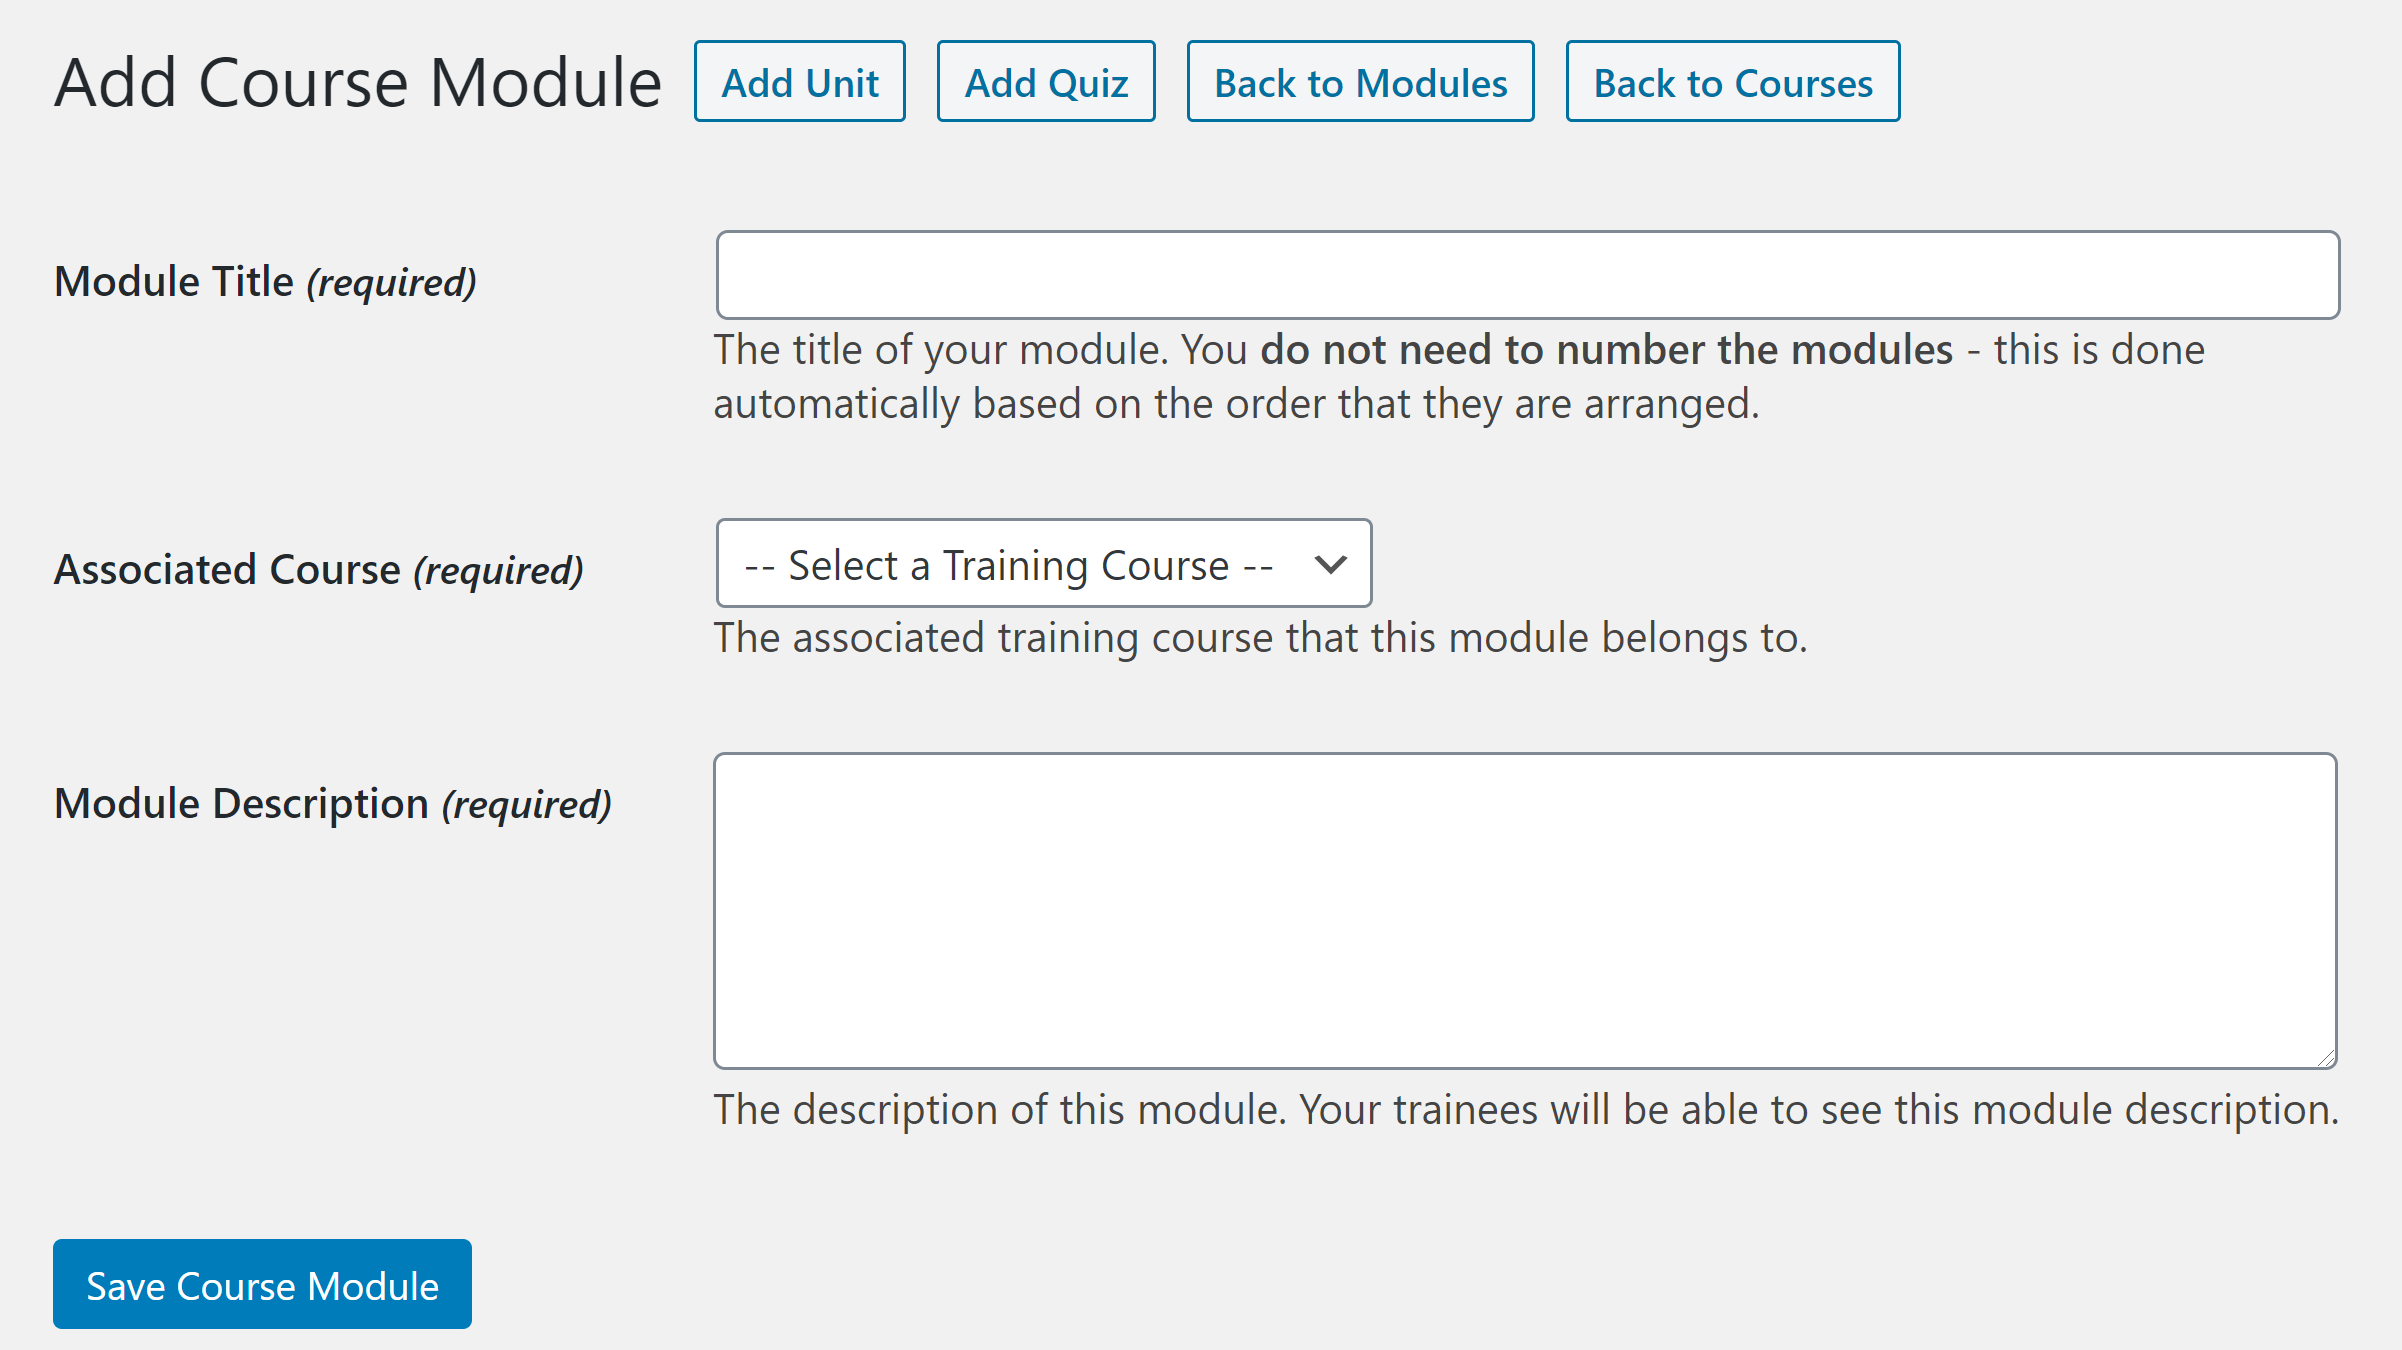
You’ll find buttons to further customize this module along the top of the page. If you choose ‘Add Unit’, this will take you to the unit editor; if you select ‘Add Quiz’, you’ll be taken to the quiz maker. I’ll talk a little more about those options in the next two sections.
Creating a Unit
One of the big things to consider in the debate between MemberPress vs WP Courseware is that WP Courseware offers a structured approach to course building. Courses are divided first into modules, then into units.
There are two ways to access the unit editor. If you’re working in the course builder, you can click the ‘Add Unit’ link in the description of any module, which will open a box version of the unit editor.
The second way to access the unit editor is to go to the ‘Units’ section of WP Courseware and click on the ‘Add New’ button at the top of the page.
This will take you to the full unit builder, which is essentially the regular WordPress page builder. If you scroll down in the sidebar, though, you’ll notice some additional options:
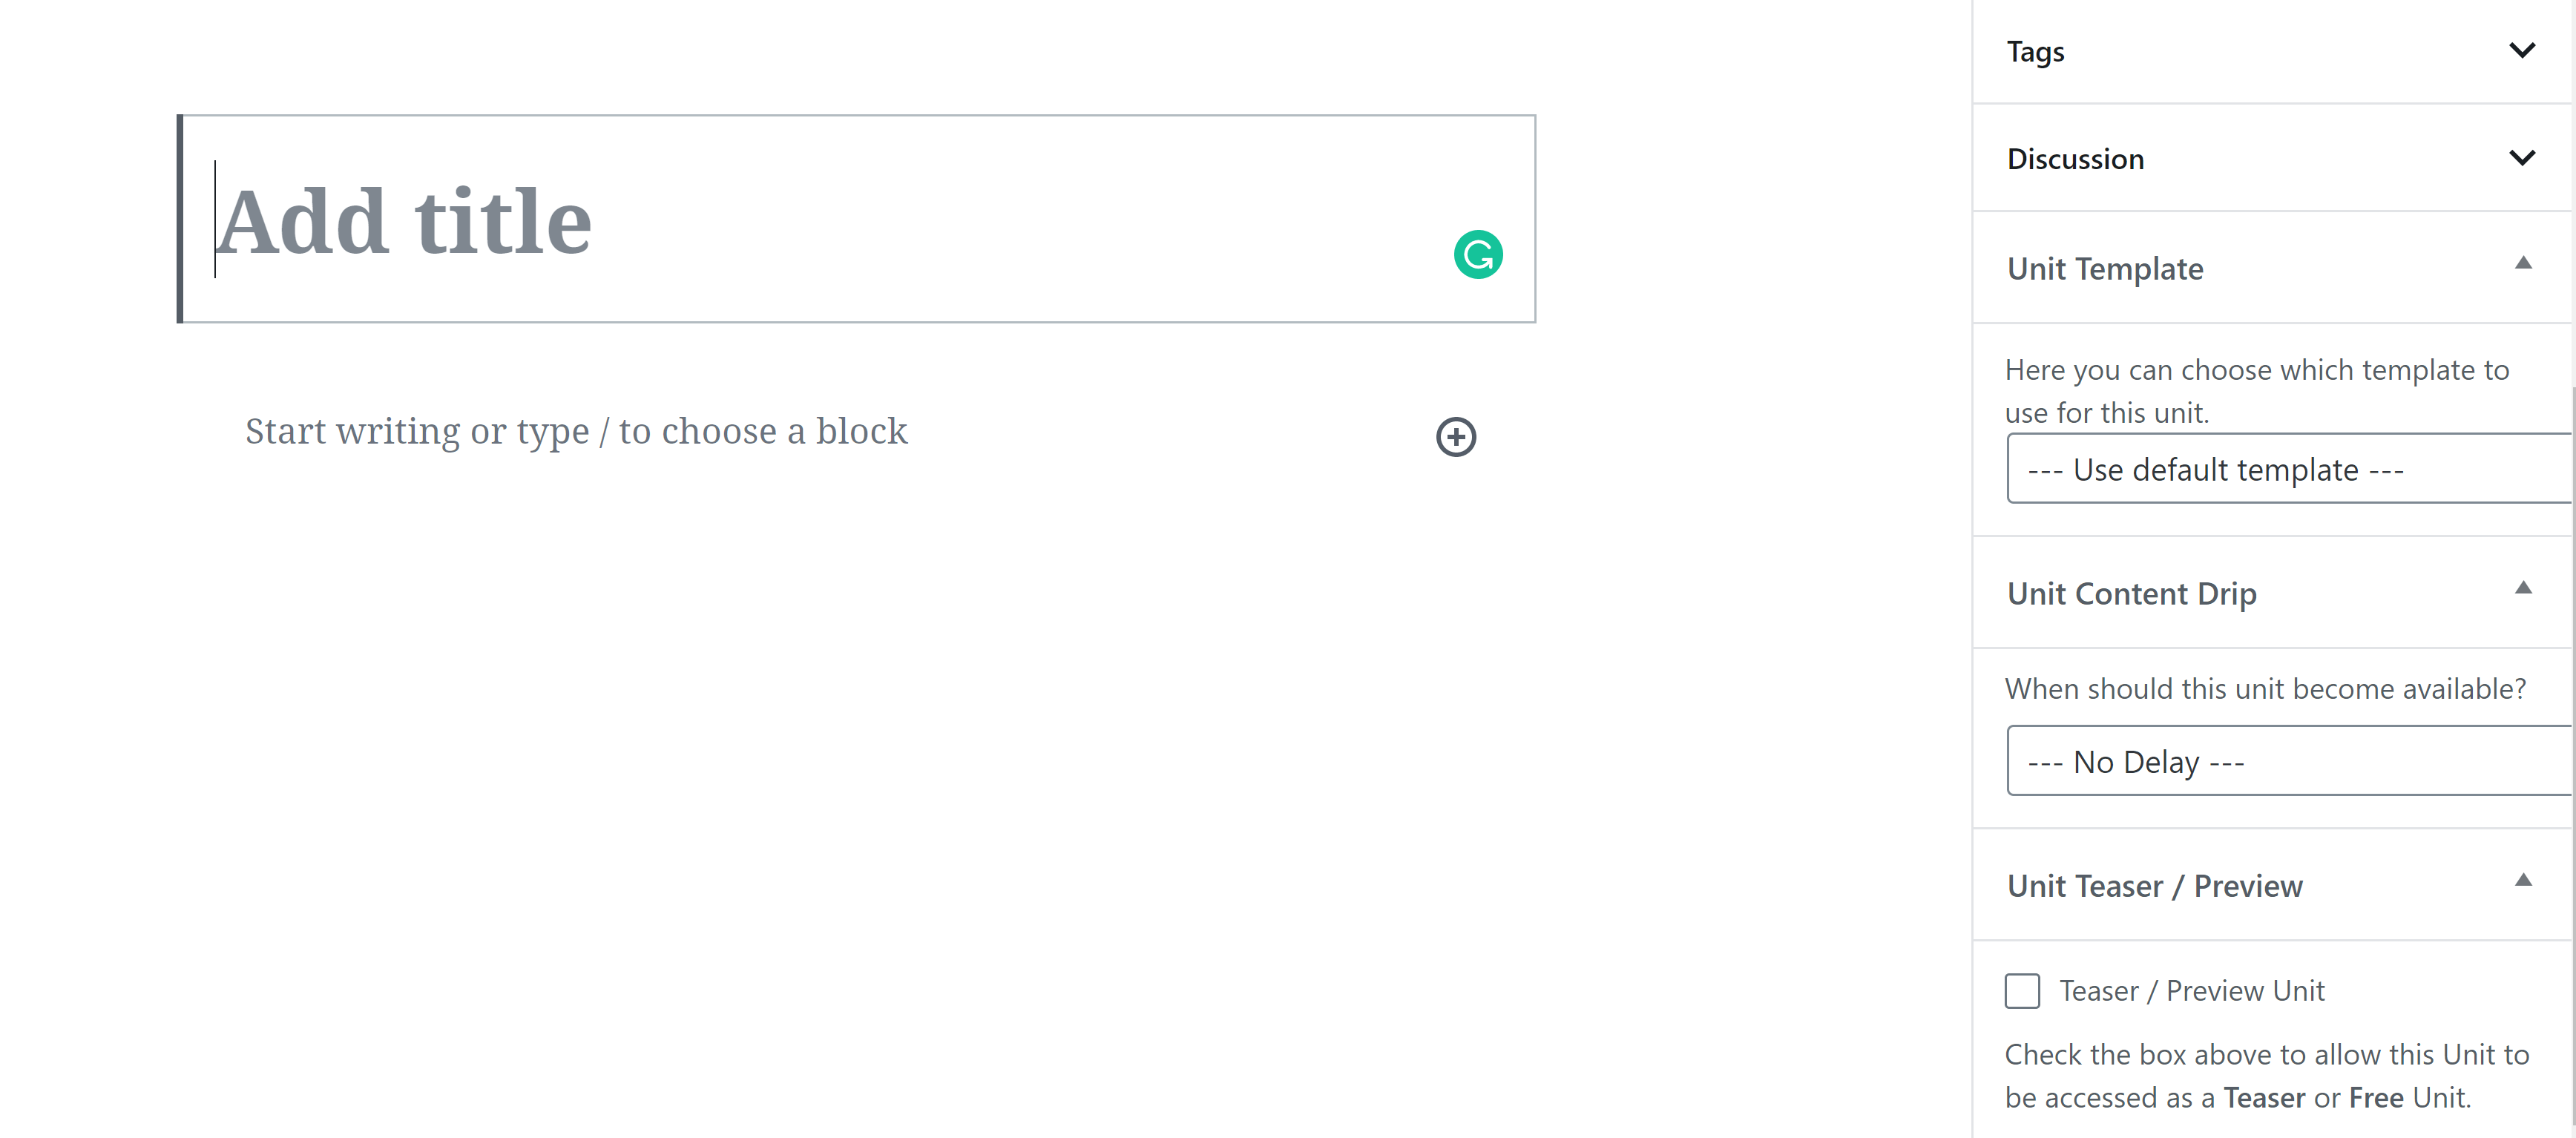
Unit templates can be used to give all of the units in a specific course a similar look.
Content dripping allows you to choose when this unit becomes available. There are three options:
- No delay.
- On a specified date.
- At a specified interval after the course’s start date.
Finally, you can choose to make this unit a teaser/preview for the course. This will make the whole unit available for free; there is currently no way to create a teaser for a specific unit.
Note: If you use the full unit builder, you can add units to your course by going to the course editor and clicking the ‘Add Unit’ link for the appropriate module.
Creating a Quiz
Another great thing about WP Courseware is the quiz builder. You can access this by clicking ‘Add Quiz’ in the module editor. This will take you to a page where you can give your quiz a name and description. You can also choose what type of quiz this will be.

Select a quiz type and save using the button at the bottom of the page. This will create the quiz and unlock the ability to add questions. You can add as many questions as you want.
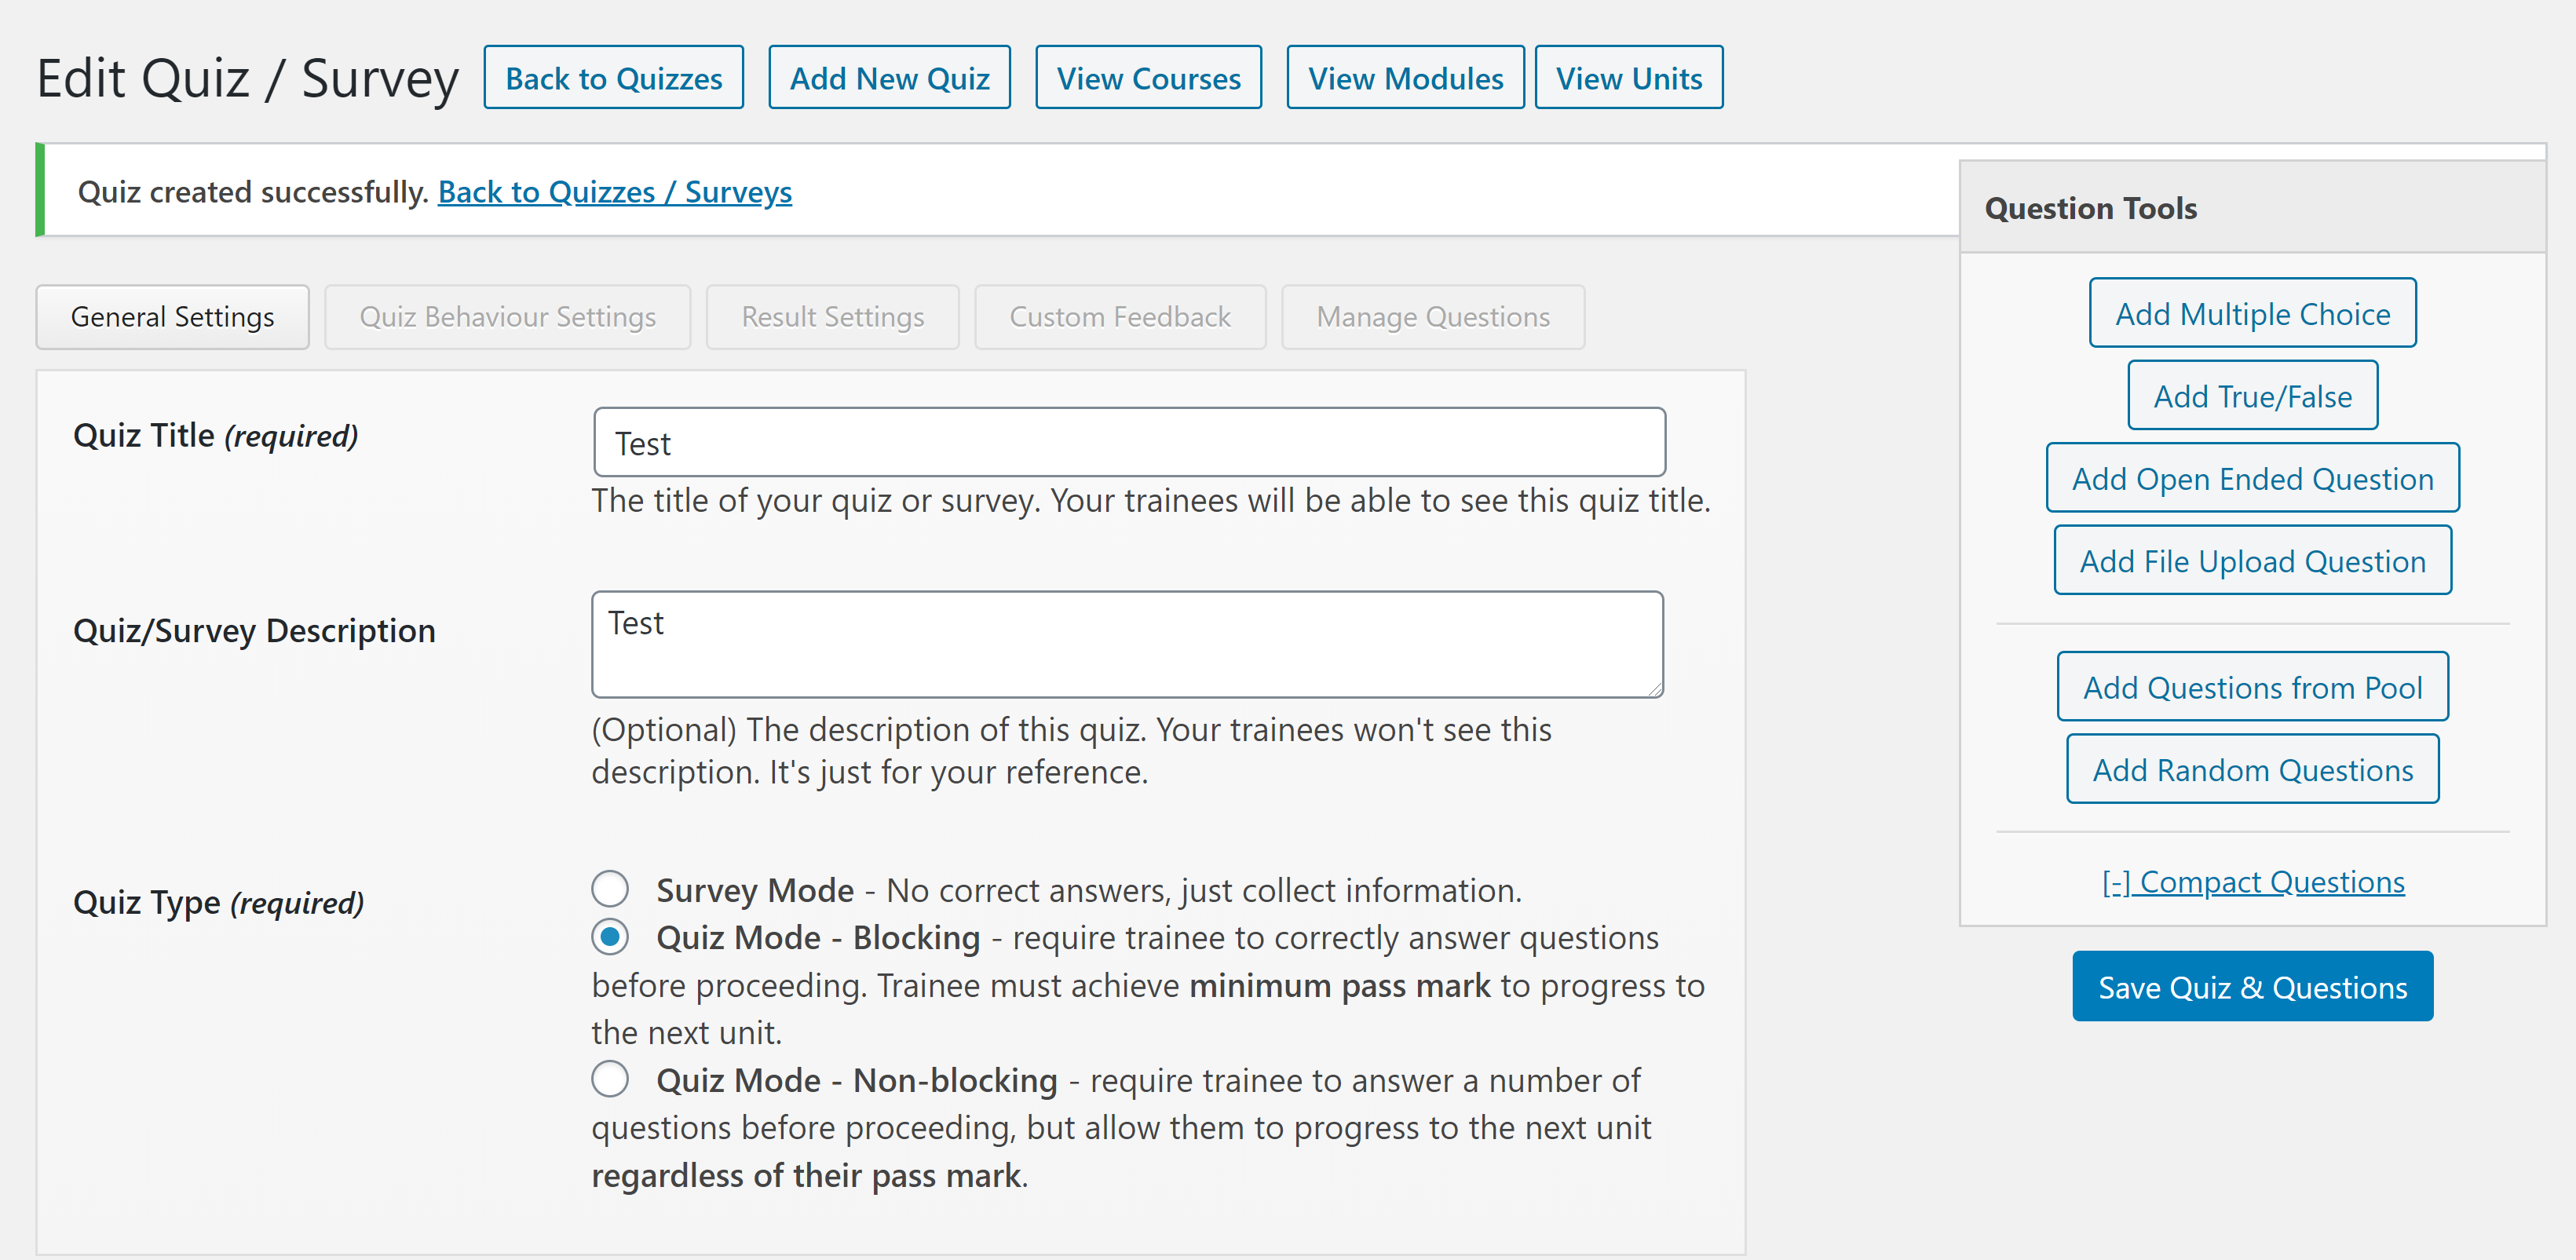
The quiz editor also allows you to customize a variety of settings:
- Quiz behavior settings: The mark required to pass, number of attempts allowed and time limit to complete the quiz. You can also toggle pagination on or off here.
- Results settings: This allows you to choose whether or not students see their results. You can also allow them to download their results.
- Custom feedback messages: These are optional custom messages you can leave for students if they give certain answers.
- Question management: This is where you can change the order of your questions.
When you’re happy with all of your questions and settings, click the ‘Save All Quiz Settings & Questions’ button again.
You can also go to the ‘Quizzes’ area and choose to create a new quiz from there, but there doesn’t seem to be a way to add separately created quizzes to the appropriate modules.
Integrations
WP Courseware offers a variety of integrations, including integrations with WooCommerce, MemberPress and several other membership plugins. These take the form of plugins that can be accessed through the regular WordPress.org database.
WP Courseware is also compatible with a variety of community plugins, such as BuddyPress, bbPress and WP Live Chat Support.
The notable lack here is email marketing integrations. At this time, WP Courseware only integrates with ConvertKit, but it does have built-in email automation. You can also use WP Courseware to email students directly from the classroom associated with their course.
Pricing
The Teacher plan, which I’ve looked at here, is available for $124.50 a year (normally $249 a year). WP Courseware also offers two other plans:
- Professor: Available for $149.50 a year (normally $299 a year), it allows you to install WP Courseware on up to ten sites.
- Guru: Available for $199.50 a year (normally $399 a year), it allows you to install WP Courseware on up to 25 sites.
Overall Thoughts on WP Courseware
The feature list for WP Courseware may look small, but this plugin offers impressive functionality. The course builder is, while not always intuitive, accessible to people with no coding experience. I found using this plugin to be an overall positive experience, and I also found the documentation quite useful — including the resources on how to build a successful course.
The main area where I found WP Courseware lacking was the community aspect — the ‘Classrooms’ are just databases of students, and there are no built-in forums, live chats or other forms of community. However, WP Courseware is compatible with plugins that accomplish all of these goals.
WP Courseware also lacks a good analytics overview for all programs, although it does track students’ progress through individual courses.
MemberPress vs WP Courseware: Similarities
- Paid subscriptions.
- Content dripping.
- Compatibility with bbPress and other plugins.
- Unlimited, highly customizable coupons.
- No experience with code required.
- Compatibility with PayPal Standard and Stripe.
- Lack of built-in community options.
- Lack of form customization.
MemberPress vs WP Courseware: Differences
- There’s no course builder in MemberPress.
- MemberPress offers comprehensive analytics.
- WP Courseware does not offer membership programs.
- WP Courseware offers multiple site licenses with all plans.
- All WP Courseware features are available with the lowest plan.
MemberPress vs WP Courseware: How to choose the best plugin for you
MemberPress and WP Courseware are wildly different plugins — while they offer similar levels of quality, the functionality is quite different, meaning your decision should be based on your business needs:
- If you want to run a membership program that includes courses, choose MemberPress.
- If you want to build a business around online courses, choose WP Courseware.
You can even opt to use these plugins together. At $550 a year, the cost is quite reasonable for most businesses. However, if you’re a solopreneur with a limited budget, you may want to consider the more affordable WishList Member.
Used/using either of these two plugins? Thoughts?


All comments are held for moderation. We'll only publish comments that are on topic and adhere to our Commenting Policy.