
MemberMouse vs MemberPress: Which Is The Best Membership Plugin?
- By
- Last updated:
- Leave your thoughts
Membership programs are an excellent way to monetize content on your WordPress site. In this guide to MemberMouse vs MemberPress, I’ll examine two popular membership plugins to determine the best option.
MemberMouse provides a streamlined, pleasant experience for both you as a creator and your members. This plugin comes with several advanced content management features, including content dripping, flexible content protection and SmartTags.
MemberPress is a popular membership plugin that gained course-building functionality in 2020. It’s easy to use, and provides a wide range of options for selling memberships, subscriptions and courses.
To determine the best membership plugin, I’ll explore the following:
Table of Contents
By the end of this guide, you’ll know which plugin wins the debate of MemberMouse vs MemberPress.
What to Look for in a Membership Plugin
The features you’ll need in a membership plugin depend on the type of membership program you want to create. For example, if your main goal is to put your best content behind a paywall, you can use a simple plugin with basic content locking features. On the other hand, if you want to build a community of learners, you’ll want a plugin with tools for course building and community interaction.
Let’s take a look at some of the features you may want to consider:
Customizable Membership Levels
You want to be able to create unlimited membership levels with customized prices, descriptions and content permissions.
Content Dripping
This is the ability to release content to users on a specific schedule. For example, you might release lessons in a course every other Friday.
Member Dashboard
This is an area where members can view and change their personal information and membership level. Members may also be able to view and access the content available to them through this dashboard.
Community
A members-only community is a great way to enrich your membership program. Most membership plugins facilitate this through integrations with tools such as bbPress, but some provide built-in community options.
Customizable Checkout
Some membership plugins let you customize the checkout experience by changing the aesthetic, specifying the payment options you accept and even adding upsells to the process.
Advanced Sales Tools
The best membership plugins offer a variety of sales tools, including coupon creation and the ability to offer free trials. Some plugins may also offer things such as prorated memberships and gifting functionality.
Analytics
At the bare minimum, your membership plugin should offer real-time reporting on all transactions. Some plugins also let you view member activity — making it easy to figure out what content is most appealing to your members.
Integrations
The best membership plugins offer integration with a variety of tools for marketing and selling. Look for one that integrates with the tools you’re already using in your business.
Ease of Use
A membership plugin should make it easy to create, manage and sell memberships, all without the use of code. The interface should also integrate with existing WordPress technology to create a seamless, intuitive experience.
Support and Documentation
When you do run into problems with your membership plugin, the answers and/or help you need should be easy to find. The plugin you choose should offer a user manual, an extensive online knowledgebase and access to quality customer support. Many of the best membership plugins also offer video tutorials.
MemberMouse Review
Features
The following features are available with the Builder plan of MemberMouse:
- Unlimited members.
- Unlimited membership levels.
- Simple member import.
- Content dripping.
- Protected members area.
- Member dashboard with full membership management options.
- Personalization through SmartTags.
- Ability to protect content categories and custom post types.
- Flexible pricing options.
- Ability to create payment plans.
- Free/paid trial creation.
- Coupon code creation.
- Gifting functionality.
- One-click upsells.
- Automated Save-the-Sale messages.
- Customizable registration, checkout and login pages.
- Customizable welcome emails.
- Analytics.
- Basic ecommerce functionality for one-time purchases.
- Numerous integrations with payment systems, marketing tools and more than 2,000 apps through Zapier.
- Excellent documentation.
To learn more, check out the MemberMouse pricing page.
How MemberMouse Works
Set MemberMouse up on Your WordPress Site
The first thing I noticed when researching MemberMouse vs MemberPress was MemberMouse offered a 14-day free trial. This is easier to deal with than the typical money-back guarantee offered by other membership programs, because, if you don’t like the program, you can cancel your subscription within 14 days from your account settings, rather than having to send in a request.
You’ll be asked to enter your name, email and credit card information to get started. The sales process also includes an upsell, which is a great display of the plugin’s one-click upsell technology.

The ‘Thank You’ page will direct you to the Member Dashboard, where your plugin license and some instructions for getting started are displayed.
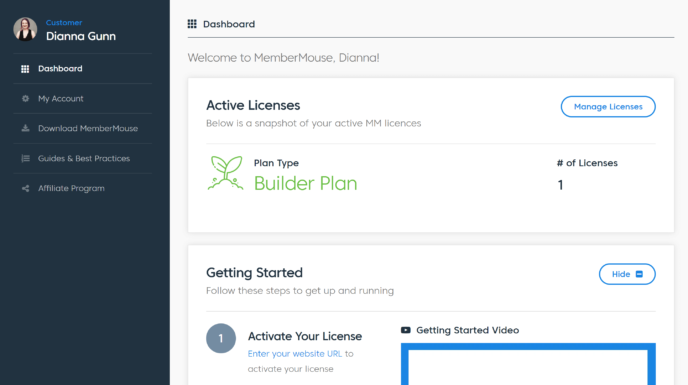
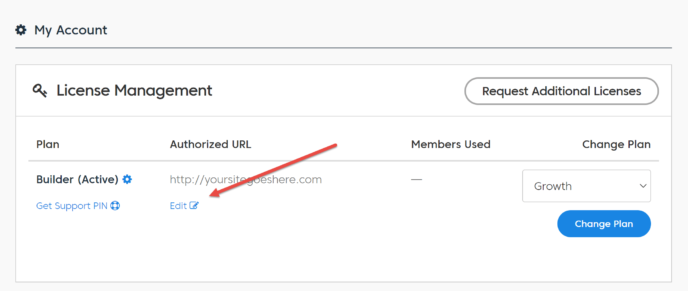
This will take you to a page where you can view your license, account and billing details. In the ‘License Management’ section, you’ll note a spot for the authorized URL. Click the ‘Edit’ link, click ‘Manage Licenses’, and then enter your site’s URL in the box that appears.
Next, click on the ‘Download MemberMouse’ link in the sidebar. You’ll be taken to a page where you can download the most recent version of the plugin. Click on the version number to receive the plugin as a .ZIP folder.
Once the plugin is downloaded, open your WordPress dashboard in another tab and go to ‘Plugins > Add New’. This will take you to a page where you can search popular plugins in the WordPress.org database. Press the ‘Upload Plugin’ button at the top, and drag and drop the ZIP folder into the box that appears. Click ‘Install Now’ for WordPress to unpack the plugin.
When the plugin is installed, click ‘Activate Plugin’. MemberMouse is now ready for configuration!
The MemberMouse Dashboard
Once the plugin is activated, click on the ‘MemberMouse’ link in your WordPress admin panel. This will take you to the MemberMouse dashboard, where you can view a snapshot of the most important statistics related to your membership program. You can also find quick links to important parts of the plugin and a series of training videos here.
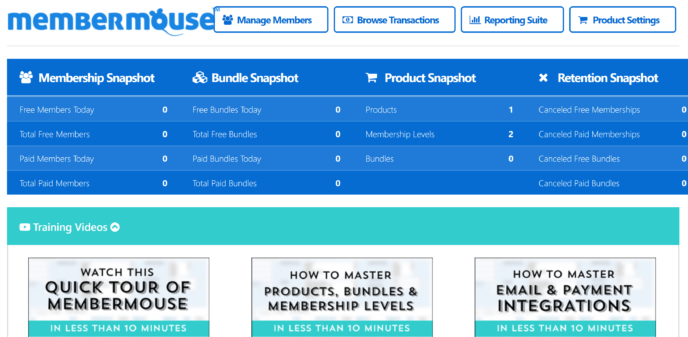
The bottom of the page also features a ‘Support Center’ area, where you can find links to the ‘Getting Started’ guide and other key resources.
Connect a Payment Method
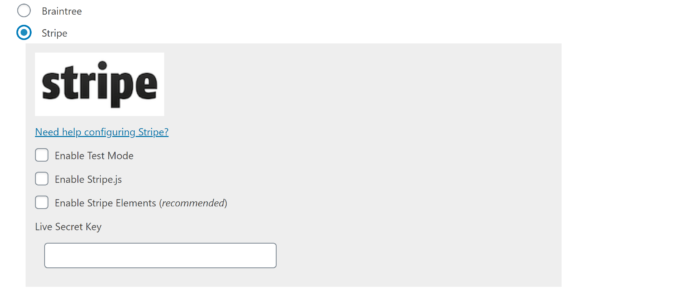
Next, head over to the ‘Payment Settings’ area of MemberMouse, and scroll down the page to see the full list of payment processing systems available. Note that you can use multiple payment systems, including both on-site and off-site systems.

When you select the payment method you want to set up, an area requiring further information will appear. From a quick exploration, most of these payment methods can be set up within a couple of minutes.
Create Your First Membership Level
Next, go to ‘Product Settings’, which is where you’ll be able to create a variety of deliverables:
- Products
- Membership levels
- Product bundles
- Coupons
- Content dripping schedule
This is where things get a bit confusing. To create a paid membership, you must create a product first. You can then assign membership levels, coupons and content dripping schedules to this product.
To get started, click ‘Create New Product’, which will open a box where you can name the product, give it a price and choose between one-time and recurring fees. You can also choose to create a free or paid trial.
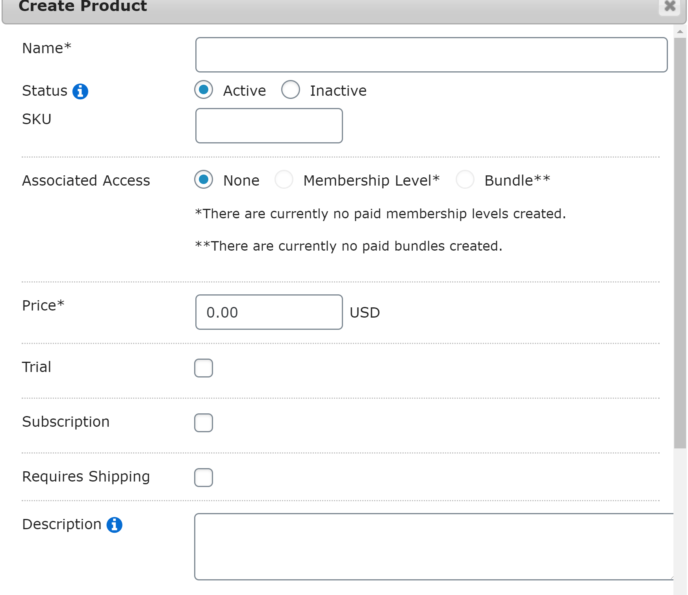
You’ll also find a ‘Commissions Profile’ area at the bottom of the page, where you can decide what amount of commission affiliates will get for selling this product. MemberMouse offers an extensive guide on integrating its software with affiliate management systems.
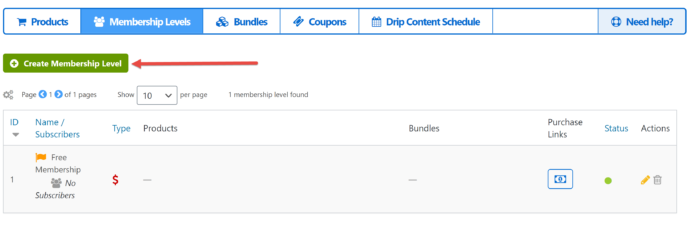
Once you’re satisfied with the product settings, click the ‘Membership Levels’ link along the top bar, which will take you to a page where you can view and manage existing membership levels. Press the green ‘Create Membership Level’ button.
This will open a box where you can edit the name, WordPress role (if any), membership type (free or paid) and the expiration time of the membership level. You can also edit the welcome email for new members here.
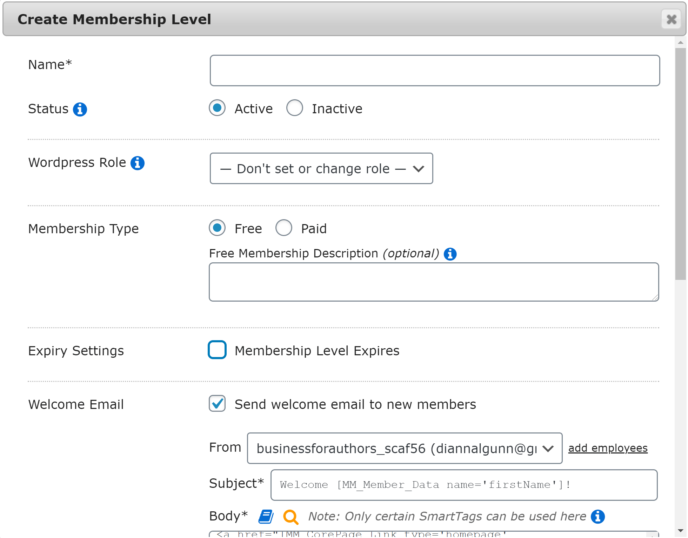
If you select ‘Paid’ for this membership, you’ll be asked to assign the membership to a product. You won’t be able to save your settings if there are no existing products, so make sure you do these steps in order!
Set up Content Permissions
One thing I noticed while setting up a membership level was the lack of options for content permissions. There was also no obvious place for content rules, as there is in the MemberPress dashboard.
A quick hunt through the MemberMouse knowledgebase revealed two ways to restrict content:
Restrict by category: If you have blog categories, an additional section for ‘Protected Categories’ will appear in the membership creation area. Since my test site didn’t have a blog set up, this didn’t appear.
Restrict individually: You can also restrict individual posts and pages in the WordPress editor. Simply scroll down the sidebar and click on the ‘Grant Access’ button. This will open a window where you can choose what membership levels or bundles can access this piece of content. If no access permissions are specified, MemberMouse will assume the content is part of your public site.
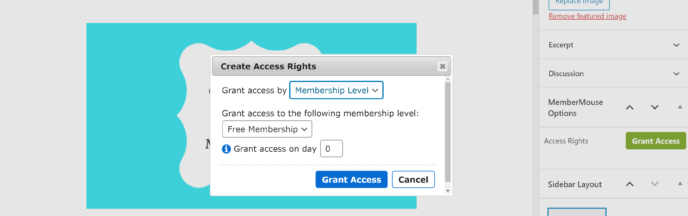
You’ll also note a checkbox allowing you to grant access to the content on a specific day. This makes it easy to create a content-dripping schedule as you build content.
Reporting Suite
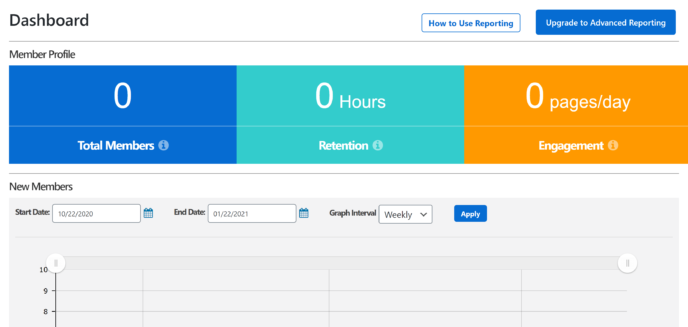
To access your MemberMouse analytics, click the ‘Reporting Suite’ link in your WordPress admin panel. This will take you to the membership analytics dashboard, which is organized in two main sections:
- Member Profile: This section tracks member statistics, such as signup numbers and engagement rates. A line graph displays membership growth over time.
- Revenue: This area tracks your total, daily and monthly revenue.
If you spring for an Advanced plan, you’ll gain access to more advanced analytics.
Checkout Settings
One of the most notable factors in the debate of MemberMouse vs MemberPress is the ability to fully customize the MemberMouse checkout process. You can do this by going to the ‘Checkout Settings’ page of MemberMouse.
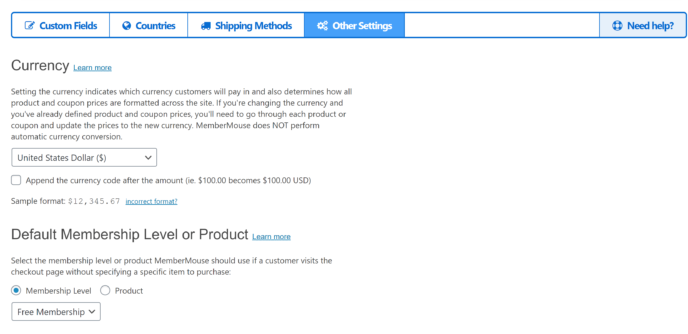
This area is divided into four sections:
- Custom fields: These are fully customizable information boxes that can be added to both the checkout page and the ‘My Account’ page. You can use these to gather more information about your members. For example, you may want to ask how they heard about your program.
- Countries: You can use this area to restrict sales to certain countries.
- Shipping methods: If physical products are involved in your membership program, you can specify how they’ll be shipped here.
- Other settings: This is where you can select the currency you charge in, enable/disable prorated subscriptions, customize the checkout processing message and more.
You can also access the checkout page itself in the WordPress editor. This lets you customize the page’s appearance and do things such as add a one-click upsell.
Integrations
MemberMouse offers built-in integration with a variety of popular tools. This includes a variety of payment processing tools, such as PayPal, Stripe, Authorize.net, ClickBank and Braintree. This is a notable factor, as MemberPress only offers compatibility with PayPal and Stripe on its most affordable plan.
MemberMouse is also directly compatible with numerous email marketing tools, including popular options such as MailChimp and GetResponse. To connect with other marketing tools, you can connect MemberMouse to Zapier.
Users of the Divi theme can also take advantage of the recently released Divi layout pack for MemberMouse.
Pricing
MemberMouse offers three pricing plans:
- Builder: Available for $24.08 a month when purchased annually. Includes all of the features discussed in this article.
- Advanced: Available for $65.58 a month when purchased annually. Comes with all features in the Builder plan, plus advanced reporting, social login, advanced billing features and employee access control.
- Premium: Available for $165.17 a month when purchased annually. Comes with all features in the Advanced plan, plus Sticky.io integration and advanced support.
You can see more details on the MemberMouse pricing page.
Overall Thoughts
MemberMouse is a high-quality membership plugin with several advanced features. You can use it to create a multi-tiered membership program based on either digital or physical products — no code required. The ability to enable prorated upgrades with a single click is particularly impressive.
However, MemberMouse is far from the easiest membership plugin to use: The membership level creation process is convoluted, forcing you to create a product first and a membership second; content dripping must be set up on individual content pages, rather than laid out in the membership level; and, to make the most of features such as the one-click upsell, you’ll need to understand basic use of shortcodes.
All in all, MemberMouse is a good plugin, but it isn’t very accessible, so you should only consider it if you adapt easily to new software or you’re willing to spend a lot of time wading through the documentation.
MemberPress Review

Features
The Basic plan of MemberPress comes with the following features:
- Easy setup.
- Unlimited membership levels.
- Subscription management.
- Code-free course builder.
- Content dripping.
- Content expiration.
- Fully customizable content access rules.
- Fully customizable pricing pages.
- Coupon creation.
- Detailed reporting.
- Easy connection to PayPal Standard, PayPal Express Checkout and Stripe.
- Integrations with a variety of popular ecommerce and marketing tools.
- Comprehensive documentation.
For more information, check out the MemberPress pricing page.
How to Use MemberPress
Set MemberPress up on Your WordPress Site
To get started with MemberPress, purchase a plan and enter your email address. When the payment is complete, you’ll be directed to answer some questions about your business. These will be used to fill in your MemberPress account information.

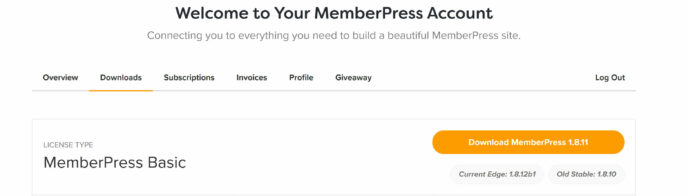
MemberPress will then send you to your account dashboard. From here, click ‘Downloads’.
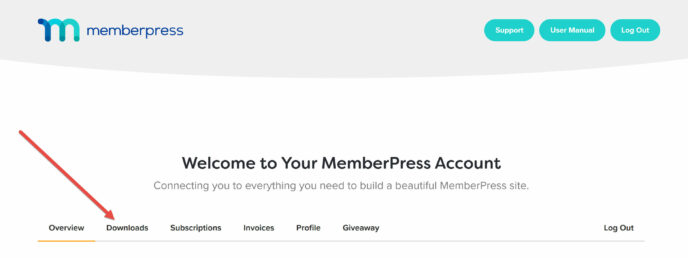
On the next page, click on the ‘Download MemberPress’ button to receive your plugin as a .ZIP folder.
Next, open your WordPress dashboard in a new tab and go to ‘Plugins > Add New’. Click on the ‘Upload Plugin’ button to reveal an area where you can drag and drop the MemberPress ZIP folder.
Once the plugin is unpacked, click ‘Activate Now’. MemberPress will now be accessible in your admin menu.
Finally, go to ‘MemberPress > Settings’ and enter your API key into the box provided. You can find this in your MemberPress account dashboard or in your purchase confirmation email.
Connect to a Payment Processor
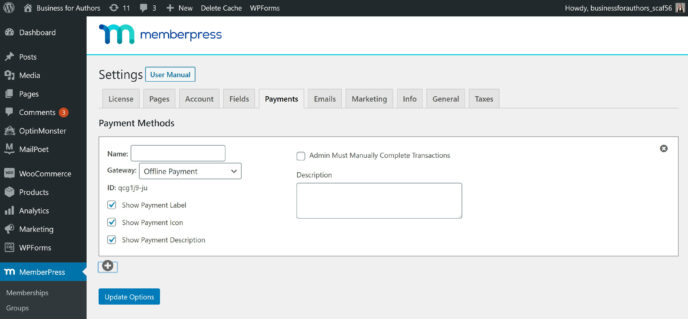
While you’re in the settings area, navigate to the ‘Payments’ tab and click the gray ‘+’ button.
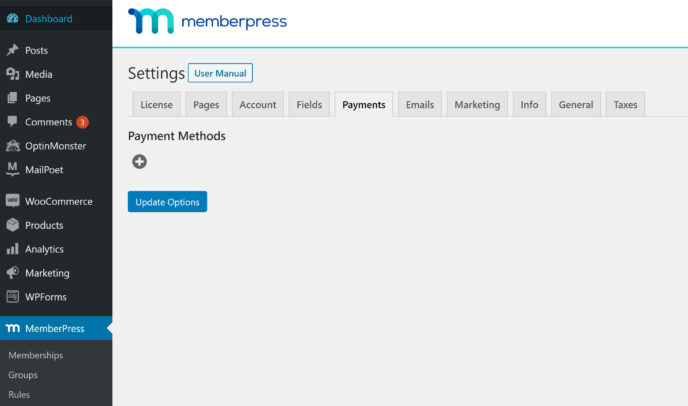
MemberPress will then prompt you to select a payment method and enter the relevant details. You can choose to accept payments through PayPal, Stripe or offline payment, and you can have multiple payment gateways connected at one time.
Create a Membership Level
Next, head to the ‘Memberships’ area of MemberPress and click the ‘Add New’ button at the top of the page. This will open the membership editor, which looks a lot like the WordPress Classic Editor:
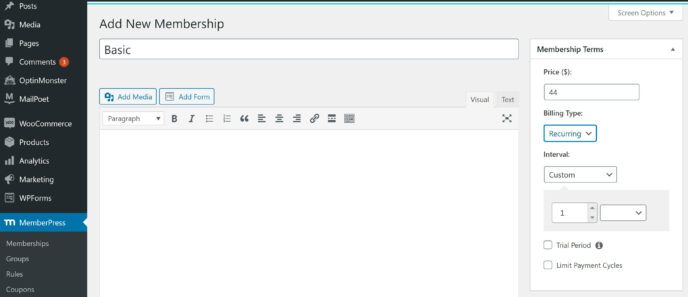
Here, you can enter the name of the membership level and give it a description, which can be formatted using WordPress’s rich text formatting.
This is also where we find the first notable advantage MemberPress has in the debate of MemberMouse vs MemberPress: The pricing can be customized right here, in the sidebar of the membership editor — including the ability to set up a free trial period.
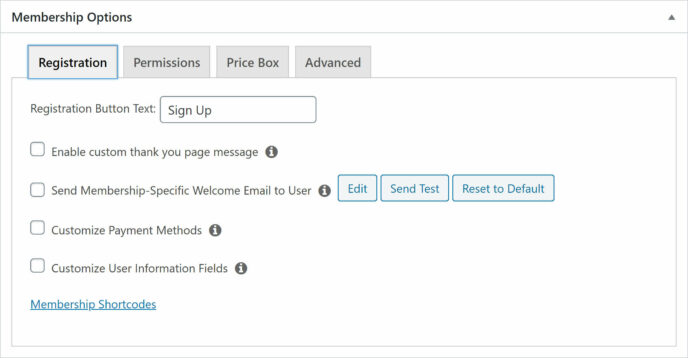
Scroll down to find the ‘Membership Options’ area, which is where you can customize a variety of settings, including payment methods, information required from users and where people are sent when they sign up for this membership. You’ll also be able to customize the location and appearance of the price box.
Create Content Rules
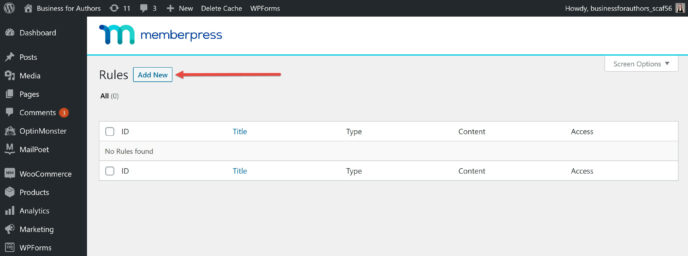
Now it’s time to establish what content each membership level has access to. The main way to do this is to go to the ‘Rules’ area of MemberPress and click the ‘Add New’ button at the top of the page.
You’ll be directed to a page where you can choose content to protect with this rule, and you can select individual posts and pages or content categories. Rules can be created per member, as well as for membership levels.
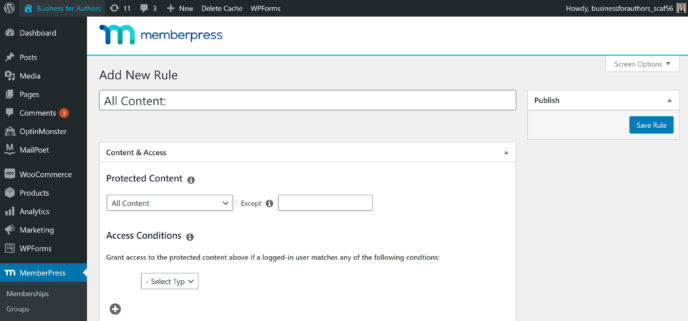
This is also where you can set content dripping and expiration dates.
Analytics
MemberPress offers real time reporting on signups, engagement rates, membership cancellations and revenue. You can access this in the ‘Reporting’ area of MemberPress. The most important numbers are displayed in a row of boxes along the top of the screen:
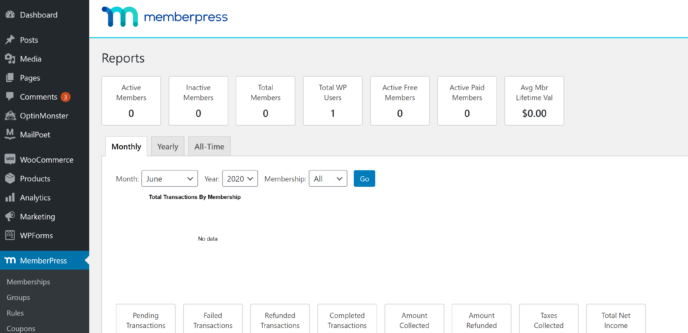
Your data is also displayed in a series of graphs, letting you view engagement patterns over time.
Add-ons and Integrations
MemberPress integrates with a variety of popular tools for marketing and community building — some of the most notable are GetResponse, ConvertKit and Help Scout.
MemberPress also offers integration with page builders, such as Beaver Builder, Divi and Elementor.
Last, but certainly not least, MemberPress offers several proprietary add-ons to increase the plugin’s functionality. Some of the features you can add this way include the ability to offer downloadable files and a PDF invoice creator; others, such as the MemberPress suite of developer tools, are only available on higher-tier plans.
Pricing
MemberPress offers three pricing options:
- Basic: Available for $149 a year (normally $249 a year), this is the plan I covered in this article. It includes access to all core features of the plugin for use on one site, plus access to more than ten add-ons. You’ll also get a three-month free trial for both OptinMonster and TrustPulse.
- Plus: Available for $249 a year (normally $399 a year), this plan includes everything from the Basic plan for use on up to two sites. You’ll also gain the ability to connect with Authorize.net, access to additional integrations and add-ons, and the ability to sell corporate accounts.
- Pro: Available for $349 a year (normally $549 a year), this plan includes everything from the Plus plan for use on up to five sites. You’ll also gain access to exclusive pro add-ons and the Affiliate Royale plugin.
Pricing is a big factor in the debate of MemberMouse vs MemberPress, since the most affordable MemberMouse plan is $288.96 a year — almost twice what you’ll pay for MemberPress.
To learn more about the MemberPress plans, check out the MemberPress pricing page.
Overall Thoughts
MemberPress is an excellent membership plugin with a streamlined setup process. You can customize most aspects of the user experience — including several of the emails users receive — with no knowledge of code. In fact, your understanding of tech in general doesn’t need to be extensive for you to work well with MemberPress.
The other advantage MemberPress has is the visual course builder. While I haven’t dived into that here, the course builder is similar to the rest of the plugin in terms of both quality and ease of use.
All in all, MemberPress is both excellent and accessible to the average WordPress user.
MemberMouse vs MemberPress: Similarities
Both plugins offer the following features:
- Unlimited membership level creation.
- The ability to create a free/paid trial.
- Content restriction settings.
- Content dripping.
- Subscription management.
- Coupon creation.
- Customizable pricing pages and member emails.
- Integration with a variety of email marketing tools.
- Integration with certain page builders/themes, such as Divi.
MemberMouse vs MemberPress: Differences
- MemberMouse offers access to a greater number of payment systems.
- MemberPress includes a built-in visual course builder.
- MemberMouse comes with the ability to create physical and digital products for one-time sale.
- MemberPress offers direct integration with a wider number of tools.
- MemberMouse allows you to fully optimize the sales process with shortcodes for things such as one-click upsells.
- MemberPress is, on the whole, much easier to use.
The Verdict
While I enjoyed testing both of these plugins, in the end, MemberPress is the clear winner.
The MemberPress plugin offers three main benefits over MemberMouse:
- Ease of use.
- Access to the visual course builder.
- Affordability (one year of MemberPress starts at $149, whereas one year of MemberMouse starts at $288.96).
The advanced ecommerce features offered by MemberMouse are great, but, for most users, they’re not enough to make MemberMouse the superior plugin.
Used/using either of these two membership plugins? Thoughts on each?


All comments are held for moderation. We'll only publish comments that are on topic and adhere to our Commenting Policy.