
MemberMouse Review – A Worthy WordPress Membership Plugin?
- By
- Last updated:
- Leave your thoughts
Membership websites are one of the most profitable ways of making money online.
They can be used to sell content, digital products, online services and more. You can charge customers a one-off fee for their membership, but it’s common to use a subscription model, and, to incentivize signups, content and products can be restricted to members.
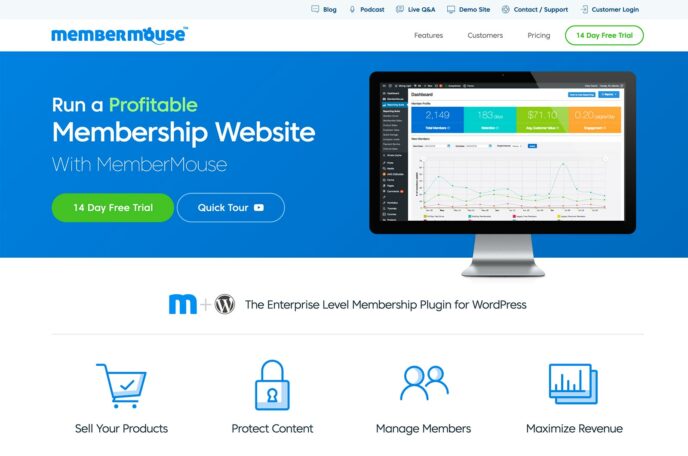
One of the best solutions for building a membership website with WordPress is MemberMouse. Retailing from $29 a month, MemberMouse gives you full control over what people can view on your website, and provides an abundance of marketing tools to increase your monthly income.
In this article, I’ll be showing you how this WordPress plugin works.
Table of Contents
What Can MemberMouse Do?
MemberMouse can be installed on any WordPress website.
There are standalone membership applications available online, but WordPress is the perfect platform to build a membership website, as you gain access to tens of thousands of themes and plugins.
Themes and plugins greatly extend the functionality of your website, simplify the process of styling your website design and make it easier to publish content.
One of the key features of MemberMouse is the ability to protect any post or page on your website. You can create multiple tiers of memberships and restrict access to your content to specific member groups. You can also sell additional access to members or non-members on an á la carte basis, as in sales of multiple courses, for example.
Signup rates can be improved by offering a free membership, which is a good marketing technique, as you can grow your email list and encourage members to sign up to one of your plans using upsells, downsells and cross-sells. Split testing different price points will help you find the optimal setup for maximum profits, and you can promote your service using trials and coupons.
If you’re selling memberships on a monthly basis, you may want to consider drip-feeding content to customers. This prevents members from consuming all of your content in a short space of time, and reduces the number of cancellations.
MemberMouse also stops the sharing of accounts. Accounts can be automatically locked if the software detects that multiple people are accessing content from one account.
The beauty of MemberMouse is that most administrative tasks are automated.
Members can log in to their account and update their credit card, upgrade to a higher-tiered plan or cancel their subscription, saving you from processing these queries manually via email.
Everything is tracked too: The dashboard allows you to view sales, average customer value, engagement and more.

Six popular email marketing services are supported by MemberMouse: MailChimp, GetResponse, AWeber, Drip, ActiveCampaign, and iContact. There’s also support for eight payment services: PayPal, Stripe, Braintree, Sticky.io, Authorize.net ARB and CIM, ClickBank and CoinBase.
Developers will love how flexible MemberMouse is: You can sync databases and call custom scripts using API; core functionality can be modified using hooks and filters; and the layouts are customisable too. MemberMouse’s shortcodes can also be inserted into your posts or pages, or directly into templates using PHP code.
It can be difficult to categorise a product such as MemberMouse because it can be used in many different ways.
For example, Chris Palmer, of Angle of Attack, offers flight simulator training videos to people who want to learn how to fly.
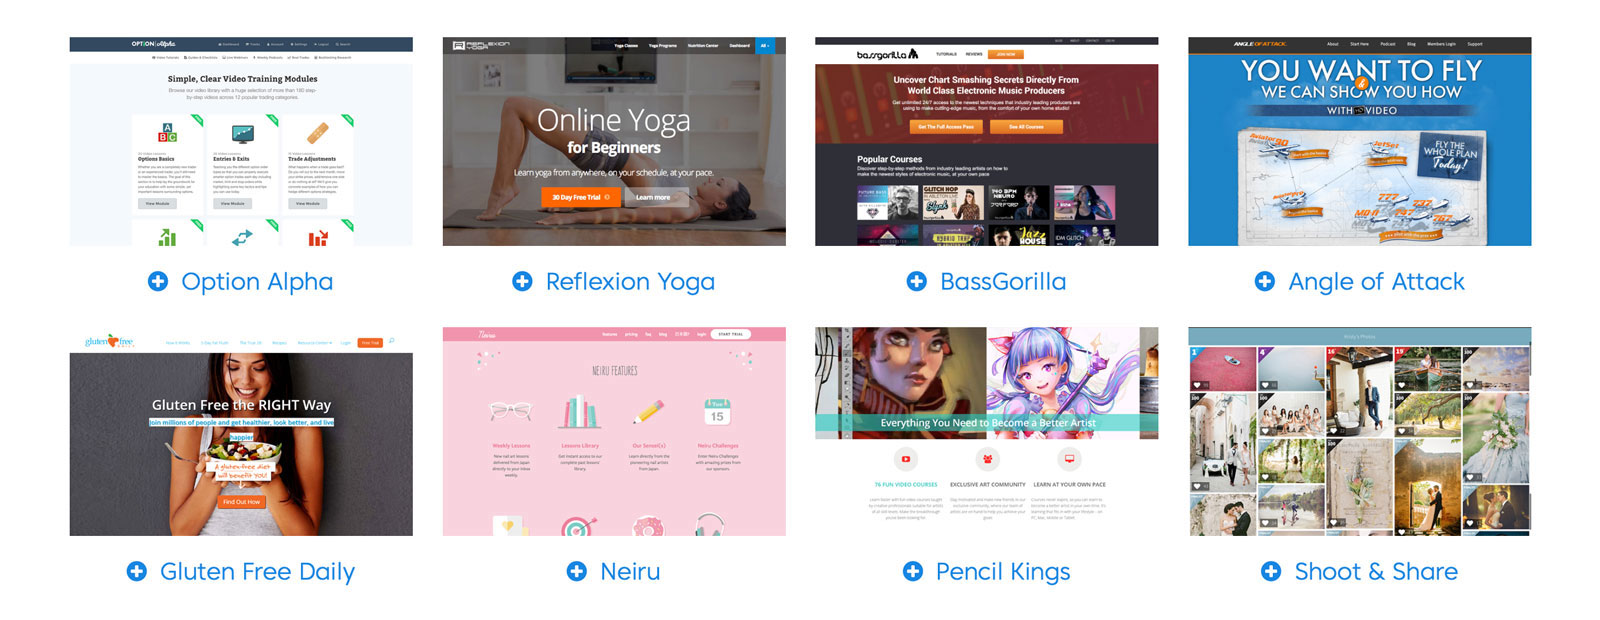
For inspiration on how you can use the software, and to see how others are marketing their membership offerings, take a look at other websites that have been built using MemberMouse.
For example, PaleoPlan sells Paleo meal plans on a subscription basis. They offer a 14-day trial to allow potential customers to test their service, and their premium plans have a 100% money-back guarantee.
After their trial has finished, customers can choose to sign up as a member by paying $9.99 a month, $49 every six months or $89 a year.

You should know that building a membership website requires a lot of hard-work, but MemberMouse gives you all of the tools you need to create something profitable.
Let’s take a closer look at how you can use MemberMouse to do this.
The MemberMouse Customer Dashboard
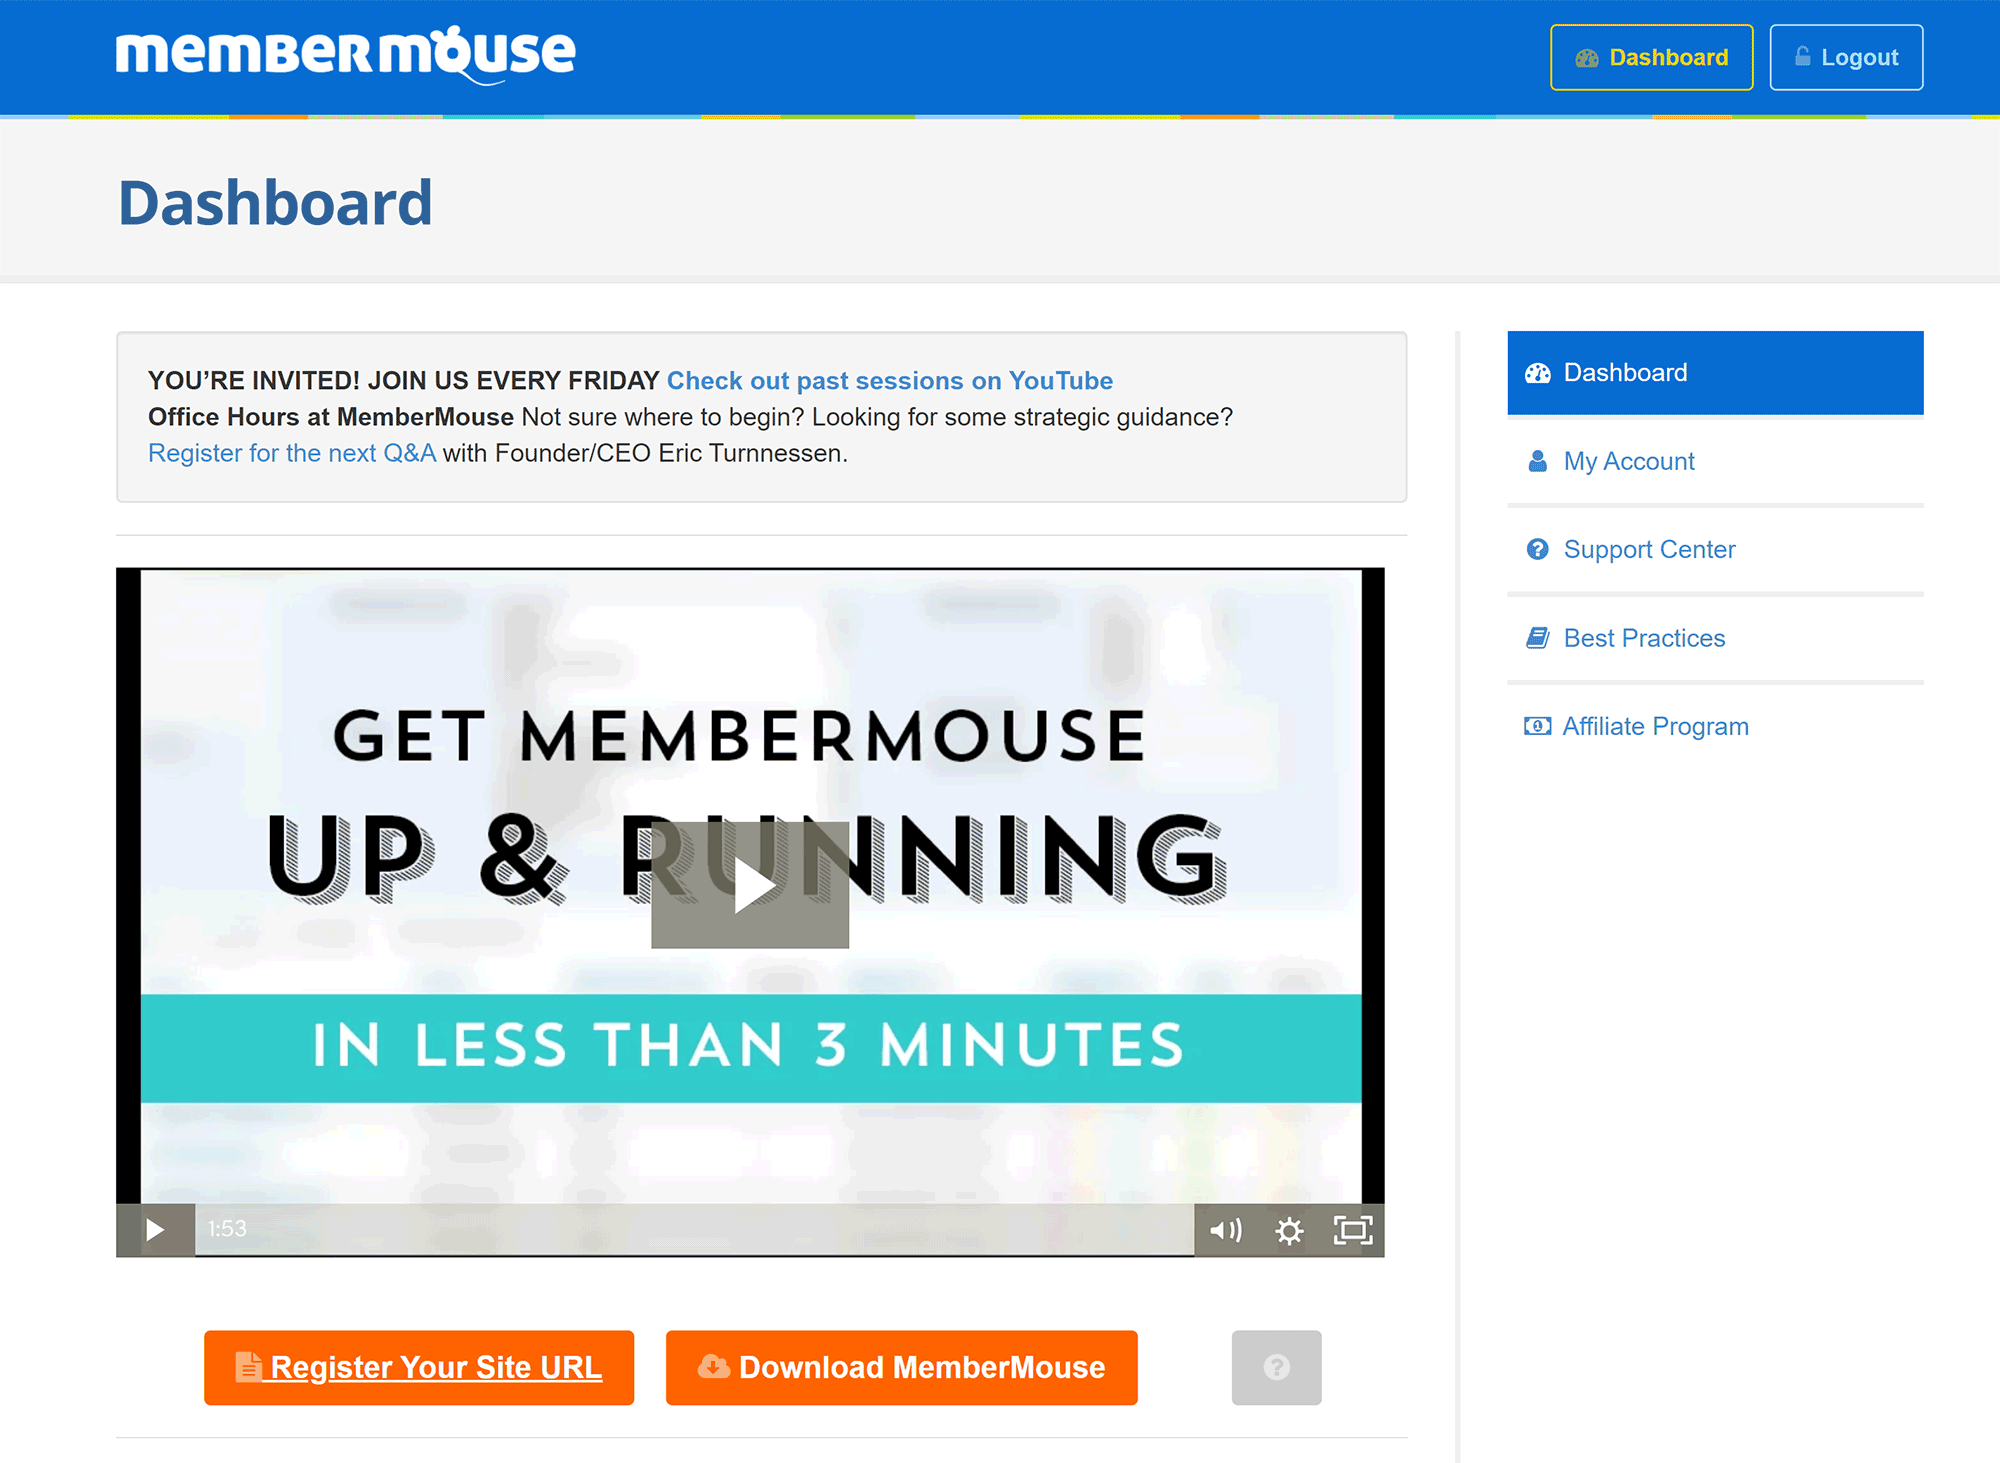
Once you’ve purchased MemberMouse, you can access the MemberMouse.com dashboard.
A two-minute ‘getting started’ video is displayed in the heart of the page, while underneath you’ll find links to register your website and download the MemberMouse WordPress plugin.
At the right-hand side of the page is a navigation menu that shows links to your account, the support area and best practices.
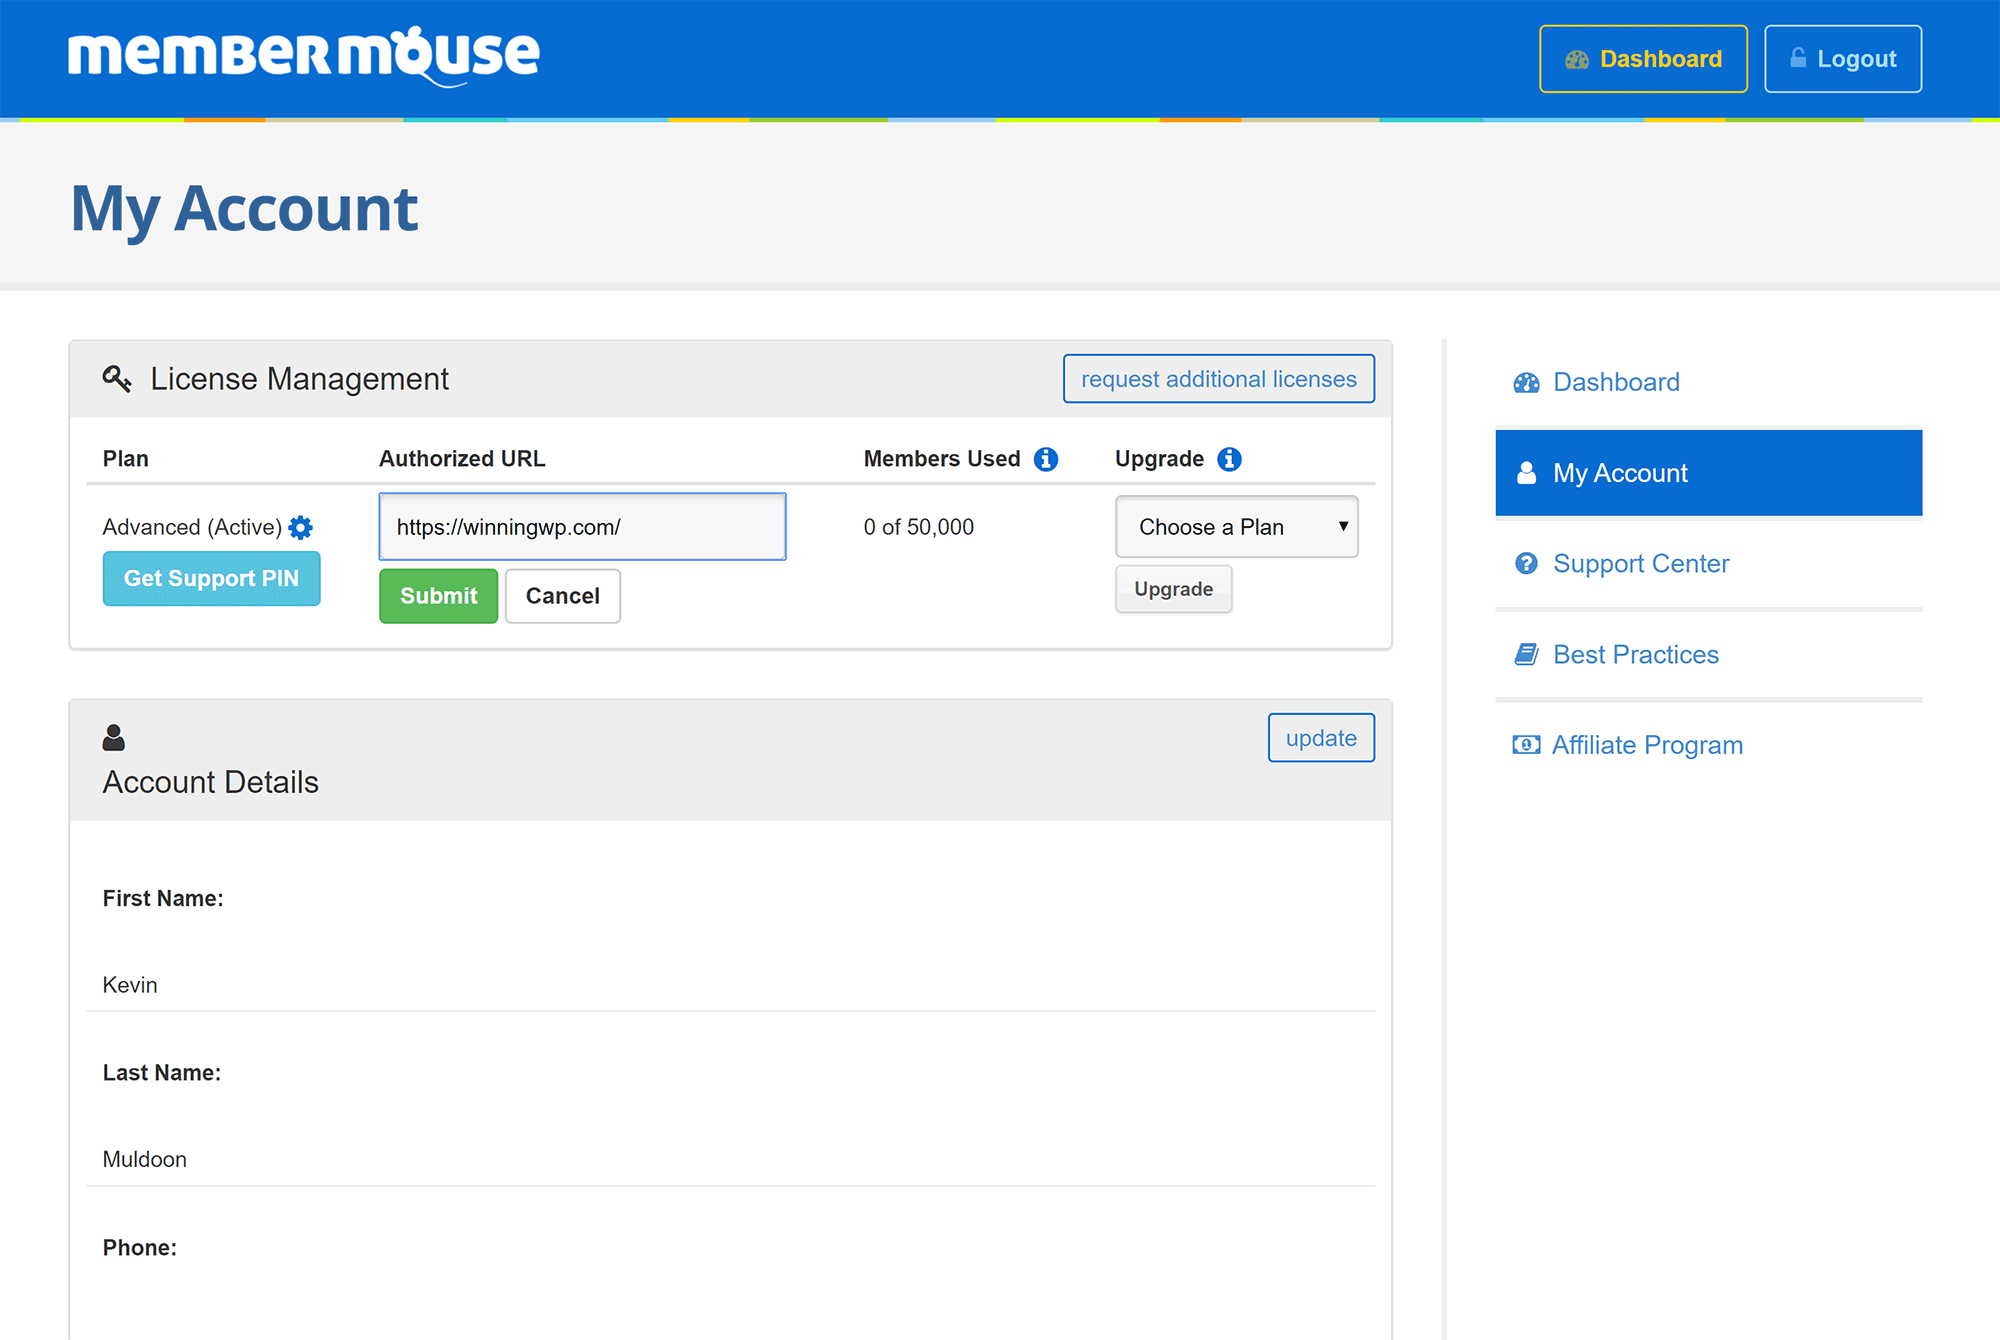
Registering the URL on which you’ll be using MemberMouse isn’t optional. If you don’t enter the URL of your WordPress website into your account page, you’ll see a fatal error when you attempt to activate the MemberMouse plugin.
The support area has an extensive knowledgebase and a community forum, and MemberMouse customers can also open support tickets here.
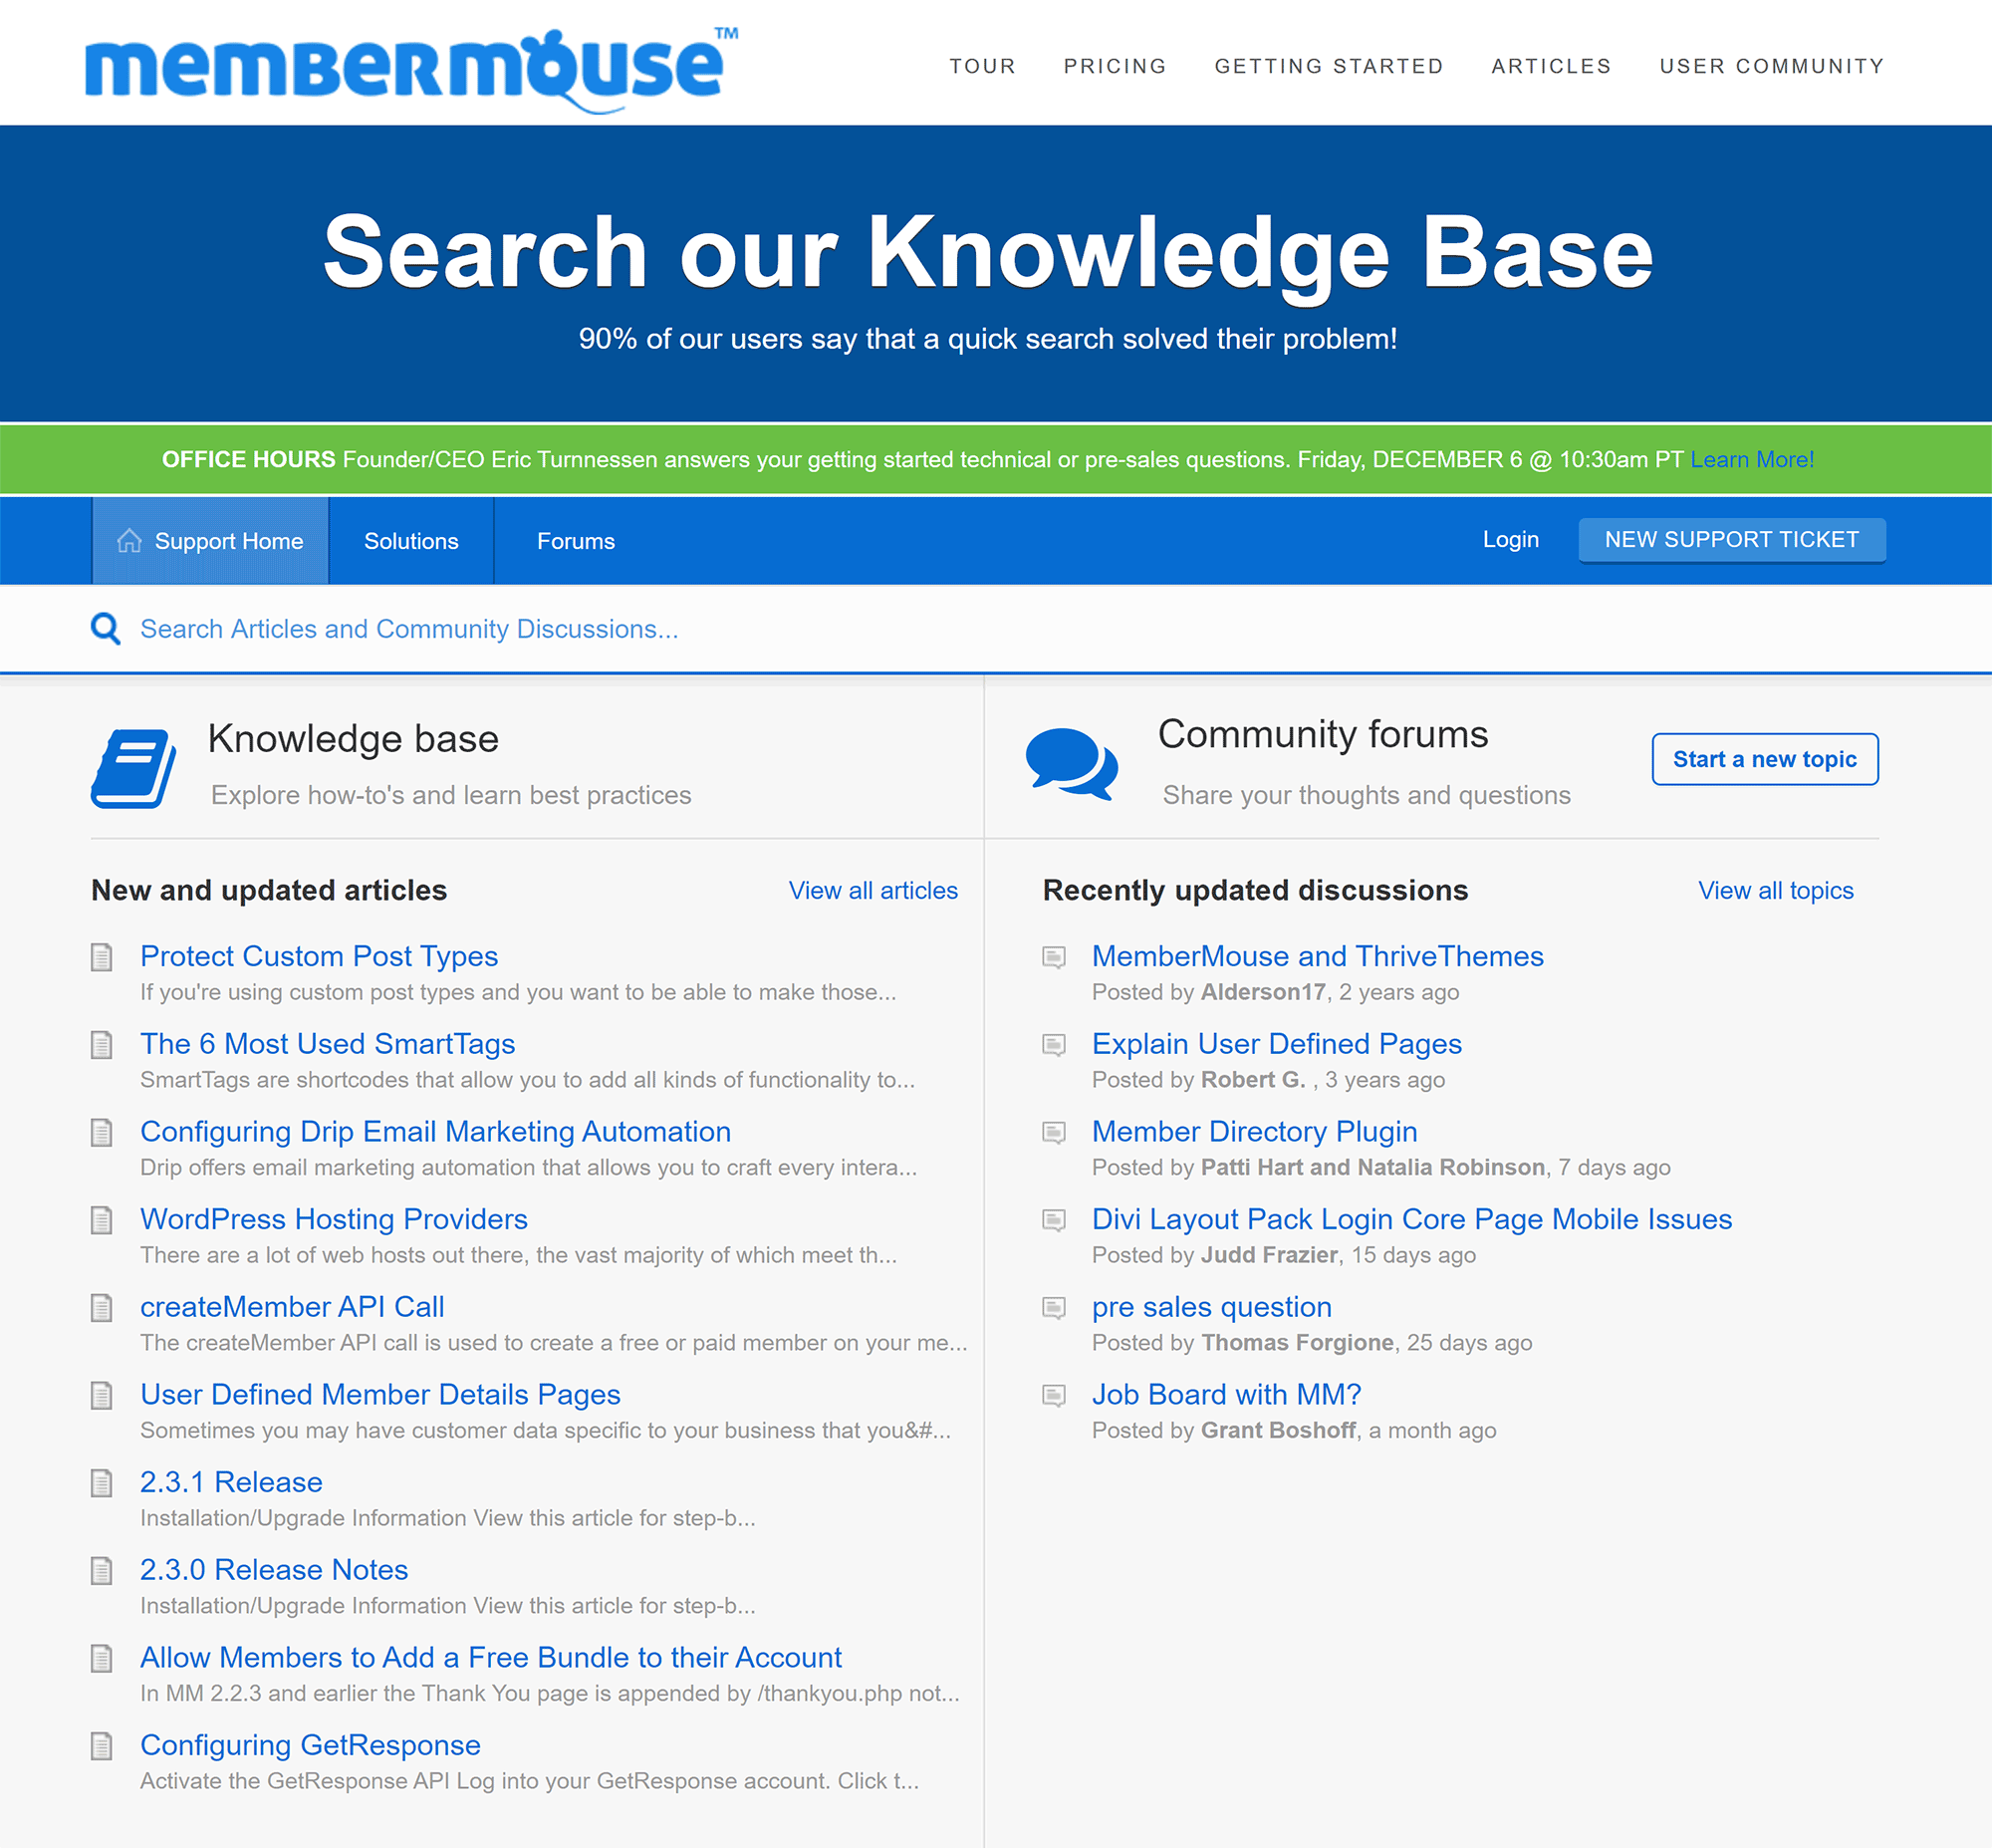
All in all, I liked the customer area for MemberMouse: it’s easy to navigate, and there are a lot of good tutorials to refer to when learning how the plugin works.
Setting Up the MemberMouse Membership Plugin
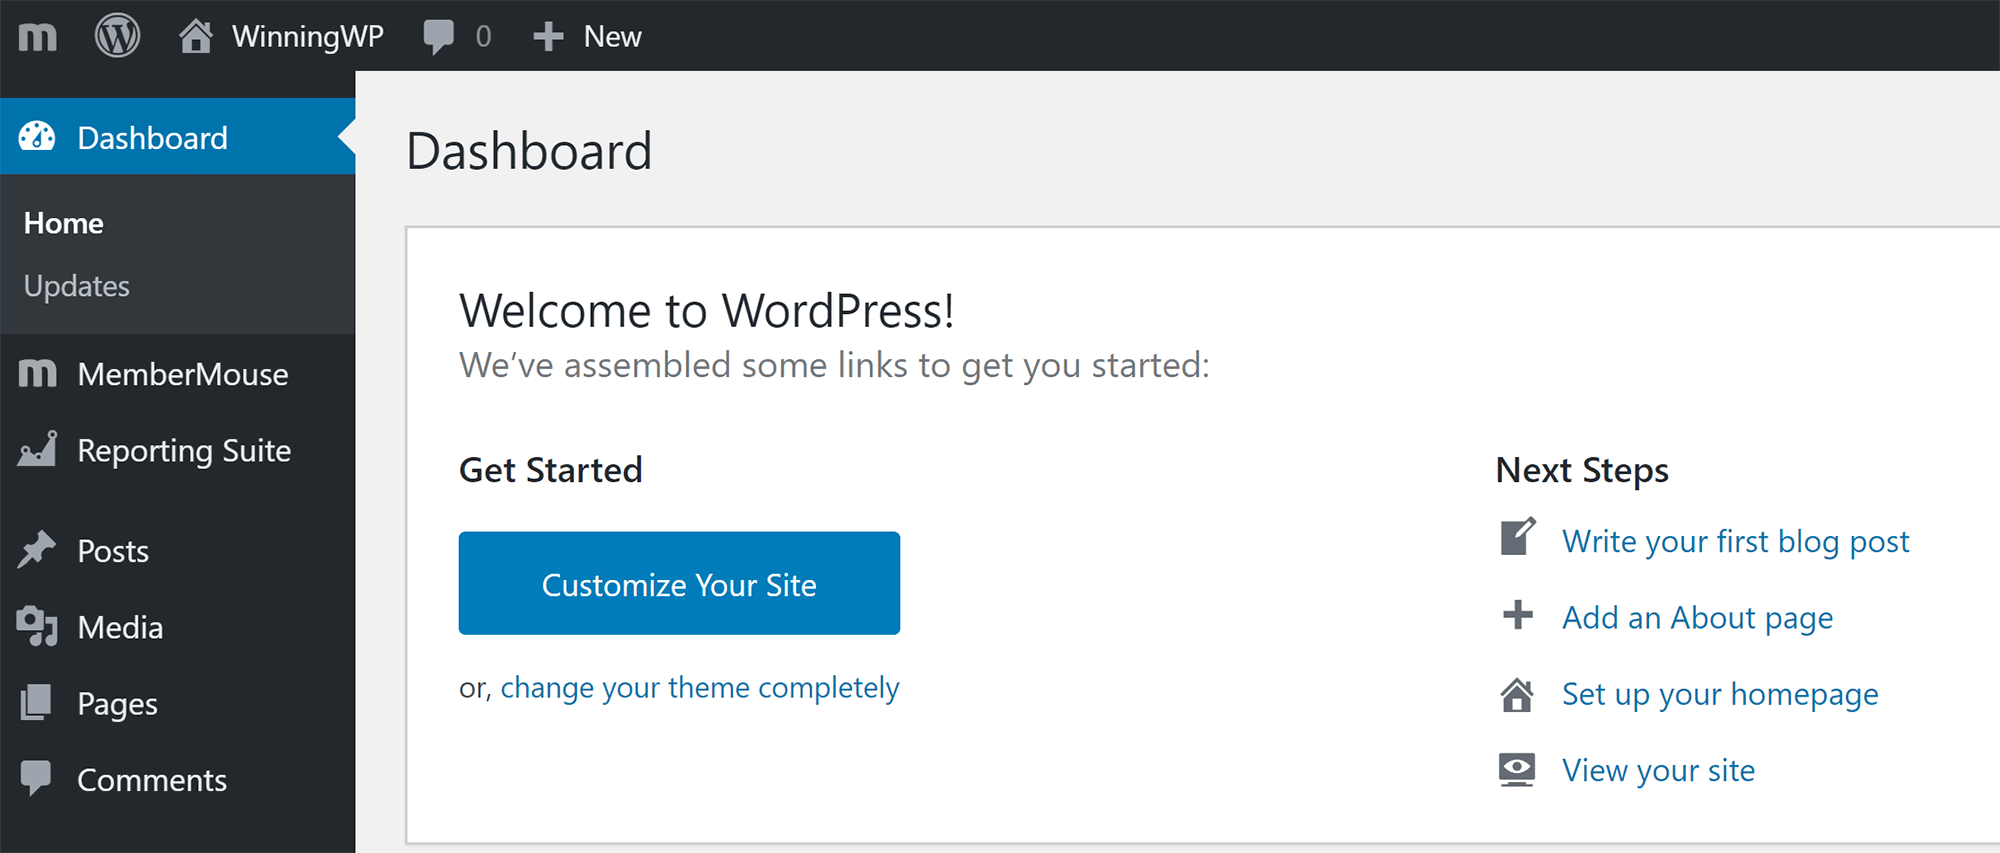
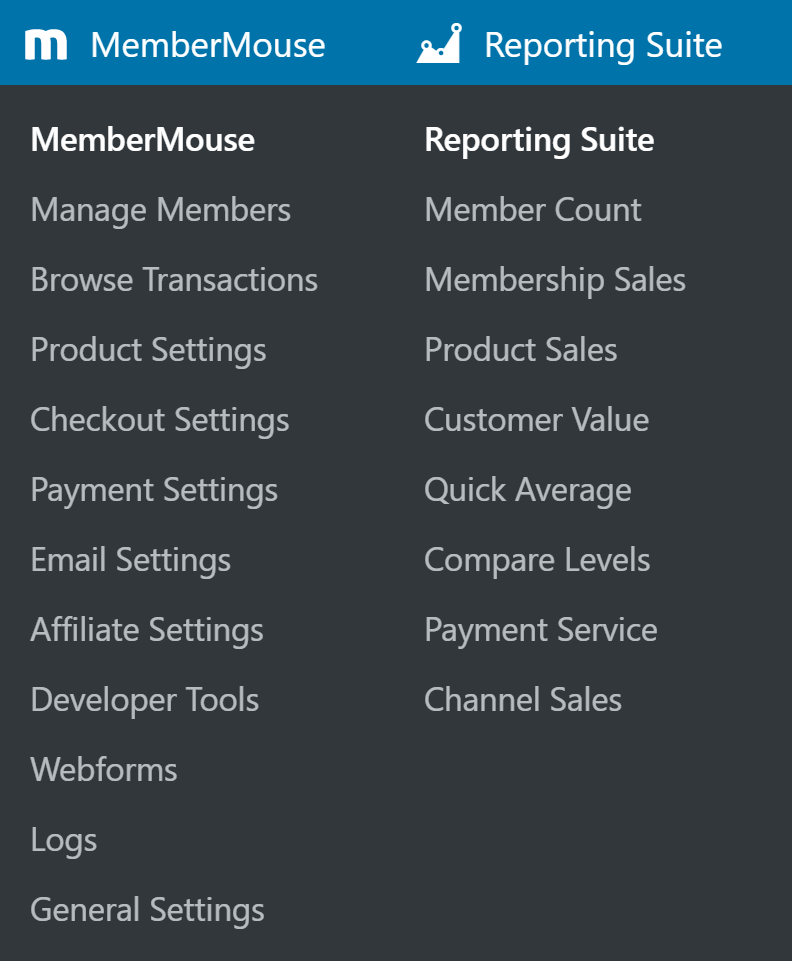
Once you’ve verified your WordPress website URL and activated the MemberMouse plugin, you’ll see two new menus in your admin area.
One is called MemberMouse and the other is called Reporting Suite.
If you don’t want these menus so high up in your WordPress admin menu, you can move them elsewhere using Admin Menu Editor.
The MemberMouse area is where you set up all aspects of your membership website. Once it’s live and you’re generating sales, you can track everything in the reporting suite.
Like any feature-rich WordPress plugin, MemberMouse can be a little daunting when you begin, as there are a lot of settings to adjust to create your membership website.
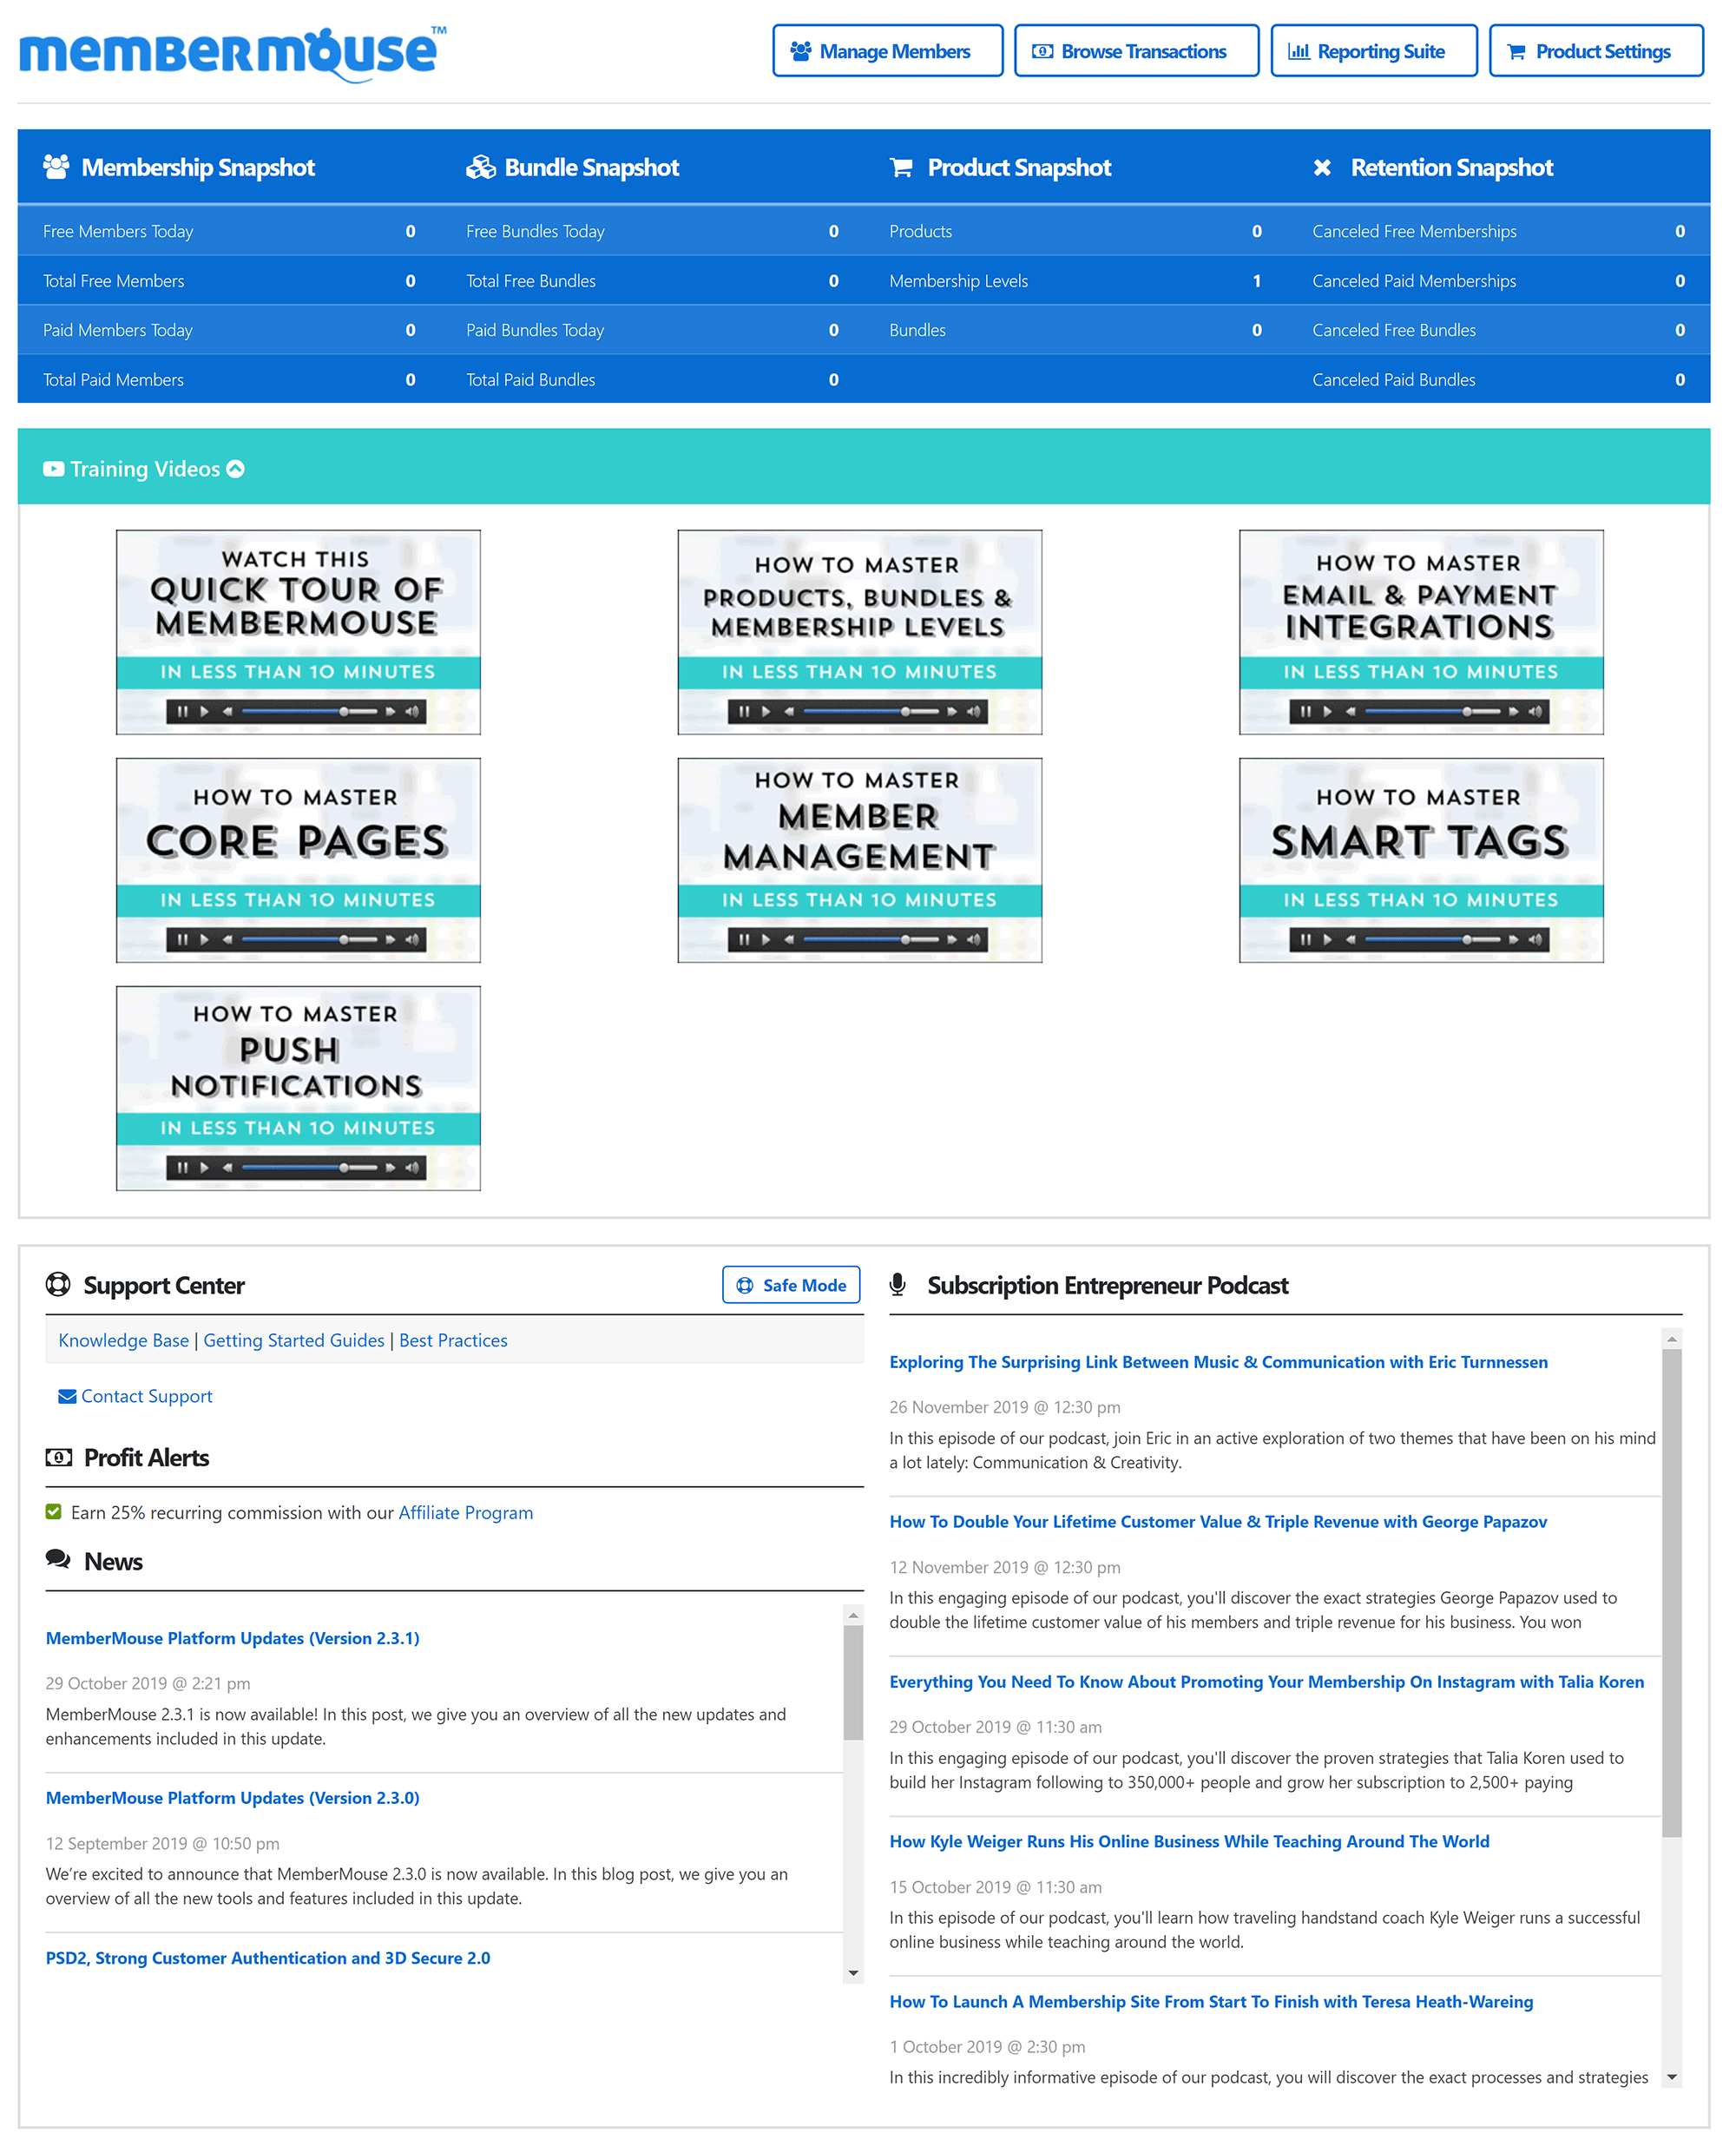
There’s no step-by-step wizard to help you to get set up, but the main MemberMouse dashboard is a good starting point, displaying several video tutorials and links to MemberMouse’s support area.
Links to manage your members, browse transactions, access the reporting suite and modify product settings are at the top of the page.
Underneath is a summary of memberships and products. When you’re first getting started, you’ll have no data here, but once you’re established you’ll find this to be a good summary of how your membership website is performing.
At the top of the MemberMouse menu are links to manage members and browse transactions. When you’re just getting started, there’ll be nothing here to reference. However, when your membership website has been launched, you’ll be checking these pages more frequently than the configuration pages.
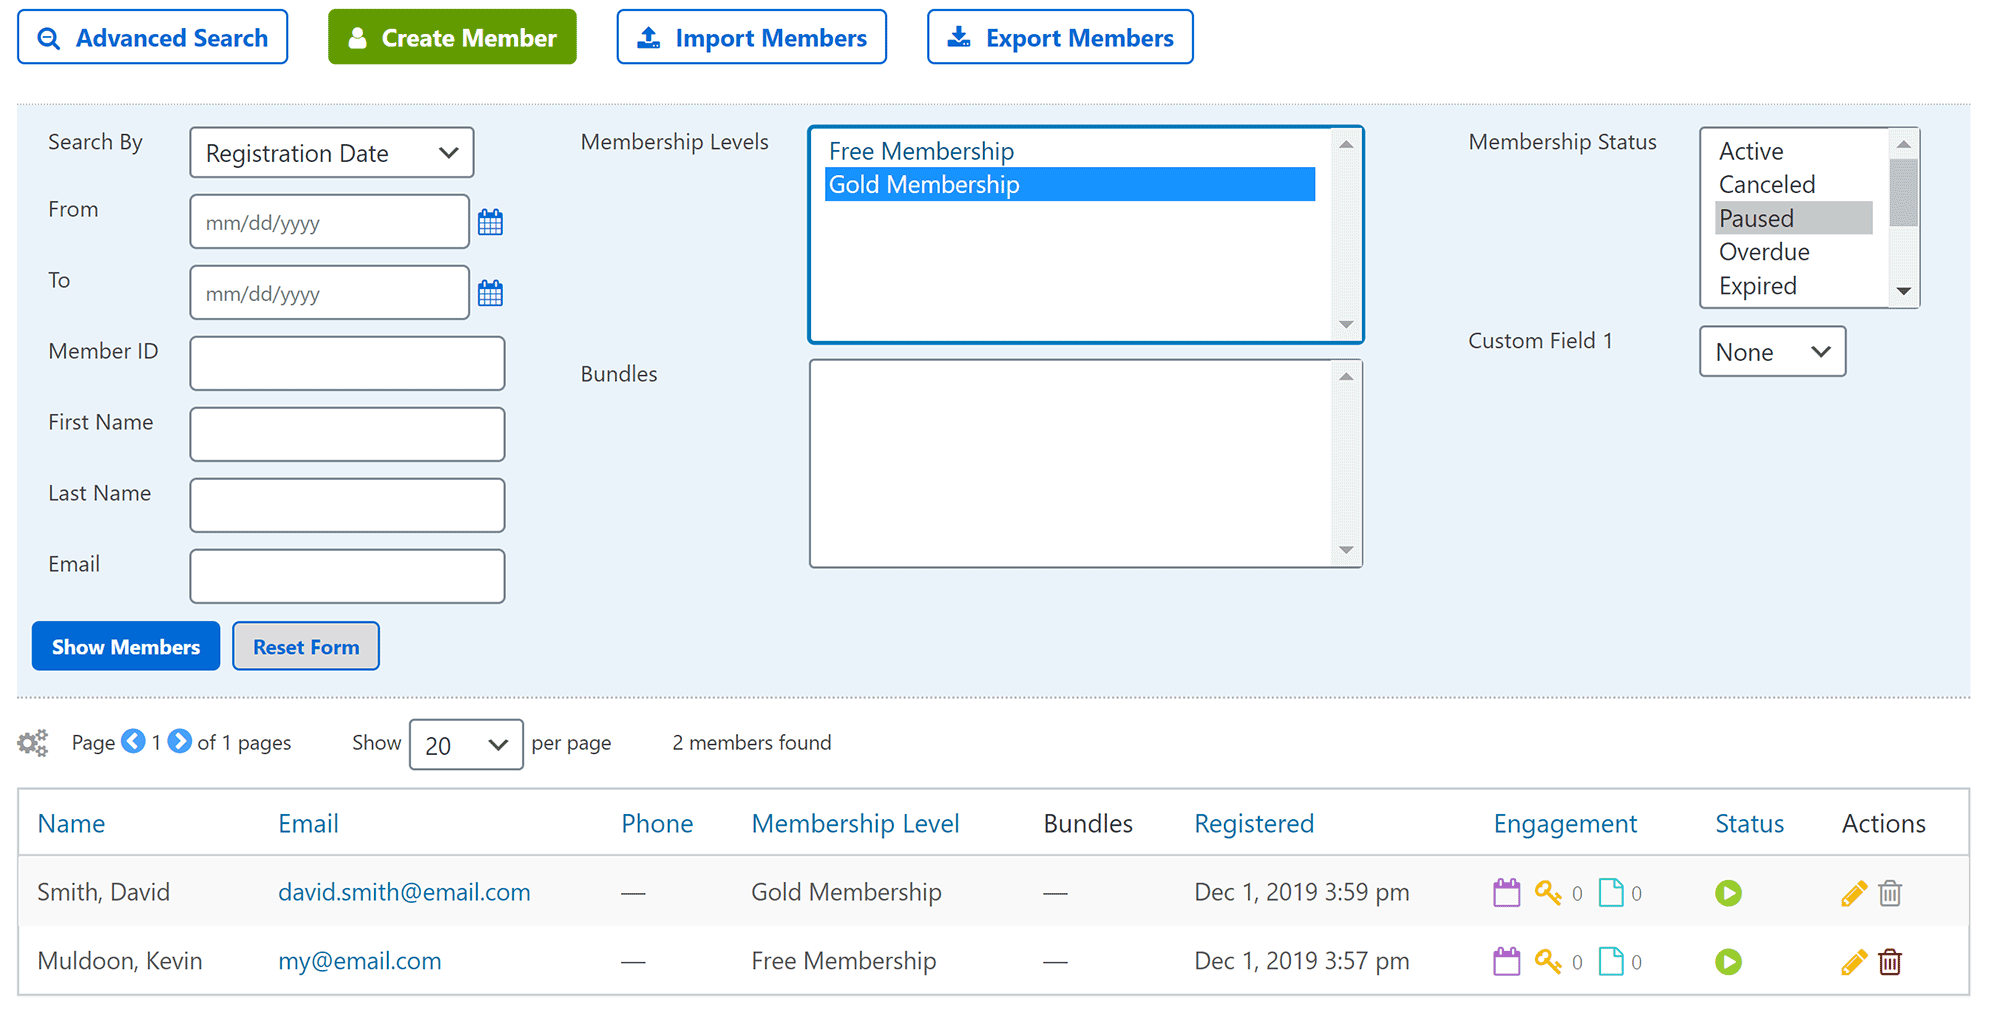
The manage members page allows you to create members manually and assign them to the different membership plans you’ve created. You can also search for profiles of specific customers using the advanced search box, and members can be exported and imported in CSV format.
In the transactions pages, you can browse the payments customers have made for memberships, which is useful for verifying memberships and checking everything is correct.
You can view the payment amount, order number, transaction time and date, and whether a payment came through an affiliate link, as well as other important information, such as whether a payment was refunded.
The product settings area is where you manage your memberships.
At the top of the page, you’ll find a list of the different sections: Products, Membership Levels, Bundles, Coupons and Drip Content Schedule.
The ‘How to Master Products, Bundles & Membership Levels’ video in the main dashboard will help you to understand how it all works.
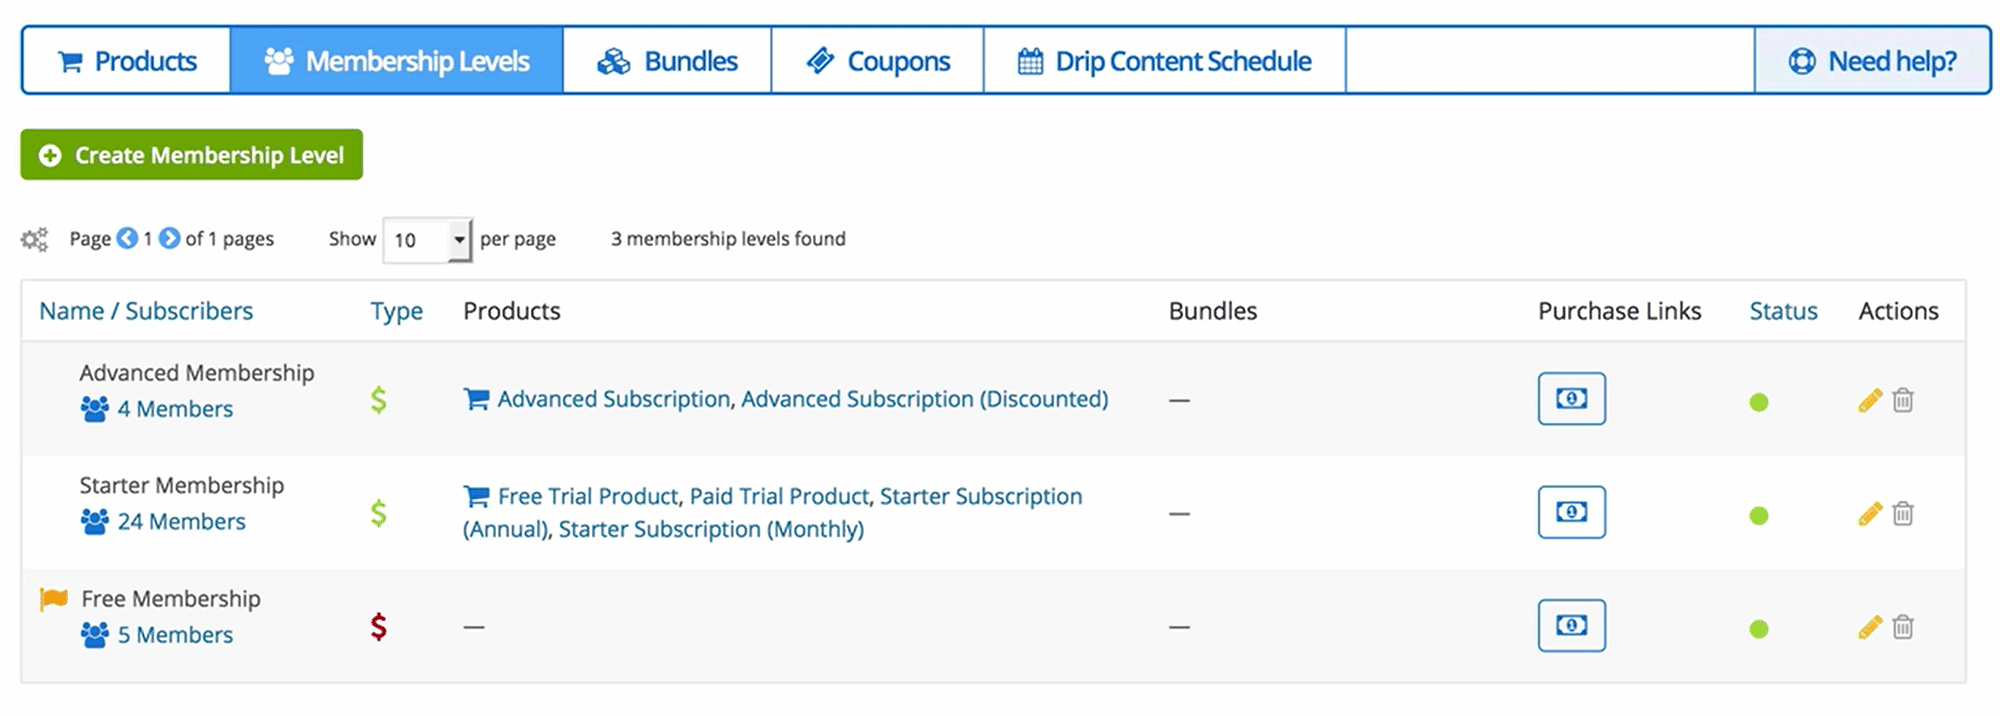
Membership levels refer to what access level a member has, and for each membership level you can assign a user to a WordPress user role and define which post categories they can access.
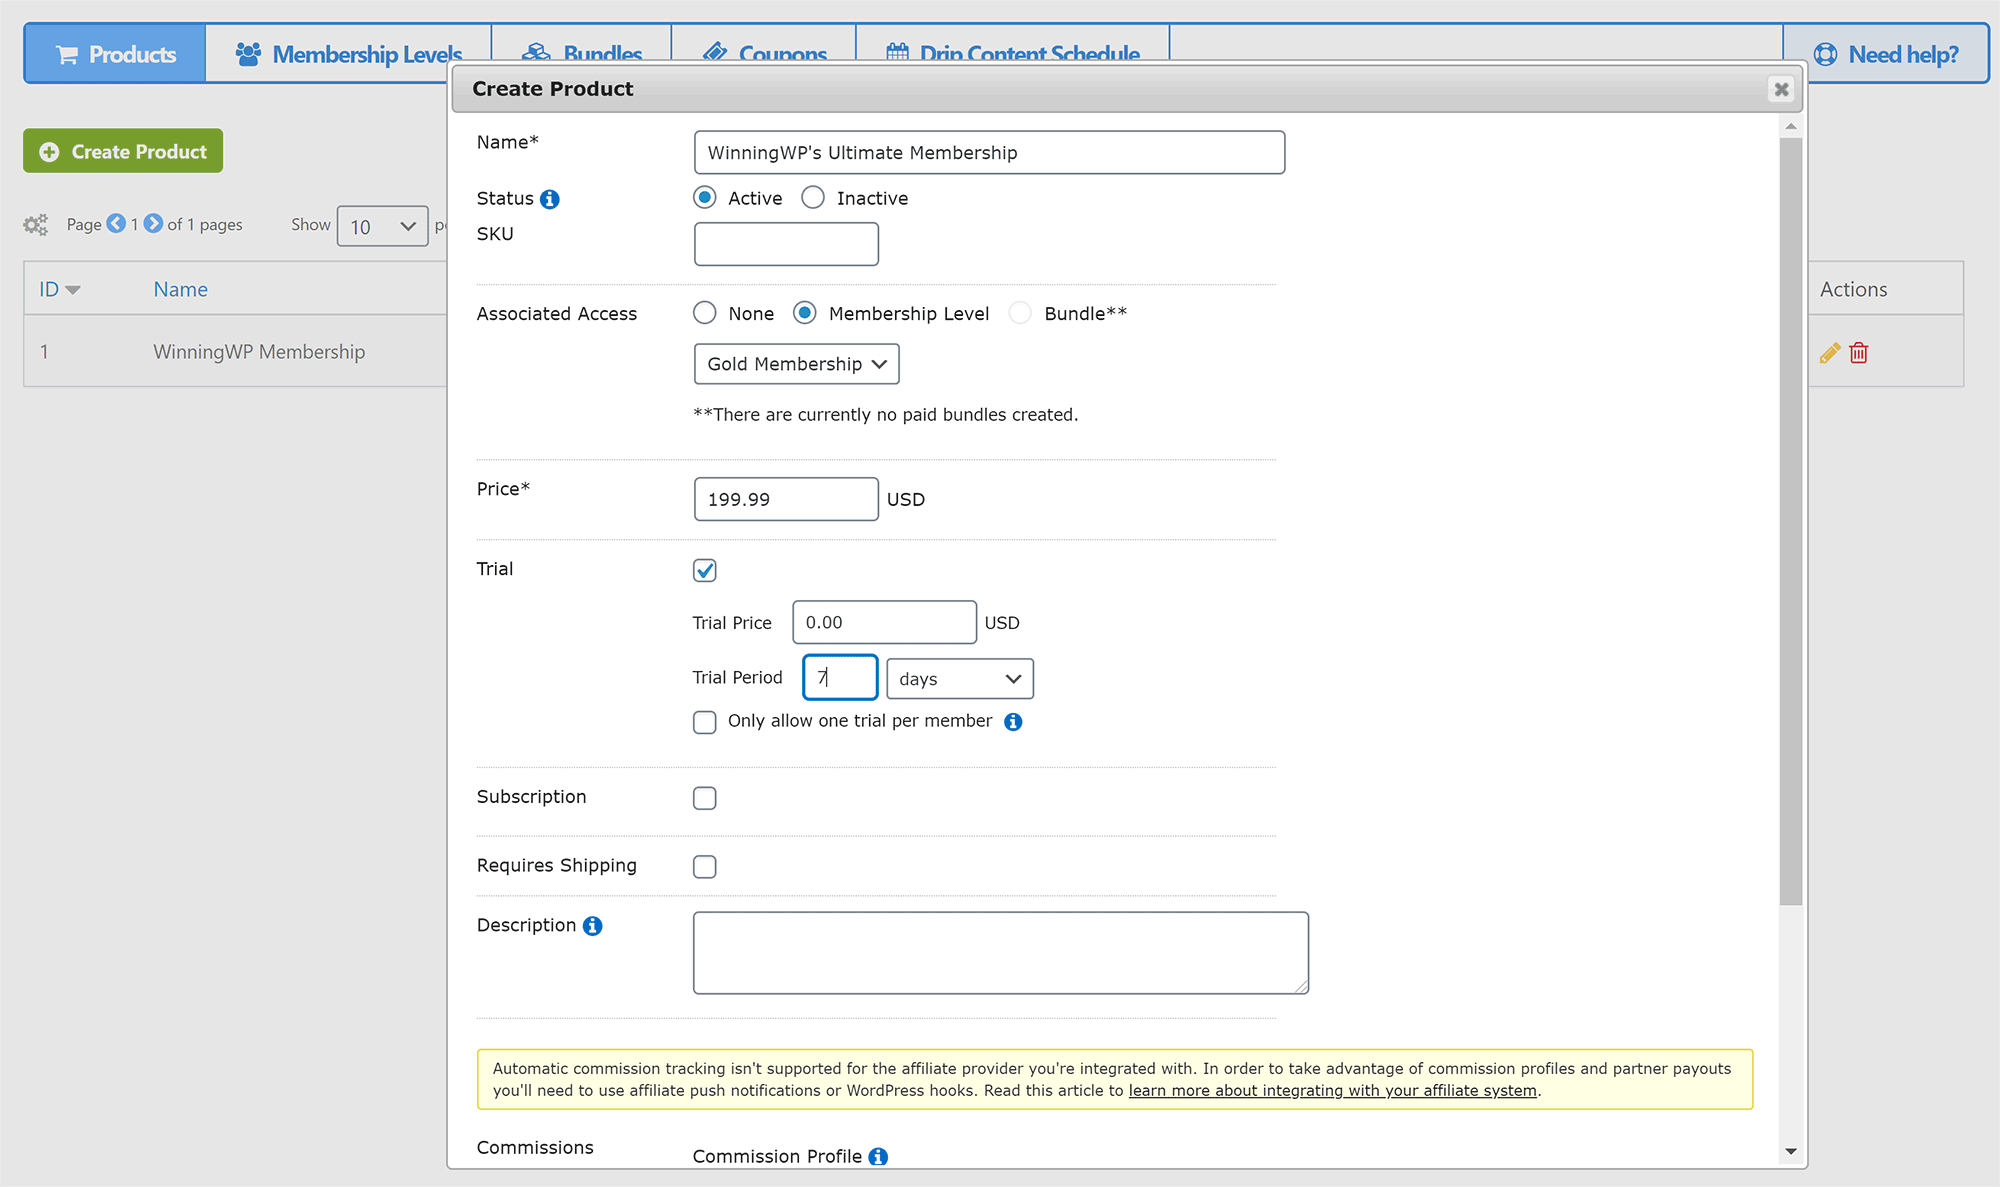
Products are what are sold to customers. A product is assigned to either one membership level or one bundle, meaning multiple products can be associated with one membership level.
Consider a membership level that allows users to view your tutorials on repairing computers. One product could be created at $29.99 a month that allows members to view that content, and you could then offer the same content to others at a discounted rate of $19.99 a month by creating a second product associated with that membership level.
Bundles allow you to add-on multiple types of access to an individual user.
Don’t worry if all of this is confusing, as it will make sense when you set things up for your own membership website. It’s all just a way of defining access levels and stating what members can and can’t view.
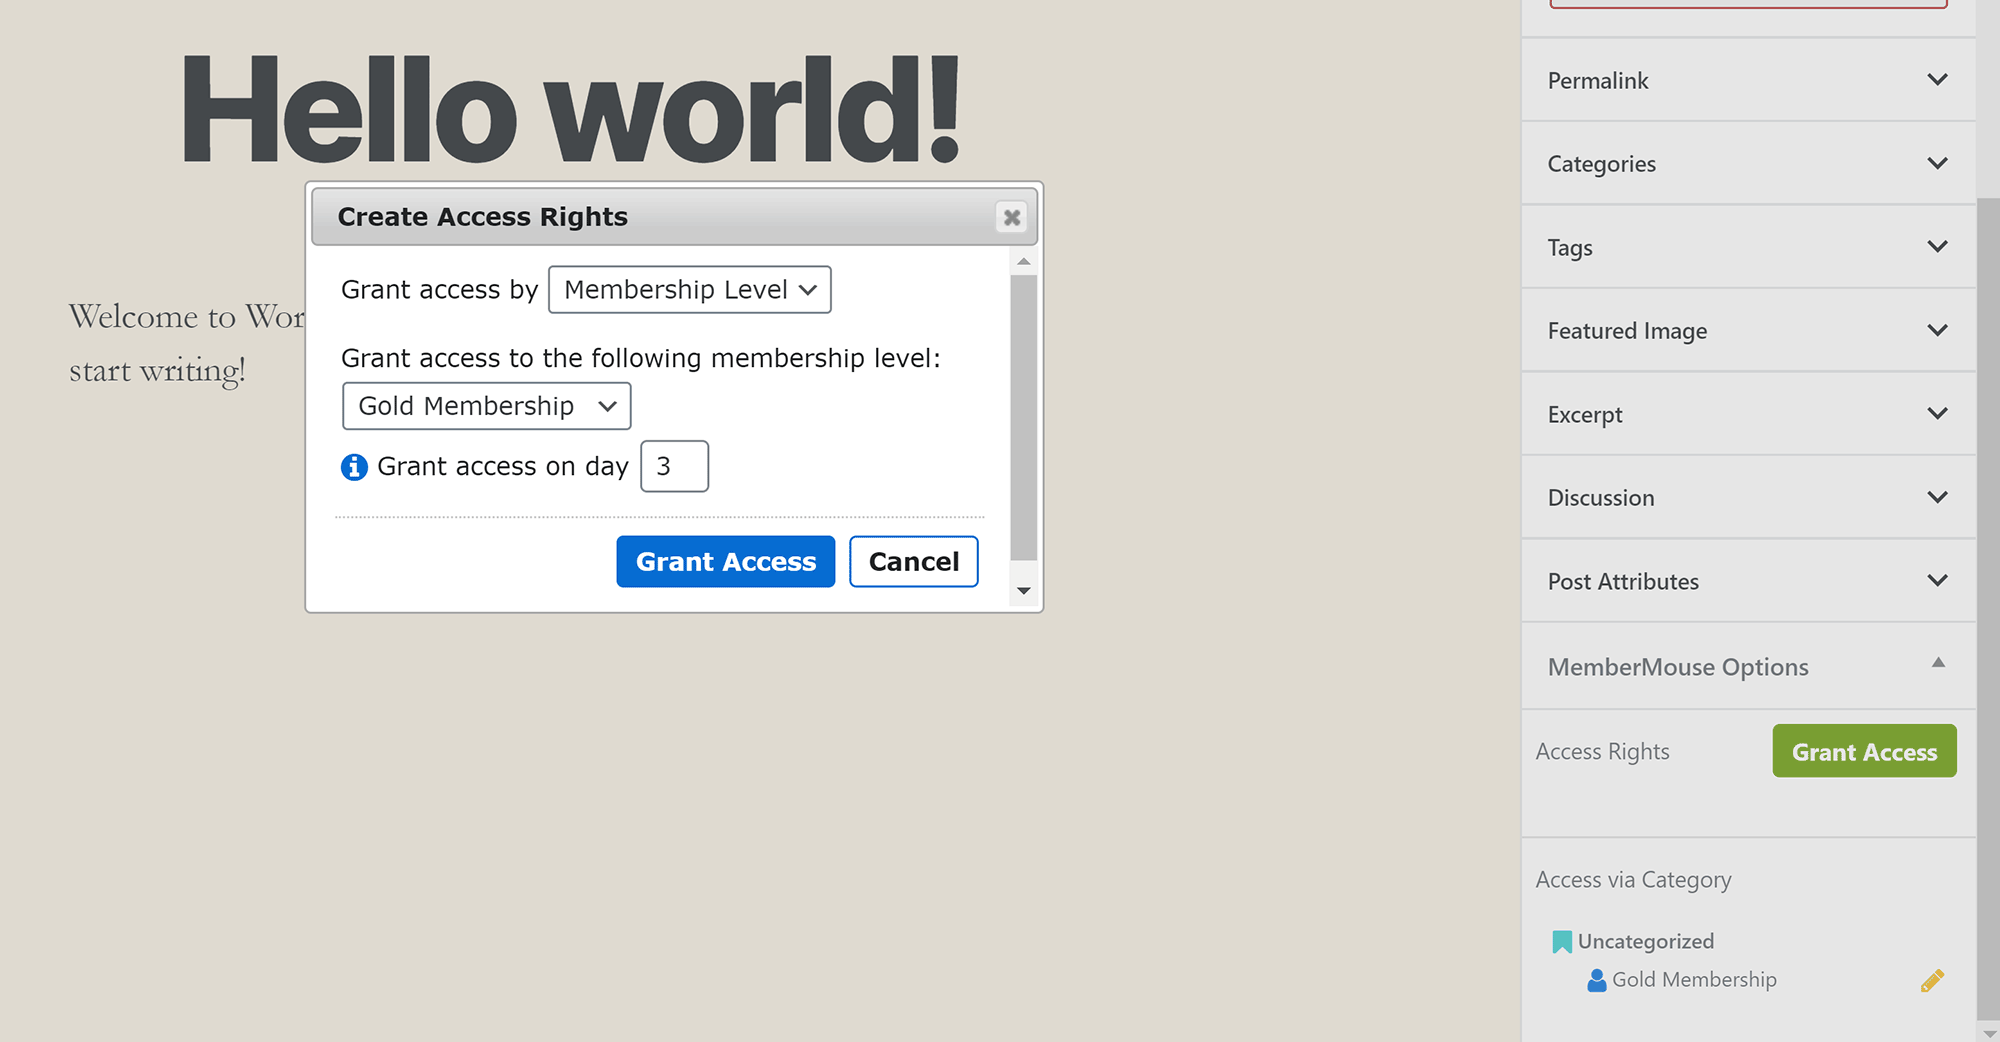
Access to your content can be restricted on a post level, page level, or by category, and you can restrict content on a post or page by membership level or by bundle.
If you’re drip-feeding content to members, you can open up access to it once a user has been a member for a particular number of days.
You can view the drip-feeding schedule for any membership or bundle at any time from the product settings area.
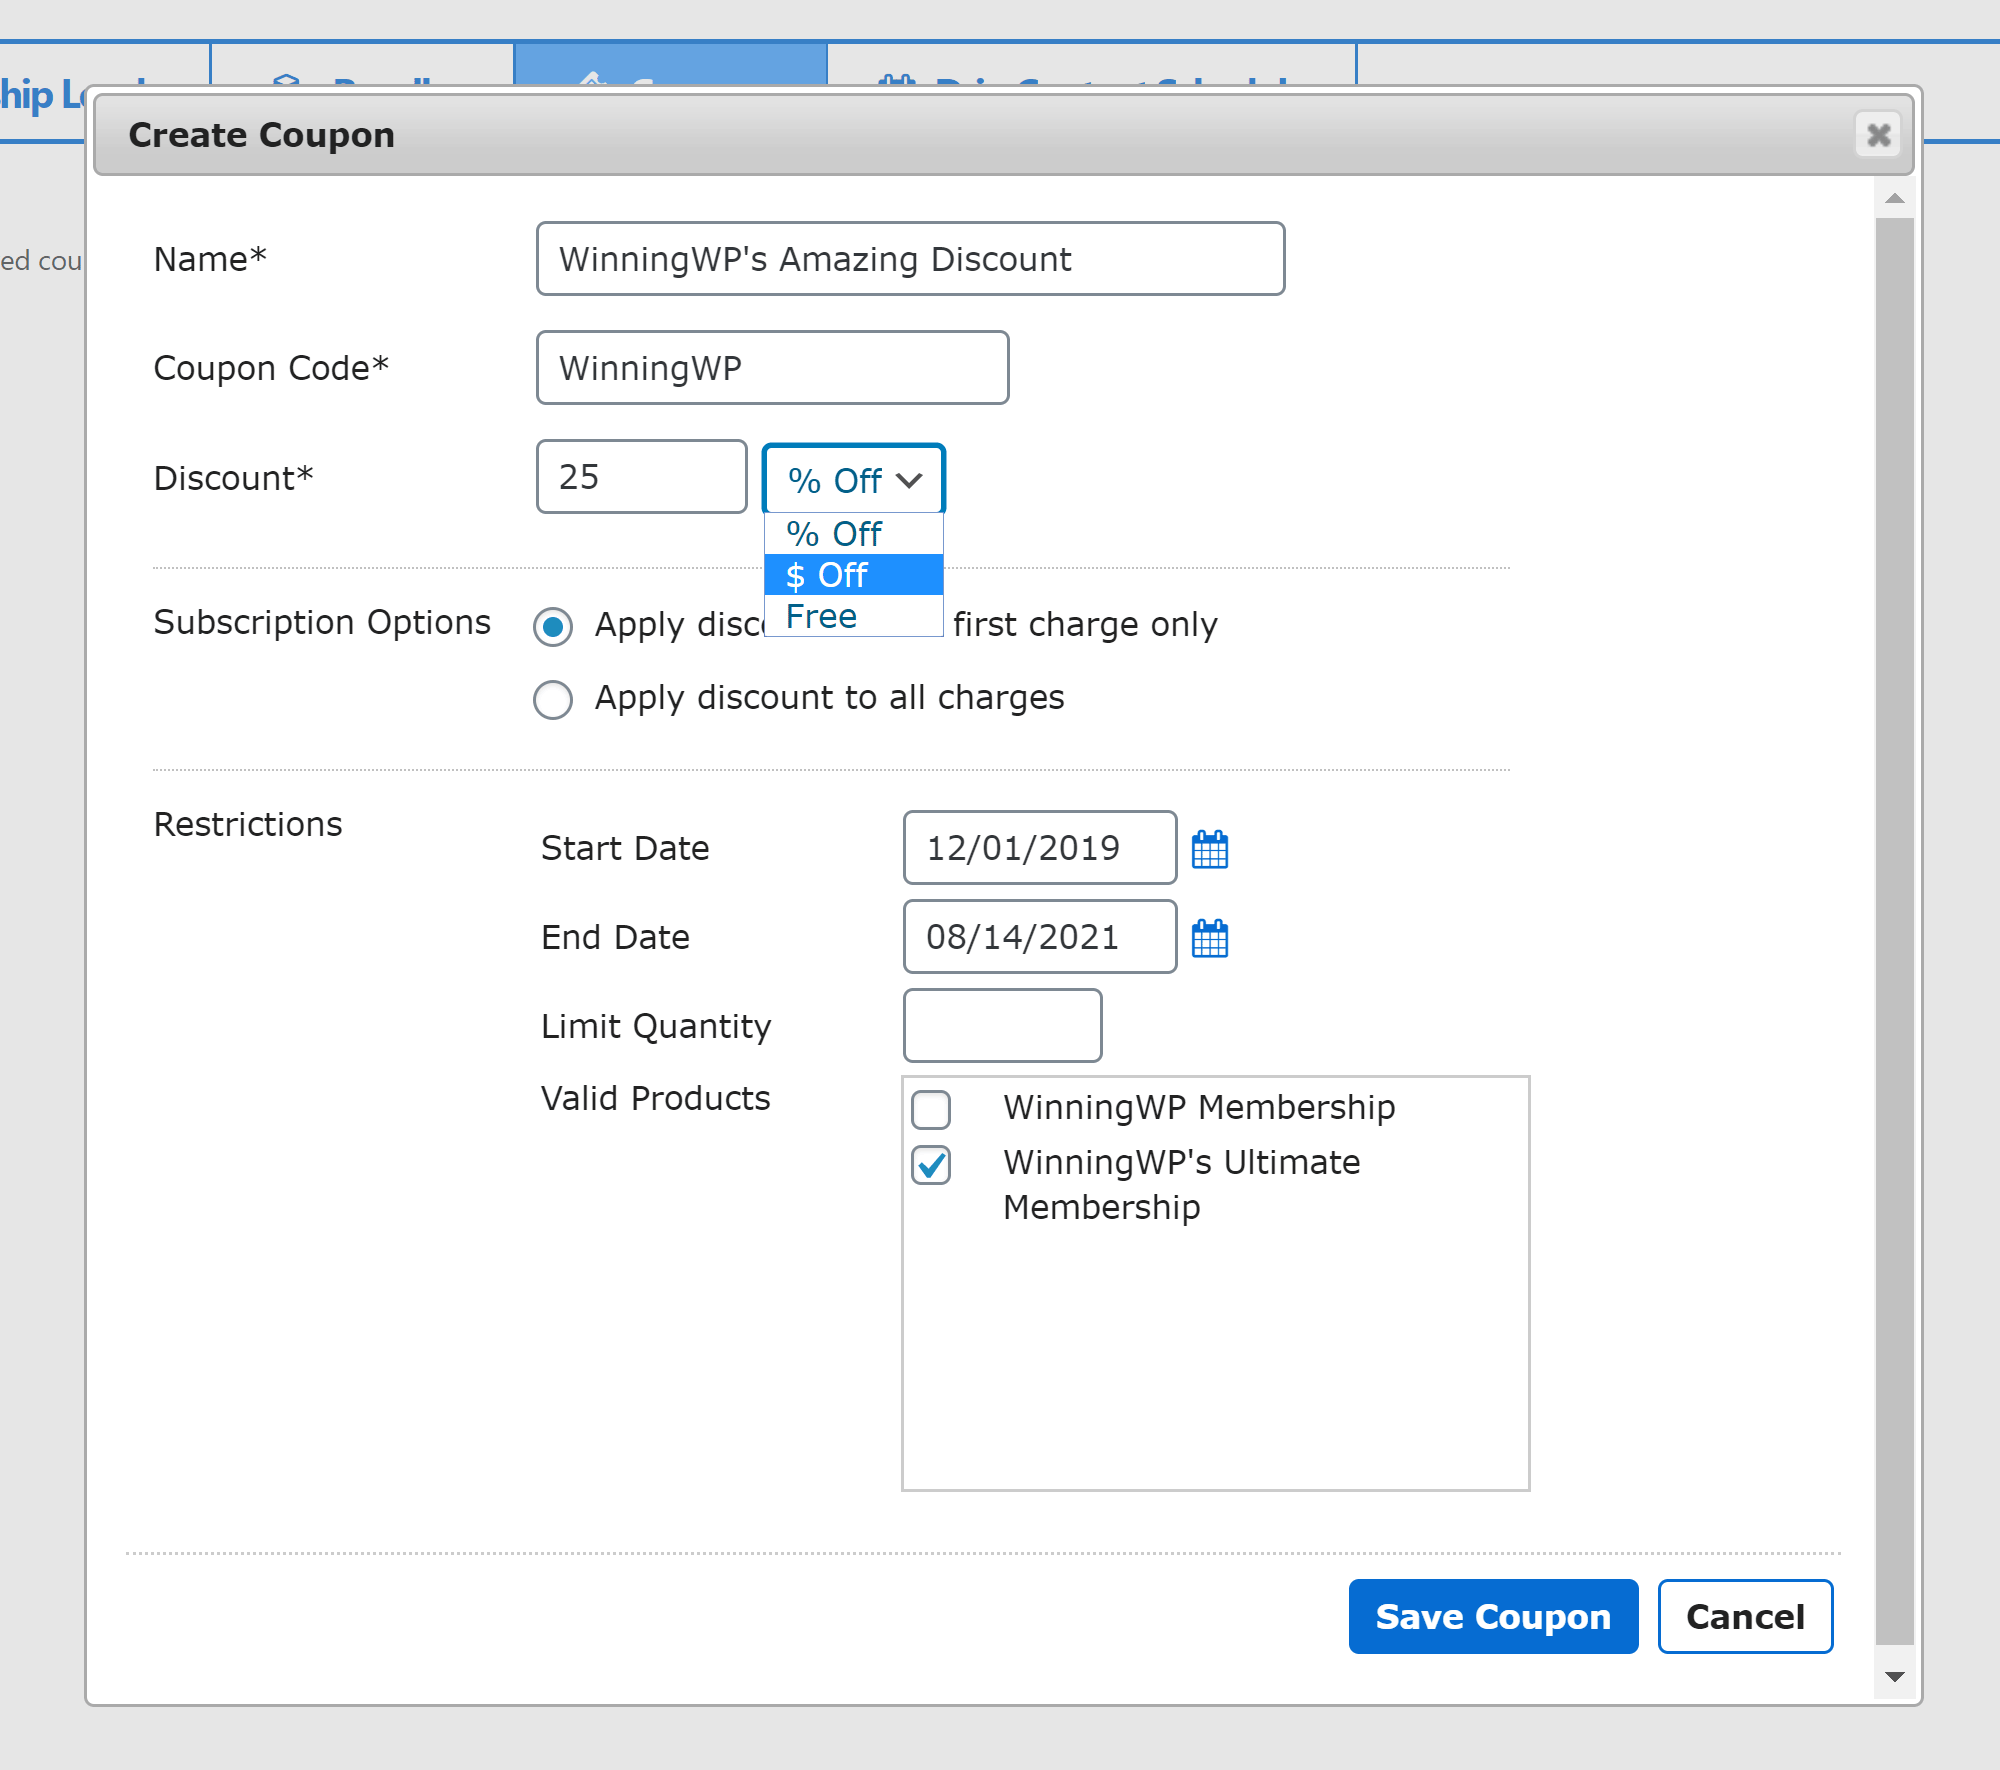
Coupons are an essential marketing tool for those who operate membership websites.
MemberMouse allows you to create coupons that offers a percentage discount or a flat-fee discount, which can be applied to the first payment or to all payments.
You can even offer a free membership using a coupon.
In the checkout settings area, you can create custom fields, select which countries customers are permitted to make purchases from and add the shipping methods you use. Other settings in this area include the default currency, default membership level and whether members are allowed prorated membership upgrades and downgrades.
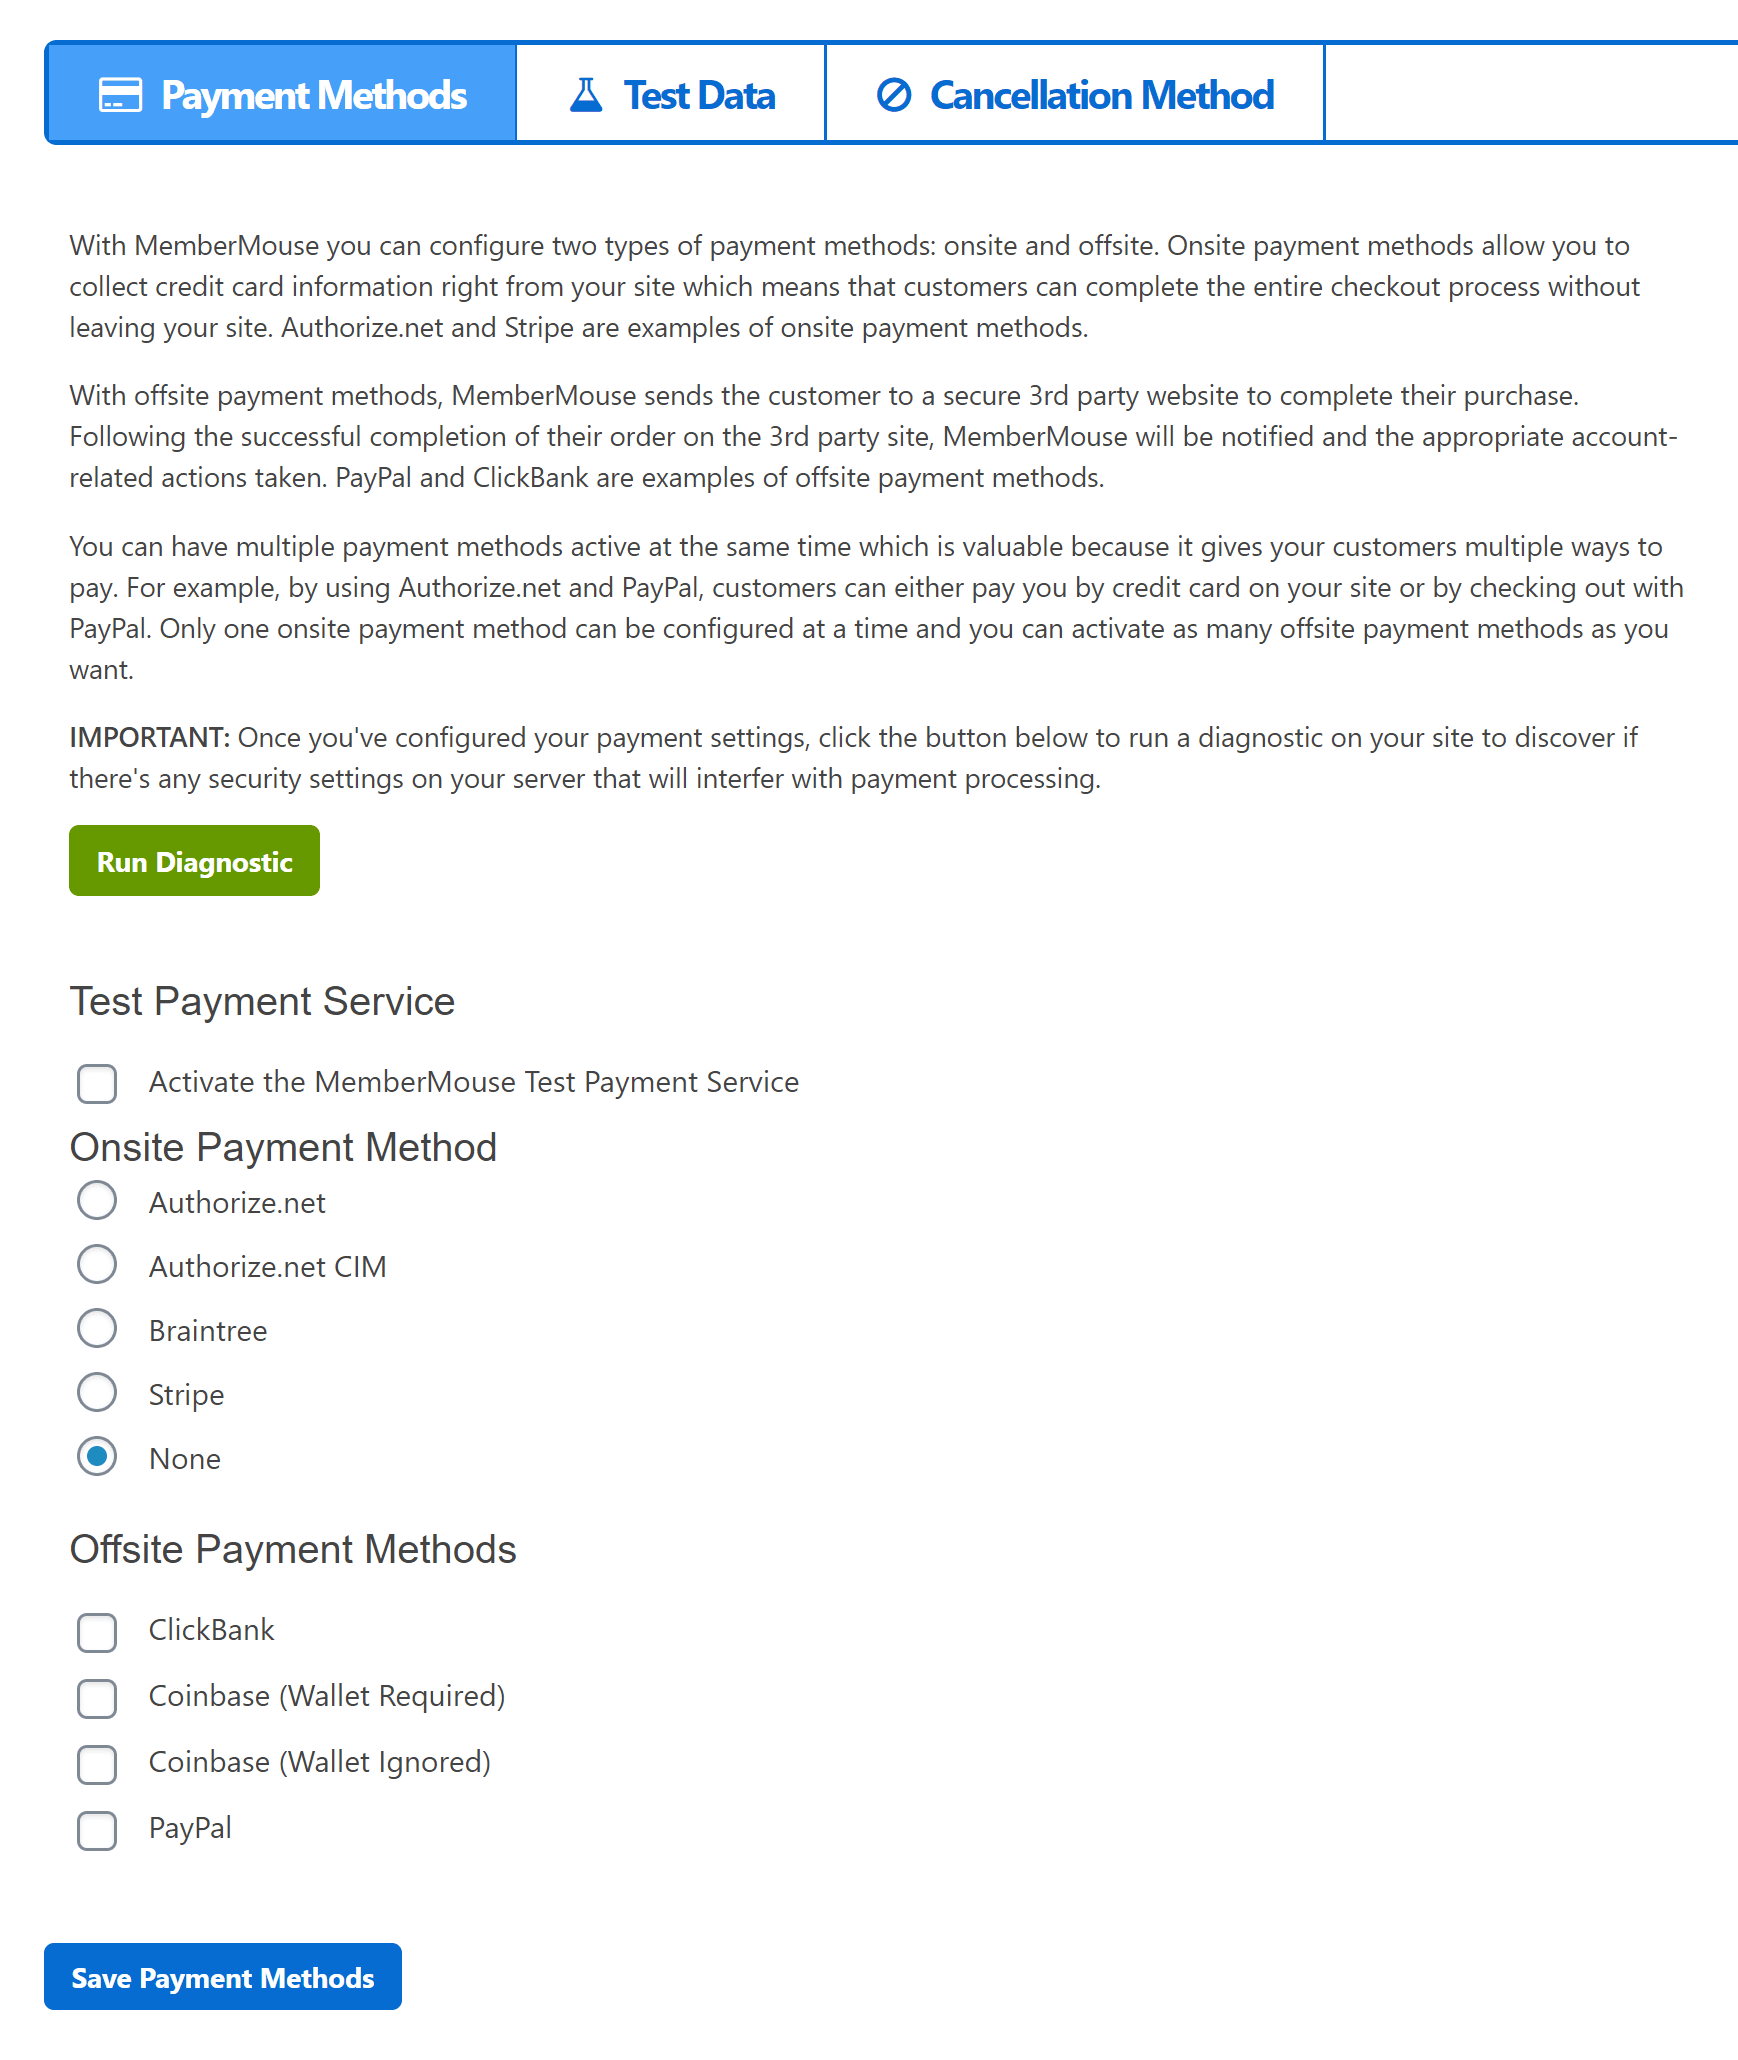
Payment providers can be configured in the payment settings area, with on-site and off-site options being available.
The test data page helps you to prepopulate checkout forms, and you can select whether a cancellation request from a member hard cancels their membership or simply pauses it.
Other settings in the main MemberMouse admin menu include email marketing integration setup, the ‘forgot password’ email template and defining the affiliate commission profile for customers.
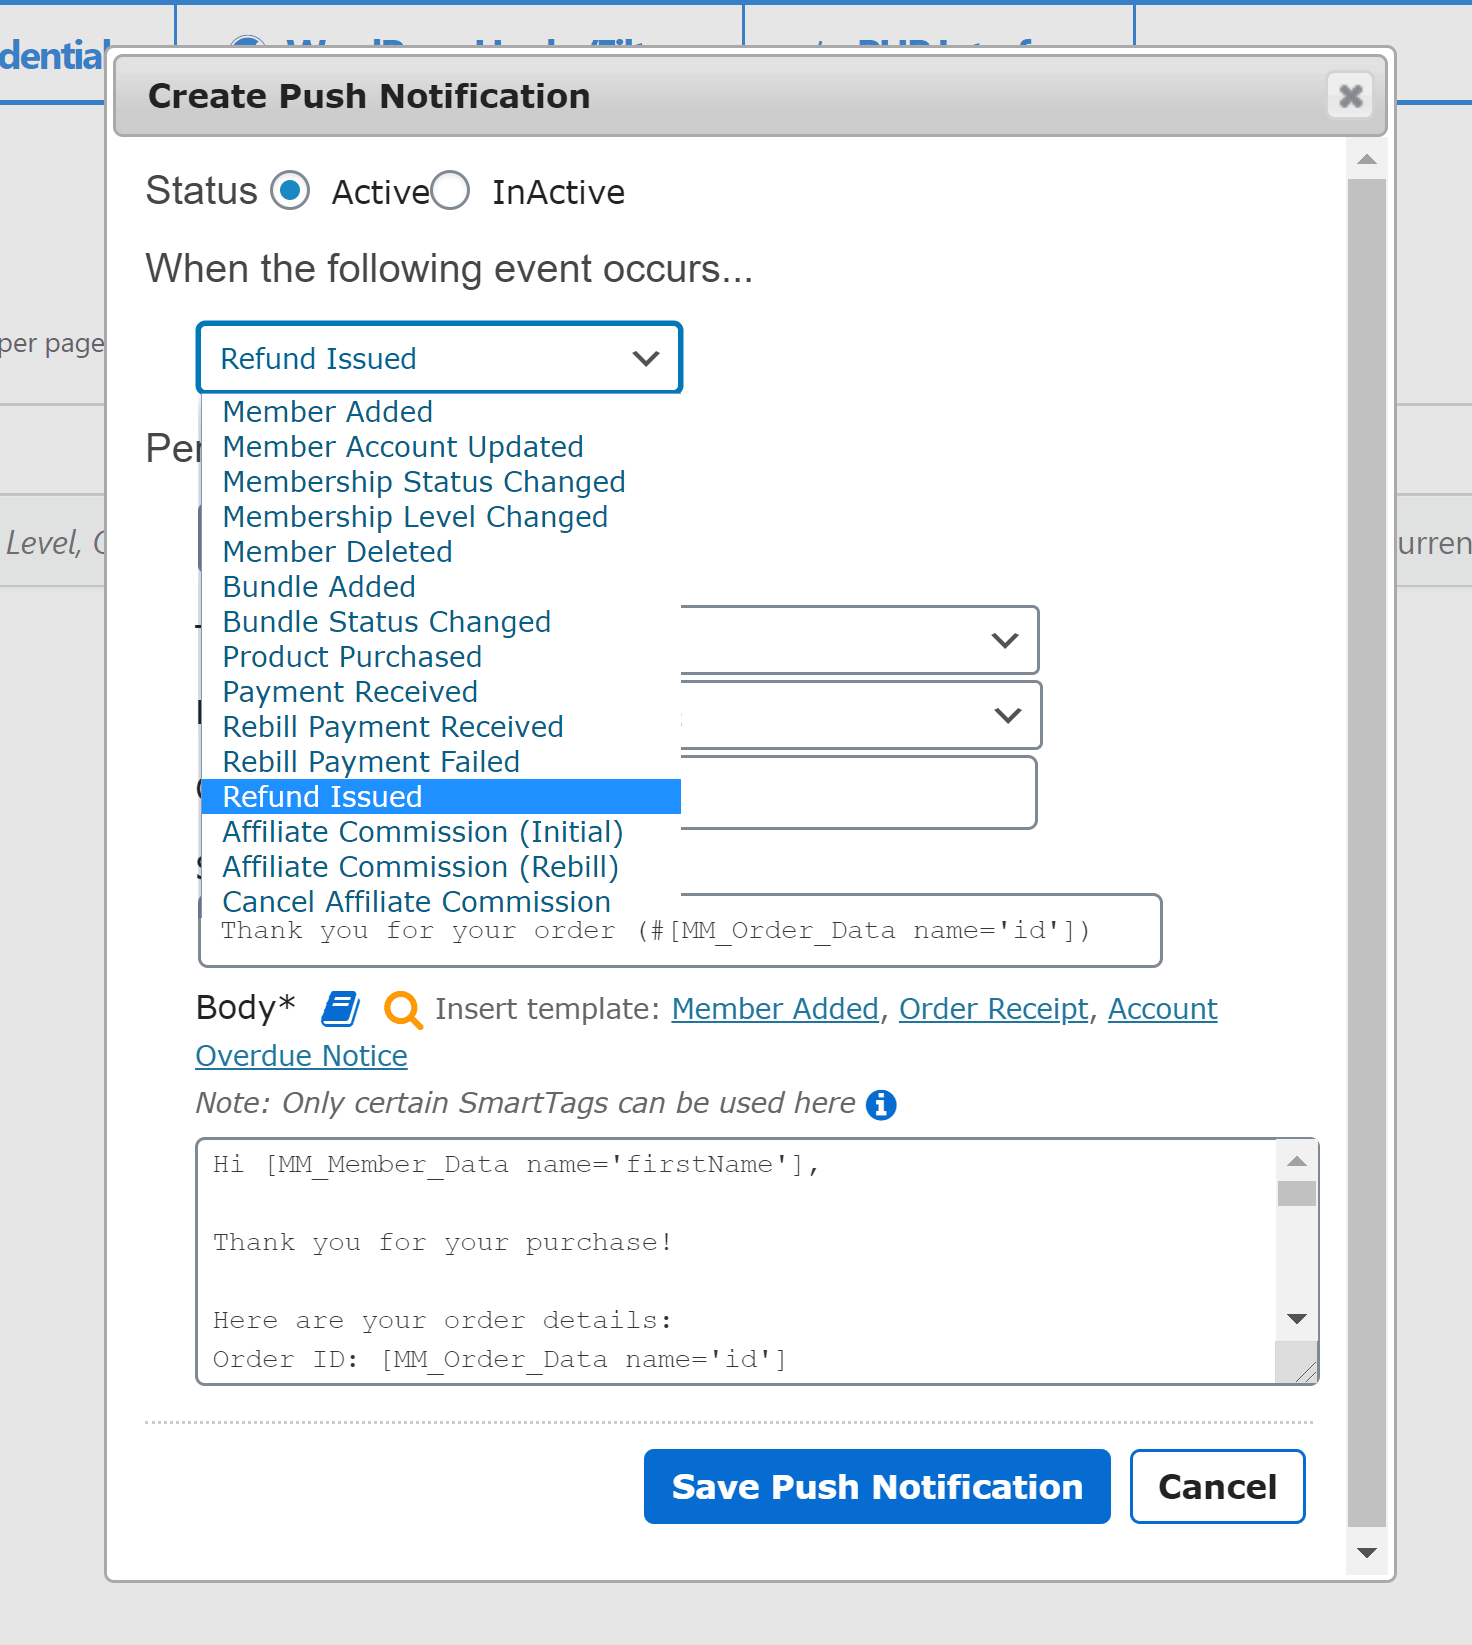
In the developer tools section, you can create push notifications when a particular event occurs. For example, when a product is purchased or a rebill payment failed. You can send an email to the member, an employee, or admin can be notified via an email or Zapier notification, or call a custom script.
This area also has information about API credentials and WordPress hooks and filters.
MemberMouse allows you to modify your login forms for your website and select which fields are included in forms.
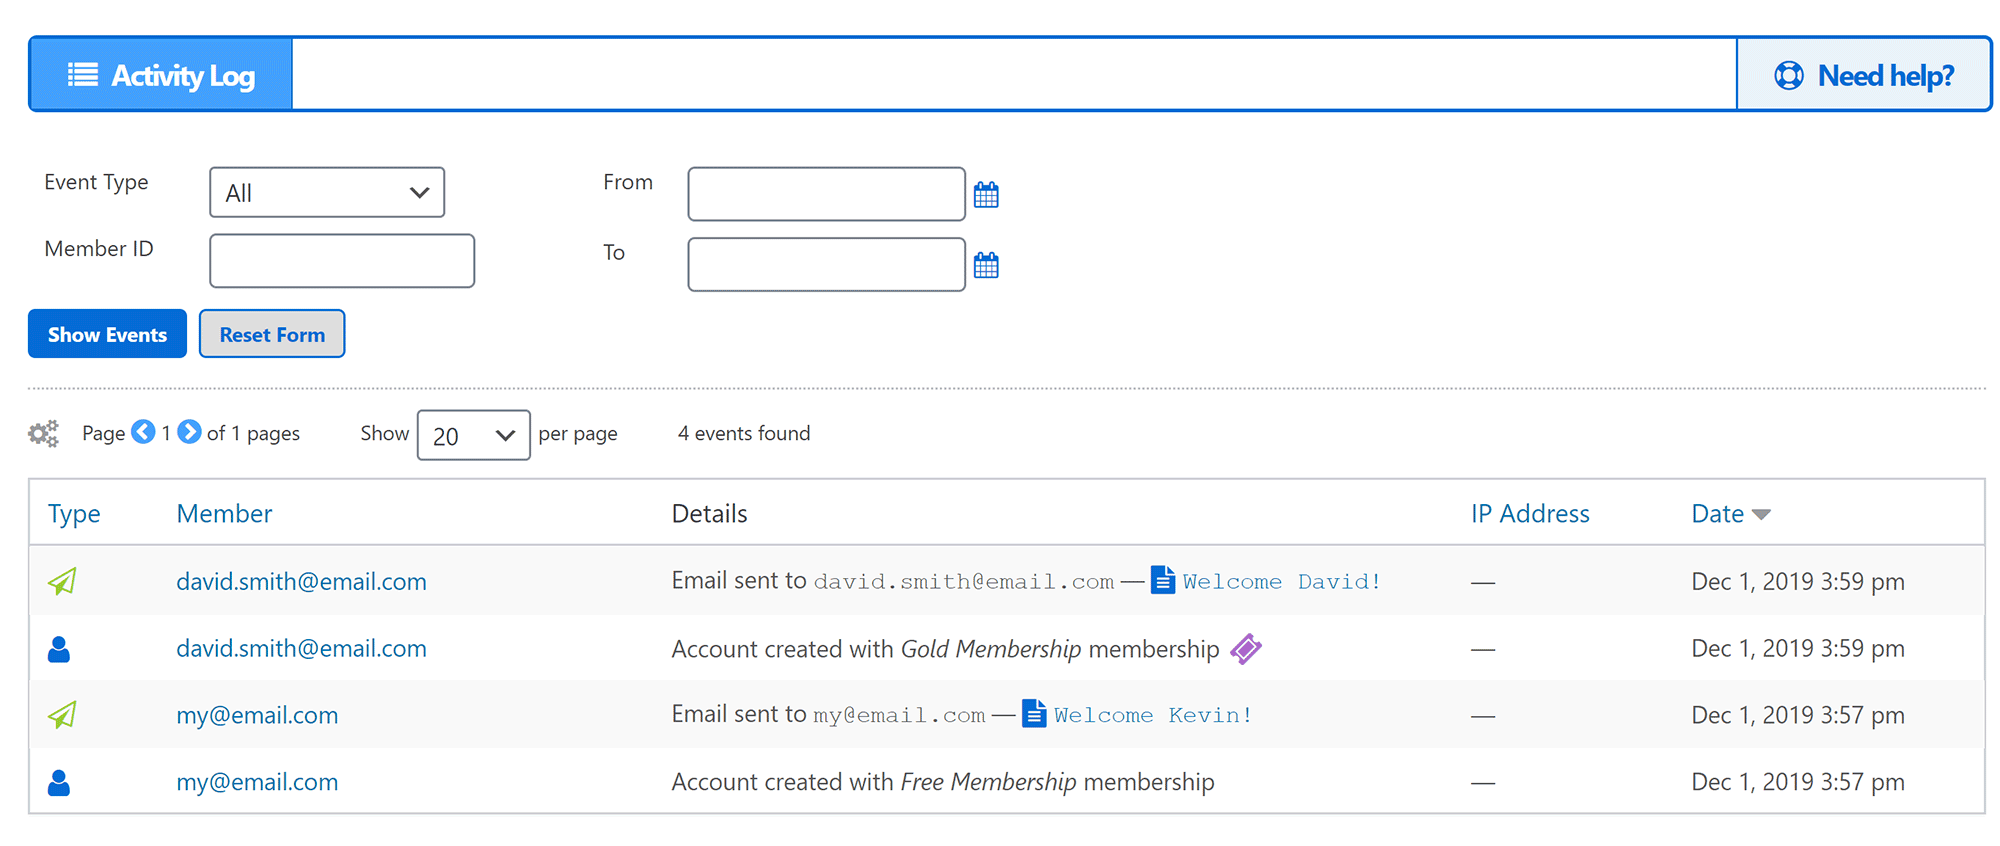
There’s also an activity log that helps you to see all of the changes that have been processed over time.
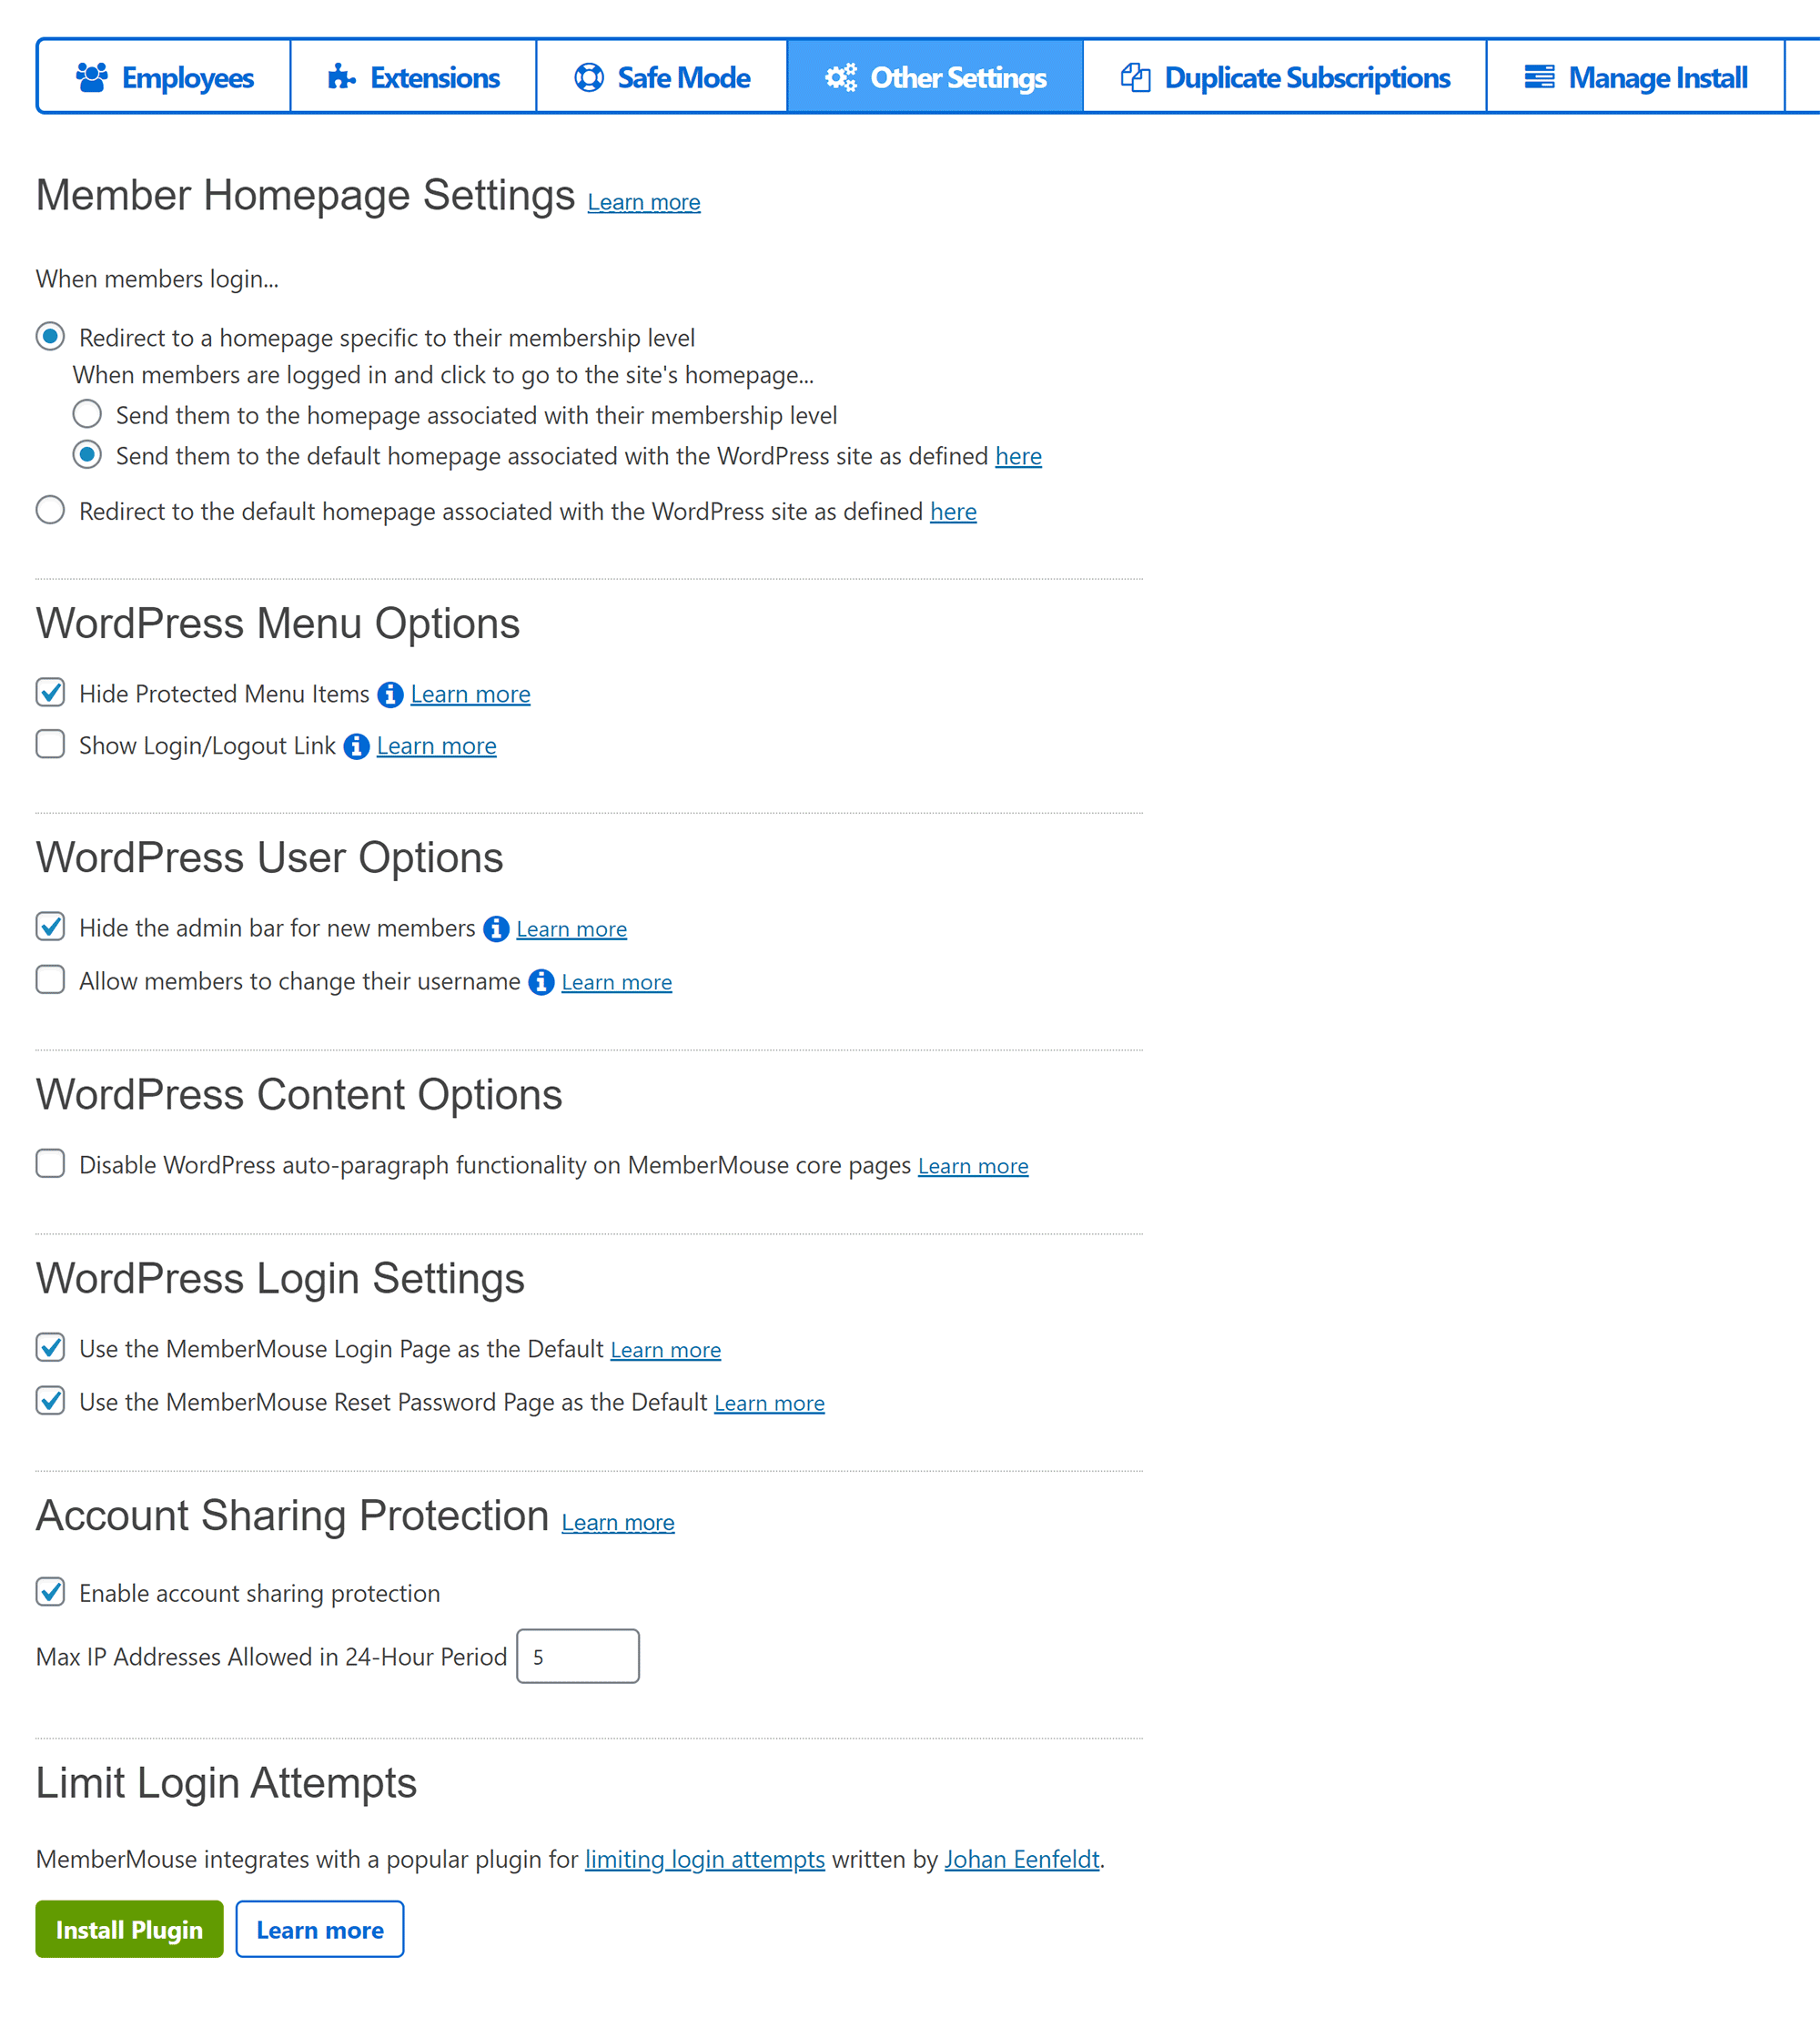
Many other useful settings can be found in the general settings area.
Employees can be created to help you to manage your membership website: a feature that will be particularly important as your website grows.
In addition to a safe mode and installation repair options, you’ll find dozens of miscellaneous settings here, including homepage, login, content protection and CSS.
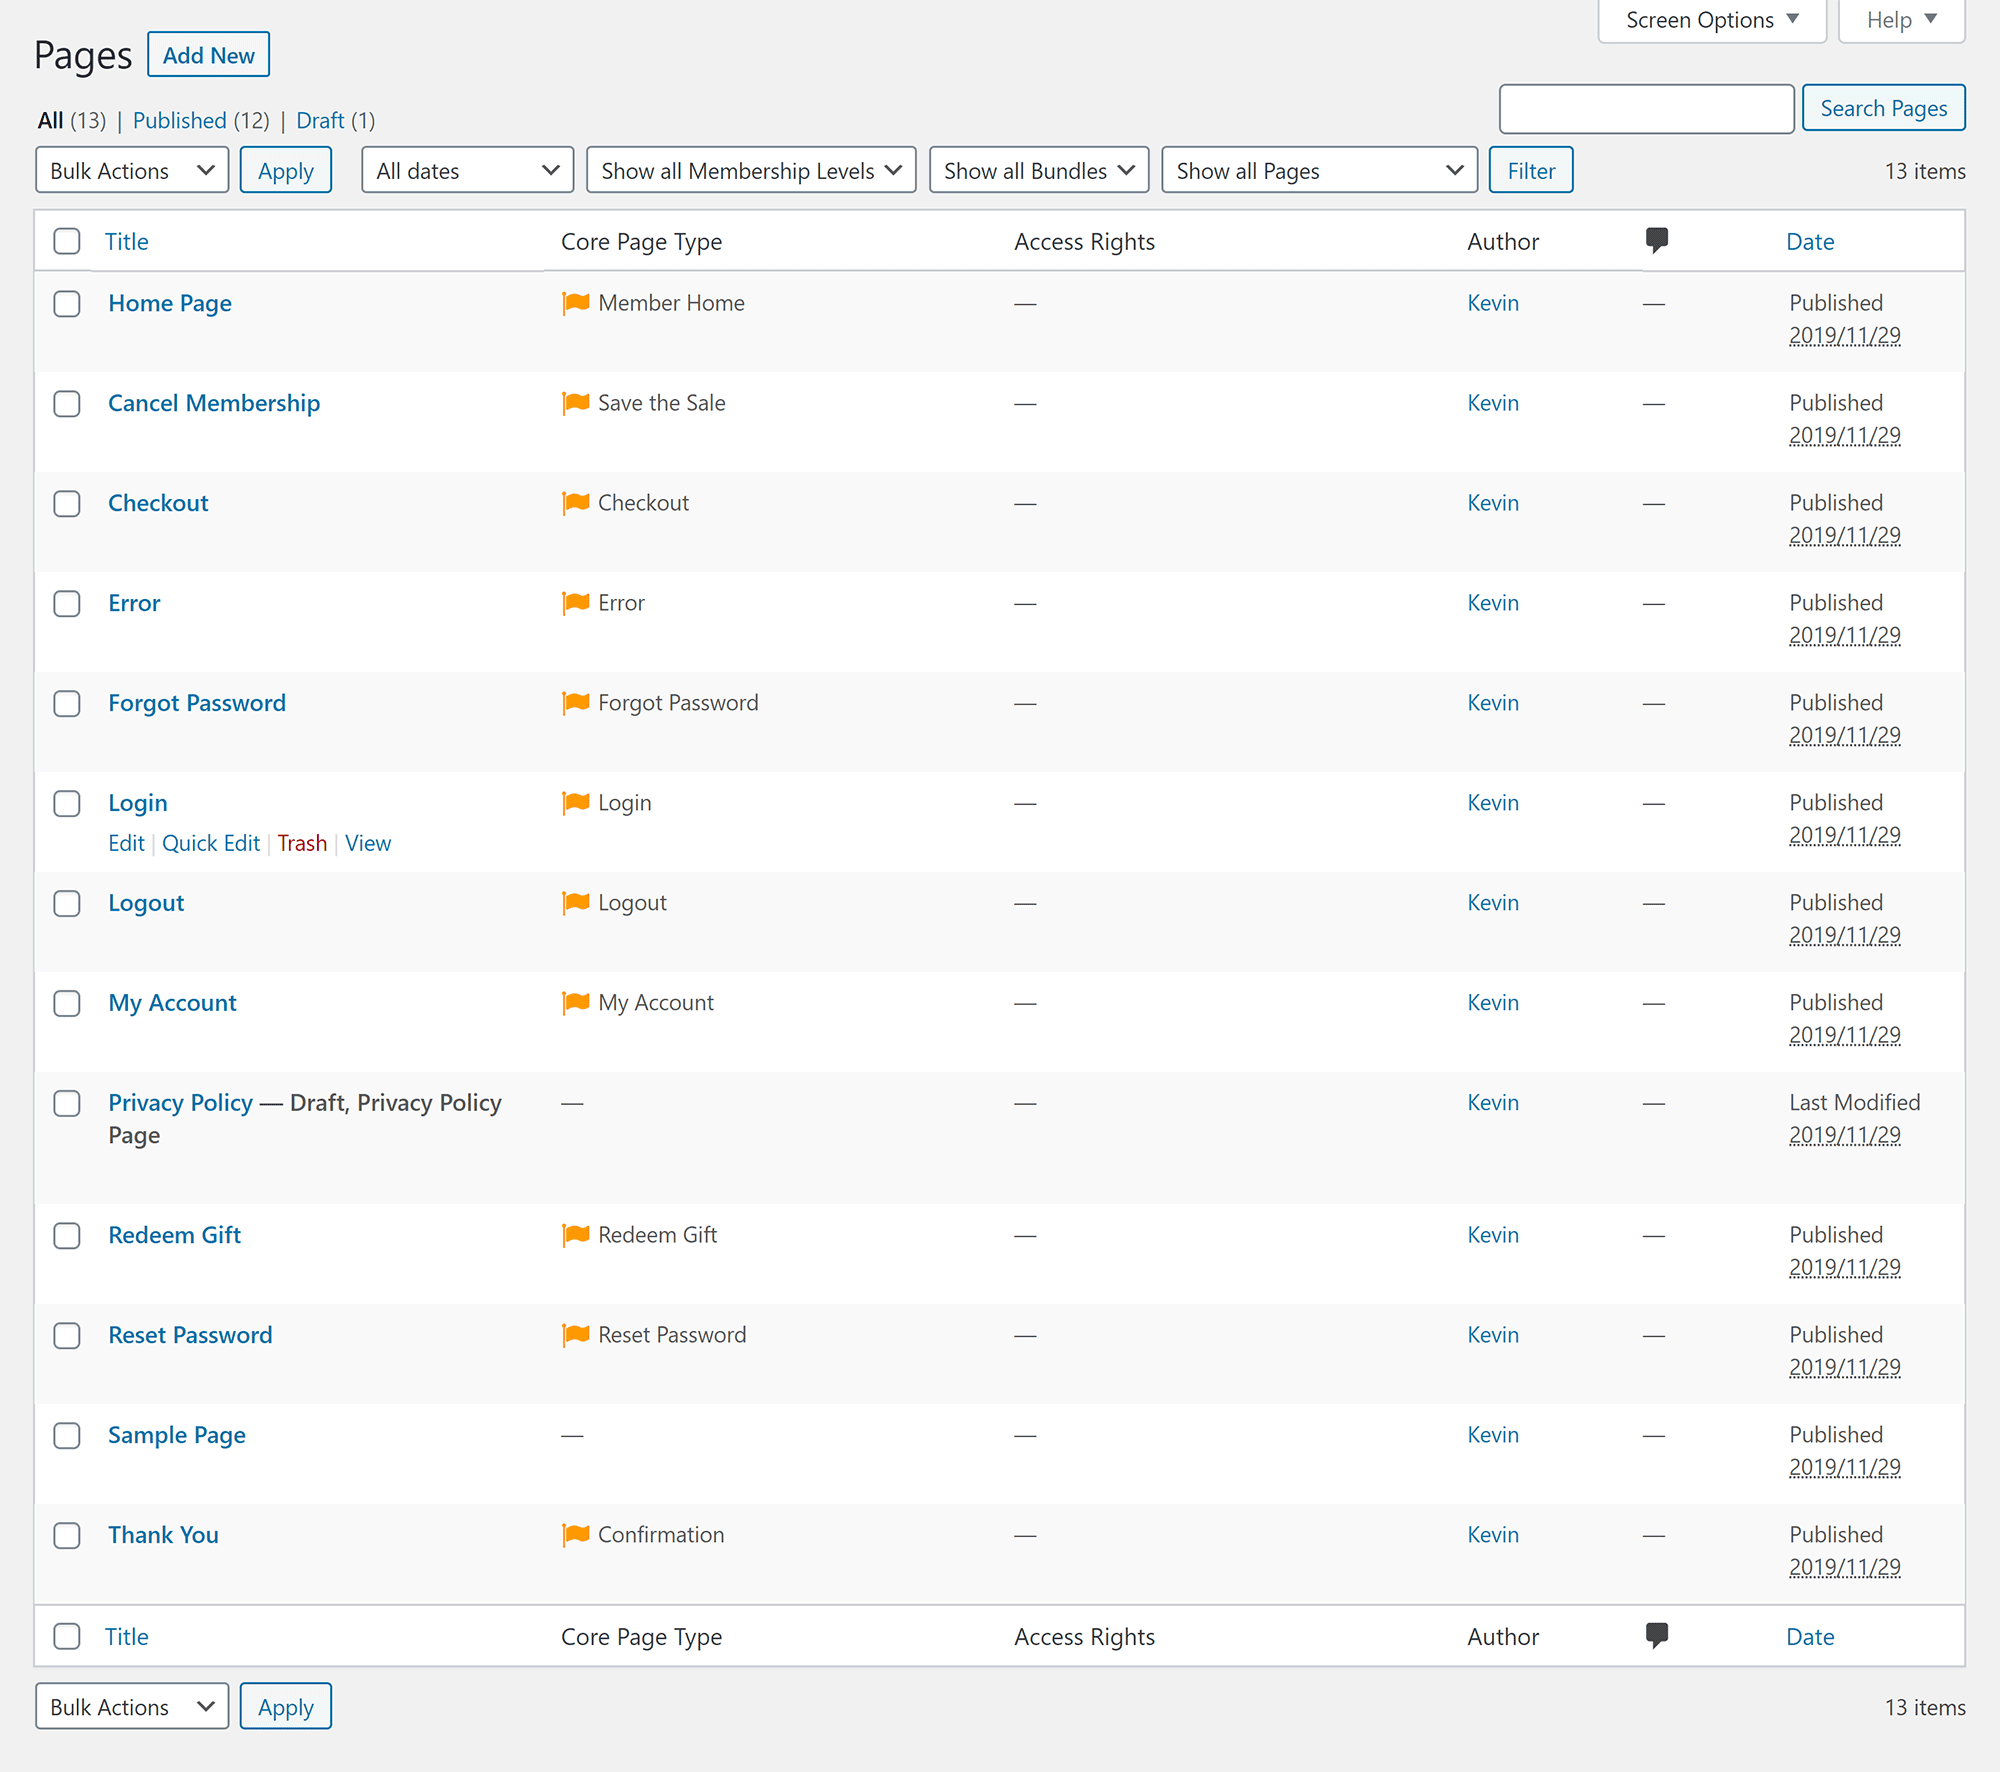
When MemberMouse is activated on your website, 13 new pages are created to help you to build your membership area.
You can modify these pages and add additional pages for members, the sample page is a great starting point for this.
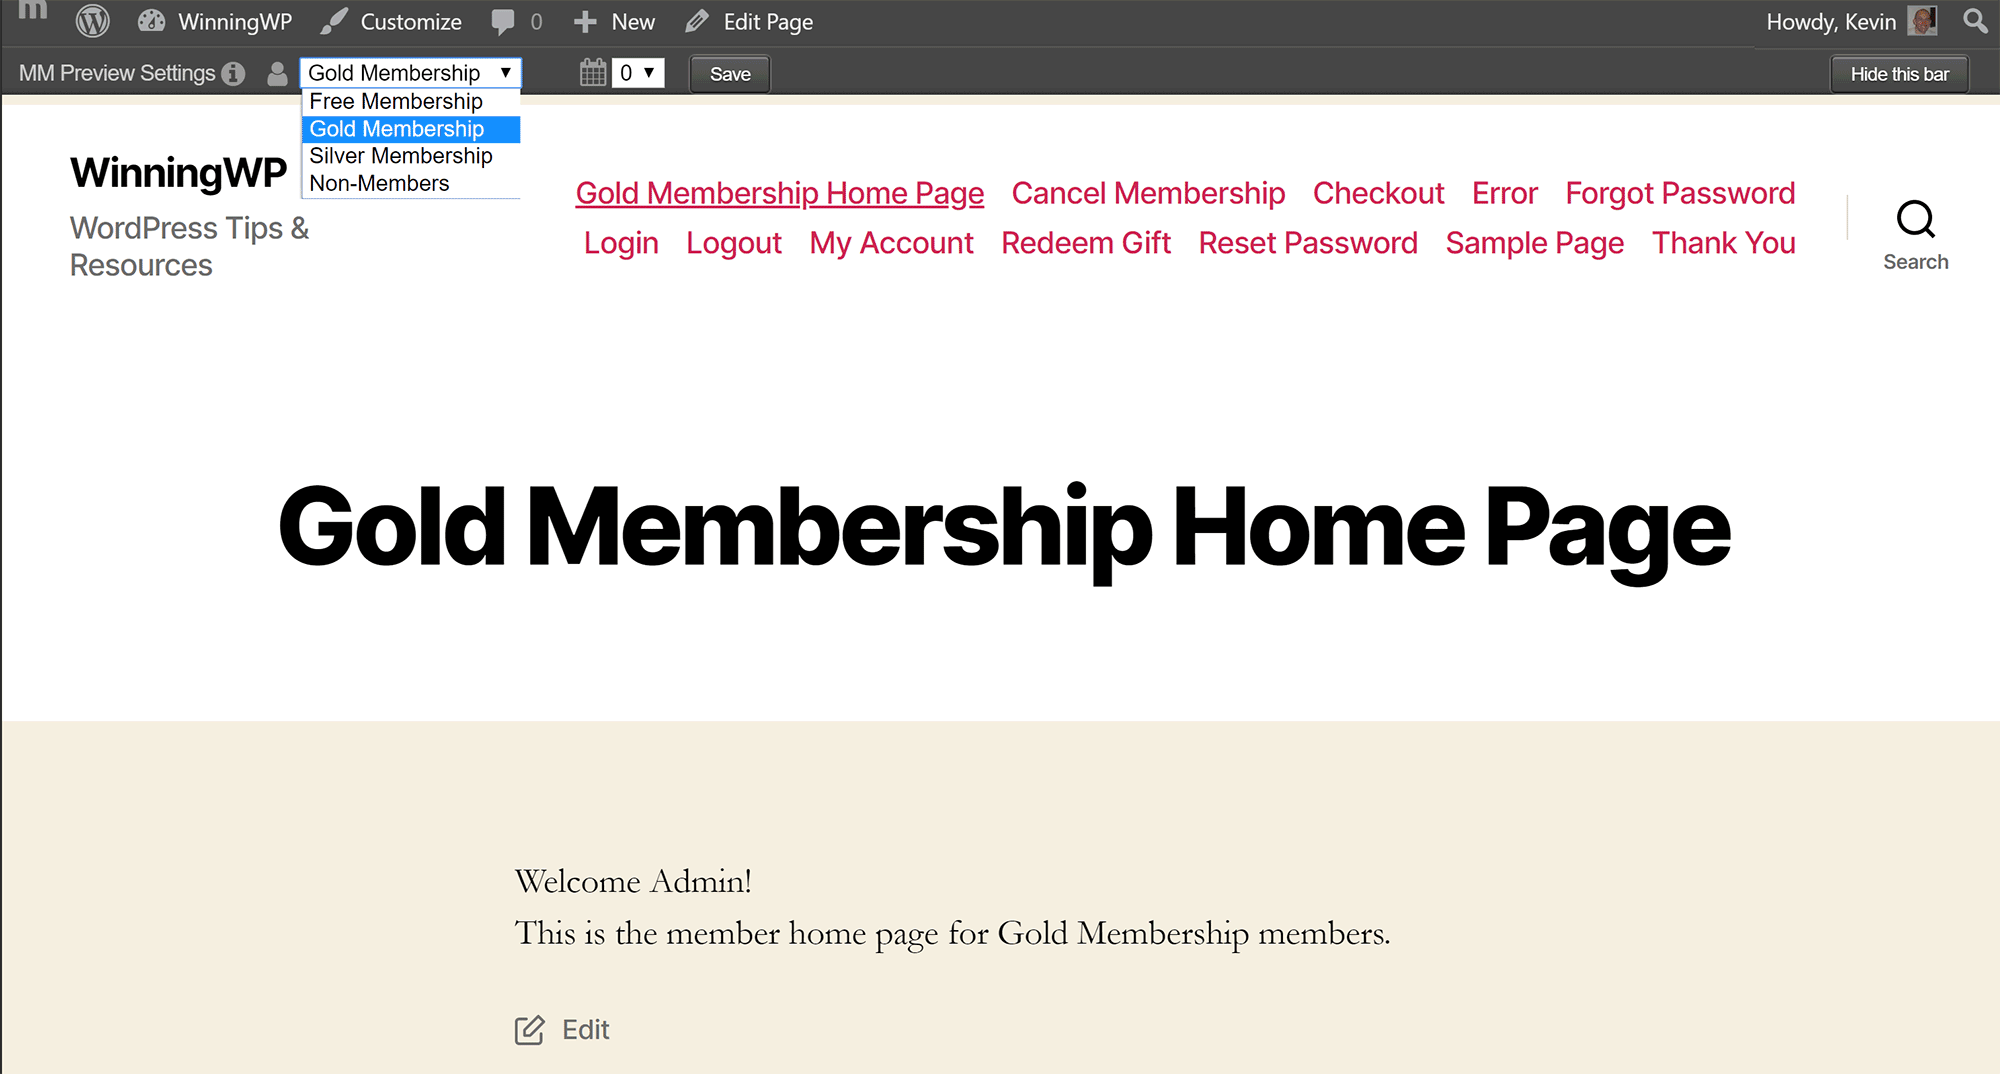
One feature I love about MemberMouse is the preview bar, which allows you to see important areas of your website through the eyes of a member. This helps you to check member pages and restricted content, and see what members will see.
You can preview pages according to a specific membership level, and according to the number of days a user has been a member. So, if you’re checking a membership level for day ten, you shouldn’t be able to see content that won’t be drip-fed until day 14.
It’s a great tool for ensuring everything is set up correctly.
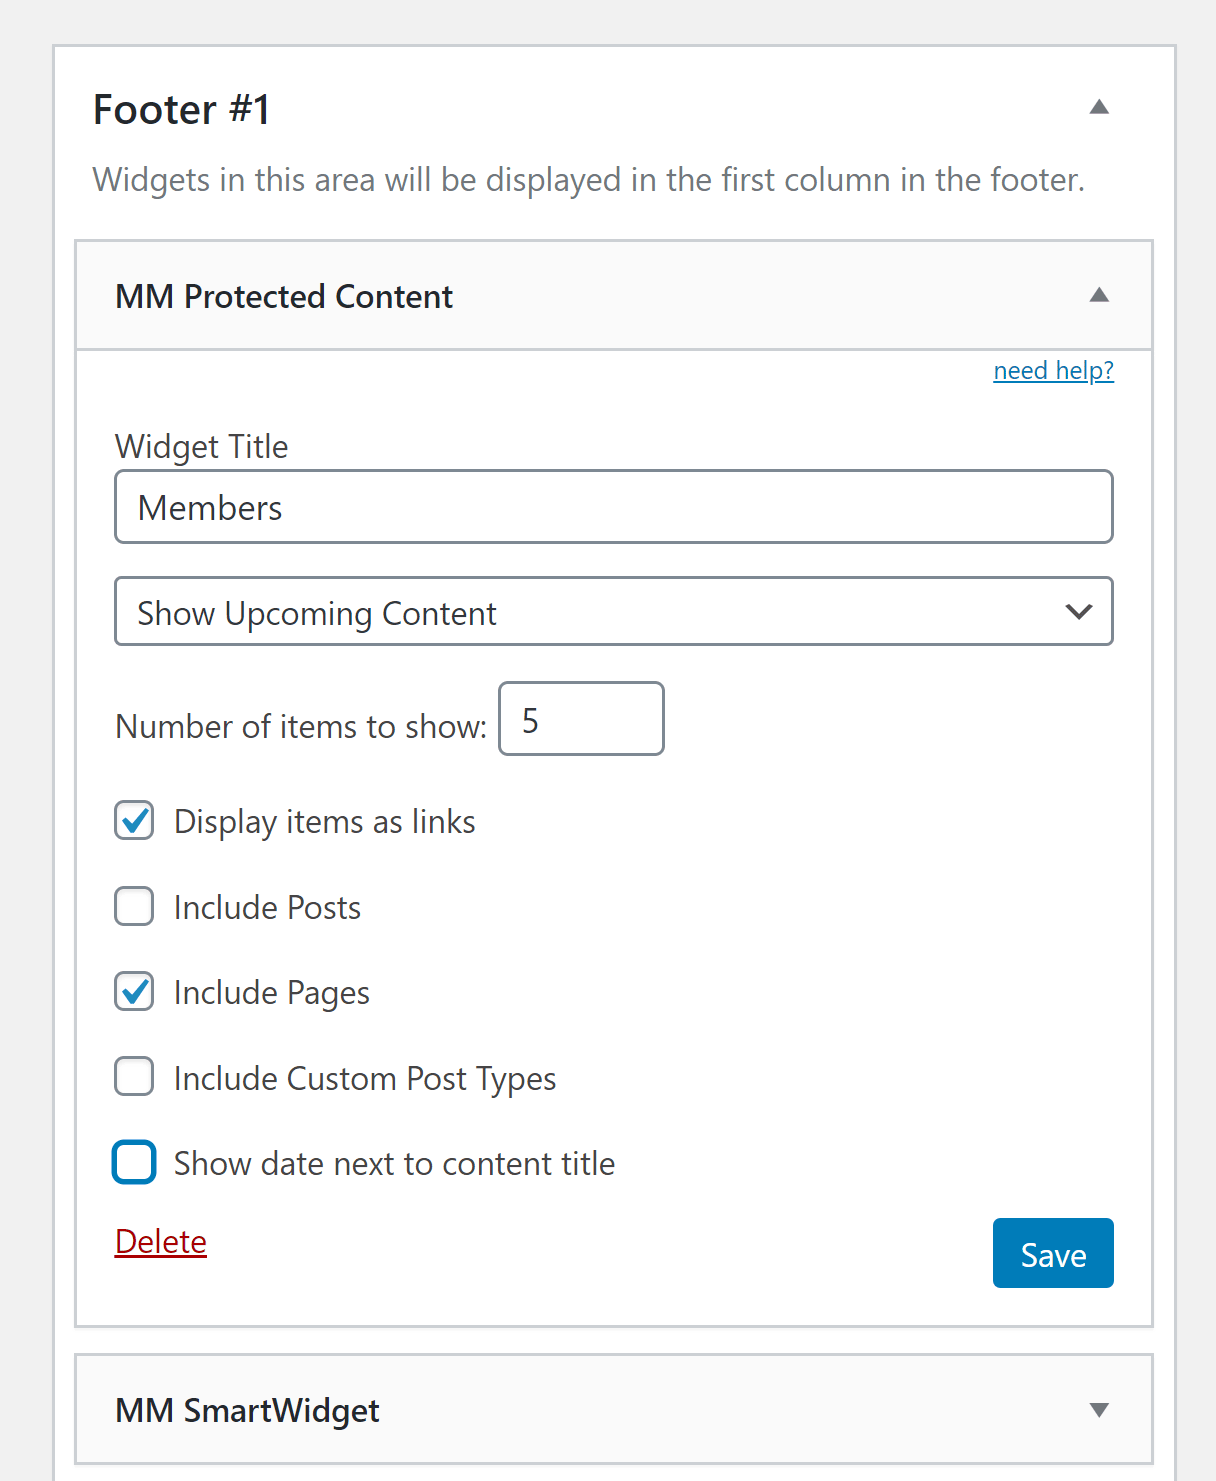
Two MemberMouse widgets are available: Protected content and SmartWidget.
Protected content helps you to show available content and upcoming content to members; the SmartWidget is a blank text area that allows you to enter HTML, Javascript and SmartTags.
SmartTags let you dynamically change what’s displayed on a page depending on who’s reading it. Using shortcodes, you can restrict content to specific membership levels, change what links are displayed and even display customised upsell and downsell offers.
You could integrate this into your website in a number of ways. For example, you can display special offers in your blog posts to existing members that non-members won’t see.
As with any membership plugin, you need to spend time with MemberMouse to set everything up exactly how you want it. This will ensure payments go through correctly and members can’t view content they’re not eligible to see.
I don’t believe any aspect of this is difficult, but I’d encourage you to watch the video tutorials in the main dashboard, as they give a great overview of each configuration area.
Analysing Data in the Reporting Suite
For the purpose of this review, the developers of MemberMouse kindly sent me a copy of the plugin. This enabled me to extensively test it on my test WordPress website, and helped me to understand how it worked.
Unfortunately, as I’ve not yet used MemberMouse on a live website, I wasn’t able to generate any meaningful data in the reporting suite. Thankfully, the MemberMouse knowledgebase helped to fill in some of the blanks.
The reporting suite displays membership information, sales information, customer value and more. The main dashboard displays a great overview of where your business is, and helps you to see how engaged members are.
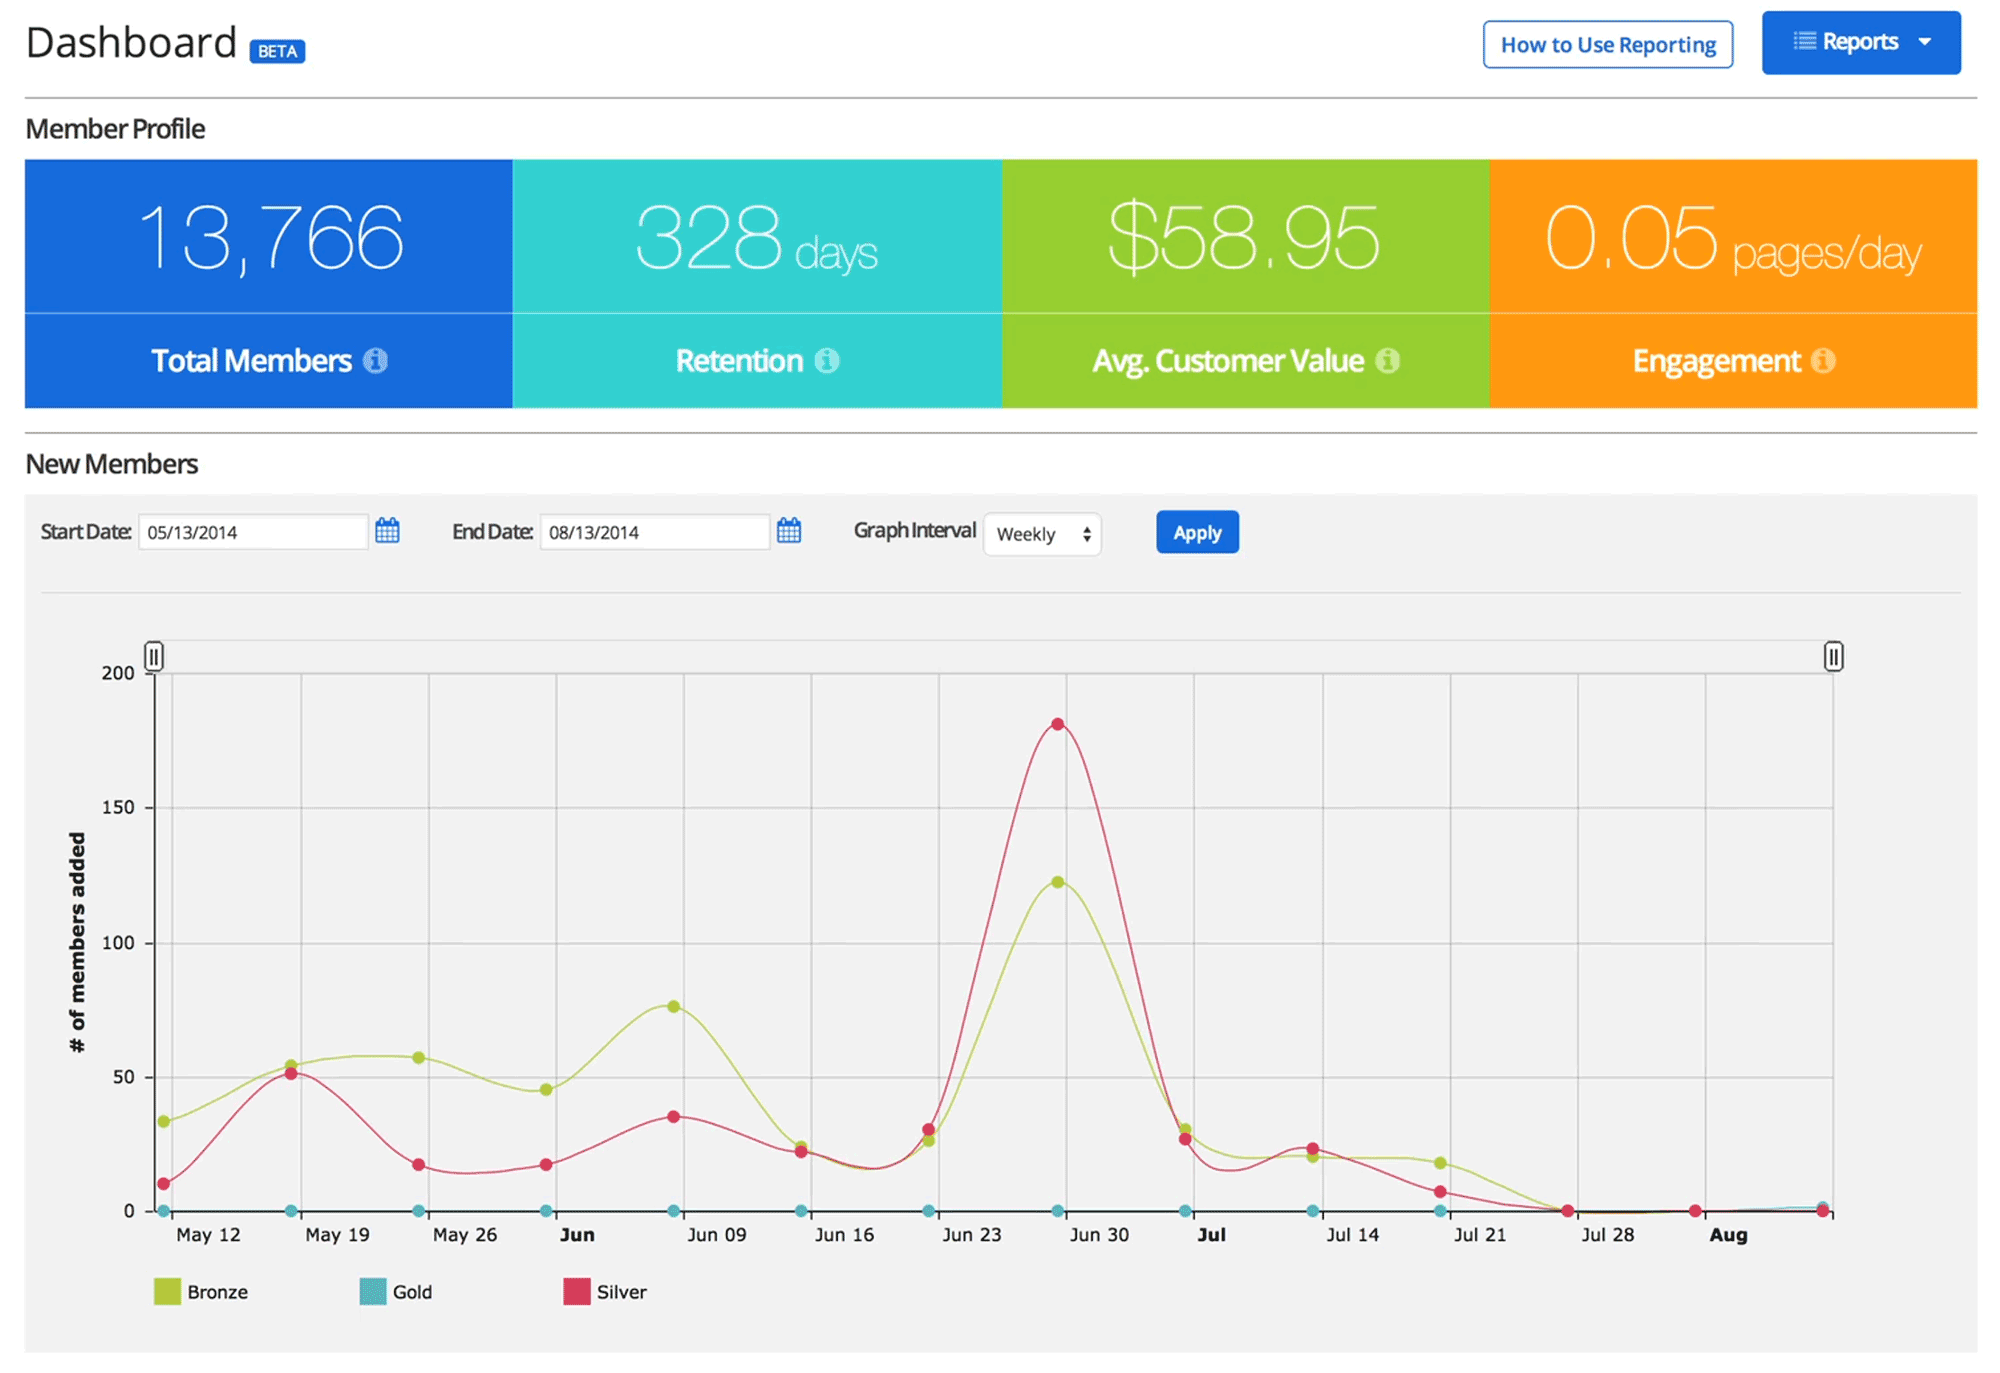
In the member count page, there’s a table that shows how many people have signed up to your memberships. You can view these values by day, week, month or year, and the start and end date can also be selected.
These figures are broken down further in the membership sales page, which is a great way of analysing where your income is being generated.
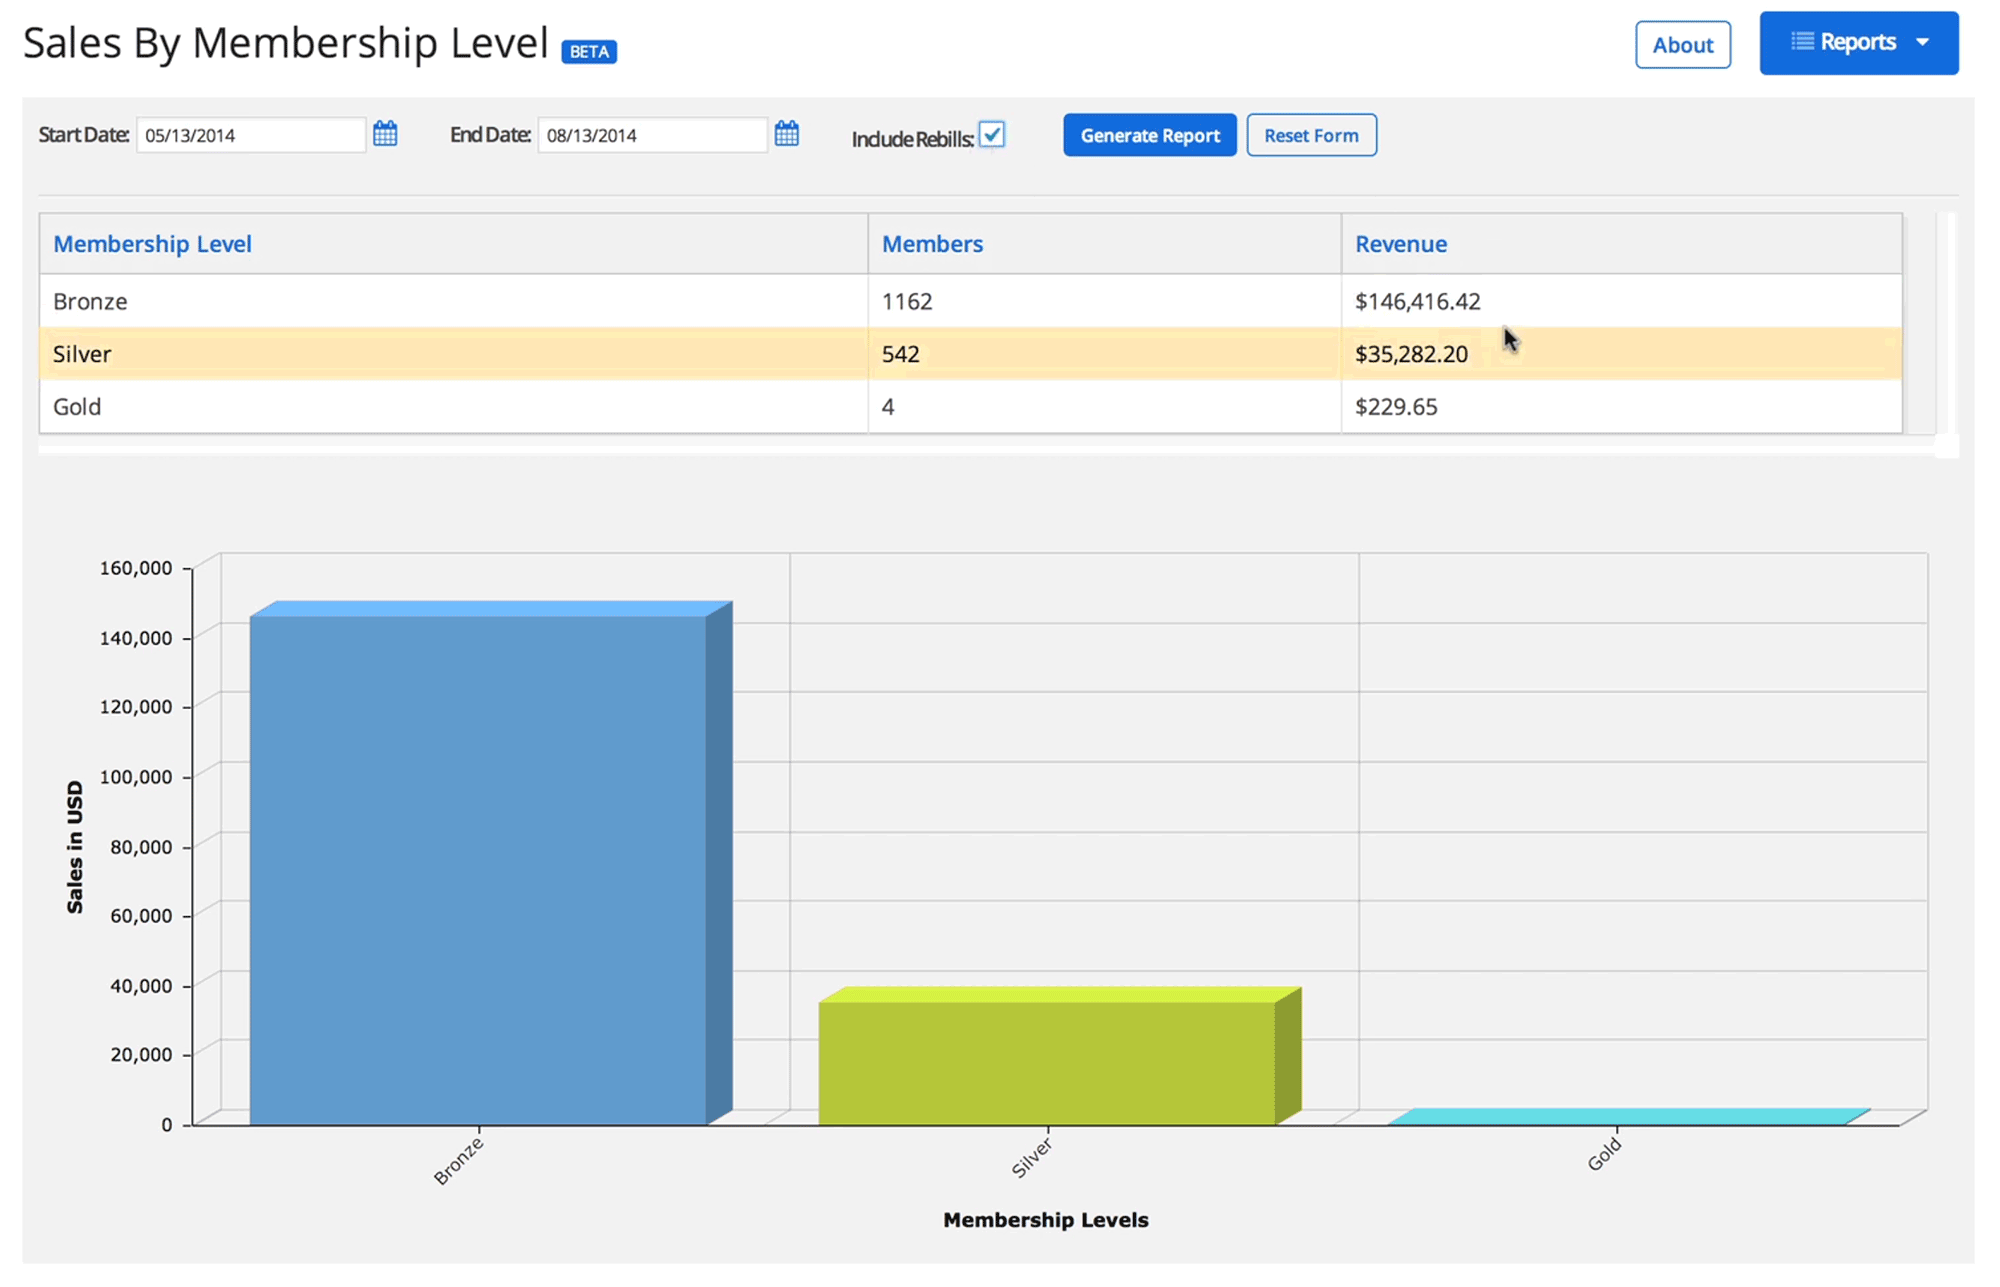
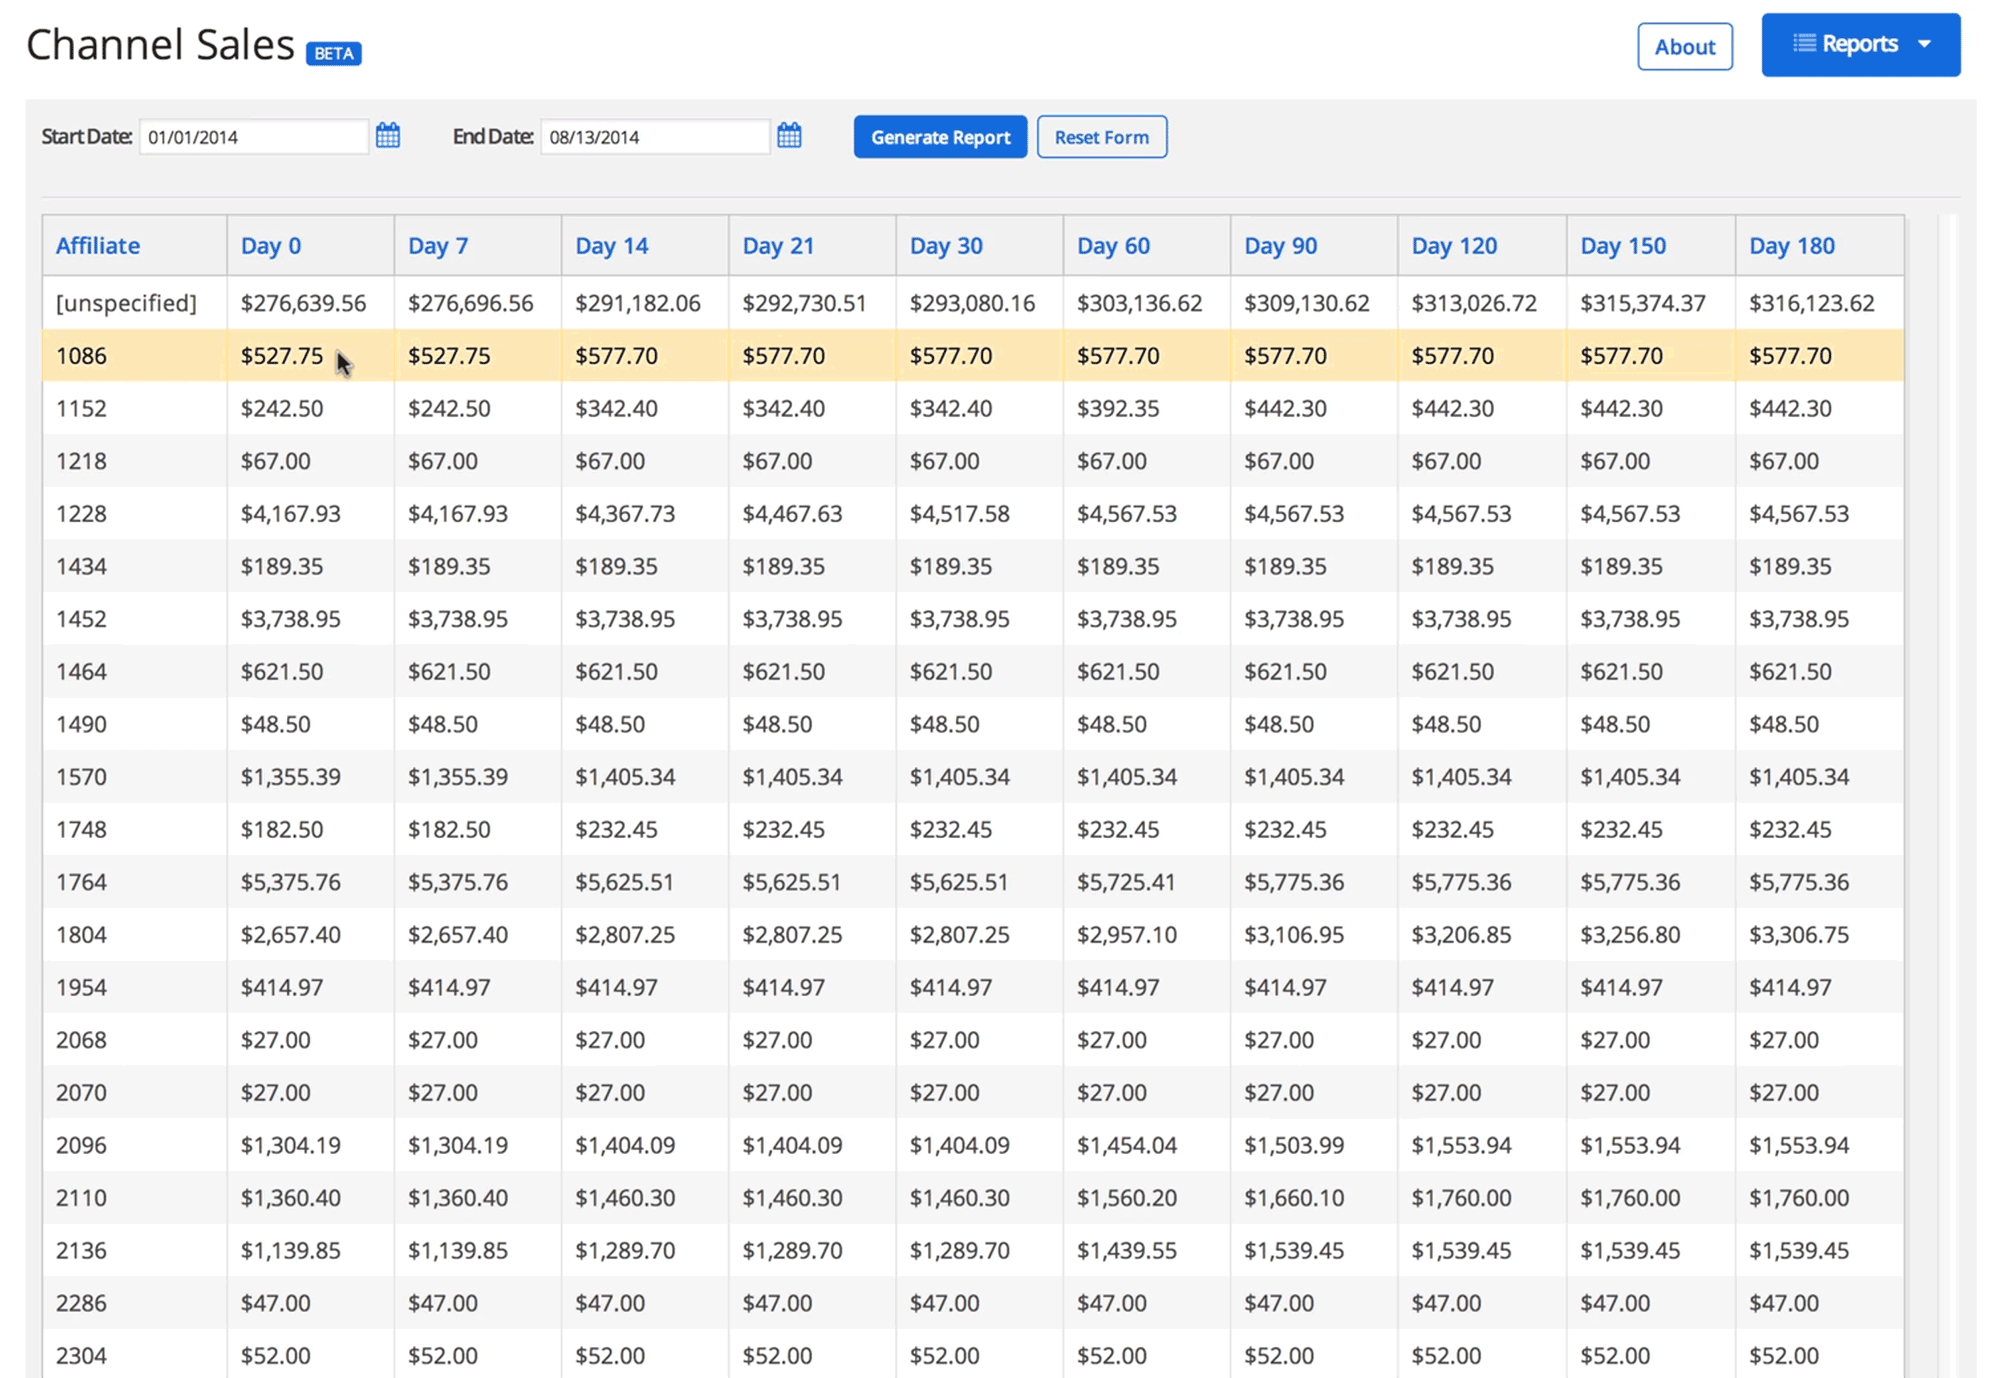
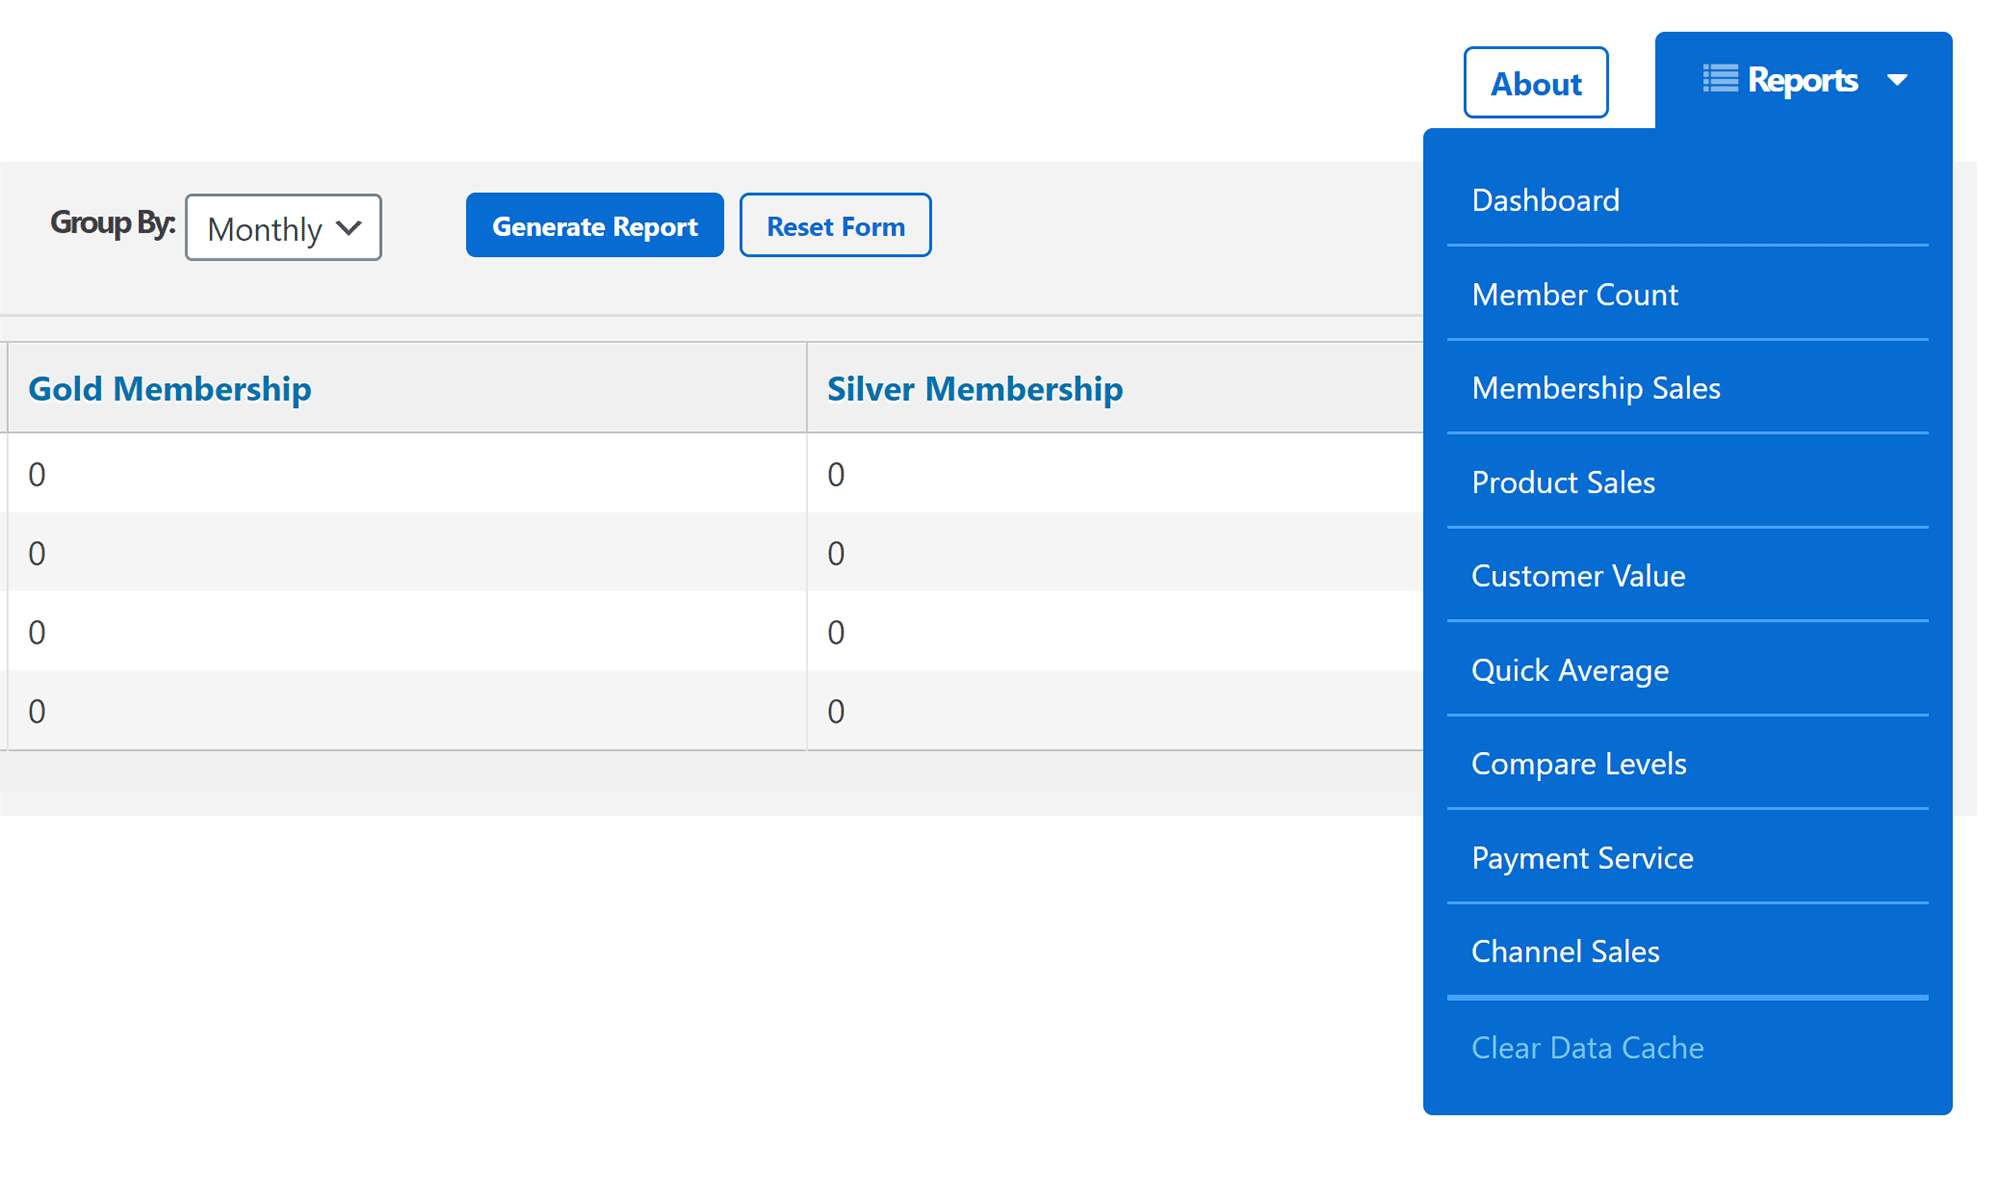
Other reports include product sales, customer value, quick average, compare membership levels, payment services and channel sales.
All of these reports help you to see the bigger picture and understand what members are buying, when they’re buying, how they’re paying and more.
A navigation menu is available throughout the reporting suite area. The same links from your WordPress admin menu are displayed here, with the addition of an option to clear the cache of reports.
I was really impressed by the reporting suite. It gives great analysis of your membership website and helps you to see what plans are performing well. As your membership website grows, analytics will become more important to your future development and marketing endeavors, so this an essential part of MemberMouse.
I was, however, surprised to see there’s no option to export reports. This is something that will hopefully be added in the future.
MemberMouse Pricing
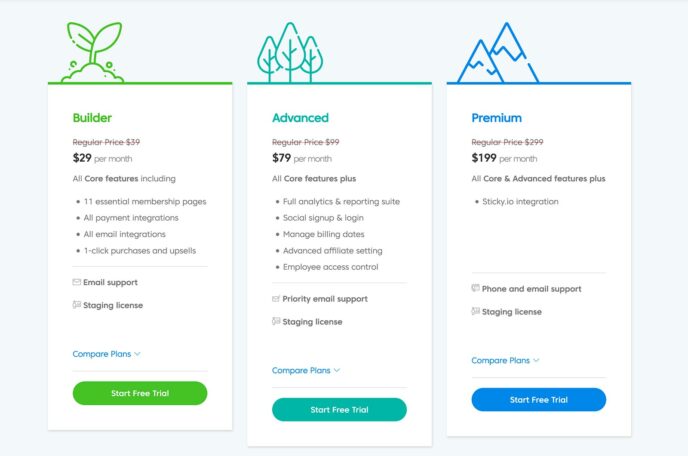
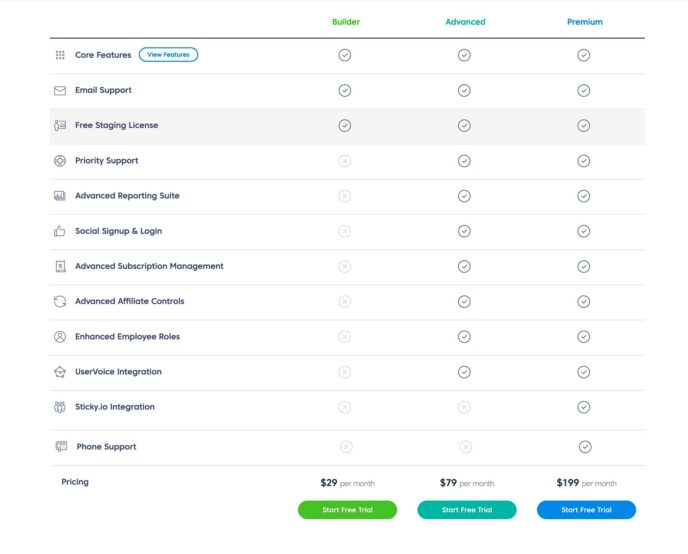
MemberMouse is a premium WordPress plugin, and three different plans are available to those who want to purchase it: Builder, Advanced and Premium.
Except for the top Professional plan, all plans limit how many members you can have.
The Builder plan costs $29 a month for 5,000 members. Most plugin features are included in this plan, such as content protection, drip content, checkout pages, upsells and downsells, and basic reporting.
The Advanced plan, at $79 a month, adds the advanced reporting suite, lifetime value reporting, churn and retention reporting, social media login, and UserVoice integration. Many WordPress users will upgrade to this plan when their membership website has been established, as it supports up to 50,000 members.
The Premium plan costs $199 a month for up to 100,000 members, and the Professional plan is $599 a month for an unlimited number of members. These plans add integration support for Sticky.io and give customers telephone support.
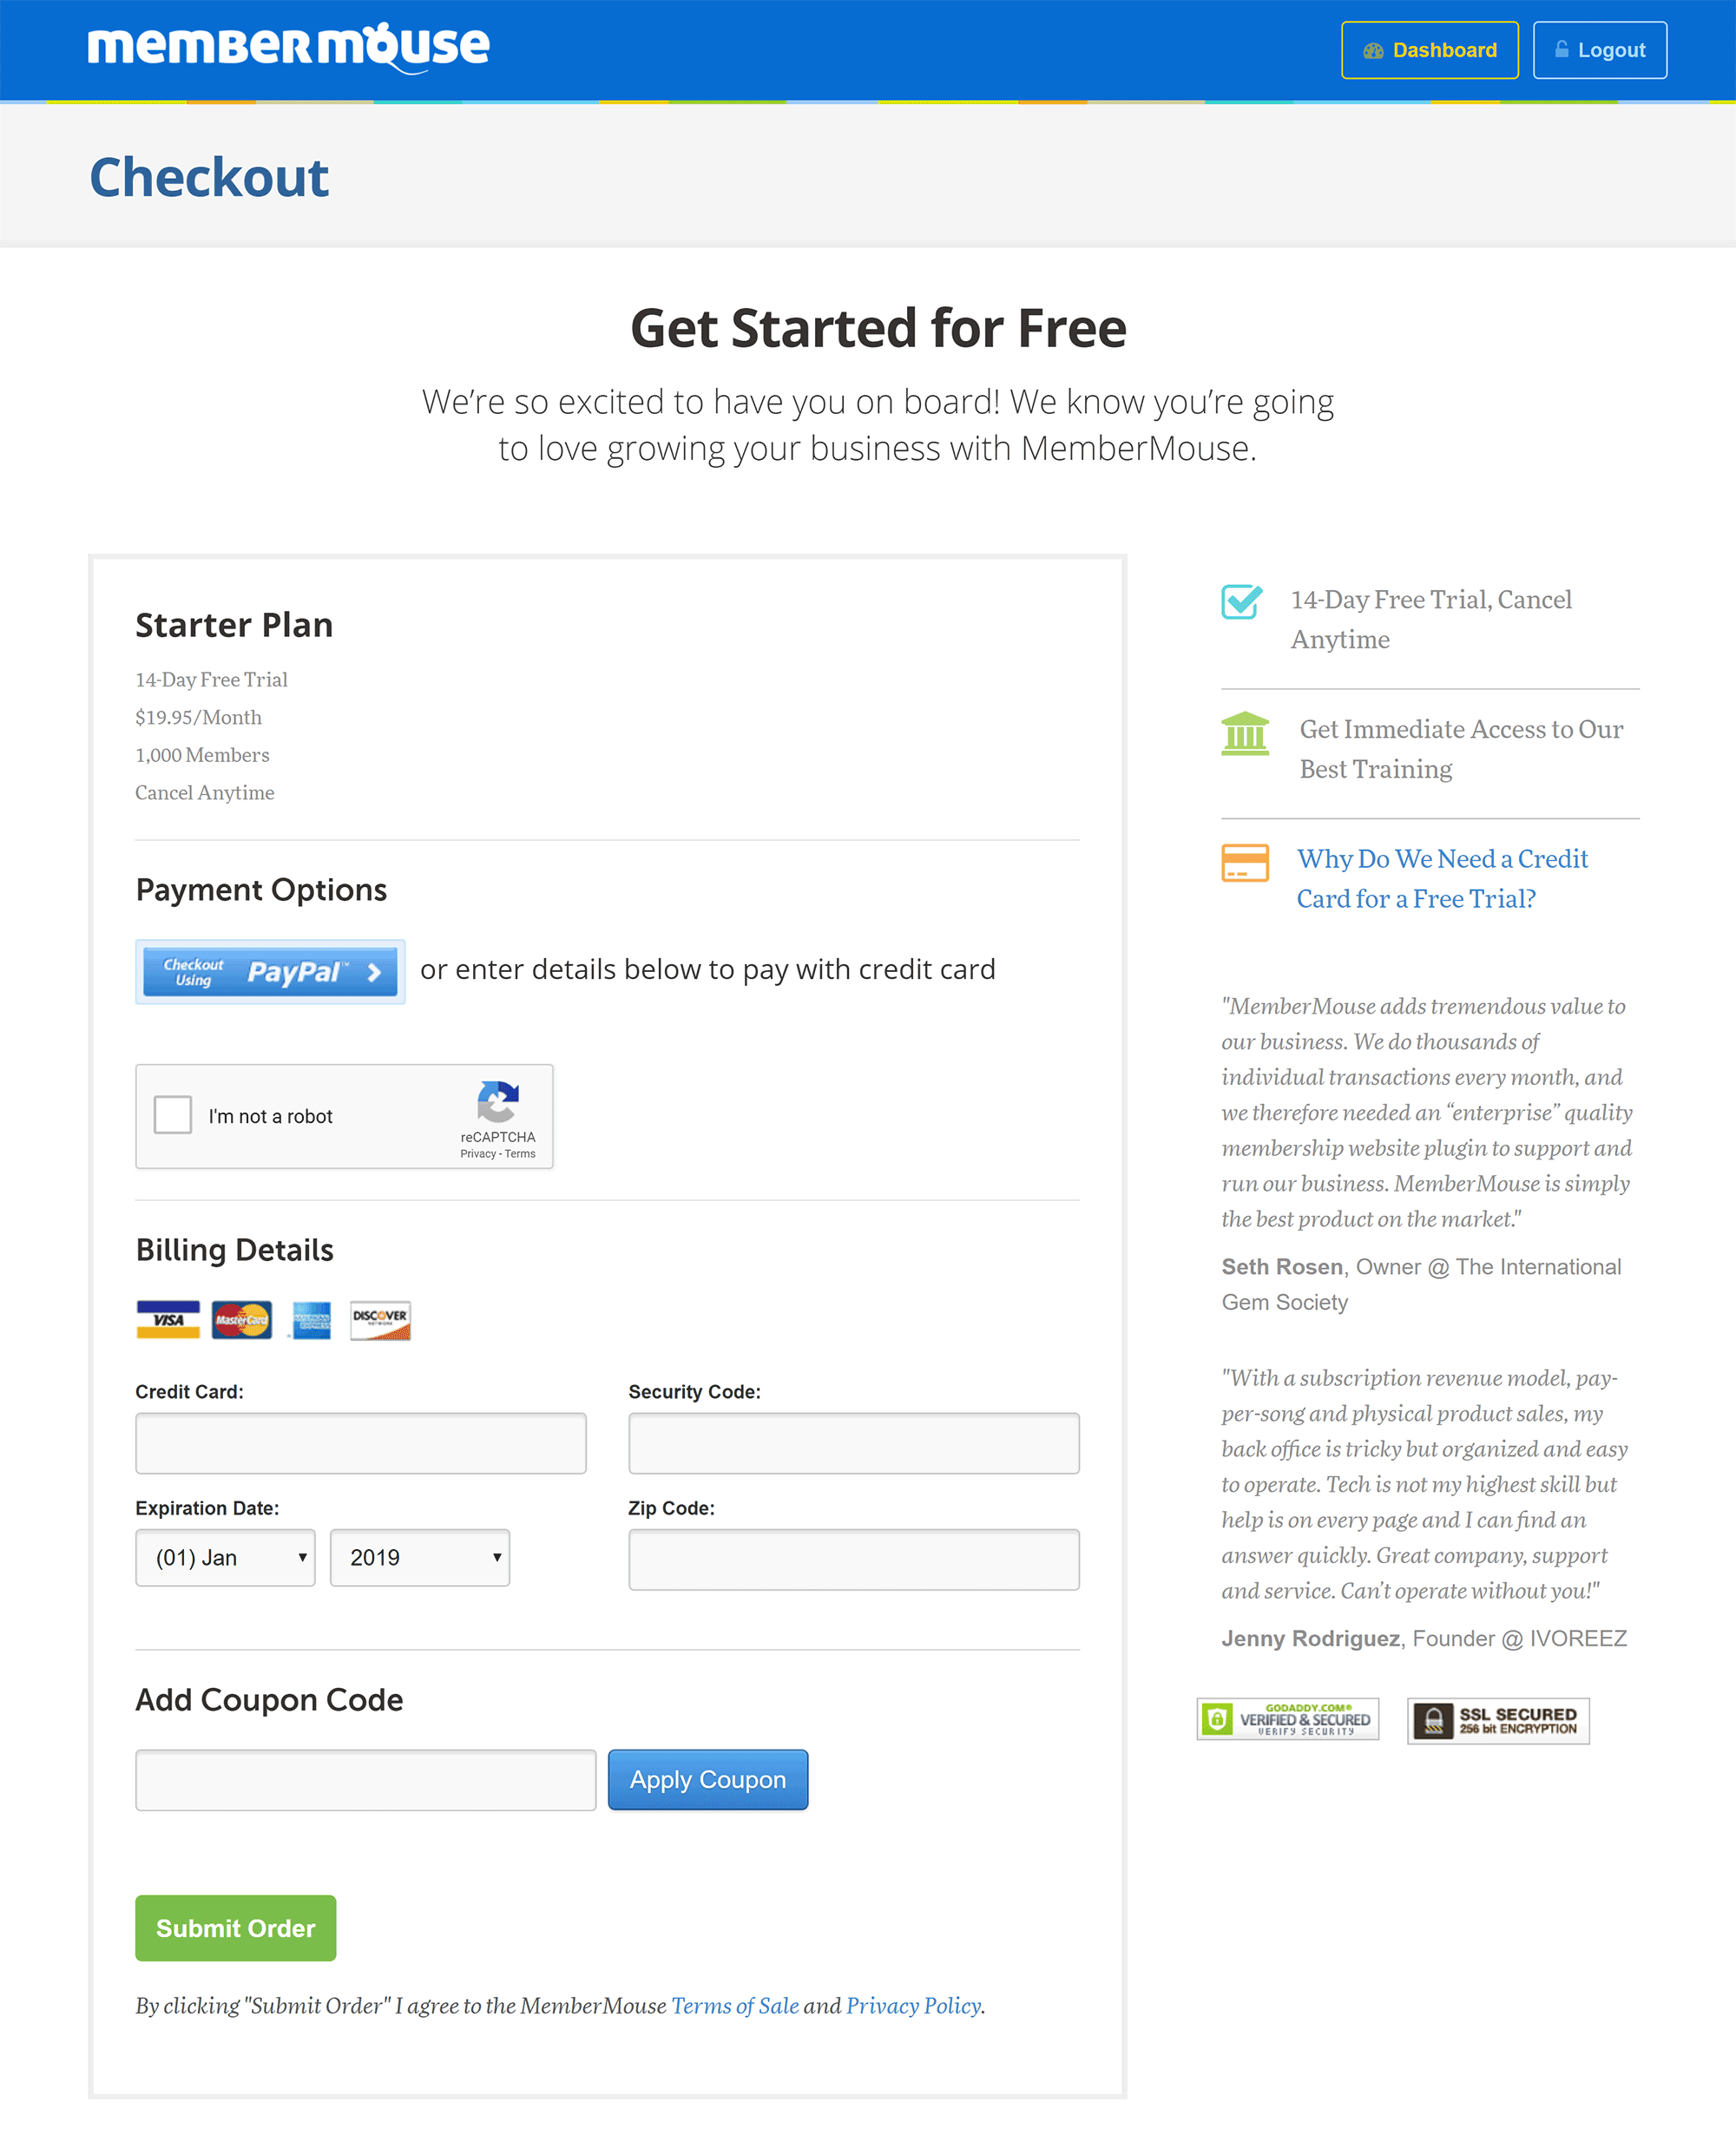
A 14-day free trial is available so you can test MemberMouse and see if it’s right for you. I recommend taking advantage of this before signing up to any plan.
To use the free trial, you need to authorise a payment with PayPal or a credit card. Be sure to cancel this recurring payment if you don’t want to use MemberMouse on your website beyond the trial, since you’ll be charged for the $29 a month builder plan if you don’t.
Enjoyed your trial?
If you’re launching a new membership website and have decided to purchase MemberMouse after the trial, I recommend sticking with the builder plan for a few weeks at least. This will let you see whether you need the functionality offered in the advanced or premium plans, such as the reporting suite.
Those of you who have an established membership website will probably need to select one of the higher-priced plans to accommodate your existing members. Check out the ‘Import Members with the Import Wizard‘ tutorial to get an understanding of how you can transfer your data from another WordPress membership plugin.
Final Thoughts
There are a lot of great membership plugins available for WordPress, and MemberMouse rightfully deserves to be regarded as one of the best.
Once you get your head around how to set up membership levels and products correctly, you can start to add content to your website and promote memberships to potential customers.
Like any WordPress plugin, there are a few areas where it could be improved. For example, I’d love to see the developers simplify the process of getting set up initially by adding a step-by-step installation wizard to complement the video tutorials they have.
As far as new features go, I’d like to see the ability to export reports. I’d also like better support for digital content, such as eBooks, PDF documents and videos. All of this content can be restricted using MemberMouse, but it would be great to see this functionality extended so users don’t have to rely on third-party plugins.
Related Reading:
Used/using MemberMouse? Or any other membership plugins? Thoughts?


All comments are held for moderation. We'll only publish comments that are on topic and adhere to our Commenting Policy.