
How to Create a Basic Contact Form (For Free) Using WPForms WordPress Plugin
A contact form is an essential feature of almost every type of website. Whether you’d like feedback from your visitors or inquiries from potential customers and clients, adding a contact form is one of the best ways to let people get in touch.
As you’d expect, when it comes to adding a contact form to your WordPress website, the most straightforward way is to use a purpose-built plugin — one of which is the popular and powerful WPForms from the team behind both OptinMonster and Soliloquy.
In this guide, we’ll show you how to quickly and easily create a basic contact form for your WordPress-powered website using the free version of WPForms: WPForms Lite.
Table of Contents
Why Use WPForms?
When it comes to WordPress contact form plugins, there are lots to choose from. However, WPForms is one of the quickest and easiest ways to add a contact form to your website — while still giving you the option to upgrade your forms should you have more advanced needs in the future.
Thanks to the WPForms templates, you can add a contact form to your WordPress website in no time at all, and, if you need it, the intuitive drag-and-drop form builder tool is on hand to help you to create custom forms for almost any purpose.
So, now that you know why WPForms is a good choice, next we’ll show you how to use this free plugin to add a basic contact form to WordPress.
How to Add the WPForms Lite Plugin to Your WordPress Website
The first step in creating a basic contact form with WPForms is to add the plugin to your website. WPForms comes in two main versions: A free one and a more-advanced commercial option. However, if all you’re after is a basic contact form, the free version is more than adequate.
The quickest way to add the plugin to your website is to log in to your WordPress admin area and navigate to the plugins section of the dashboard.
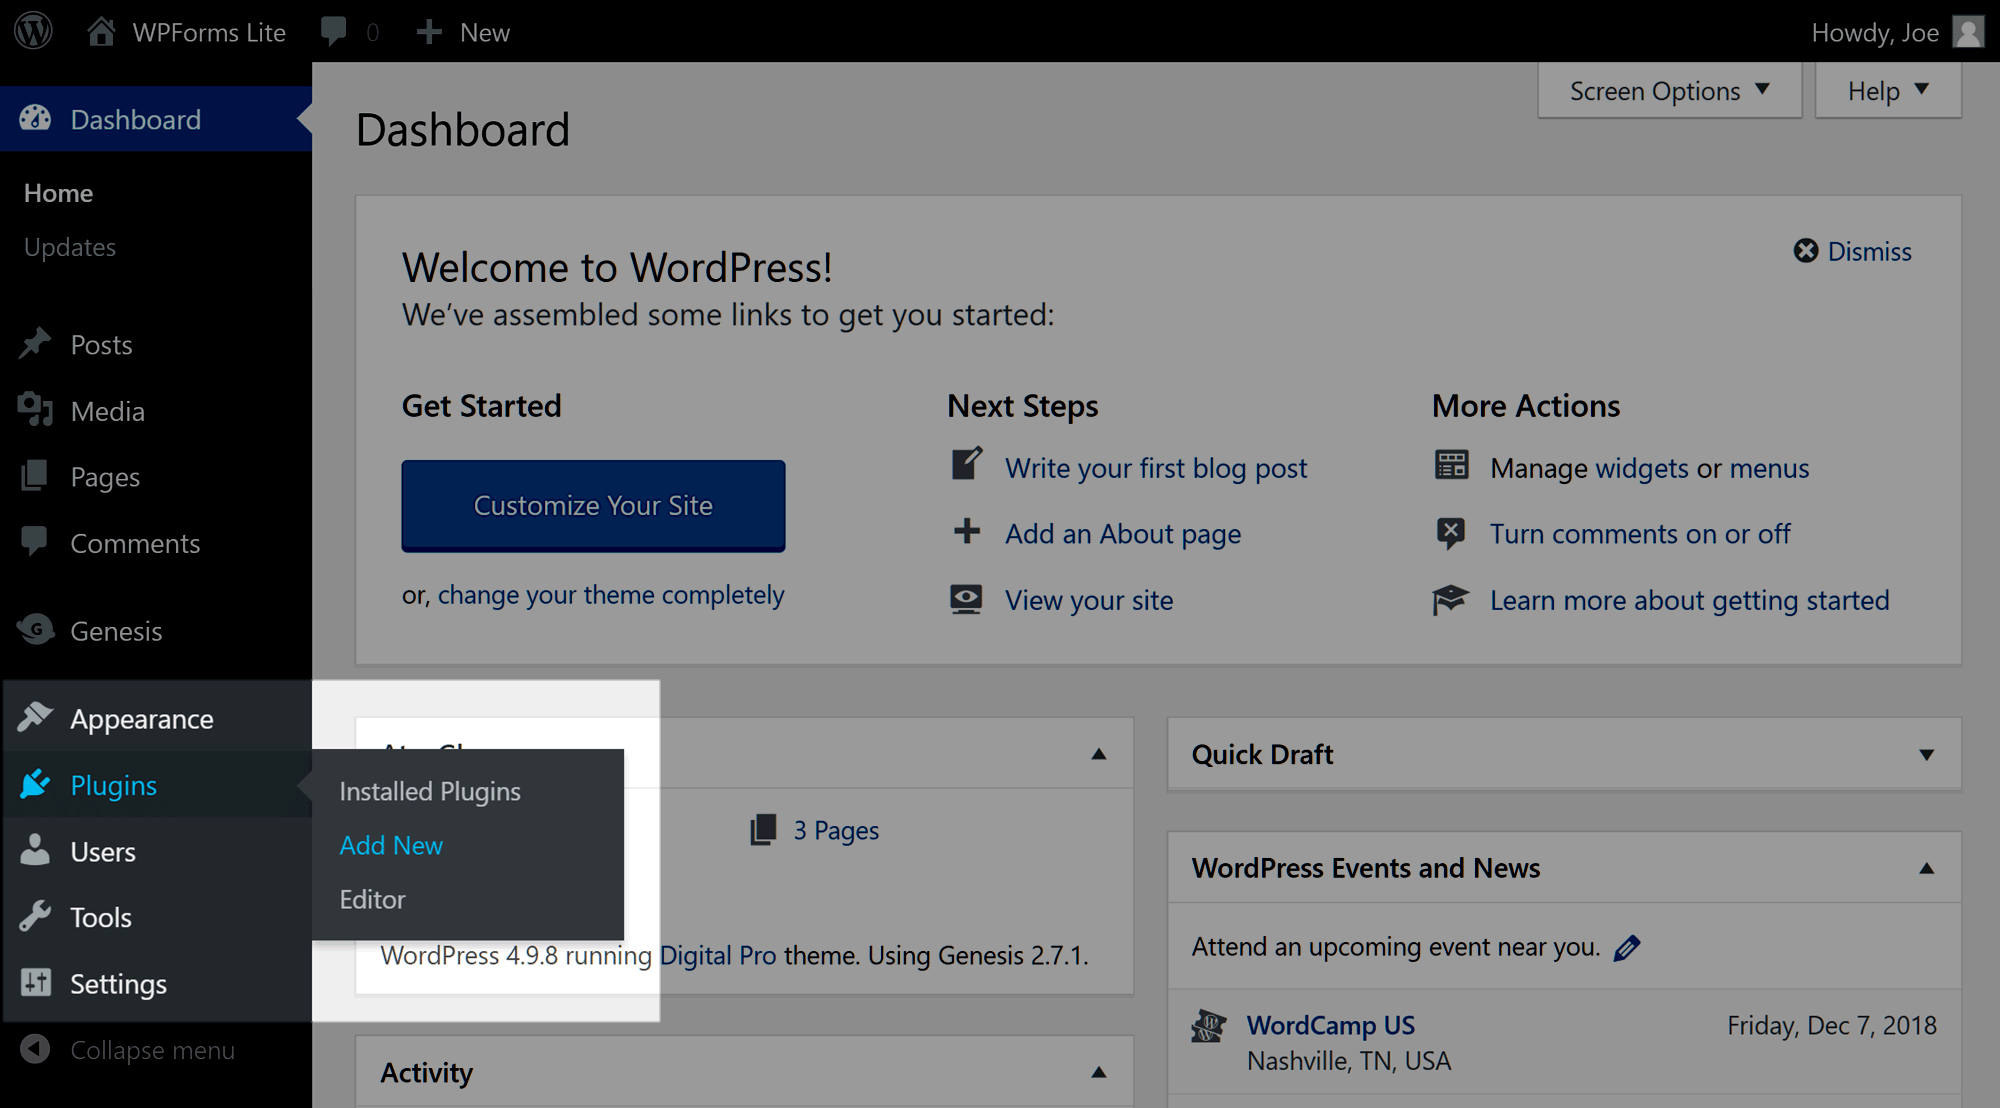
From the Add Plugins page, enter ‘WPForms Lite’ into the search box, and install the first plugin returned in the results.
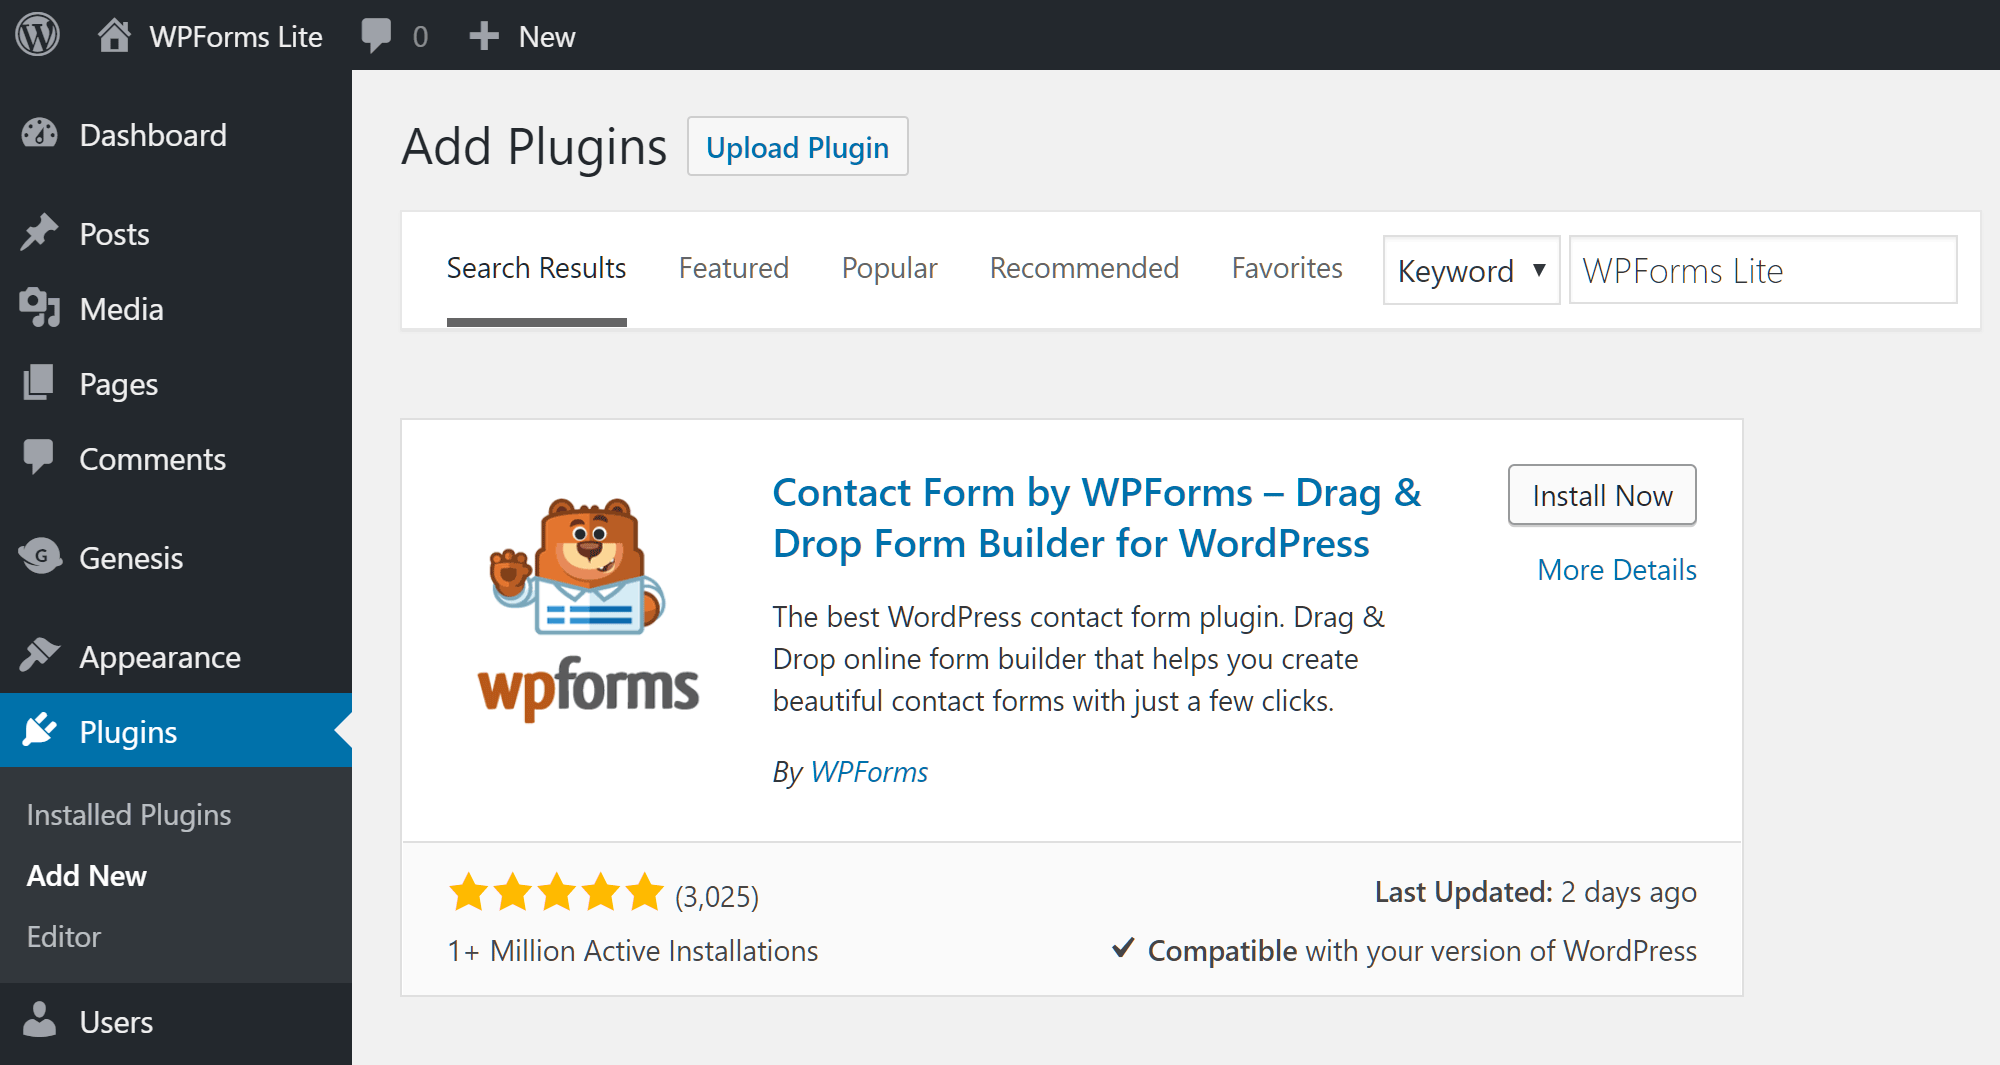
On the next screen, click on the Activate button, and WPForms will be ready to use on your WordPress website.
How to Create a Basic WordPress Contact Form with WPForms
As part of its attempt to be the most user-friendly WordPress forms plugin available, WPForms displays a helpful welcome message after the plugin has been activated.
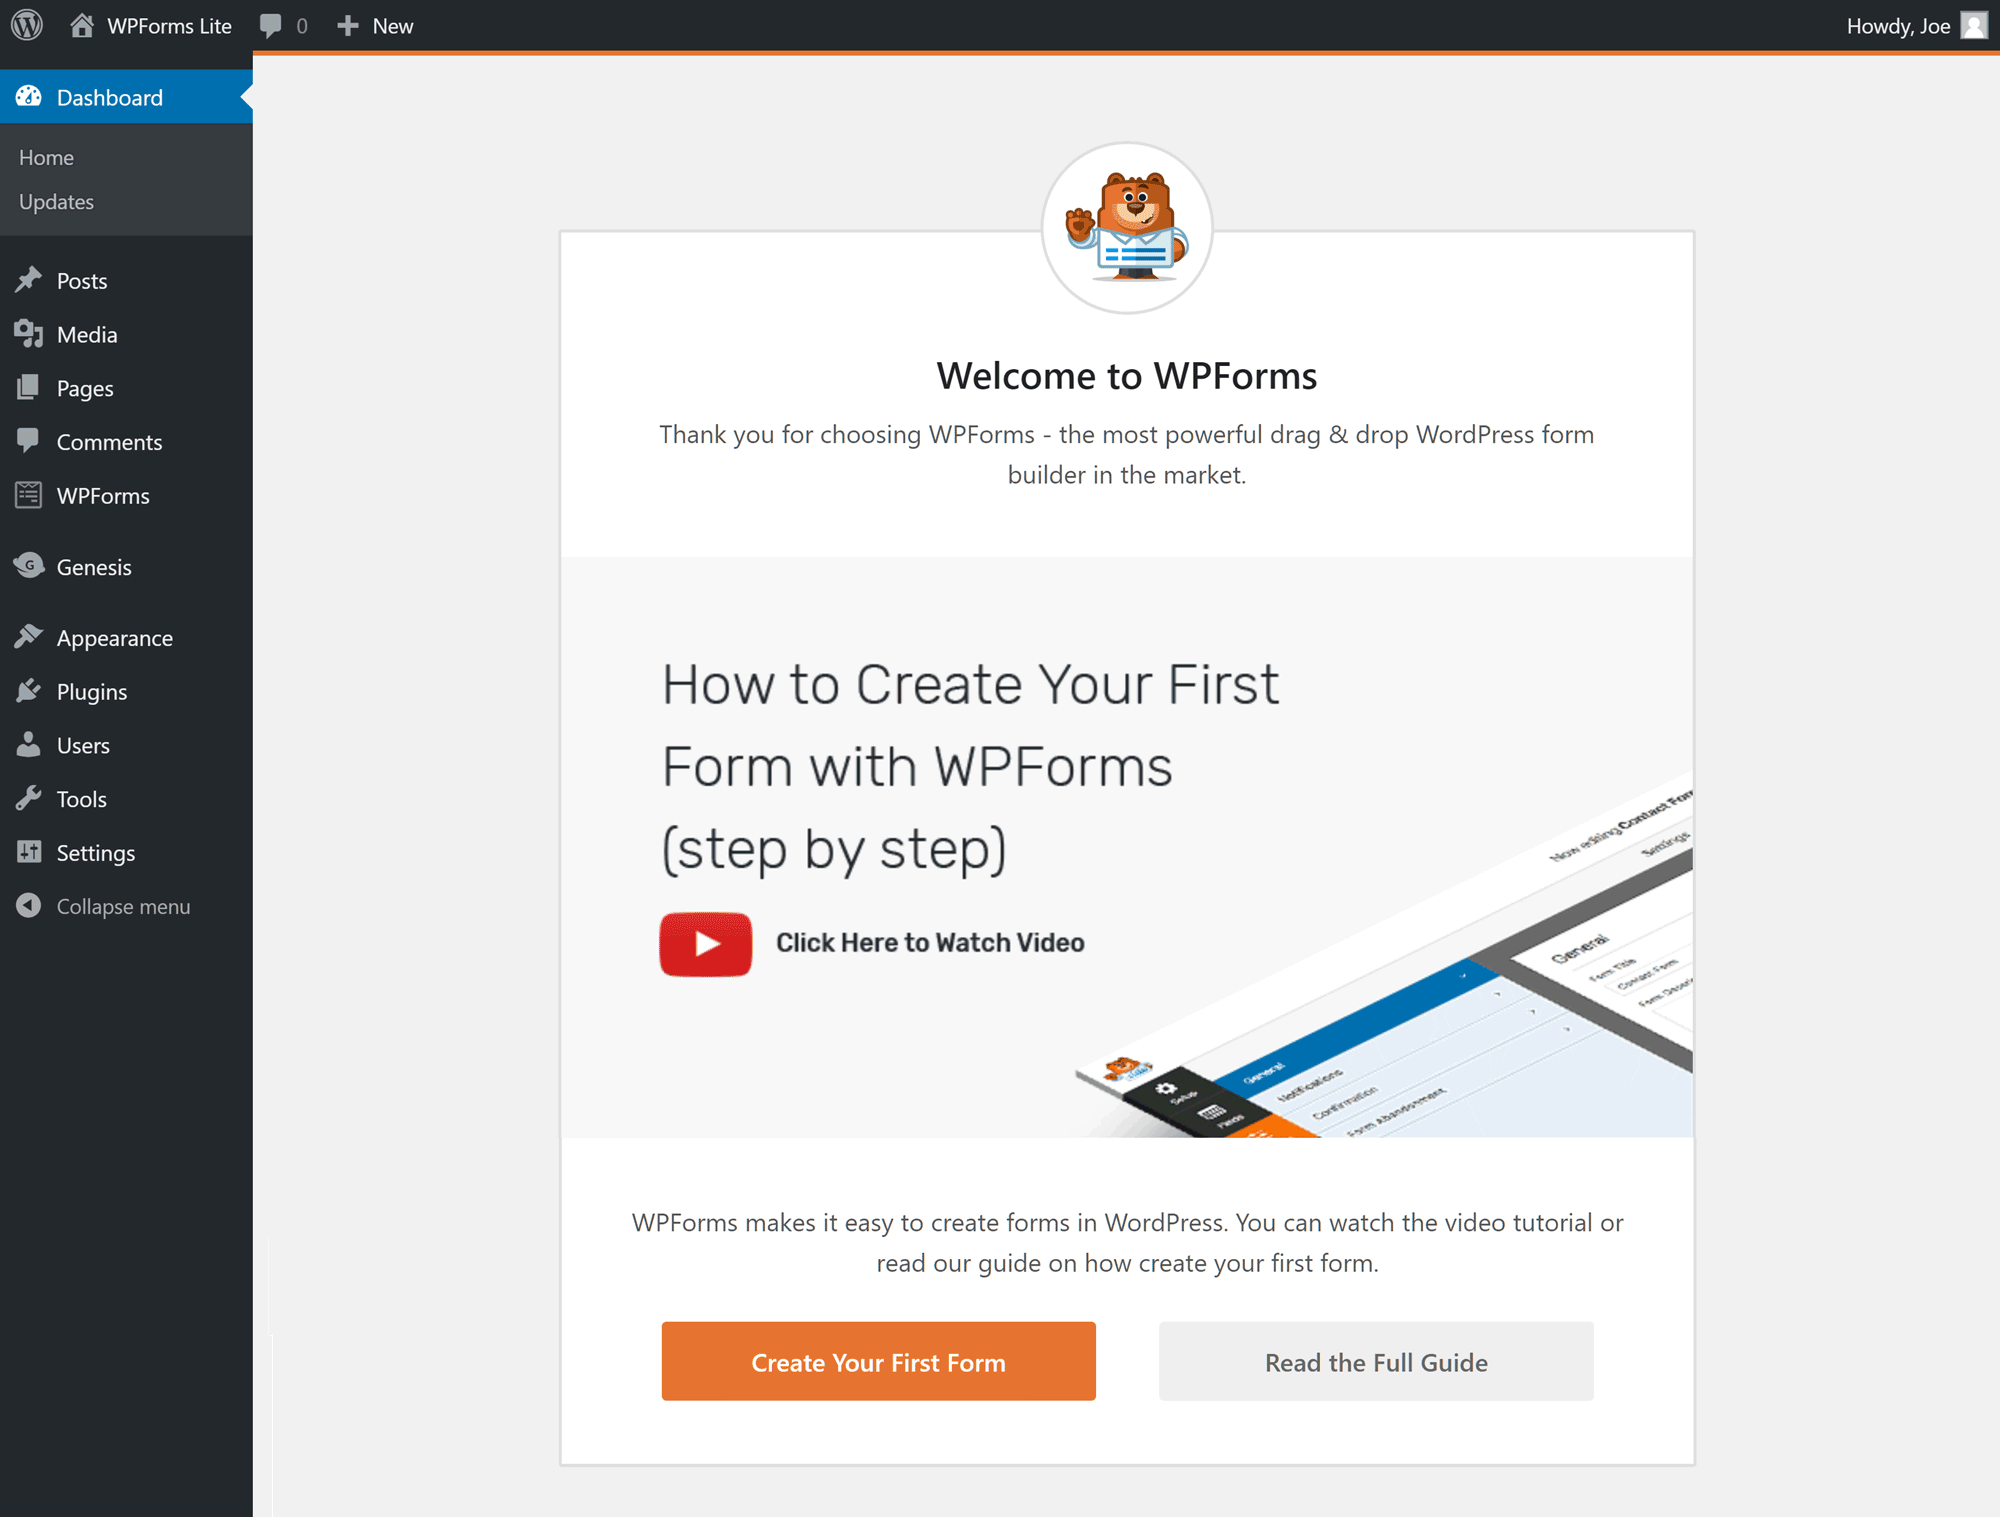
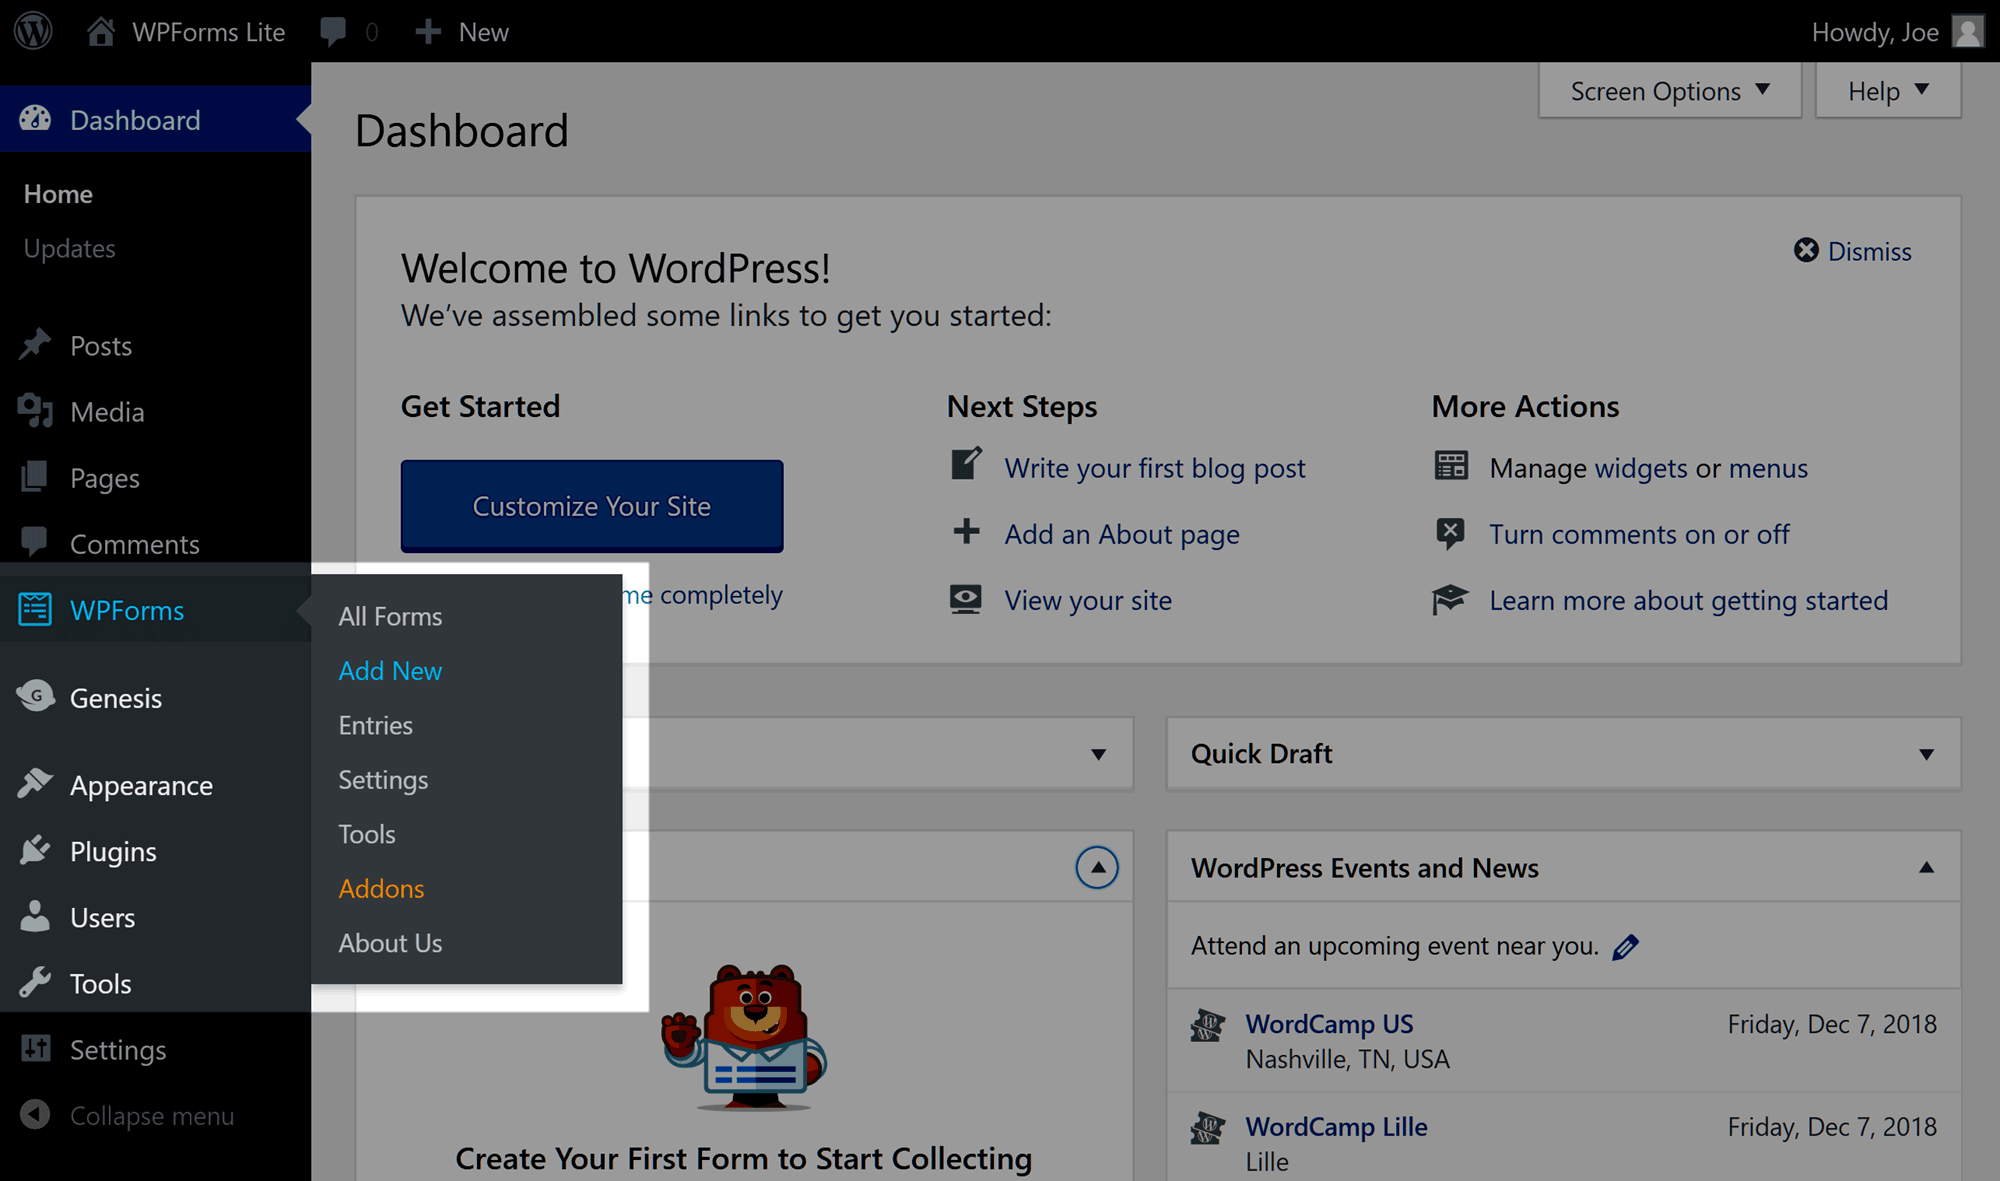
From the welcome screen, you can watch a helpful video walkthrough guide to creating your first contact form with WPForms. Alternatively, you can simply click on the Create Your First Form button to get started. If for some reason the welcome screen isn’t displayed, you can create a new contact form by clicking on the WPForms sidebar menu, and then the Add New item.
As well as clicking on the Create Your First Form button, you now also have the option of taking the WPForms challenge that aims to guide you through the process of creating your first form in less than five minutes. If you do choose to take the challenge, the setup wizard will walk you through the five steps of creating a form — from giving it a name to publishing it on your website.
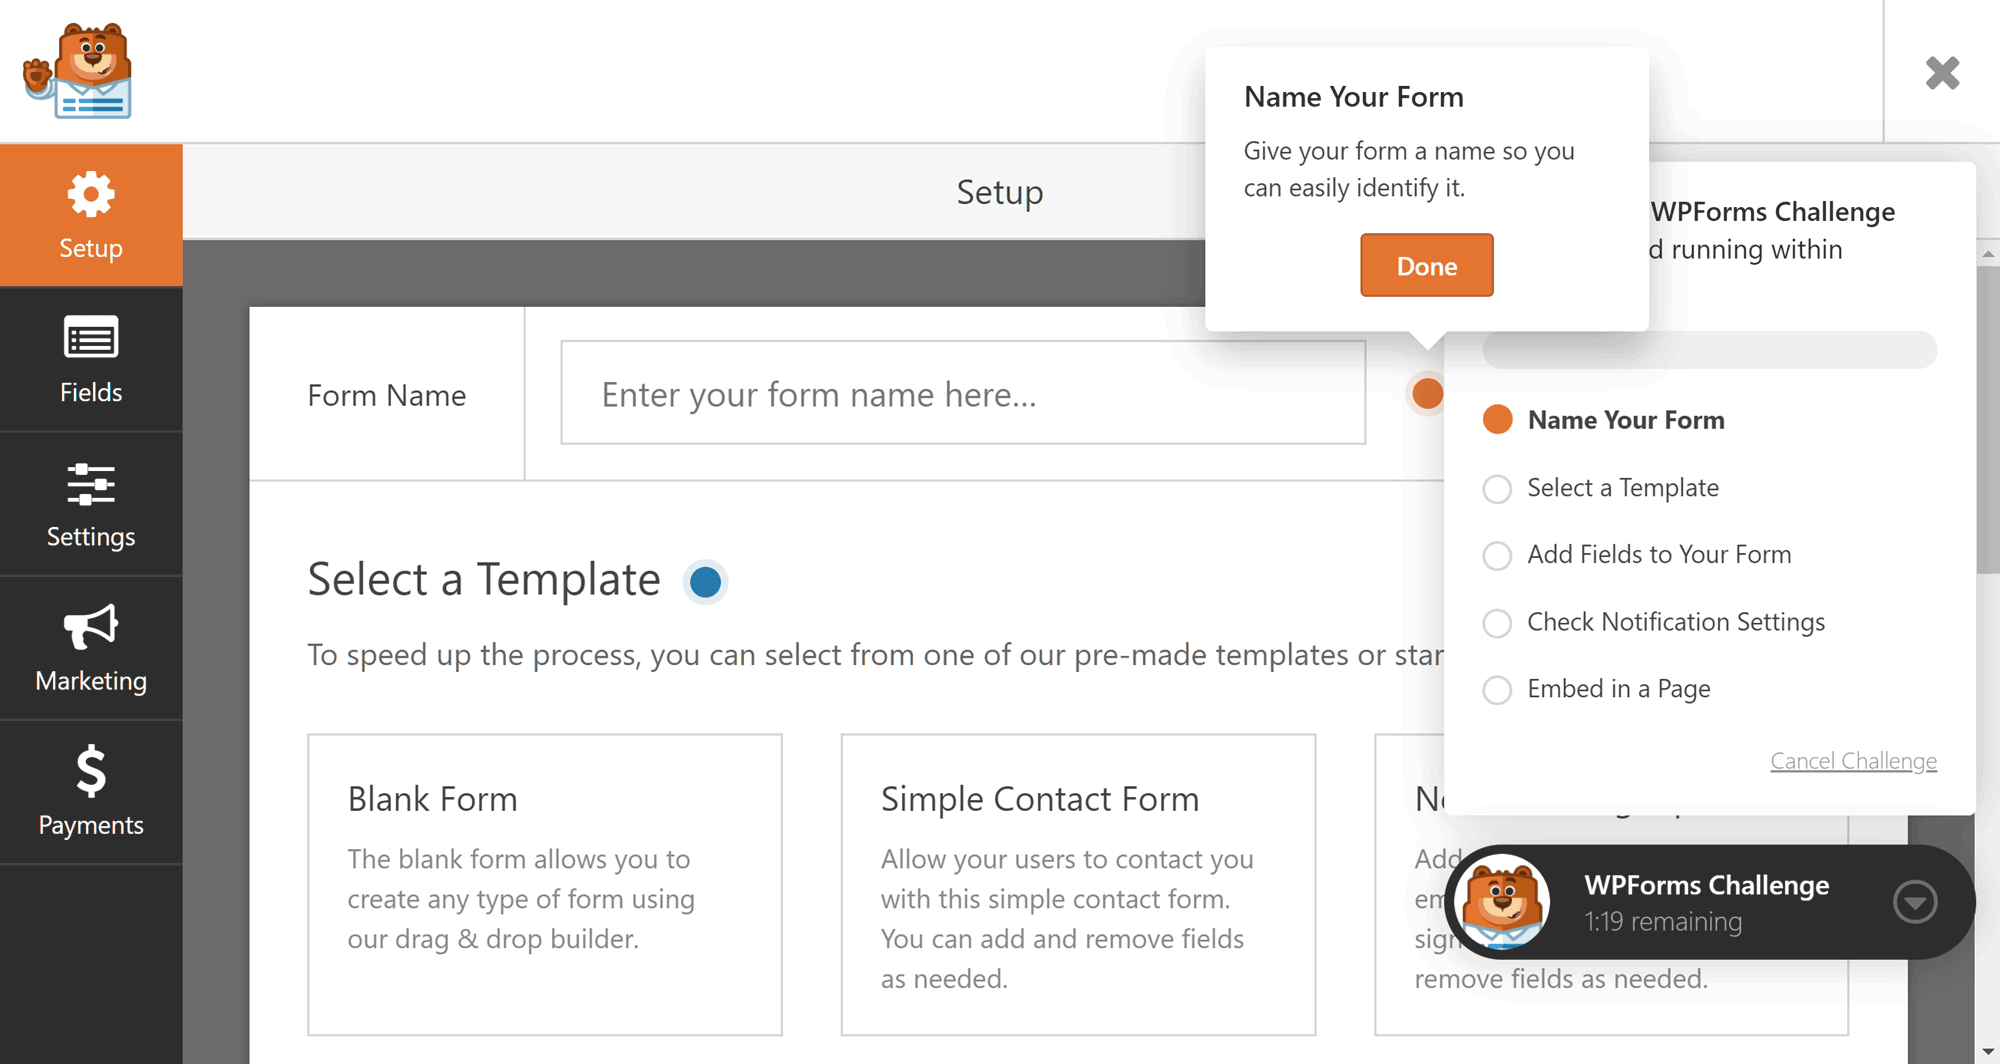
Whether you decide to go it alone or use the wizard, once you get started you’ll notice the custom WPForms user interface takes over the WordPress Dashboard to give you the maximum amount of space to work on your form. Once the form builder interface has loaded, the first step is to give your form a name. Try to choose something meaningful and relevant that will help you to identify the form in future.
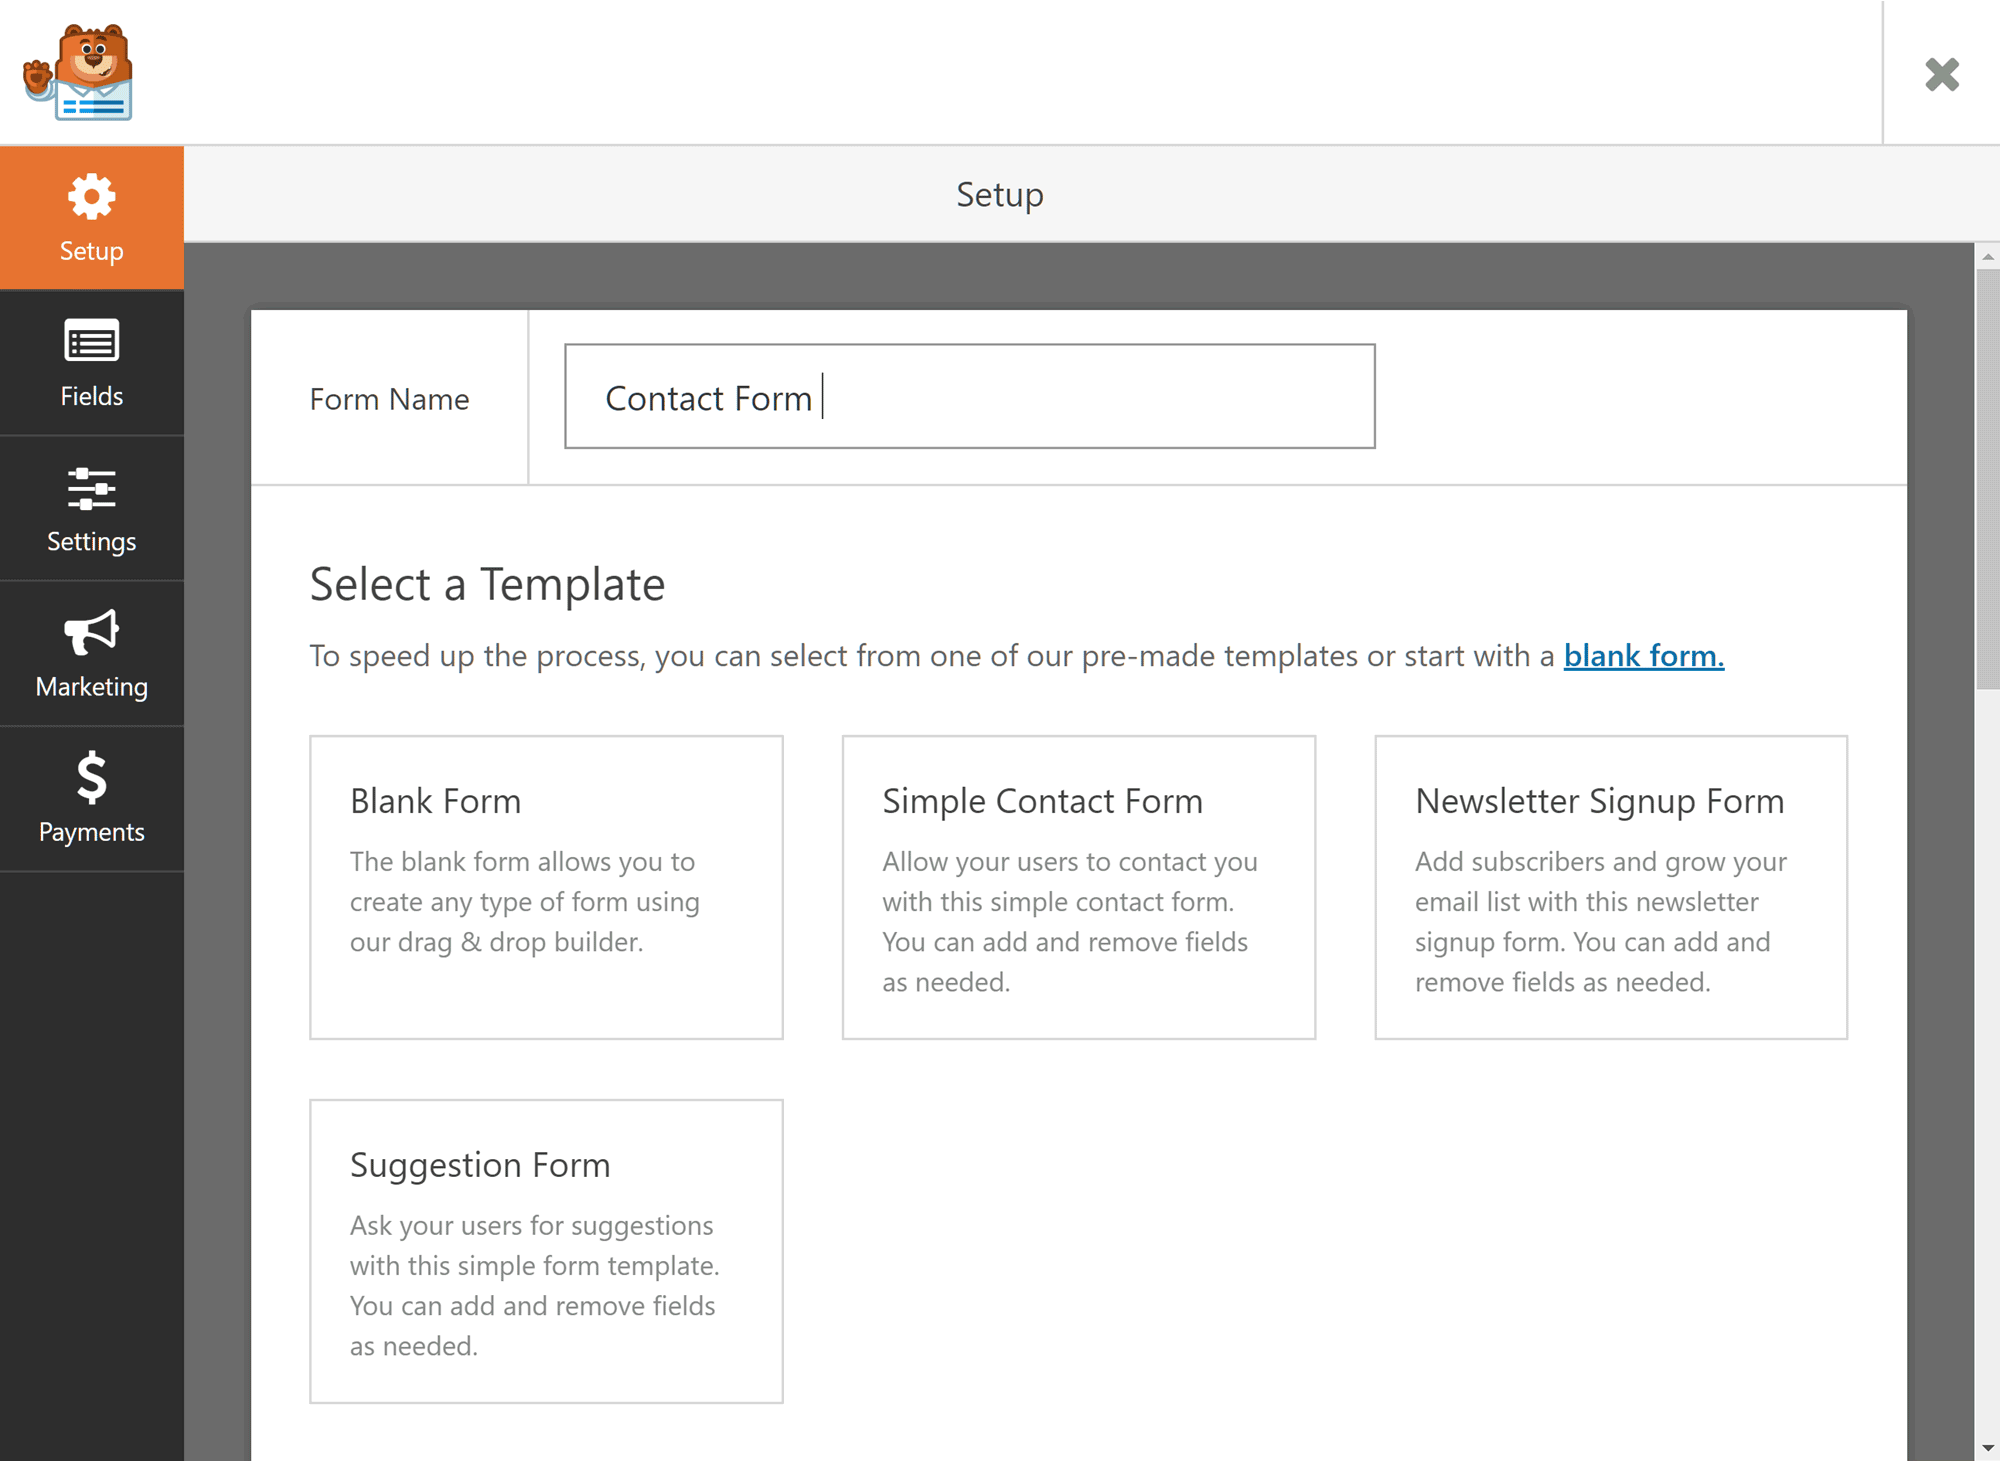
While you’re free to start with a blank form, choosing the simple contact form template is recommended.
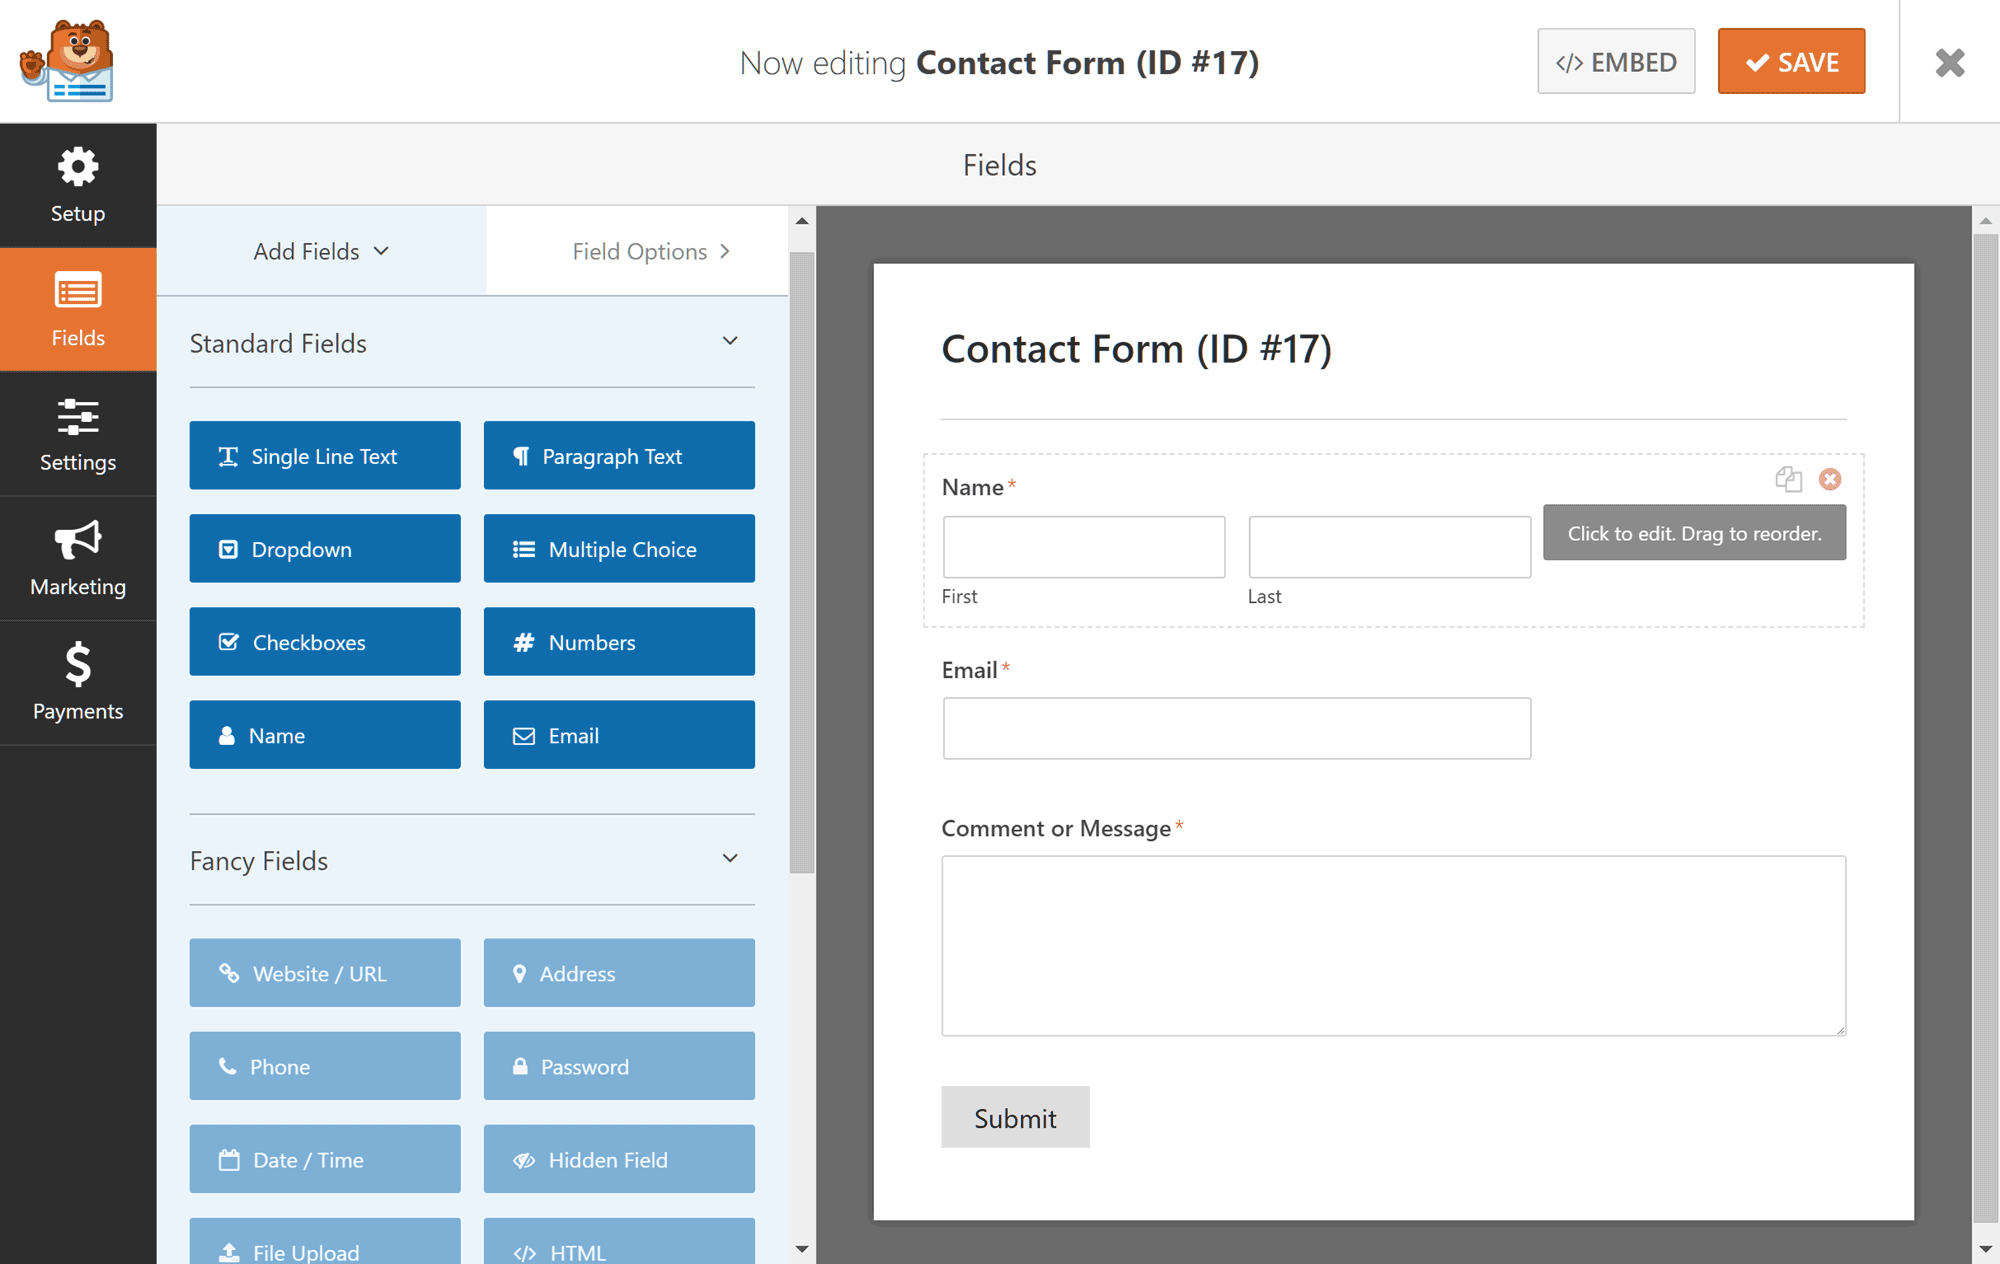
For most purposes, the simple contact form template should suffice. However, if you need to add any extra fields to your contact form, it’s as easy as clicking on any of the standard fields from the left-hand panel to insert them into your form. If you want to make use of any of the Fancy Fields or Payment Fields, though, you’ll need to upgrade to the pro version of WPForms.
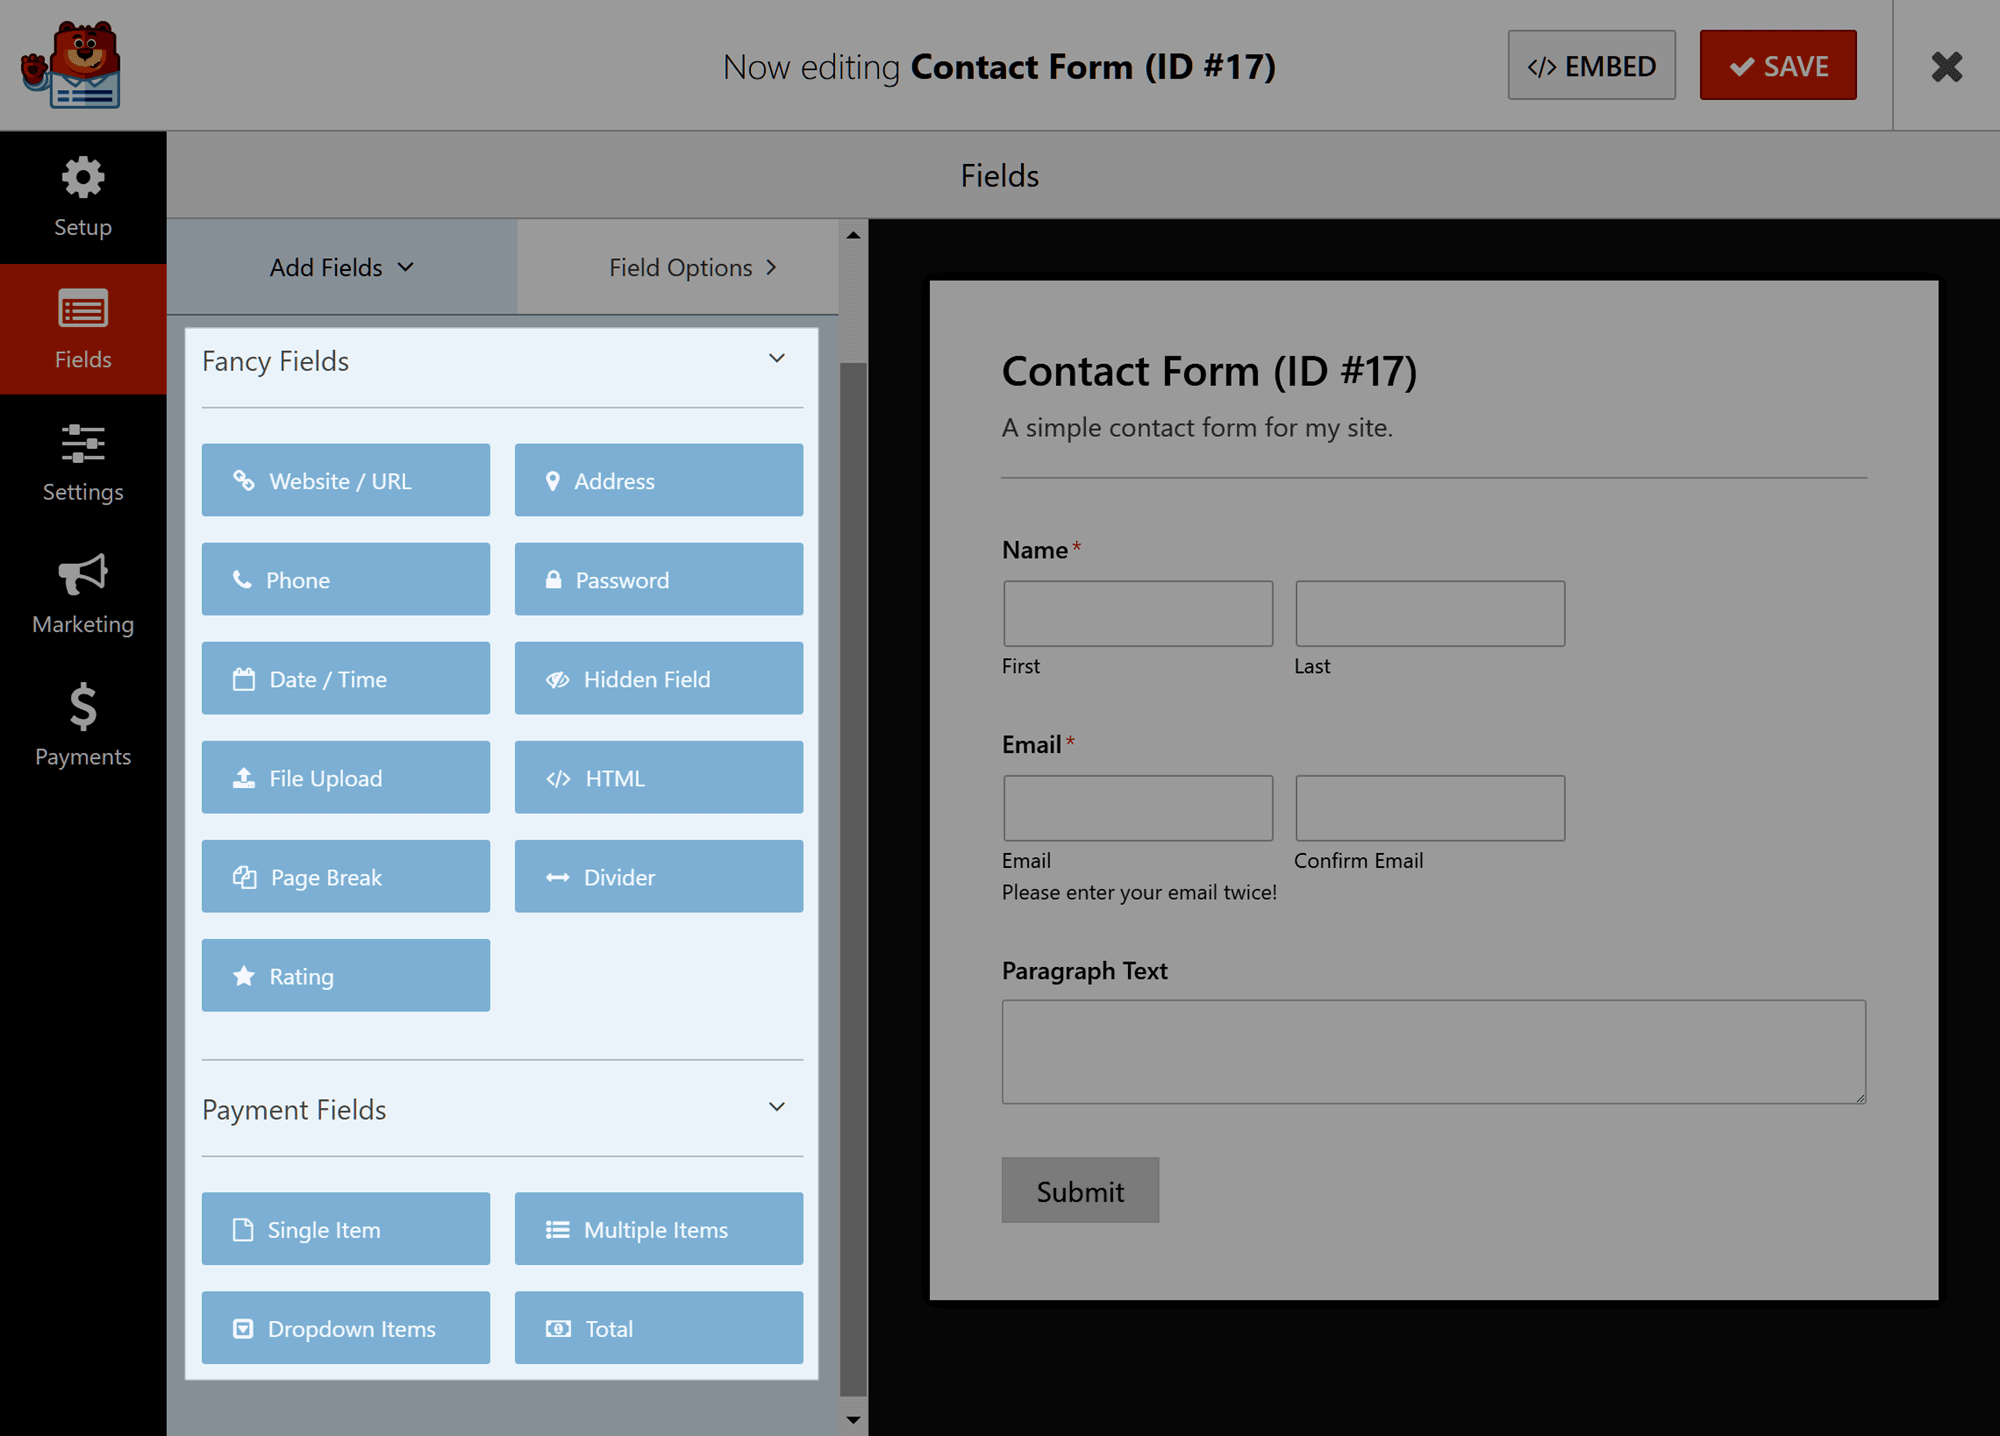
If you do click on a standard field from the left-hand panel, it’ll be added to your form instantly. From there, you can drag and drop it into a new position, or click on the field to start editing it.
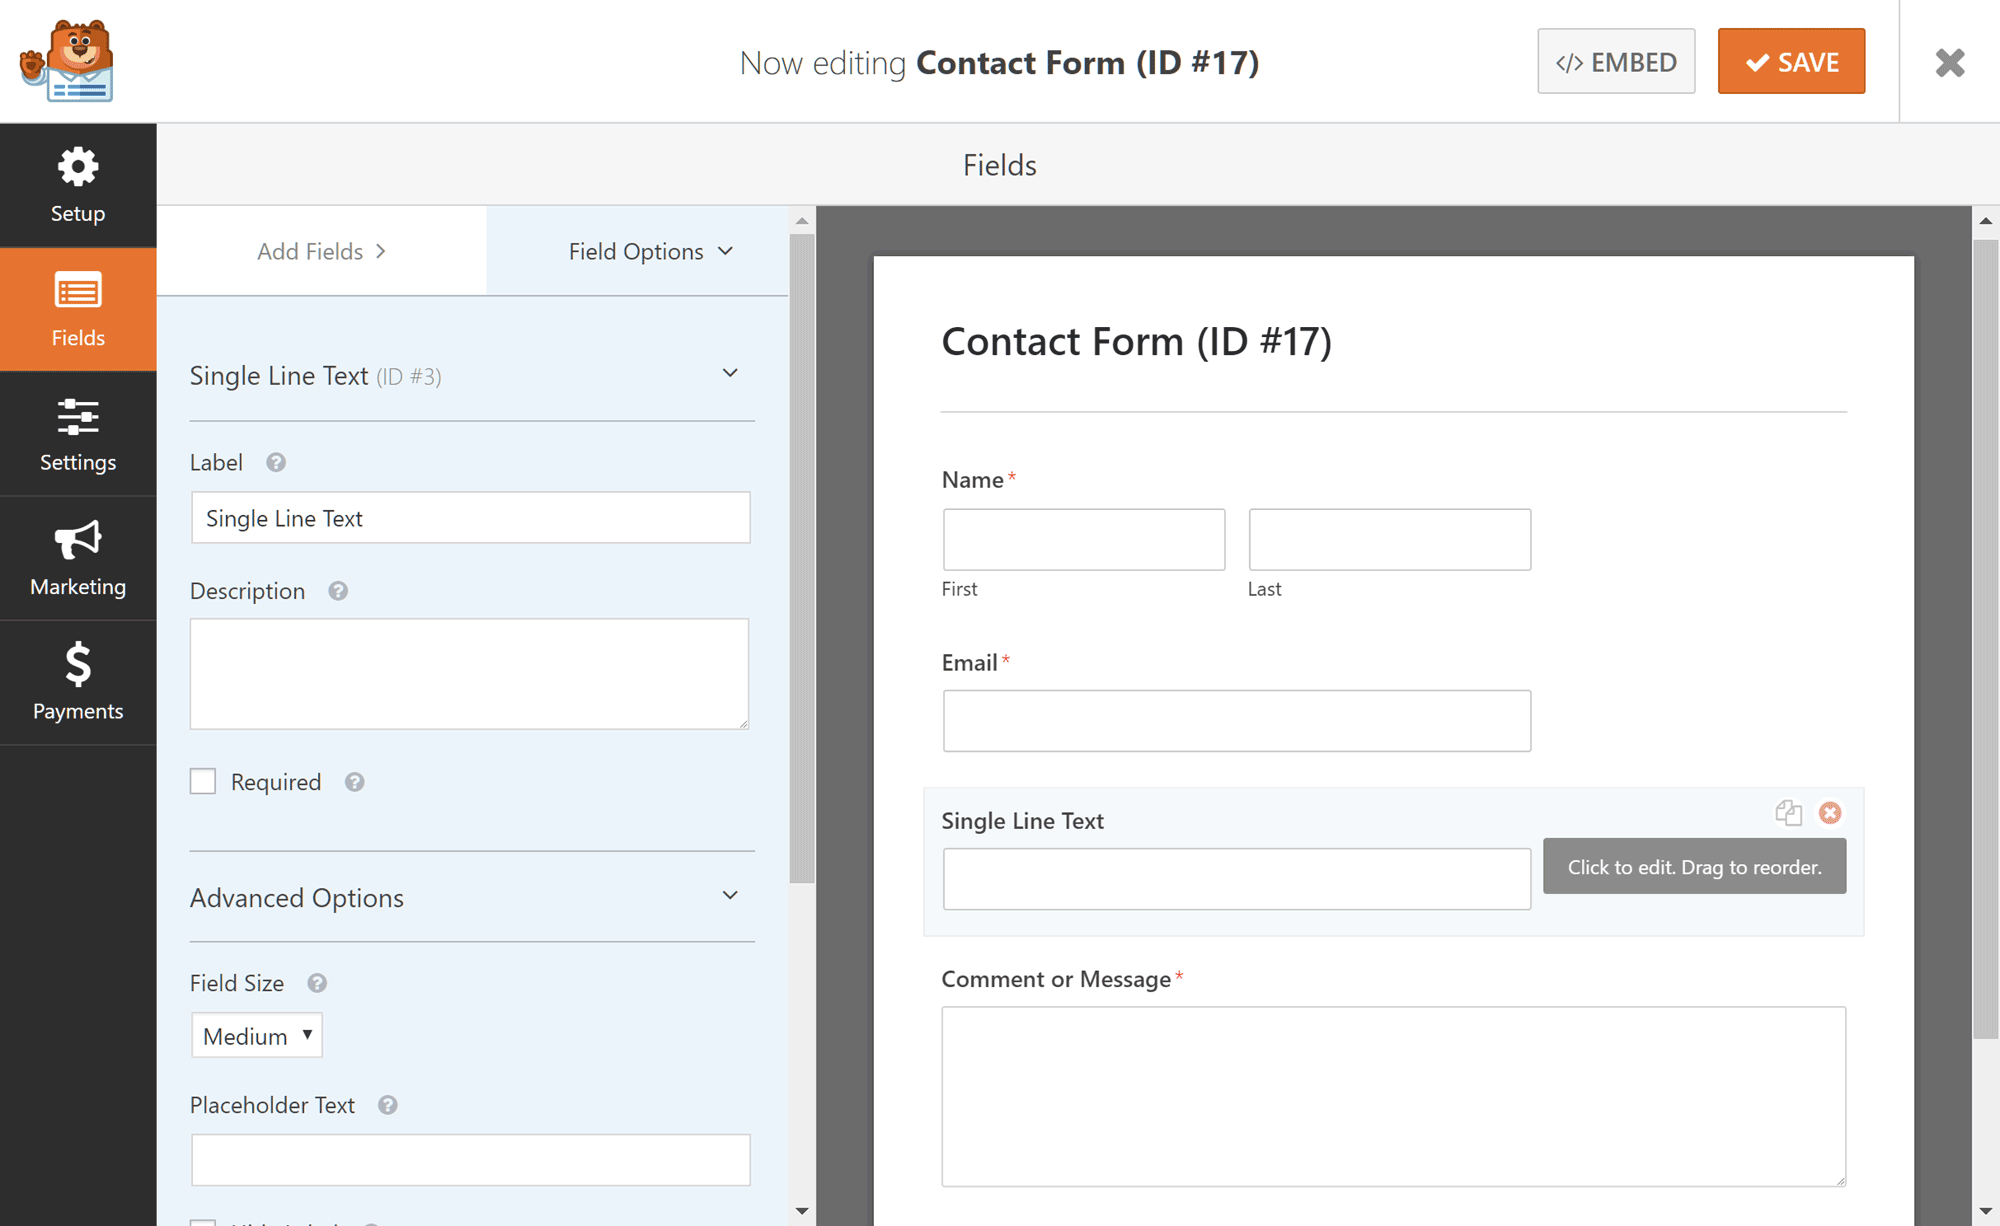
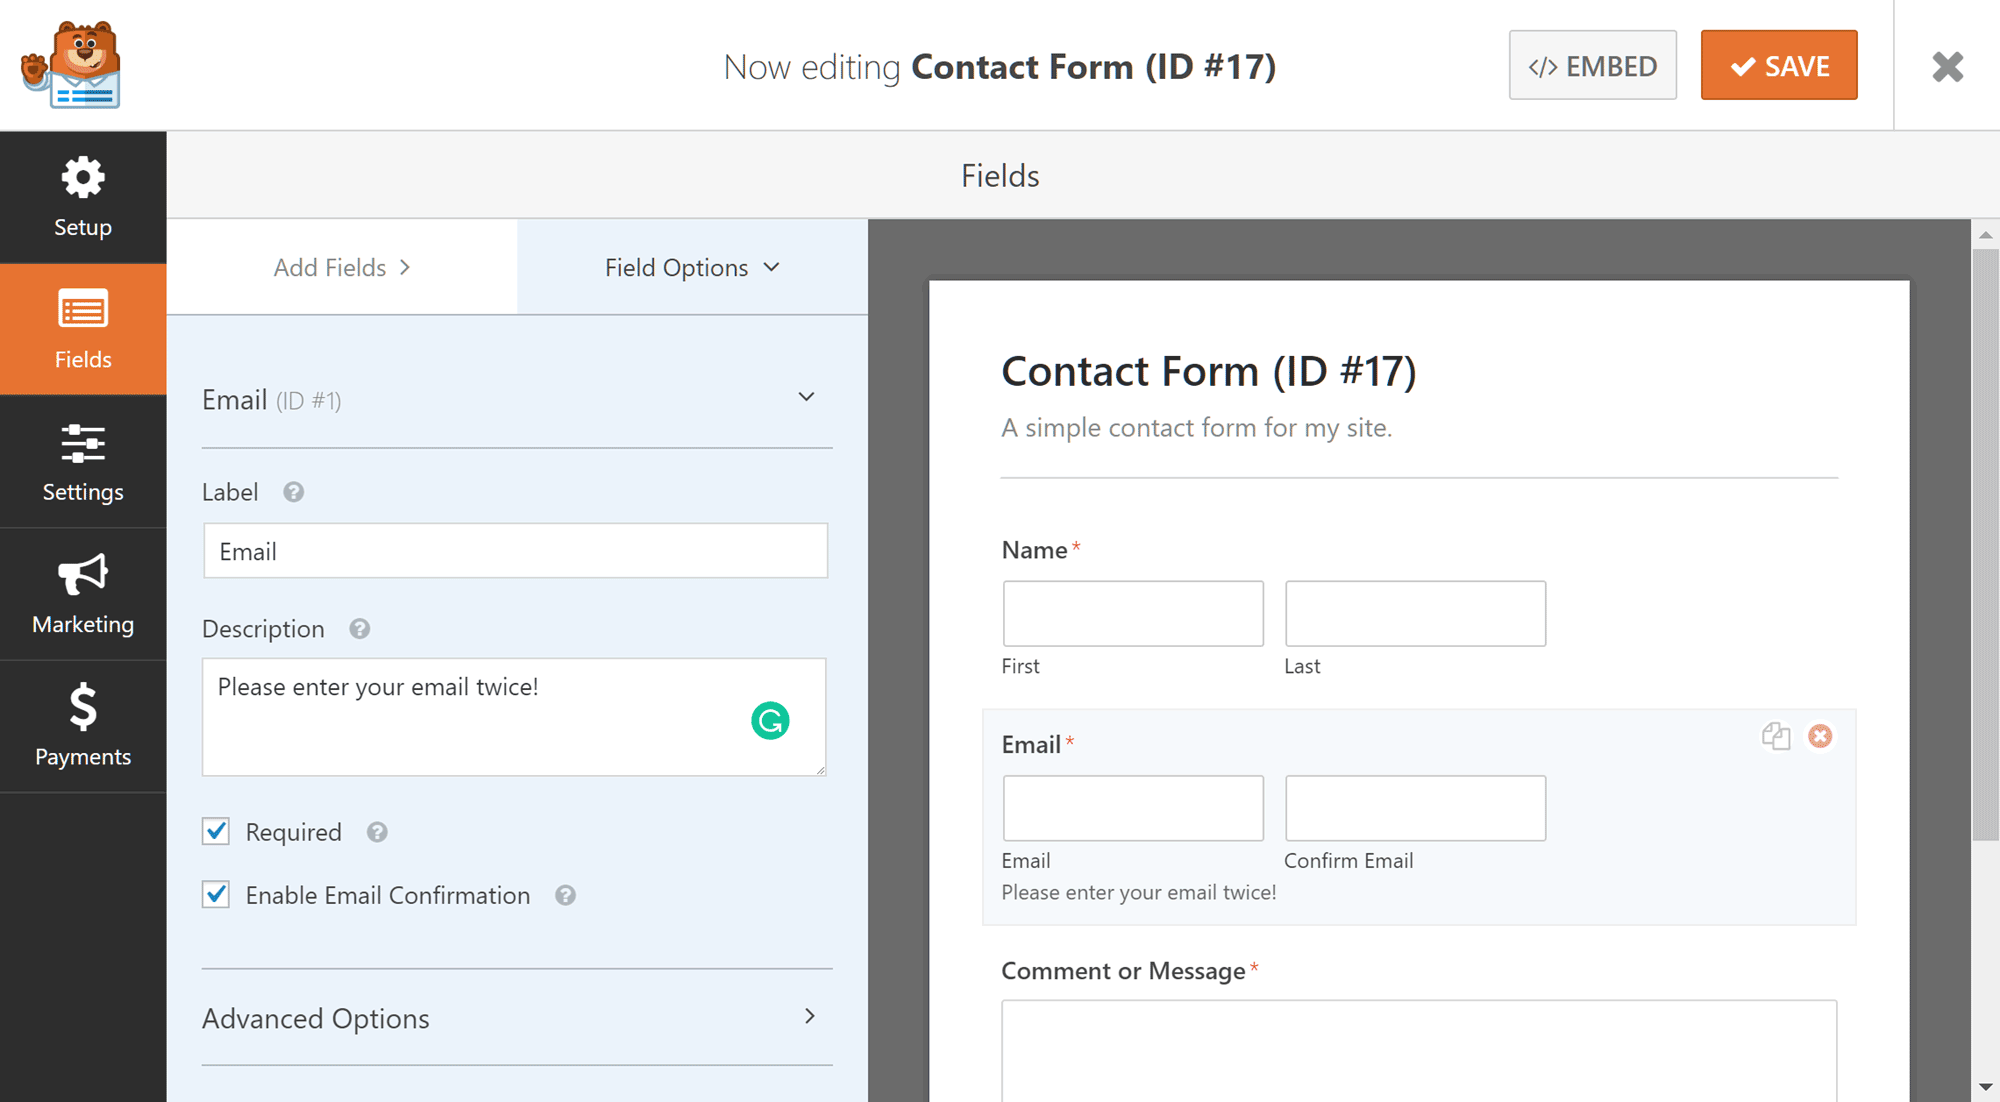
Form field editing takes place in the left-hand panel of the builder, allowing you to modify the field label and description, set the field size, and enter any placeholder text. The settings that are available to you are dependant on what type of field you’re editing — for example, with the email field you can easily enable a confirmation field that requires the user to enter their email address twice. Once you’re happy with the form fields and their settings, click on the save button.
Configuring Your Contact Form
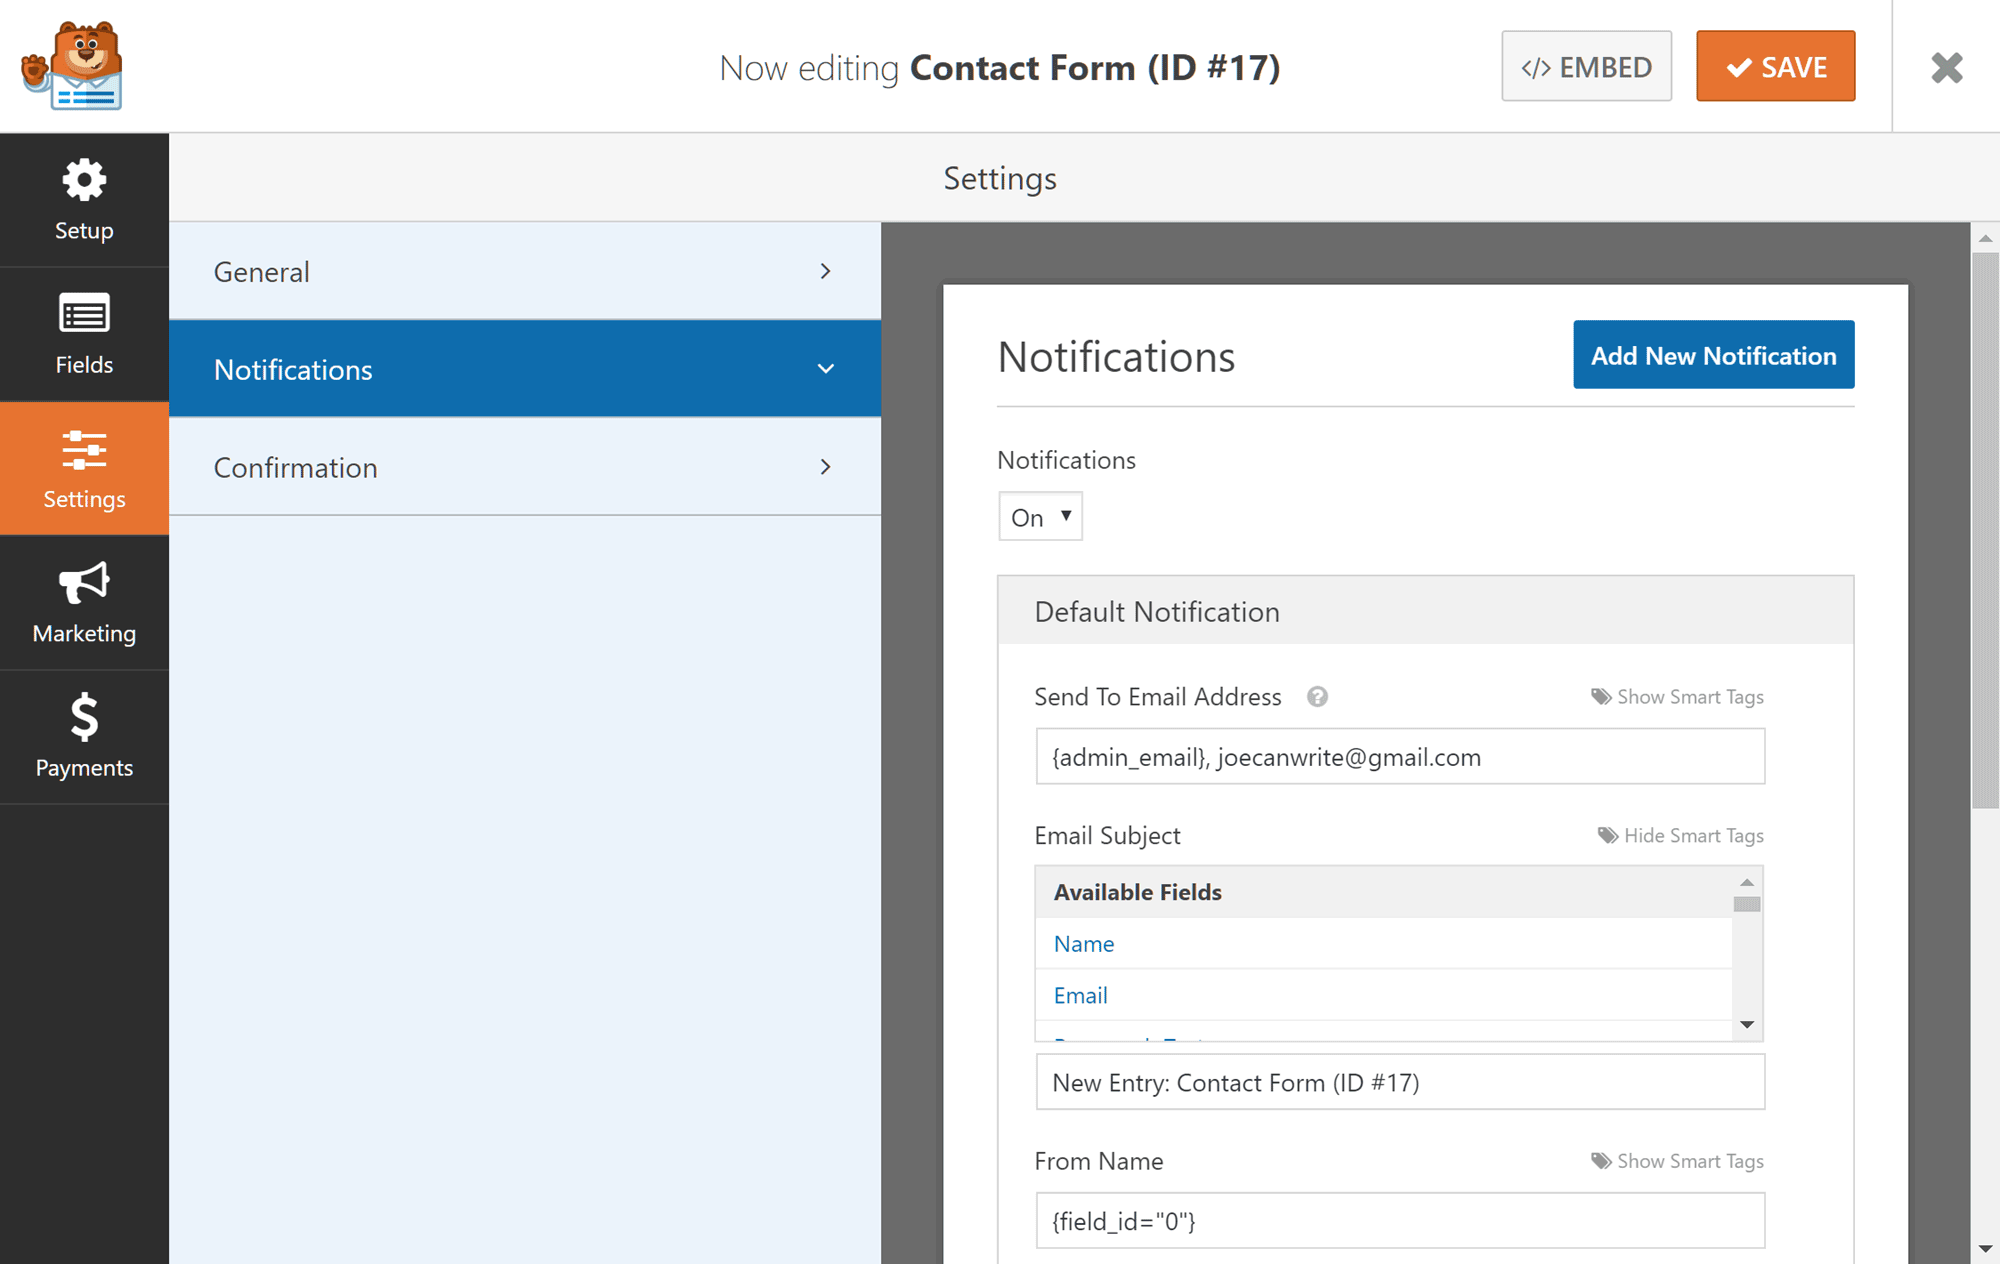
Each form you create with WPForms can be configured individually to meet your needs. So, to view the current settings or customize the way your form works, simply click on the Settings tab of the form builder screen to open up the configuration options for the form you’re working on.
The settings are grouped into three sections, covering the General, Notification, and Confirmation options for the form.
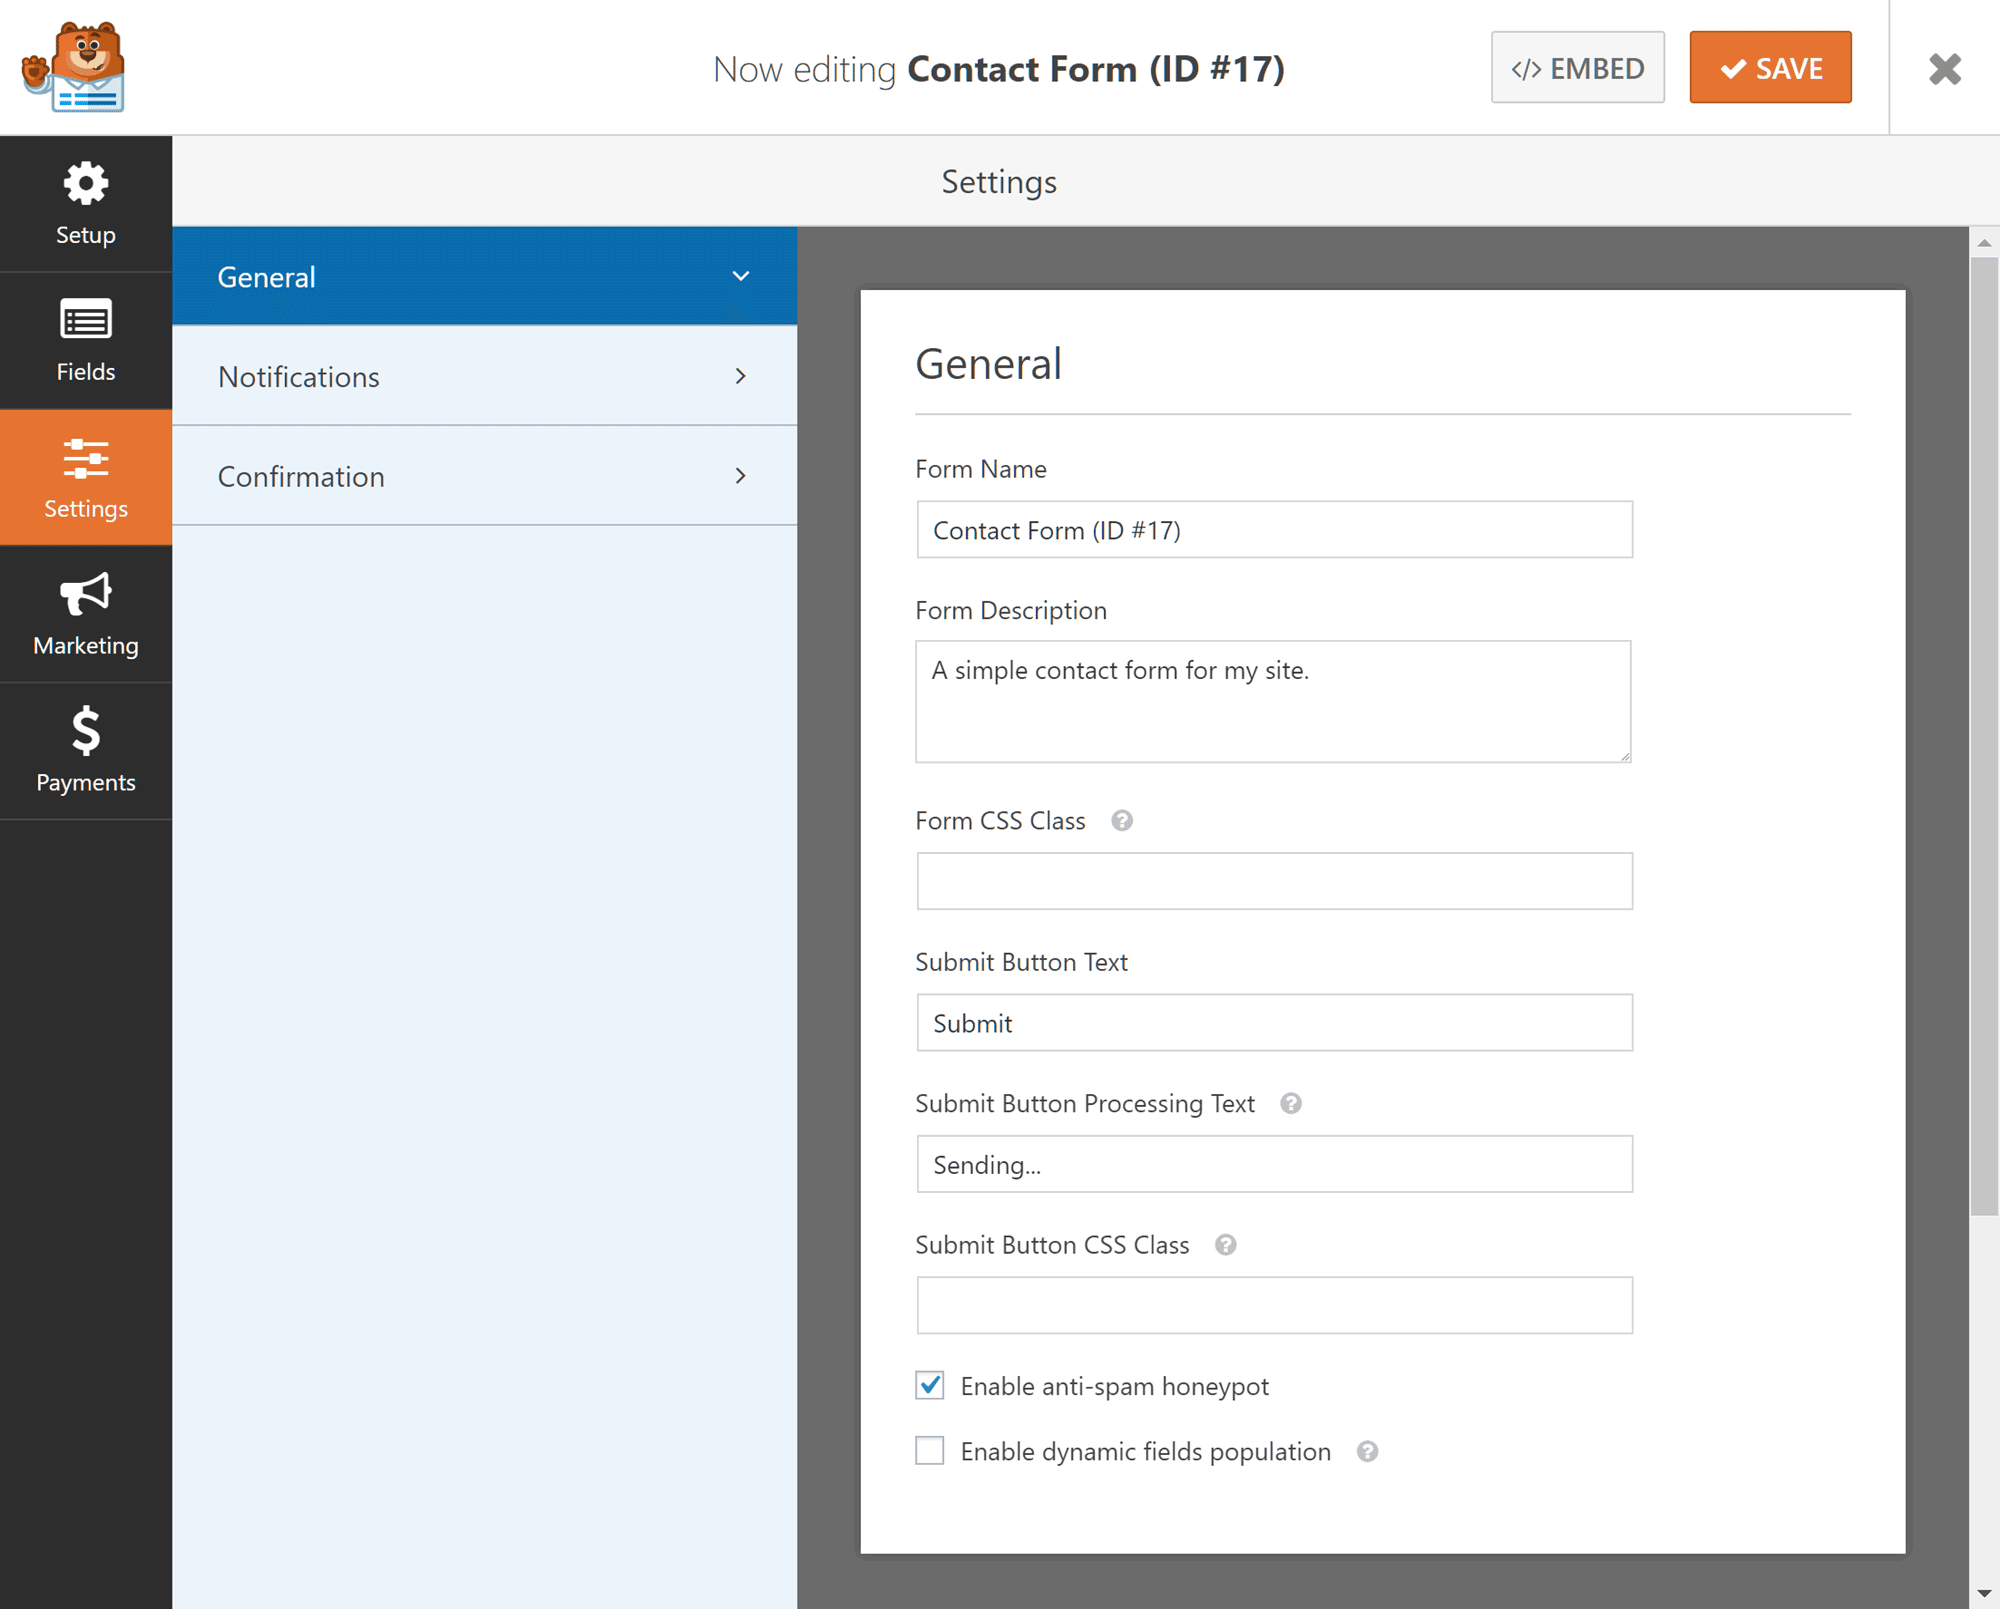
Through the general settings, you can edit the form title and description, change the submit button text, and enable the anti-spam honeypot features. Using the anti-spam honeypot feature is recommended, as it’ll help to reduce the number of spam submissions you receive — without affecting the user experience of your forms by requiring visitors to complete a captcha field.
The notification settings allow you to specify which email address the form entries should be sent to, with the ability to enter multiple addresses if required. WPForms uses Smart Tags to dynamically populate the notification email with content from the form fields, such as the email subject and form name. If you’d like to create multiple notifications, such as a separate message that’s emailed to the user who submitted the form entry, then you’ll need to upgrade to the premium versions of WPForms. However, it is possible to use the Smart Tags to send the same notification email to the person who submitted the form, as well as any other recipients you specify.
You can also use the confirmation settings to customize the message that’s displayed after a visitor has submitted the form. Alternatively, instead of displaying a custom message, you can choose to display a page on your website, or take the user to a URL of your choice, after a form entry has been submitted.

Again, once you’re happy with your form confirmation, click the save button to commit your changes.
Publishing the Contact Form on Your Website
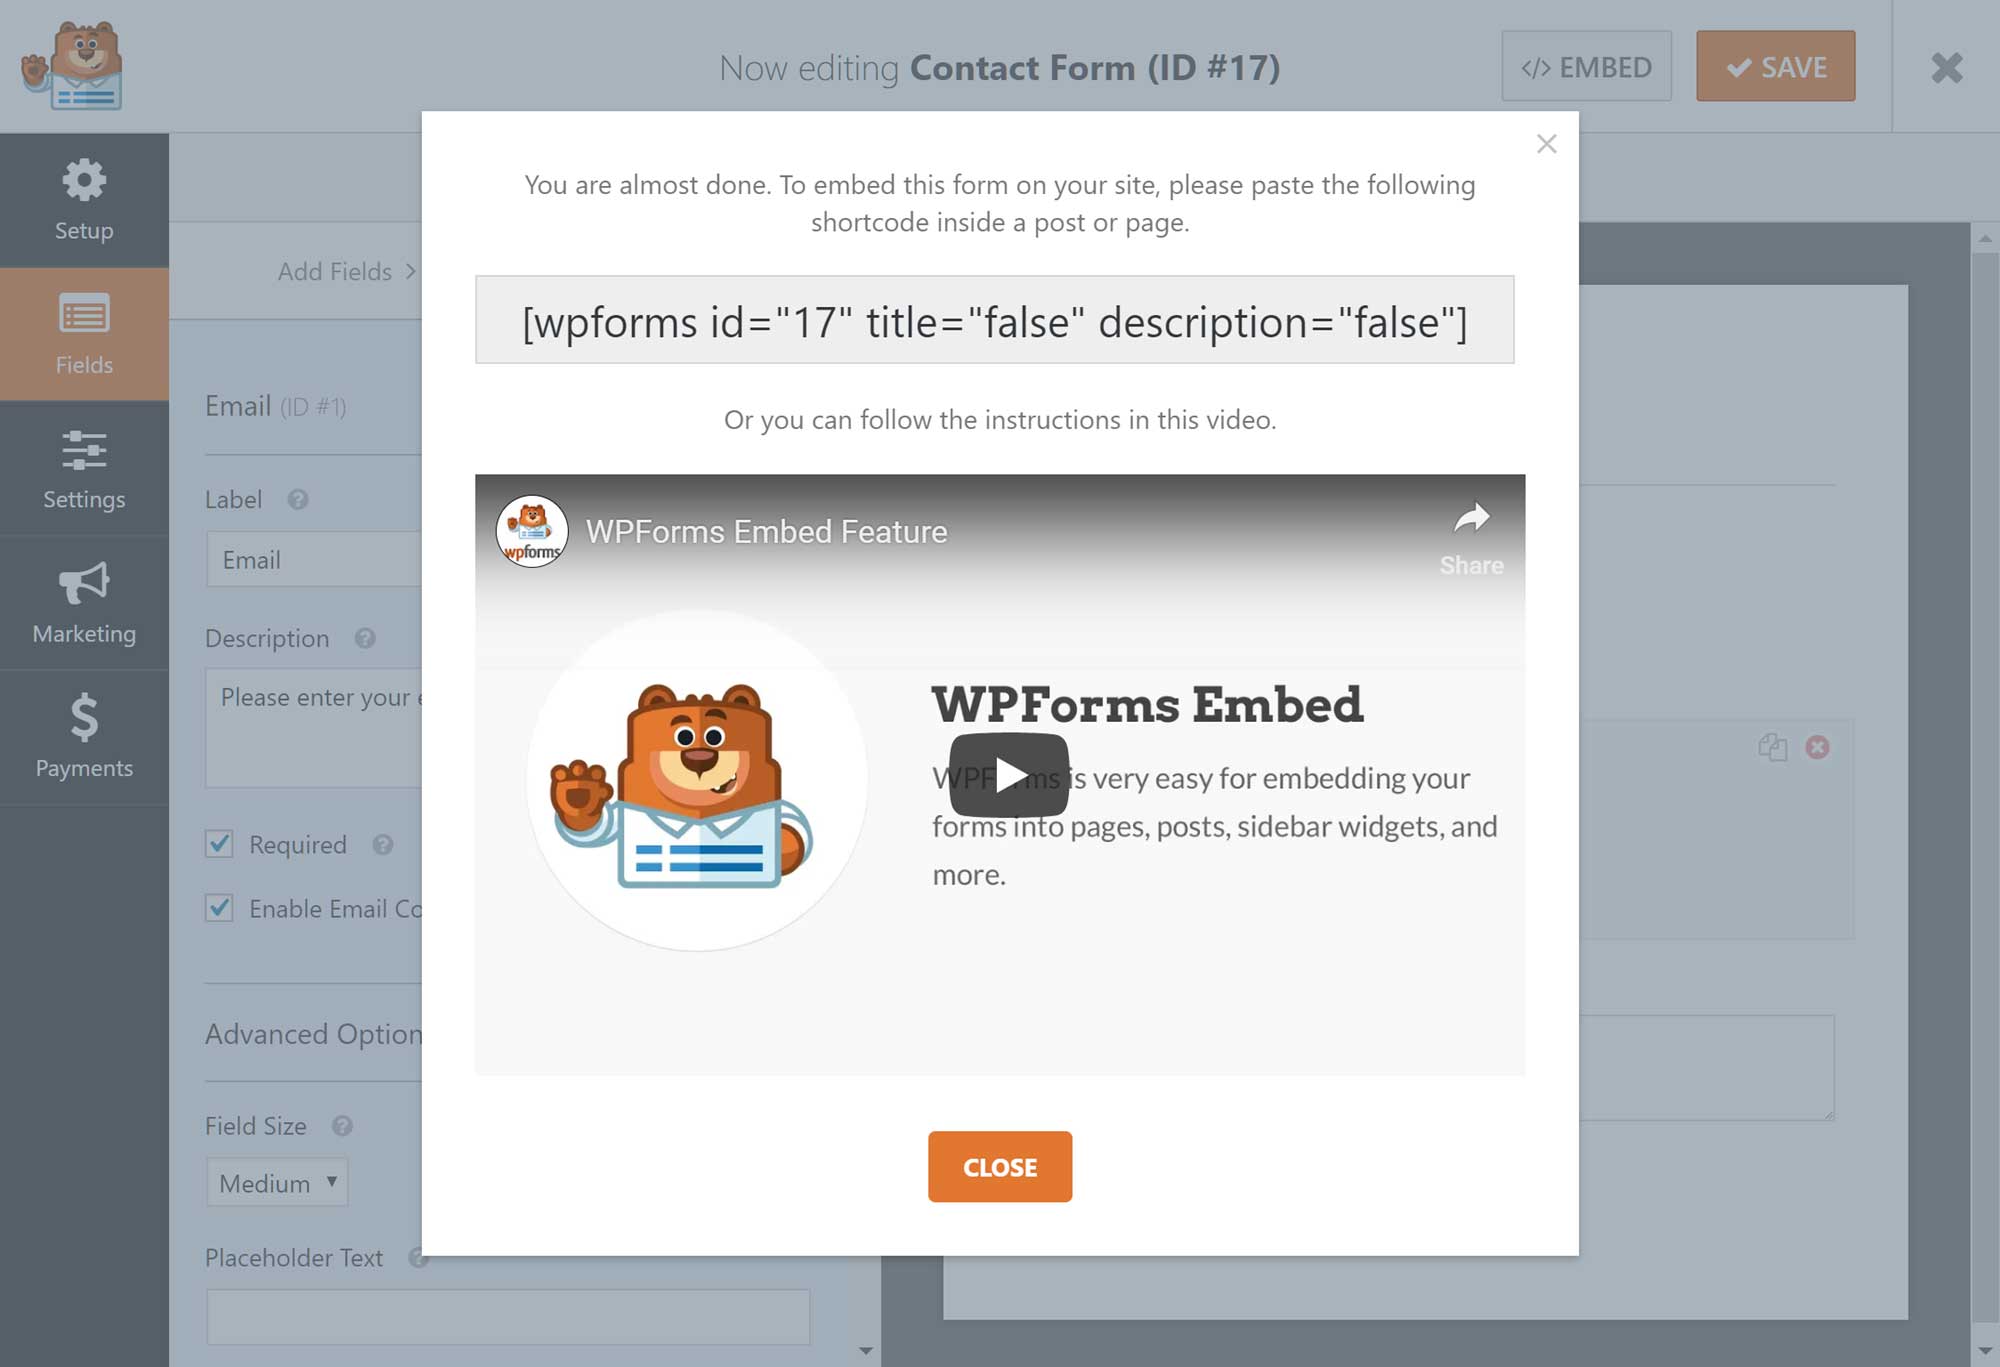
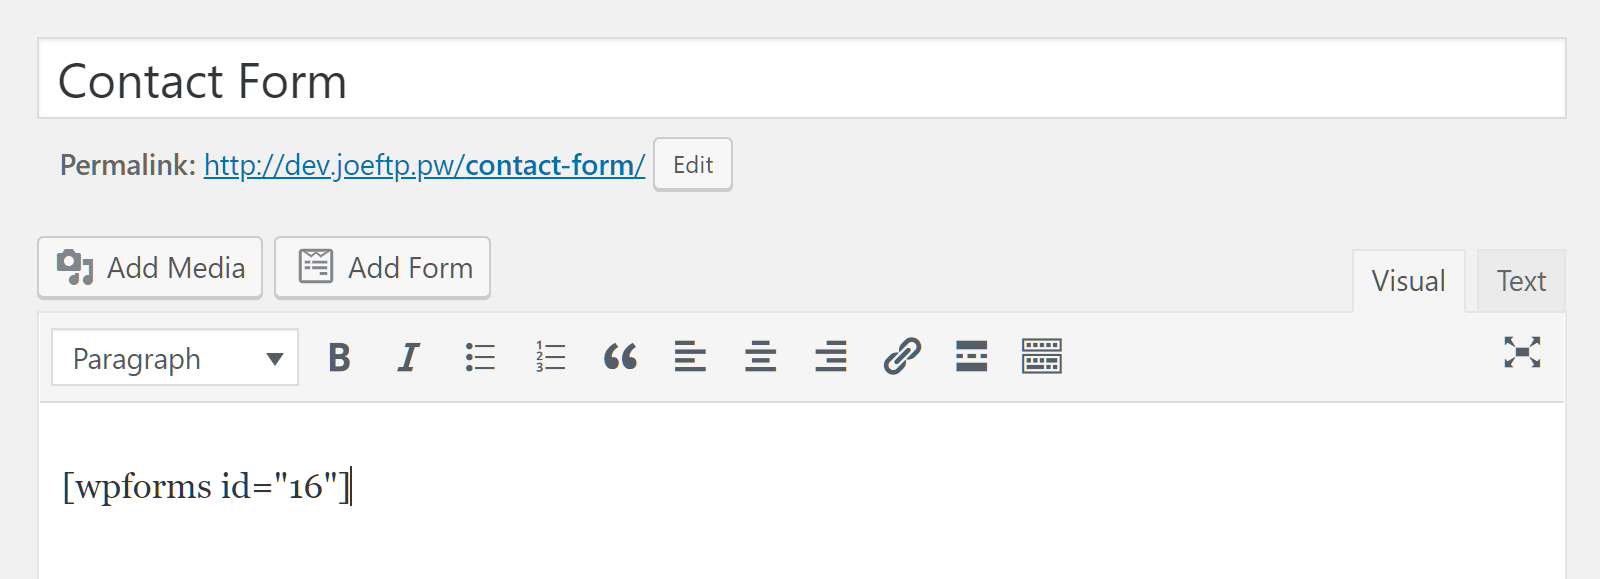
After you’ve saved your form, you can publish it on your WordPress website to make it available to your visitors. Clicking on the embed button on the form builder screen will display a shortcode for the form you’re working on. You can then copy and paste this shortcode into a WordPress post or page to make the form accessible. Helpfully, a tutorial video is displayed to demonstrate what you need to do to insert your form shortcode into a post or page. However, the process is very straightforward.
Another way to add one of your forms to your website is to create a new post or page, or open an existing one for editing, and then click on the Add Form button.
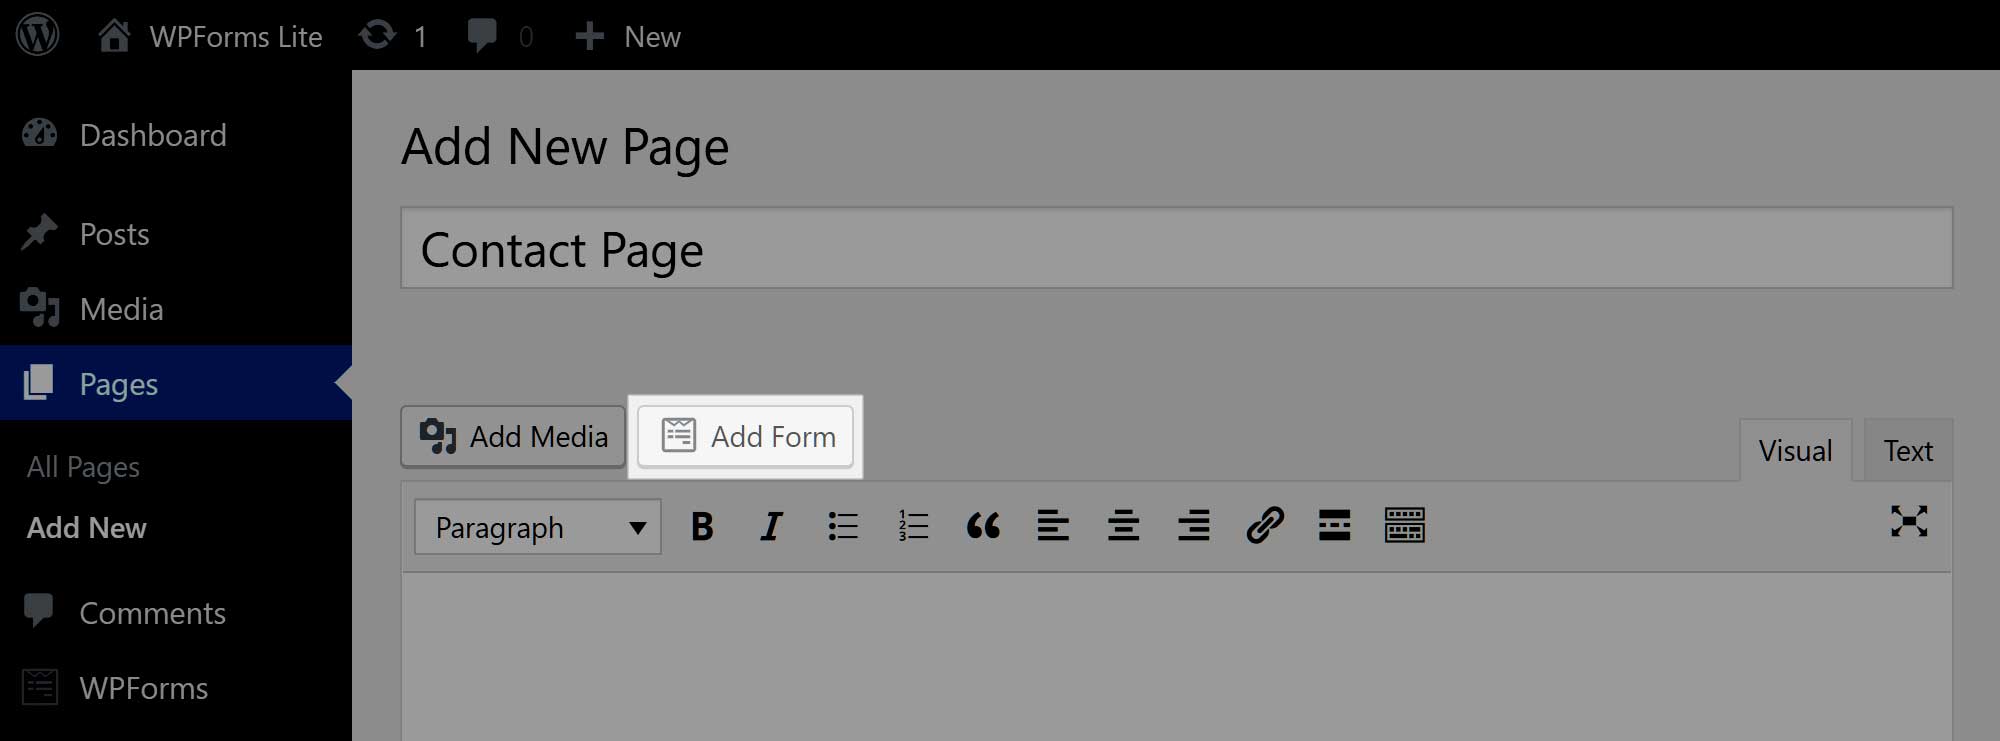
Once you’ve clicked on the Add Form button, you can choose which form to insert, and also choose whether to display the form title or description.
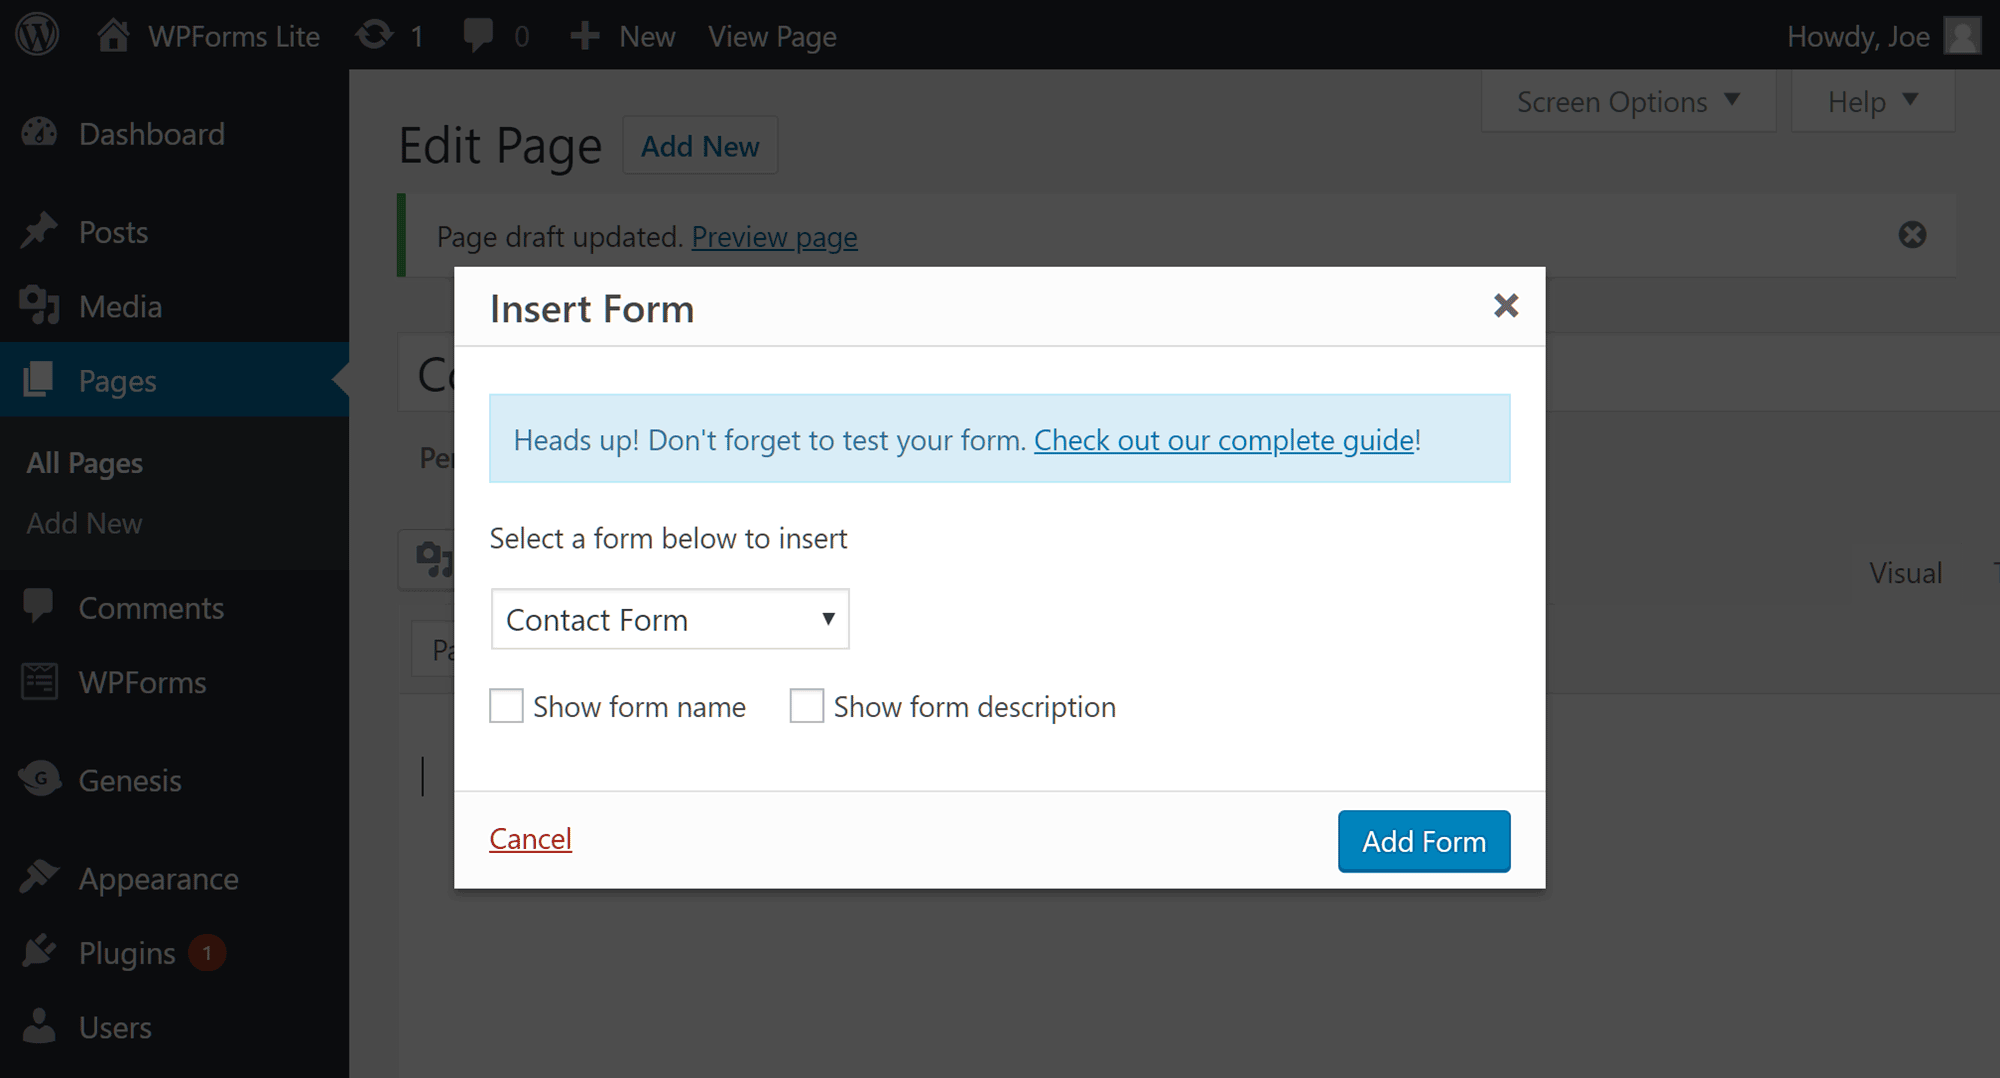
After you’ve inserted the form, a shortcode will be added to your post or page. Then, upon publication, the shortcode will be replaced with the corresponding form. Because of the way shortcodes work, if you make any changes to your form they will be automatically applied to your published form (find out more in our previous article, WordPress Shortcodes Explained).
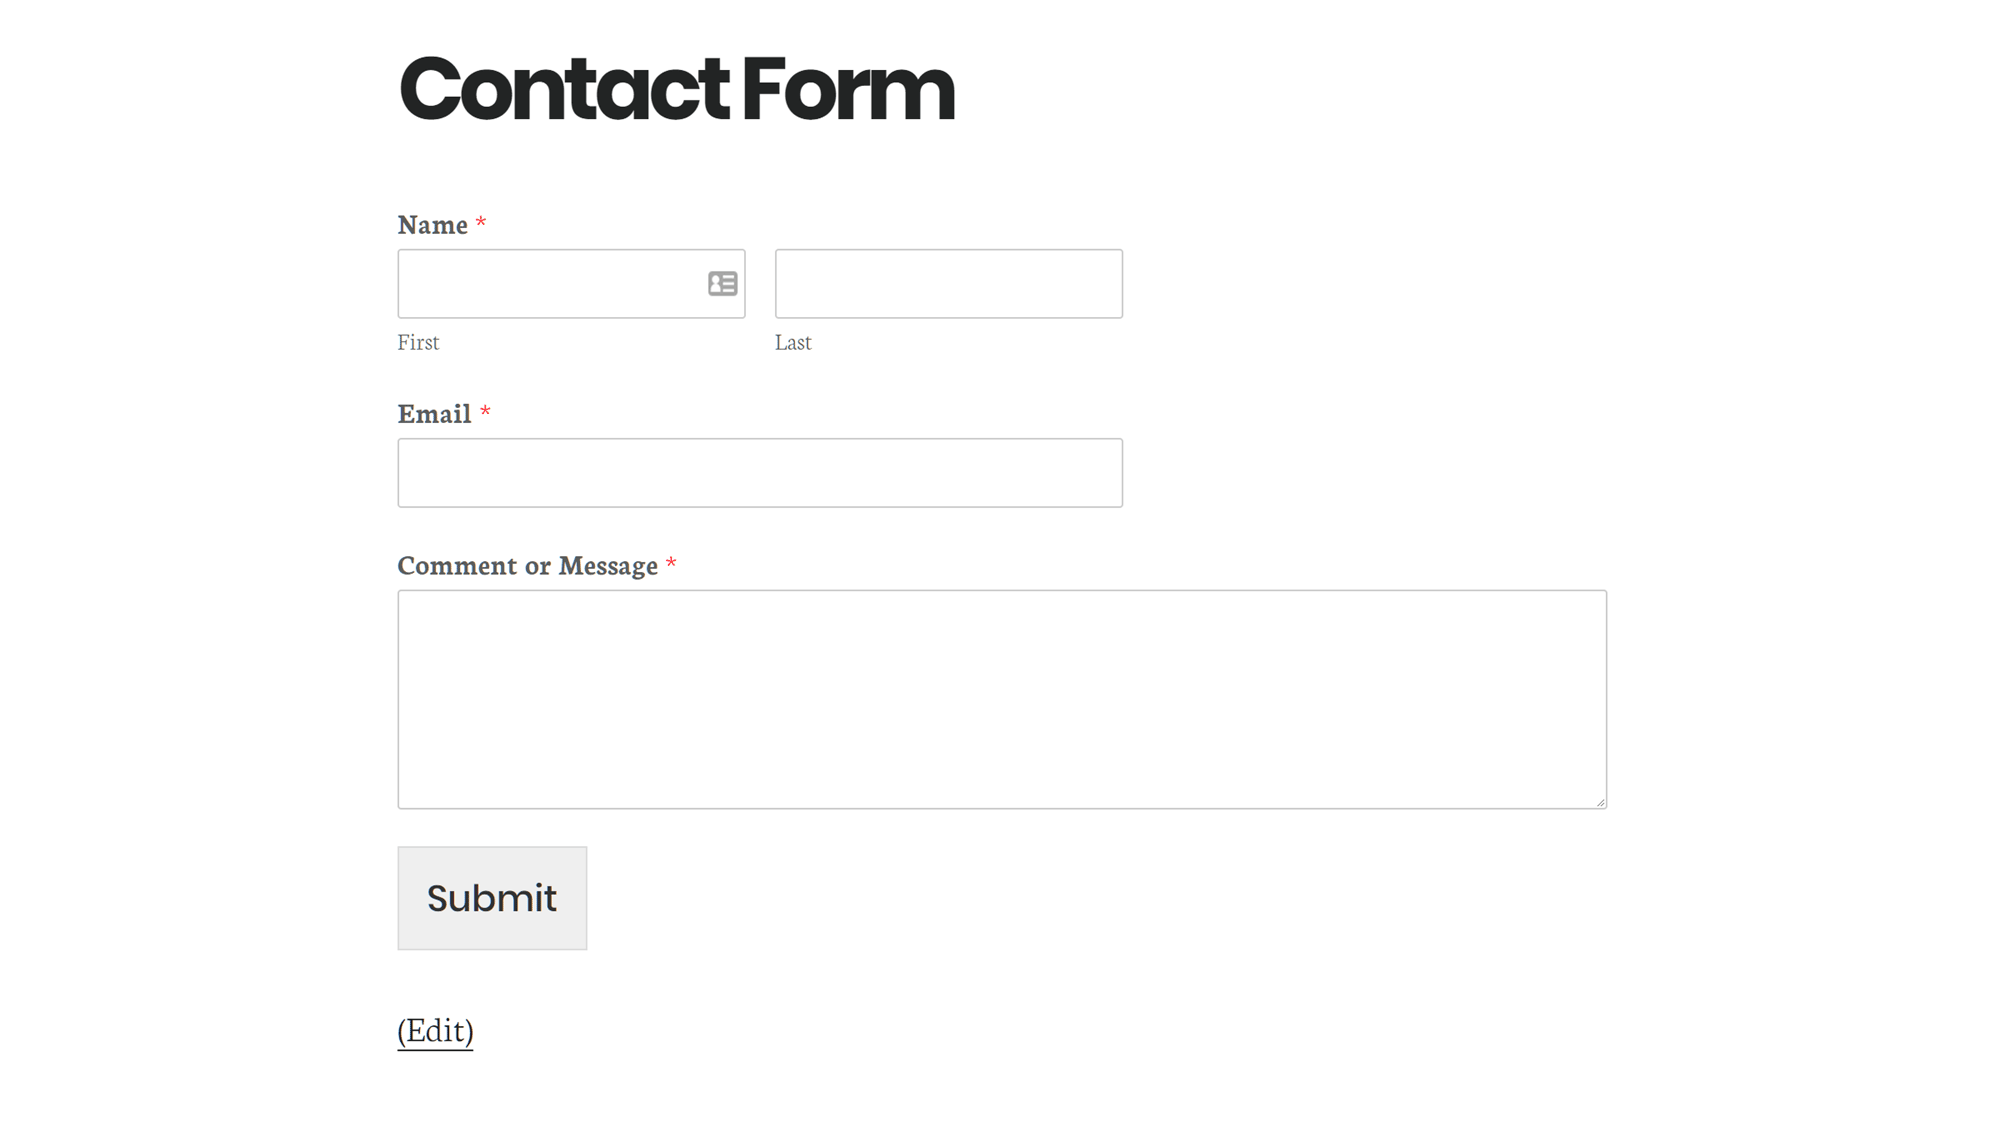
Now, if your visitors want to send you a message all they have to do is complete the form and press the Submit button.
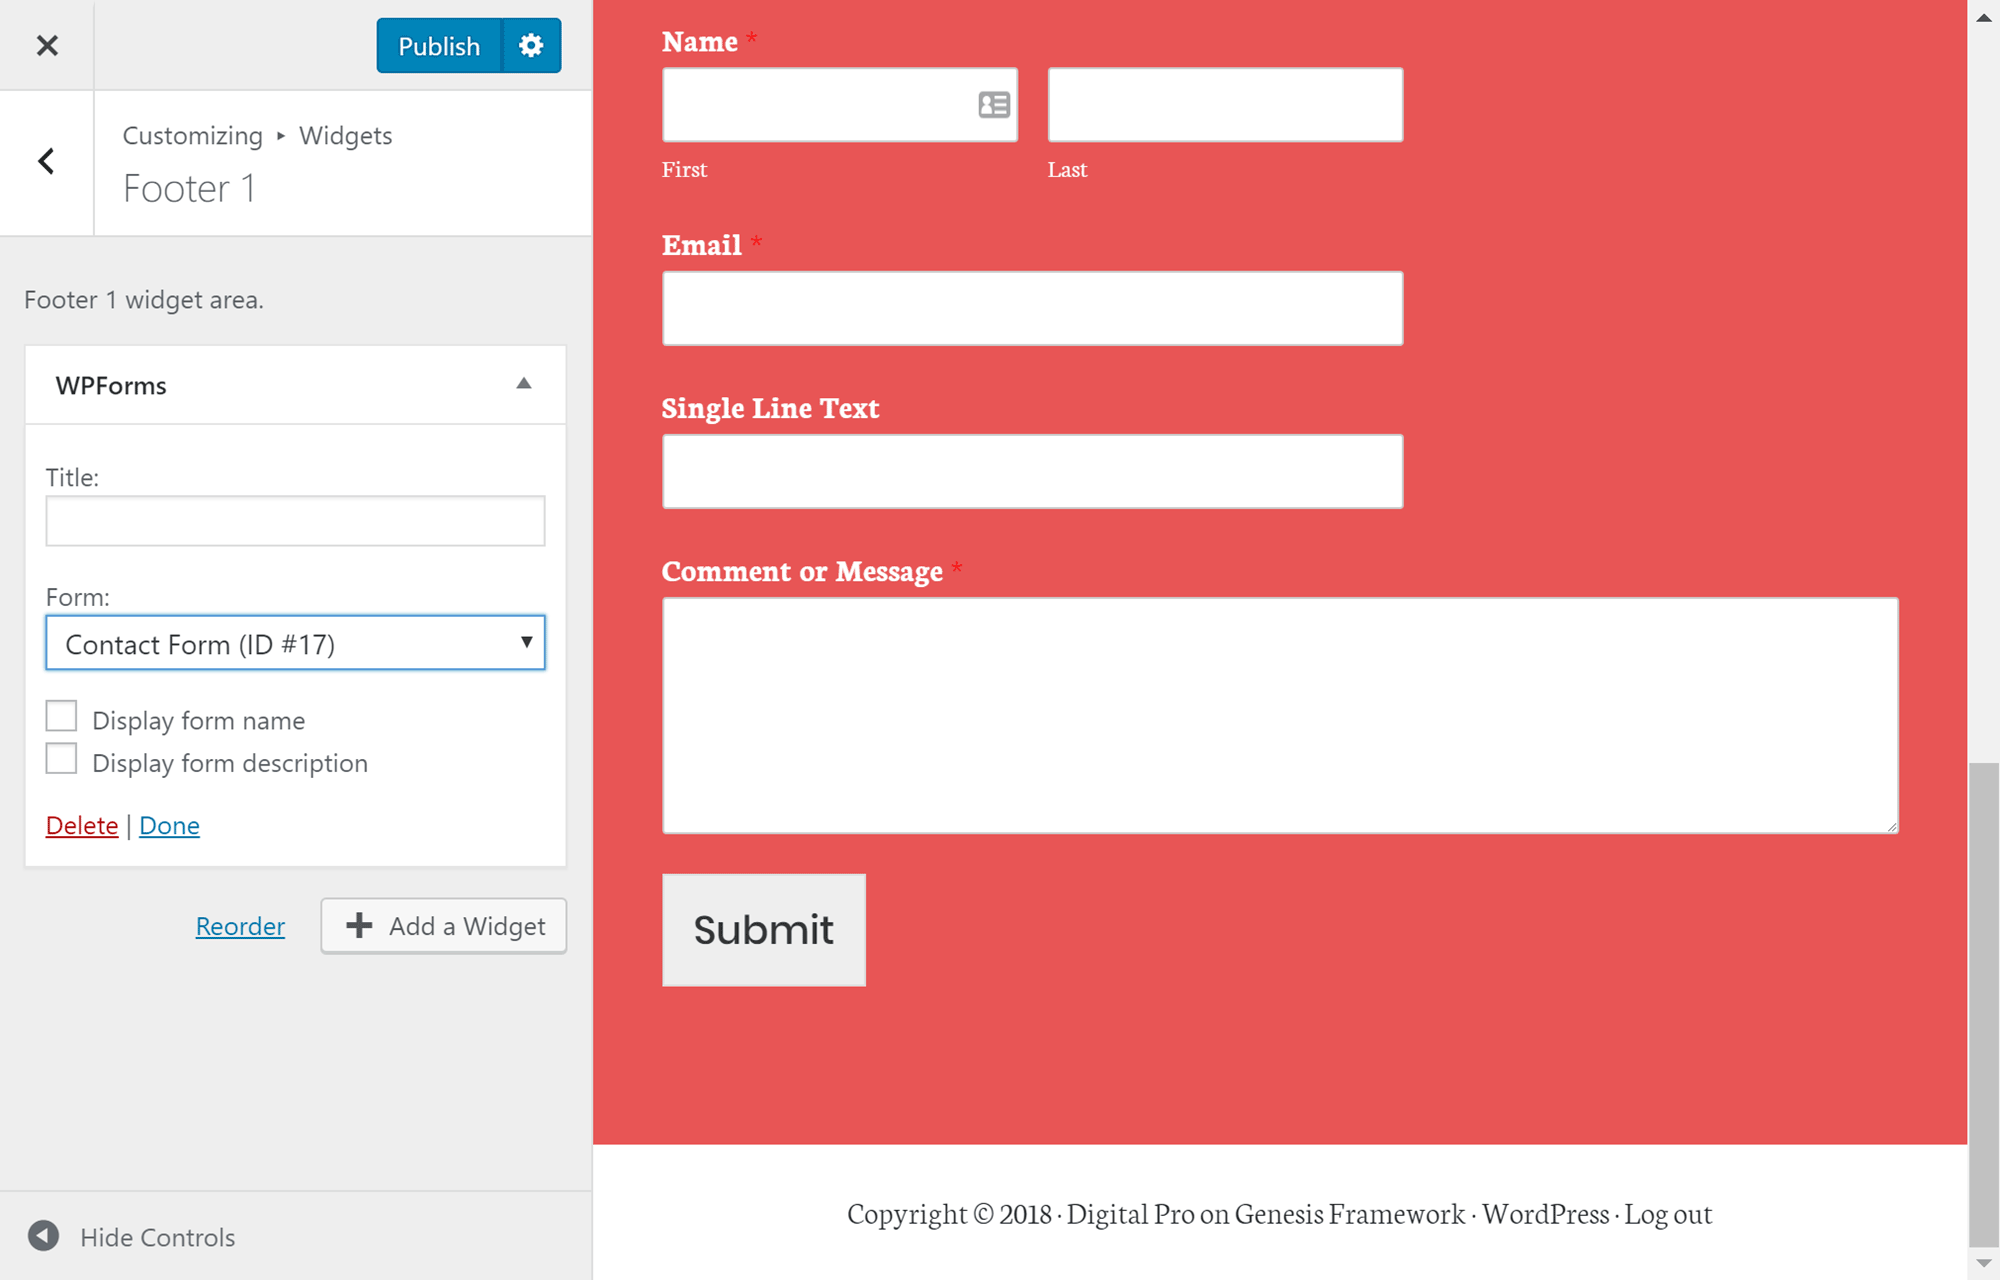
WPForms Lite also includes a widget that lets you display your forms in the sidebar and other widget-ready areas of your WordPress theme. Depending on your choice of theme, the WPForms widget could give you the ability to display a form in the footer of your website, as pictured below.
Managing Your WordPress Contact Forms
If you need to make any changes to your forms, you can access them via the All Forms item on the WPForms menu.
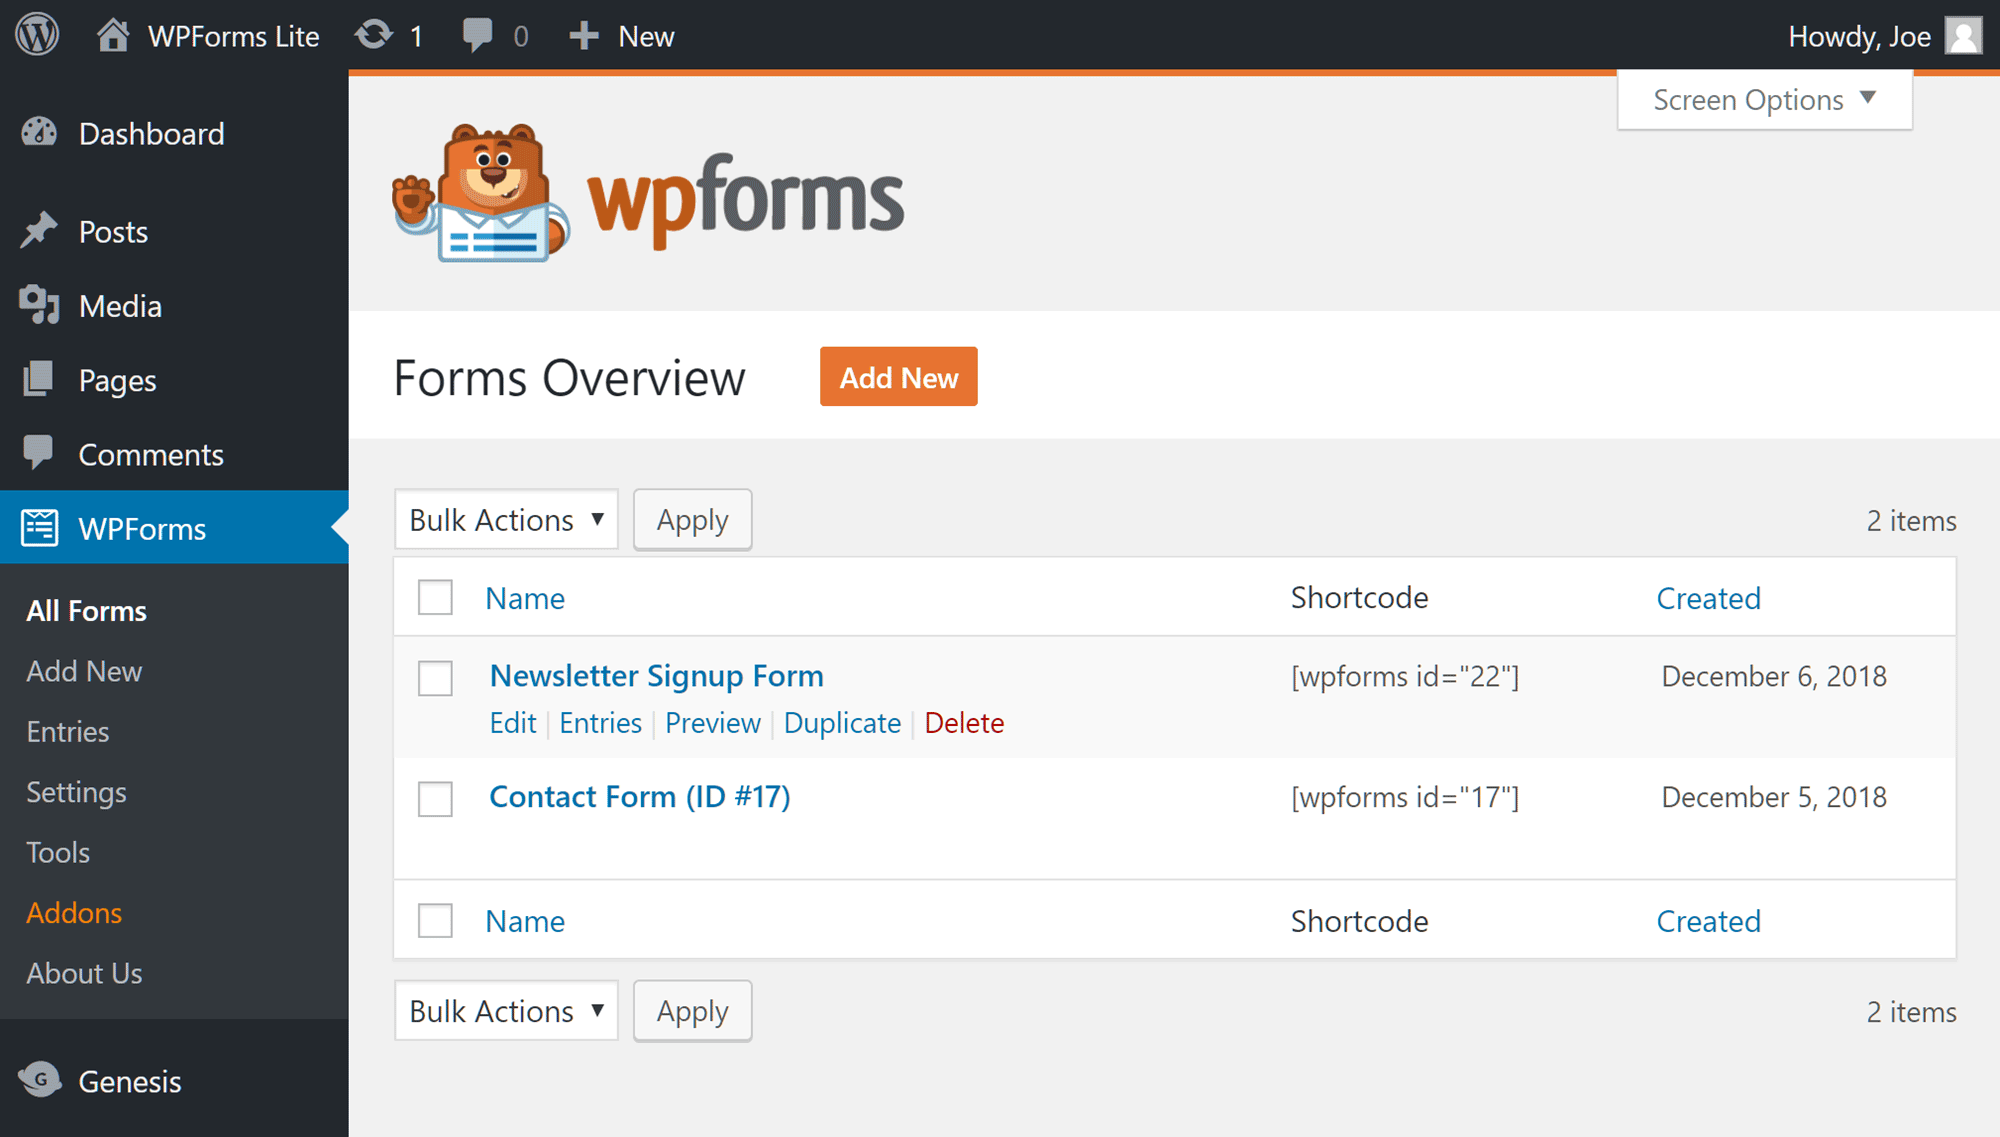
From this section of your WordPress Dashboard, you can delete or edit any existing forms, and, if you upgrade to WPForms Pro, you can view the form entries that have been submitted by your site’s visitors.
As mentioned earlier, any changes you make will be instantly reflected in your published forms, thanks to the power of WordPress shortcodes.
Final Thoughts
As you can see, the free WPForms Lite plugin provides a very easy way to add contact forms to WordPress websites.
By using the standard contact form template, you can add this type of form to your website in just a few clicks — and, thanks to the drag-and-drop editor, if you do need to make changes to the template (such as adding form fields or modifying the default text), the whole process is really very straightforward.
Note: To find out more about the advanced features and functionality of WPForms, be sure to check out our in-depth WPForms Pro Review.
Using WPForms? Thoughts?


All comments are held for moderation. We'll only publish comments that are on topic and adhere to our Commenting Policy.