Envira Gallery Review: The Best WordPress Image Gallery Plugin?
- By
- 3 Comments
In this post, I’ll be reviewing one of the WordPress platform’s most popular image gallery plugins: Envira Gallery. Read on to learn about its best features, how to use it and whether or not it’s a plugin worth paying for.
As a webmaster, it’s your job to satisfy internet users’ obsession with photos and pretty visuals, while also serving your website at lightning speed. But aren’t these two goals, well, sort of incompatible? After all, adding a ton of photos to your pages is bound to make things slower — using large, quality images means sacrificing load time, right?
Well, not always. And in this post, I’m going to be assessing a potential solution to this predicament: The Envira Gallery plugin.
The claim on the Envira Gallery website is bold and unambiguous: ‘The Best Premium WordPress Gallery Plugin.’ It builds beautiful image and video galleries, it’s quick and easy to use, and it’s been fine-tuned for maximum speed. What more could you ask for from a gallery plugin, right?
Of course, any plugin can sound good on paper. The more important questions are: What’s it like in reality? Does it live up to expectations? And is it worth the price tag?
I’ll be looking to answer all of these and more, as I take Envira Gallery for a test drive.
Let’s get started.
Table of Contents
Introducing Envira Gallery
First, though, a little background on Envira Gallery.
Envira Gallery was part of the Awesome Motive stable of plugins, which also includes OptinMonster, MonsterInsights and WPForms (click for reviews!). However, Syed Balkhi and the team sold Envira Gallery (and Soliloquy) in 2018 to focus on their other plugins.
Despite the change of hands, Envira Gallery remains a formidable option in the gallery plugin space. It’s still regularly updated, with new features added on a consistent basis. The plugin celebrated its sixth birthday in January 2020, so it’s been around for a while now. During this time, Envira has established itself as arguably the top gallery plugin, and possibly one of the best-known plugins in the WordPress world — period. As such, it may already be on your radar.
Right from the get-go, performance has always been a vital part of Envira’s philosophy. Original developer Thomas Griffin set out to create a gallery plugin that wasn’t bloated with code but could still stand up against other top gallery plugins. In fact, much of Envira’s success can be attributed to this approach — the plugin squeezes impressive usability and a ton of powerful functionalities into an insanely lightweight and super-fast package.
Although Envira is known for its speed, in my opinion the impressive feature set is probably the plugin’s biggest boon.
You can, of course, quickly create video or image galleries, complete with lightbox and slideshow functionalities, but it’s when you throw the various premium addons into the mix that you begin to unlock some of the most exciting features for an image gallery plugin. These include password-protected galleries, WooCommerce integration, and image printing, to name just a few.
As you’d expect from a top plugin in 2020, it is, of course, fully responsive, too.
So, there’s lots to like about Envira, but let’s see how it performs on a live website as we dive into the bulk of today’s post: Our detailed Envira Gallery review.
Getting Started with Envira Gallery
Let’s start by installing the plugin. Navigate to Plugins > Add New > Upload Plugin and install and activate the Envira Gallery .zip file.
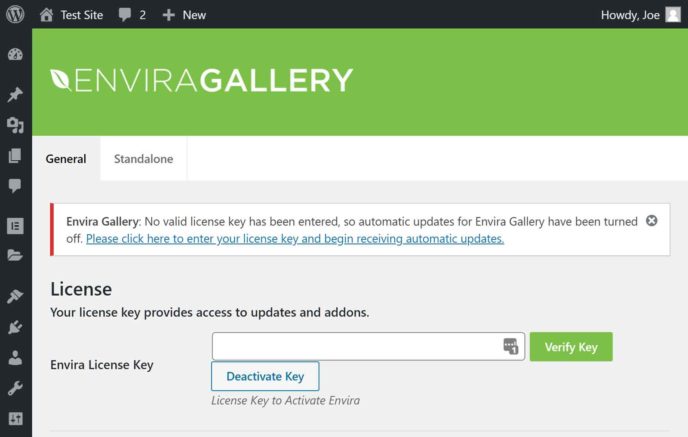
Once the plugin is live on your site, you can enter your license key. Doing so enables the Envira Gallery plugin to update itself with the latest features and security patches, while also unlocking access to any addons that are available on your pricing plan (more on those later).
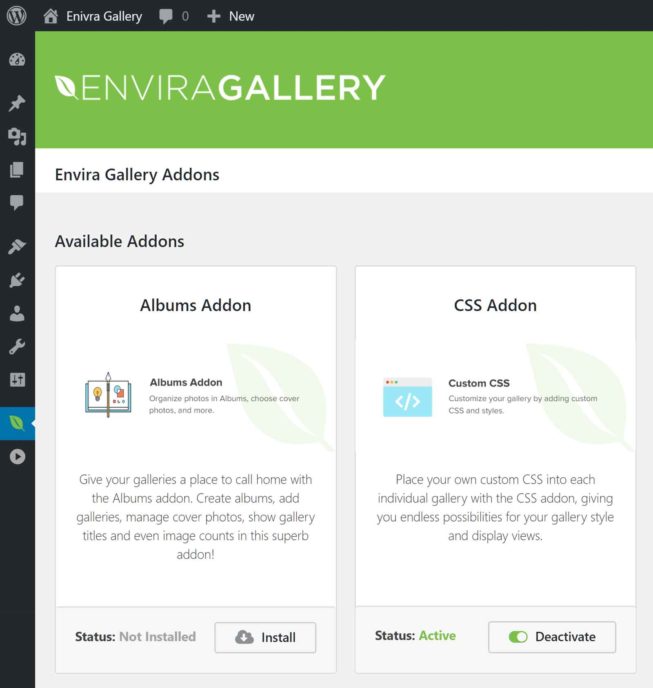
Now it’s time to install the addons. This is achieved by clicking Envira Gallery > Addons, then clicking Install on the ones you have access to and want to use.
There are up to 28 addons available, which means you can add an impressive range of functionality to the core plugin. Which ones are you eligible for? Well, that depends on your license type, which leads us nicely on to the topic of price.
Envira Gallery Pricing
Envira Gallery offers four license types.
- Basic ($29) — use on one website, get access to a set of eight addons.
- Plus ($69) — use on three websites, get access to a set of 19 addons.
- Pro ($99) — use on 25 websites, get access to all 28 addons.
- Agency ($299) — use on unlimited websites, get access to all 28 addons.
Your choice of license will dictate how many websites you can activate Envira Gallery on and which addons you’re able to use. All licenses cover you for one year of access to support and plugin updates. After the year is up, you can continue using the Envira Gallery and its addons unsupported or pay for another year of access to support and plugin updates.
And, for comparison, Envira Gallery’s main competitor is NextGen, which prices its Pro version between $79 and $299. As such, Envira Gallery is more affordable at entry-level, while in line at the top end.
Addons
The addons are probably the distinguishing variation between the licenses, as they unlock some really cool features. There’s no need to run you through all 28 of them, but here are some of the best:
- NextGen Gallery Importer Addon (Pro and up) — migrate galleries directly from the popular NextGen gallery plugin.
- Protection Addon (Basic and up) — prevent visitors from right-clicking and saving your images.
- Instagram and Pinterest Addons (Plus and up) — import images from social media sites.
- EXIF Addon (Plus and up) — for professional photographers, this one lets you add EXIF metadata to images, such as camera model and shutter speed.
- Featured Content Addon (Plus and up) — lets you link to posts, pages and custom post types.
- Gallery Themes Addon (Plus and up) — prettify your galleries with additional stylish templates.
- Pagination Addon (Plus and up) — in the interest of speed, this addon splits galleries across multiple pages.
- ZIP Importer Addon (Pro and up) — save your images in one handy .zip folder, then upload them in bulk into a single gallery.
- WooCommerce Addon (Pro and up) — integrate Envira with WooCommerce to sell your images to visitors.
- Deeplinking Addon (Pro and up) — optimize your images for a ranking boost.
- Social Addon (Pro and up) — add social sharing buttons to your images.
These addons are activated individually, which means you only need to install the ones you intend to use. The benefit of this is that the plugin carries no unnecessary baggage.
Creating Your First Gallery
Envira prides itself on being one of the most streamlined gallery plugins, giving you the ability to build galleries in mere minutes. In this section, we’ll put the plugin through its paces to see if this really is true.
Since the release of WordPress 5, which contained an update to the WordPress editor, you now have two ways to create image galleries with this plugin. First, we’ll look at the new method of creating a gallery, before checking out the more traditional, second approach.
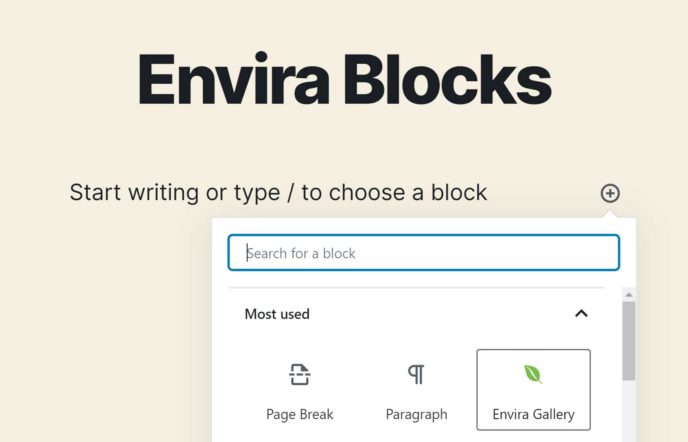
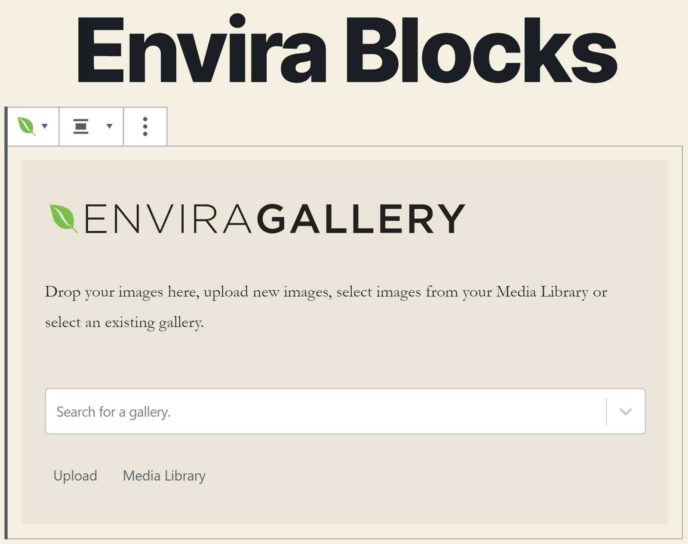
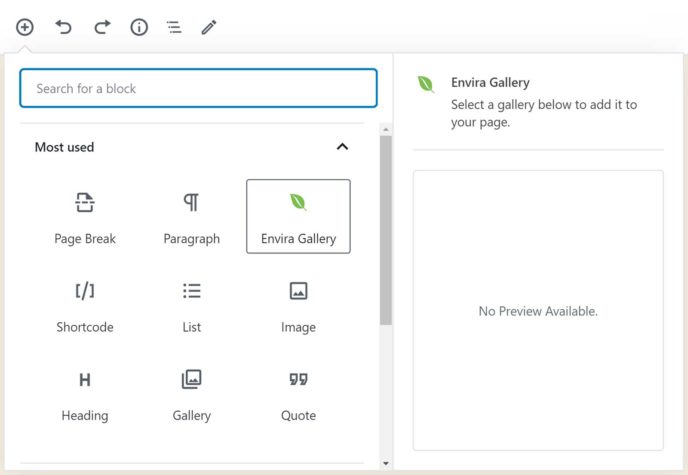
Thanks to good support for the new WordPress editor and its blocks system, you can now create an image gallery directory inside a post or page with Envira Gallery. To do so, simply create a new post or page in WordPress, or open an existing one for editing, and click on the Add block button.
Now choose the Envira Gallery block to add it to your post or page.
Once you’ve added the Envira Gallery block to your post or page, you can simply drag and drop the image files from your computer onto the block. Alternatively, if the image files have already been added to your WordPress website, you can click the Media Library button and then select them from there.
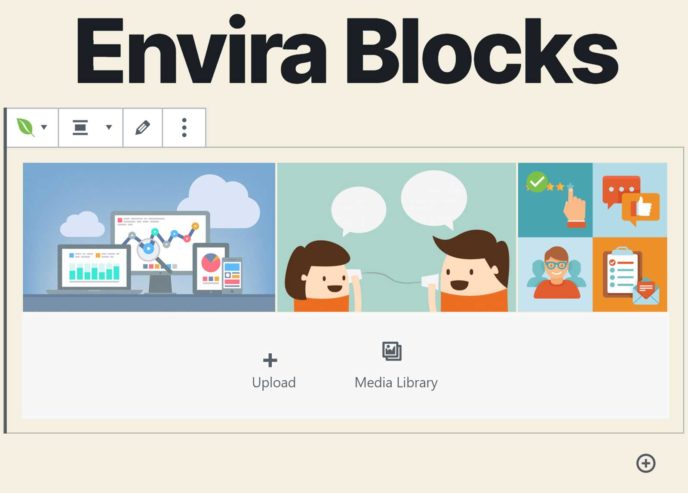
After you’ve added some images to the block, either by dragging and dropping them or selecting them from the library, you should have an image gallery configured with the default settings.
Now, if you preview your post, you’ll see the image gallery in action. If you want to customize the settings of the gallery, just click on the Edit gallery pencil icon. Doing so will take you to the Envira Gallery area of your WordPress dashboard, which we’ll explore in the next part of this review.
As we’ve just seen, thanks to good support for the latest version of the WordPress editor, you can quickly add an image gallery to your WordPress website with Envira Gallery.
If you’d rather create a gallery the traditional way — inside the Envira Gallery area of your WordPress dashboard — the process is almost as straightforward.
One of the benefits of creating a gallery this way is that you have access to all of the settings and configuration options while you work. So, if you’d like more control over how your gallery looks and functions, this will probably be the best approach for you. That being said, any galleries you create in the WordPress editor can also be configured afterward in the Envira Gallery area of your WordPress dashboard, too.
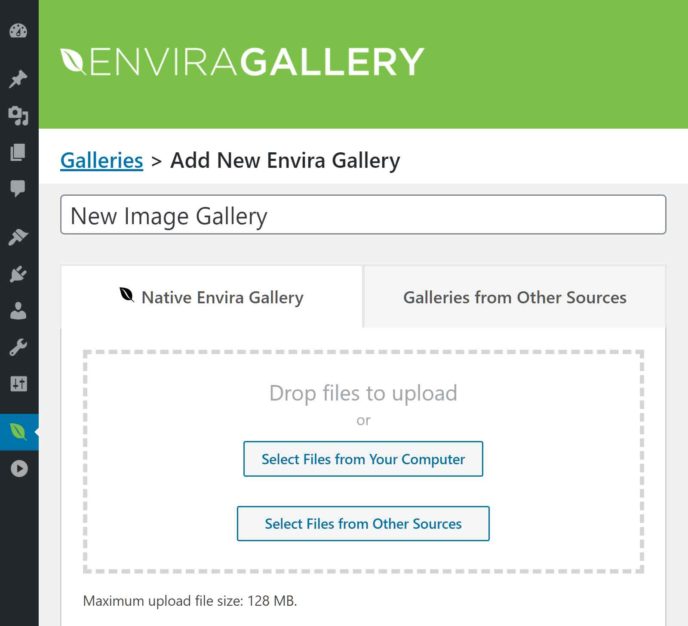
To start, we need to navigate to Envira Gallery > Add New, then give the image gallery a name.
Now, the most important part of any image gallery is, of course, the imagery itself. As such, selecting your images is a sensible place to start. Envira gives several options for sourcing your images.
- Choose existing ones from your WordPress Media Library.
- Upload new ones by dragging and dropping them into the gallery pane.
- Import images directly from Dropbox, Instagram, or Pinterest (*requires addons*).
- Upload a .zip file containing all of the images you intend to use — a ready-made gallery in a folder, if you will (*requires addon*).
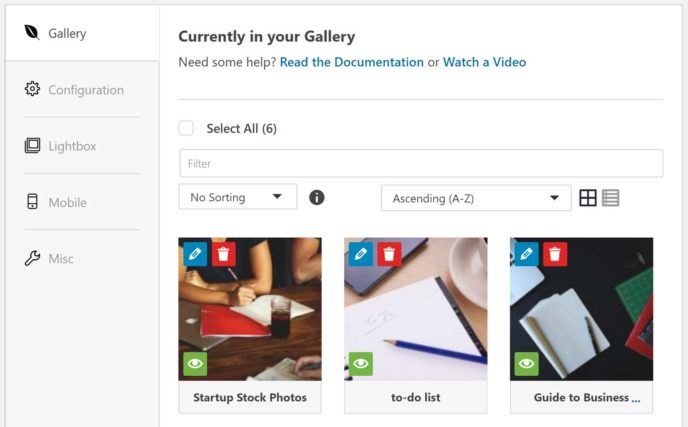
When you’ve selected, imported or uploaded your images, you’ll be able to see them in the Image panel in the section below.
From here, you can choose to modify your images or you can reorder them using drag and drop. It’s all effortlessly easy, and it takes just seconds to populate and arrange your gallery.
Configuring the Gallery
Now, it’s time to start configuring the gallery. This is done by working your way down through the Config, Lightbox, Mobile, and Misc panels. *Note — as you activate more addons, new panels will become available with new settings to configure.
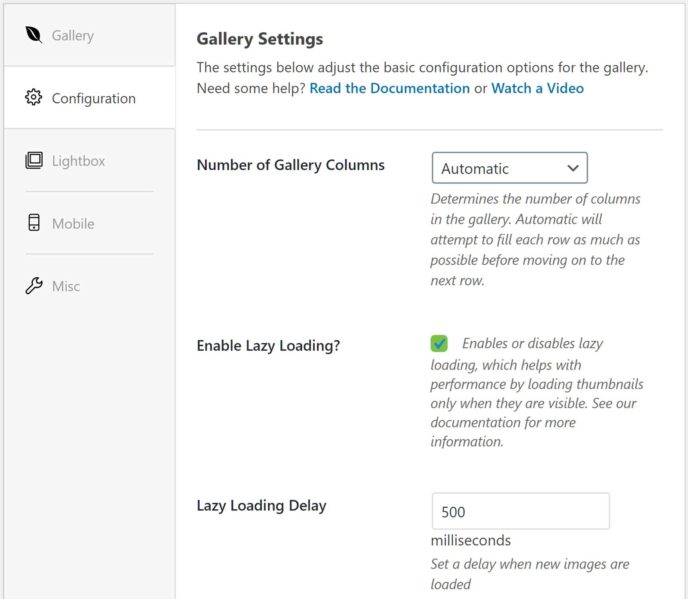
First up is the Config panel, which allows you to configure several basic settings for your gallery. For example, you can specify how many columns you want to spread your gallery over, select image dimensions, and activate image auto-cropping.
Although you can organize your image gallery using drag and drop (as we did before), you can also choose alternative sorting methods. These include random, by URL, by file name, or by publication date.
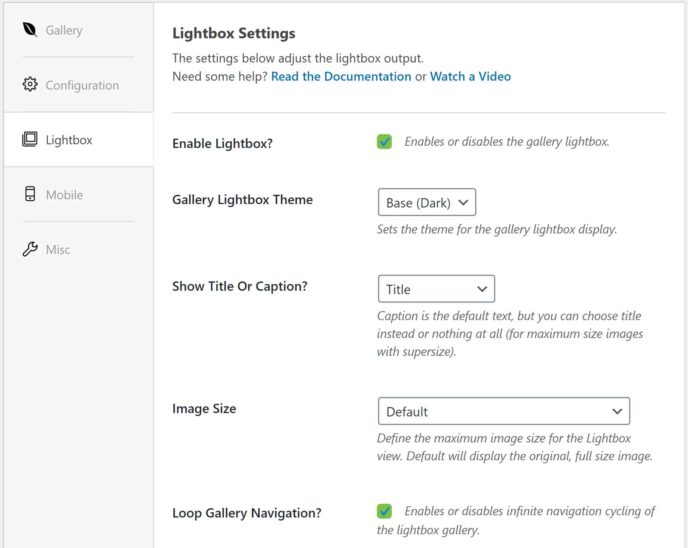
Next, the Lightbox tab. From here, you can modify the lightbox and how the images behave when clicked.
If you’ve activated the Gallery Templates Addon, you’ll be able to select eight lightbox styles — without the addon, you’re limited to two. You can also configure the size of the lightbox images, whether the galleries can be scrolled using the mouse-wheel, and the animation effects.
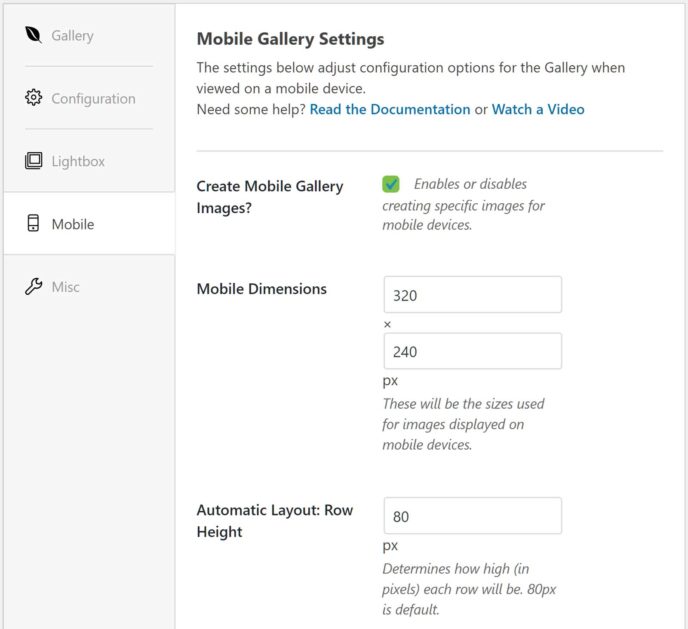
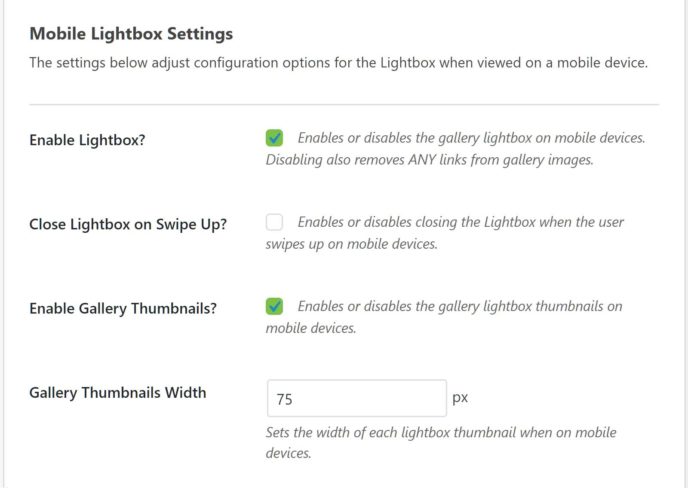
Now, on to the Mobile panel, which lets you configure your gallery’s mobile settings.
For starters, you get to activate galleries on mobile devices. You can also specify dimensions, pick lightbox styles and activate swipe gestures for navigating the galleries.
Finally, the Misc tab. This one lets you give your gallery a slug and also export/import galleries. Chances are, you won’t need to spend much time on this screen, so we’ll breeze over it.
Placing the Gallery
The gallery is now good to go, so it’s time to display it in all its glory on your site! And, as with every aspect of Envira Gallery, the process couldn’t be easier — in fact, the plugin ships with several options.
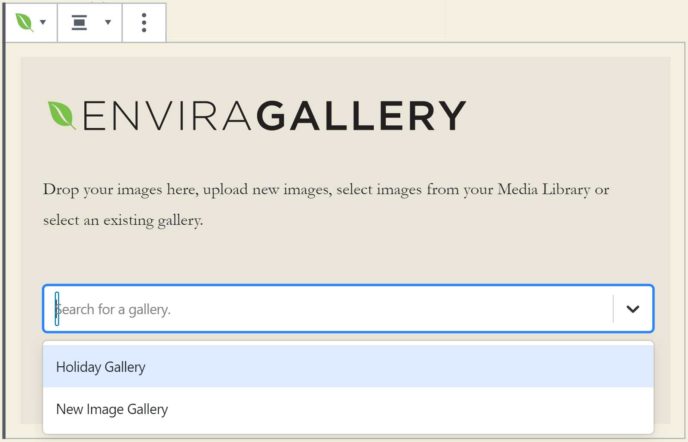
The easiest option, which most of you will want to use, simply involves creating a new post or page or opening an existing one for editing, and then adding a new Envira Gallery block.
Once you’ve added the block, you can choose one of your existing galleries to insert into the post, page or any other post type you may have on your website.
After you’ve chosen which gallery to insert, it will be displayed in your post or page.
You can also place a gallery in a sidebar or other area of your site that supports widgets simply by using the dedicated Envira Gallery widget. Just drag and drop into your preferred widget space, then select the gallery you want from a dropdown list. Also, if you’re using a drag-and-drop page builder plugin, such as Elementor, you can incorporate your galleries into your custom content designs by using the widget support of these tools.
Those of a more technical inclination may prefer this other option: Embedding a code snippet directly into your theme’s code. Again, this is super easy to do, with the code snippet readily available on the edit gallery screen.
Job done.
Galleries in Action
So, we’ve seen how easy it is to build a gallery with Envira, but what do the galleries actually look like? The proof is in the pudding, as they say, and the gallery’s appearance is the most important thing for users.
Fortunately, the results are really impressive — as you’re about to see. Remember, though, try not to be too swayed by the images featured in the gallery screenshots. After all, the quality of the images in use has no bearing on the quality of the plugin.
First up, here’s a simple three-column, masonry grid layout gallery.
Here’s a gallery using the Polaroid template, which is available in the Gallery Themes Addon, included with Pro licenses and above.
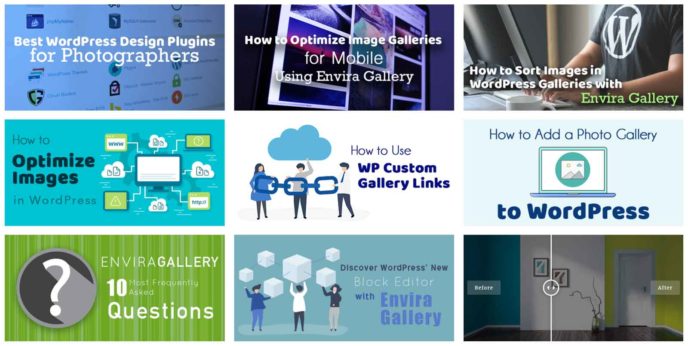
And here we see the featured content option, available with Plus licenses and above, which links to blog posts on your website.
As you can see, all galleries look really stylish — very clean and modern.
Clicking on an image can trigger the lightbox mode, depending on how you configured your gallery. When this happens, the background is darkened, and the image expands to full-size. Visitors can also navigate in lightbox mode by using the buttons provided, clicking left or right on their keyboard, scrolling their mouse wheel, or swiping on touchscreen devices.
Here is the standard lightbox.
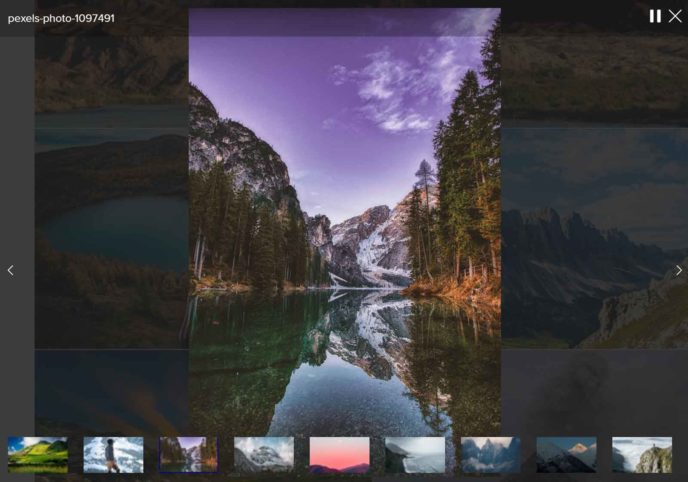
This is the lightbox using the slideshow feature with thumbnails.
And, finally, the mode which displays sharing buttons via the Social addon that is available on Pro licenses and above.
Those are just some of the ways you can use this plugin, and you can view more examples of Envira Gallery in action on the demo page of the website.
Envira Gallery Lite
The features we’ve outlined above are all well and good, but some users are looking to build quality image galleries using a free plugin.
If this describes your situation, you’re in luck. The official WordPress plugin directory stocks the Envira Gallery Lite version. The plugin has garnered more than 100,000 active installations and currently enjoys a stellar 4.8 out 5 rating. Compare these stats with the main rival, NextGen Gallery Lite, which has a far bigger user base — more than 800,000 — but a slightly less impressive 4.3 rating.
The Lite version is still exceptionally well coded and speed optimized, but it comes without most of the bells and whistles of its premium big brother. The plugin is just as easy to use — the process for building galleries is identical, in fact — but there are fewer options and none of the functionalities the addons provide.
Still, if you want a free gallery plugin, it’s an excellent option, or it gives you the opportunity to try Envira Gallery out before purchasing the full version.
The Verdict
Overall, I was really impressed with the Envira Gallery plugin. Not only is it one of the fastest around — an important consideration for any image-heavy website — but it’s also one of the most user-friendly plugins I’ve had the privilege of testing. The learning curve is as flat as it gets.
As far as feature sets go, Envira Gallery can do everything you could ask of an image gallery plugin. Social sharing, WooCommerce integration, image SEO, stylish templates, gallery imports — the list goes on and on.
Each function is activated at the click of a button, which means you only need to install the features you’re actively using. This means that, for users just looking for a streamlined gallery, there are no unnecessary configuration screens to drown in. And for those looking for specialized functionalities, there is a dedicated settings screen for each one, enabling you to tweak the galleries to your exact liking.
The biggest decision is choosing which license to opt for. As you’d expect, the more expensive licenses ship with additional (and more sophisticated) addons, so it’s a tradeoff between price and feature set.
For most users, the optimal license will fall somewhere between Plus and Pro — Plus unlocks the bulk of the best addons, while Pro unlocks the lot.
Having looked closely at the addons available with each license, I personally lean towards the $99 Pro license and feel it represents the best value. Yes, it’s the most expensive option (apart from the Agency license that lets you use the plugin on an unlimited number of sites), but it’s not much more expensive than the Plus license, and you get access to lots more features. Pro also offers premium support, although, because of how easy the plugin is to use, you probably won’t use this much.
All in all, Envira is a really strong gallery plugin. Quick, reputable, and easy to use — and gets a full endorsement from us.
Using Envira Gallery? Thoughts?
Related Reading:
Leave a Reply
All comments are held for moderation. We'll only publish comments that are on topic and adhere to our Commenting Policy.










What a horrible company Envira is. Their Customer support are rude, and careless.
Important thing to know, if they get angry because you complain, They will just ban your website, making it useless.
I don’t know about you, but that is not a company I want to trust.
Installed fresh version of WordPress.
And only their script. I asked them what theme to use.
Their #1 Recommended theme does not work with their script properly.
After wasting numerus hours, frustrated, complaining, no response.
I had to hire a tech and pay him to fix it.
He found that Envira Gallery does not work with that script!
We got a new theme, finally got the site 100% running and finished,
But Envira decided to shut down my website, even knowing it was now 100% done.
I lost a whole week of work, and money I paid the tech.
Yes I got to be rude with them after 50 wasted hours!. But I also sent apologies the next day.
They did not care, they are Vindictive people, they shut down my site anyway!
I will be suing them, thanks, John.
The Envira Gallery support is non-responsive. They’ll quite happy to take subscriptions from customers but are silent afterwards. I’ll use PayPal to refund my payment as I’m sure they’ll not respond to any further emails.
Yup, it happened to me after I lost my cool and started complaining.
What a horrible company Envira is. Their Customer support are rude, and careless.
Important thing to know, if they get angry because you complain, They will just ban your website, making it useless.
I don’t know about you, but that is not a company I want to trust.
Installed fresh version of WordPress.
And only their script. I asked them what theme to use.
Their #1 Recommended theme does not work with their script properly.
After wasting numerus hours, frustrated, complaining, no response.
I had to hire a tech and pay him to fix it.
He found that Envira Gallery does not work with that script!
We got a new theme, finally got the site 100% running and finished,
But Envira decided to shut down my website, even knowing it was now 100% done.
I lost a whole week of work, and money I paid the tech.
Yes I got to be rude with them, after 50 wasted hours!. But I also sent apologies the next day.
They did not care, they are Vindictive people, they shut down my site anyway!
I will be suing them, thanks, John.