Sumo (fomerly SumoMe) Review: The Ultimate All-In-One Set of Online Marketing Tools for Website Owners?
- By
- 3 Comments
A WordPress webmaster’s goals are relatively simple: Increase traffic, build an email list, generate buzz on social media, and convert like crazy. Of course, such things are all easier said than done!
What if I told you there was a single all-in-one tool with the potential to dramatically boost your efforts in almost all of these critical areas?
Introducing Sumo (formerly SumoMe) — a complete suite of marketing tools aimed at helping webmasters grow both traffic and conversions.
Let’s take an in-depth look at all this incredible set of tools has to offer — with a mind to see whether it provides value for money, and whether or not it lives up to expectations…
Introducing Sumo
Sumo isn’t your typical WordPress plugin. In fact, it’s not actually a plugin at all. It’s a set of cross-platform-compatible tools, meaning it can be used on just about any website (WordPress-powered or otherwise).
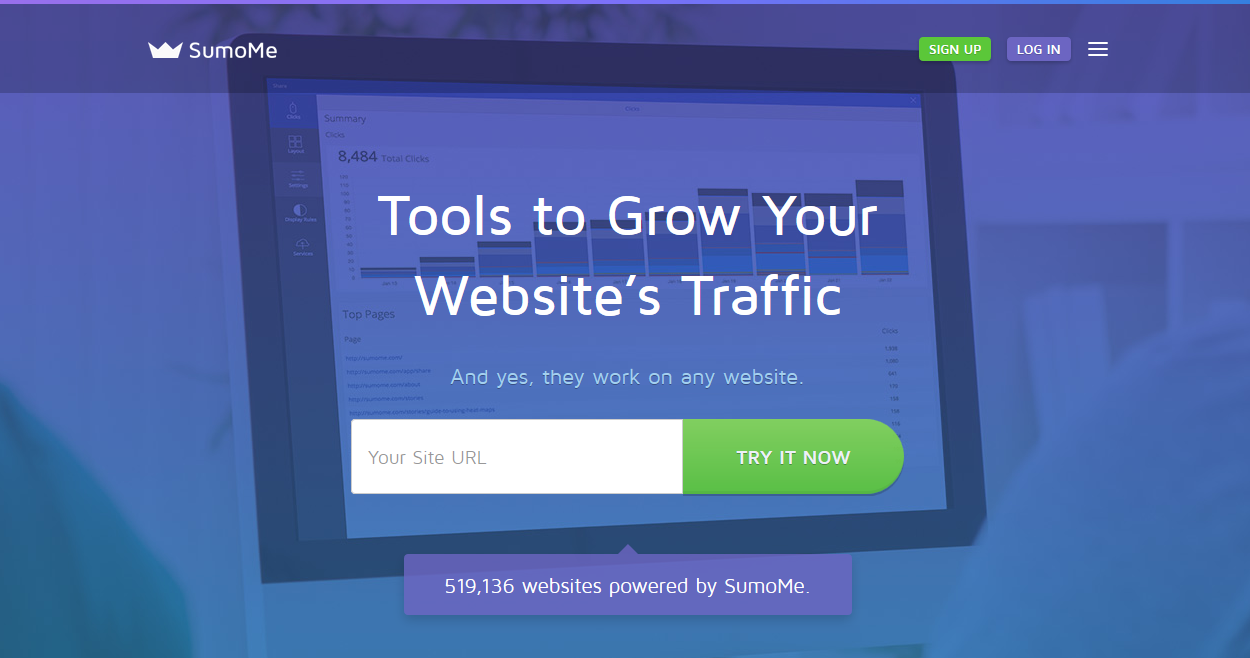
So if it isn’t solely for WordPress and it isn’t a plugin, what is it?
Simply put: Sumo is a powerful, all-in-one suite of apps — a collection of standalone tools to boost your site’s performance in all kinds of cool ways.
With new apps added regularly, Sumo’s capabilities will only improve. However, to date, Sumo’s apps fall into six categories: List building, on-site analytics, social sharing, traffic boosting, communication and ecommerce.
The best way to demonstrate what Sumo can do is to introduce the full complement of Sumo apps. Speaking today, there are 13 apps available:
List Building
- List Builder — pop-up opt-in forms.
- Scroll Box — corner-positioned opt-in forms triggered when a visitor reaches a specific scroll point.
- Smart Bar — notification toolbar.
- Welcome Mat — full-screen call to action.
On-Site Analytics
- Google Analytics — Google Analytics in the WordPress dashboard.
- Content Analytics — colored scroll maps showing how much of your content visitors read.
- Heat Maps — shows where visitors are clicking on your site.
Social Sharing
- Share — social sharing buttons.
- Image Sharer — social sharing buttons for images.
- Highlighter — visitors can highlight your content to share or tweet.
Traffic
- Discover — reciprocated content sharing between Sumo users.
Communication
- Contact Form — visitors can email you directly from your website.
Ecommerce
- Buy Button — streamlined ecommerce functionality.
As you can see, Sumo handles lots of important tasks — tasks that could ordinarily require seven, eight, or even nine separate plugins. With such varied, useful, and powerful functionalities, the Sumo suite is not just for growing a website, but growing an entire business.
In this article, I’m going to cover Sumo’s full range of features to show you how this tool could benefit you, and review every app in turn to demonstrate what each can do.
Price
But first, there’s the small matter of the bill. Or, in Sumo’s case, there isn’t necessarily a bill at all.
When you look at Sumo’s complex and performance-boosting functionality, you immediately gulp and wonder how much it’s going to cost — probably quite a lot, right? Incredibly, though, there’s a version available for nothing.
Zero. Nada. Zip. Zilch.
Forever.
That’s right. Every one of Sumo’s apps is available free of charge — with only small restrictions. Many plugin developers offer a free or lite version of their plugin to act as a gateway to the paid product. What sets Sumo apart is that the free version is a genuinely useful tool in its own right. The only real compromise is a lack of VIP support, plus you’ll have to persevere with the Sumo branding.
Sumo is available in a premium version, too, though. Prices start at $20 a month for up to 5,000 visitors, and scale up to $119 a month for a cool million visitors per month.
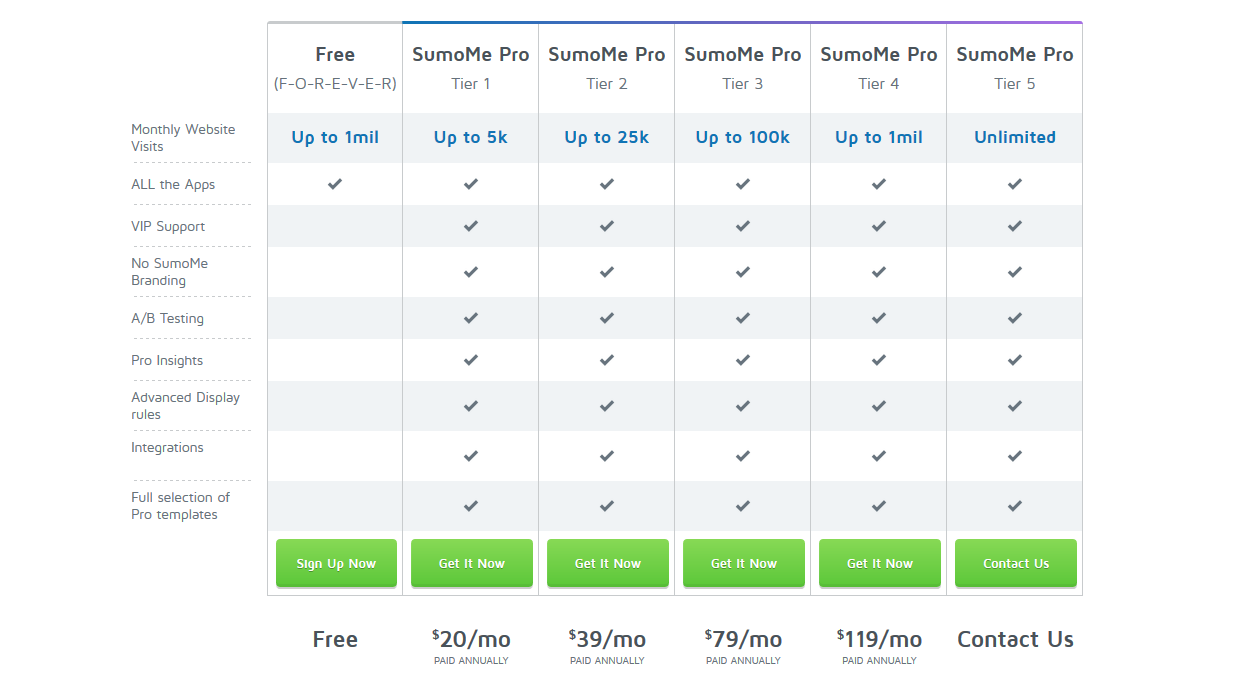
Premium licenses include A/B testing, Pro Insights, Advanced Display Rules, Integrations, and a collection of pro templates.
Quick disclosure: Although many features and functionalities overlap, in today’s review I tested out the paid version of Sumo.
Getting Started with Sumo
Sumo is compatible with a range of website-building tools, including Shopify, Tumblr, Weebly, Squarespace, and Blogspot. We WordPress users have it easiest, though, as we can install the dedicated Sumo plugin to add the full complement of functionalities to our website.
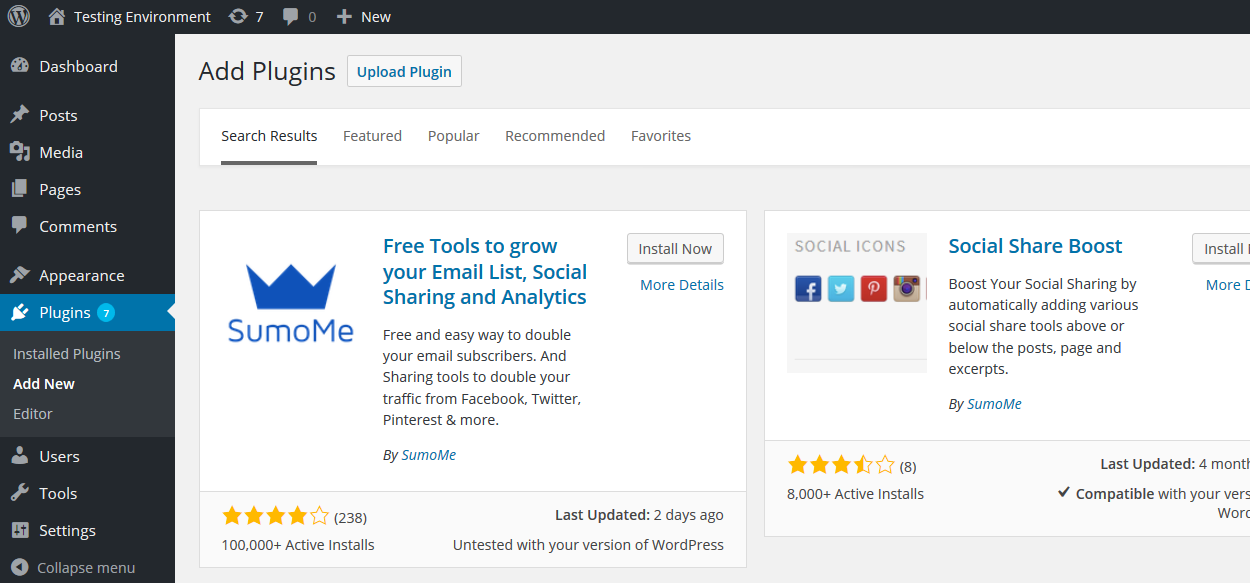
To install Sumo, log in to your WordPress dashboard and make your way to Plugins > Add New > search for ‘Sumo’ > click Install Now > Activate Plugin.
The next step is to connect your Sumo account with your WordPress site. Click the blue crown icon that should have appeared in the top-right of the screen, then log in using your Sumo credentials — you can also create an account if you haven’t got one already.
Click the blue crown again to open the dedicated Sumo interface. This first screen shows you the full suite of Sumo apps.
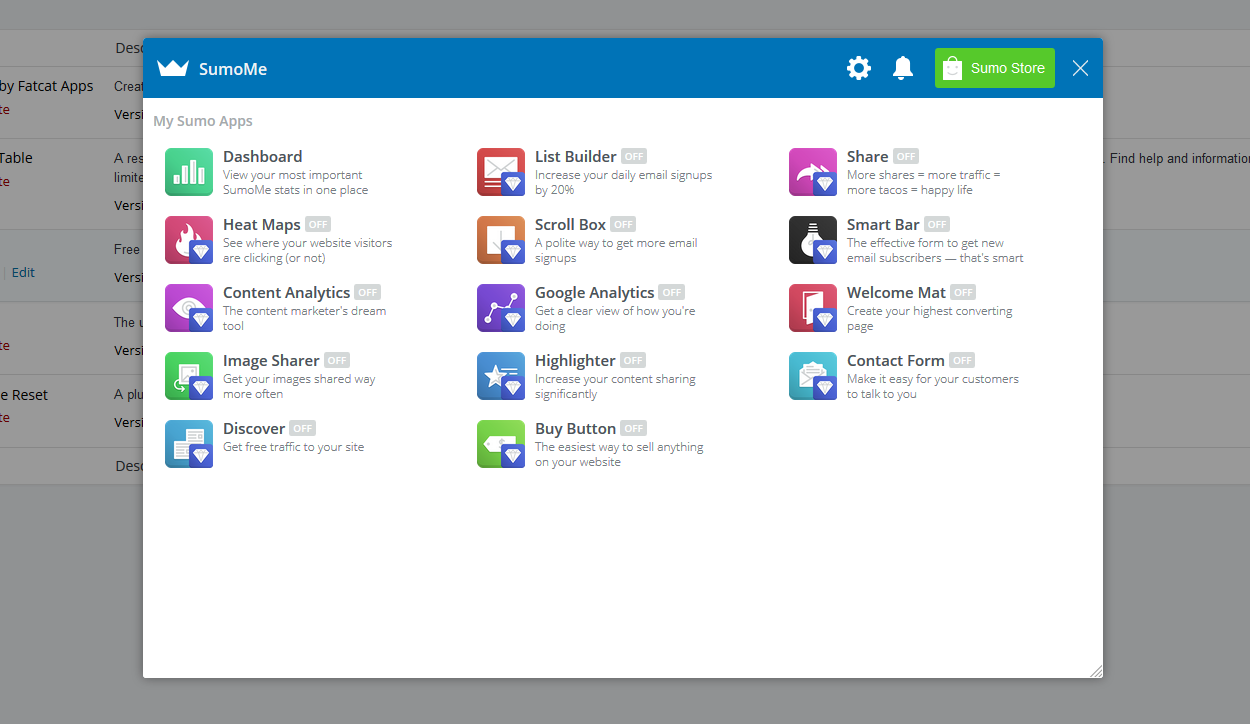
The apps come deactivated as standard, so simply choose the ones you want by toggling the on/off button next to each app. Even free users can use all 13 apps simultaneously.
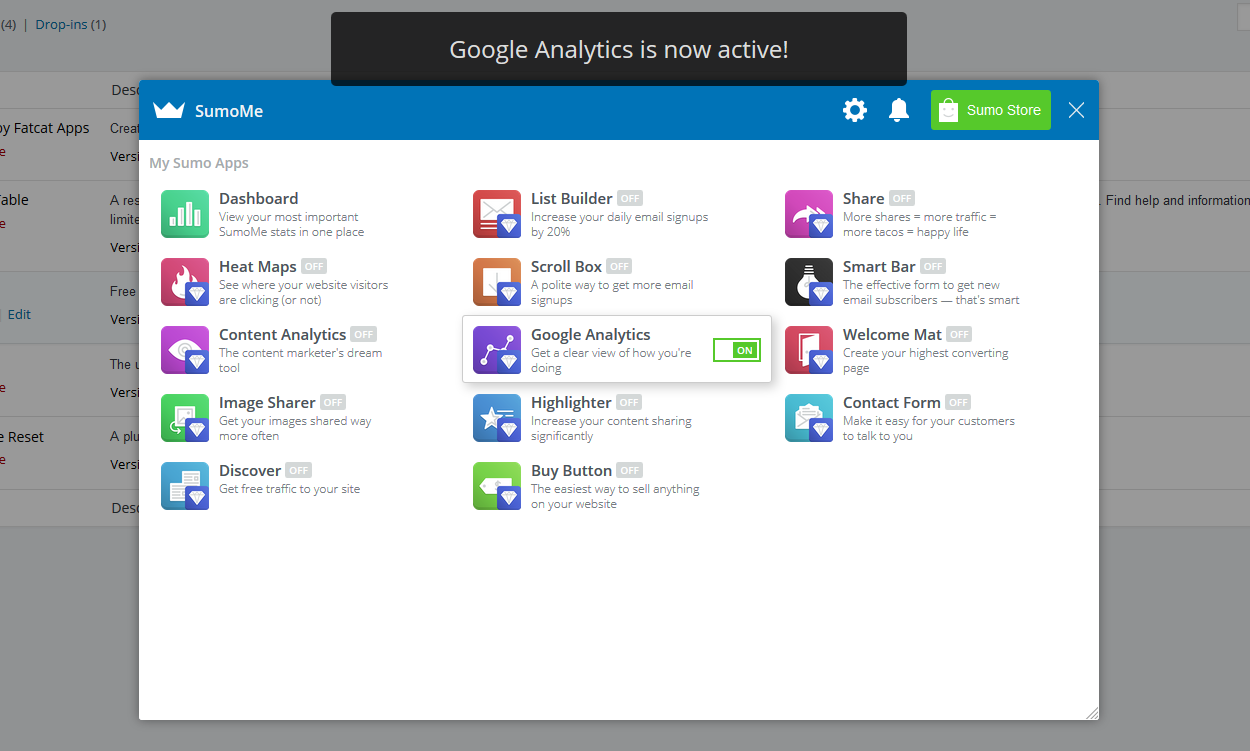
Once you’ve activated the apps, you can configure each one by clicking on the app’s icon. Let’s test some of them out.
List Building with Sumo
First up is Sumo’s list building functionality, which is divided into four apps: List Builder, Scroll Box, Smart Bar, and Welcome Mat.
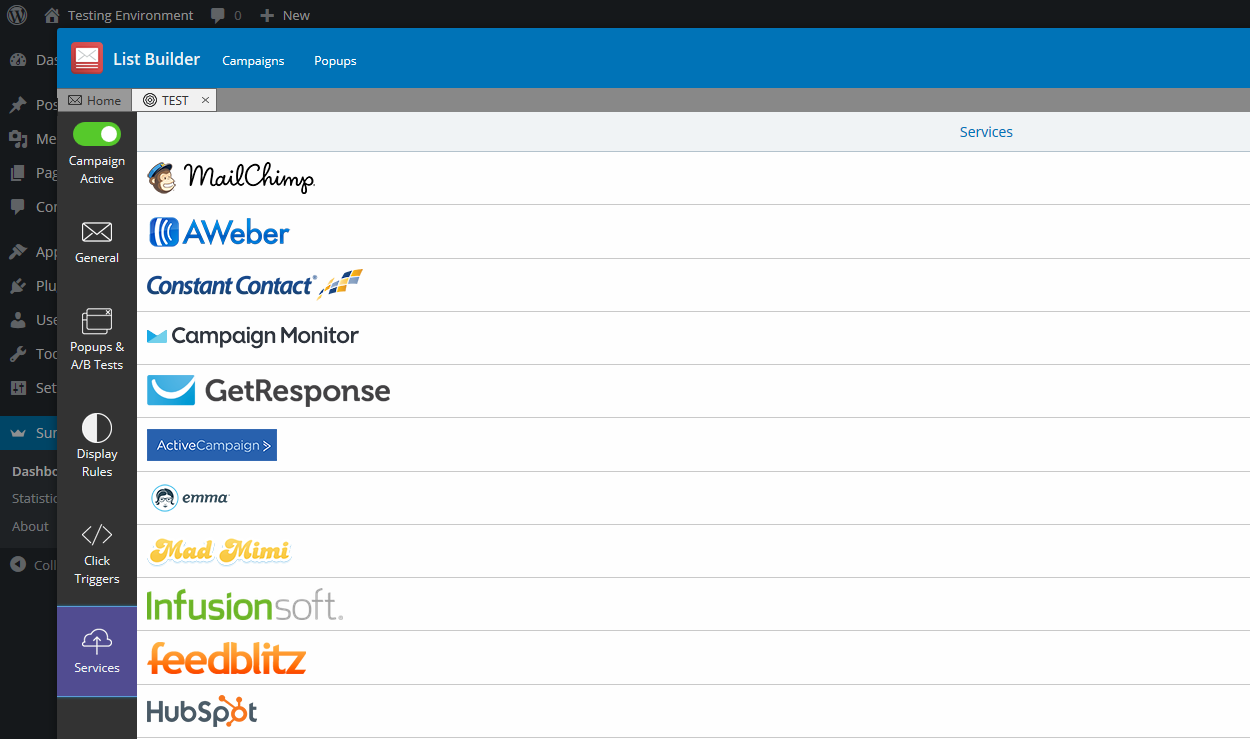
Sumo is fully compatible with all the big names in email marketing. In just a single click, you can connect it with MailChimp, Aweber, Constant Contact, or one of 25 other services you may be using.
All you need to do is navigate to any of the list building apps, click on the Services tab, find your service, then input your API code into the pop-up window. It’s quick, easy, and painless, and makes Sumo accessible to any email marketer.
List Builder App
Let’s start by testing out the List Builder app, used to create pop-up opt-in forms. When you click on the List Builder icon, you’ll be greeted with an overview of your key stats — a day-by-day breakdown of pop-ups displayed, subscribers, and the all-important conversion rate.
To create your pop-up opt-in form, first, you need to add a new campaign. Next, make your way to Popups & A/B Tests, before clicking Add New Popup.
Click the pop-up you’ve just created to open the Sumo editor. You can customize everything, and with minimal fuss, too. The interface is extremely intuitive to use, letting you choose from 37 templates before customizing the text, colors, and sizes. You can also choose a goal for your pop-up — collect emails, call-to-action button, or growing your social following.
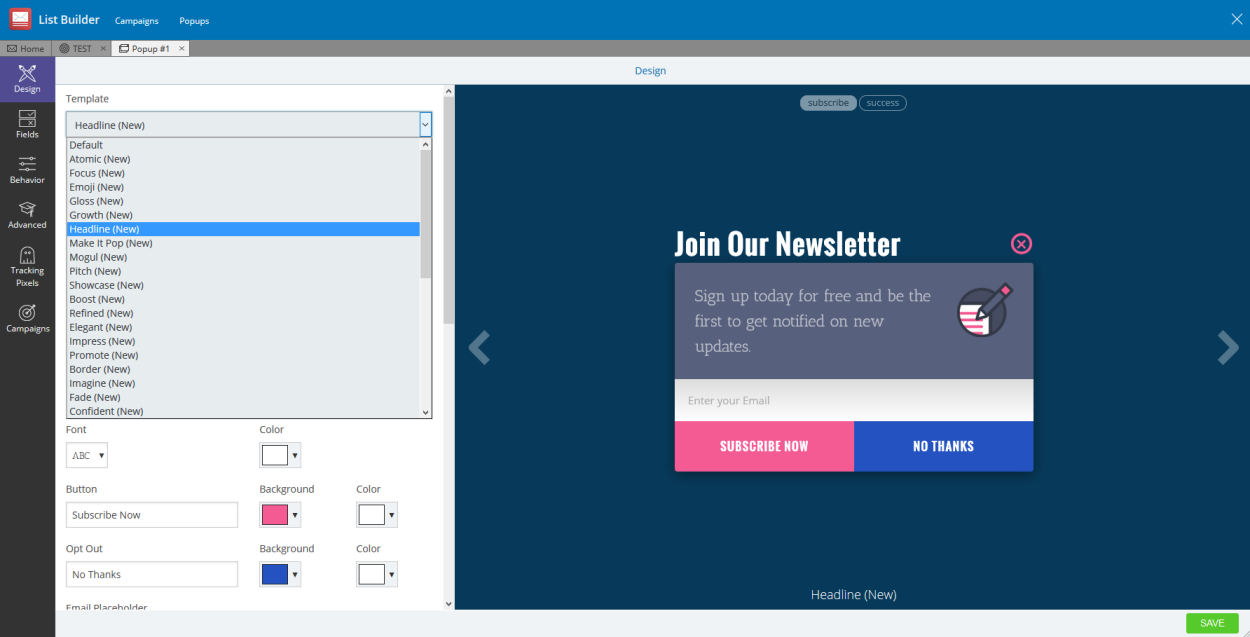
You can preview your changes in real-time, plus you can flick between the ‘subscribe’ and ‘success’ message.
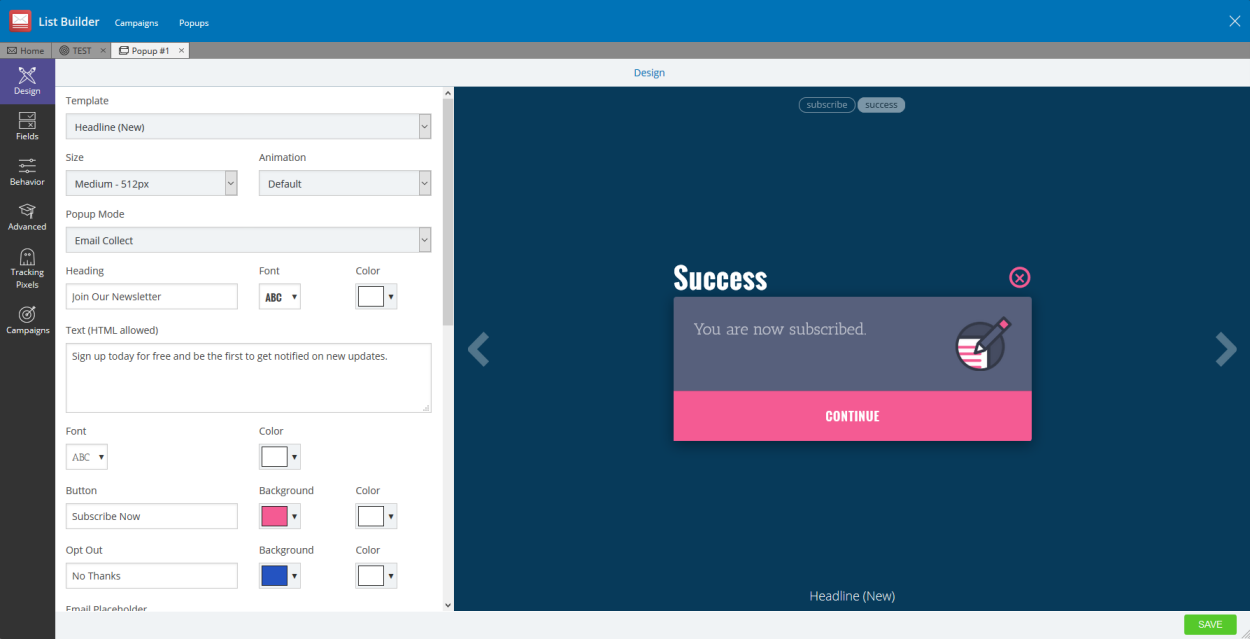
Before you finish, make sure you work your way through all the tabs. You can choose the fields you want to display via the Fields tab, then the pop-up triggers using the Behavior tab — Sumo lets you choose between a time delay and exit intent.
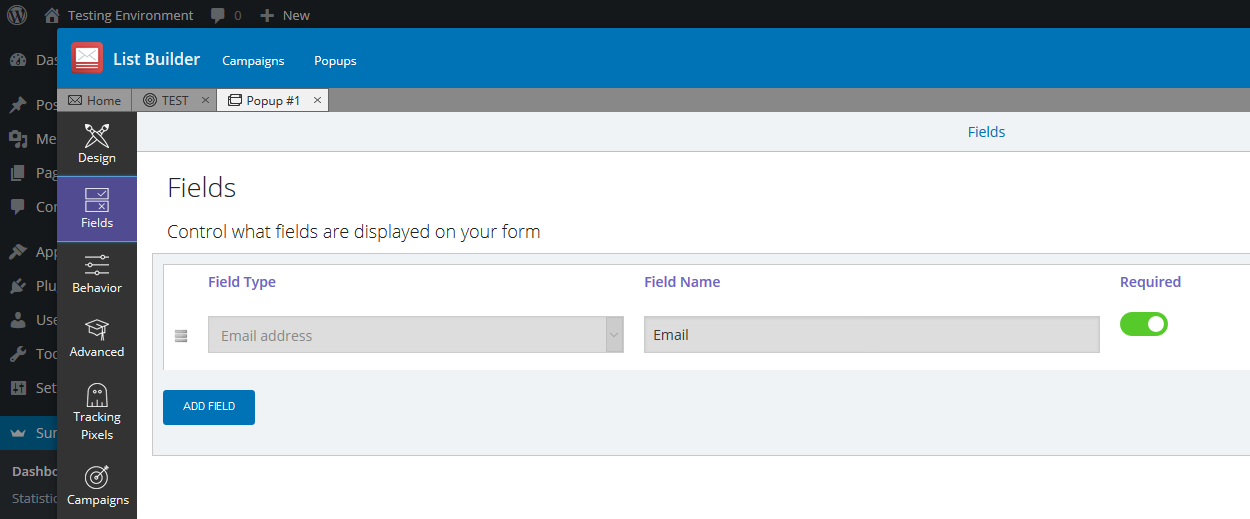
The other tabs let you add custom HTML and tracking pixels to your form. When you’re finished, hit the Save button.
Now, having tested several opt-in plugins, it’s worth pointing out that the Sumo builder does not have the complexity or power of, say, a Thrive Leads. However, I don’t think this is a bad thing. While it’s easy to get lost with many plugins, I felt right at home with Sumo at all times. You can still customize every aspect of your pop-ups, but it felt a far more streamlined process — customization without the headaches.
A/B Testing and Targeting Functionalities
Of course, list building isn’t a set-and-forget activity. You need to continuously improve and refine your opt-in forms to maximize conversion. Fortunately, Sumo ships with built-in A/B testing functionality.
As soon as you have created more than one pop-up, the split testing functionality kicks in. Now, you can specify how often each pop-up is displayed using the simple slider.
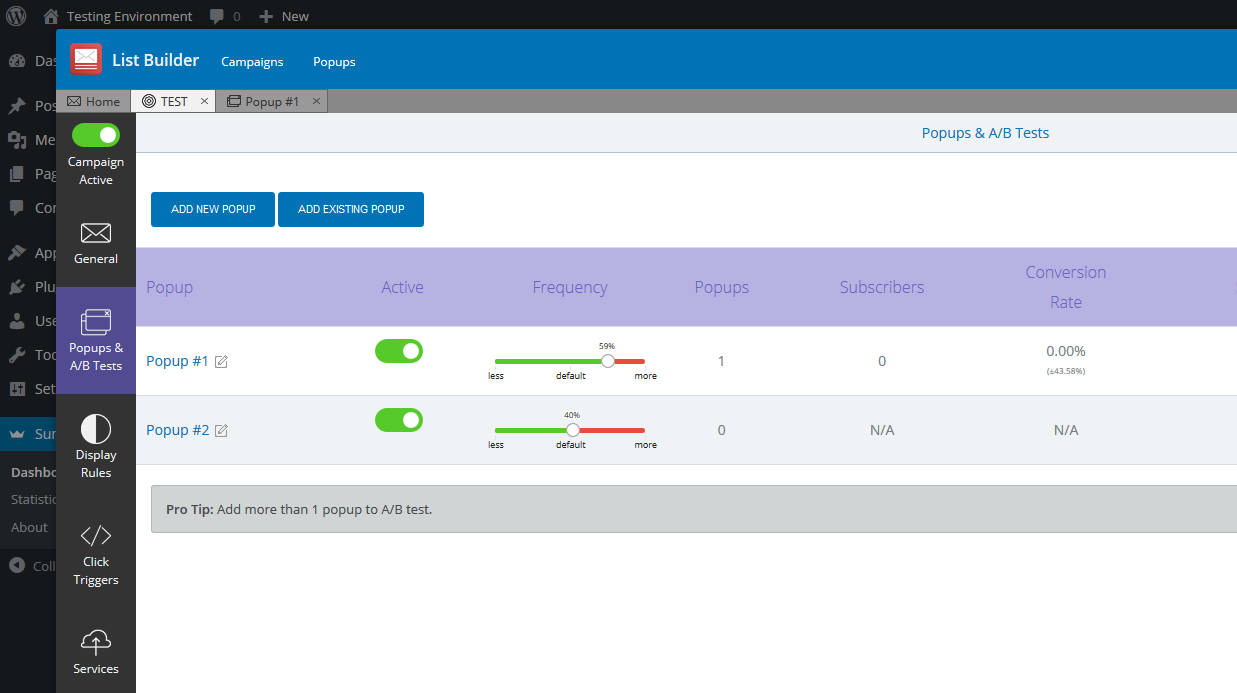
After the test has run for a bit, you’ll be able to see the performance of each pop-up, side by side. When you’re happy you’ve determined a winner, you can discard the unwanted pop-up and get to work creating a new one. It’s a fairly hands-on approach, but it means you retain complete control of the process.
The other essential functionality is form targeting. This lets you narrow in on where a pop-up is displayed. You can target your forms based on a huge range of parameters — URLs, user devices, user location, referral domain, number of page views, and so on.
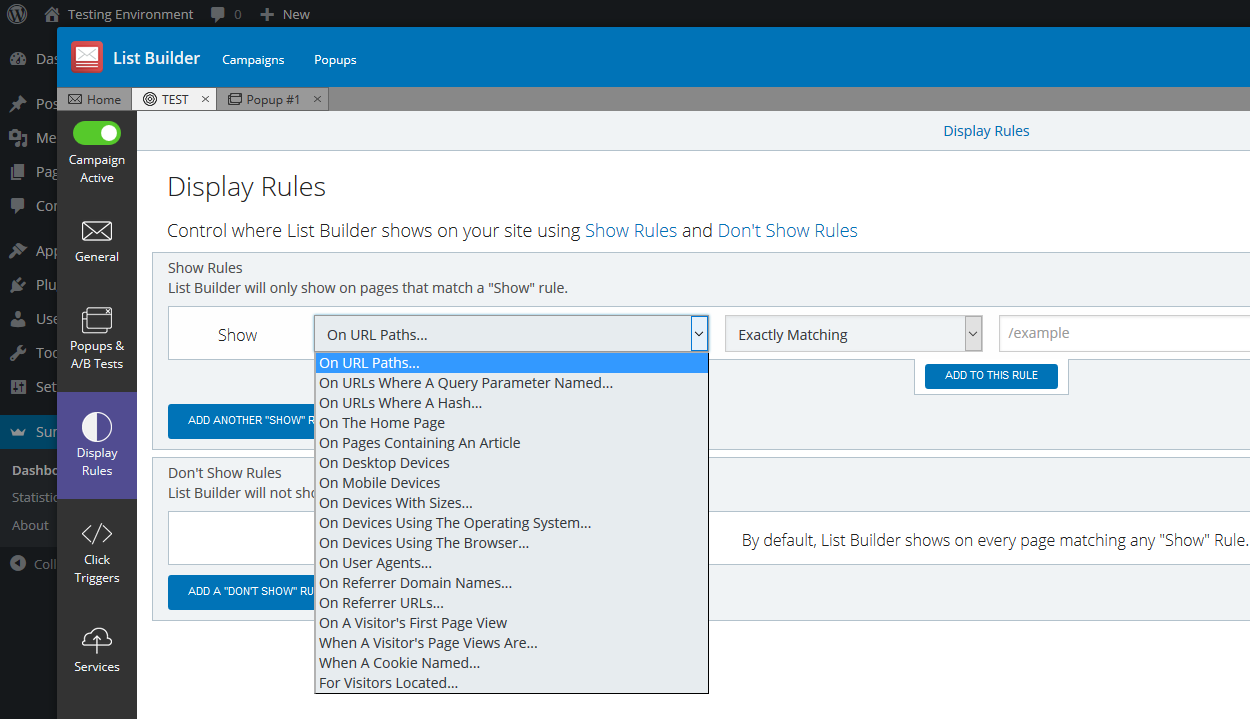
Last but not least, you also have the option to create a ‘click trigger’. Click triggers let you add links to your content which, when clicked, will trigger the pop-up. If you want your pop-ups to feel less imposing to visitors, this is a great feature.
Other List Building Apps
The other list building apps use the same interface, but create different types of opt-in forms.
For example, you can create slide-ins…
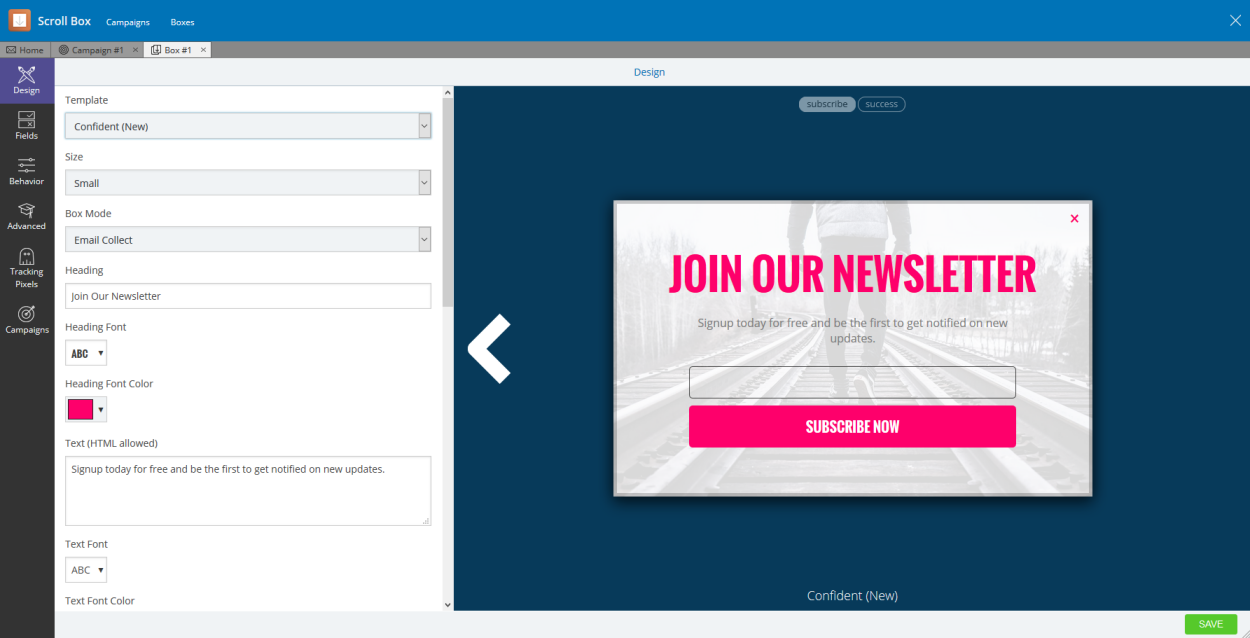
Toolbars…
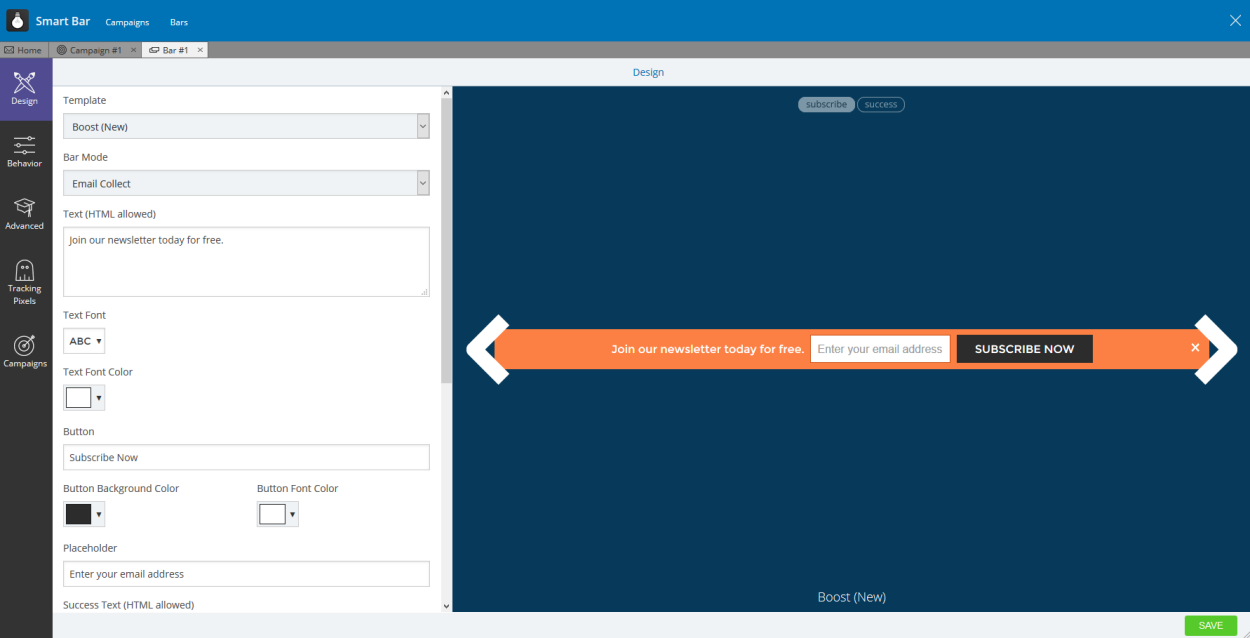
Or welcome mats.
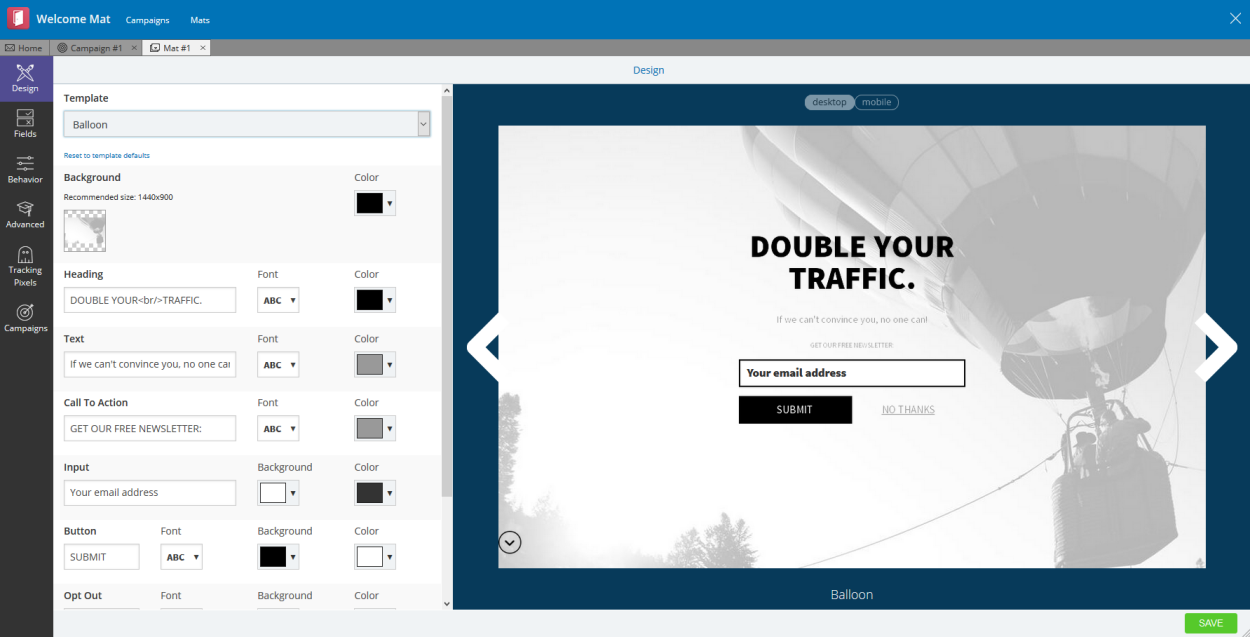
All are easy to configure, so play around with different opt-in forms to see which works best on your website.
Growing Traffic with Sumo
Sumo is more than just a list building plugin, though. You can also use it to grow your traffic. In this section of the review, we’ll take a look at the three on-site analytics apps — Google Analytics, Heat Maps, and Content Analytics — as well as the potentially traffic-boosting Discover app.
Google Analytics
These days, the overwhelming majority of webmasters are using Google Analytics to track their visitors and fine-tune their site’s performance by analyzing key on-site metrics.
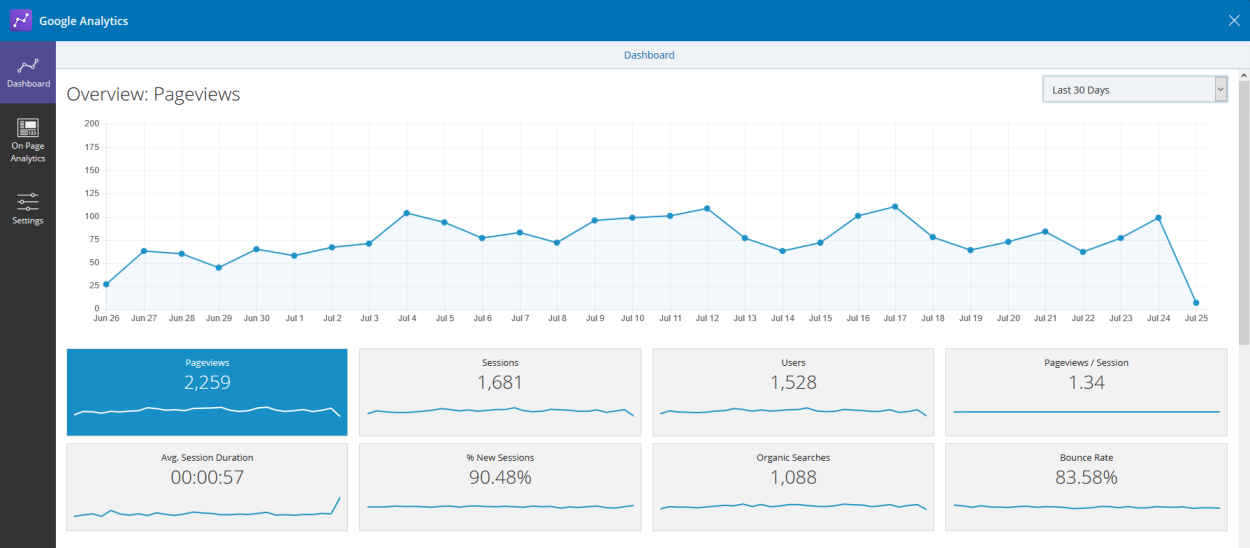
Google Analytics really is an awesome tool, but it can be a nuisance to flick back and forth between Analytics and your WordPress dashboard. Well, by activating Sumo’s Google Analytics app, you no longer have to — you can view your site’s metrics directly from the Sumo UI within the WordPress dashboard.
After clicking on the Google Analytics icon, the first step is to sync Google Analytics with your website by pressing the Connect button. This will open a pop-up that lets you log in to Google and then give Sumo the required permission.
Select the website from your portfolio, then click Next. And that’s all there is to it.
Now, when you click the Analytics icon, you’ll be able to see the Google Analytics overview — including traffic figures, bounce rate, and session duration.
Content Analytics
We website owners are a vain bunch. We assume that, because our content must be top-notch, our visitors will be reading it from top to bottom.
But are they? Really?
Sumo’s Content Analytics app is another really cool tool that lets you answer this question definitively. It tracks how far visitors scroll before leaving the page.
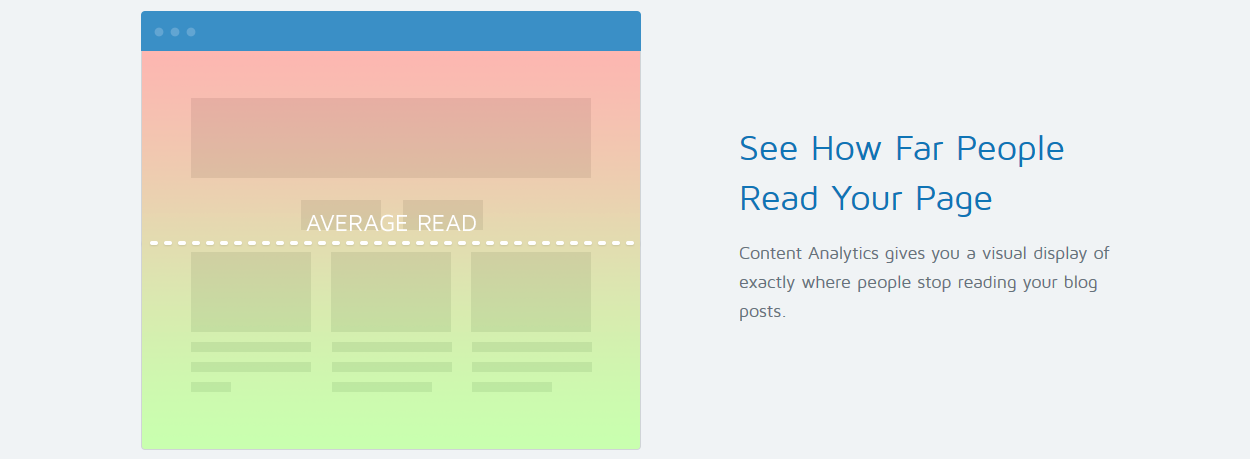
Why is this useful? Well, many webmasters place a call-to-action at the bottom of their content. This targets the most engaged readers, sure, but if only 10% of visitors reach the bottom of a blog post, wouldn’t it make more sense to place the CTA higher up the page where it reaches more eyeballs?
To use this invaluable tool, activate the Content Analytics app, then click the Record New Campaign for This Page button.
Next, navigate to the Auto Record tab, which will let you choose which pages to target — or, if you want, you can simply select to track all pages.
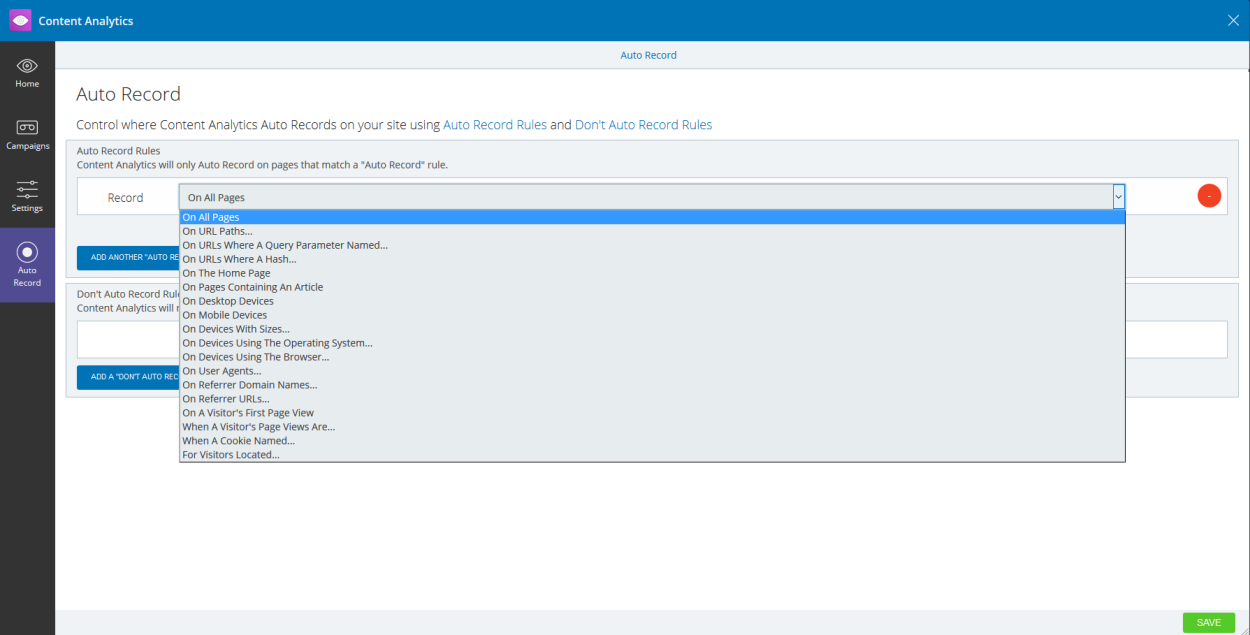
Now when you go to the overview screen, you’ll see what percentage of your content your visitors are reading on average.
Heat Maps
With Google Analytics and Content Analytics installed and activated, you’ll probably have a pretty good understanding of how your visitors are interacting with your website. If you want to take this understanding to the next level, though, Sumo’s Heat Maps app will be right up your street.
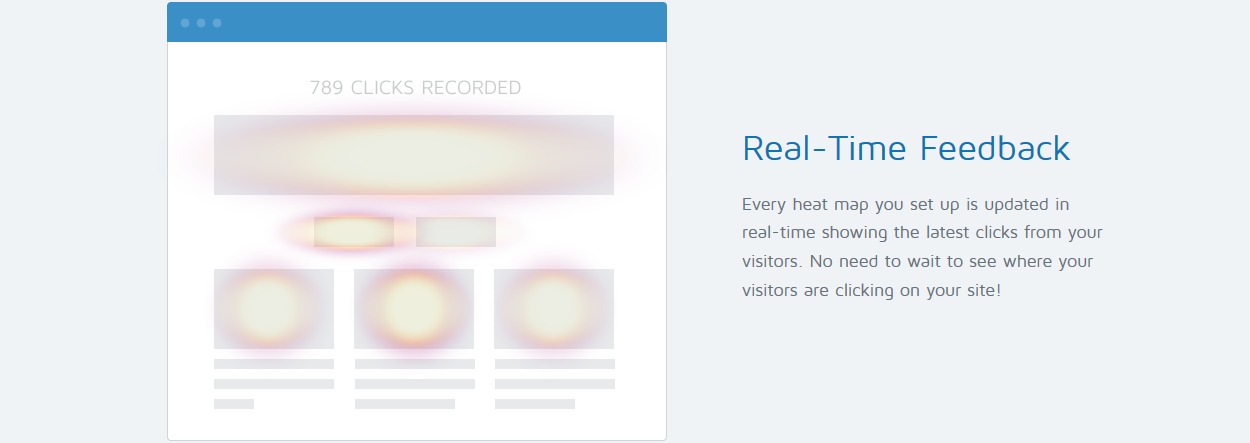
The Heat Maps app is configured in the same way as Content Analytics — click to start recording, then configure which pages are tracked from the Auto Record tab.
However, instead of tracking how far your visitors scroll, it creates a heat map of where your visitors are clicking.
Why is this information useful? Because it lets you place your call-to-actions in the ‘hot’ areas of your website to generate even more clicks.
Discover App
This one is a little difference from the data-gathering analytics apps we’ve just examined. Discover lets you use the Sumo user network to generate free traffic for your website.
The best way to describe this app is as a sponsored content section. If I display other Sumo content on my website, I earn credits that I can use to have my content displayed on another user’s site — you scratch my back, I scratch yours.

You can display others’ content in a grid format or as a scrollbox — the latter is ideal for widget areas. You have full control over how many listings you want to display, and to ensure the content is relevant to your audience, you get to choose the language and content category. If you want to team up with specific site owners, you can also create a private network of content sharing.
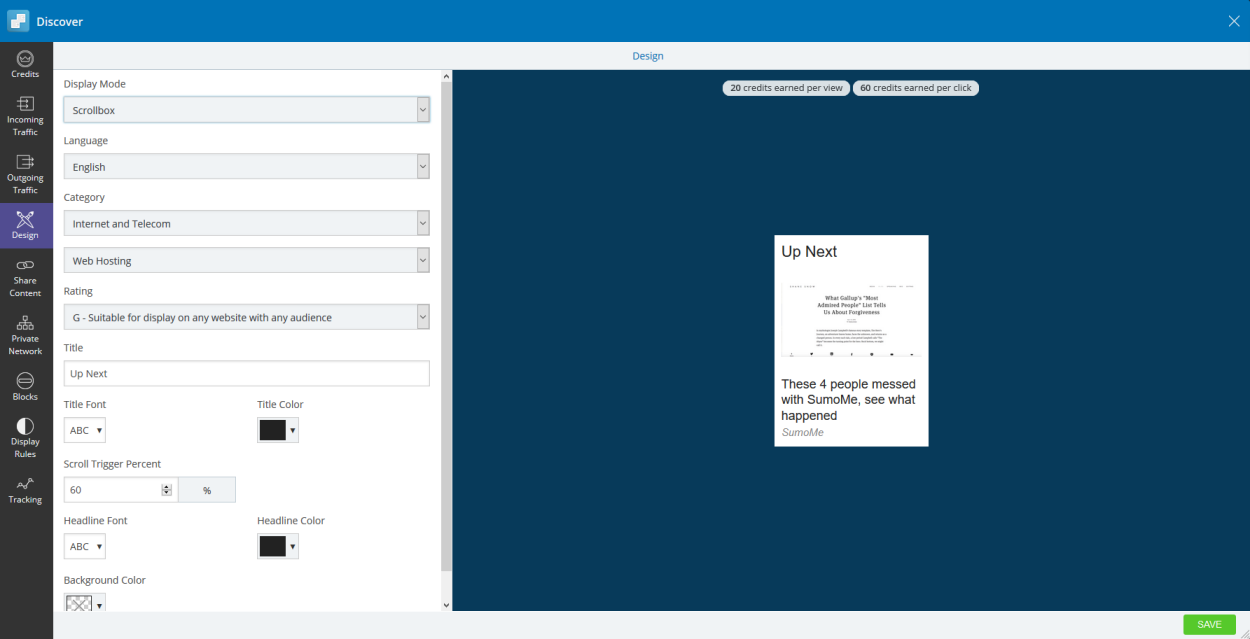
You can click on the Discover dashboard at any point to see how many credits you’ve earned/spent.
Social Sharing with Sumo
Now, we all know what social media is. More importantly, we all know the benefits of having our content regularly shared on social media. As such, having great-looking, insanely clickable social sharing buttons is a must.
Fortunately, Sumo is equipped with social sharing functionality, packaged as three separate apps — Share, Image Sharer, and Highlighter. This three-app-combo offers just about everything you could possibly need from a social sharing plugin. As such, it has to be considered one of Sumo’s best features.
Share App
First, the Share app, for adding social sharing buttons.
The options are certainly comprehensive. There are a whopping 70-plus services supported. You can choose the ones you want using drag-and-drop, plus you can cap the maximum number of buttons displayed.
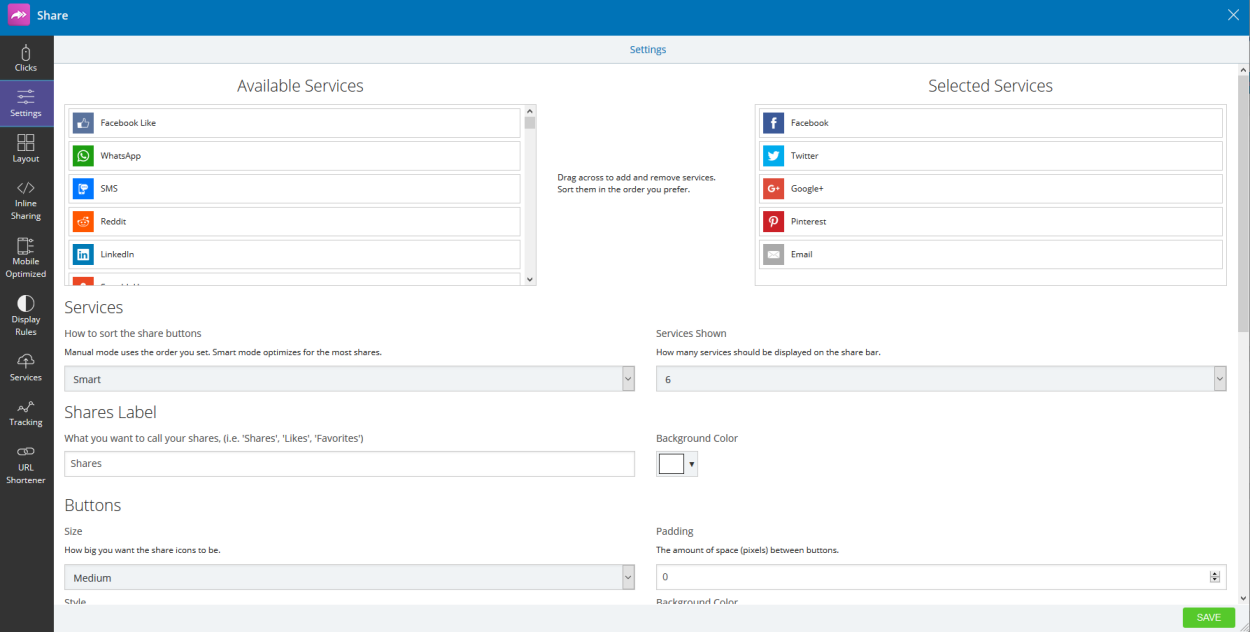
You can also configure the design of your sharing buttons, with a choice of three sizes, three styles, and unlimited background colors.
Button sorting is probably my favorite feature, though. The choice is between smart sorting, which optimizes the order of your buttons for maximum clicks, and manual sorting. You can also choose to display share counters and set a minimum threshold for display.
Sumo’s Share app has another neat feature, available in the Layout tab. You’ll see an interactive image of a laptop and mobile device showing you where you can display your buttons. Simply click on the white squares to select your buttons’ position on the screen (you can select more than one).
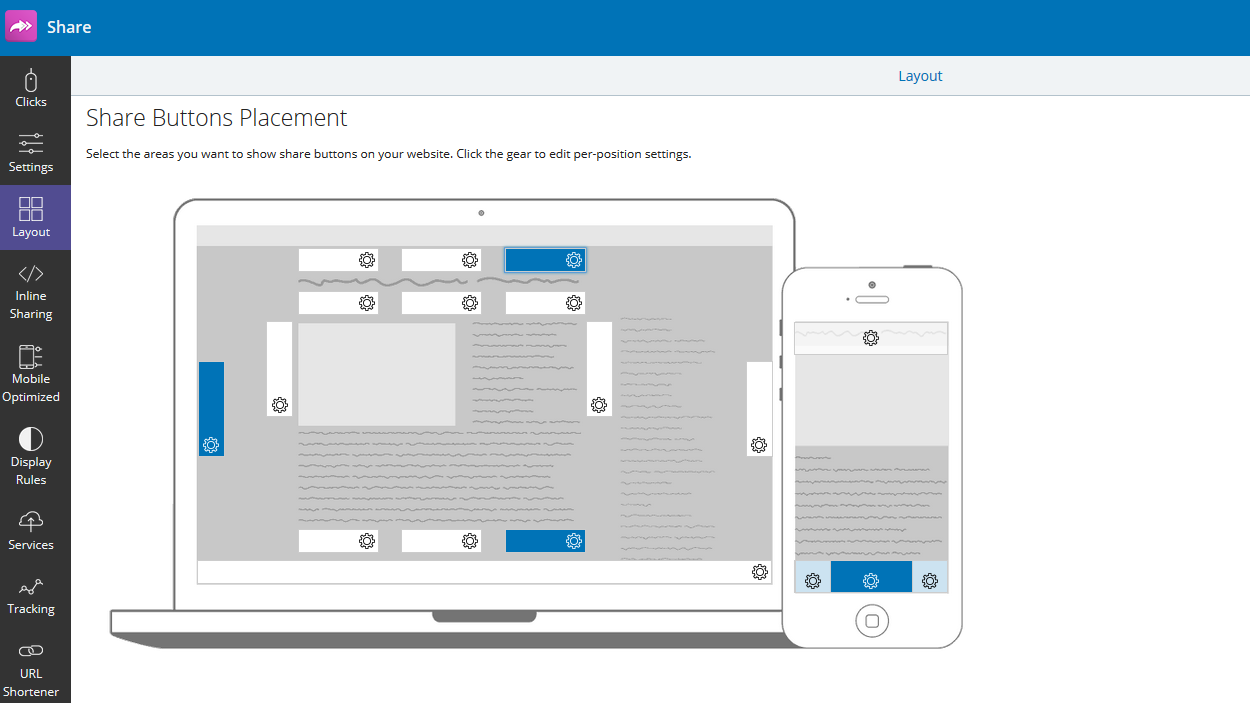
The screenshot below shows you what the sharing buttons look like — clean and stylish, and, in my opinion at least, the equal of any dedicated plugin out there.

Image Sharer and Highlighter
The Image Sharer app adds social sharing buttons to your images, with four networks supported. By clicking, a visitor can share the image directly on social media.
The final social media app is Highlighter. When activated, visitors can highlight small snippets of your post, which they can directly post to Twitter or Facebook.

Other Sumo Features
Before we finish, there are two more apps to discuss.
Contact Forms
Let’s start with Contact Forms. Now, most WordPress contact form plugins use shortcodes to place the forms. With Sumo, you place your forms the same way as the social media buttons — picking a spot on the interactive laptop screen, then letting Sumo take care of the rest.
You can build your contact forms using the same builder interface we used to create our opt-in forms, with five templates and loads of customization options to play with.
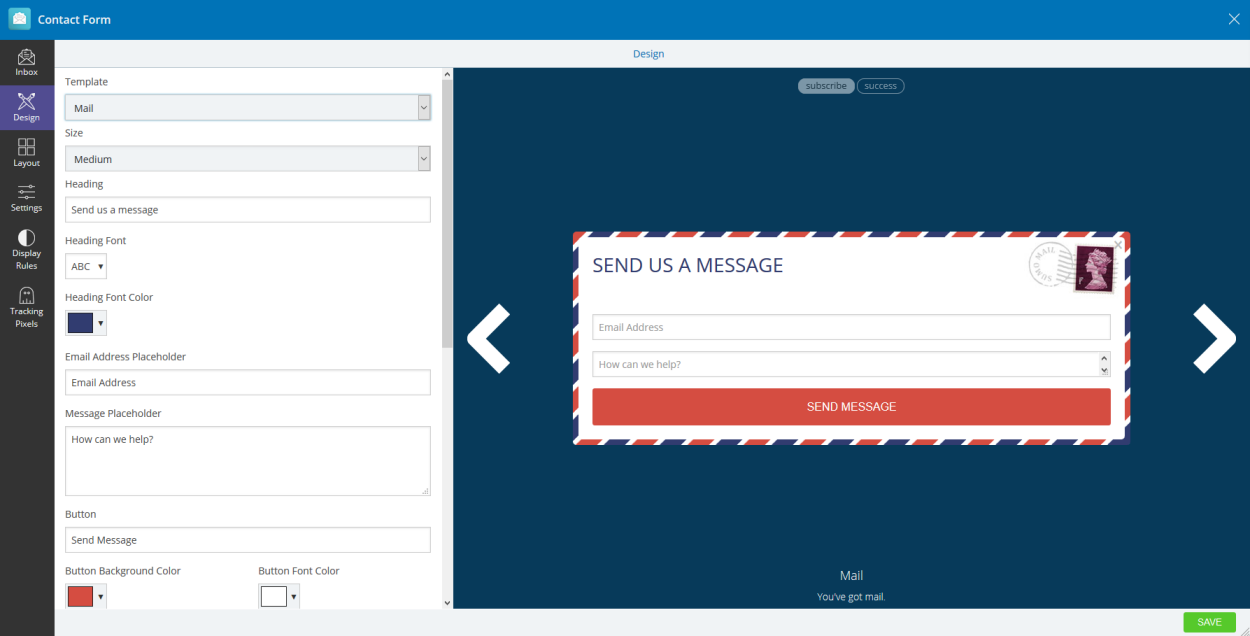
Beyond standard contact form functionality, Sumo has two really useful features. First, after sending a message, the contact form will instantly turn into an opt-in form for growing your email list.
Second, all received messages can be viewed from within the Sumo interface. This means you never have to leave your website to check emails, which serves as a real time saver.
Buy Button
Sumo’s final app is Buy Button. This lets you turn your website into a streamlined ecommerce store by syncing up with the Stripe payment gateway. This isn’t as powerful as, say, WooCommerce, but it’s incredibly quick and easy to set up.
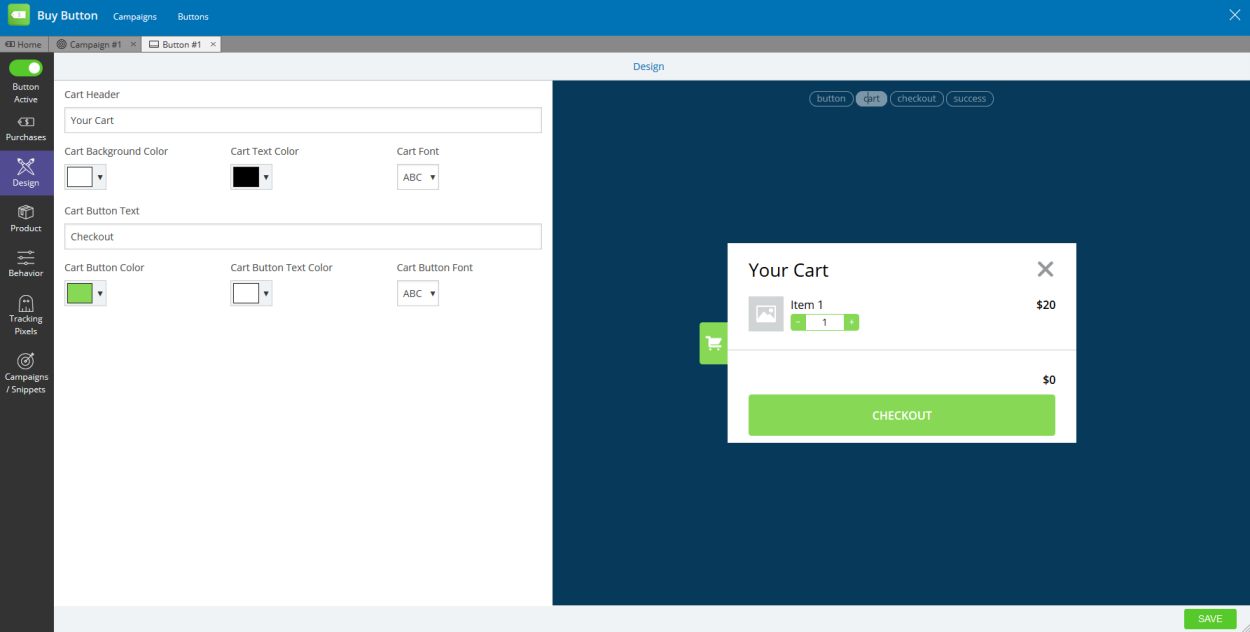
To use this functionality, create a campaign, then create a new button. Using the familiar editor, you can create designs for each step of the process — from the buy button to the cart and checkout, right through to the success page.
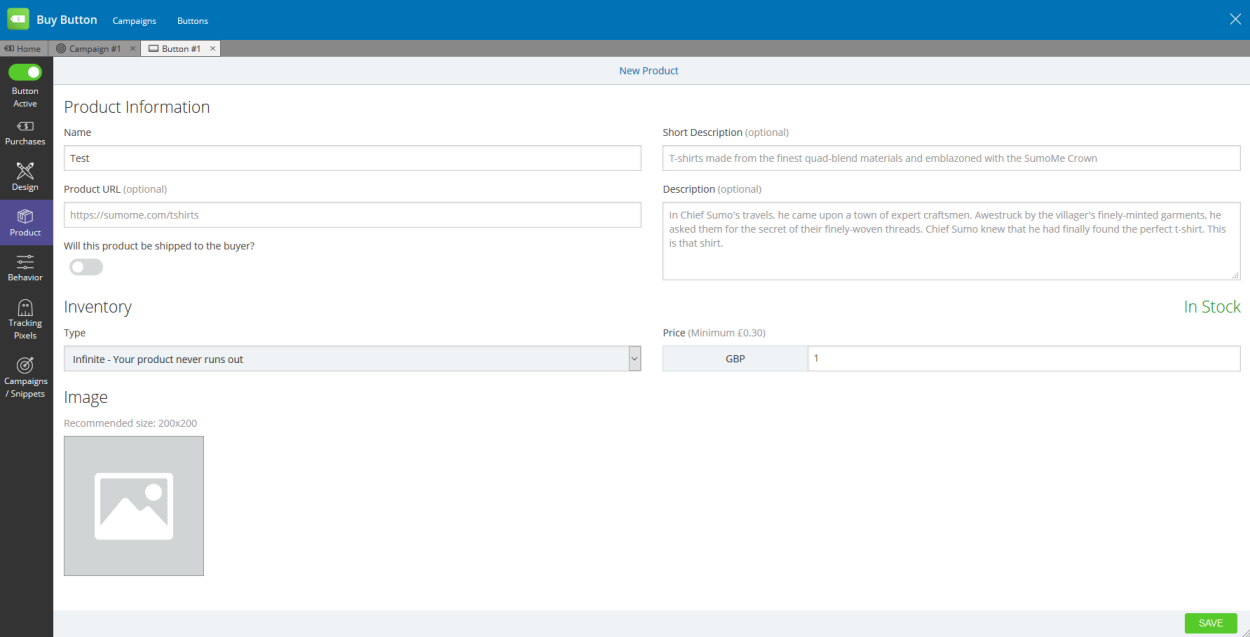
Next, you need to configure a product. You can give it a name, a description, upload an image, control stock levels, and, of course, set a price.
When you’re done, you can go back into the Campaign section and access the Code Snippet tab. This gives you an HTML code you can paste into the WordPress text editor.
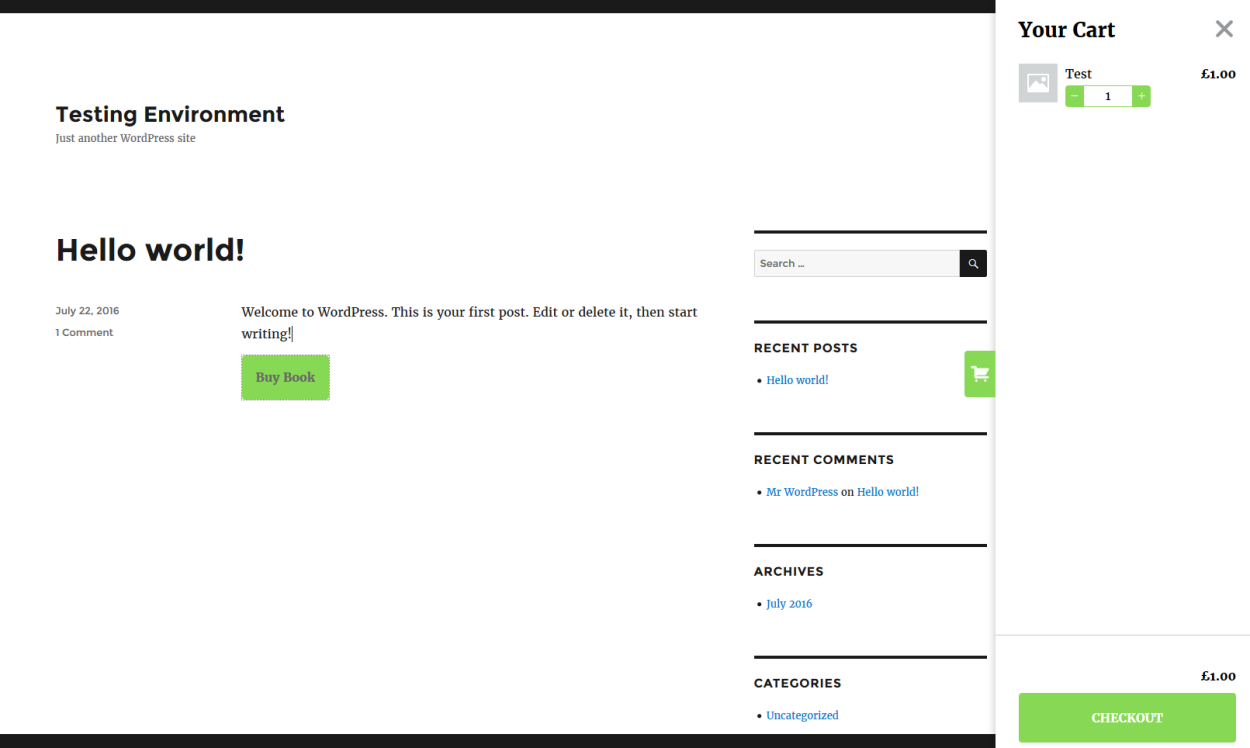
When your content is published, visitors will be able to see a Buy button within it.

Clicking it slides a shopping cart into view. Visitors can adjust their quantities here.
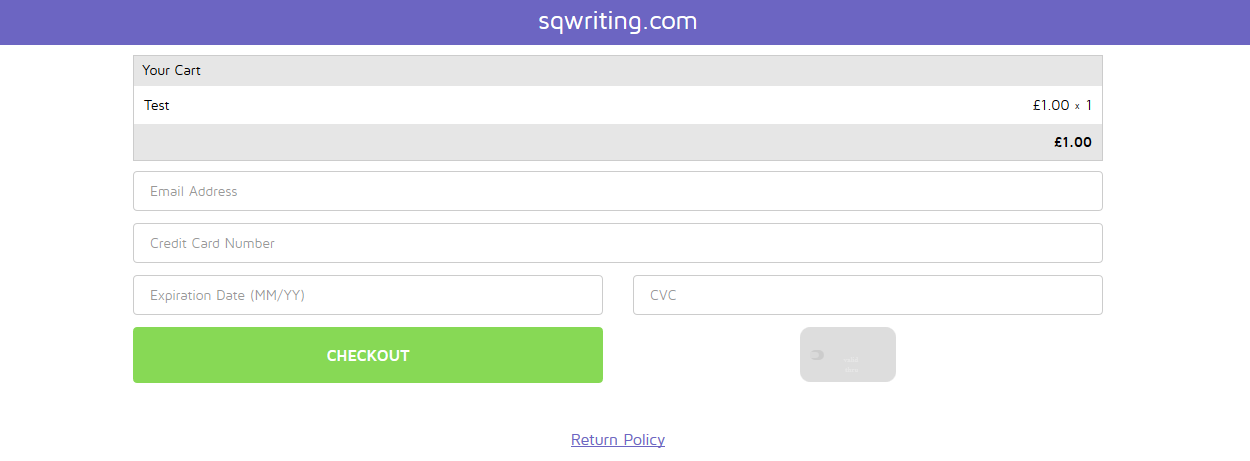
Clicking the Checkout button opens the checkout in a pop-up. Visitors can use this window to input their card details and finalize their purchase.
Behind the scenes, you can track and manage all orders from the Buy Button app’s dashboard.
Personally, I found this to be a really nice feature. The functionality is streamlined rather than powerful, so it probably wouldn’t suit a fully fledged ecommerce store. If, however, you have a blog and you’re looking to sell, say, an eCourse, Sumo would fit the bill perfectly. Within minutes I had a product set up and a website that could handle card payments courtesy of Stripe.
The Verdict
Wow. The sheer depth of functionality crammed into Sumo’s 13 apps is simply staggering.
Of all the WordPress plugins I’ve tested and reviewed, I can’t think of a single one that can compete with Sumo’s ability to transform and enhance a website so comprehensively at this price point. Yes, as a multi-purpose tool, Sumo has a distinct advantage over single-purpose plugins, but the execution is fantastic — the developers have done a stellar job.
Although the individual apps may lack the ultimate power of standalone plugins, I was really impressed with what Sumo could do. Sumo supports the vast majority of features found in market-leading plugins, and, if anything, I found Sumo’s interface to be more streamlined and easier to use.
For this reason, I’d say Sumo is ideal for small to medium-sized websites that need an affordable service that’s quick and easy to set up and use. The feature set is impressive and makes powerful functionality such as heatmap tracking accessible to everyday WordPress users without breaking the bank.
If I were forced to list a criticism, it would be that Sumo doesn’t feel as integrated with WordPress as it could be. The interface is clean and user-friendly, but it does feel segregated from the usual WordPress plugin setup — the UI appears in a pop-up, rather than being a part of the WordPress dashboard itself.
However, since Sumo isn’t built solely for WordPress users, this approach is completely understandable. And, it has to be said, the Sumo developers have actually gone to great lengths to create a dedicated, easy-to-use, WordPress-friendly version of their software.
With both a free and an affordable paid version of the suite available, I’d highly recommend Sumo to anyone looking to grow their email list, boost traffic, increase their social presence, and gain a greater understanding of their audience’s behaviors.
Used/using Sumo? Thoughts?
Leave a Reply
All comments are held for moderation. We'll only publish comments that are on topic and adhere to our Commenting Policy.


It seems a great plugin almost having every important feature needed for marketing. I am going to use it for my website. Thanks for sharing.
Interesting. What about the application “load” on your site speed visa-vie a separate form and pop up plugin (11 separate apps in one.. why I won’t use jet pack) . It has campaign options? What of your email application campaign availability? Good questions, no? ( you say the other apps can be deactivated; will it still affect your site performance?)
Thanks
Hey Shaun,
SumoMe is really great plugin, they are giving 13 plus plugins for free. With these tools we can equip our website with tools to generate traffic from social media, increase our email list and analyse our current user engagement.
I’ve been using it from one year and I am really loving it.
Thanks