
What’s the Best Way to Accept Donations with WordPress?
- By
- Last updated:
- Leave your thoughts
WordPress is the perfect platform for accepting donations on your website. Whether you are looking to add a solitary donation form to an existing website or create a dedicated charity website, you’ll find a WordPress donation plugin that meets your requirements.
All WordPress donation plugins boast different features and functionality, though the process of accepting donations on your website is the same whatever solution you choose. So once you’ve set up one WordPress donation solution on your website, you’ll be familiar with how to set up alternative solutions.
In this article, I would like to show how you can accept donations with WordPress in five easy steps. To help illustrate these steps, I have referenced the popular donation solution GiveWP. Check out my full review of GiveWP to learn more about what this plugin can do.
Table of Contents
Step 1: Choose a Suitable Donation WordPress Plugin
The first step in accepting donations on a WordPress website is choosing a donation plugin. The best WordPress donation plugins can be found in the official WordPress plugin directory, so I recommend starting your search there.
Most donation WordPress plugins are released under a freemium business model. This means that the plugin is free to download and use, but you will need to upgrade or purchase premium add-ons in order to unlock all features and functionality.
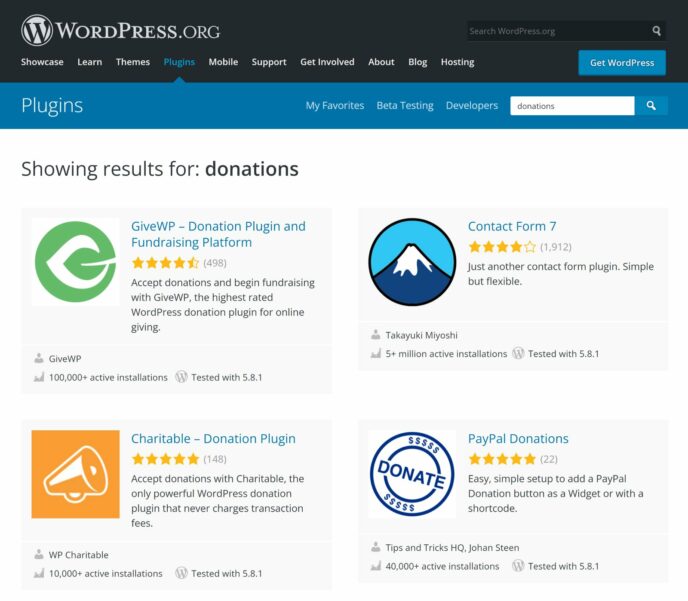
I explored the Best Donation Plugins to Accept Donations with WordPress in a previous article. During my research, it became clear that there are pros and cons to using every donation plugin, therefore it is important to test multiple solutions to see which one fits your needs best.
I believe that GiveWP is the best donation solution on the market overall, though simpler solutions such as PayPal Donations will appeal to those that just want to add a donation payment button to their website. Another one to consider is Donorbox, which is a hosted donation service with no upfront fees.
To make an informed decision about which donation plugin you use on your website, you need to consider a few factors:
| Simple or Advanced | Think about the type of donation setup that is required. For one-off charity events, a simple donation solution that inserts a donation button or form into an existing website may be preferable. For dedicated charity websites and large charity events, your focus should switch to professional solutions that offer advanced features and tools. |
| Features & Functionality | Which features are important to you? * Donor management * Recurring donations * Quality of form designs * Payment methods * Advanced reporting * Marketing tools |
| Project Budget | How much money are you willing to invest in a donation solution? Most WordPress donation plugins are free to download, however, the core version is always restricted in some ways. Be prepared to spend money on advanced features and settings. |
Please be aware that no WordPress donation plugin is perfect. The most suitable donation solution will therefore depend on the project, required features and available budget.
My recommendation is to set up an offline WordPress installation so that you can install and test multiple donation plugins. This allows you to compare and contrast their features and ease of use.
Step 2a: Display a Donation Button (The Simple Donation Method )
Donations can be accepted on your website using donation buttons or donation forms.
The simplest way to accept donations on a website is to display a donation button. Payment services such as PayPal can be used to generate a donation button in minutes, though you should consider using a WordPress donation plugin to create the donation button as it simplifies customisations.
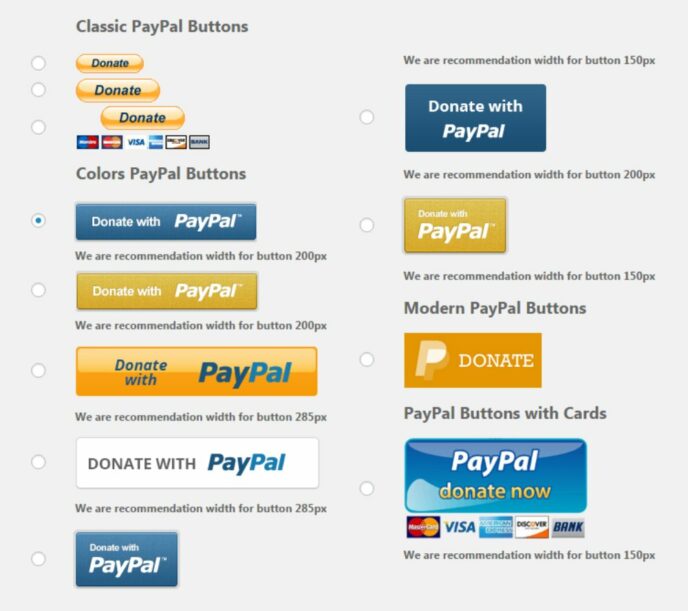
Once you have configured your donation button in WordPress, simply copy the provided shortcode and insert it into a blog post or page.
Step 2b: Create Your Donation Form (A Better Donation Method )
Whilst donation buttons remain popular with some website owners, donation forms are a better option in most situations.
- Donation forms look more professional
- Allow additional information to be collected from donors
- Support multiple payment services
- Process donations directly on the charity website
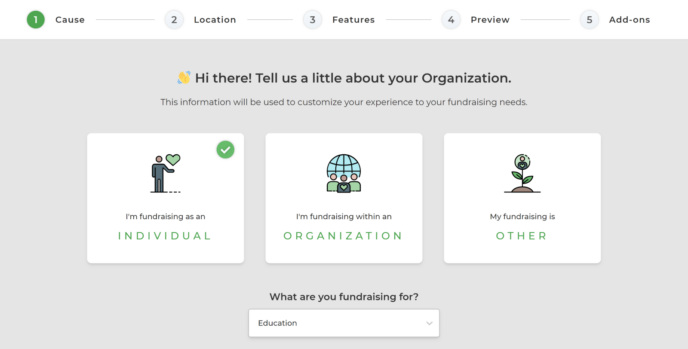
In many WordPress donation plugins, a setup wizard will be displayed as soon as the plugin is activated. The wizard will ask you a few questions about your fundraising needs and then create a donation form using the information you provided. This is a great starting point for your first donation form, though I recommend reviewing form settings before the form goes live.
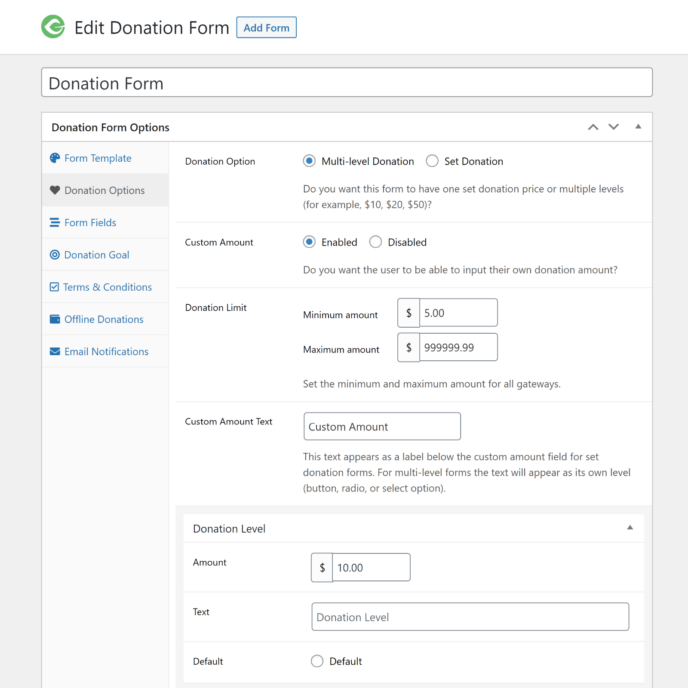
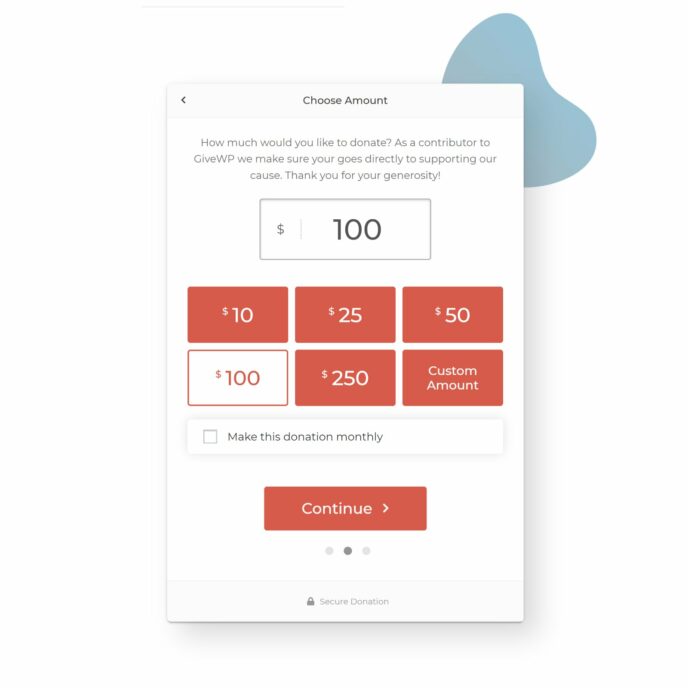
The level of customisation available for donation forms will depend on the plugin you are using. Most donation solutions allow you to change the form headline, description, image, button and donation amounts. Custom fields are common too, though some plugins are more flexible than others in this area.
Please note that in many WordPress donation plugins, common form settings have to be configured on the main plugin settings page, not on the form itself.
An important factor to consider is form styling. With some donation plugins, forms look fantastic right out of the box. With others, you may have to customise form templates or use custom CSS to create a professional form design.
- Colours – Brighten up donation forms by using colours
- Multi-Step – Display fields across multiple steps instead of using a large form
- Keep It Simple – Don’t request unnecessary information from donors
It is common for donors to be unsure about how much they should donate. This issue can be tackled by displaying suggested donation amounts.
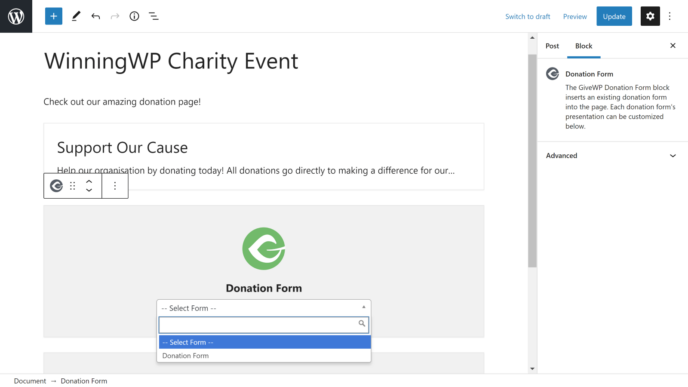
Be prepared to go back and forth a few times before your donation form looks exactly how you want. You can then add the form to your website using a shortcode, WordPress block or widget.
Step 3: Select Your Payment Method
When donors click on a donate button, they will be taken directly to a third-party payment service to make their donation. Donation forms give you more flexibility with how donation payments are made, though a little extra configuration is necessary.
When deciding which payment methods to accept on your website, you need to consider a few factors.
- Ease of Use – How easy is it for donors to make a donation?
- Brand Name – Donors will be more likely to donate if they are familiar with the payment service
- Donation Fees – Payment fees will reduce the total amount that is donated
- Cost – Many payment gateways are only available if you upgrade to the pro version of the donation plugin
* Some payment services waive fees for registered charities
Make it easy for donors by giving them a variety of ways to make a donation. This includes debit cards, credit cards, bank transfers, offline donations and more. If you wish, you can integrate multiple payment gateways into donation forms, but be mindful of overcomplicating the donation process.
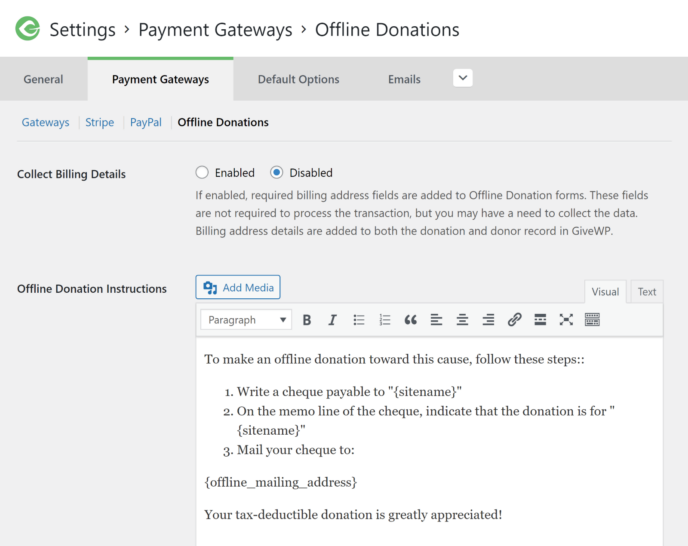
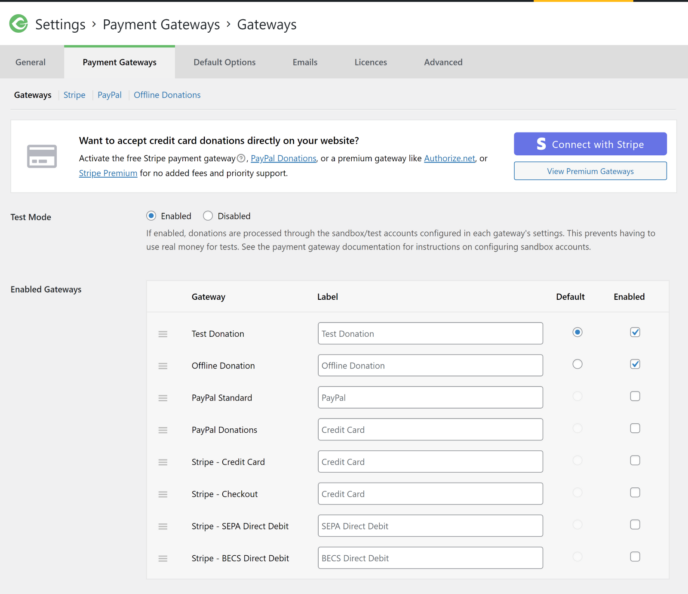
PayPal and Stripe are available in the core version of most WordPress donation plugins, though you will see support for alternative payment services such as Authorize.net and 2Checkout too. Offline donations can also be accepted if you want to allow donors to pay by cheque, bank transfer or cash.
To configure payment services such as PayPal and Stripe, all you have to do is click their connection buttons to authorise a connection to your WordPress donation plugin. For other payment services, you may have to enter your account’s API key.
In order to check each payment gateway is set up correctly, use your plugin’s test mode. Also known as a payment sandbox, the test mode creates a virtual testing environment where you can safely process sample donations.
PayPal and Stripe continue to be the most popular payment gateways for accepting donations so there is great support for them in WordPress donation plugins. Support for alternative payment services is usually only available through a premium add-on, though they can end up being a better option overall if payment fees are lower.
Step 4: Review Donation Settings
For the most part, WordPress donation solutions do the hard work for you, simplifying the process of creating a donation form and accepting payments on your website.
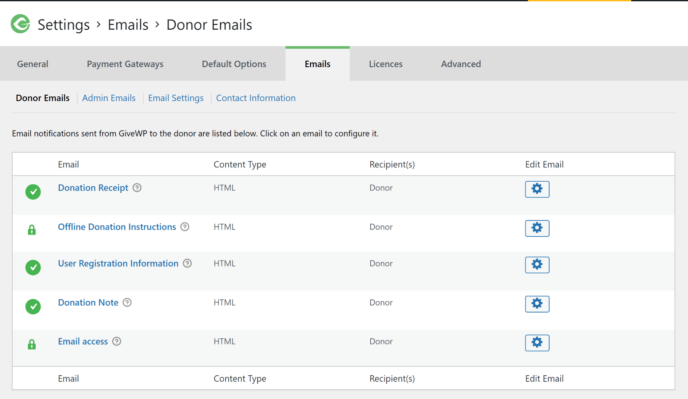
It is, however, important to review key plugin settings before you go live. So be sure to check key donation settings such as currency settings, anti-spam settings, email notification templates, admin email addresses, analytics and user profile fields.
Donation forms can be inserted into your website using WordPress widgets, shortcodes and blocks. Most donation plugins provide additional parameters and configuration options for each of these options that change what is and isn’t displayed on your form.
Incorrect payment settings can cause a major headache if they are not resolved before you go live. So in addition to verifying payment settings via a test sandbox, I recommend that you and your friends make a couple of real donations to ensure that everything is working correctly.
Step 5: Promote, Promote, Promote
You can have the best donation setup in the world, but you won’t raise any money unless people know about your charity event. So once your WordPress website is set up to accept donations, you need to start promoting it to potential donors.
Take advantage of every platform to spread the word:
- Blogs – Detailed articles explaining what you’re fighting for
- Social Media – Regular updates for donors and supporters
- YouTube – Publish a video that highlights your good cause
- Newsletters – News and updates direct to email inboxes
- Offline – Offline marketing is still effective
- Friends & Family – Ask your loved ones to help with your campaigns

Email marketing remains one of the most effective ways to raise funds online as it allows you to speak directly to donors and potential donors. You can use a WordPress newsletter plugin to send emails, though popular email marketing services tend to be better supported by donation plugins. Additionally, services such as MailChimp are free to use up to 2,000 contacts.
In order to grow your email list, I recommend displaying an email sign up form on your donation page and other key areas of your website. You can also ask donors to opt-in to your email newsletter when they make a donation, though be aware that this functionality sometimes costs extra. Therefore, you may have to upgrade to the pro version of the donation plugin or purchase a premium add-on to add support for email marketing.
Final Thoughts
WordPress is the platform I would recommend to anyone who is looking to accept donations on their website. There’s a fantastic selection of donation solutions on the market and most are free to download from the official WordPress plugin directory.
As you have seen, the process of accepting donations in WordPress is straightforward.
- Step 1: Choose a Suitable Donation WordPress Plugin
- Step 2: Create a Donation Button or Donation Form
- Step 3: Select Your Payment Method
- Step 4: Review Donation Settings
- Step 5: Promote, Promote, Promote
Whilst it only takes a few minutes to configure a WordPress donation plugin and accept donations on your website, I strongly encourage you to take the time to test multiple donation solutions so you can see how each plugin works. This will also highlight which features are important to you and whether it’s worth paying more for advanced features and functionality.
Good luck!


All comments are held for moderation. We'll only publish comments that are on topic and adhere to our Commenting Policy.