
Jetpack WordPress Plugin Review – Should You Use It?
- By
- Last updated:
- 2 Comments
Jetpack by WordPress.com is a website enhancement, performance and security plugin, developed by Automattic (the company behind WordPress.com).
With more than 5 million active installations, Jetpack is undoubtedly one of the most popular WordPress plugins on the market. And, with so many great features, it’s easy to understand why it’s used by so many website owners.
In this article, I’ll show you the main features of Jetpack and explain why you should consider using it with your WordPress websites.
Table of Contents
- What Is Jetpack and Why Should You Use It?
- A Secure WordPress Website
- Auto-Plugin Updates
- Anti-Spam
- Enhanced Search
- Performance Enhancement
- Site Stats
- Subscriptions
- Blogging Enhancements
- WordPress Theme Enhancements
- Jetpack Widgets
- Other Great Features
- Switching Modules On and Off
- Customising Jetpack Modules
- Jetpack Plans
- Final Thoughts
What Is Jetpack and Why Should You Use It?
Jetpack was launched by Automattic in 2011.
WordPress co-founder Matt Mullenweg had first introduced the idea of Jetpack during his talk at the State of the Word WordCamp conference in San Francisco in 2009. His vision was that Jetpack would be ‘a way to provide feature parity between WordPress.com and WordPress.org for everybody’.
The first version of Jetpack included eight popular features: Hovercards, stats, an ‘After the Deadline’ spellchecker, a Twitter widget, shortcodes, shortlinks, social media sharing buttons and mathematics tool LaTeX. Jetpack calls these features modules.
Over the past eight years the plugin has been continually expanded and refined, and the number of modules has grown to 43. However, Jetpack is so much more than the modules it offers.
As Matt envisioned, Jetpack has indeed become a bridge between WordPress.com and WordPress.org.
Popular Automattic services from WordPress.com, such as WordPress.com themes, have been integrated into Jetpack, while their backup service, VaultPress, has been completely migrated to Jetpack. Today, the VaultPress website is nothing more than a landing page that promotes Jetpack.
The real-integration with WordPress.com happens behind the scenes. Jetpack’s secret weapon is its ability to use WordPress.com’s fast and secure hosting infrastructure, and, by offloading the heavy work to their efficient servers, Jetpack is able to improve your website performance significantly by reducing the number of intensive tasks your site performs.
Whether it’s improvements in website performance and security, seeing how many website visitors you have or adding useful blogging features to your website toolbox, there are many good reasons to install Jetpack.
What’s particularly interesting is that every WordPress website owner uses Jetpack for different reasons. In preparation for this article, I had a long email conversation with WinningWP founder Brin Wilson, whereby we discovered the Jetpack functionality that was essential to him wasn’t as important to me, and vice-versa.
Therein lies the beauty of Jetpack: The plugin offers dozens of useful features, but you only need to activate the ones that apply to you.
Let’s take a closer look at what Jetpack has to offer.
A Secure WordPress Website
Security is at the heart of Jetpack, and it offers plenty of features that can make your website safer from attack.
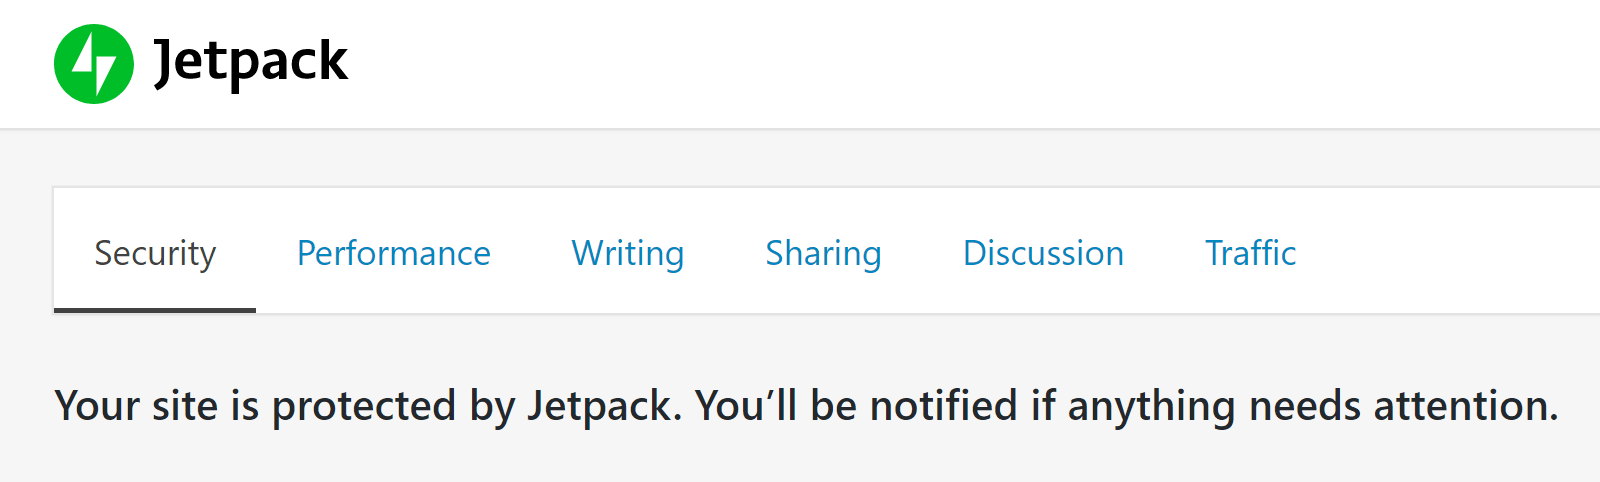
In the main navigation menu for Jetpack settings, security is listed first, as it’s the most important category. The other categories are performance, writing, sharing, discussion and traffic.
The priorities for every website owner are to keep their website secure and ensure it remains online. Jetpack provides a host of security tools to help to protect your website from attackers and keep it running.
Jetpack’s Secure Authentication feature lets you switch your login system to WordPress.com, forcing users to use secure passwords. There’s also an option to use two-factor authentication that, if selected, will require users to enter a verification code from an SMS that’s sent to their phone.
Your login system can be protected further with Brute Force Attack Protection. When you enable this feature, malicious IPs that are trying to access your website using common username and password combinations will be automatically blocked. Valid IP addresses can be whitelisted, so administrators, editors and other staff aren’t excluded from blacklists.
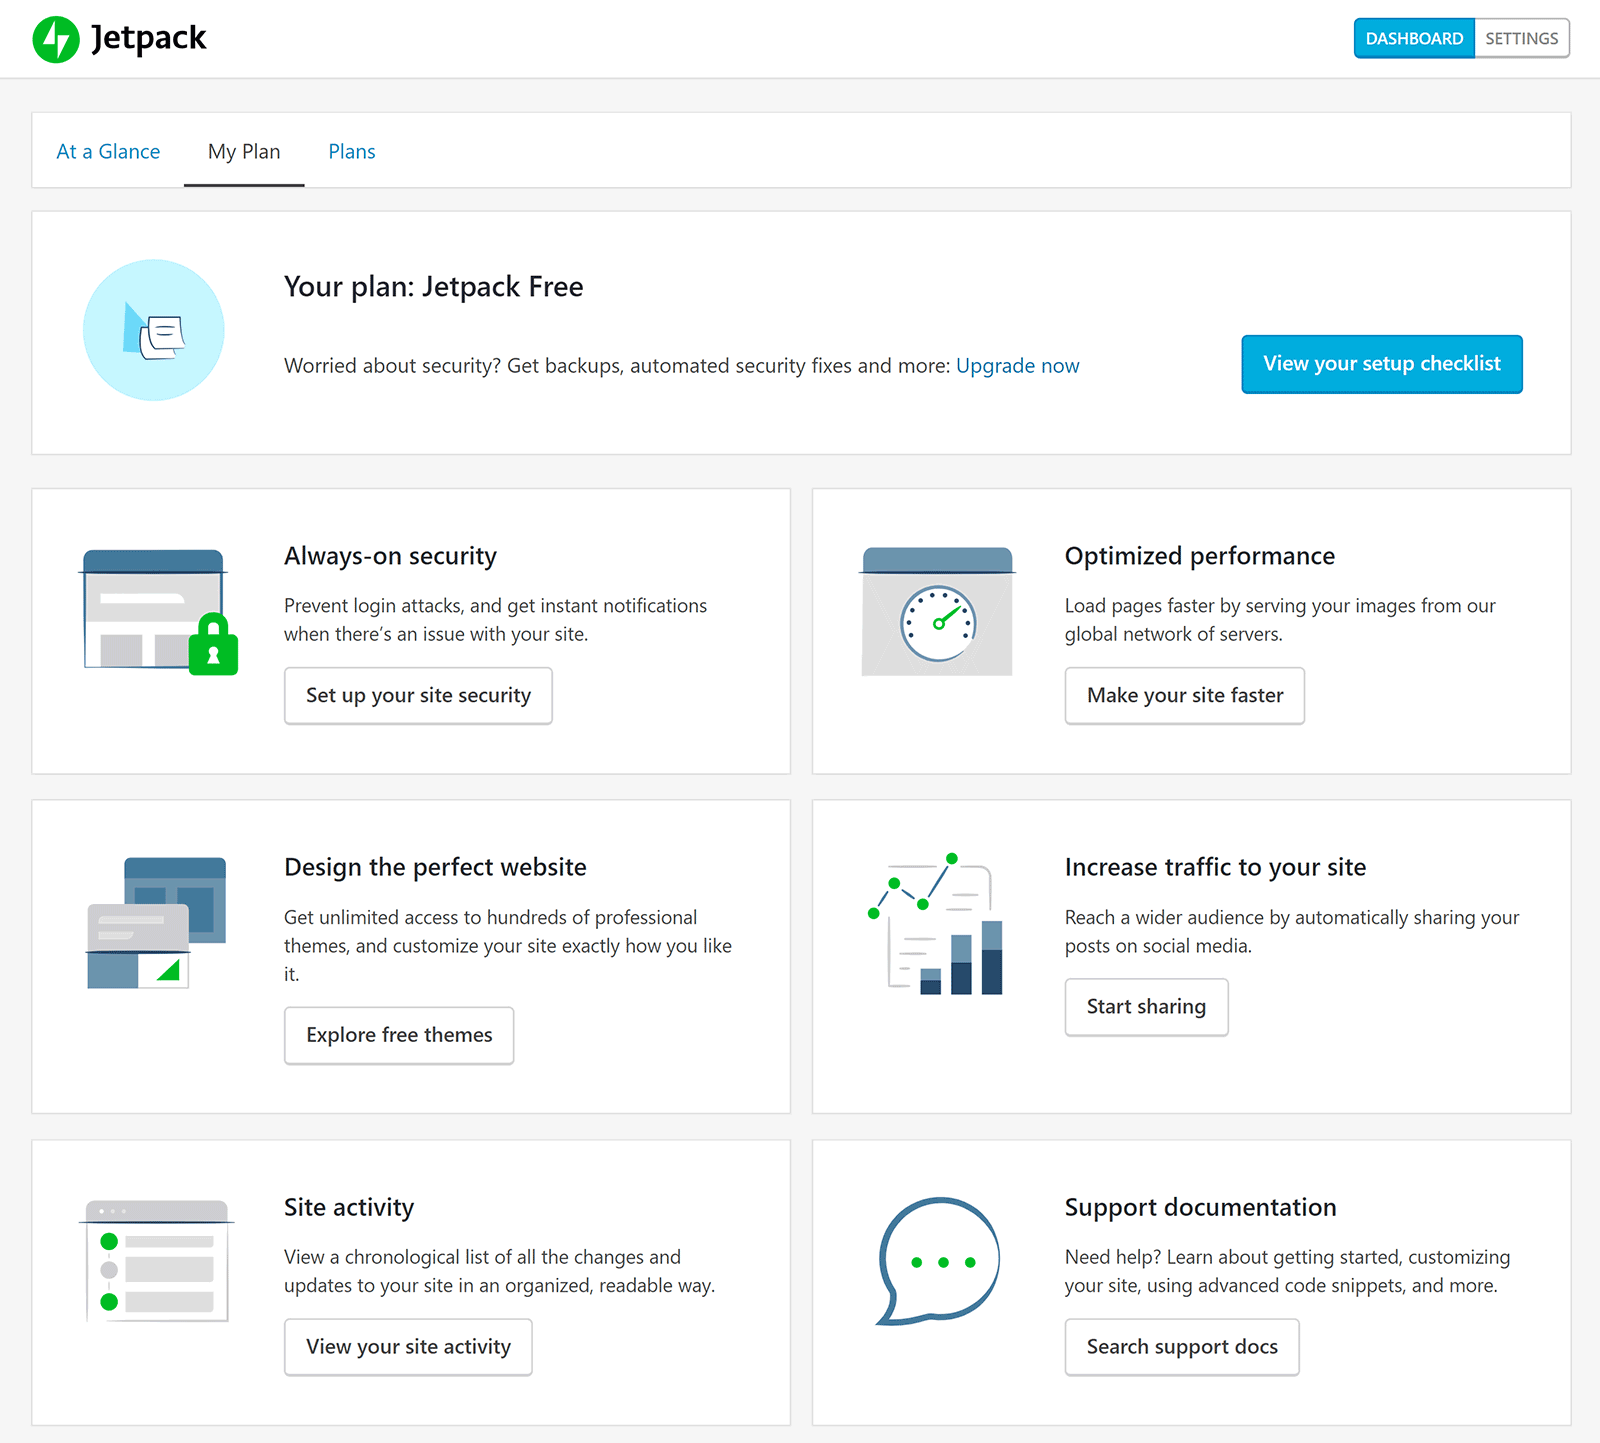
The total number of attacks that Jetpack has prevented is displayed in your main dashboard.

The Jetpack premium and professional plans also offer Security Scanning. Your website will be automatically scanned daily for malware, hacks and other suspicious code — with many known threats being removed immediately when they’re detected. Emails are sent to you whenever a threat is detected.
In the event that your website does go down due to a website hosting issue, attack or whatever, Jetpack’s Downtime Monitoring feature will notify you via email and/or mobile. The tool will check whether your website is online every five minutes, so you’ll be made aware as soon as there’s an issue.
As noted earlier, Automattic’s VaultPress backup service has been integrated into Jetpack and is no longer available as a standalone service. It’s included in all premium Jetpack plans.
Jetpack will perform backups automatically, and allows one-click website restores and website migrations. In the Jetpack personal and premium plans, one website backup is made every day, and backups are stored for 30 days. If you upgrade to the Jetpack professional plan, a website backup is made every hour, and all backups are stored for as long as you use Jetpack.

Another useful feature is the Activity Log. This provides an audit log of every activity on your website. This is useful for debugging, user management and general tracking.
The great thing about Jetpack’s security and backup features is that everything happens in the background, and you’re only alerted when something goes wrong. This reduces the amount of time you need to spend managing your website.
Auto-Plugin Updates
One of the most important maintenance tasks WordPress website owners have to perform is plugin updates.
Keeping your plugins up to date not only ensures you have the latest features, it also means you have the latest bug fixes and security upgrades.
WordPress plugins can be automatically updated by Jetpack. This feature is listed in the security tab, but when you click on the link you’ll be taken to WordPress.com.
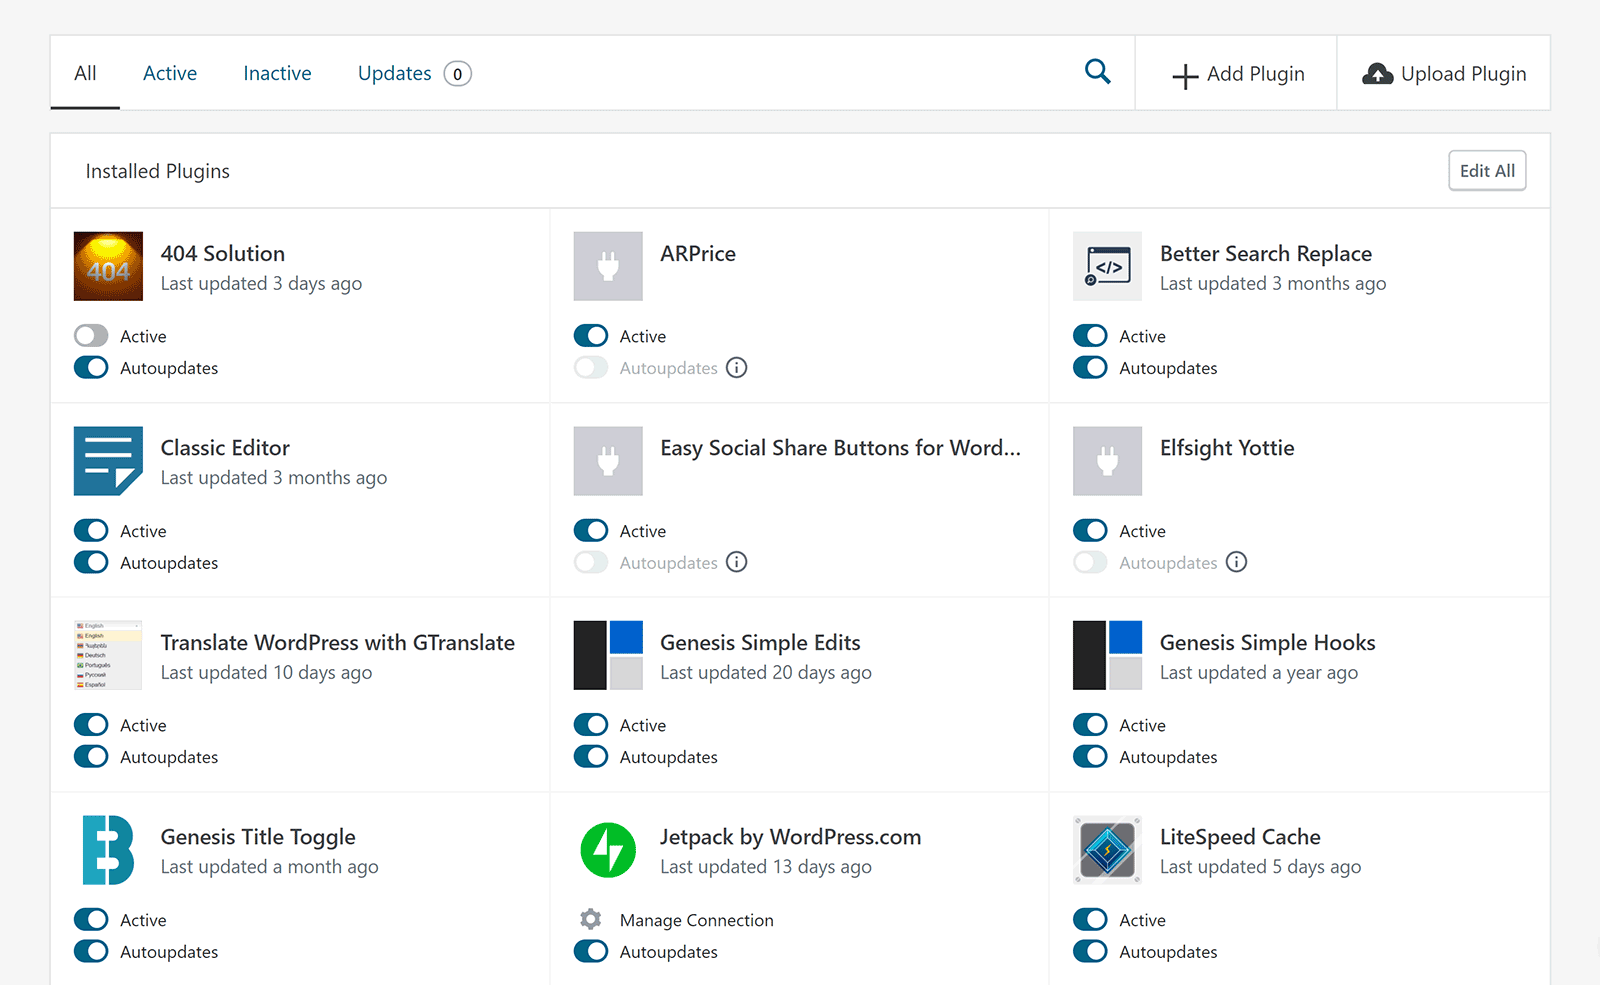
On the plugin page, you’ll see a list of all installed WordPress plugins on your website. Each plugin can be deactivated from this page, and you can select whether it’s auto-updated.
This feature doesn’t support WordPress plugins that were downloaded outside the WordPress.org plugin repository, so, if you have premium WordPress plugins installed on your website, you’ll still need to update these from your WordPress admin area.
Anti-Spam
Spam remains one of the biggest headaches for website owners.
Even if your website doesn’t have a major spam problem, you still need to spend time every week deleting spam comments that have been posted by bots. Failure to delete spam can make your website look unprofessional, and may even lead to your website being blacklisted or banned by search engines. Some websites have chosen to remove comments from their website altogether because of particularly bad problems with spam.
Automattic have been at the forefront of this fight for years with their popular anti-spam plugin Akismet. The plugin continues to be packaged with all downloads of WordPress alongside the pointless Hello Dolly.

All Jetpack premium plans offer Spam Filtering. It’s an extension of Akismet that Automattic describes as the equivalent of an Akismet Plus plan (which costs $5 a month on its own).
The spam filtering feature automatically filters out known spam from comments, pingbacks and contact form submissions. Comments that have been marked as spam can be reviewed, and you can view recent spam activity on your website.
Enhanced Search
The default WordPress search engine has a reputation for being, well, really bad. It’s slow, causes timeouts on larger websites, and the search results that are generated aren’t relevant.
Those of you who upgrade to a Jetpack professional plan can address this problem by taking advantage of Jetpack Search for WordPress.
Powered by Elasticsearch, Jetpack Search will provide fast relevant results and eliminate MySQL timeout errors.

The Jetpack Search widget enhances search functionality for website visitors significantly by adding category and tag filtering, and the ability to sort results by relevance or date. You can, however, continue to use the default WordPress search widget if you prefer.
Developers can also access the Elasticsearch API to customise the search query, and the search widget can be styled to match your WordPress theme.
Performance Enhancement
In addition to improving the speed of search results, Jetpack can help you to reduce page loading times on your website.
In the performance settings area, you’ll see a feature called Site Accelerator. If you enable this, images will be automatically resized for mobile devices and images and static files will be optimised and served from a fast Content Delivery Network (CDN) that has distributed data centers around the world.
This feature will not only improve the speed of your website, it can also greatly reduce your hosting bandwidth costs.
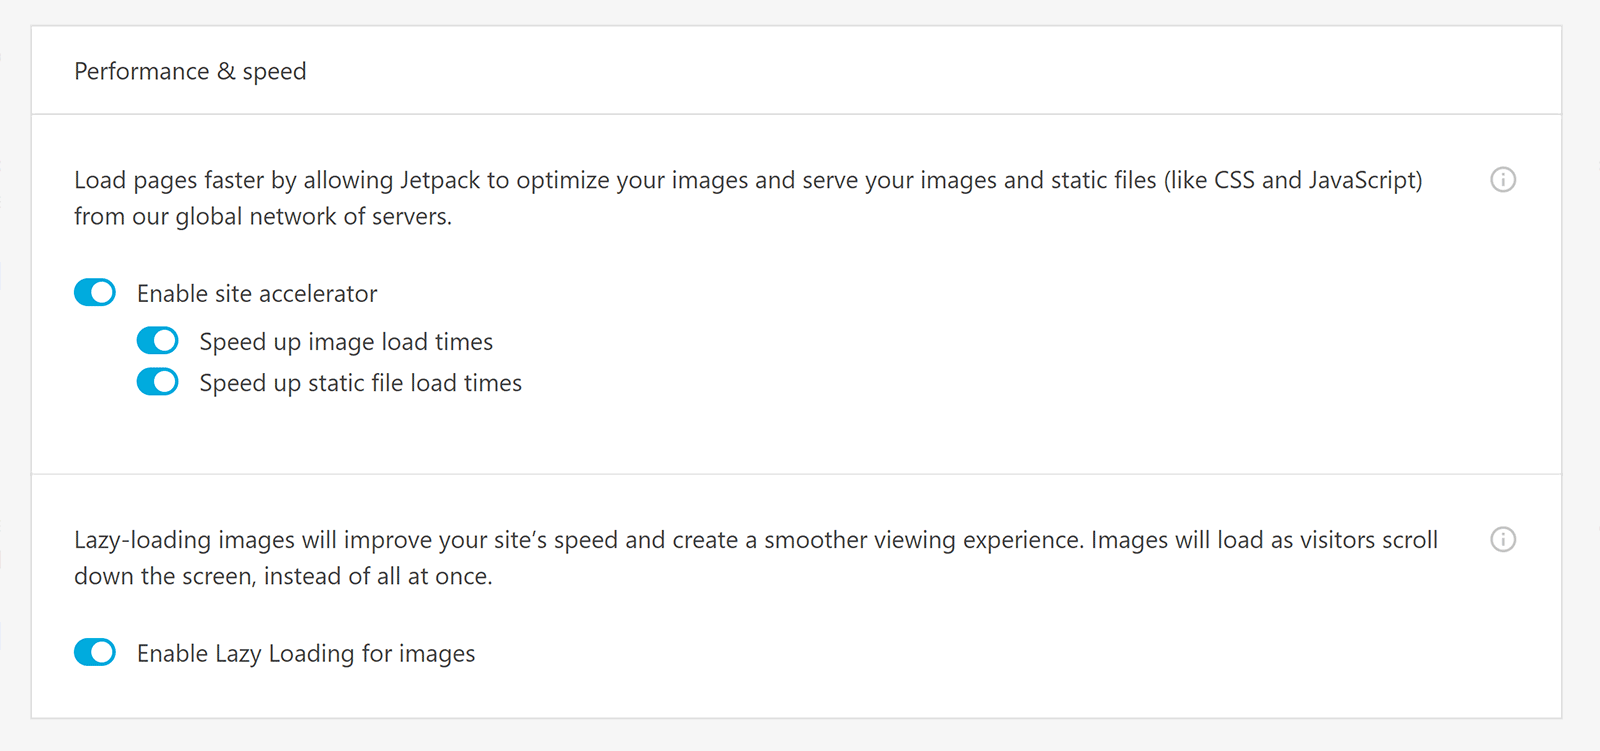
Lazy Loading can be used to delay the loading of image files in your content. Your pages will load quicker as a result of this, as images will only need to be downloaded once the user scrolls down the page. This feature works in conjunction with the Jetpack Content Delivery Network.
Another feature that works with the CDN is Video Hosting. Included in Jetpack premium and professional plans, it can be used to deliver fast-loading videos without any ads.
One thing I love about Jetpack’s performance features is there’s no limit to how many images, videos or files are optimised on their CDN.
Site Stats
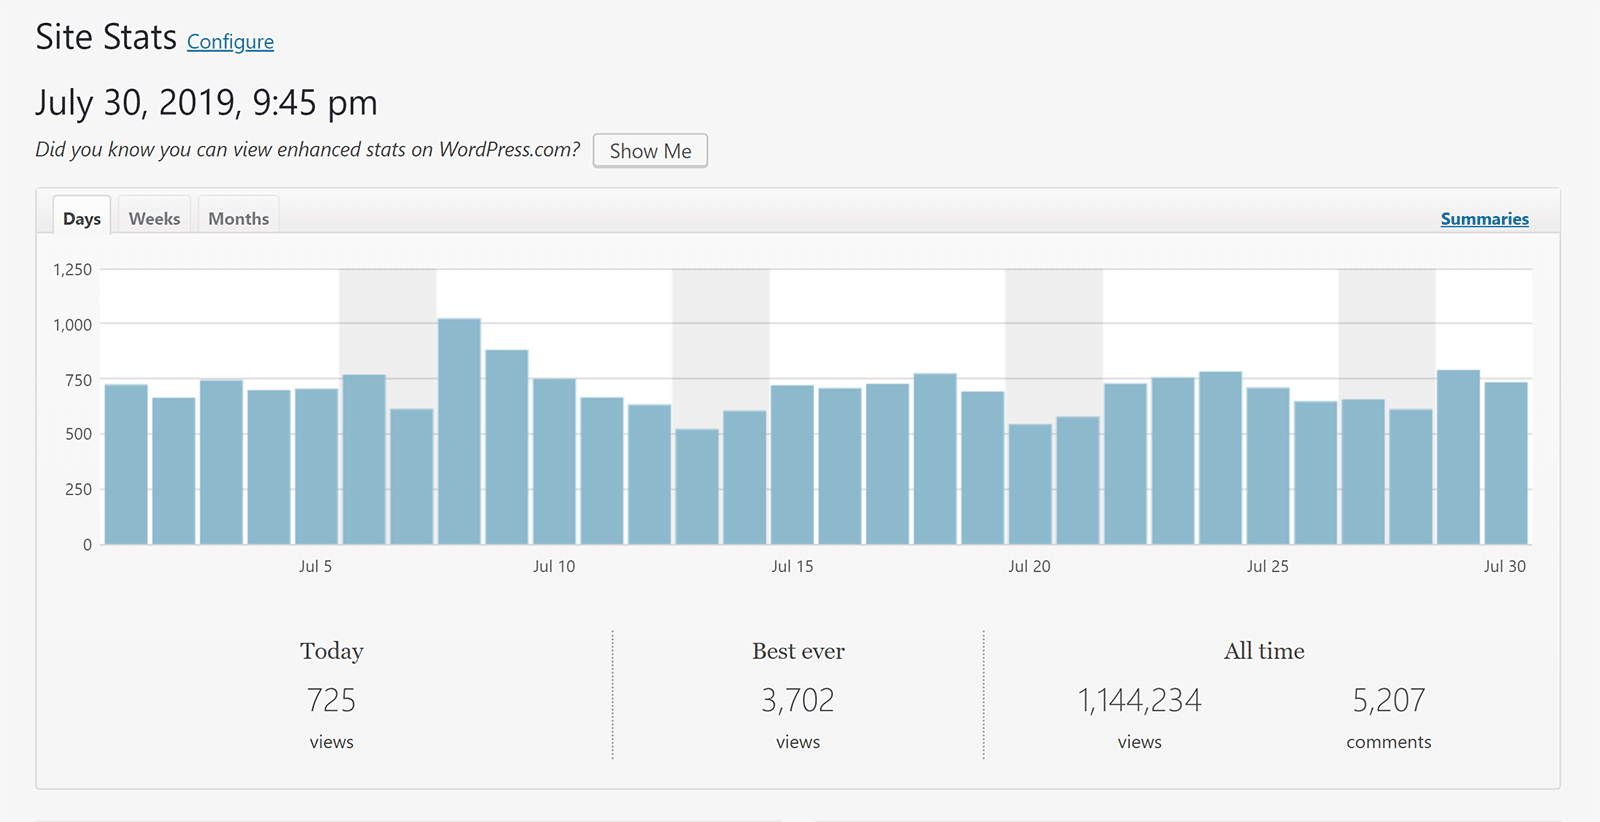
Site Stats has been an integral feature of Jetpack since it launched. It allows you to see statistics about your website from the WordPress admin area, on WordPress.com and via the WordPress mobile app.
You can use these statistics to get a better understanding of your readers and what content they’re viewing on your website.
Stats include top referrers, clicks, search engine terms, top posts and pages, the location of visitors, subscriptions, social media followers, and more. Results can be shows in days, weeks, months and even years.
I’ve always found Site Stats to complement Google Analytics well, as it shows me a lot of information about my website in a simpler format.
It’s convenient to check statistics from your WordPress admin area, but I encourage you to view your stats on WordPress.com too, as it shows many additional metrics.
Subscriptions
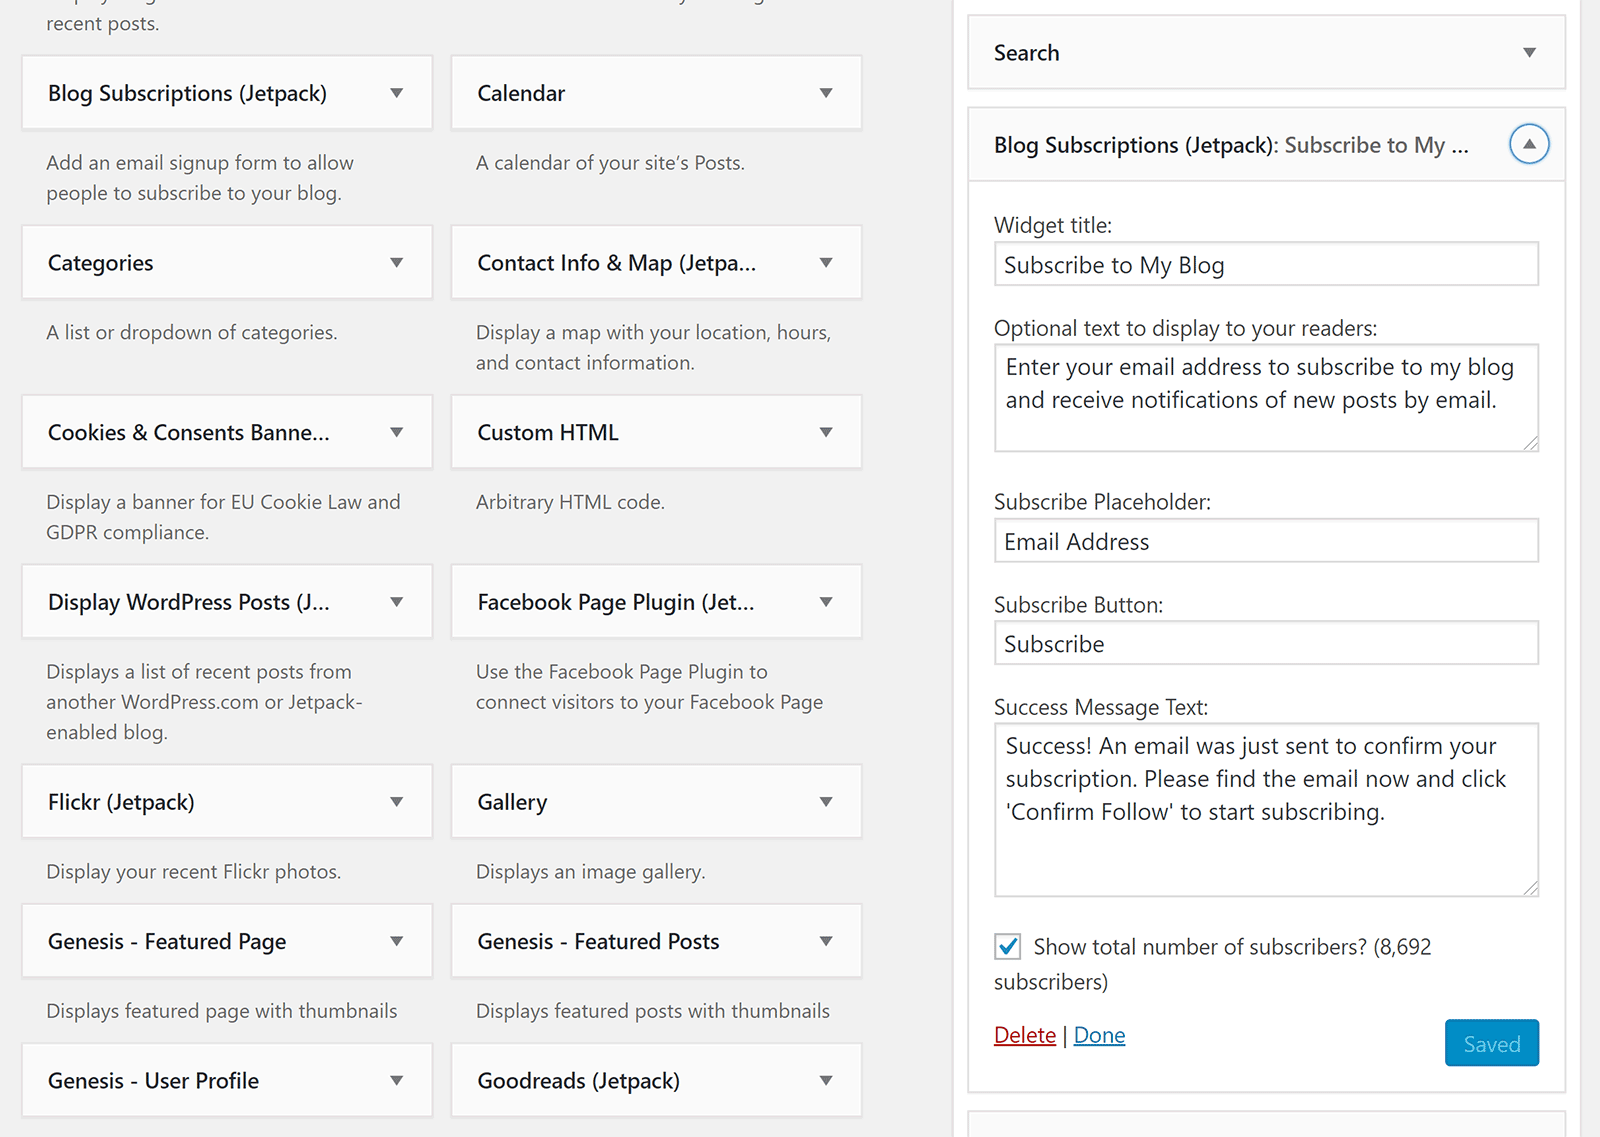
Jetpack Subscriptions is a fantastic way of connecting with your readers and encouraging them to return to your website.
It can automatically email subscribers whenever you publish new posts. Comment updates can also be provided to those who check a box in your comment form.
I previously used services such as MailChimp and GetResponse to deliver post updates to subscribers of my blog. However, I switched to Jetpack Subscriptions in 2017.
Many bloggers may feel that Jetpack’s subscriptions tool is too basic, but, for me, that’s its greatest strength. I recommend trying it out if you’re looking for an effective way of automatically letting readers know when you’ve published new content.
Blogging Enhancements
As a content creator, I’m always looking for ways to be more productive.
Subscriptions is one of my favourite features of Jetpack. However, the plugin provides many additional tools that bloggers and other content creators will love.
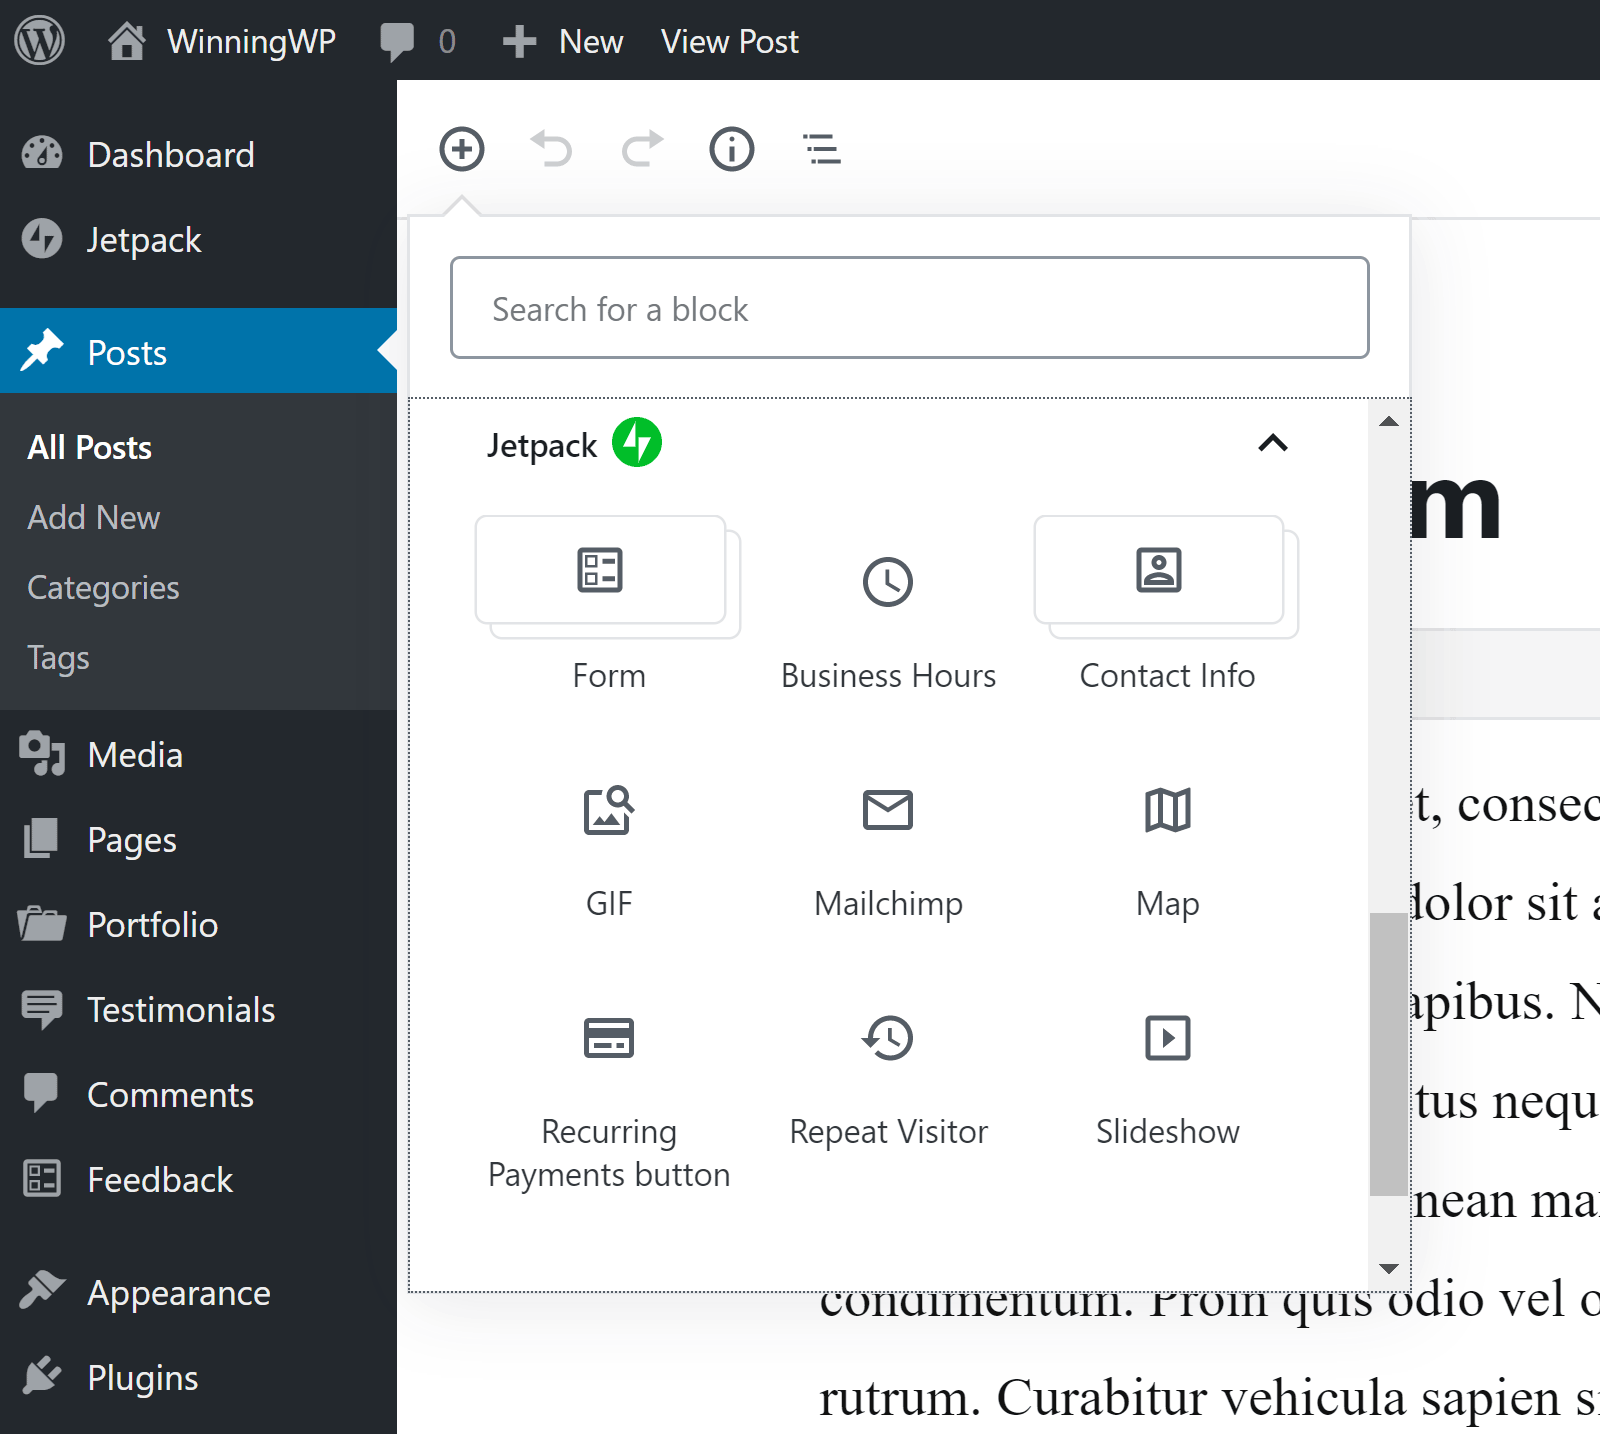
Its Content Embeds feature uses shortcodes to simplify the process of embedding video, audio, documents, social media and more. You can also improve how images are displayed to readers by placing them in galleries, carousels and slideshows.
Markdown can be used to speed up the process of formatting content. For example, you can make text bold by placing two asterisks before and after the text you want to highlight. The mathematical markup tool LaTeX is available too.
Post by Email is a tool that more WordPress users should be aware of. It can be used to publish new articles by simply sending an email to an email address that Jetpack generates. I assumed this would be restrictive, but you can define the post title, content, tags and categories. You can also format text and attach images and image galleries.

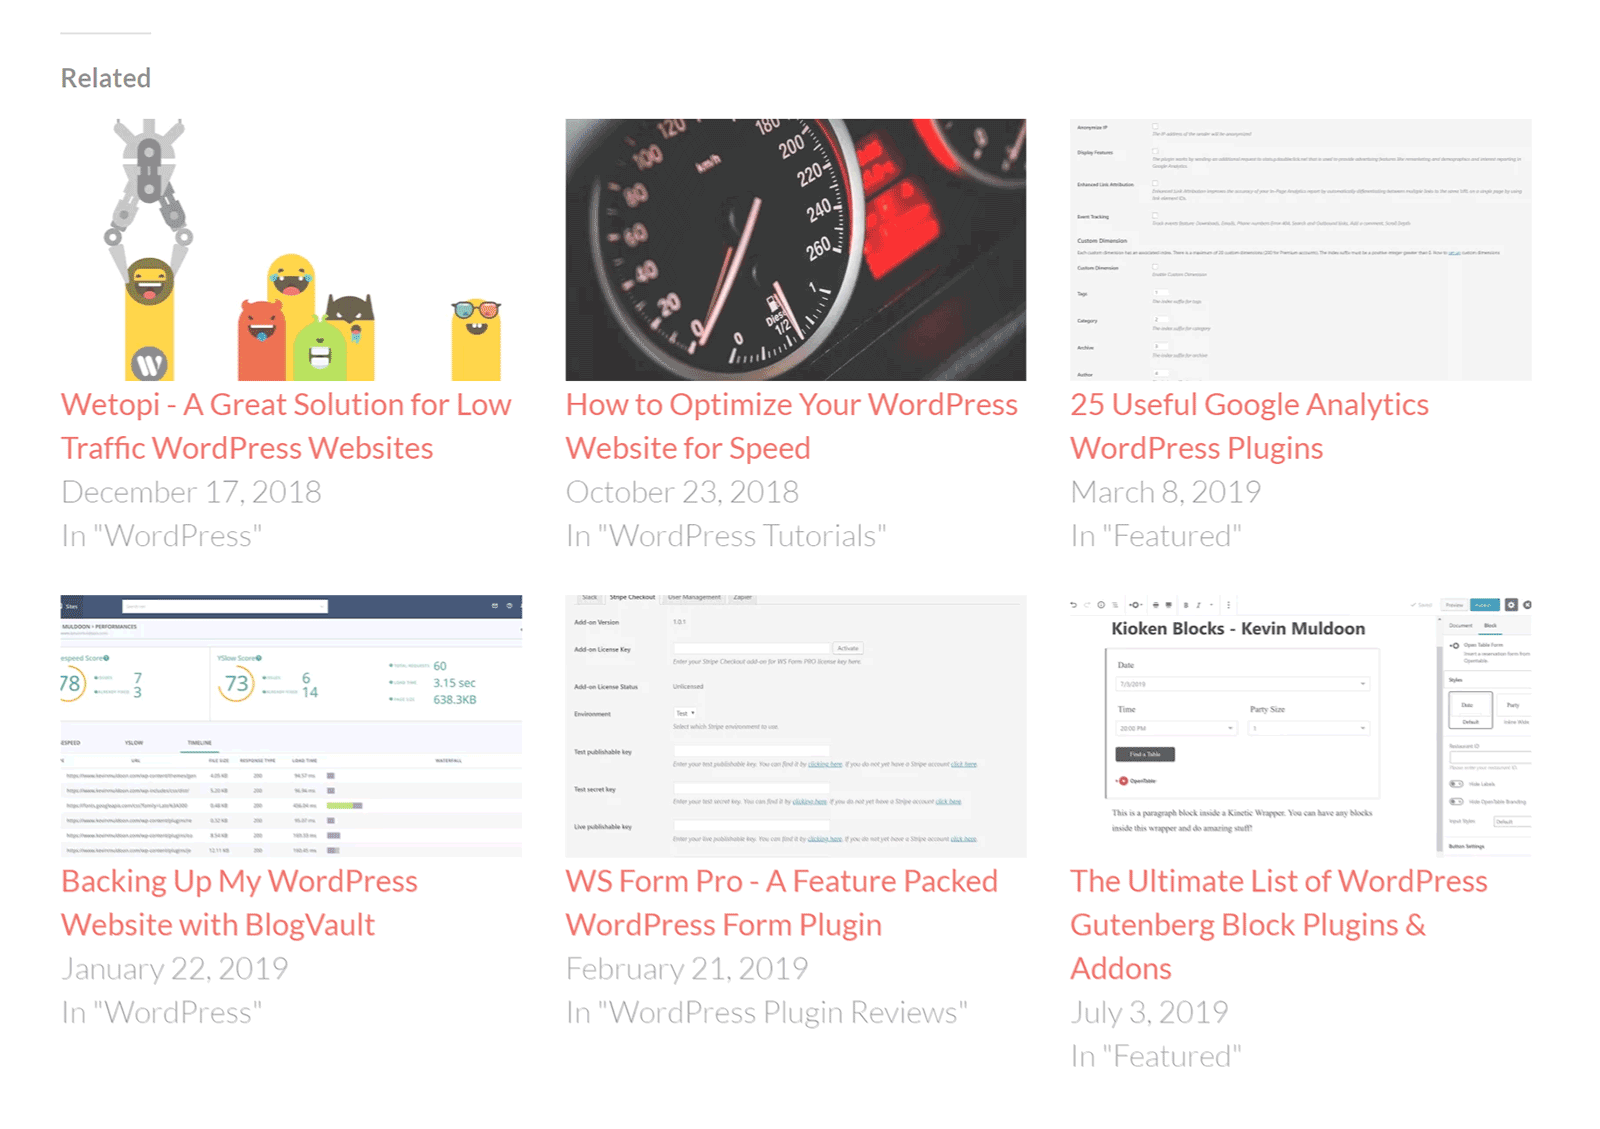
Jetpack also offers Related Posts. With one click you can display related blog posts you’ve published with their corresponding image thumbnails, which is a great way of keeping visitors on your website for longer.
One of the biggest problems with WordPress related posts plugins is that they can be CPU intensive and slow down your pages. This isn’t an issue with Jetpack, as related posts are processed on WordPress.com’s fast servers.
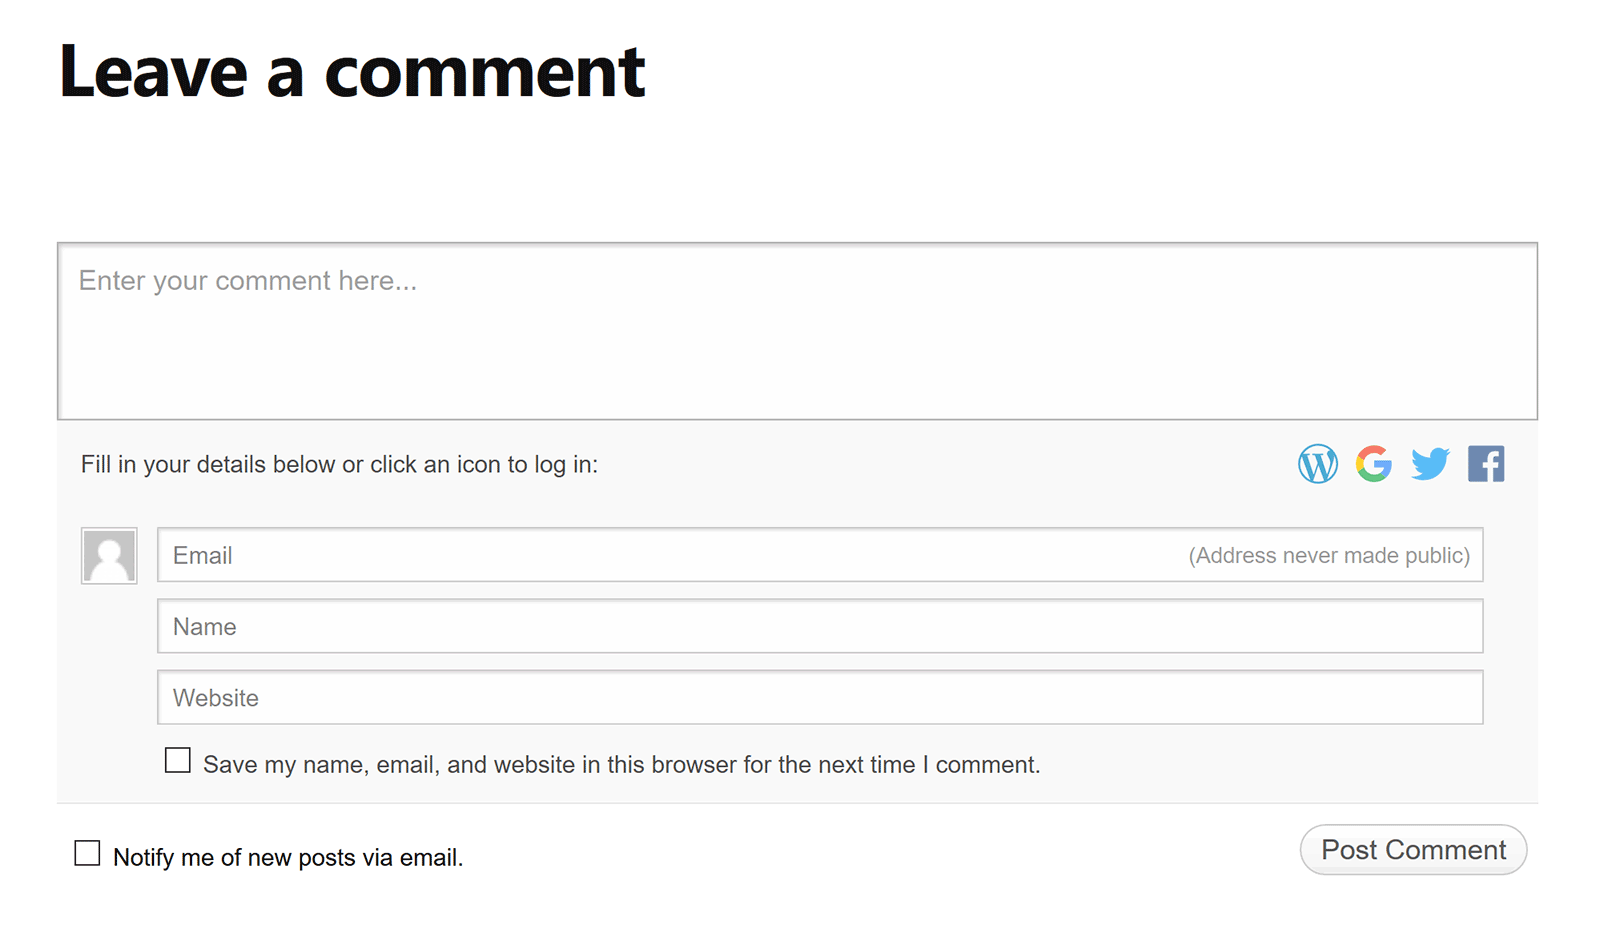
Jetpack’s Comment Form replaces the default WordPress comment form, and is a major improvement, as it allows users to log in using a WordPress.com account, Google, Twitter or Facebook.
Subscriptions are integrated into the comment form, which is an effective way of encouraging people to subscribe to your website, as they’re already engaged. Commenters can get updates about new comments via email too.
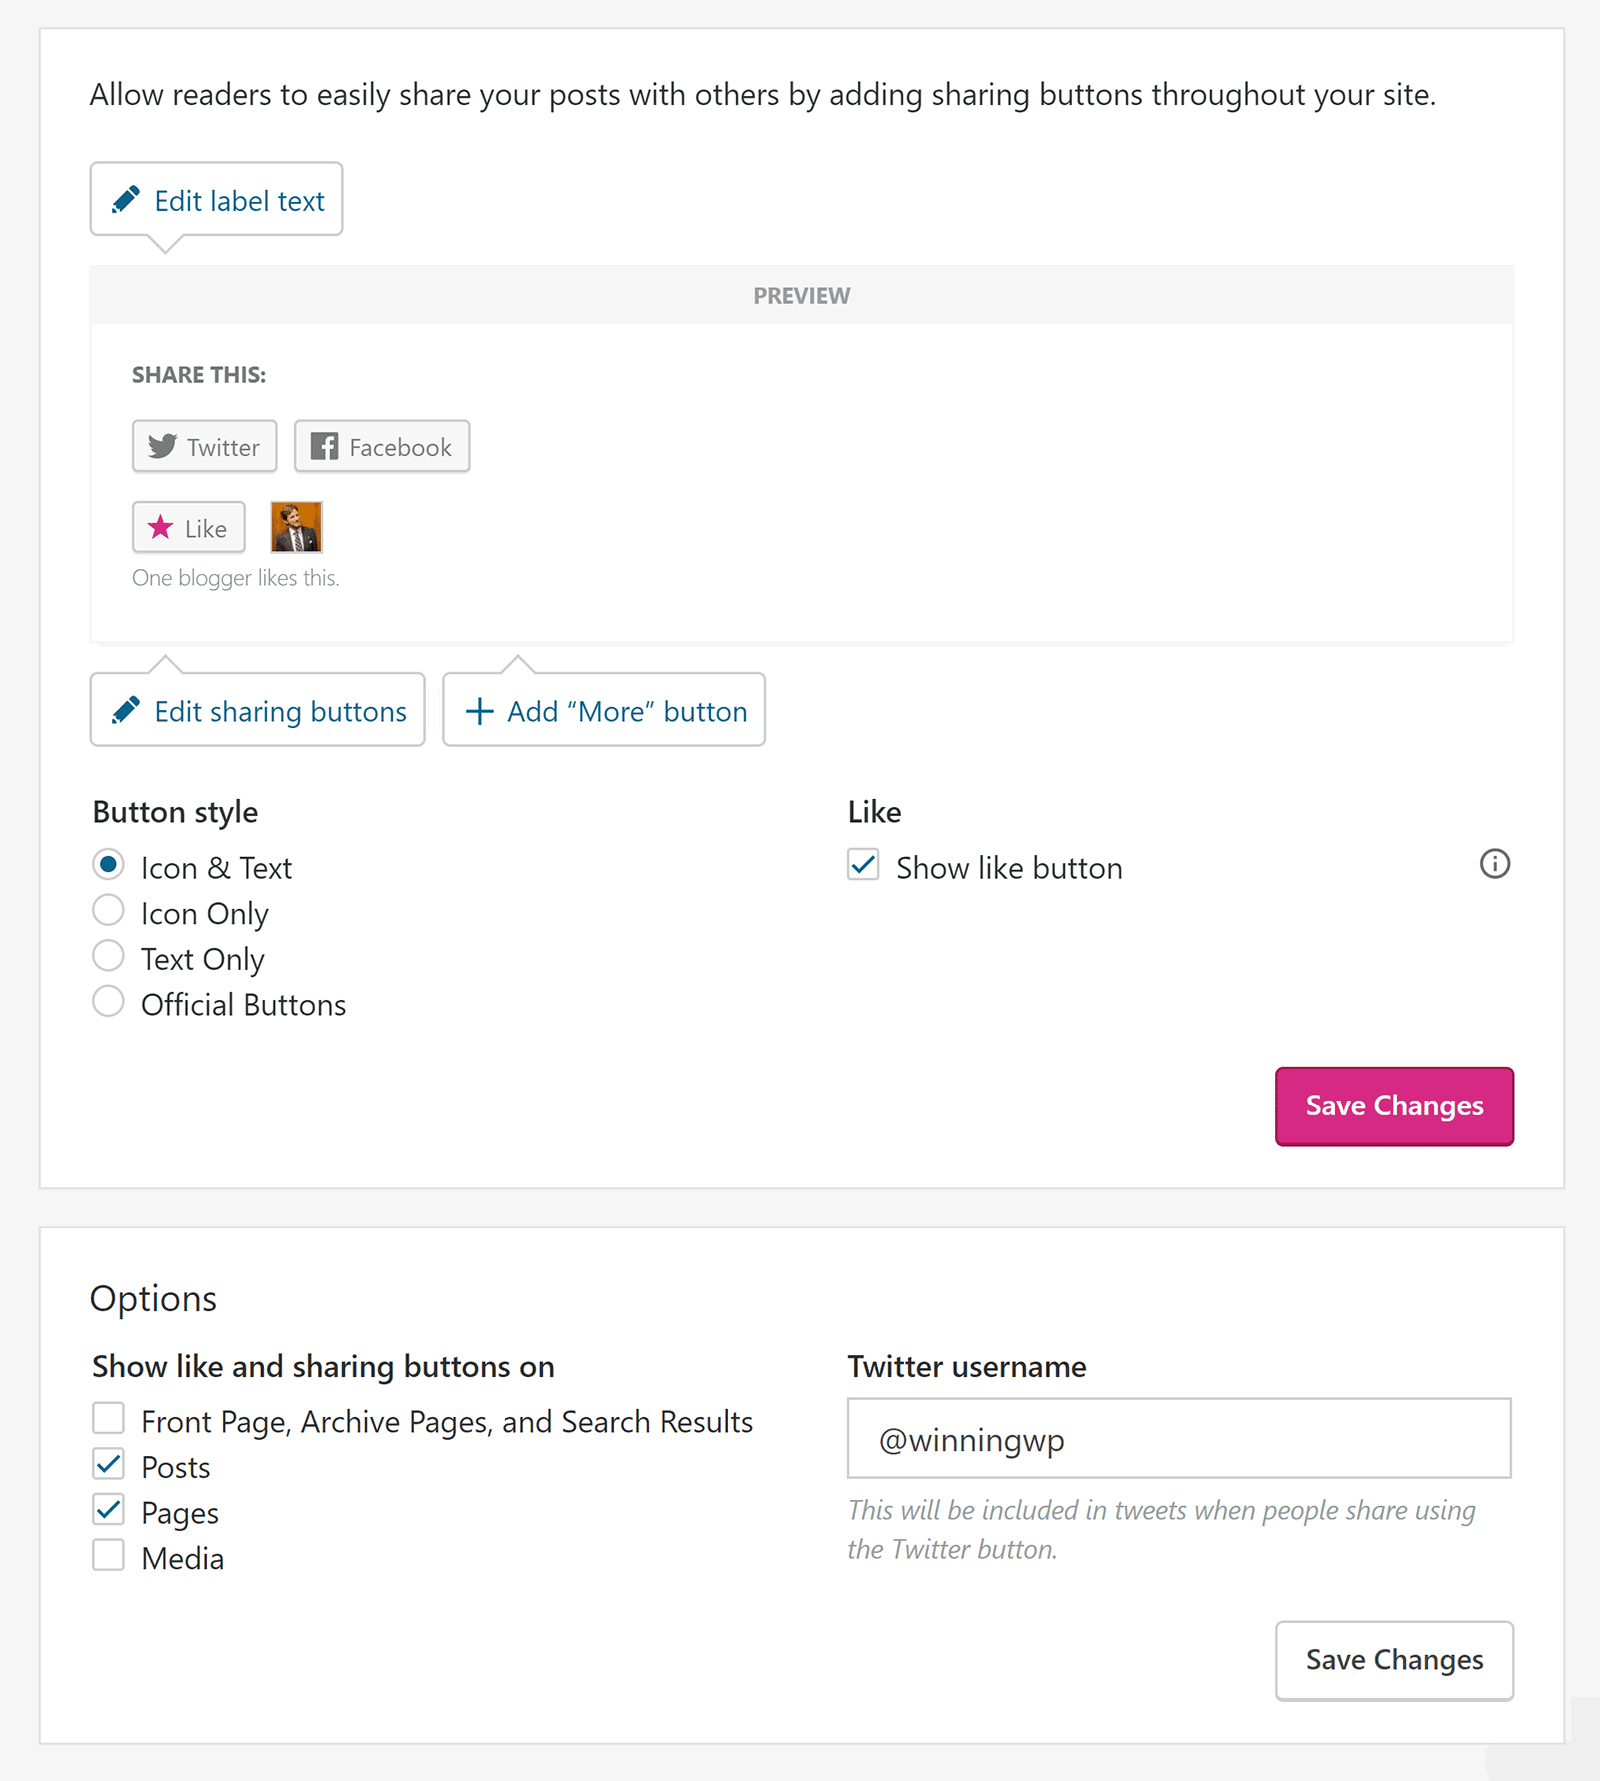
Jetpack has great support for social media.
Options include a like system, social media icon widget, Twitter and Facebook widgets, and social media sharing buttons for your posts and pages.
The feature I use the most is Publicize. Whenever you publish a new blog post, a notification message can be sent to your preferred social media networks. Facebook, Twitter, LinkedIn and Tumblr are supported.
Unfortunately, Jetpack’s Proofreading feature, which was powered by After the Deadline, was quietly retired in 2019. I do understand the reasoning behind this as there are many proofreading browser extensions on the market, but I always found it to be useful.
All in all, I believe bloggers and writers will appreciate the additional functionality Jetpack provides for content creators.
WordPress Theme Enhancements
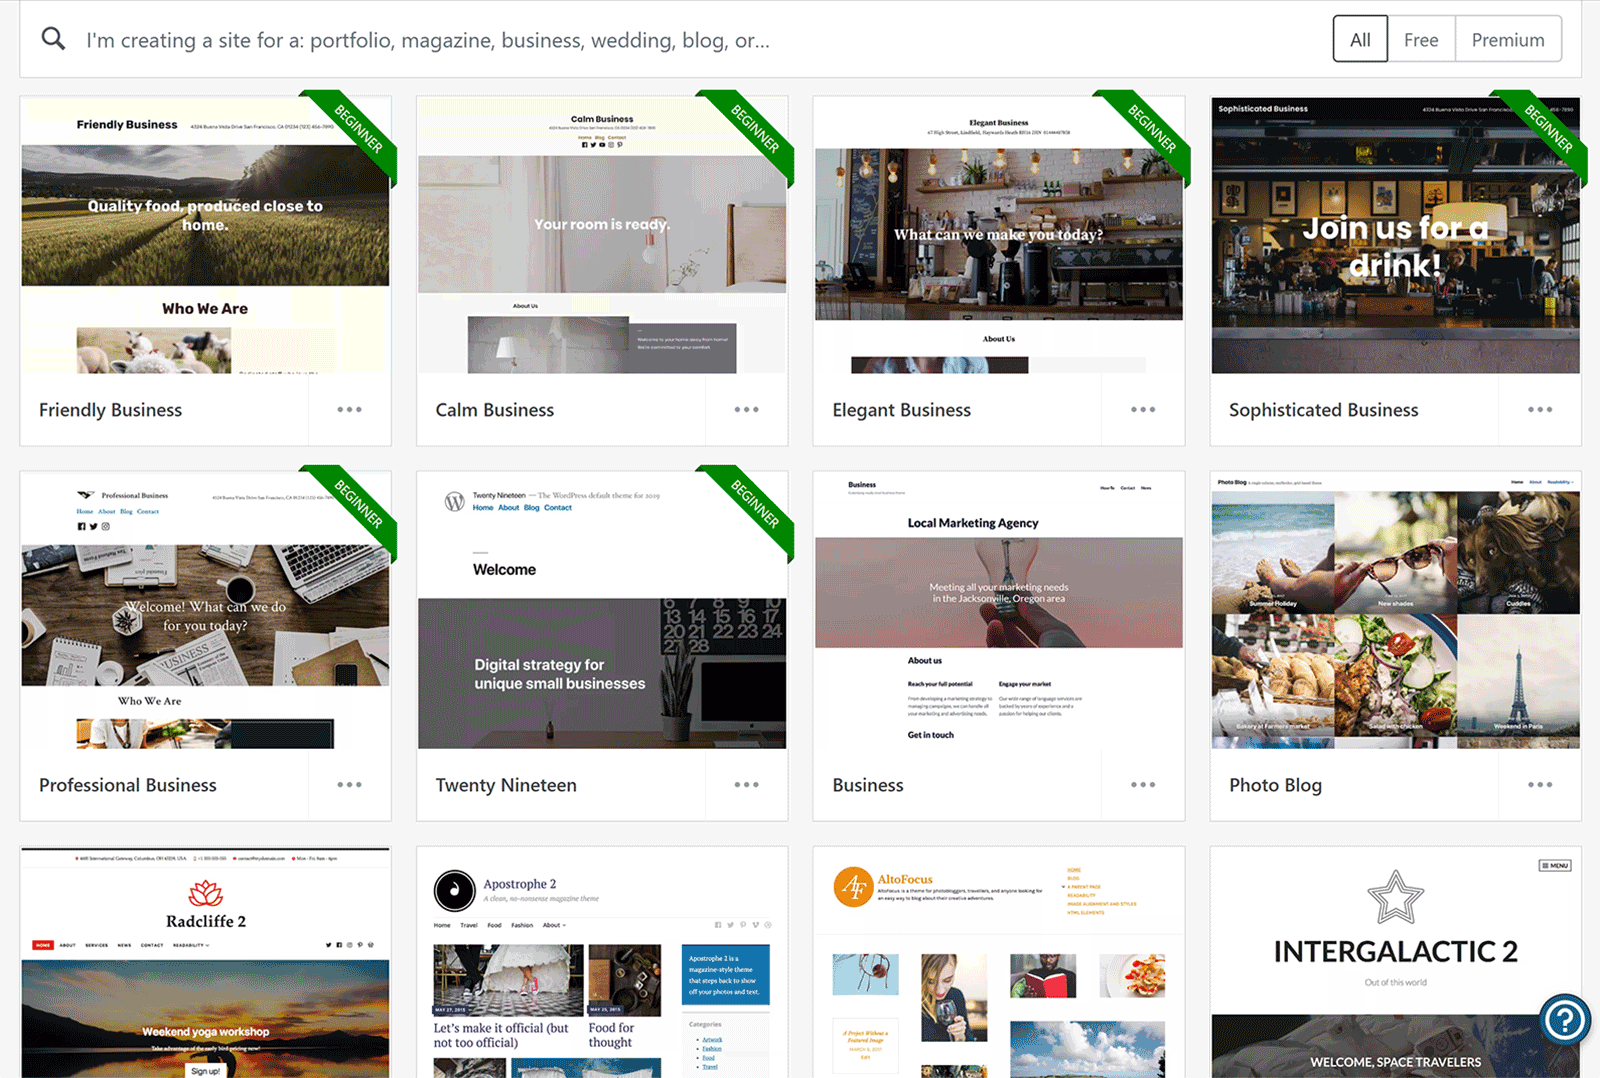
Anyone who installs Jetpack gains access to over a hundred WordPress themes from WordPress.com, and 200 more are available to those who upgrade to Jetpack professional.
The information page for each theme is much better than on WordPress.org, as it shows more image previews and details about the theme’s requirements. The standard of designs is also very good. However, the WordPress.org theme directory remains the best place to find free WordPress themes, as there are thousands of designs listed there.
The theme enhancements section can be found in the writing settings page, and features three useful theme options: Infinite Scroll, Custom CSS and Mobile Theme.
Infinite Scroll can be used in one of two ways. One option is to display a button that allows readers to load more posts to be displayed, but a more practical option is to load posts automatically as the reader scrolls down your page.
Custom CSS lets you add your own styling code. The cool thing about this feature is it’ll keep the last 25 CSS revisions you’ve made, so you can compare code, and, if necessary, restore it.
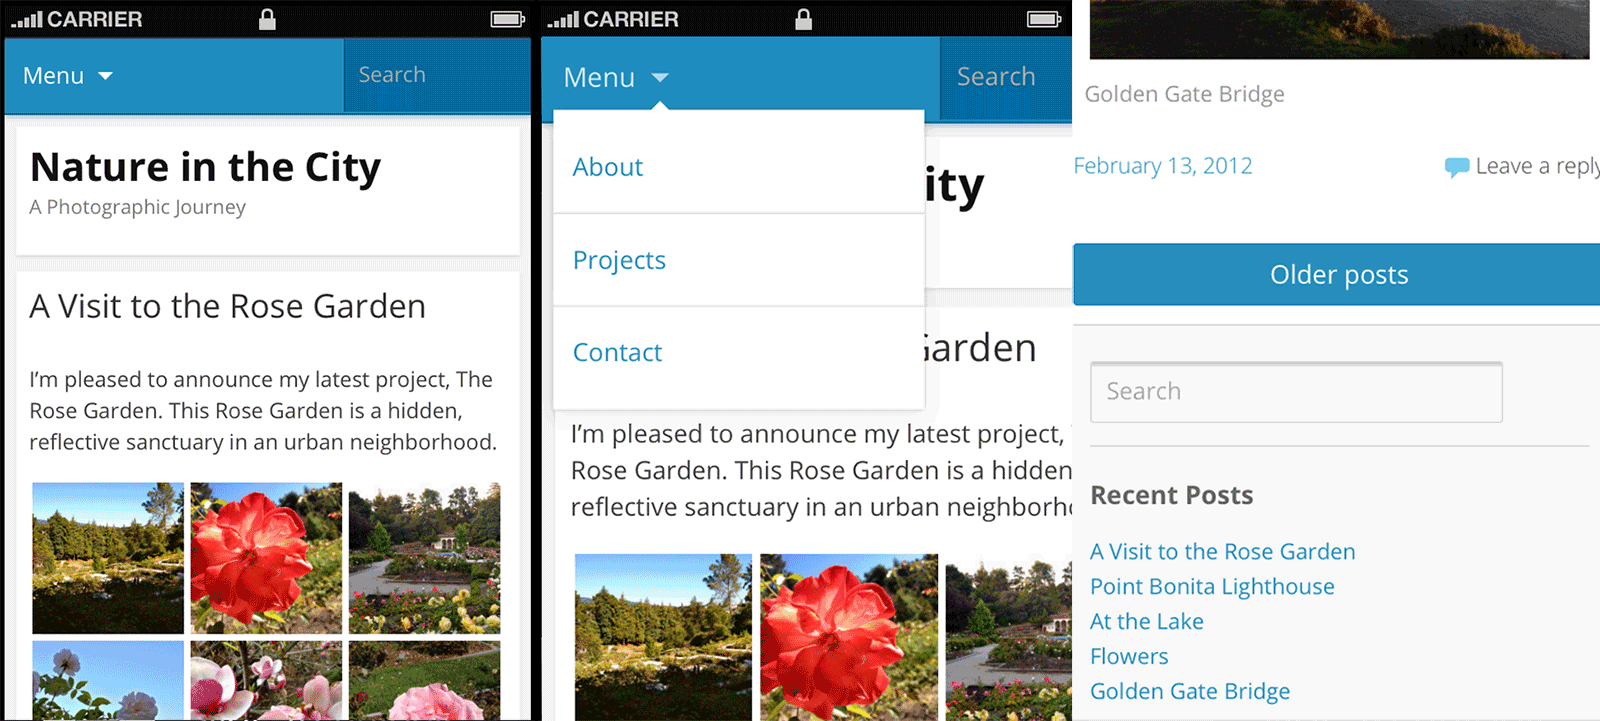
If you’re looking to make your website content more accessible, you may want to consider enabling the Jetpack Mobile Theme. It supports featured images and lets you display excerpts instead of full blog posts.
Those of you who are using an old WordPress design that’s not responsive should check it out.
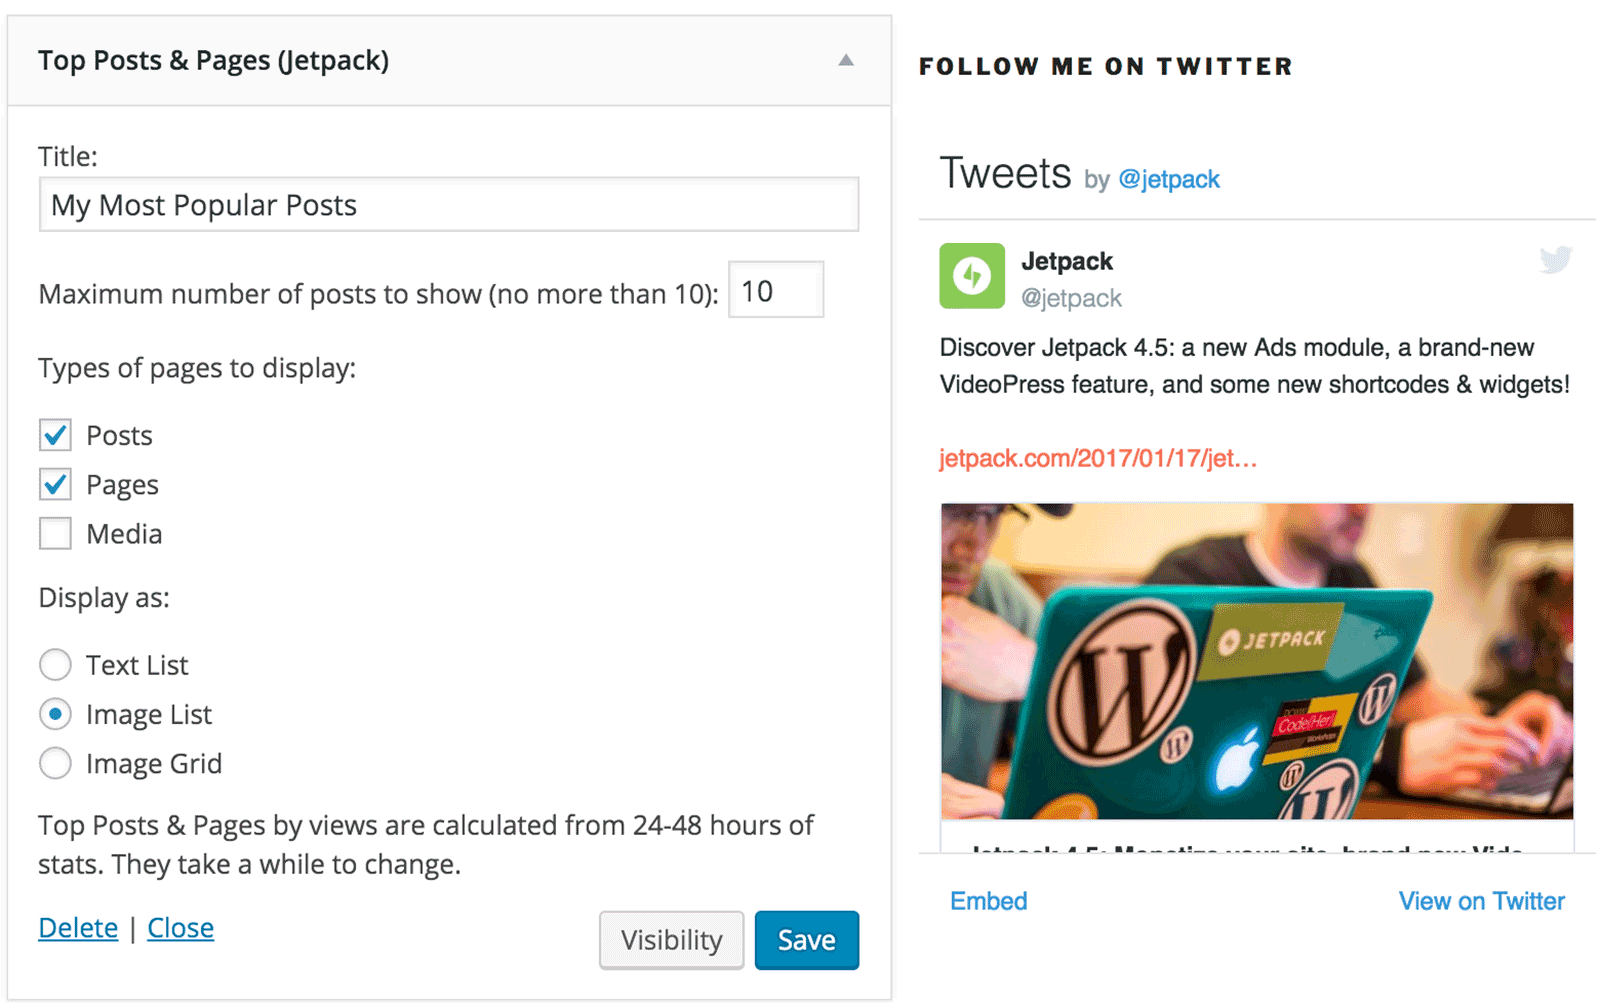
Jetpack Widgets
More than 20 WordPress widgets are available through Jetpack.
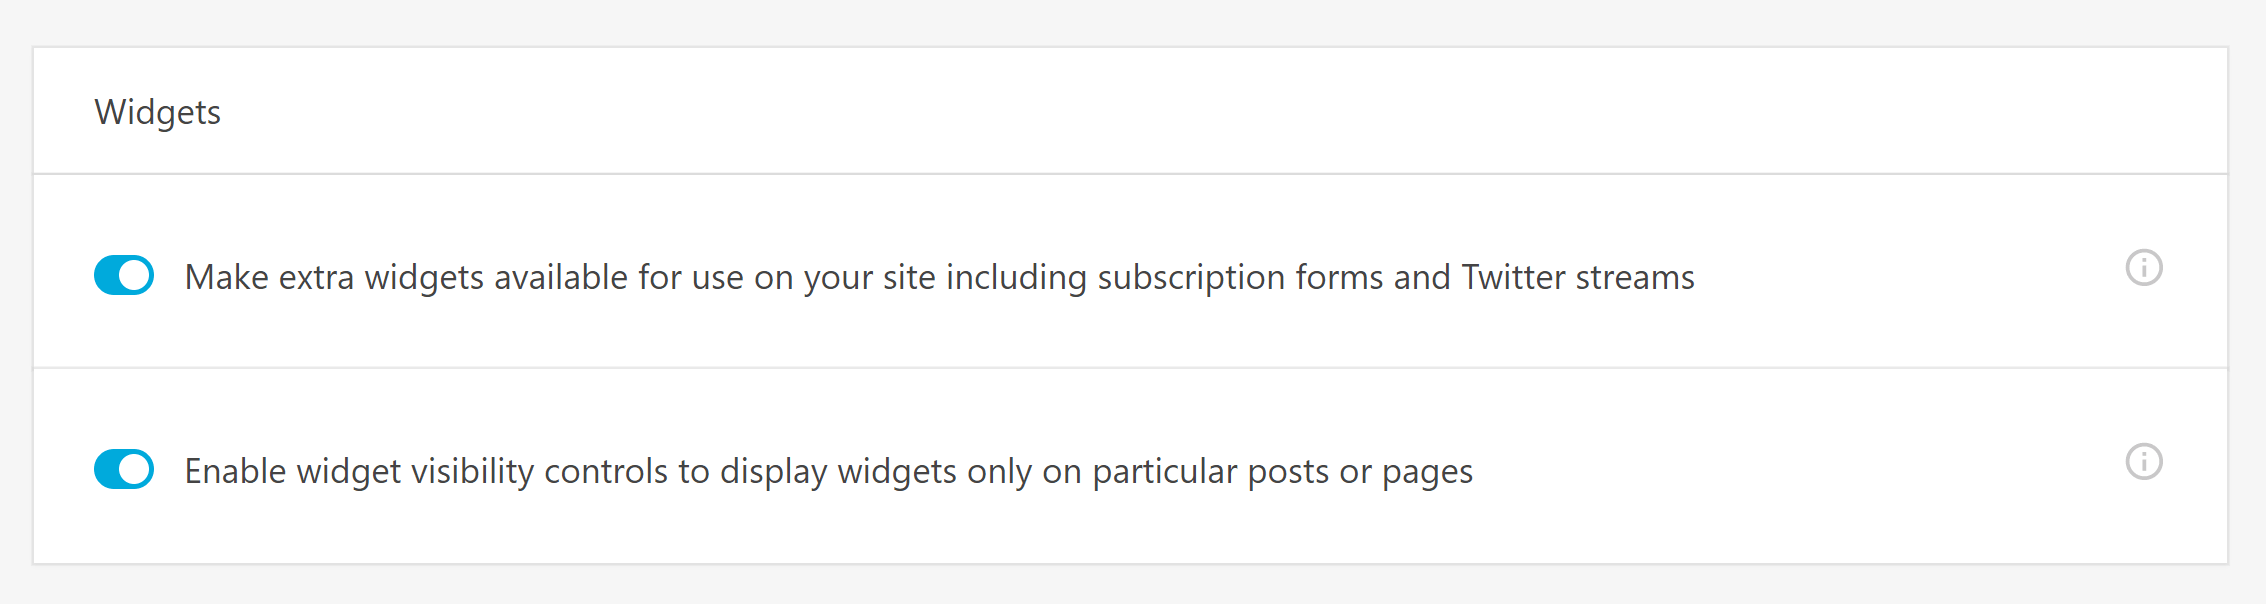
You need to activate widgets in the writing settings page, as they’re deactivated by default.
There’s a good variety of widgets on offer, including for Twitter, Facebook, Flickr, Google Translate, author profiles, upcoming events, top blog posts and more.
Options are fairly limited in most of these widgets, but, by enabling Jetpack widgets, you can save yourself from having to install additional WordPress plugins.
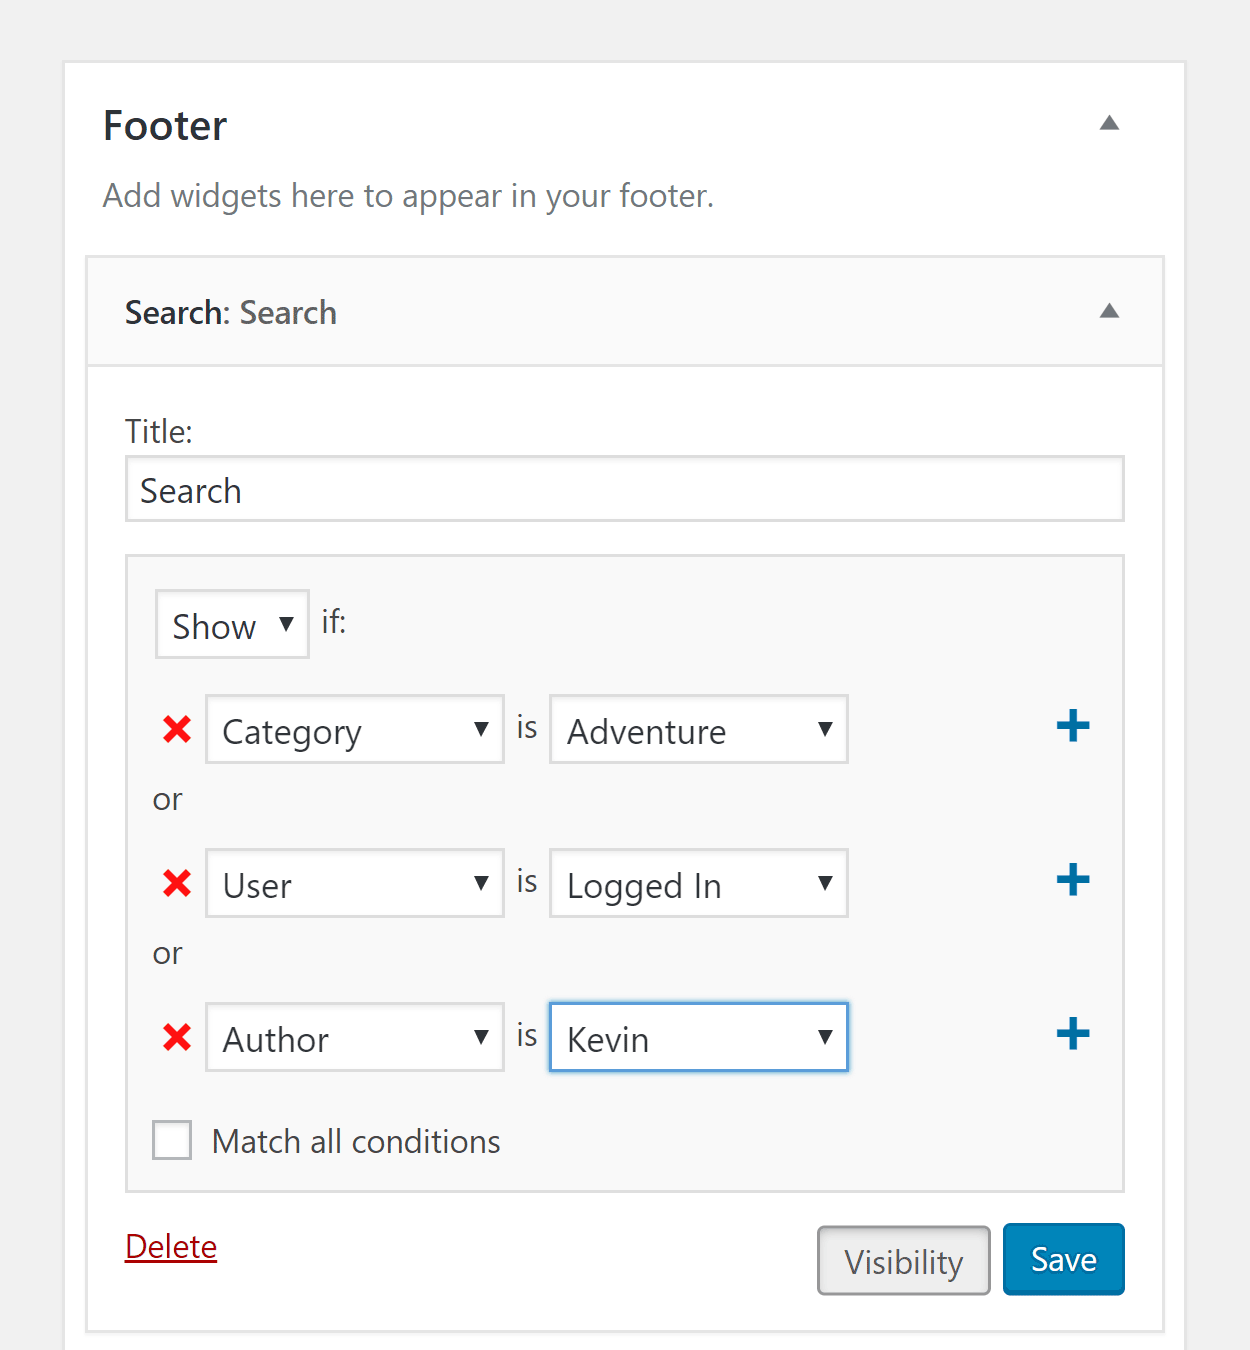
Jetpack also lets you define who sees your widgets. If you enable widget visibility controls you can say whether a particular widget is shown for specific page types, categories, tags, dates and authors.
All of this is done through a series of IF statements that you create. You can also set it so that all conditions are met. This changes all IF statements to AND statements.
Be sure to check out the Jetpack widget support page for a full list of available widgets.
Other Great Features
Jetpack boasts so many features that it’s impossible to cover them all in one article, but, in this section, I’d like to briefly talk about other cool things Jetpack can do.
Portfolios & Testimonial Post Types can be activated from the writing settings page of Jetpack. Testimonials are a great way of displaying quotes from customers and important people within your industry.
Portfolios can be placed into different project types (categories) and have tags assigned to them. Since a custom post type is being used, you have more flexibility with how media is displayed than with a regular gallery.

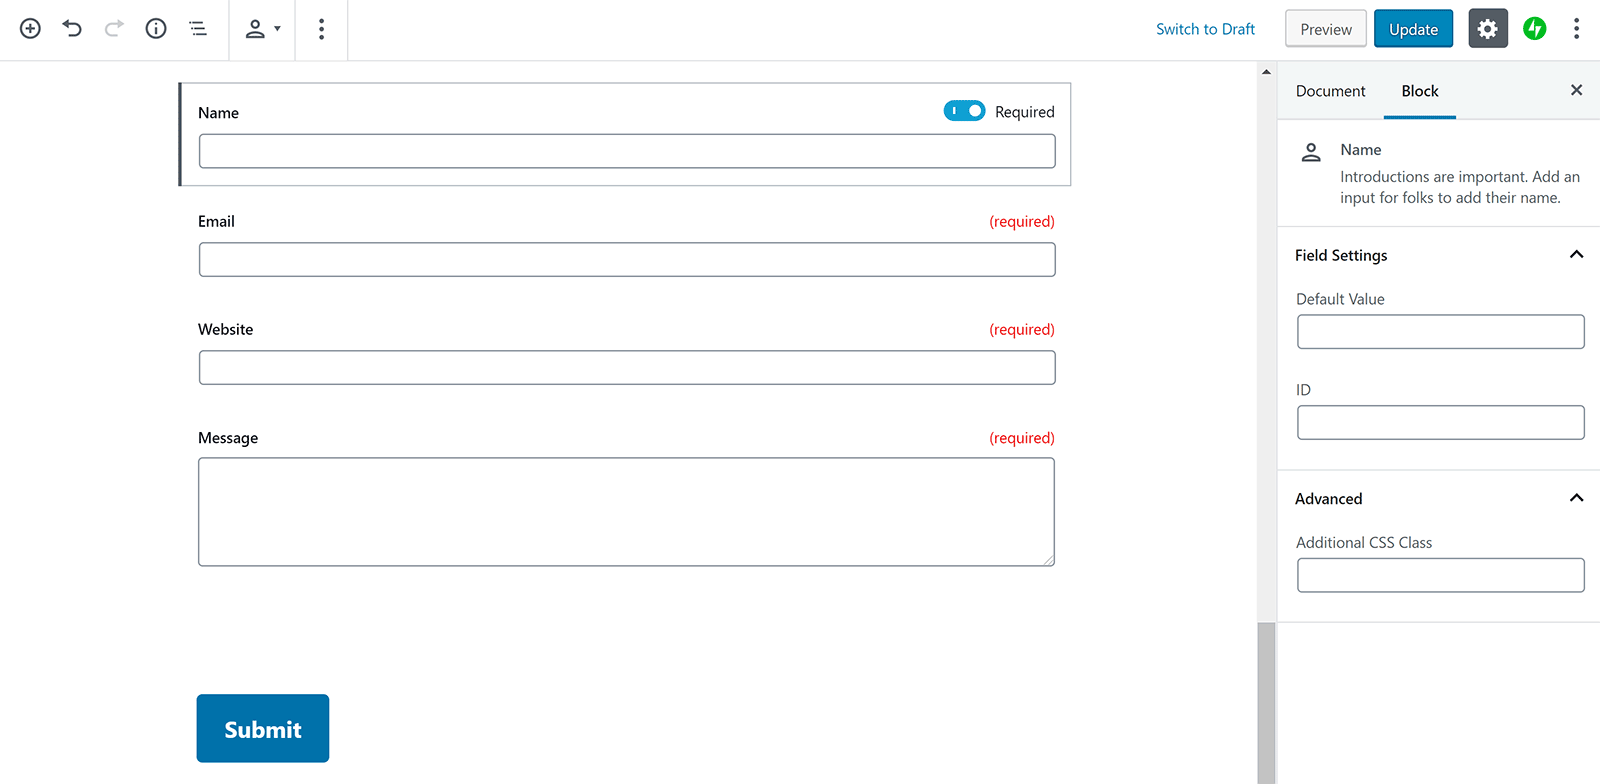
The Jetpack Contact Form is quite basic, but I’m a big fan, as it’s a great way of building simple contact forms quickly.
It allows multiple people to be notified when an email is submitted.
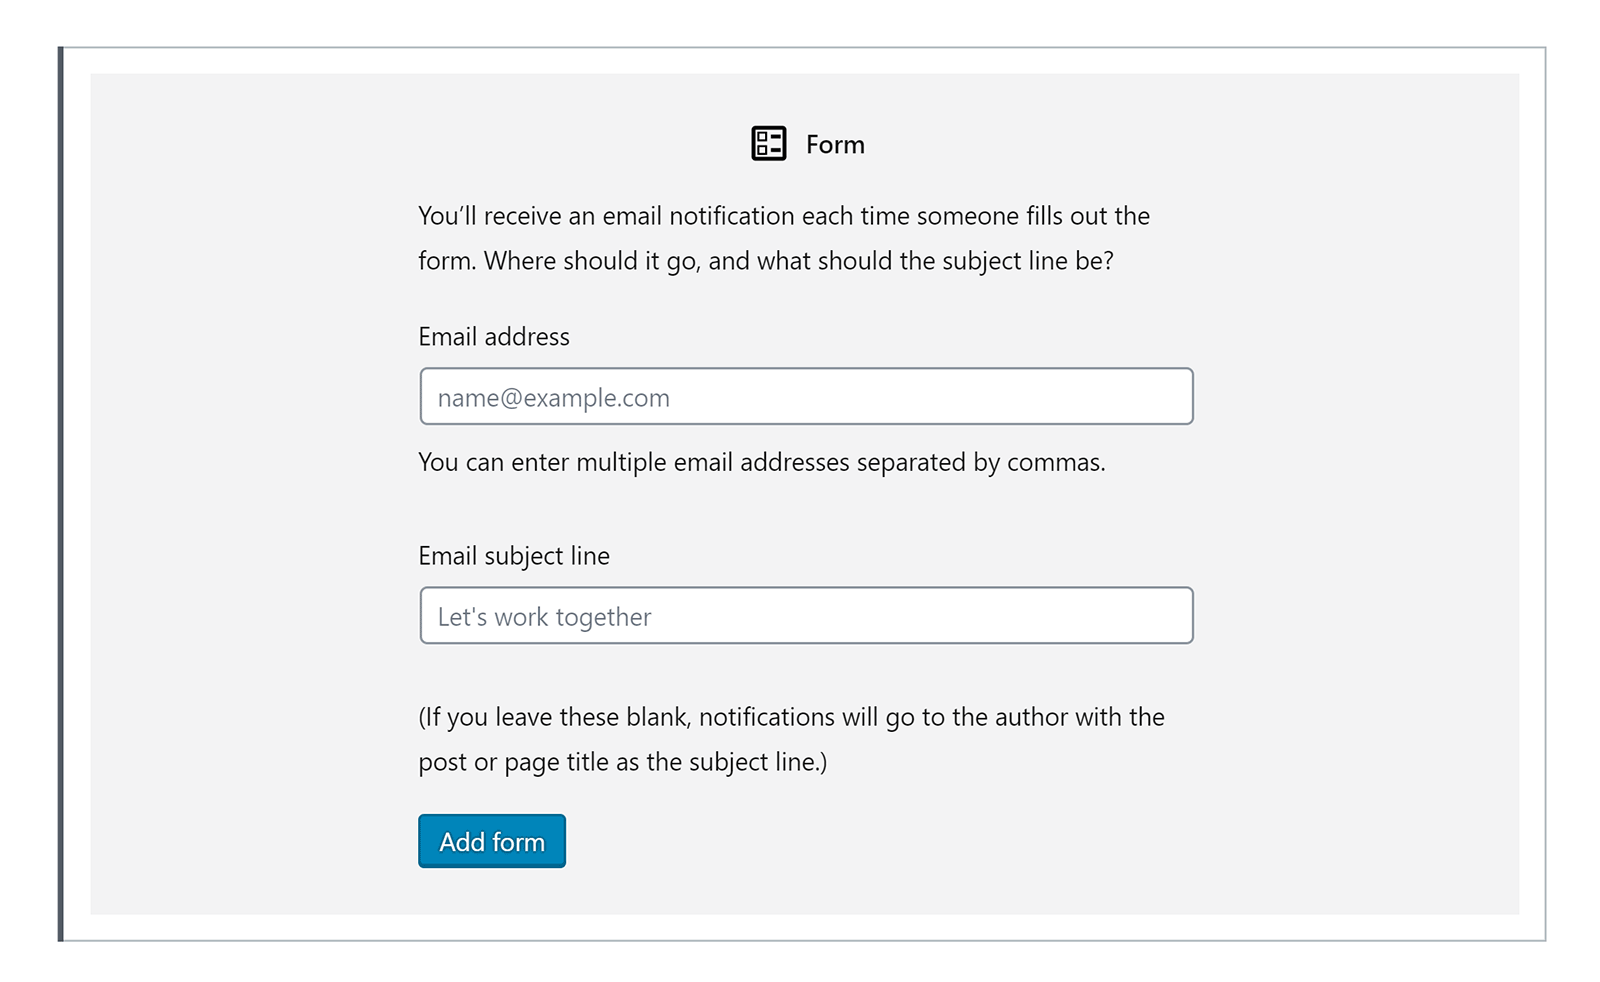
Four fields are available in the form: Name, email, website and message, and you can define which fields are required and enter default values for them.
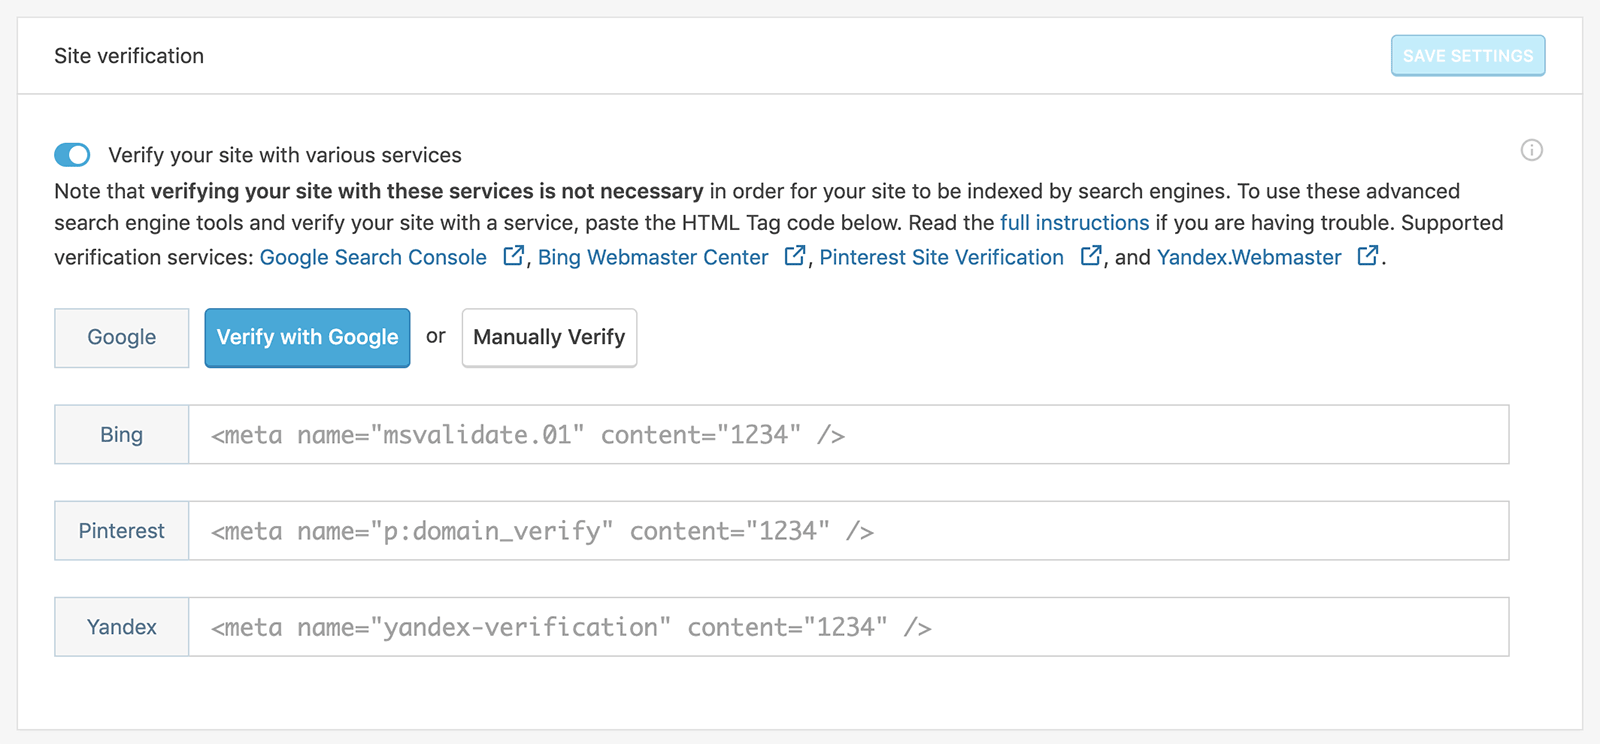
In the traffic settings section, you’ll see options to enable shortlinks, sitemaps and site verification.
WP.me Shortlinks can be generated for your posts and pages. This can be useful when sharing links on social media sites such as Twitter.
Jetpack offers two types of website XML sitemaps. The first sitemap was designed for search engines, such as Google, Yahoo!, Bing and Ask.com. The second sitemap will help you to get your latest news articles listed on Google News.
Your website can be verified with major search engines with Jetpack’s Site Verification Tools. Google, Bing, Pinterest and Yandex are supported. This will save you from having to verify website ownership using an alternative verification method, such as uploading a file to your website.
Those of you who upgrade to the Jetpack premium or professional plan will also add functionality for Google Analytics, SEO preview tools, PayPal integration and eligibility for the WordPress.com ad network.
I’m unsure as to why Google Analytics integration is reserved for premium plans, given how simple it is to add the tracking code to your website. Hopefully, this will be made available in all versions of Jetpack in the future.
The Search Engine Optimisation module will help you to add meta information to pages, and change what’s written for titles, descriptions and more.
Jetpack’s Ad Program for WordPress Websites can be used to increase income to your website. Ads are optimised for the geographic locations and locale of website visitors, and you can check your statistics and earnings on WordPress.com.
As the name suggestions, Simple Payment Buttons help you to insert PayPal buttons into your website. For each button, you can define a product image, product title, product description, product price and the corresponding PayPal email address you want to be paid through.
Switching Modules On and Off
At the bottom of every page in Jetpack is a navigation menu. The modules link in this menu will take you to a page where you can see all Jetpack modules, and activate and deactivate them.

The modules page displays all Jetpack modules in a list. It’s a practical way of seeing which modules are active and which are not.
Modules can be sorted in alphabetical order, or by newest or popular. You can filter modules by category too.

If you’re unsure as to why specific functionality isn’t available, check the Jetpack module list. It helps you to quickly see which modules are active, and lets you switch multiple modules on and off.
Customising Jetpack Modules
One of Jetpack’s greatest strengths is its simplicity.
Most features in Jetpack can be activated with a single click. Jetpack then takes care of everything for you.
It’s one of the reasons I love Jetpack, but, in some areas, the lack of customisation options can be a little frustrating.
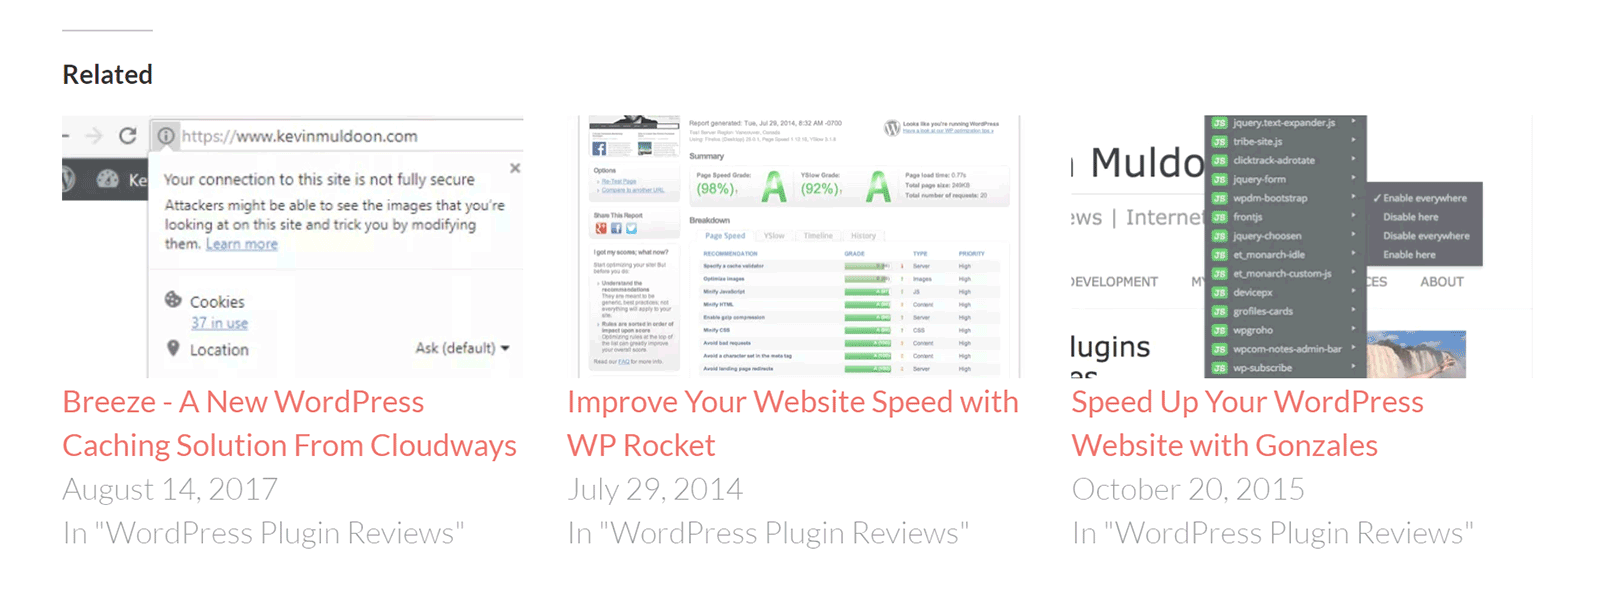
The Related Posts module is a great example of this. It’s one of the fastest related posts solutions available to WordPress users, but, from the Jetpack settings area, you can only select whether you want the title ‘Related’ to be displayed above posts and whether a thumbnail is displayed.
A bigger concern is the related posts that are displayed aren’t restricted by any date range, which makes the module unusable on blogs that have posts more than a few years old.
On my personal blog, Jetpack would show articles I published five, eight or even 12 years ago. All of these blog posts are now outdated.
Because of this, I disabled the module on my blog.
When I disabled related posts on my website, I wasn’t aware Jetpack does indeed give you a way to modify its modules.
All you have to do is add some code snippets to your website.
Jetpack has a dedicated page that shows you how you can customise related posts and around a dozen examples are provided. You can copy and paste the relevant code into your website, and make any adjustments you think are necessary.
Code snippets can be placed in your theme’s functions.php file. However, a simpler solution is to use a WordPress code snippet plugin. I prefer this method as it means the code isn’t tied to a particular WordPress theme.
The plugin I recommend is called Code Snippets. For each snippet you can add your code, name it, add a description, add tags, set its priority, and define whether the snippet is run at the back end or front end of your website.
Since the code I added was for the related posts module, I chose to only run the code at the front end of my website.
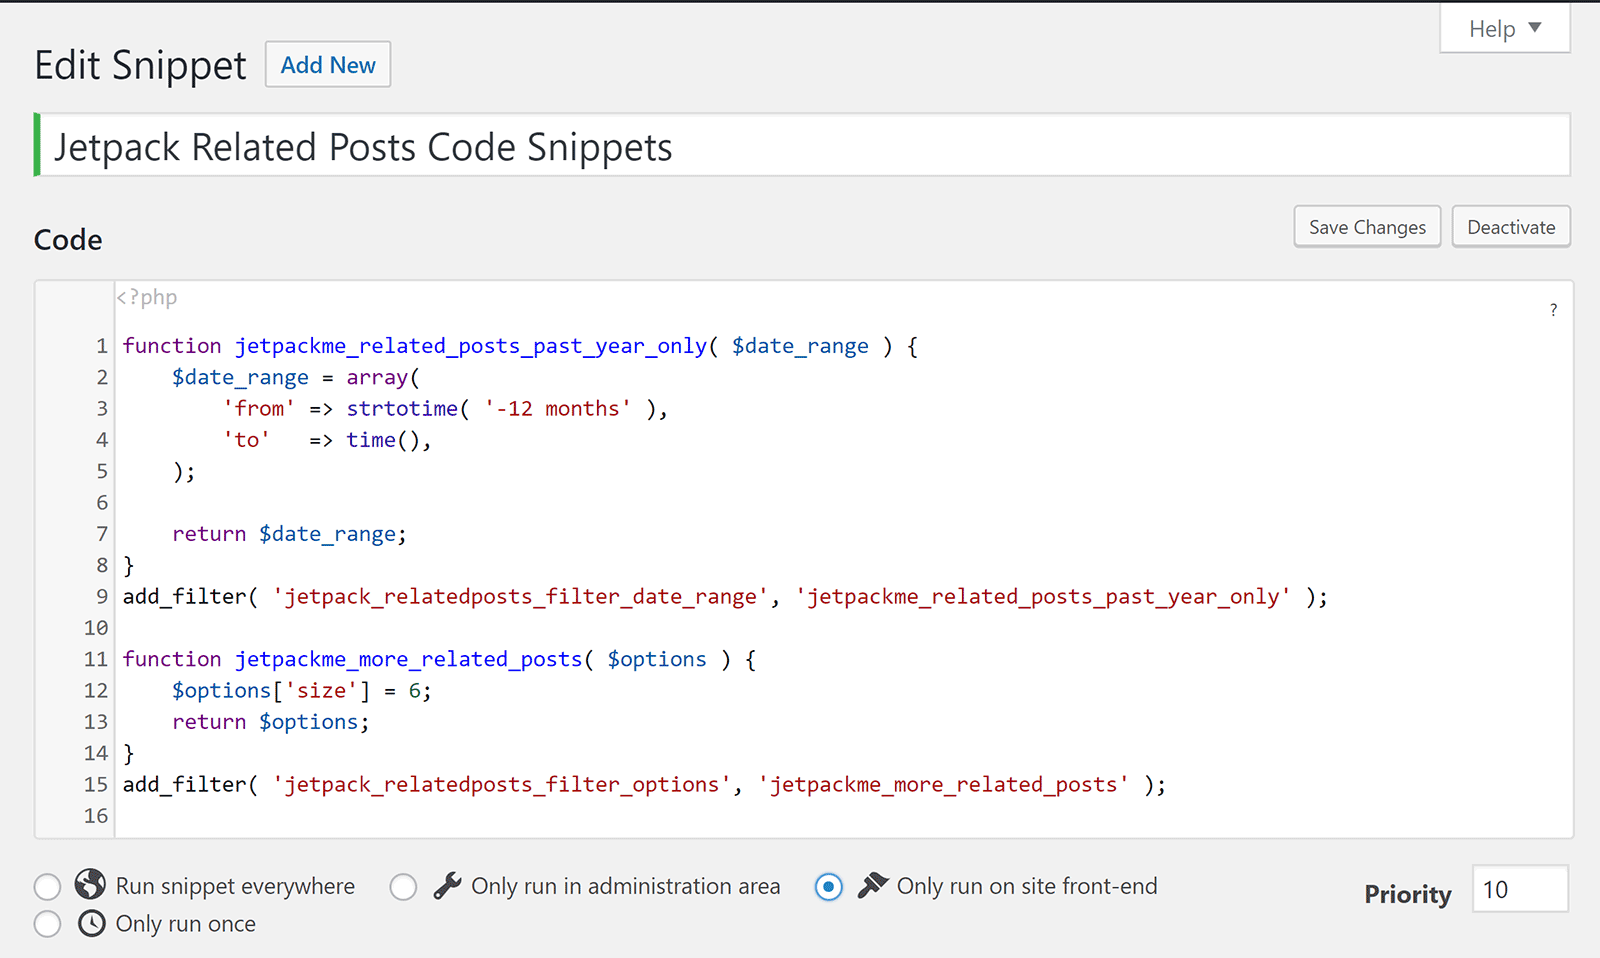
Using the examples provided by Jetpack, I was able to restrict related posts to those that were published within the past year. I also increased the number of related posts displayed from three to six.
I encourage you to browse the Jetpack Support area for code snippets that can be applied to your favourite Jetpack modules. You’ll find code snippets that will help you to modify subscriptions, contact forms, searches and more.
By applying a few code snippets to your website, you’ll have a better appreciation of how Jetpack can be customised to suit your needs.
I think the code snippet modification method makes sense in most situations. By reducing the number of options in the Jetpack settings area, the developers have been able to ensure the plugin remains user-friendly and website owners aren’t overwhelmed with options.
Admittedly, there are a few Jetpack modules I’d love to see expanded, but Jetpack offers code snippets for most of the modifications I need.
Jetpack Plans
The vast majority of features in Jetpack are available free of charge. The only requirement being that you sign up for a WordPress.com account to use the plugin.
There are, however, many valid reasons to upgrade to one of the three available premium Jetpack plans.
The most affordable plan is the personal plan. For just $3.50 a month, or $39 a year, you can unlock daily backups of your website. This will allow you to perform a one-click website restore of any backup that was made within the previous 30 days.
The Akismet-powered spam filtering module is also included in this plan, together with 30 days of activity tracking and priority support.
When you consider that the Jetpack backup system was previously sold on VaultPress.com for $5 a month, and the spam filtering functionality costs $5 a month if you purchase it directly from Akismet.com, the Jetpack personal plan offers great value for money at only $3.50 a month.
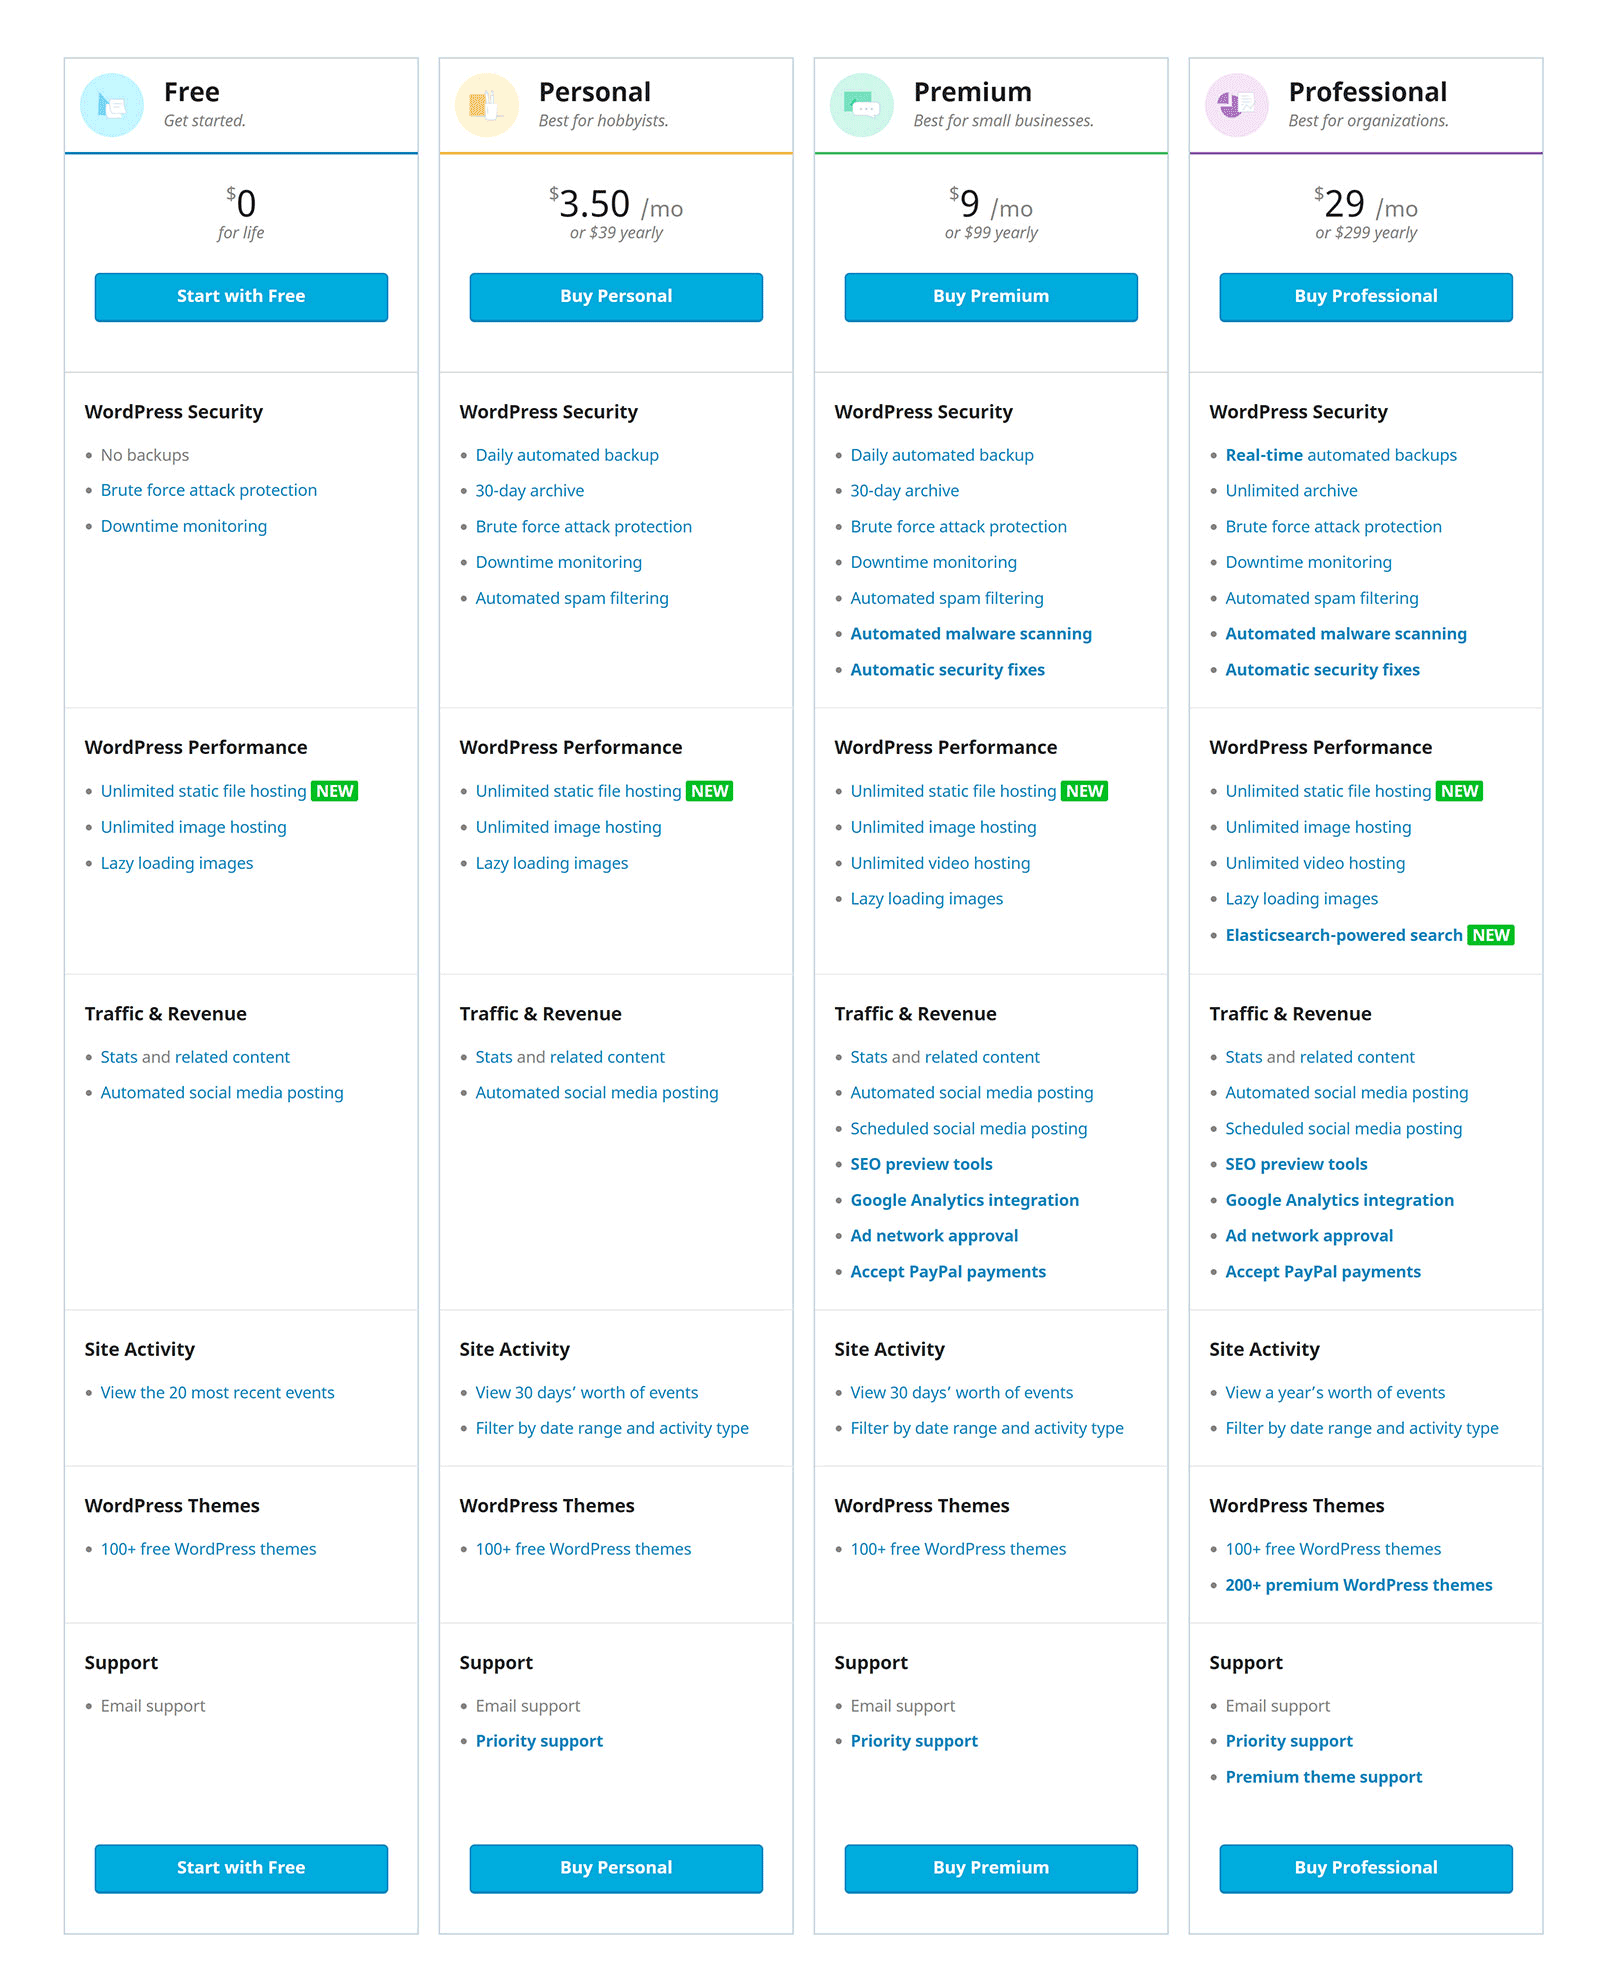
The Jetpack premium plan costs $9 a month or $99 a year. Upgrading to this plan improves your website security by adding malware scanning and automatic security fixes. This plan also includes video hosting, Google Analytics integration, SEO tools, WordPress.com ad network support and PayPal buttons.
Jetpack professional is the most expensive plan, retailing at $29 a month or $299 a year. This plan increases backups from daily to hourly, and all backups are kept as long as your membership is active.
The Elasticsearch-powered Jetpack Search is included in this plan too, as well as 200 premium WordPress.com themes. The activity log will also track events for up to a year.
As you can see, Automattic is being aggressive with its pricing.
The core functionality of Jetpack remains free, but, by offering their premium plans from just $3.50 a month, they make it very enticing to upgrade.
Final Thoughts
What started in 2011 as a useful collection of tools has grown to become one of the most versatile plugins in the WordPress.org plugin marketplace.
Should you use Jetpack on your own WordPress website?
I believe that, for most WordPress users, the answer to that question is YES. However, it will depend on what functionality you need.
A good way to evaluate Jetpack is to install the plugin on your website and test each of its modules. If you find that Jetpack is able to replace multiple WordPress plugins, or multiple third-party services, then it makes sense to continue using it.
By installing Jetpack on my own WordPress websites, I was able to stop using third-party services for downtime monitoring, email marketing and social media sharing of new blog posts. I also deactivated WordPress plugins for functionality such as related posts and lazy loading images.
In short, Jetpack has become a must-have WordPress plugin for me because it resolves several important issues and helps me to manage my WordPress websites more efficiently.
Used/using Jetpack? Thoughts?
By
TOP DEALS


Leave a Reply
All comments are held for moderation. We'll only publish comments that are on topic and adhere to our Commenting Policy.
This thing does not even remotely work and moreover, it creates so much work trying to get it to work. The thing never connects to Twitter for any lengthy period of time. The plug in wont even connect to 11 of the sites on one platform. The Thing disconnects every few hours on another server. It stops working on a totally other server. Every morning, we have to log back in to every account and reconnect it if it even connects in the first place. I cant believe this thing is for sale and most of all, the false sense of security is awful. Nothing about this plug in works and the people that run it, blame anything else but the app itself. This is an open source work in progress to be redundant plug in and product. this is not a finished product. The fact that its for sale has got to be illegal. They cant get the free one to work 24 hours a day. Let alone a paid version which is the same thing anyway. We have paid version and we use free versions. They do not work. Not ever. The thing has never even worked one time for a full 24 hours span of time. And, this is an automated platform. that’s not automated. you have to do more work than not. Its horrible. And, their customer service or developer do NOT care about it. Trying to figure out how it works or how to get it to work has cost this company so much money and so many wasted days. Only to get to the point where it still does not work. not ever. not even one time has this worked.
It is more of a bloatware than the benefit it offers. It also messes up with other plugins. IMHO it is not worth it.