

How to Install – and Set Up – a New WordPress Theme
Having chosen your ideal WordPress theme, you'll now be in a position to really get things moving: Deciding on layouts, inserting images, and generally fleshing out the main content for your site. Before you get to all that, though, you'll have to install and set up your theme -- and the goal of this guide is to show you everything that needs to be done. (Note: For more guides in the same series, head here: WinningWP Guides.)
-Note: WinningWP content is free to all. If you make a purchase through referral links on our site, we earn a commission (learn more).
A WordPress theme can look complicated to set up, but it's really all quite straightforward once you know how.
It’s very important to spend time choosing the best WordPress theme for you before you start, as, while setup isn’t difficult, it can be time consuming. You don’t want to waste time setting up a theme that’s not right for your site!
This guide will tell you everything you need to know to install and set up your new WordPress theme. We'll cover:
- how to install a WordPress theme (free and premium)
- additional theme setup: Plugins, content and widgets
- using the WordPress Customizer to set up the basics
- understanding theme options pages
- changing the look and feel of your site (with CSS customization and child themes)
- what to do if things don't look right
- how to get development work done
- updating your WordPress theme.
This is literally everything you need to know.
If you've just chosen a WordPress theme and are installing it for the first time, we'll hold your hand (not literally) through the installation process. If at any point you see a term and want to clarify what it means, see our WordPress Glossary.
If you've installed WordPress themes before and want a refresher, this guide will introduce you to some new tips and best practices to get your theme set up more smoothly.
Ready to dive in? Let's get started...
How to Install a WordPress Theme
Installing your WordPress theme is remarkably simple.
Before you start, you need to establish what type of theme you’ll be using. This will help later, as different themes have different setup requirements.
There are three types of WordPress theme:
- Free themes from the WordPress.org theme repository.
- Free themes from an external website.
- Premium themes from an external website or marketplace (such as ThemeForest or Elegant Themes).
Remember what kind of theme you've chosen, as you’ll need this throughout the tutorial.
Whichever theme you choose, if you’re working on a live site, you may wish to use a maintenance mode plugin before you install to give you some privacy while you set up the site.
How to Install a WordPress Theme from the WordPress.Org Theme Repository
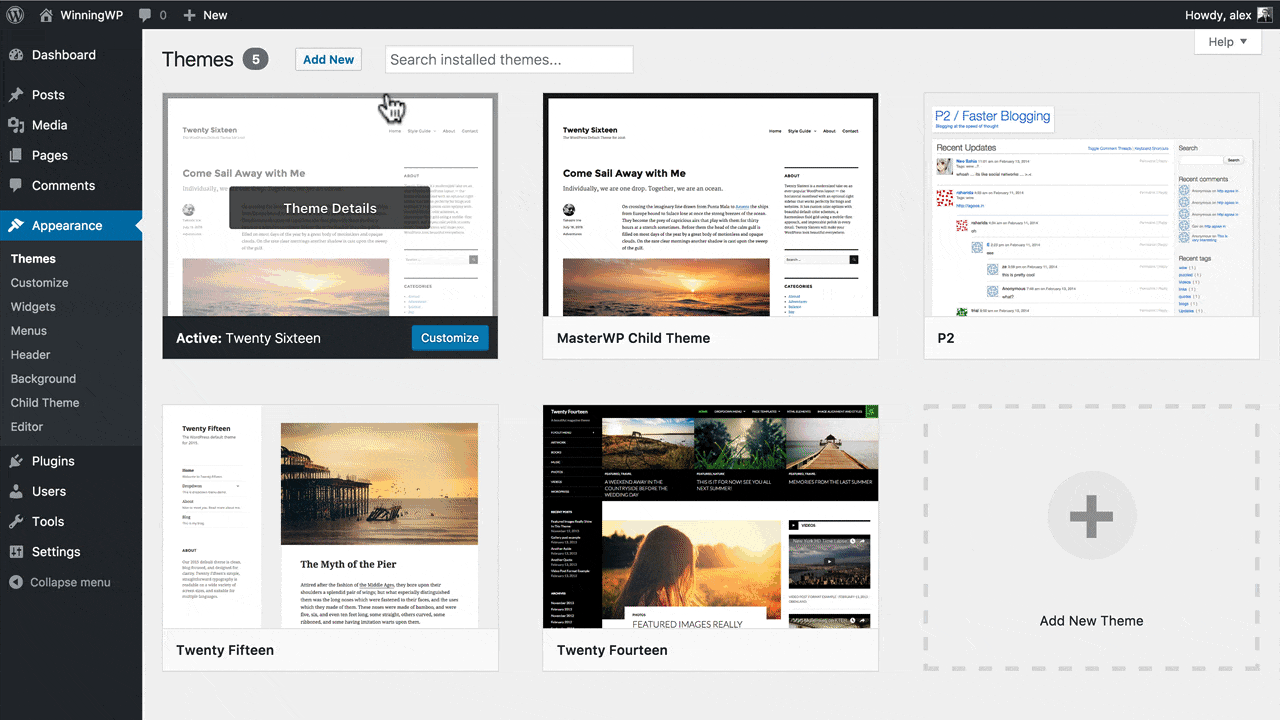
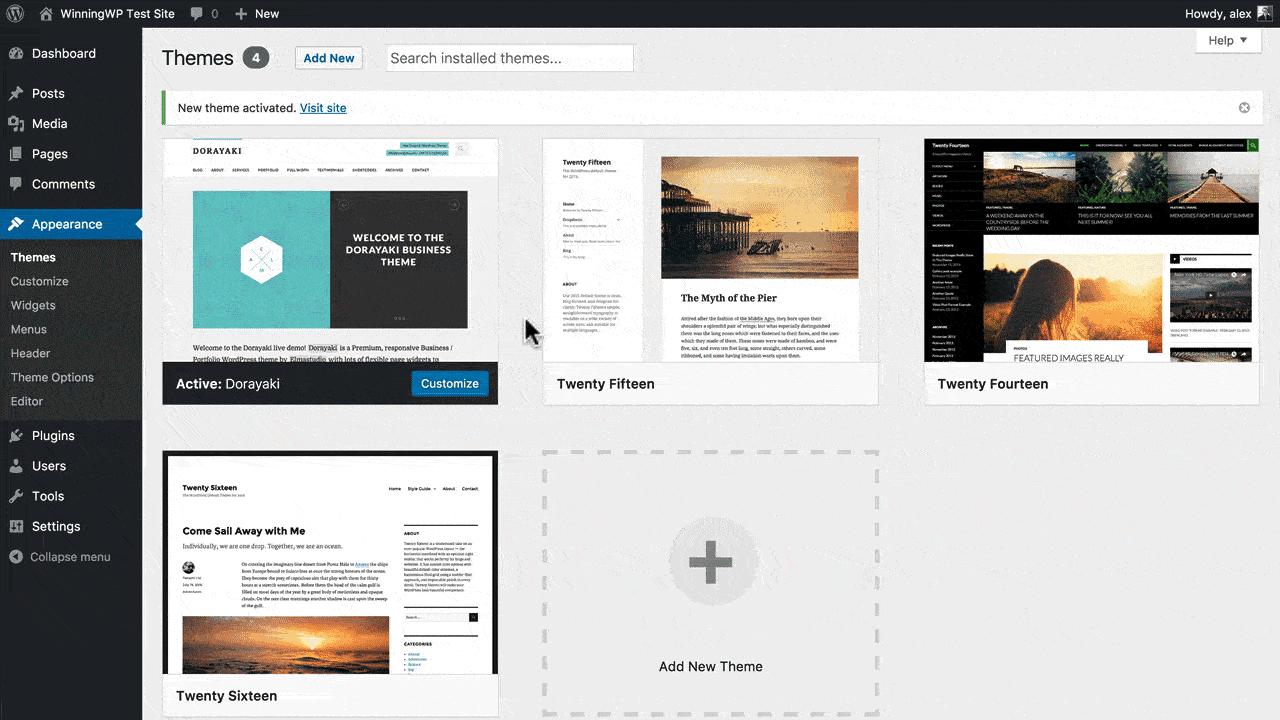
Installing a theme from WordPress.org is incredibly easy. Make a note of the theme’s name, and head to your WordPress Dashboard. Navigate to Appearance → Themes and click Add New.
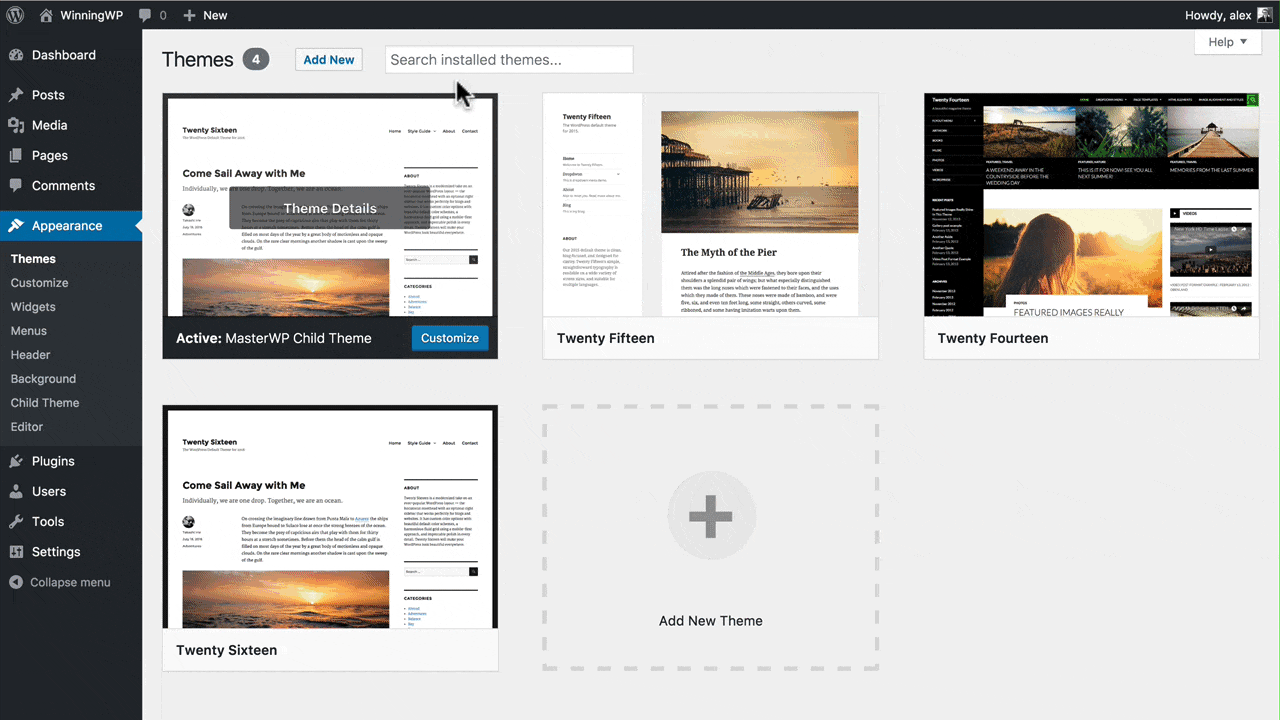
Now, search for the theme’s name using the search bar in the top right. Find your theme in the search results, and press Install. Wait for WordPress to load the theme onto your site and then hit Activate to set it live!
Told you it was easy!
How to Install a WordPress Theme Manually
The installation process for free themes from external websites and for premium themes is the same. This is the 'manual' method, and you’ll find these two types of themes grouped together throughout the tutorial.
First, you’ll need the zip file containing your theme, which you should have from your theme developer’s website. You don’t need to unzip or extract it, just know where it’s saved on your computer.
Next, head to your WordPress Dashboard and go to Appearance → Themes. Click Add New and then Upload Theme. You now want to select the zip file you’ve just downloaded. Press Install Now, and WordPress will upload the theme to your site. Once that’s done, press Activate and the theme will be running on your site.
WordPress misleads you here: The initial theme installation process is very easy, but there's typically a lot more additional setup still to be done. You're now ready to do this, so we'll cover it next.
Additional theme setup: Plugins, content and widgets
The 'additional setup' process varies between themes, but most themes have some additional setup required to get them looking as you'd expect.
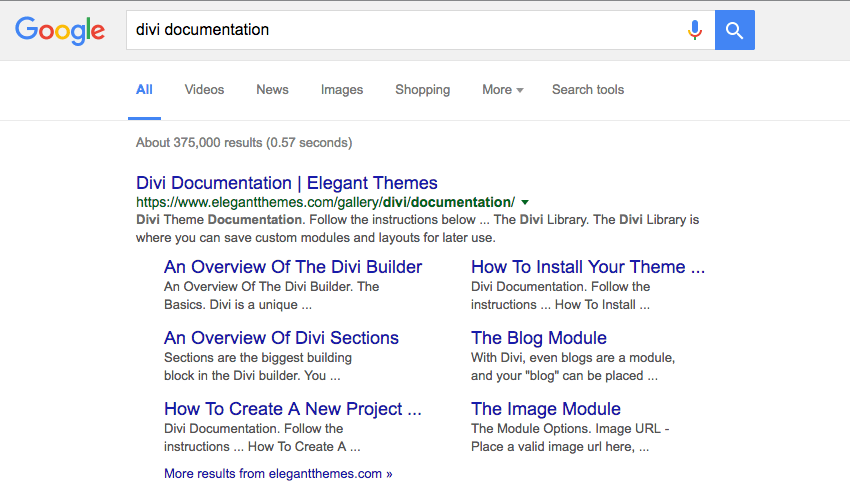
Your first port of call here should be to check your theme's documentation. This will be available from the theme developer's website, or you'll find it embedded into the theme. If it's not obvious where to find the documentation, do a search for theme name + documentation.
While a lot of themes have very good documentation, and some even have video tutorials, it's common for documentation to be not quite good enough. This guide will fill in the blanks for you.
Typically, your additional setup will involve some or all of the following:
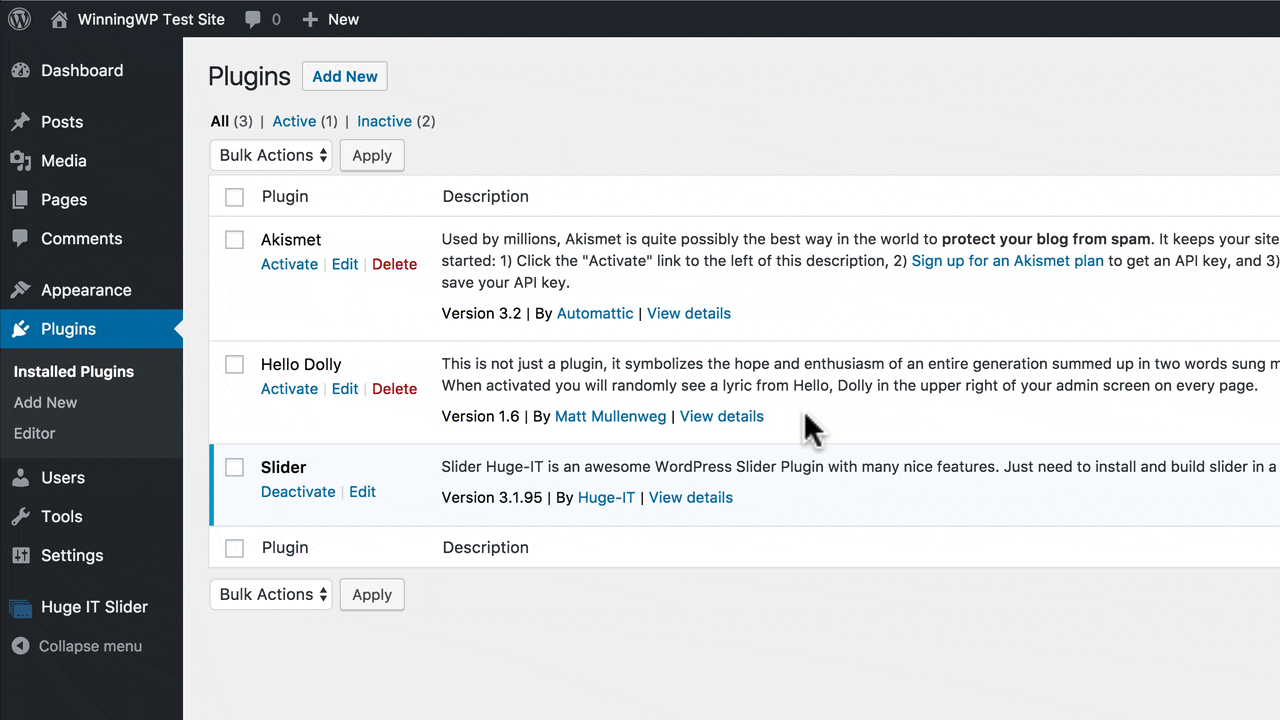
1. Install Required Plugins
Plugins are a way of adding extra functionality to WordPress (if you're unfamiliar with plugins, read more about them here). Themes often require you to install certain plugins to add the functionality the theme needs to work.
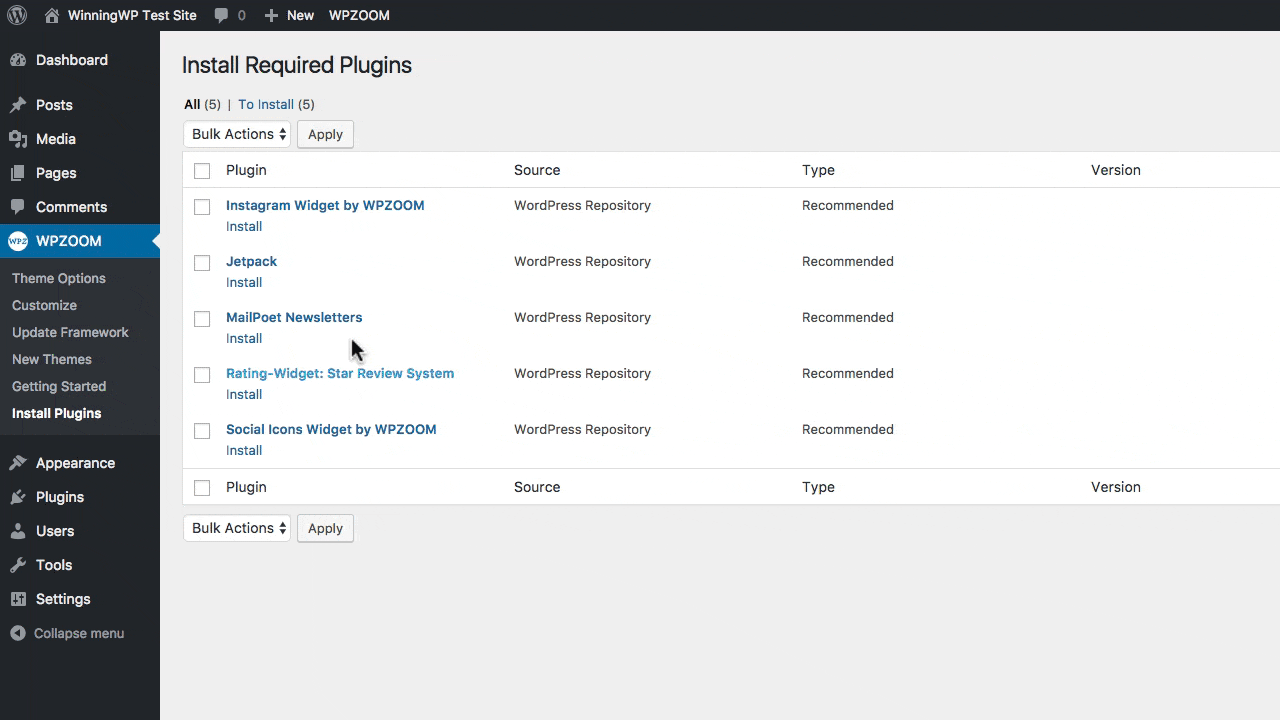
If your theme requires plugins to work, you'll either see a notice on your WordPress Dashboard after activating the theme, or details will be in the documentation.
Installing required plugins using a bulk installer is very easy. If your theme gives you a notice from the WordPress Dashboard that plugins are required, it's likely you'll be taken through this process automagically. Click through to bulk install plugins as prompted, and use the bulk select tool to bulk install and then bulk activate the plugins. It's usually not best practice to activate multiple plugins at once, but as these plugins have been specifically chosen to work with your theme there shouldn't be a problem.
Installing plugins manually is what you'll need to do if you have details in your documentation. If you find links to plugins in the WordPress.org Plugin Repository, install these by heading to Plugins → Add New on the WordPress Dashboard, and searching for the plugin name, installing and then activating.
If you're given zip files to download, install these by heading to Plugins → Add New but then clicking Upload Plugin. Add the zipped files one at a time, install and activate. Note: Installing plugins like this means you may not get automatic updates. See more here on updating plugins.
A question you may be asking: Why don't themes just include this? Why do I have to install plugins separately? Great questions! Installing plugins required by a theme can be a hassle, but it's the not the worst option. Themes used to have plugins built-in, but this posed a massive security risk. Keeping themes and plugins separate allows you to get updates that can patch security holes much faster. Additionally, if you switch themes you'll be able to keep the plugin's functionality and any data the theme adds.
2. Use the Theme Options Page
Your theme may have a theme options page that lets you control various elements of your theme. If it has one, you’ll find it under Appearance → Theme Options, or as a separate menu on the WordPress Dashboard with the same name as your theme.
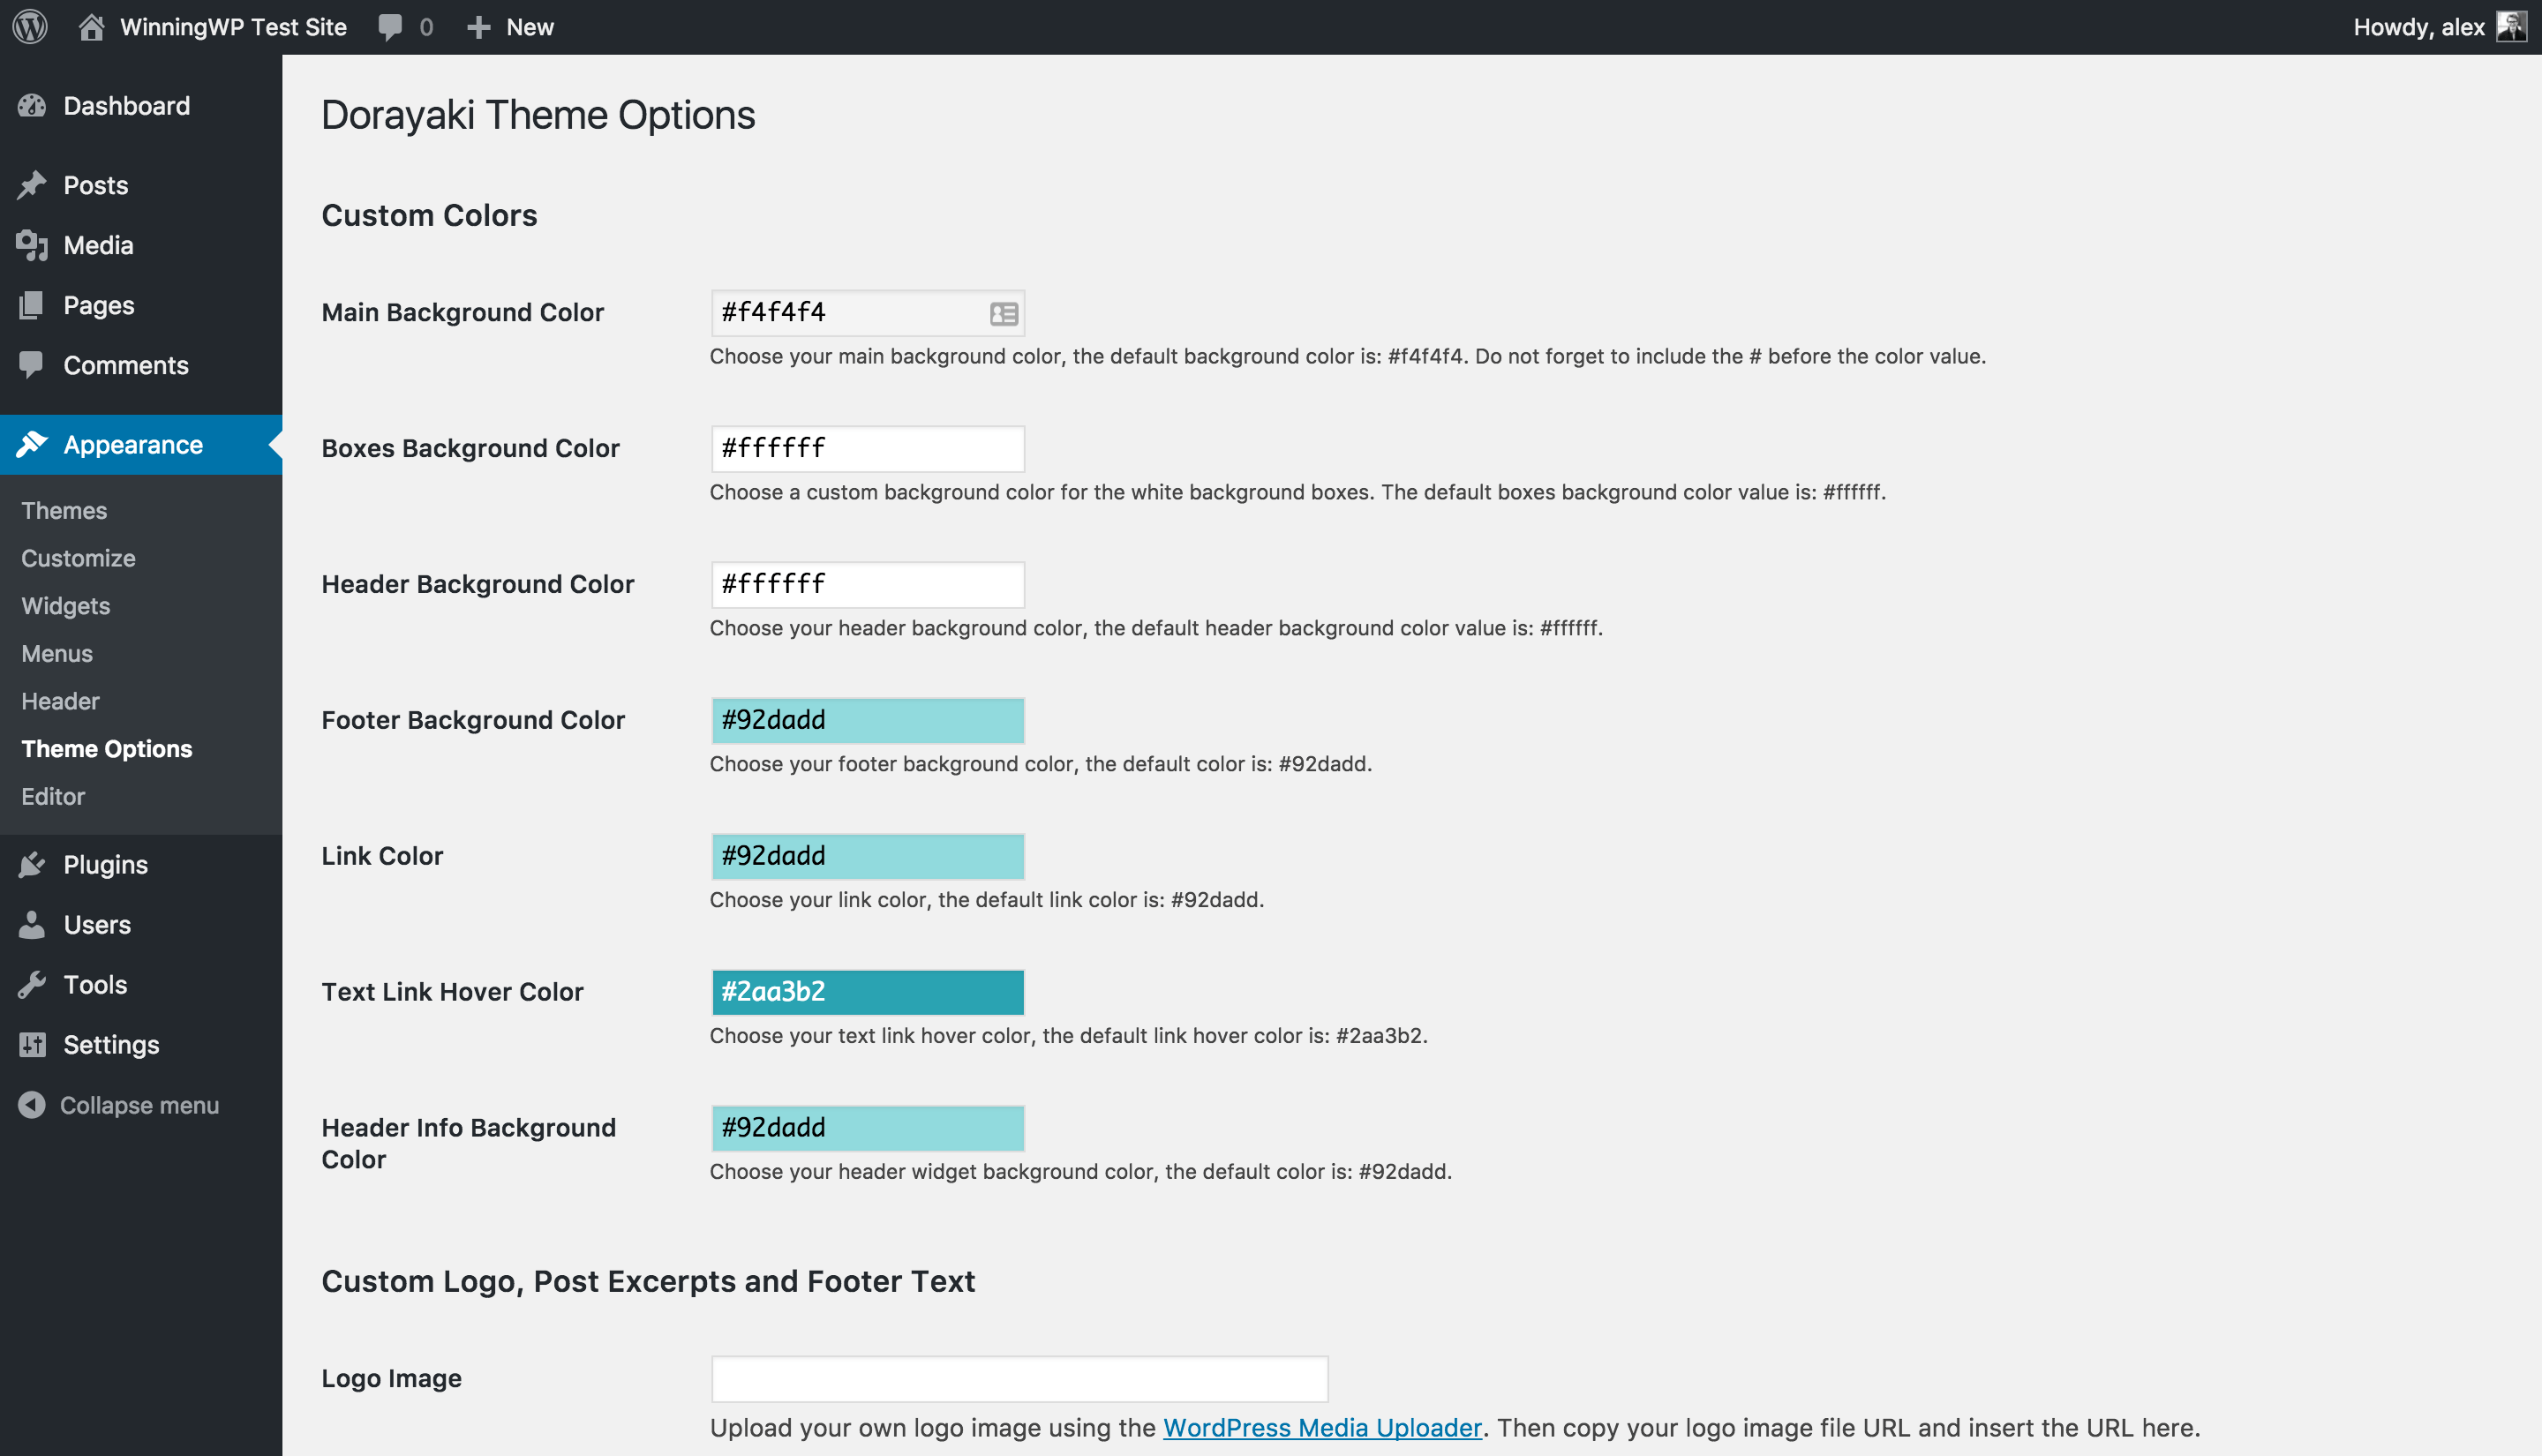
The theme options page is usually used for letting you choose how your site is set up and for inputting data. Each theme is different, but here are some typical options:
- Choose layout options.
- Customize colors and choose color schemes.
- Add Twitter and Facebook links.
- General homepage setup.
These should be fairly self explanatory, with each accompanied by a description. Setting up your options page is just a case of working through the different options and selecting the settings as you want them. You may also find additional direction in your theme's documentation.
Good to know: A lot of functionality previously found in theme options has been moved to the Customizer, where you get a live preview of your changes. If you're expecting to see an option in the theme options and it's not there, it's probably in the Customizer. We'll cover this in a moment.
3. Add Demo Content (Only if Appropriate)
Some themes include the content used on the theme's demo, which is the version you see when looking at it on the developer's website.
You can add demo content to get your site replicating the demo look and feel, which was most likely what persuaded you to choose the theme.
Themes offering this functionality will typically have it available from the theme options panel. Head there, look for a demo content tab and follow the instructions to import. This typically takes a couple of minutes, so be prepared to wait. Once the content is added, you may find your images are stretched. Use the Regenerate Thumbnails plugin to fix this.
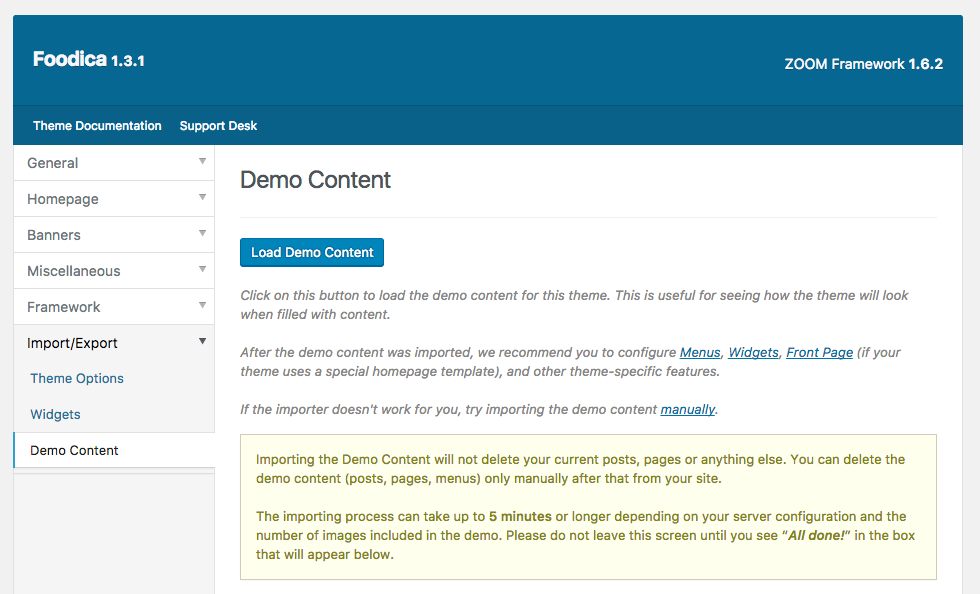
Note: Doing this will mix your content with the demo content and overwrite any theme options you've set up already. You'll also need to delete the content once you've finished setting up, so you may find it much easier to add your own content rather than import demo content.
The content from a theme’s demo is something theme developers think people want, but they rarely do. Don’t import it if you have content on your site already, and if you’re starting from scratch be aware you’ll need to delete all of the demo content before you can start your site.
4. Add a Static Homepage
WordPress' history is as a blogging platform, and its default homepage setup reflects this: It displays your latest posts. WordPress also makes it easy to change this to either a page from your site or a 'homepage template'.
For themes using a homepage template, add a new page with the title 'Home', and then select 'Homepage' (or similar) from the Page Templates dropdown, then publish the page. If you want to add a specific page as your homepage, create its content and publish.
Now head to Settings → Reading, and, under Front Page Displays, select your chosen homepage. Save, and you'll replace your homepage.
5. Use the Customizer to Set Up the Basics
The WordPress Customizer is a really useful tool: It lets you set up your site with a live preview of the changes you’re making.
The Customizer lets you do a lot -- change basic site info, header and background images and more -- but it’s up to individual themes to add support for specific Customizer functions. This means your theme may not let you do everything the Customizer supports.
You can see what your theme supports and what you can change in the Customizer by heading to Appearance → Customize. This will load up the Customizer.
You’ll see a two-pane view with a menu for what can be changed on the left, and a live preview of your site on the right. Using the Customizer is now just a case of clicking on what you want to Customize using the menu and making the changes you want. From WordPress 4.7, you can click the pencil icon on the live preview and you'll be taken to edit the appropriate section.
If you want to change your site title, for example, you’d click on Identity and then just change the text! Your live preview will show you what your changes will look like when you publish.
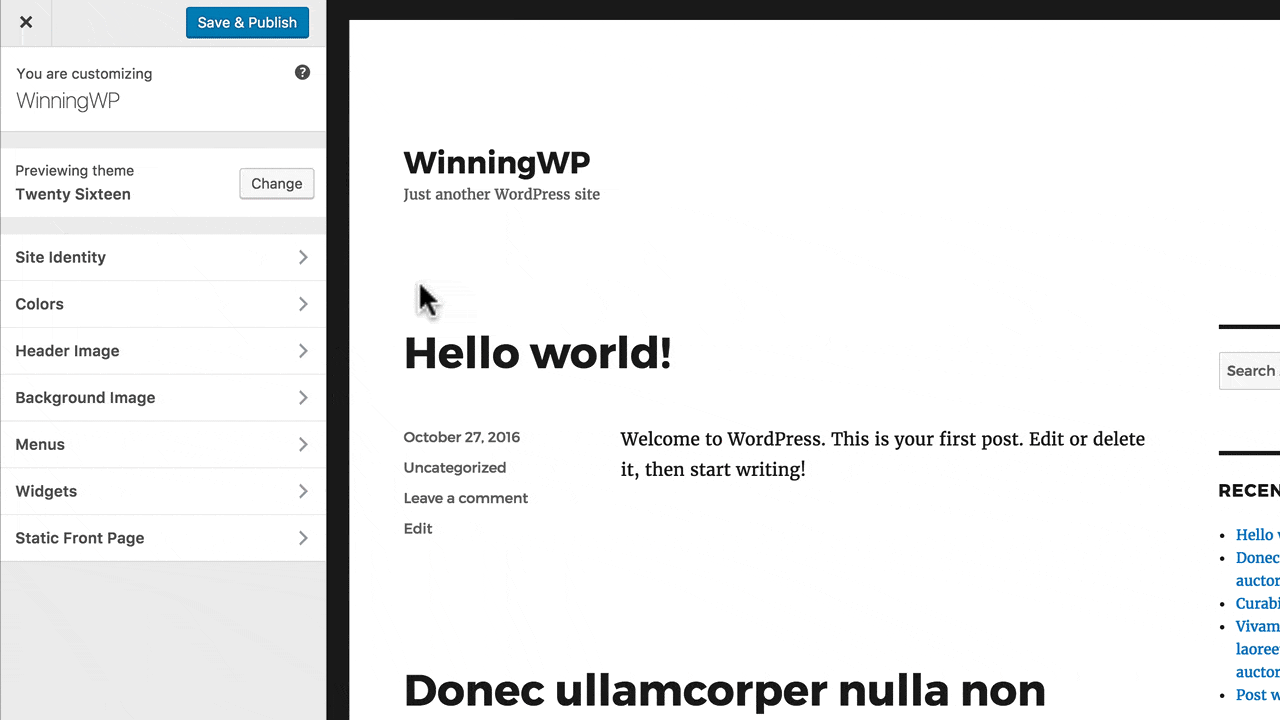
A second common example is changing your site's background color. You can do this by clicking on Colors or Background Color, and using the color picker to choose a color that matches your brand. Some themes will also let you upload a background image; if you're doing this, make sure your image is wide enough for all screen sizes.
You can now repeat this process through all of the Customizer's functions. When you're done, click Save & Publish to set your changes live.
The Customizer is easy to use, very powerful and, in the coming years, is only going to get more powerful still. It's well worth spending the time to get familiar with it so you can get your site set up exactly how you want it.
5. Set Up Widgets
Widgets are blocks of content you can add to predefined areas of your theme, known as widget areas (if this is your first time encountering widgets, read this for more).
Widgets are the best way to add extra content, such as latest posts, popular posts and email signup forms, to areas of your site. Plus, they have a really useful drag and drop interface.
Note: Before you set up your widgets manually, check whether your theme has one-click import for widgets (if it does, it'll mention this in its documentation).
To use widgets head to Appearance → Widgets. You'll then see available widgets on the left-hand side, and the widget areas these can be dragged into on the right-hand side. Helpfully, both the widgets and widget areas have descriptions telling you what they do and where they show on your site.
Setting up widgets is just a case of dragging and dropping the ones you want into the widget areas you want them to go. Look out for descriptions that note specific widgets especially suit specific widget areas (this will likely be the case if your theme uses widgets on its homepage).
Once a widget is dropped into a widget area, you can set its options. Expand the widget to see these and set them how you want. Save once you're done, and the changes will be made to your site straight away.
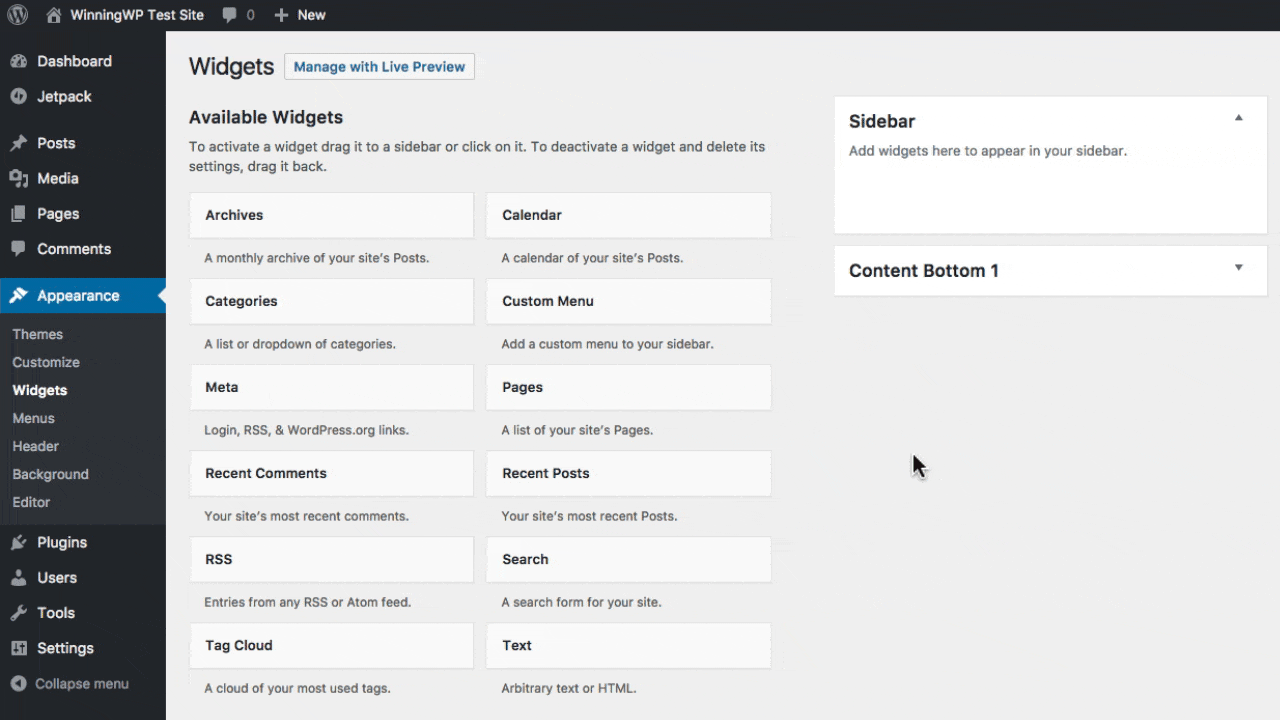
You can drag and drop as many widgets as you want into each widget area, and drag and drop widgets between widget areas if you decide a widget would look better elsewhere on your site.
Widgets are the best way of adding extra content to your site, so take the time to get them looking exactly how you want.
6. Add Menus
WordPress features a handy menu editor where you can set up the navigation menus that display on your site. You'll find this under Appearance → Menus.
As with widgets, items you can add to your menu can be found on the left-hand side, and the structure of your menu on the right-hand side. If it's your first time creating a WordPress menu, create a new menu and give it a name that reflects where you want it to display.
It's now just a case of adding the content you want to your menu (use View All to see everything, and Custom Links to add anything that's missing), and arrange it how you want with drag and drop. You can indent menu items to get them displaying as sub-menus.

Once you're done, tick where you want the menu to display under Menu Settings. Typically, you'll see your main navigation called Main Menu or Primary Navigation. Now, Save Menu and create new menus for any other menu locations. Note: You don't need to fill all your menu locations -- just do what's useful for your site.
7. This Is When You Find out Whether You like Your Theme
The additional setup process is where you find out whether or not you have a WordPress theme you like and that suits your site. Each theme is different, but follow the steps above and you should be able to set up any WordPress theme properly.
If you've done all of this and don't like how your site looks, or something looks wrong, you can either change it or switch themes.
As we mentioned earlier, it's often difficult to imagine how a WordPress theme will look until it's actually on your site, so there's no harm in switching themes at this point. Recognising this, most premium WordPress theme developers have a 'cooling off' period, during which you can get a refund, so you can make use of this if you decide you want to switch.
For most WordPress themes, however, you won't need to switch completely -- you'll just need to make some changes. Next, we'll look at how to change how your site looks.
Changing the Look, Feel and Functionality of Your Site
Themes rarely look precisely how you want them to out of the box, nor will they come with all of the customization features you'll want. To change the look, feel and functionality of your site beyond what your theme supports via its options page, the Customizer and widgets, you'll need to use some code.
This isn't as daunting as it sounds, but, if you don't fancy changing any code yourself, then for both of the methods we're about to cover you should be able to get help from your theme's developer. If you're struggling, check in with them for assistance. Alternatively, for more advanced changes, you can hire a developer. We'll cover how best to do both of these later on.
Customizing with CSS
WordPress makes it very easy to make small style changes straight from the Customizer. If you want to make simple changes to colors, widths and fonts, customizing with CSS is the way to do it.
CSS is a coding language used to control the styling output of websites. As you'd imagine, to customize your site with CSS you'll need to know some CSS. Fortunately, it's one of the more accessible web languages, and you can learn only the bits you need quite quickly. This video tutorial will show you the very basics.
When you're ready to customize some CSS, head to the Customizer as before, but now select Additional CSS. You can now enter your CSS code into the text box and -- as this is the Customizer -- see a live preview of the changes.

WordPress has only just added this feature, so it's not as fully developed as some plugins. If you're making serious changes, you'll want to use the Jetpack plugin's Custom CSS feature. You'll also find some additional CSS customization help in this guide.
Creating a Child Theme for Advanced Changes
For any other changes, you'll need to create a 'child theme'. A child theme is a separate theme designed especially for making advanced changes to theme files. It inherits all of the styling and functionality of the 'parent theme' (this is just your main theme), so you only need to add the files you want to customize.
If a change you want to make requires changing your theme's files, do not do this. You should absolutely not edit your theme files directly, as when you update your theme you'll lose all the changes. Instead, create a child theme to avoid this problem.
Child themes also have the advantage of separating your changes from the main theme, so, if anything goes wrong, you can easily revert.
The One-Click Child Theme plugin will make the process easy for you, and this tutorial will show you everything else you need to know.
Child themes are essential for advanced changes to your site. Anything involving changing theme files needs to go into a child theme, and we can't stress enough the importance of doing this. Use a child theme to avoid problems developing in the future.
What to Do When Things Don't Look Right
Every website is different -- different hosting, different plugins and different users -- and sometimes things go wrong. This isn’t unusual, so if you find yourself with a theme that’s broken it’s not a cause for serious alarm (if you decide you need better hosting check out our list of WordPress hosts here).
What should you do when your theme doesn’t look right? Here's our three-step process.
1. Have You Got Any Plugin Conflicts?
The most common cause of broken WordPress themes is plugin conflicts.
A plugin conflict happens when your theme and a plugin you've installed are trying to use similar code (specifically, similar code libraries such as jQuery), causing one or both of them to break. The fix typically offered is to deactivate the offending plugin and find an alternative. Plugins using sliders, image galleries or popup boxes are the most likely offenders here: If something's broken on your theme, deactivate any plugins you have that fit this description, and this should fix it.
Note: This is a mildly unsatisfactory solution, as it doesn’t actually fix your plugin conflict, it just makes it go away. Finding an alternative plugin is an option, but this may not be possible, or you may have paid for the plugin and be unwilling to switch. In this case, you'll need to get support. Try both the theme and plugin developers, and use the steps outlined below to make sure your request is dealt with promptly.
If you do need to get theme support, you'll almost certainly be asked to check plugin conflicts, so it's worth doing the check yourself first.
2. Get Support from the Theme Developer
This is how most people get their WordPress themes fixed. The type of support you can get depends on the type of theme you have:
- Free themes from the WordPress Theme Repository: Developers can choose to answer questions at the WordPress.org Support Forum, but are under no obligation to do so.
- Third-party free themes may offer support via their websites, even for free themes (this is also worth checking with Theme Repository themes). Most will only offer support to paying customers, so it may be worth buying something (see if there’s a 'premium' version of your free theme) just to get support access.
- Premium themes should have support included, and you’ll find this on the developer’s website. Note: It's usual for support and updates to only be available for 12 months after a purchase, so get your support requests in early!
When getting support, make it easy for the person helping you. Help them to help you, and you’ll get a solution faster. When submitting your support request, provide as much information as possible, and if you’re asked for details, such as purchase ID, site URL or version numbers, provide all of these.
A lot of developers will ask for admin access to your site. This is common practice, but not necessarily a good idea. One leading WordPress publication likened it to 'handing them the keys to your home'.
The household analogy is useful here: Would you give your house keys to someone fixing your boiler? Probably not, but you’d be happy to let them in and leave them to it. Do the same with your WordPress installation: Use Controlled Admin Access, and give access to the bits of your site needed to fix the issue, but nothing else. If you want to be extra careful, use Plainview Activity Monitor to see exactly what changes have been made.
Whichever safeguards you use, when giving admin access to your site, create a new admin account and delete it once any issues are fixed.
Make the most of developer theme support, but make sure your site is in safe hands.
3. Hire Someone to Fix It
This is the most expensive option, and should be a last resort. If your theme’s developer is unwilling to fix your problem (if we’re at this stage, it’s likely the problem isn’t your theme’s fault, and the developer will argue this), you’ll need to hire someone to fix it for you.
Numerous WordPress-specific services will be happy to help you, and you can find a list of WordPress maintenance and support services here. If you’re being referred by a developer, though, they may recommend someone familiar with their own themes.
When something doesn’t look right, the steps here are going to help make sure it gets fixed.
Getting Development Work Done
The best way to get any major changes made to your site is to hire a professional developer. This isn't cheap, but you'll get precisely what you want at a high quality.
It's worth noting that trying to make savings here probably won't be worth it: Badly written code will cause you future headaches, so spend more upfront for something that's going to work.
Trying to save money at this stage by cutting corners could mean you end up paying more. If you don't invest in the right support, things may not go as planned, and you'll have to spend time and money solving the issues.
Sites such as Codeable make it easy to connect with a network of developers globally. You can post what you want done, how much you want to spend and your timeframe, and you'll get contacted by developers wanting to take on the project. Most developers on the site charge $60 to $90 an hour, so expect to pay more than you paid for your theme, but bear in mind you're getting a personalised service.
You can also get major development work done through Codeable. Expect major reworkings of your theme to start at $2,500 and max out at $10,000, depending on their complexity. Custom development work is expensive, but it's the best option if you want features or design added to your site that aren't commonly available.
Updating Your WordPress Theme
There’s one final thing left that you need to know about: Updating your WordPress theme. This is important, as keeping WordPress up to date is one of the best ways of keeping it secure -- and that includes your theme.
Before you start, it’s important to have a backup -- you’ll find some WordPress backup solutions here. Updates also illustrate the importance of using the customization methods mentioned earlier -- if you edit your theme files directly, when you update you'll lose your changes. Customize as we discussed, and there won't be any problems.
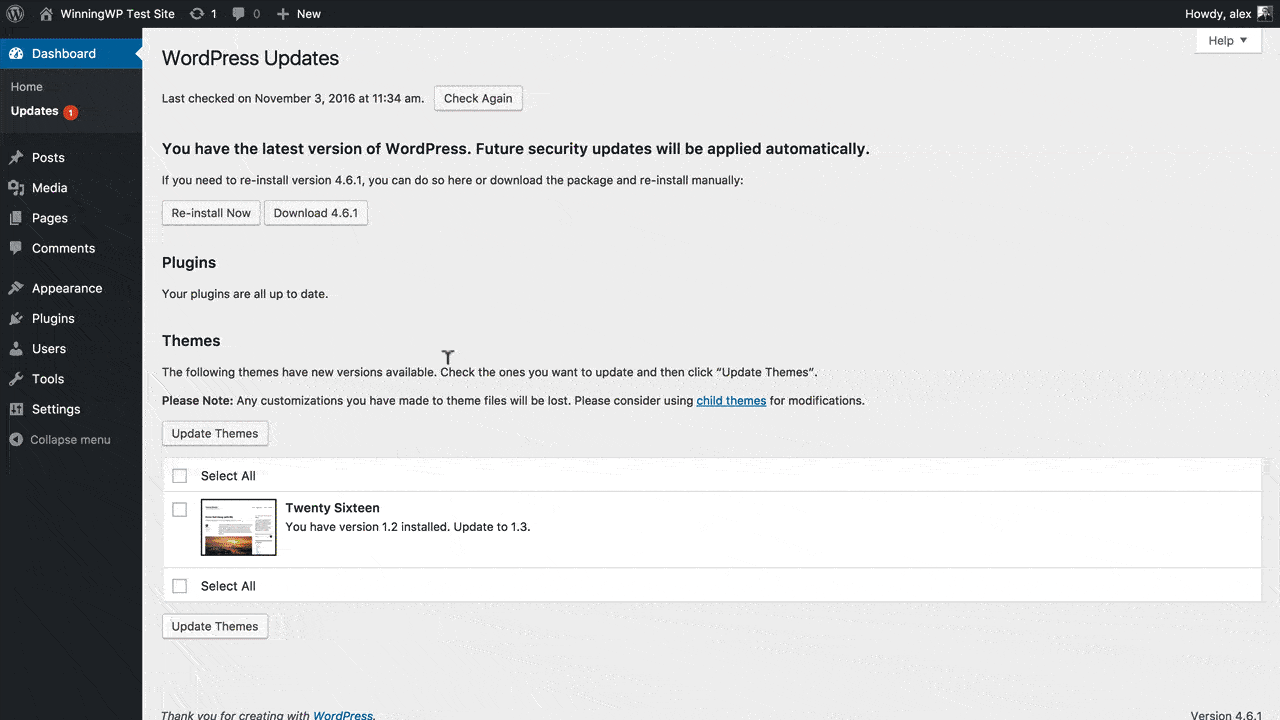
Updating a WordPress Theme from the WordPress.org Theme Repository
If you’ve got a theme from the repository, updating it is really simple. When updates are available, there’ll be a notification on the Updates tab of the WordPress Dashboard. You just need to head there, tick the box and update your theme. That’s it.
Updating an External WordPress Theme
Updating external themes is slightly more complicated. Your theme may have automatic updates available, in which case you’ll get an update 'nag' on the WordPress Dashboard, and you can update the same way as you would with repository themes.

If automatic updates aren’t available, you’ll need to do this the manual way.
Manually updating a theme involves a couple of steps: Putting your site into maintenance mode, deleting your theme and then re-uploading it. This sounds complicated and difficult, but it isn’t. All your settings will be saved, so it should be a smooth process -- and you’ve also got a backup in case something goes wrong.
Start by putting your site into maintenance mode, using a maintenance mode plugin from this list. Updating your theme only takes a couple of minutes but involves activating a different theme, so you’ll want to stop visitors from accessing your site.
With maintenance mode on, head to Appearance → Themes, and activate the latest WordPress default theme. Now, click on your theme, and press the Delete button in the bottom right corner. You’ll be asked if you’re sure -- it looks scary, but you are sure.
You can now install the latest version of your theme. Download it from your theme developer’s site, and install it in the same way you did earlier: Click Add New, Upload Theme, add your zip file, install and activate. Now double check how your site's looking. The maintenance mode plugin should let you see your site (but hide it to visitors), so check everything looks okay.
All of your settings and widgets will still be there, but things will likely have changed with the theme, so there may be new options to configure or little tweaks to fix. You should be able to find a changelog by Googling 'developer name, theme name, changelog', and this will tell you in detail what has changed and what’s new.
Once you’re happy everything’s looking good, disable maintenance mode and show off the updated version of your site to readers!
Where to Go from Here?
You now know how to install, set up, customize and update your WordPress theme, and are set to put this into practice. So get to it!
There are a number of next steps you can take, depending on how much control you want over your site:
- Do nothing! Your theme is set up now, so you just need to keep everything up to date.
- Change your mind. A theme in practice can look very different from how you imagined it, and it’s totally fine to decide you don’t like your site once it’s set up. See here for how to choose your WordPress theme.
- Install some plugins. WordPress’ great strength is its flexibility, and plugins epitomise this by letting you add just about any functionality you can think of. Here’s a great list of recommended plugins to look at.
- Customize more. If you want more control over how your site looks, you’ll need to customize it. This guide digs into WordPress customization.
WinningWP Staples
There's more to us than just WordPress guides. Here's a few favorites:


Under the Hood
Wondering what plugins, tools and services we used here at WinningWP? We spill the beans...
WordPress Deals & Coupons
Save oodles of cash on some of the best hosting, themes & plugins around!
Good luck!
Every WordPress theme is different to the next — and learning the various intricacies of a brand new WordPress theme isn't easy. Worse still, things can occasionally act in unexpected or confusing ways. The trick is to stick with it and work through any issues that come up one by one — and sooner or later you'll be as pleased as punch with everything you've managed to achieve: just keep going until you get there!