
WP Simple Pay Review – The Best Stripe Payment Plugin for WordPress?
- By
- Last updated:
- Leave your thoughts
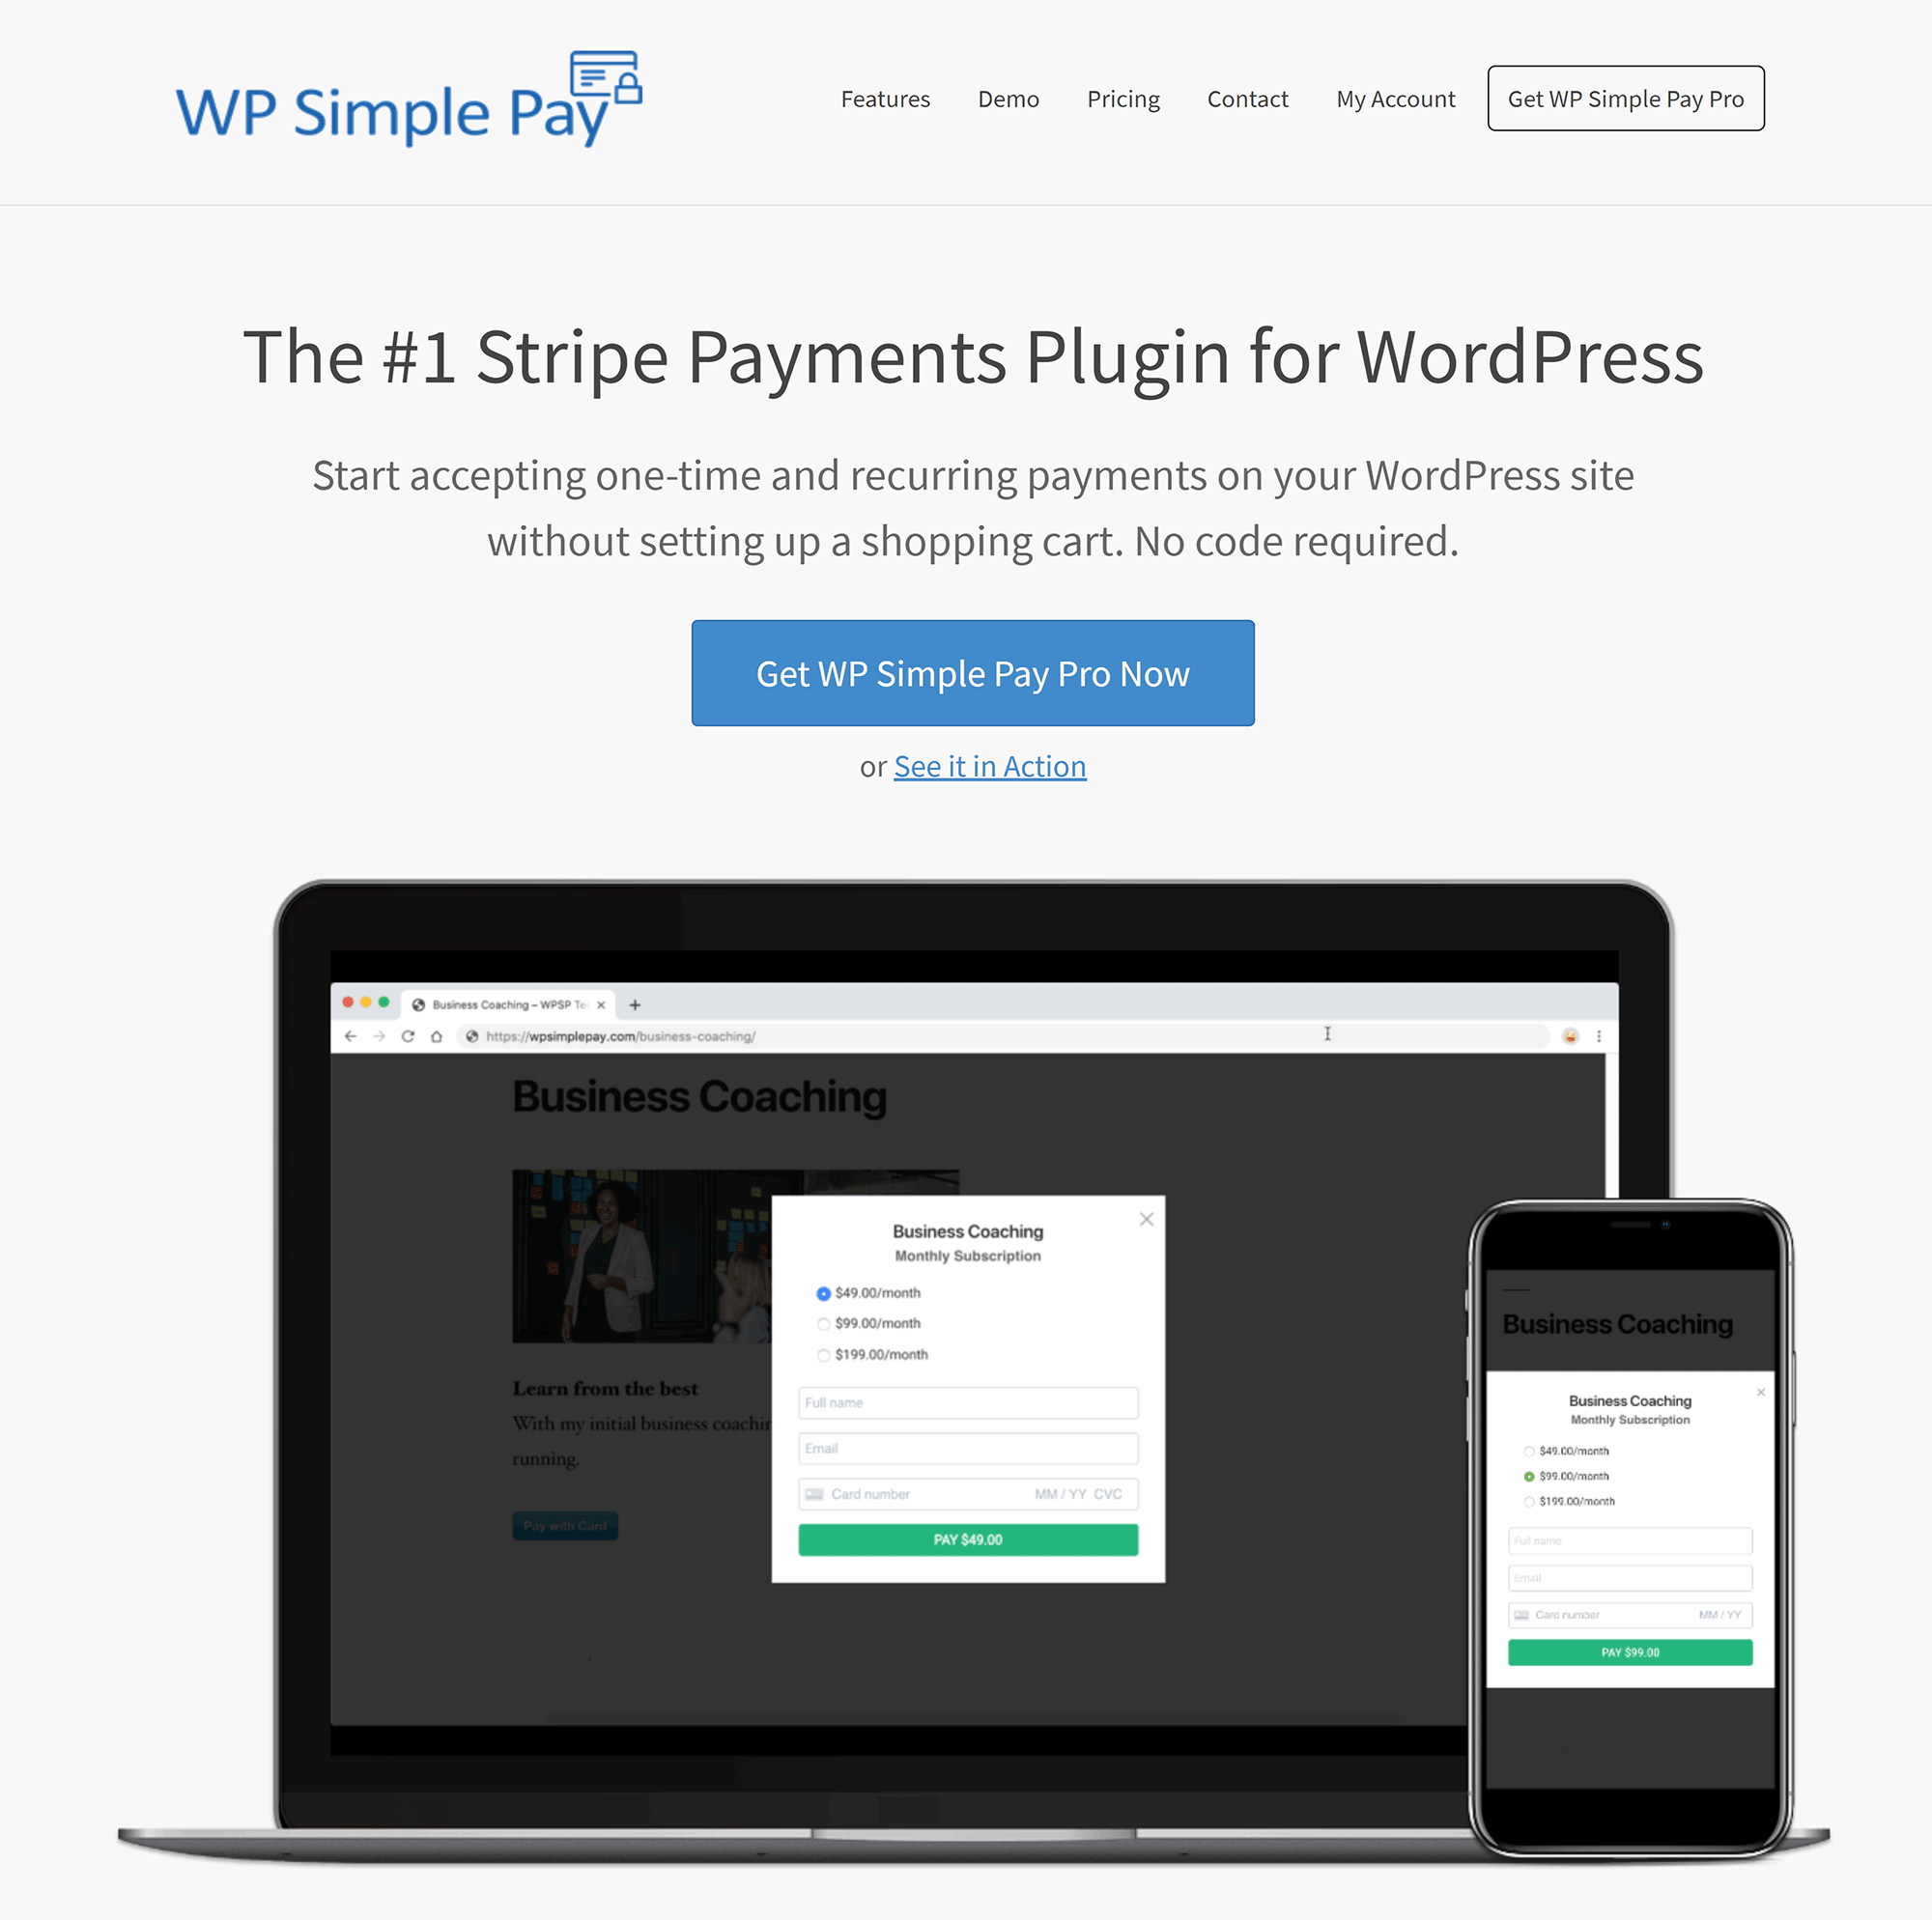
WP Simple Pay is a WordPress payments plugin that allows you to accept one-time payments and recurring payments through your website, designed to work specifically with the Stripe payments service.
It lives up to its name by offering a user-friendly interface, and, while there are many options to configure, in comparison with a solution such as WooCommerce, setting payments up via WP Simple Pay is relatively simple.
The free version of WP Simple Pay doesn’t restrict usage, but you’ll unlock lots of additional features if you choose to upgrade to the full version.
Whether you run a small blog, local club, large membership website or high-traffic online shop, you can use WP Simple Pay to accept Stripe Payments, and, in this article, I’d like to show you what it can do.
Table of Contents
What Can WP Simple Pay Do?
WP Simple Pay was launched by Phil Derksen in 2014 as a way of accepting Stripe payments on WordPress websites, and, in 2018, the company joined forces with Pippin Williamson’s Sandhills Development.
Phil spoke about this transition in the blog post ‘Why I Merged My Profitable One-Person Software Company with a Bigger Player‘.
Sandhills Development is behind many popular WordPress plugins.
In addition to its flagship plugin, Easy Digital Downloads, it’s also behind AffiliateWP, Restrict Content Pro, Sugar Calendar and WP Simple Pay.
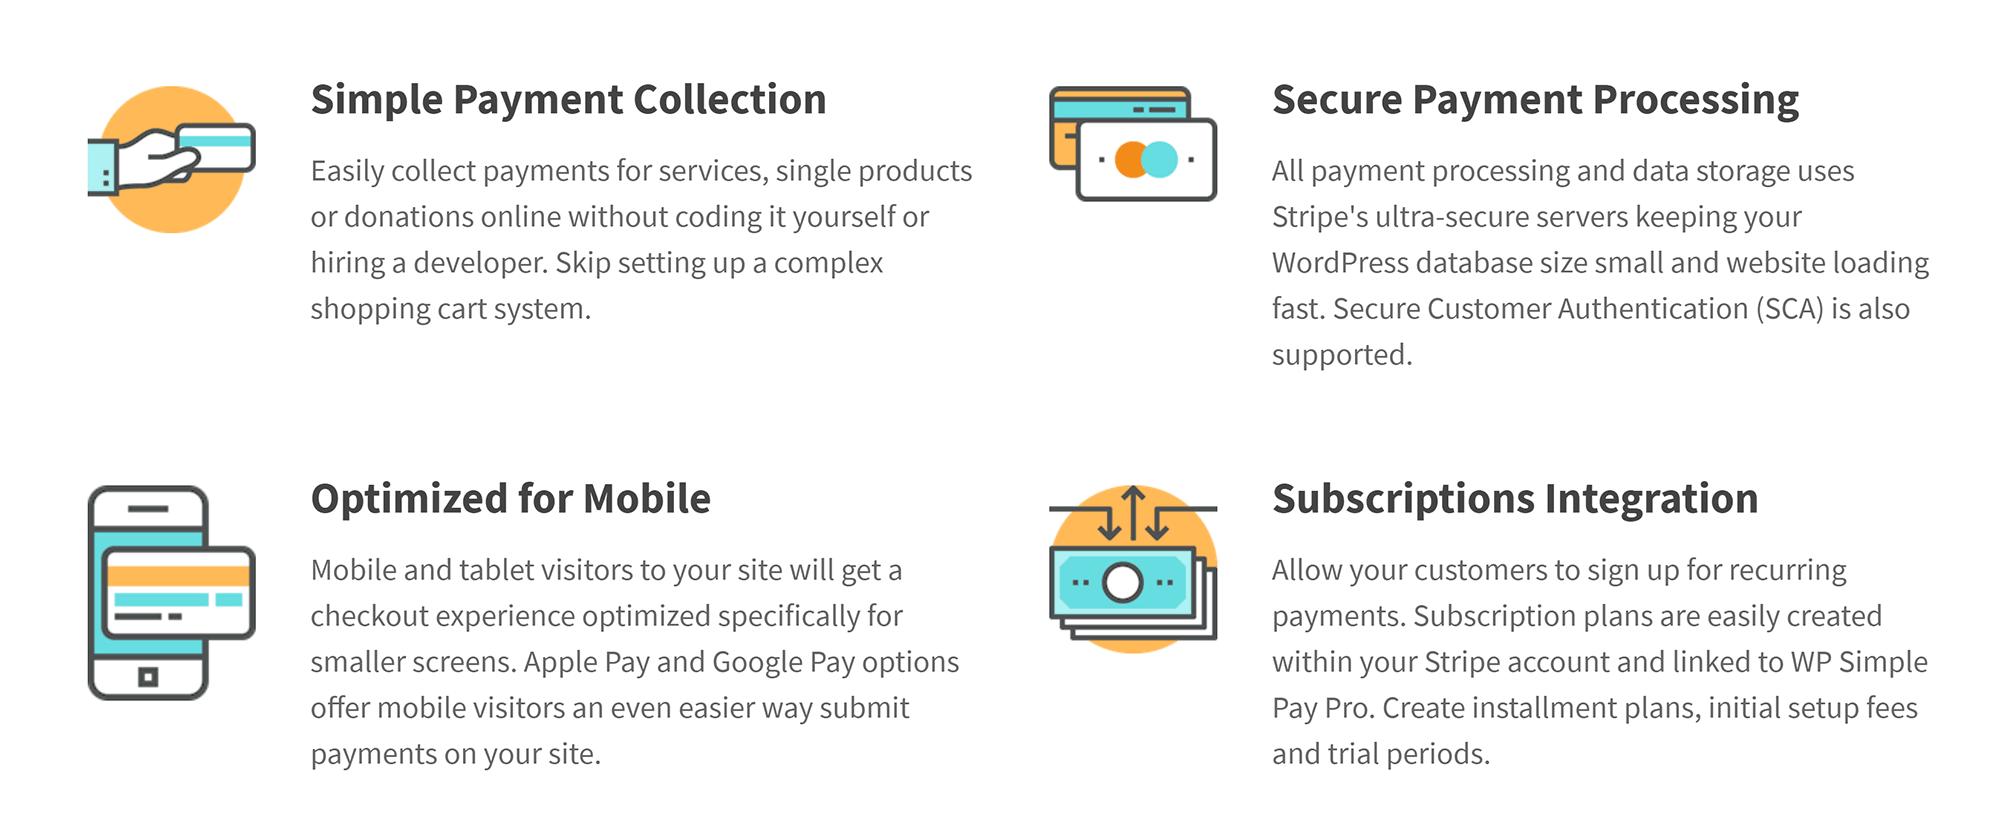
One of the key features of WP Simple Pay is that the process is straightforward for both website owners and customers. The developers have simplified the process of accepting payments — whether it be a single payment or a subscription.
As you’d expect, it’s been optimised for tablets and mobile devices, and mobile visitors can also pay using Apple and Google Pay.
However, please be aware that WP Simple Pay has purposely limited options, so it doesn’t become bloated like many alternative solutions. Therefore, all customer and payment information is stored on your Stripe account, not on your WordPress website.
Payment forms are created using a user-friendly drag-and-drop form builder, and there are three form types: Embedded form display, overlay form display and Stripe checkout.
Checkboxes, text fields and buttons are all available, while custom fields can also be created, so you can specify exactly what information you require from customers when they buy from you.
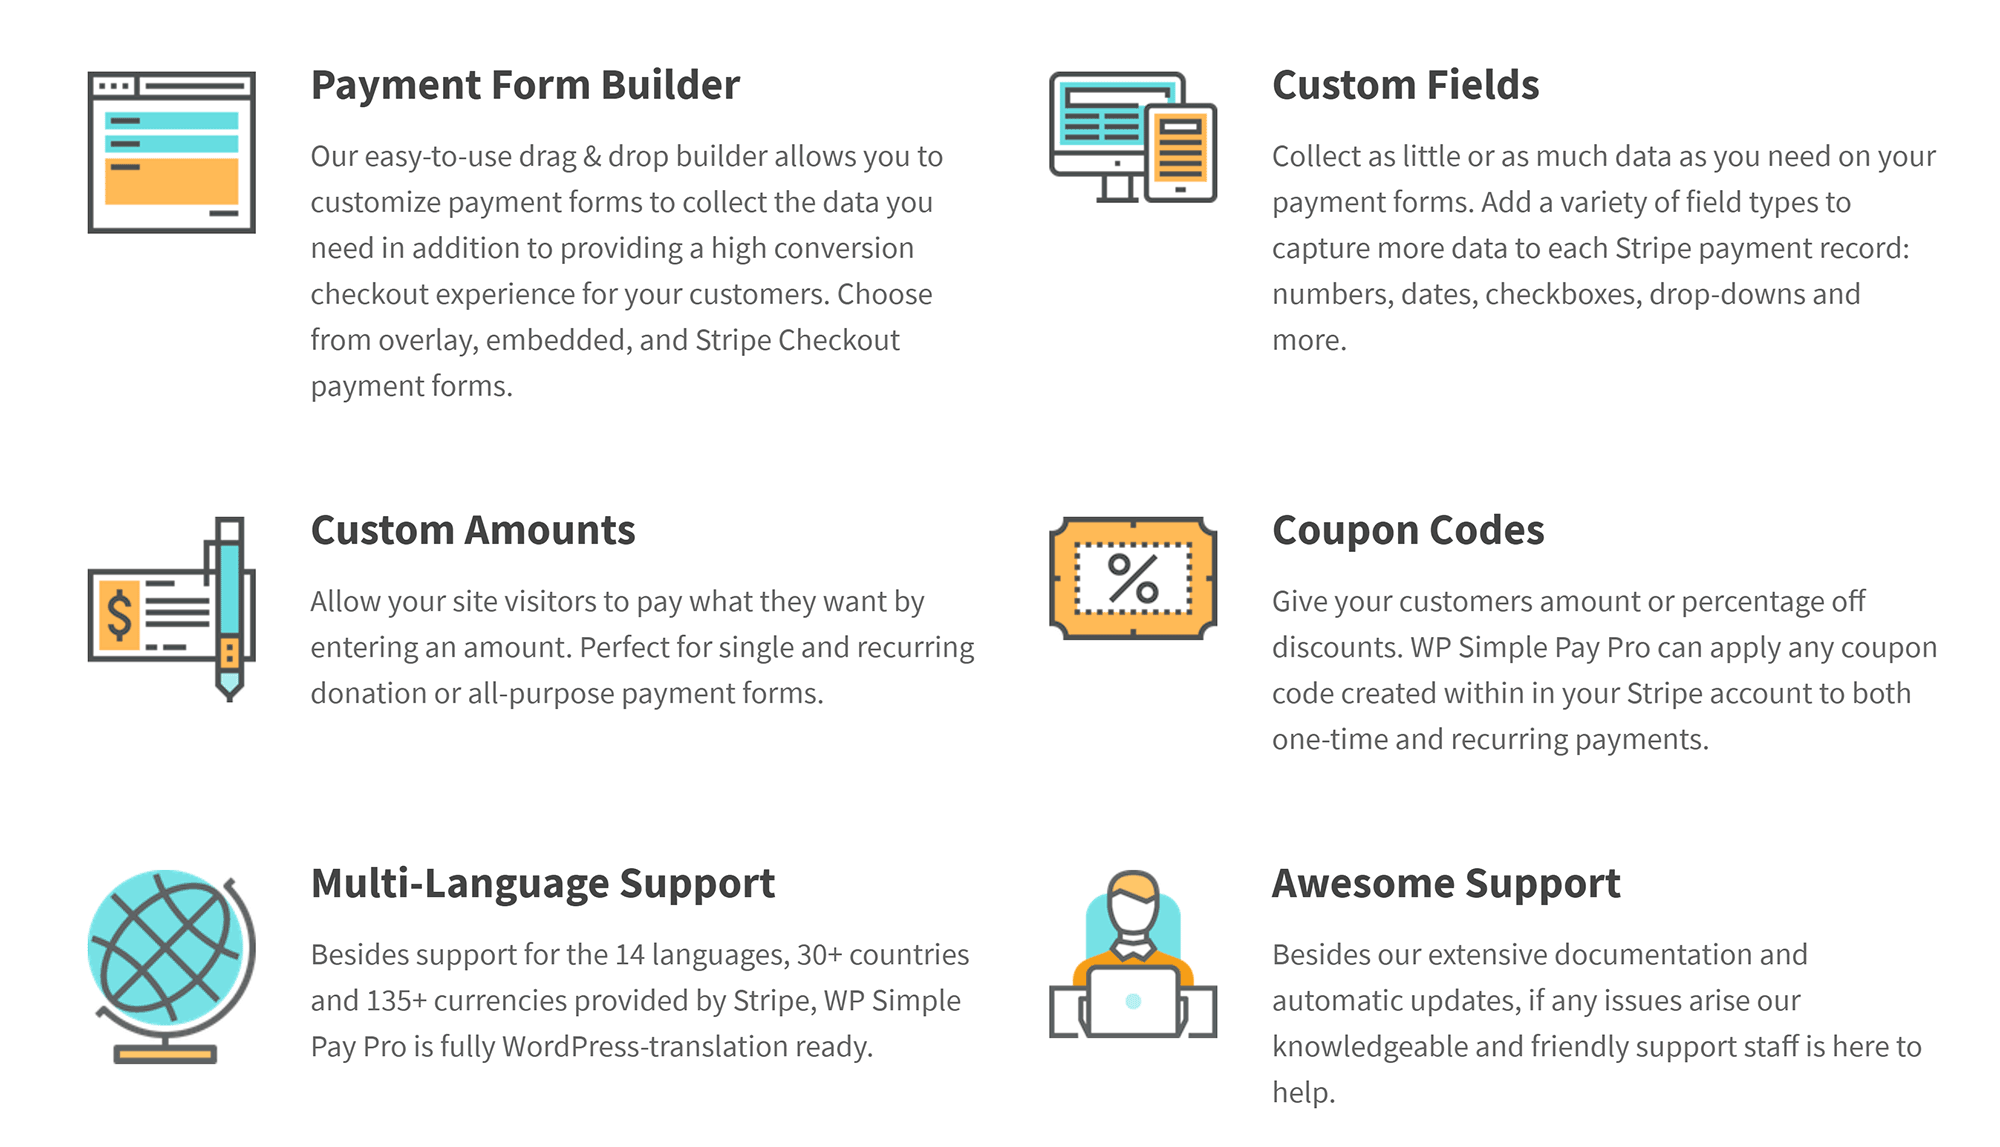
Charities will appreciate the fact that WP Simple Pay supports customers entering custom values. This is useful if you’re accepting donations on your website and want users to decide how much they send.
It also features coupon codes and supports 14 languages, more than 30 countries and more than 135 global currencies.
Check out the WP Simple Pay features page for a detailed list of what the plugin can do.
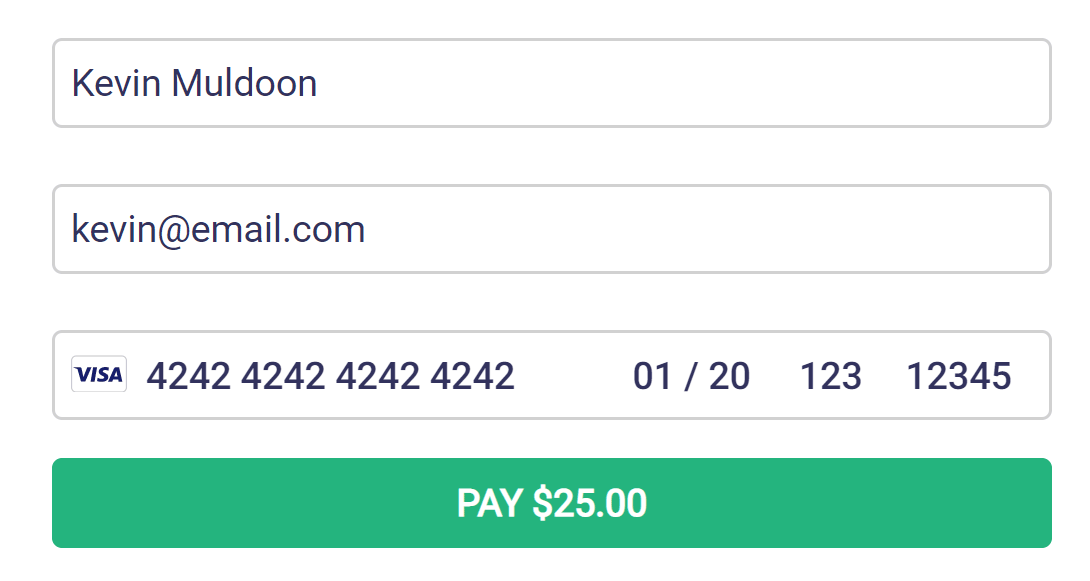
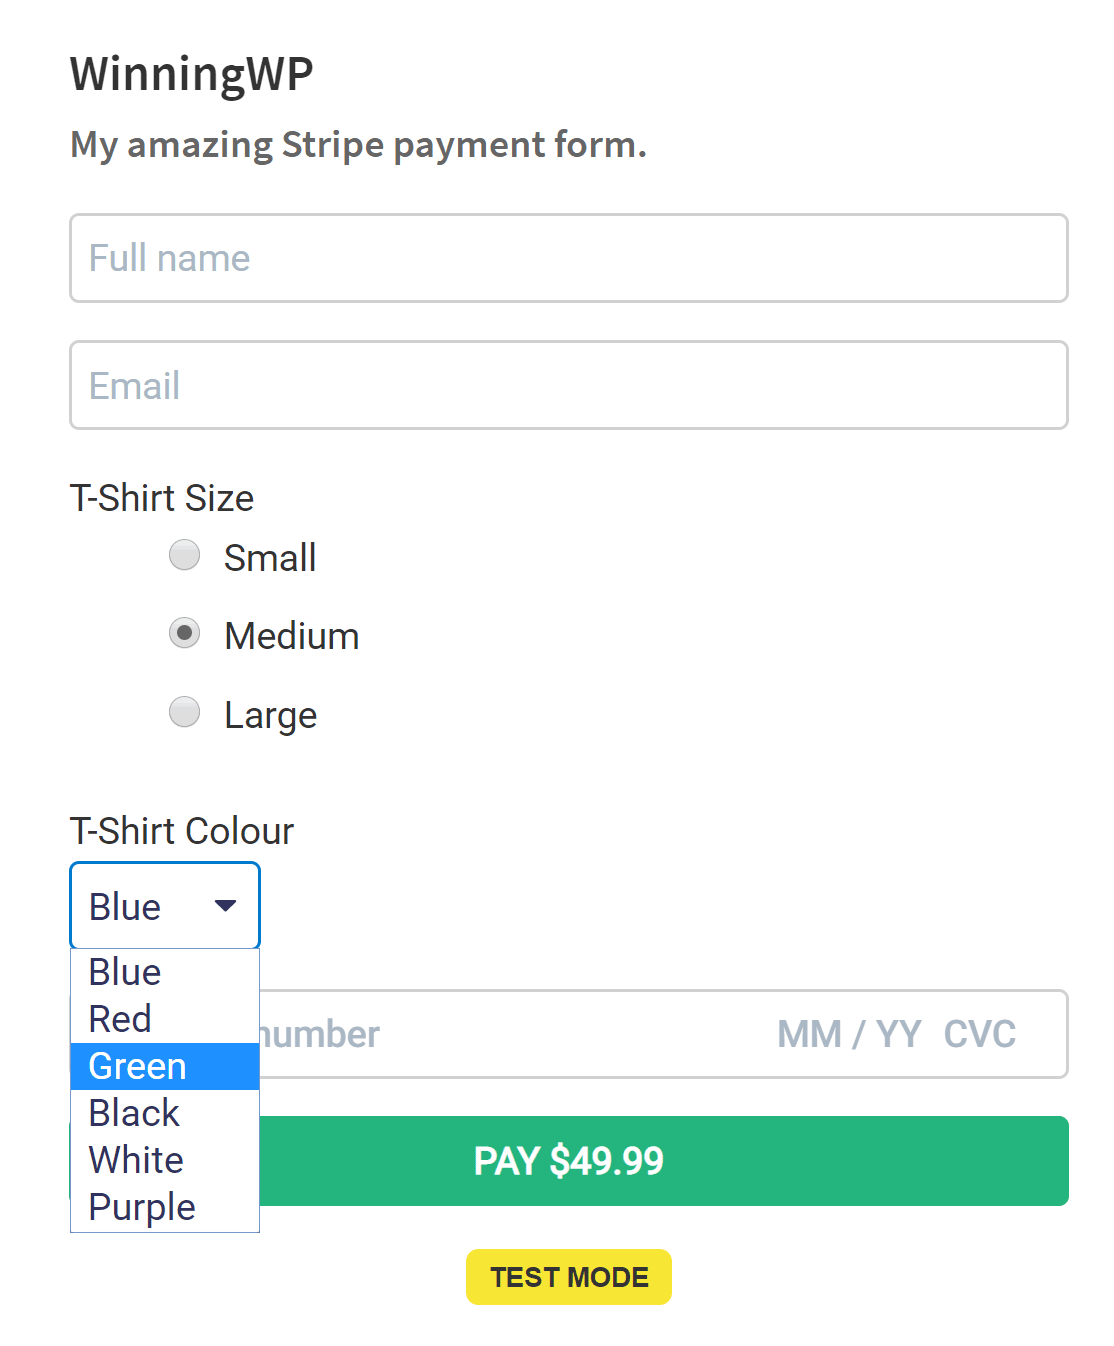
Amazing Front-End Forms
One of the most attractive features of WP Simple Pay is the beautiful payment forms it allows you to create.
There are three different form display types: Embedded, overlay and Stripe checkout.
An embedded form is a regular form that can be embedded into posts and pages on your website.
In contrast, with an overlay form, the user has to click on the buy button. The form will then be displayed over a transparent background on your page.
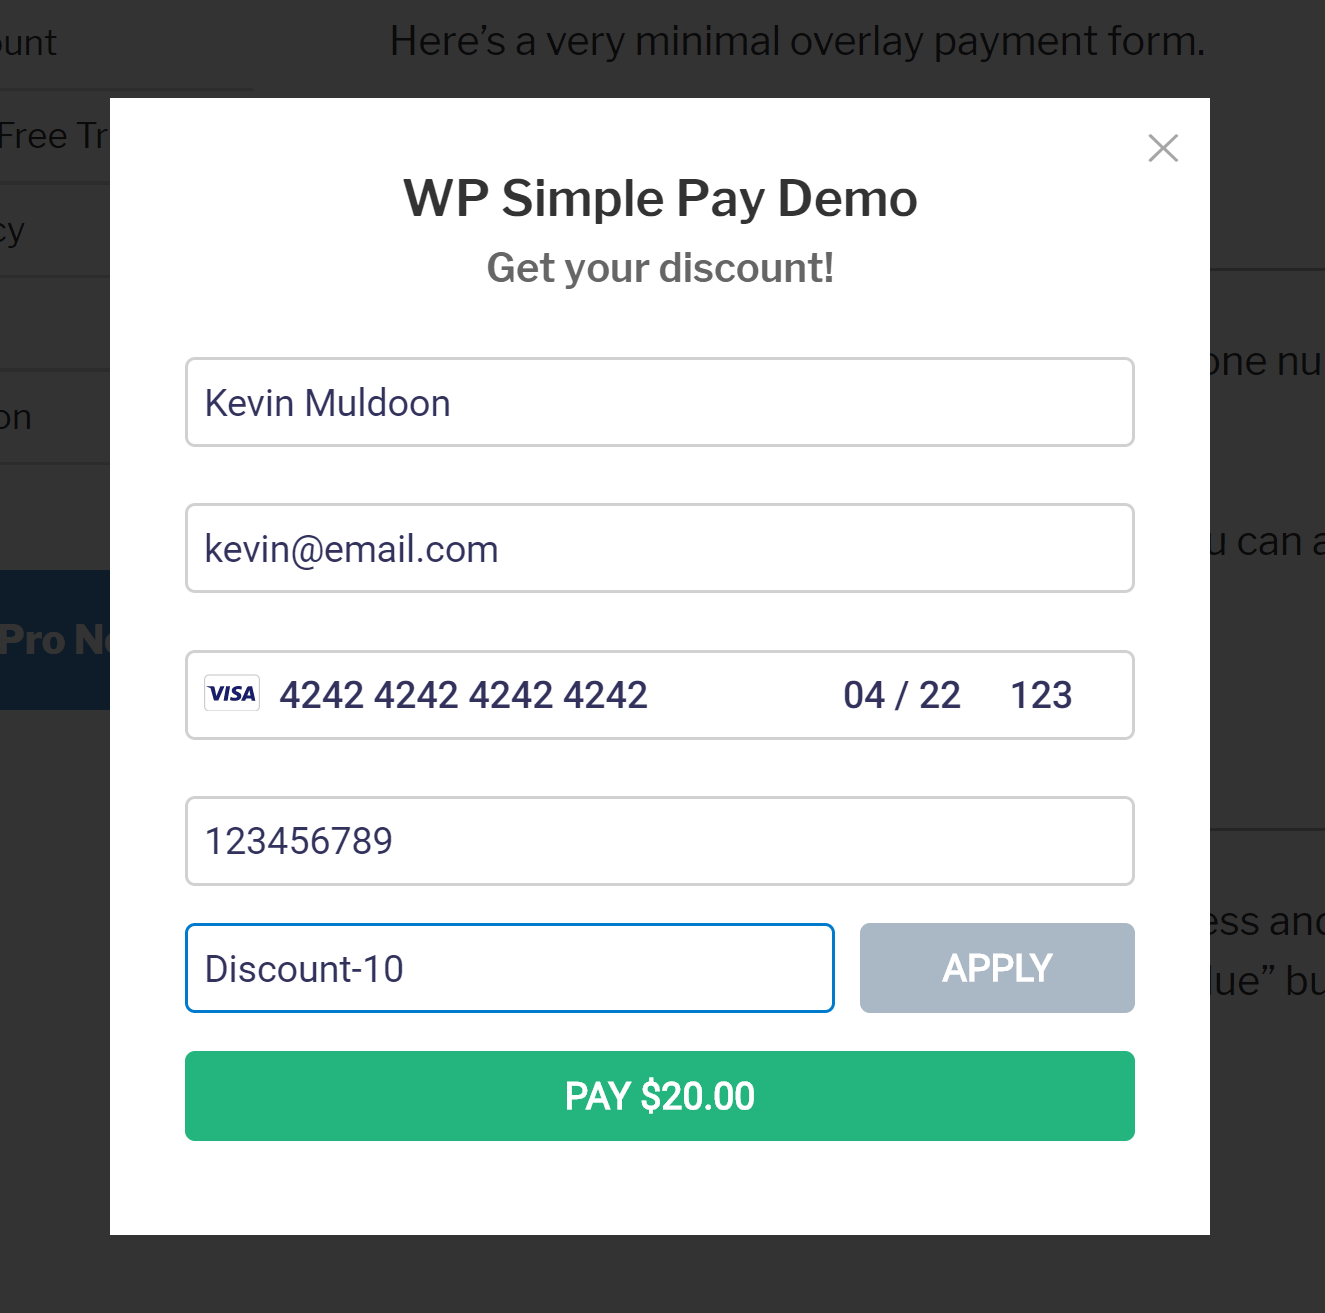
The Stripe checkout form type displays a few fields on your page, but displays others in a Stripe checkout form (which is hosted by Stripe)
As you’ll see later, you can incorporate many different fields into your forms, such as name, address, coupon codes and more. Checkboxes and dropdown boxes can also be used for features such as trials and subscriptions.
Check out the demo area of WP Simple Pay to see more examples of the plugin in action.
WP Simple Pay: Lite vs Pro
WP Simple Pay Lite is a fantastic payment solution in its own right — it’s perfect for simple payment setups, and it has no restrictions on the number of forms you can create.
WP Simple Pay Pro does, of course, offer more features, but I recommend testing the lite version first to see how WP Simple Pay works.
From a usability point of view, both plugins work the same way.
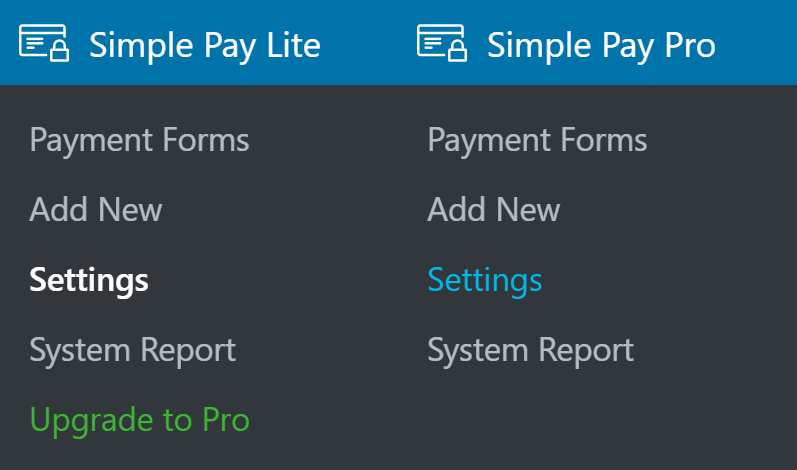
The WP Simple Pay admin menu has links to your existing payment forms, the new payment form page, settings and system reports. There’s an additional link in WP Simple Pay Lite that directs you to the Lite vs Pro feature comparison page.
In the next section, I’ll show you how you can set up payment forms using WP Simple Pay Pro.
The process of creating forms is identical in the lite version, but premium features are hidden and replaced with a promotional message for WP Simple Pay Pro.
Settings for premium features aren’t displayed in the lite version, but you’ll see a reminder of what the pro version offers.

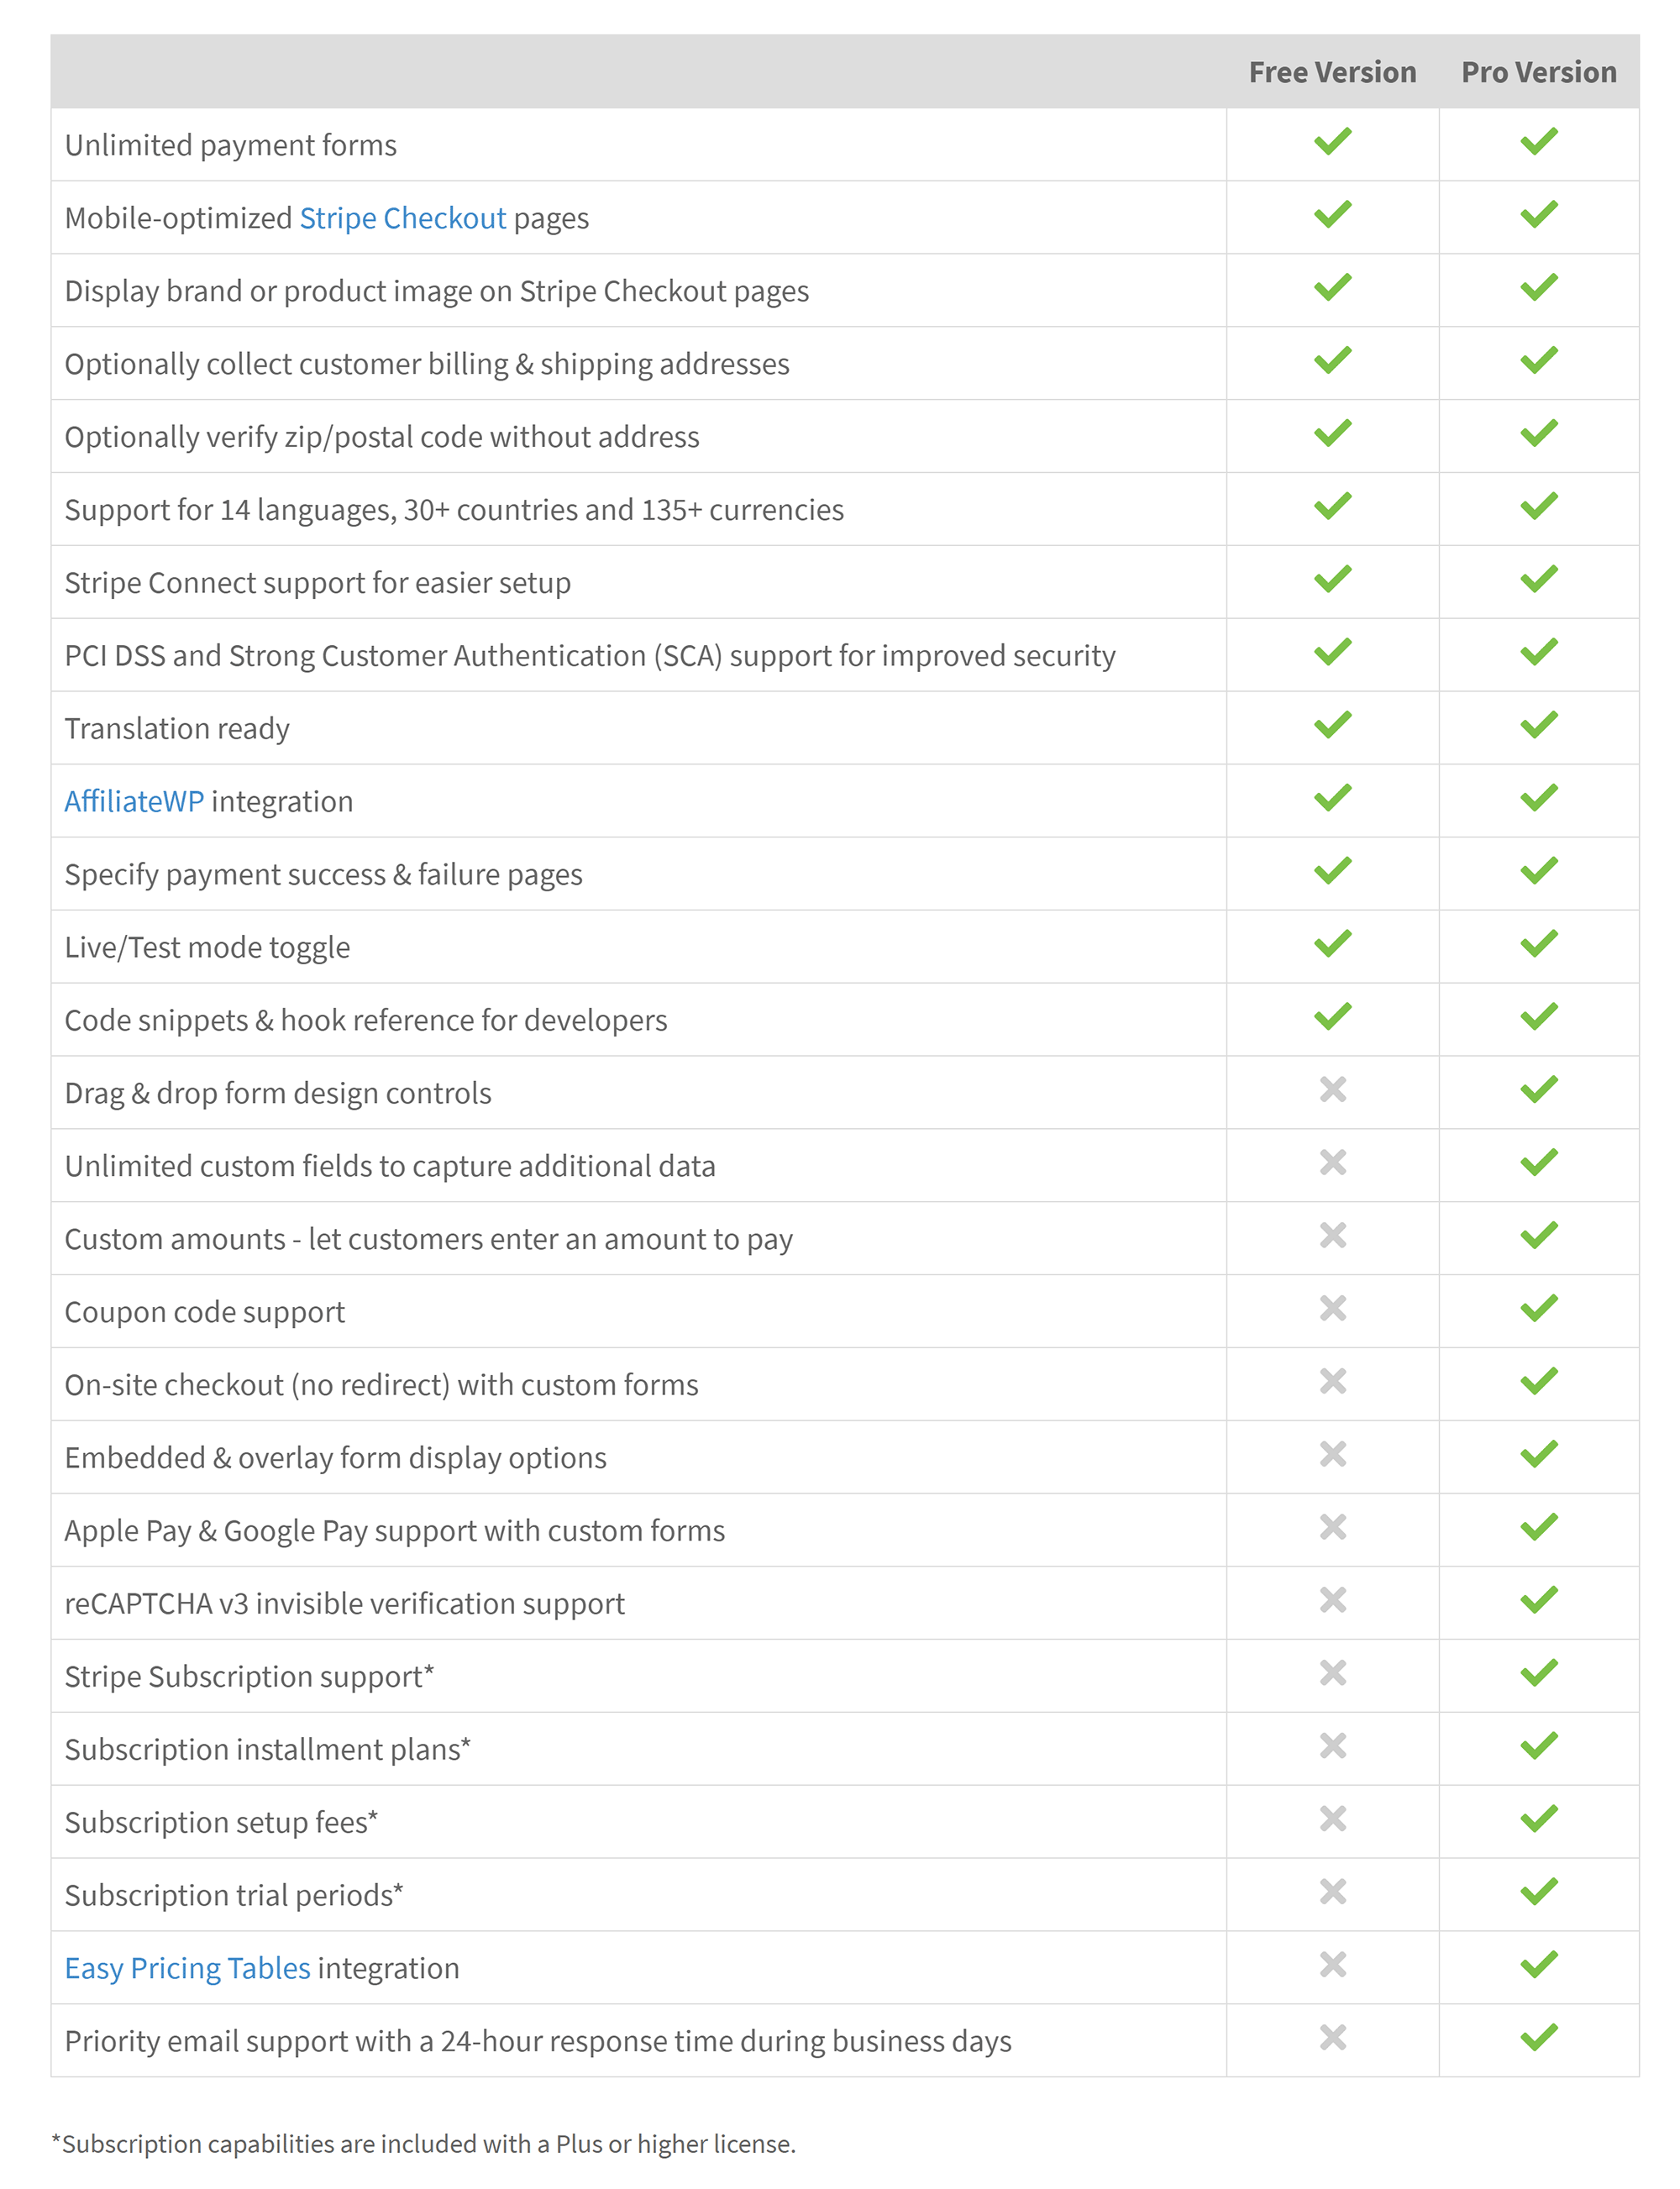
The WP Simple Pay Lite vs Pro page details the additional features that are available in WP Simple Pay Pro.
This includes custom fields, coupon codes, subscriptions, trials, Apply Pay and Google Pay support, and more.
I believe Sandhills Development has been very generous with the features it’s included in the lite version of WP Simple Pay, but there are certainly many great features to encourage website owners to upgrade.
My recommendation is to install the free version of the plugin to see if you require any of the premium features for your payment setup.
Creating a Stripe Payment Form
When you initially activate WP Simple Pay in WordPress, you’ll see a button in your WordPress admin bar that says ‘Simple Pay Test Mode Active’.
This button is there to remind you that the plugin is still in test mode. Once you’ve configured your payment forms, you should ensure test mode is also enabled in your Stripe dashboard, so you can process some test payments.
When you’re happy that everything has been set up correctly, you can disable test mode in the ‘Stripe Setup’ page of your settings area.

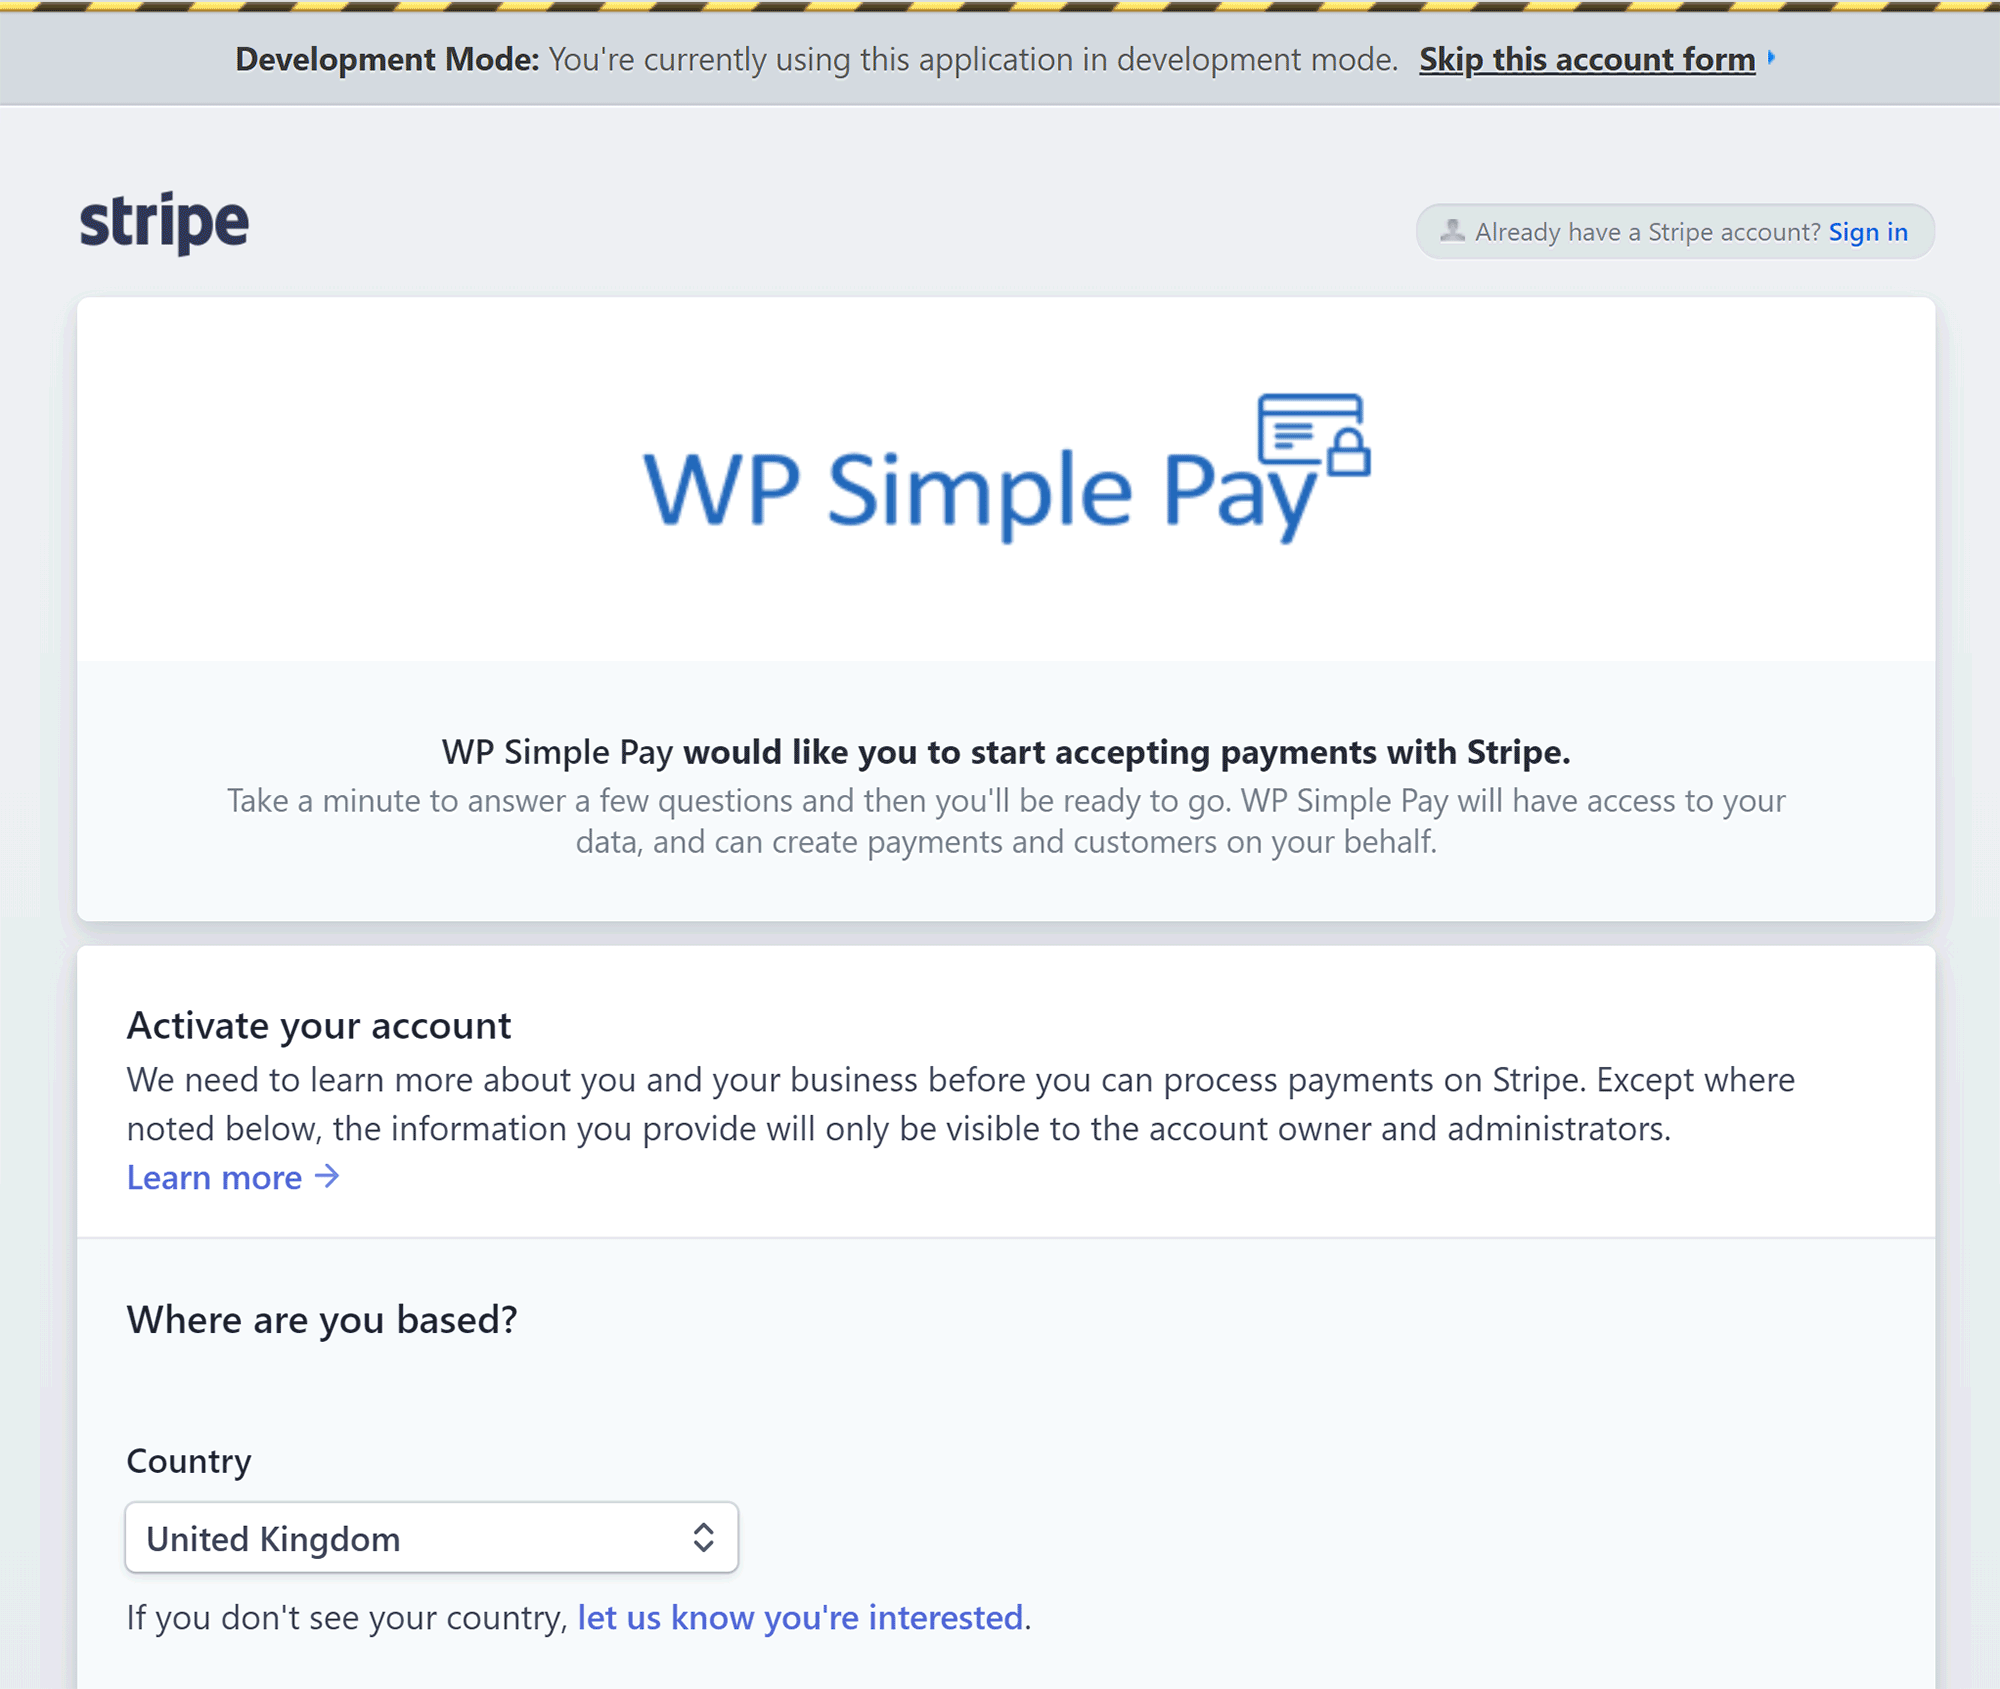
After activation, you’ll also see a message to connect with Stripe. This involves logging in to your Stripe account to give WP Simple Pay access.
* Note: Some settings mentioned here aren’t available in WP Simple Pay Lite.
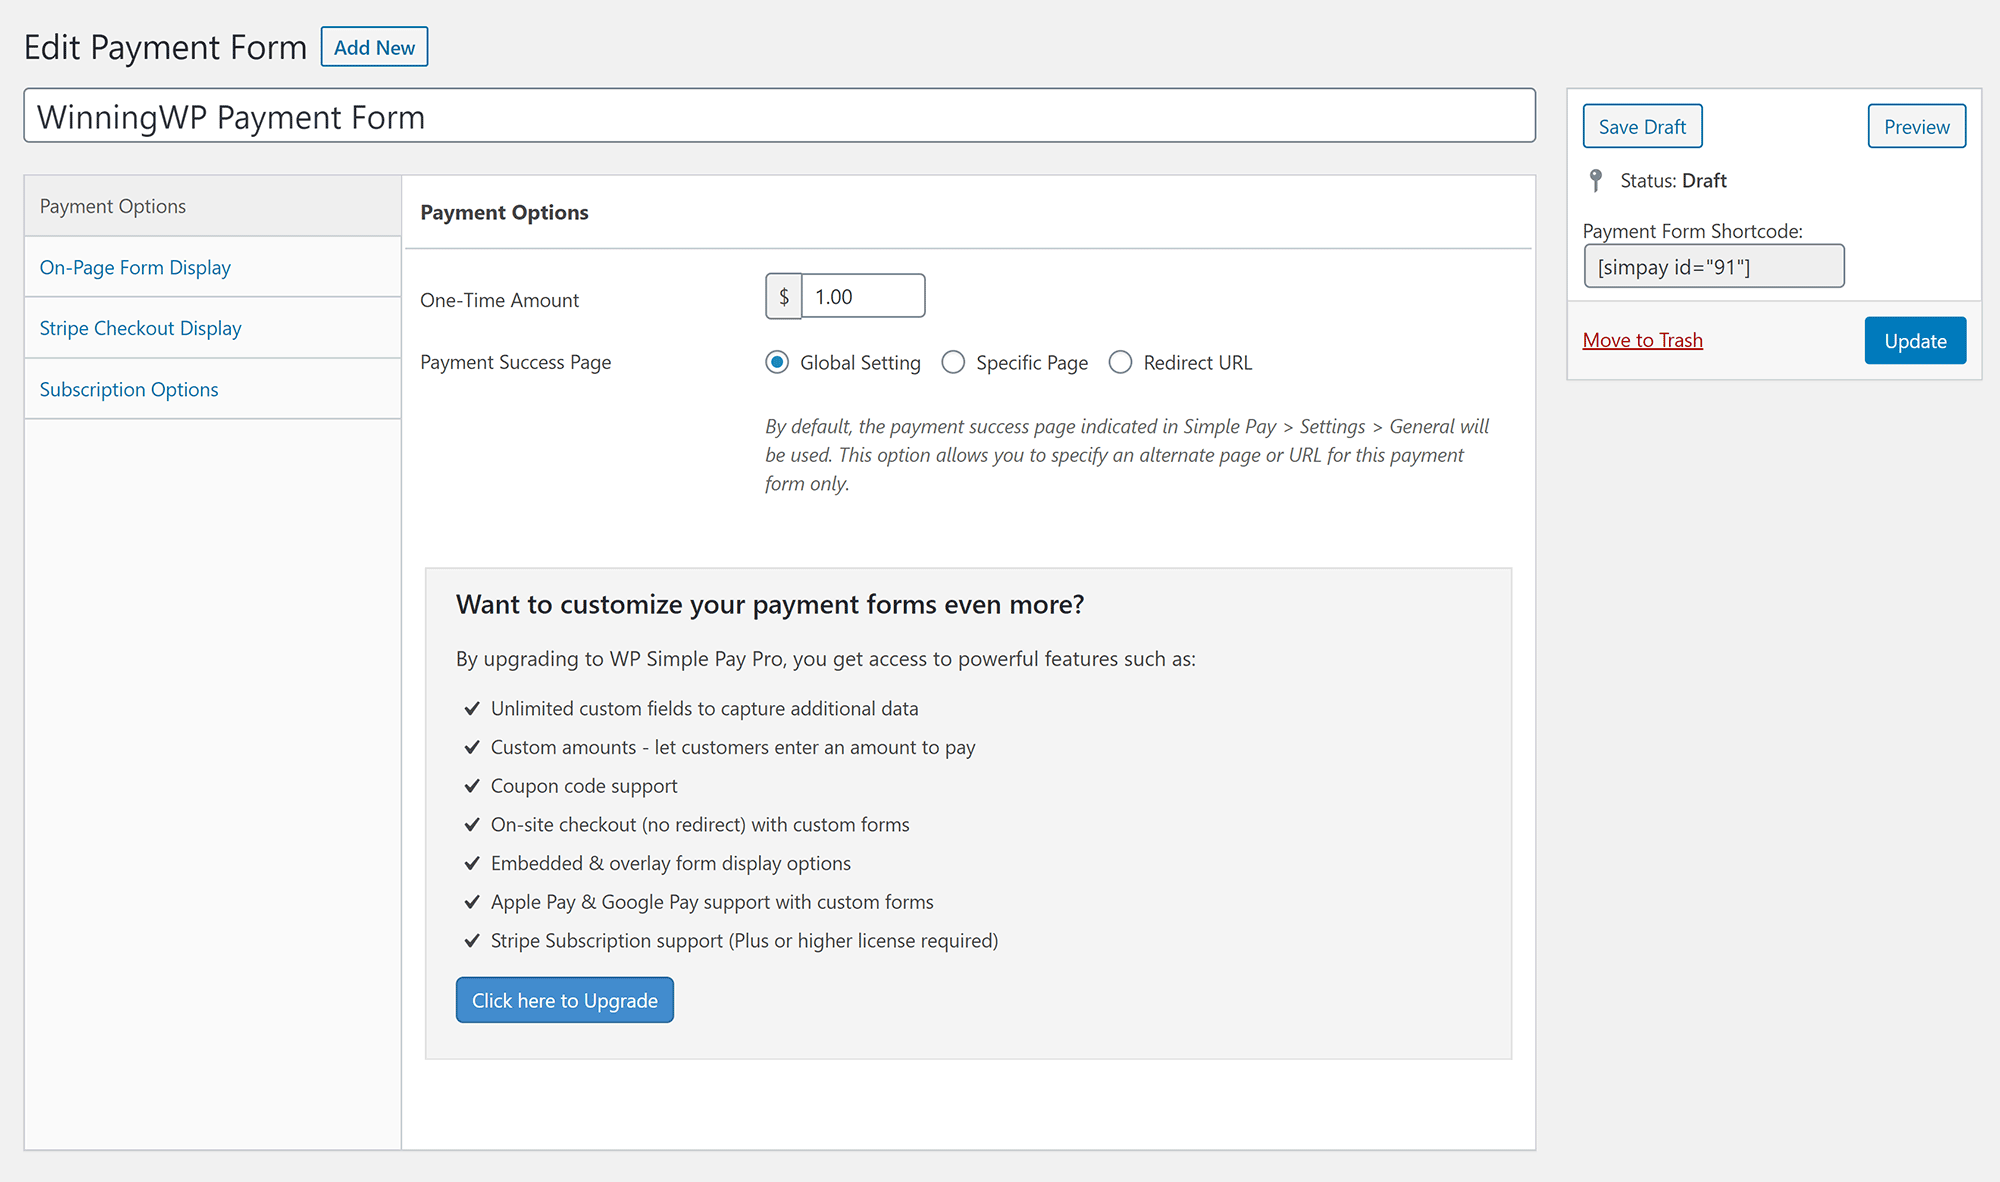
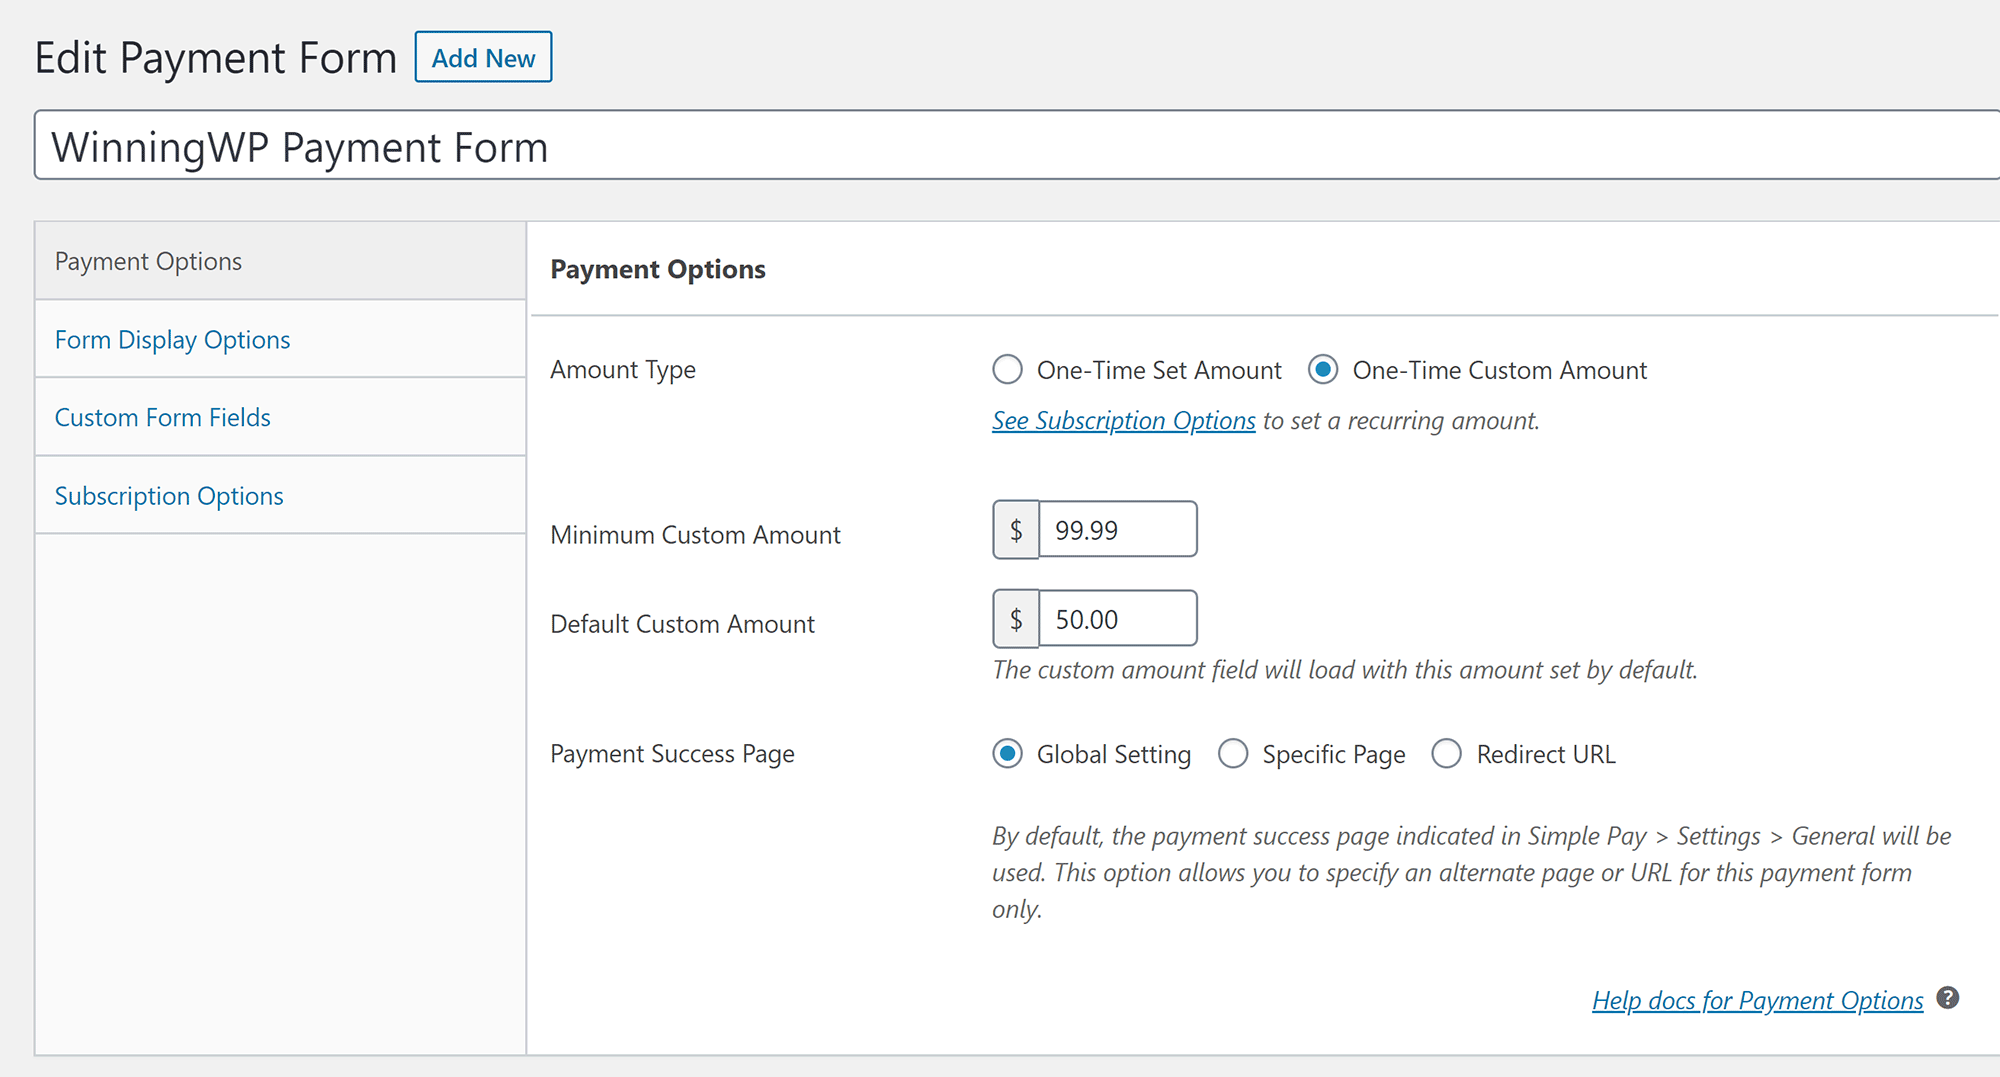
The payment form is divided into four settings tabs: Payment Options, Form Display Options, Custom Form Fields and Subscription Options.
In the payment options tab, you can define whether the payment is a set amount or custom amount. The custom amount field is a premium feature that’s helpful for donation websites where you need to allow the user to set the amount they’re paying.
This area also lets you define where users are redirected to after making a payment.
Be sure to check out the WP Simple Pay documentation area, as it lists many template tags you can use on your custom payment confirmation page.
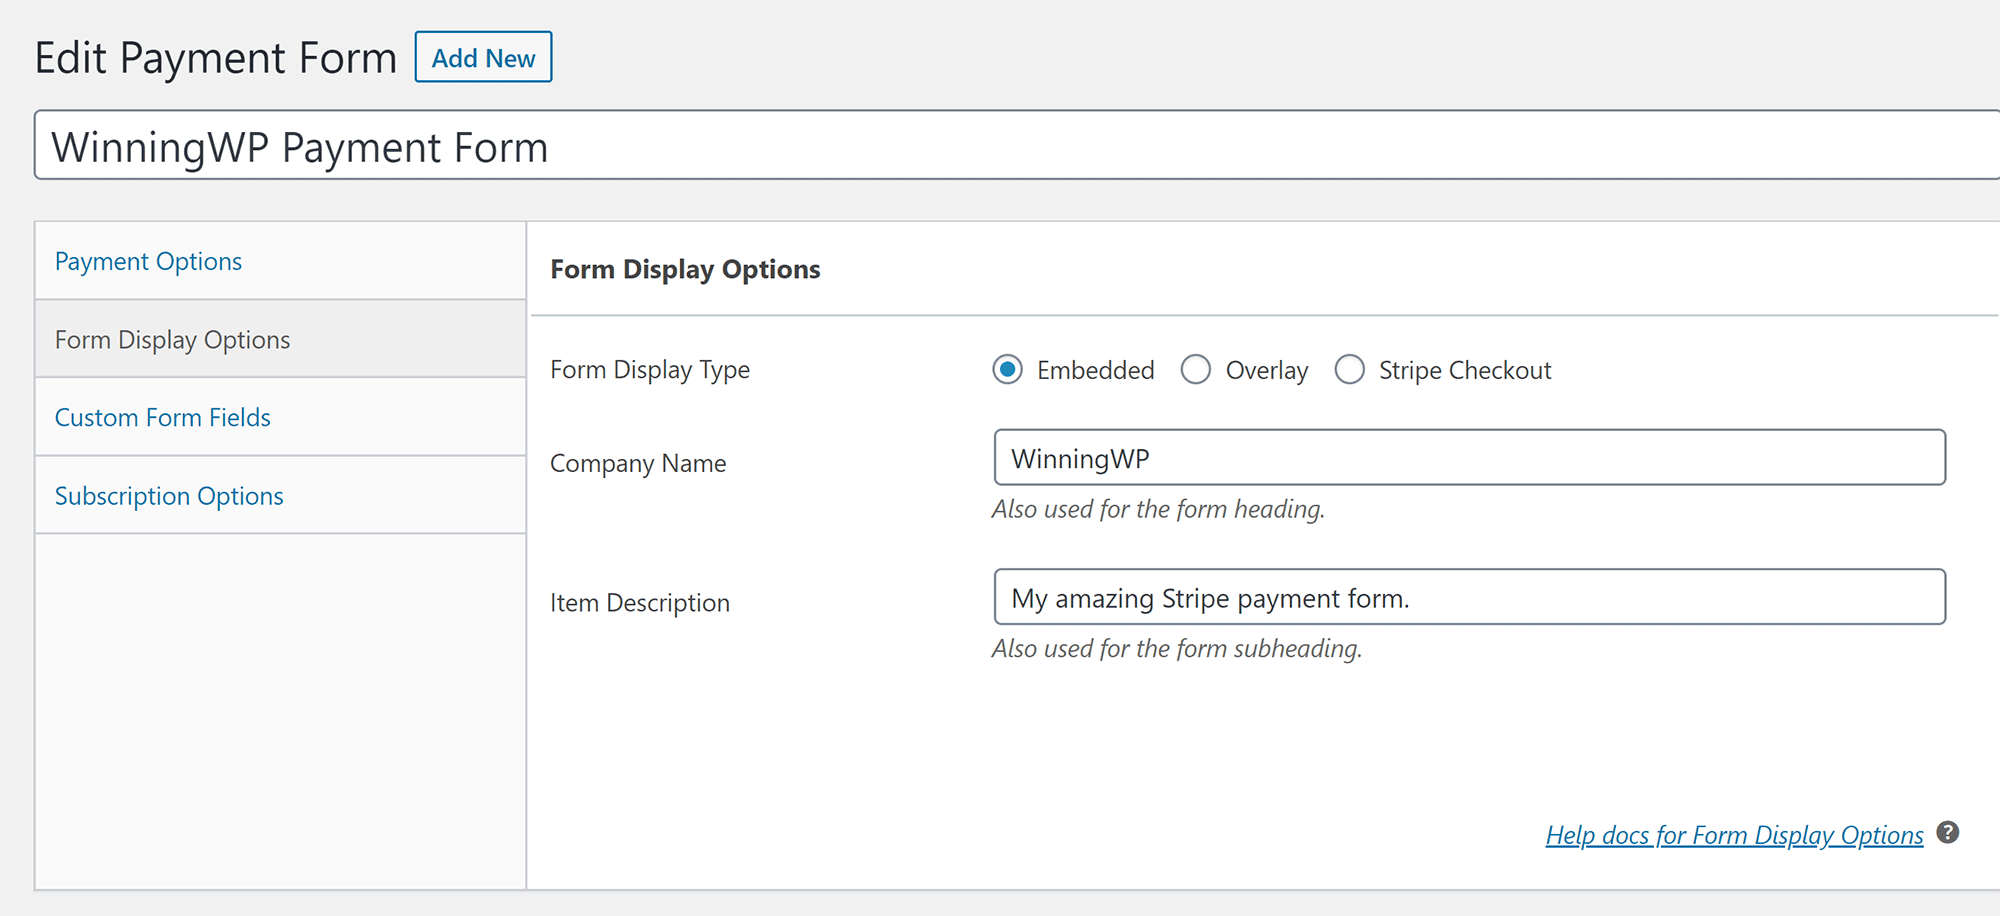
In the next tab, you can select whether your form is an embedded form, overlay form or Stripe checkout form.
The form name and description are defined here too.
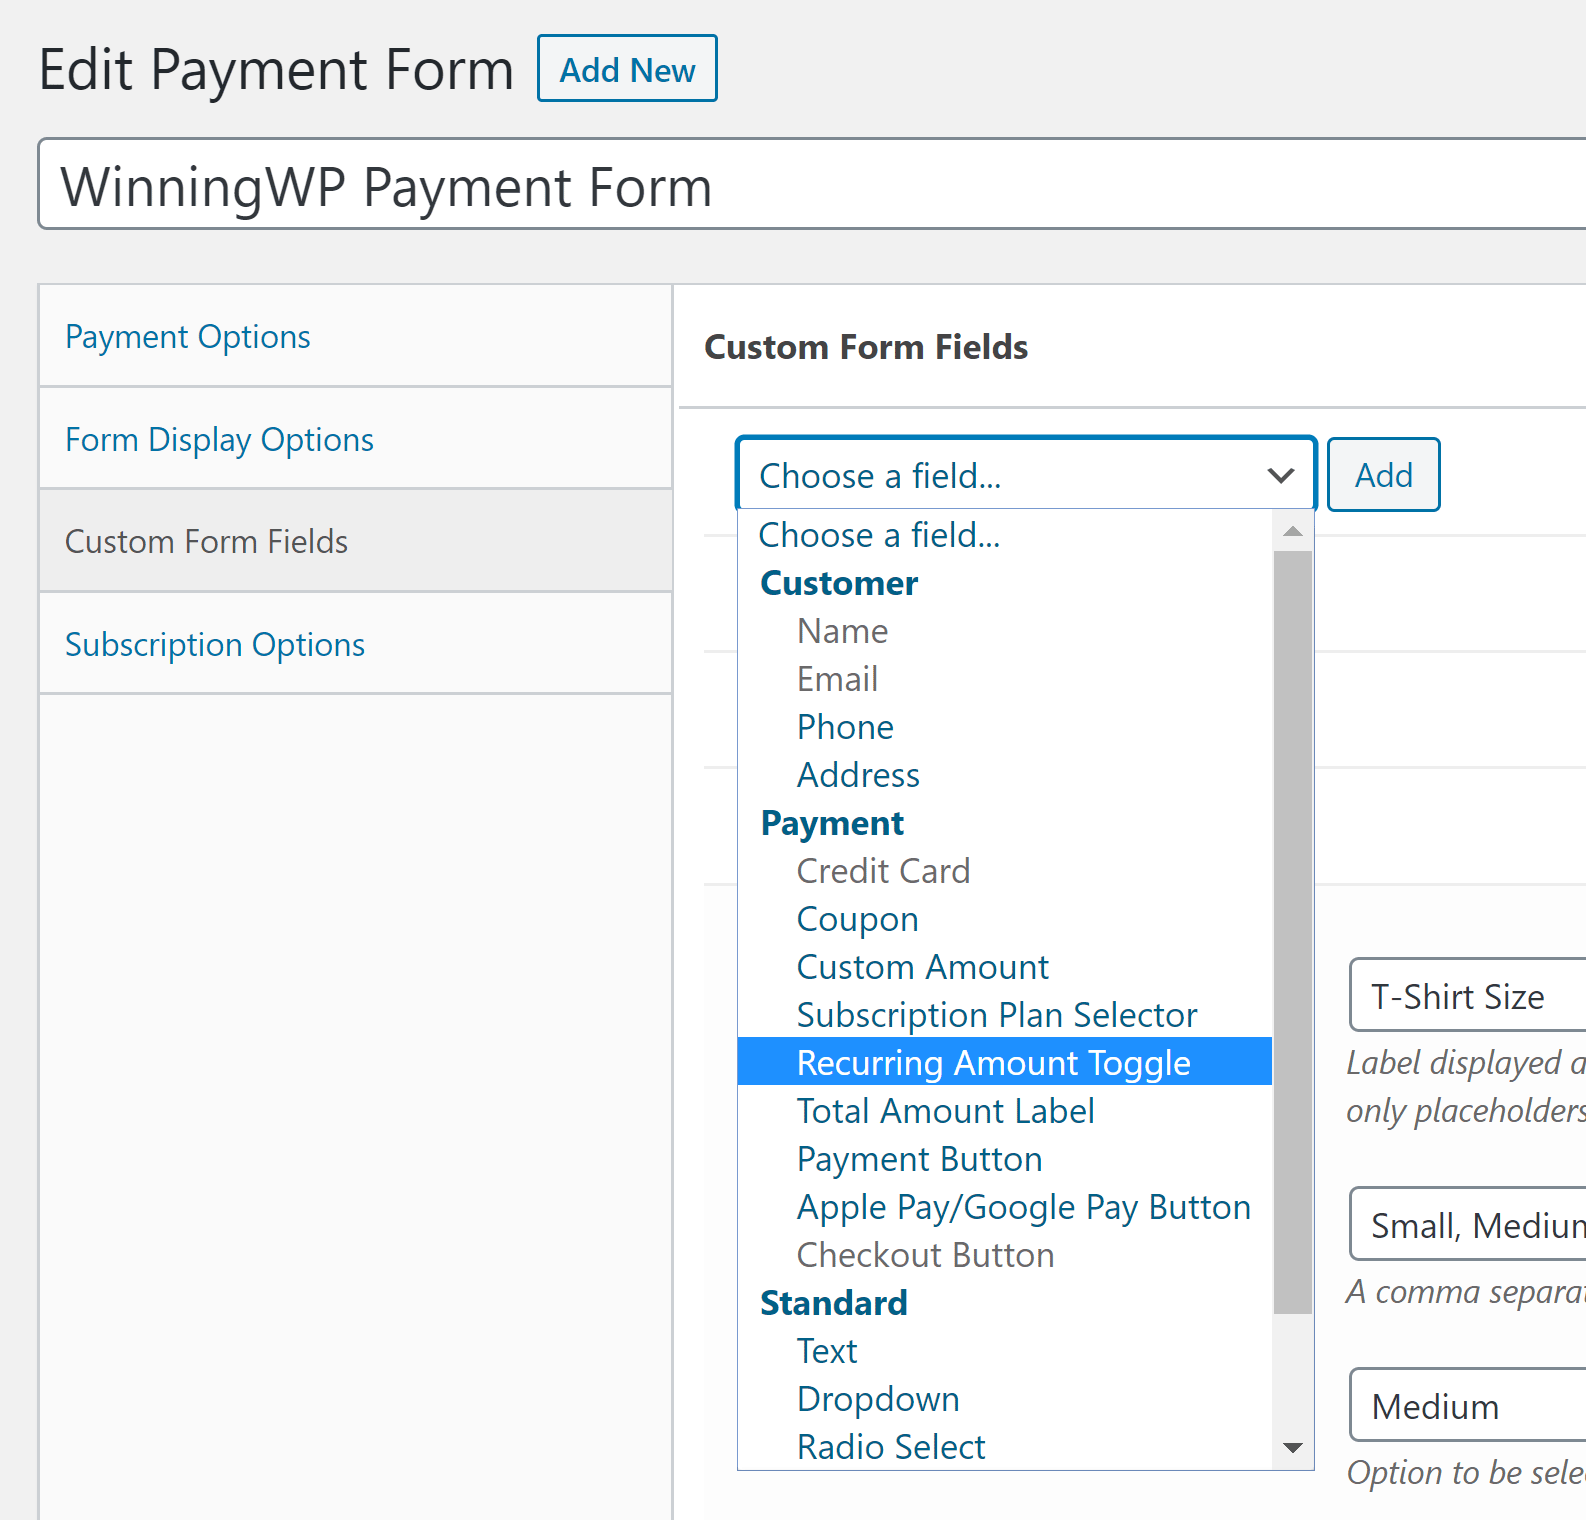
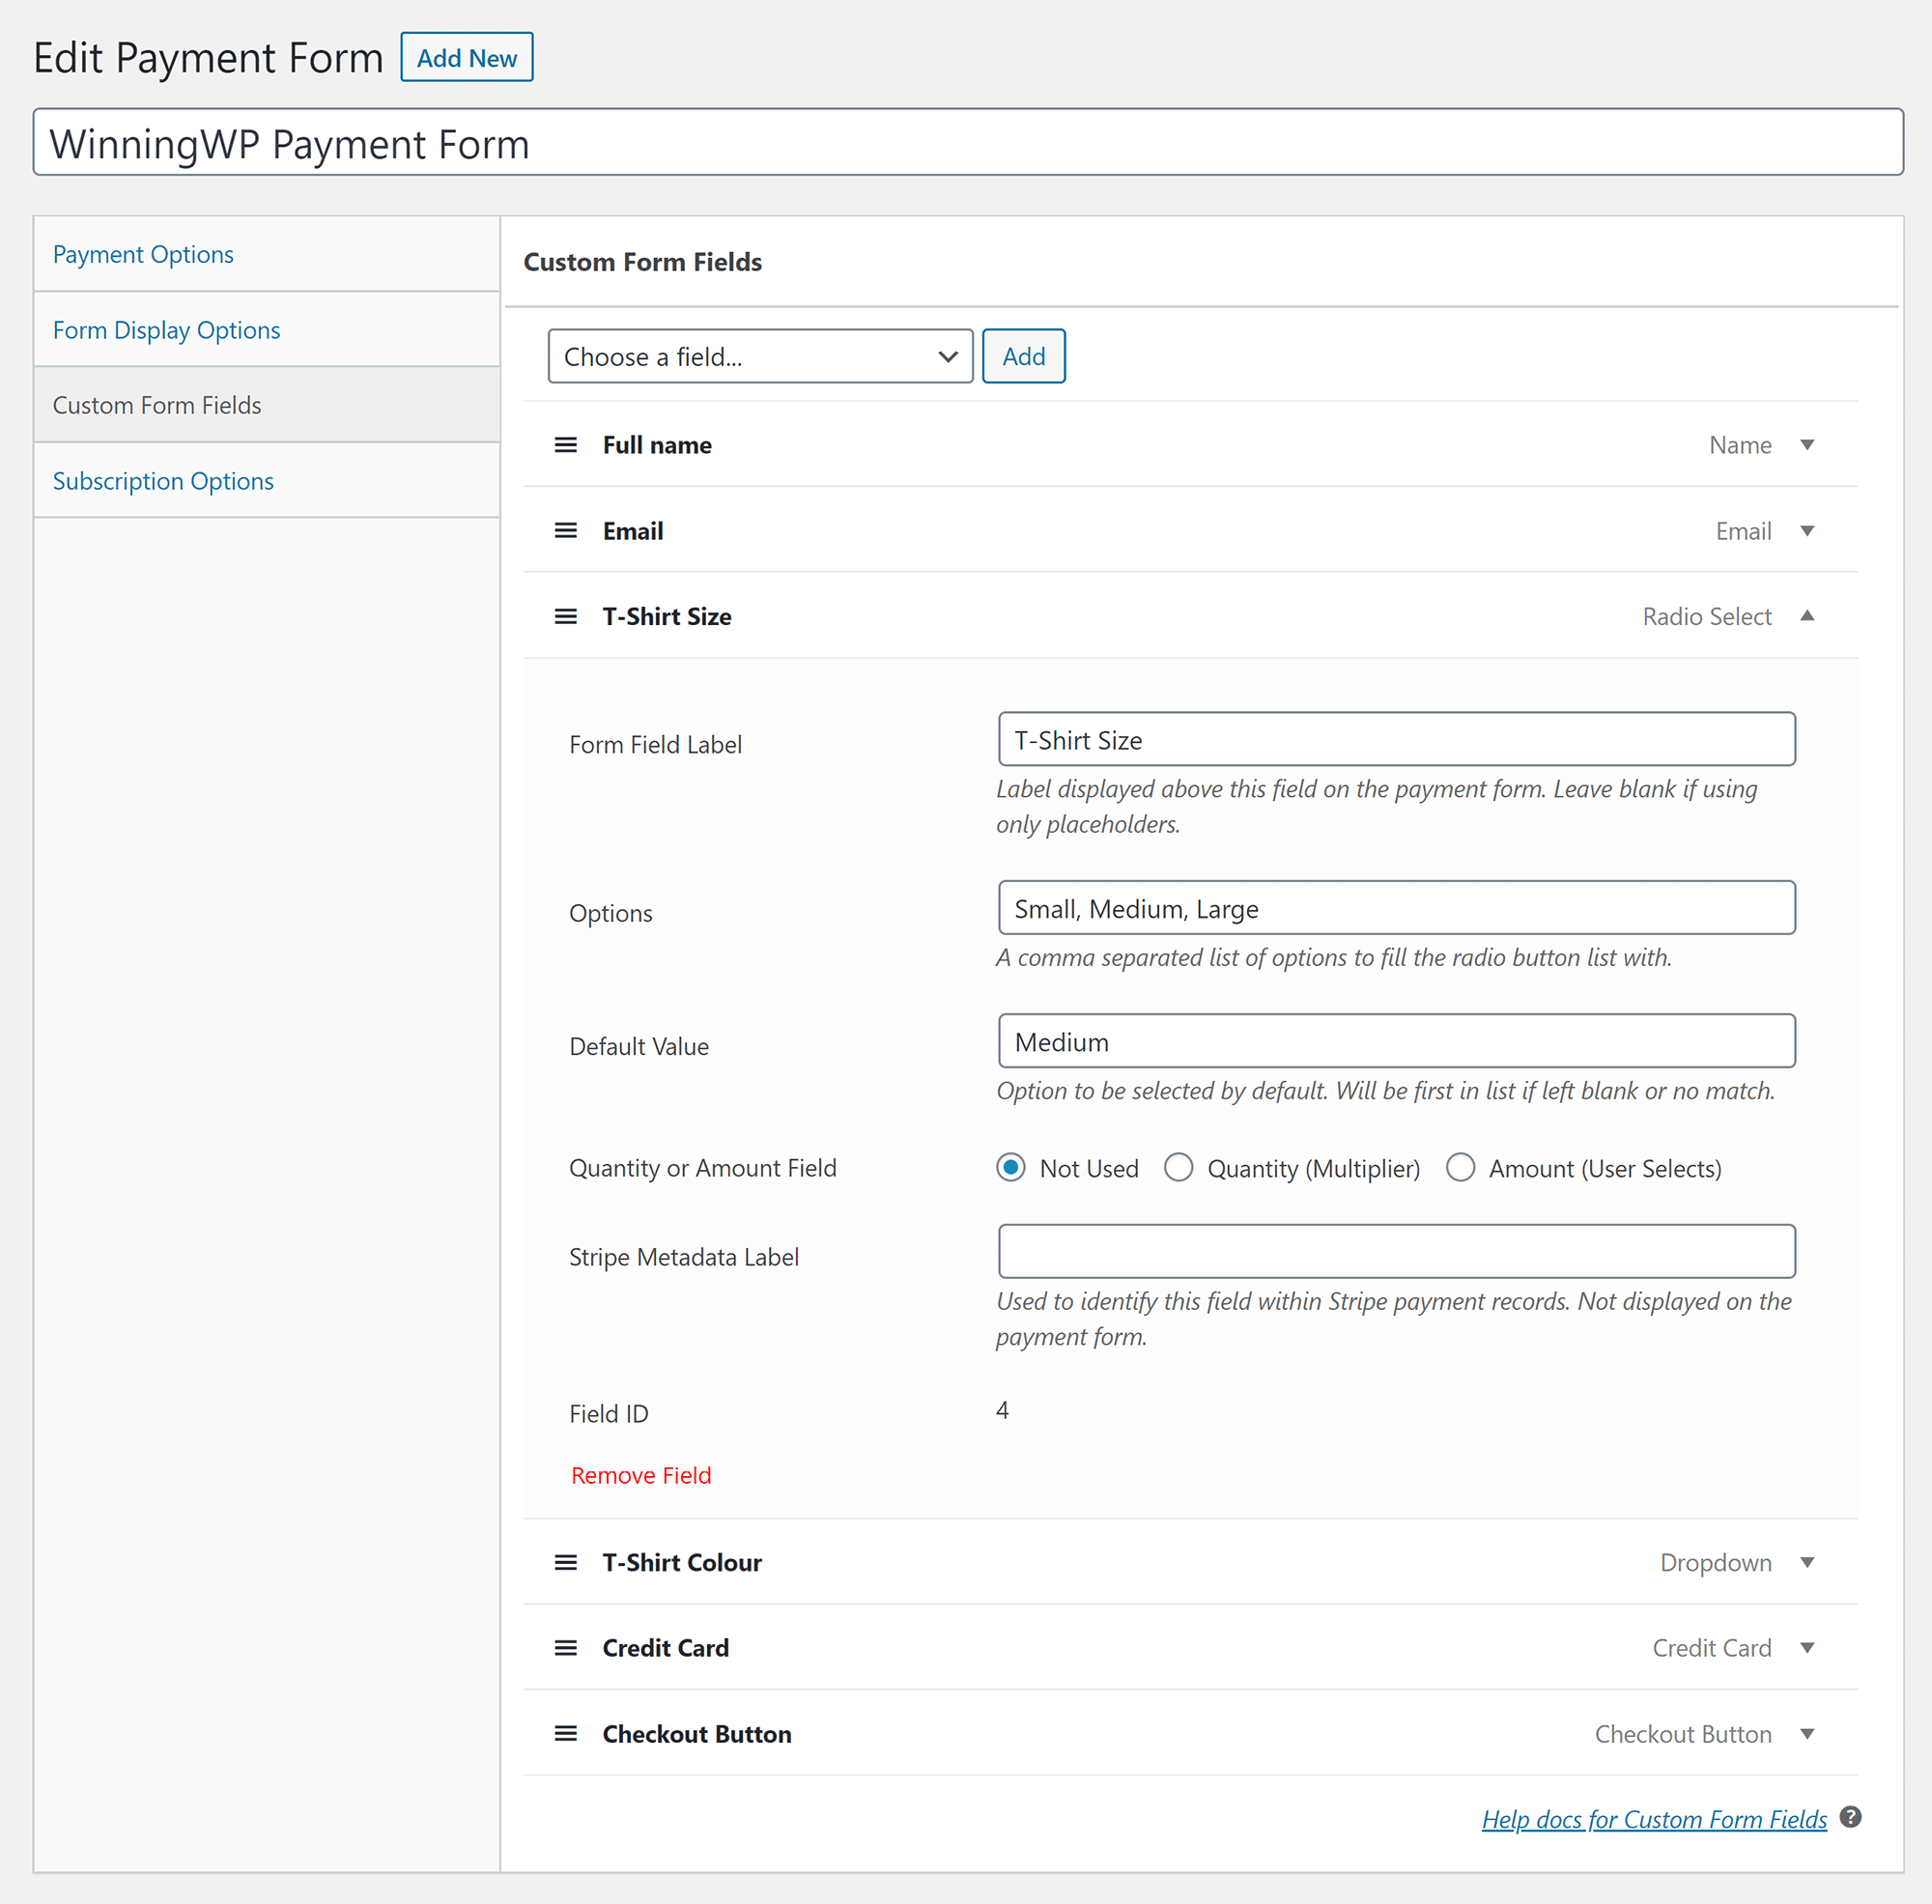
The custom form fields tab is where you build your payment form.
In total, there are 19 fields available: Four custom fields, nine customer fields and six standard fields. WP Simple Pay understandably limits some fields to one instance. For example, the checkout button.
Once you’ve added a field to the form, you can drag and drop it into any position you wish, and then adjust the settings accordingly. It’s a joy to use.
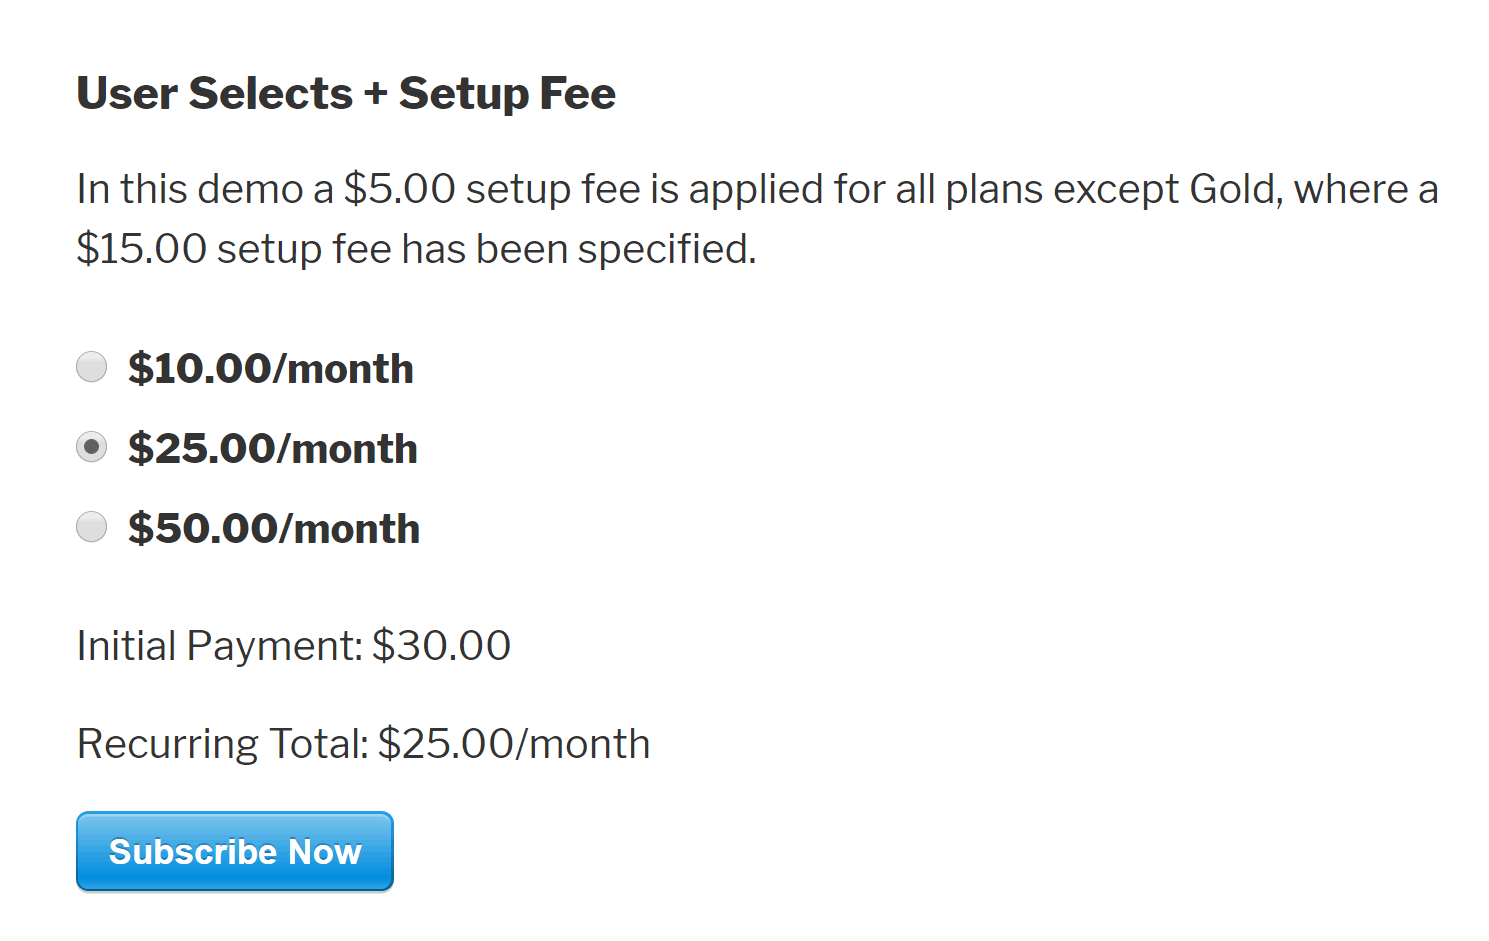
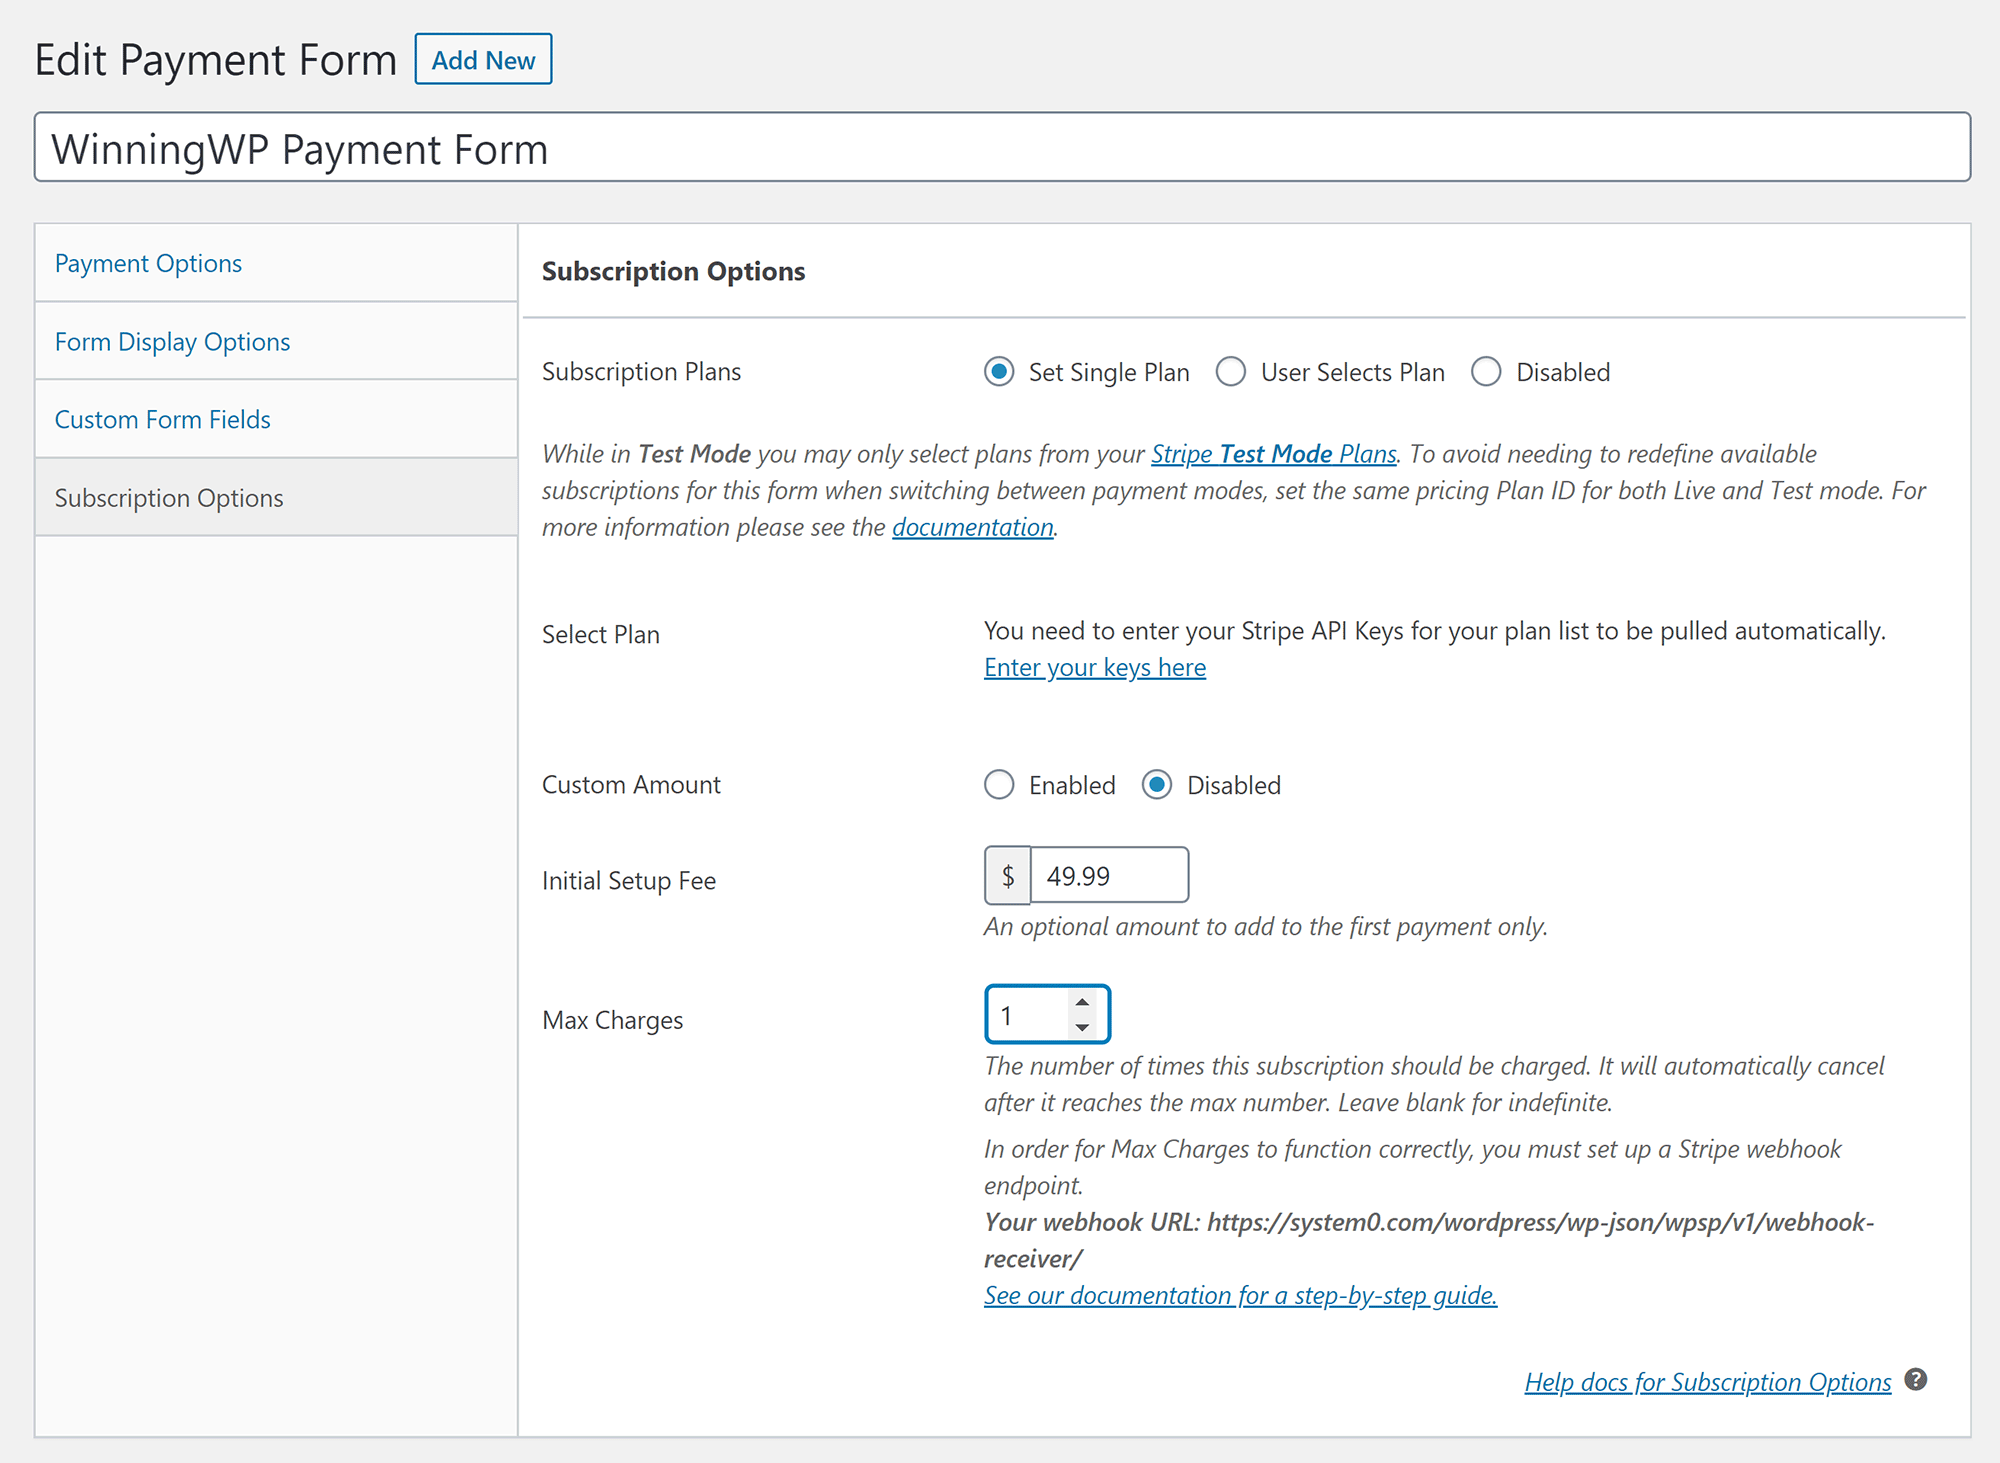
Subscriptions can be configured in the last tab. You can choose between a single subscription plan or the more customisable user-selected plan.
A host of fields can be defined here, such as subscription cost, setup fee, maximum permitted charges of the subscription and more.
Payment forms can be saved on the right-hand side of the page, and this box also notes the shortcode for your form.
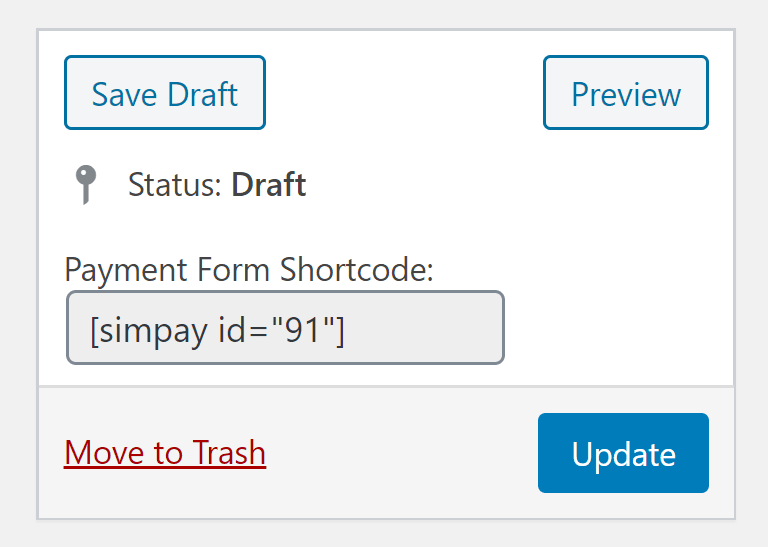
You need to copy this shortcode into the post or page in which you want to insert your form.
Your form will then be displayed.
While I’m a big fan of the simplicity of WP Simple Pay, I do feel there are some useful options that are missing — ones that would improve usability without affecting the principle of simplicity.
For example, while you can remove form fields, there’s no way to duplicate fields.
Beginners would also appreciate additional ways of inserting forms into their website. At the moment, there’s no WP Simple Pay button in the WordPress editor that allows you to select a form and insert it into a post or page. Additionally, you’ll have to install a WordPress plugin such as Shortcode Widget to display a form in a sidebar area, as no WP Simple Pay widget is available.
The developers have, however, provided a long list of actions and filter hooks for advanced users, which will give you complete control over your payment forms and submissions.
Perhaps the largest omission I noticed was styling.
In a future version, I’d love to see predefined color schemes, a color wheel and a CSS box for custom style classes. At the moment, forms inherit their styling from your website’s activated WordPress theme.
Configuring Your WP Simple Pay Payment Setup
You’ll need to spend a little time configuring WP Simple Pay to ensure your payments are processed correctly.
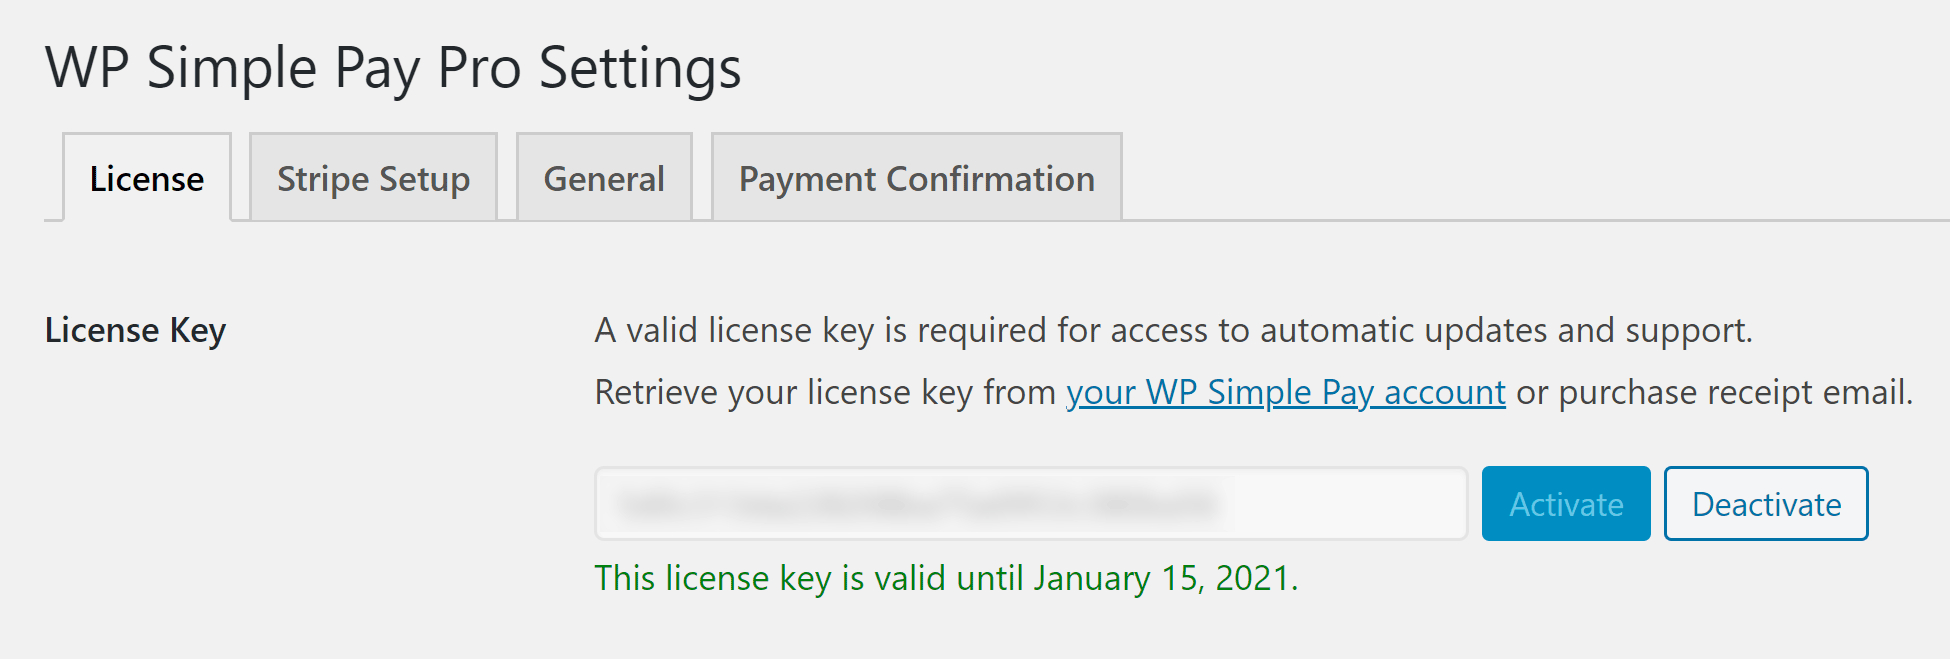
In WP Simple Pay Pro, you need to enter your license key in the first settings page. Doing this ensures the plugin can be automatically updated within WordPress.
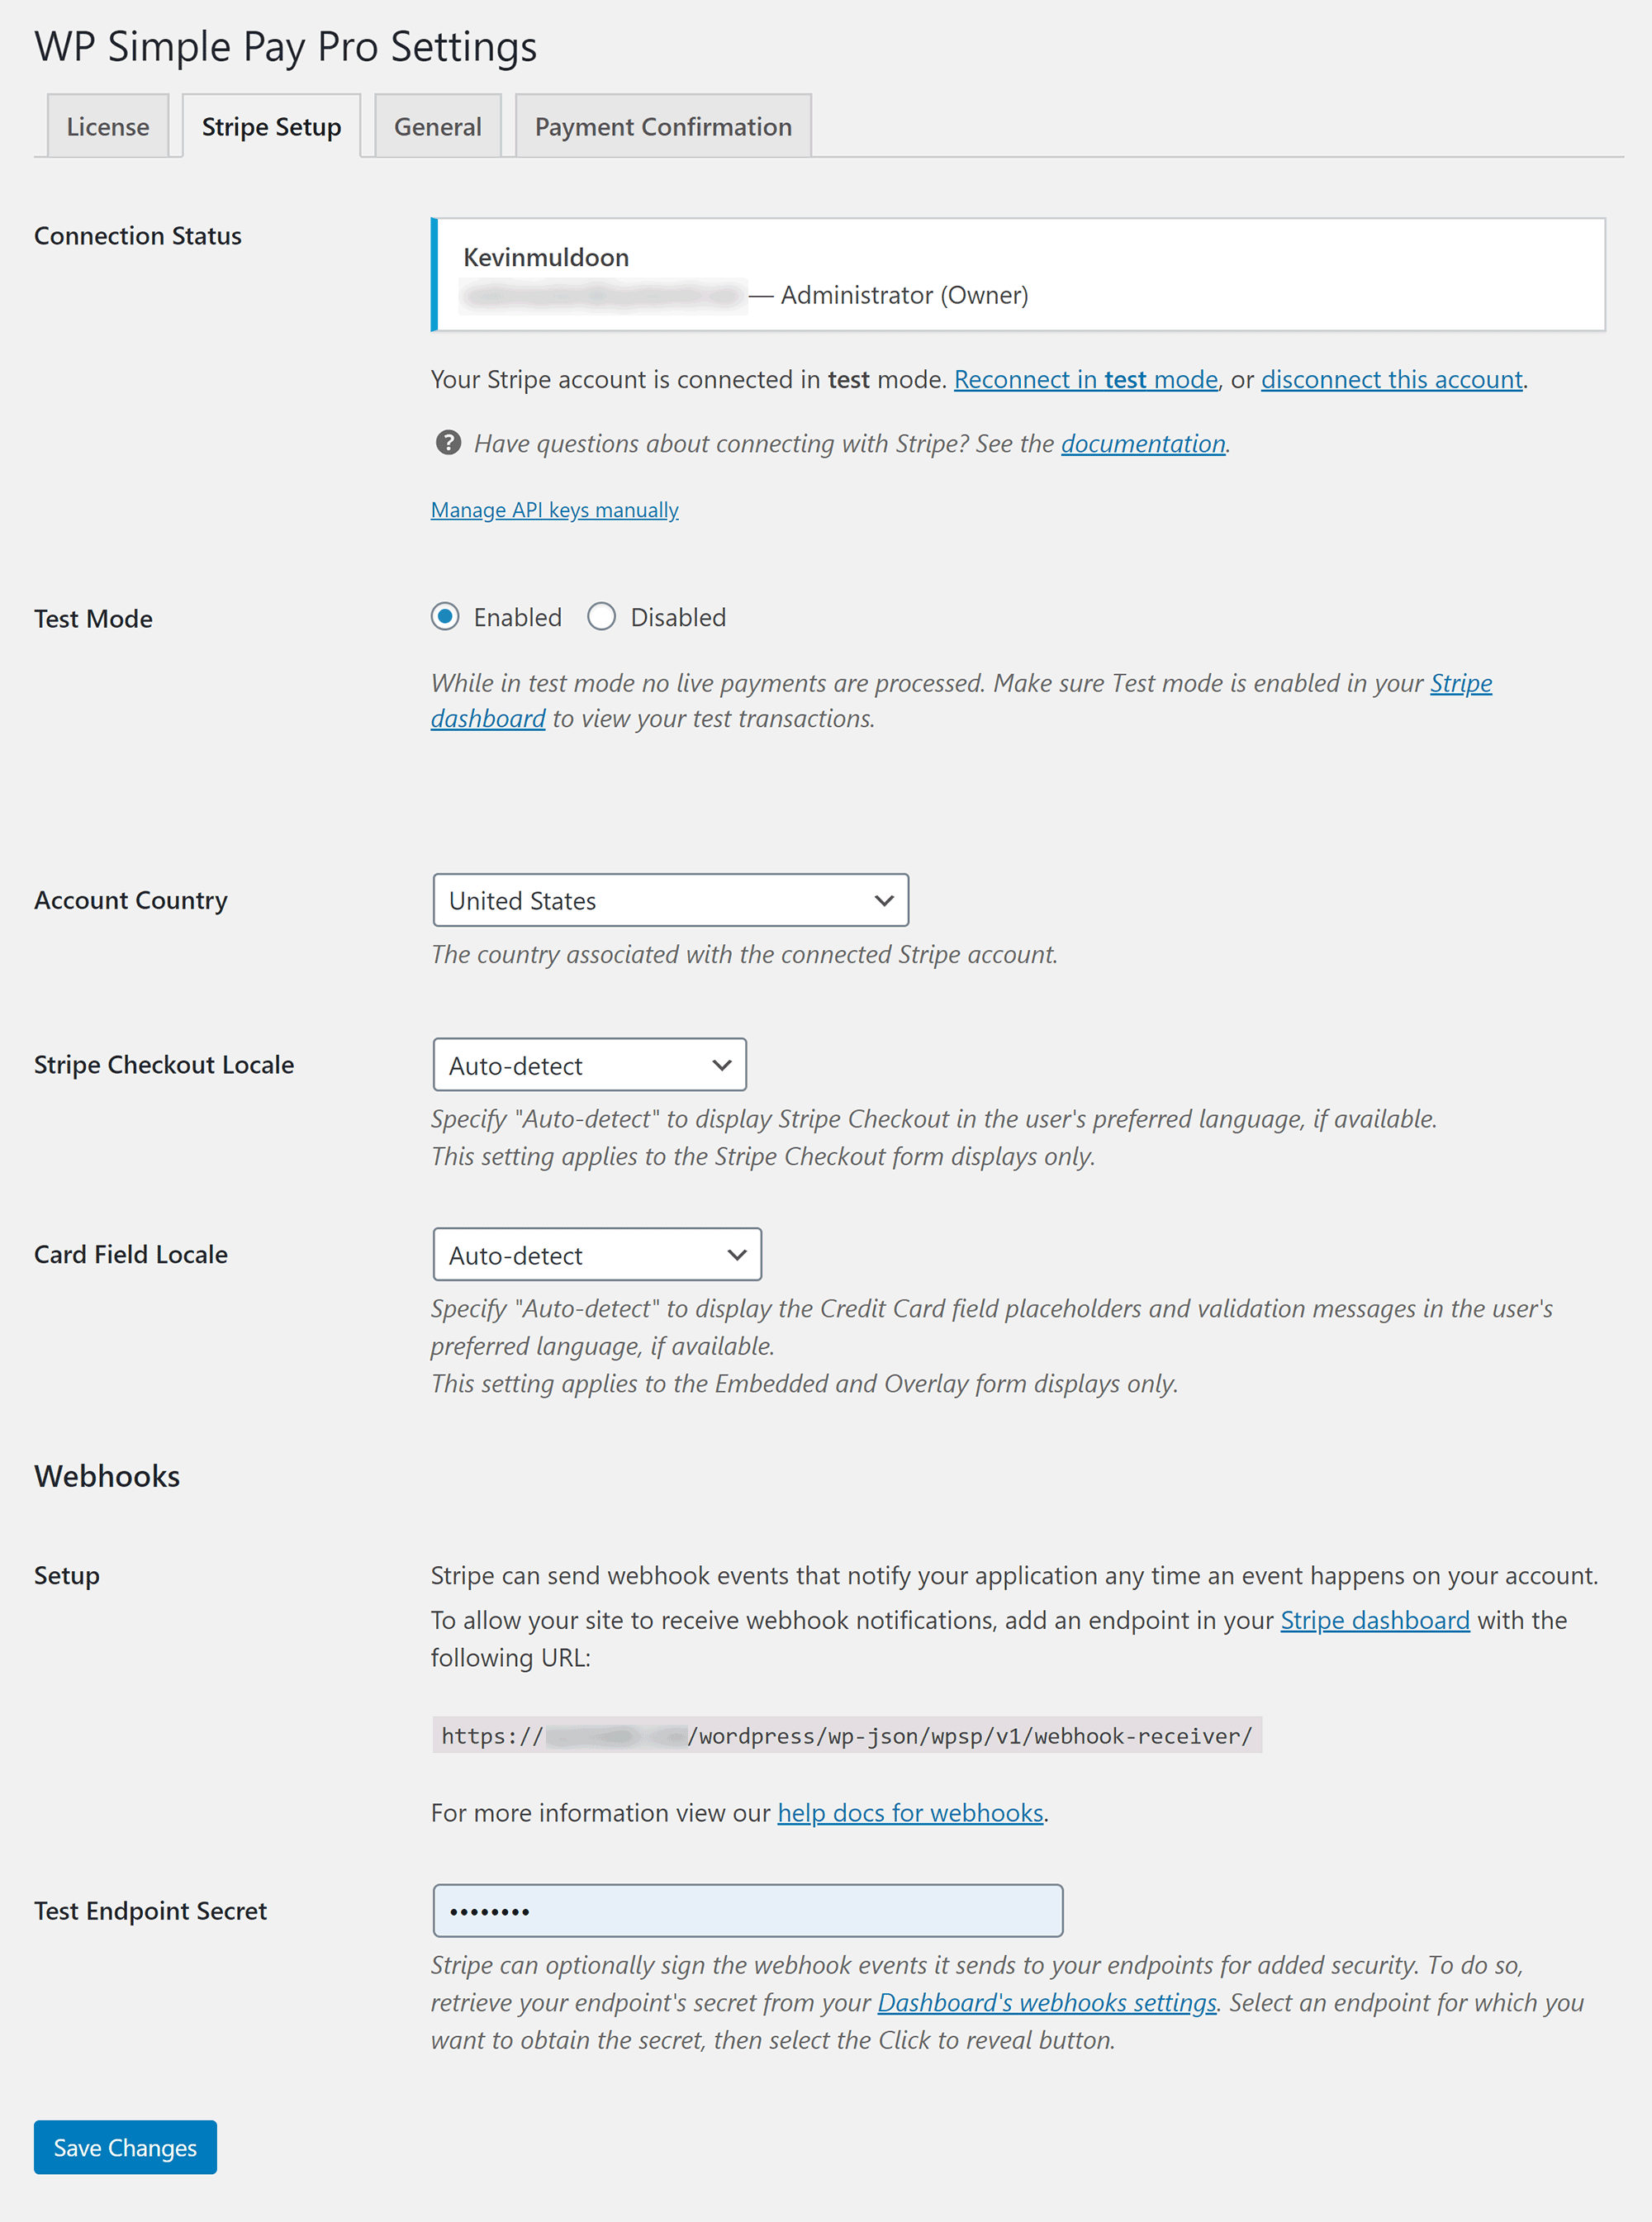
The Stripe setup page confirms whether you have successfully connected WP Simple Pay to your Stripe account. This page is also where you enable and disable test mode.
On this page, you also define your account country, Stripe checkout locale, card field locale and webhooks.
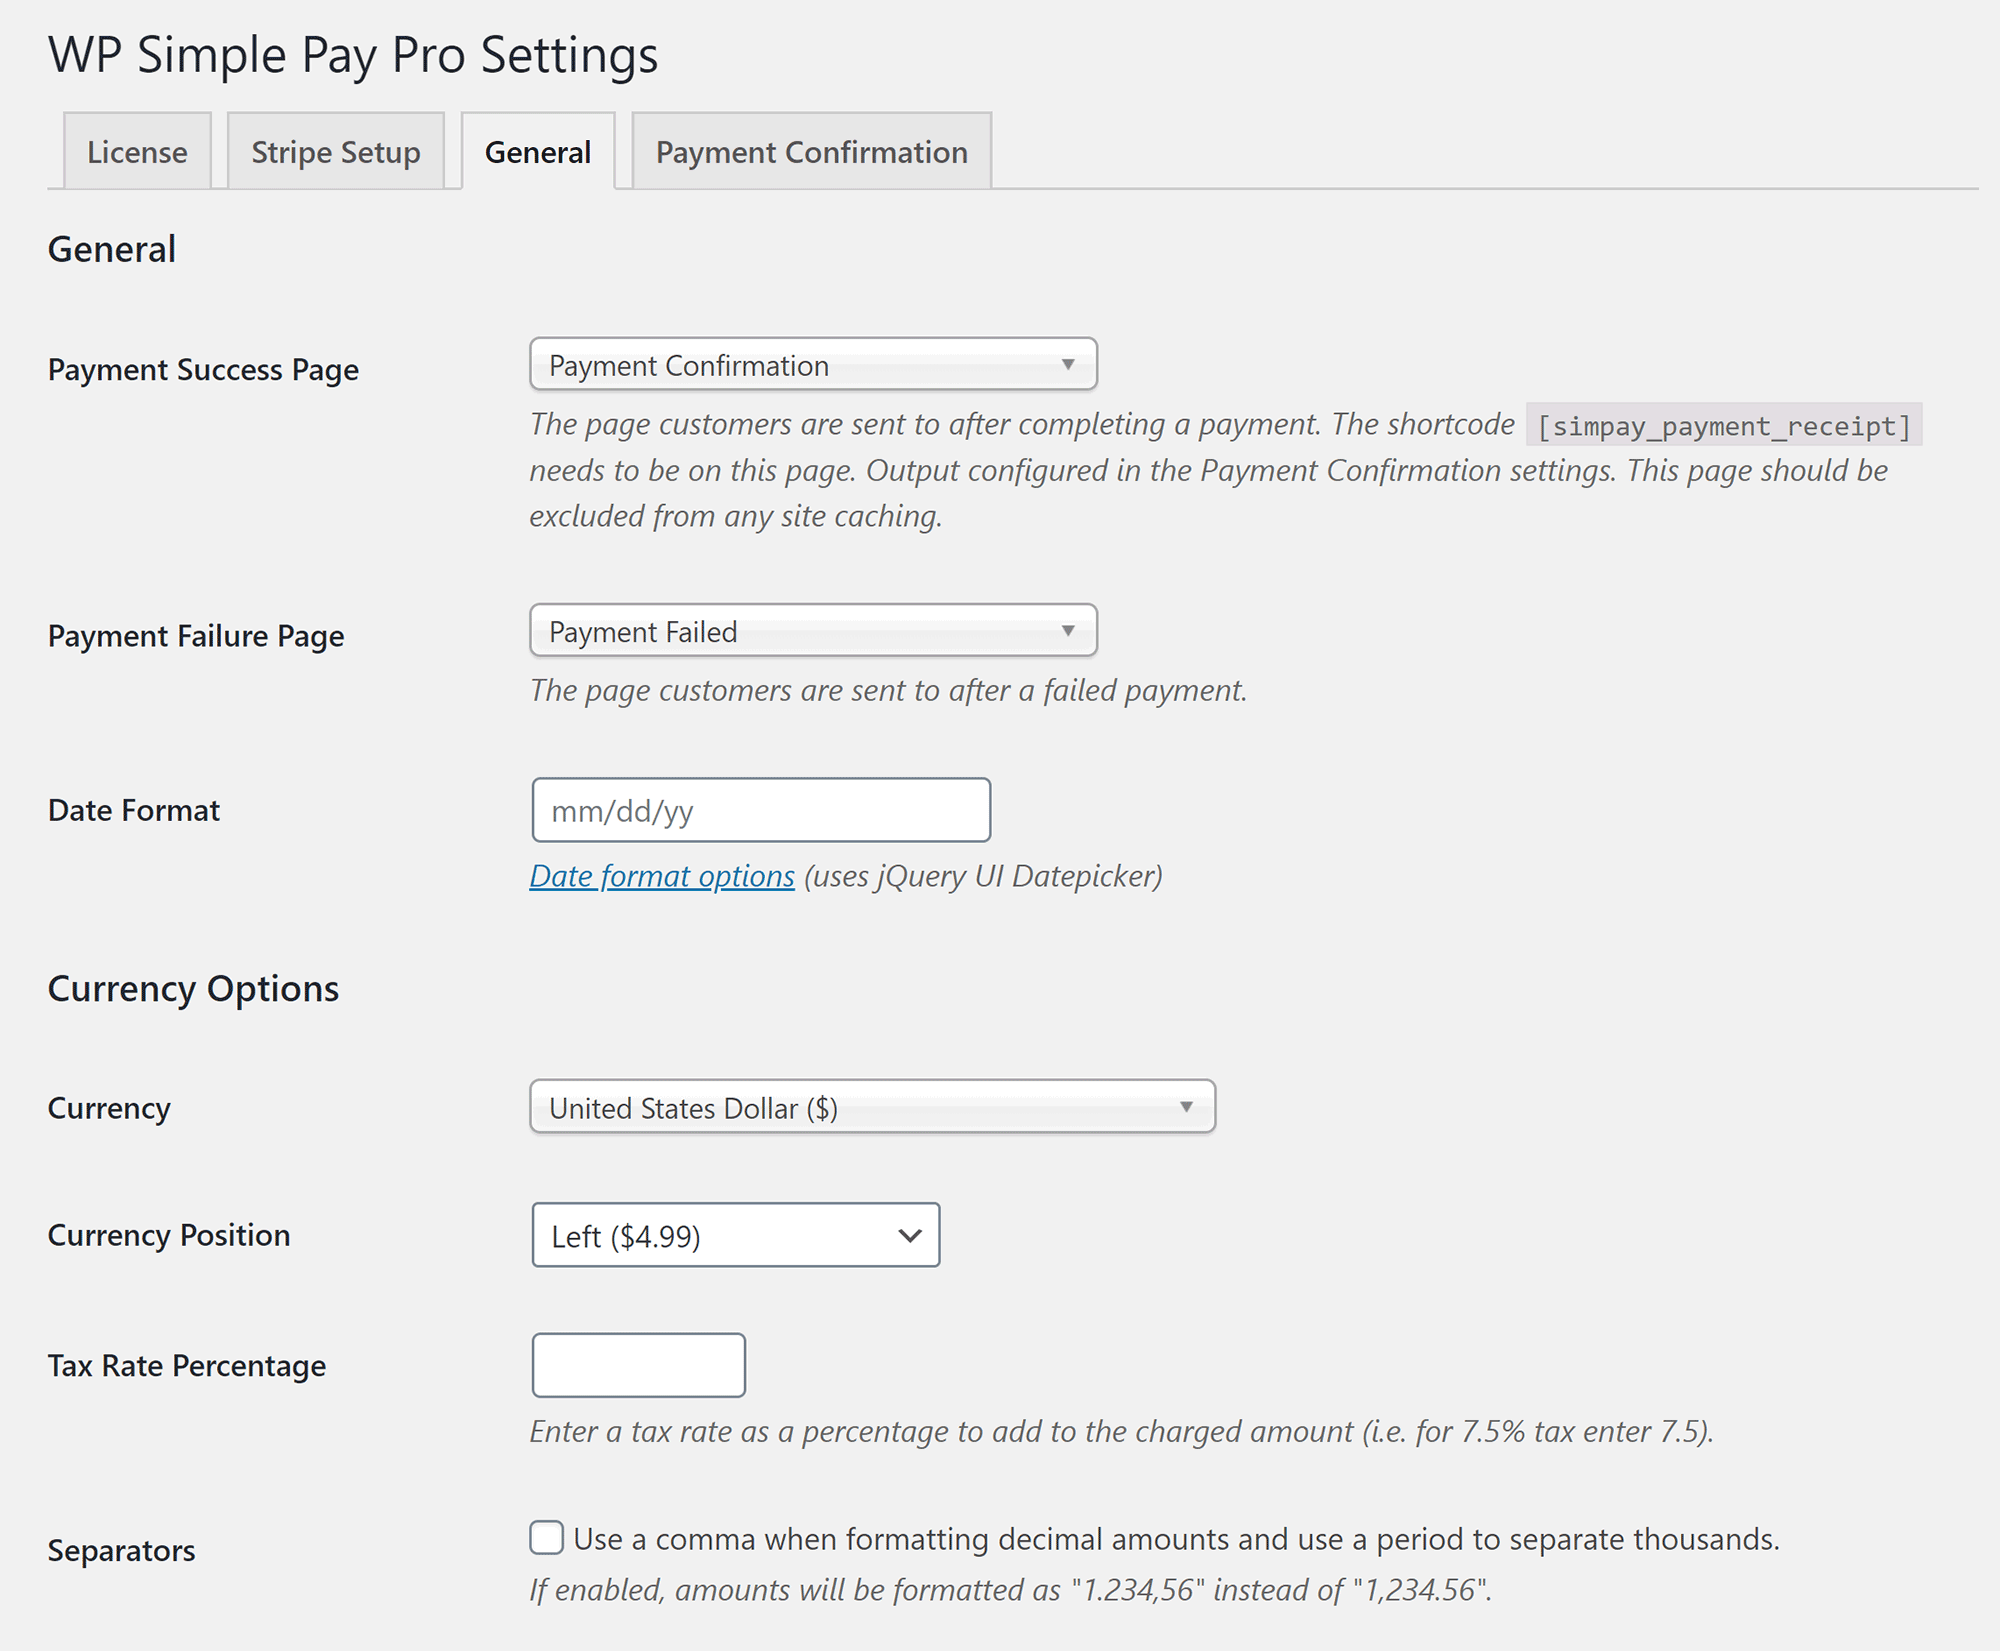
You’ll find many important settings in the general settings area, including the payment confirmation and payment failure page, the date format, your preferred currency, currency position, tax rate percentage and separators.
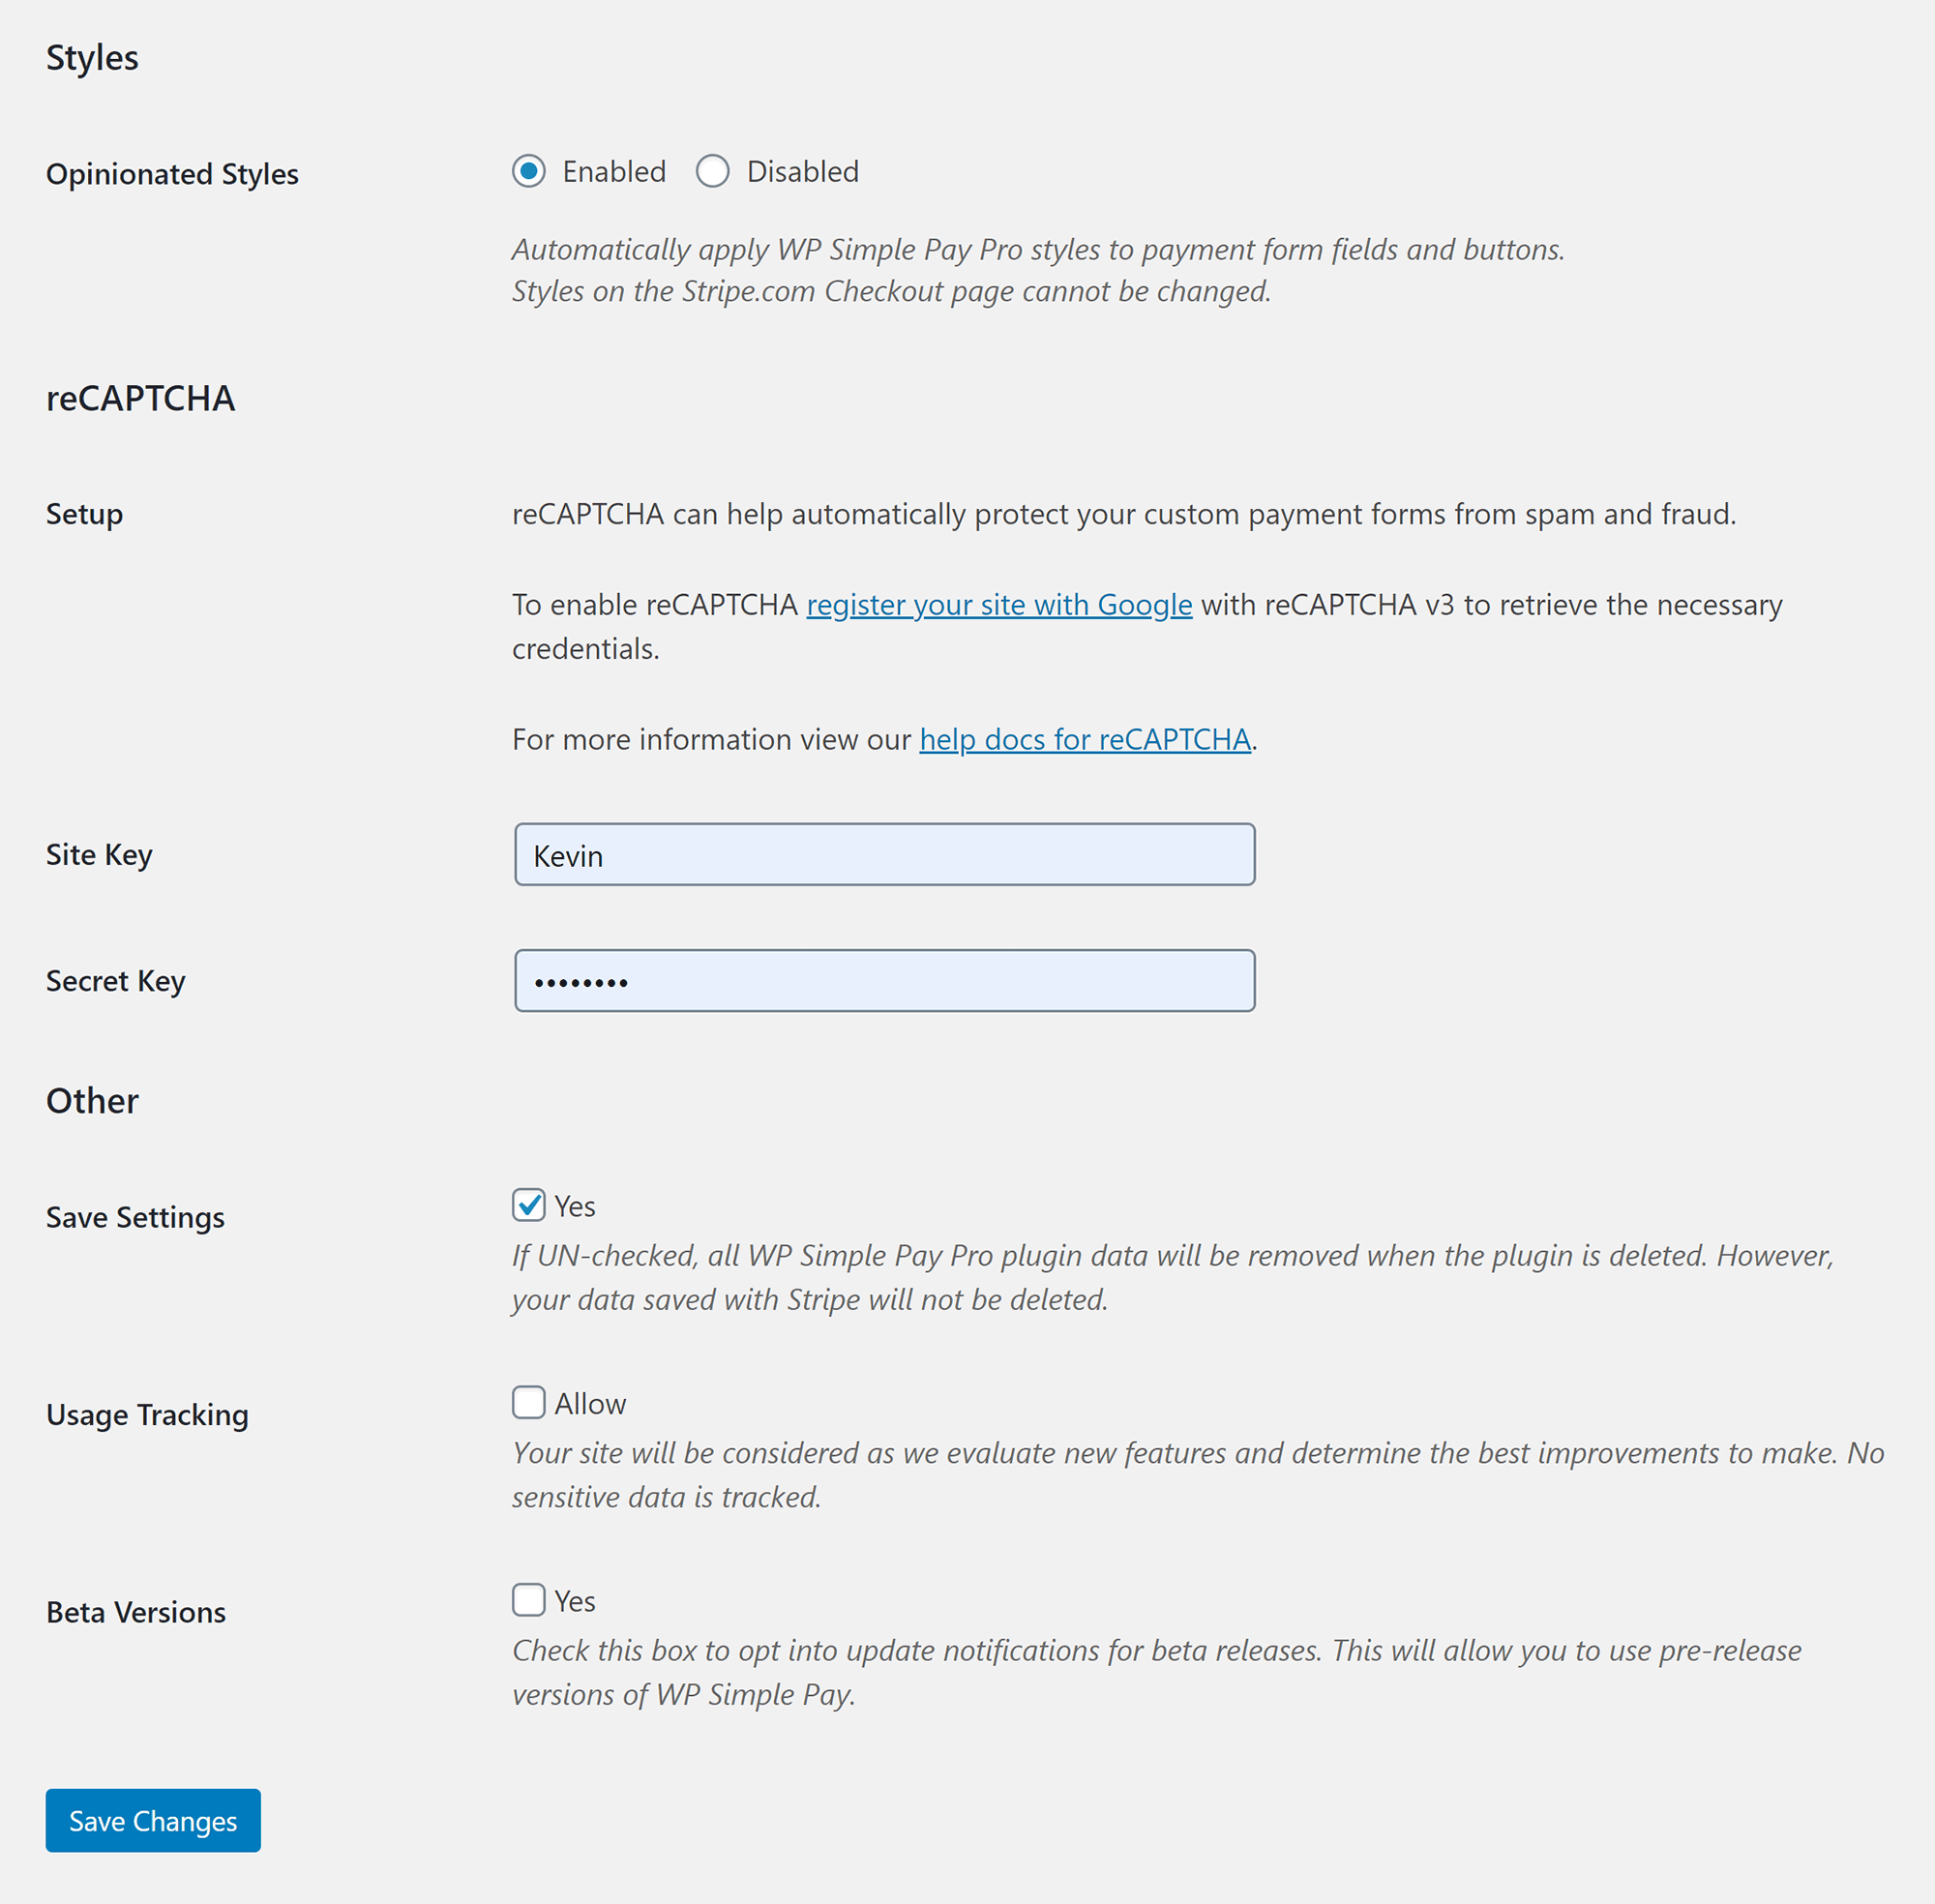
The opinionated styles option automatically applies WP Simple Pay Pro styles to payment form fields and buttons, while reCAPTCHA can be set on this page too.
This page also has an option to remove all WP Simple Pay data from your WordPress website once the plugin has been deleted.
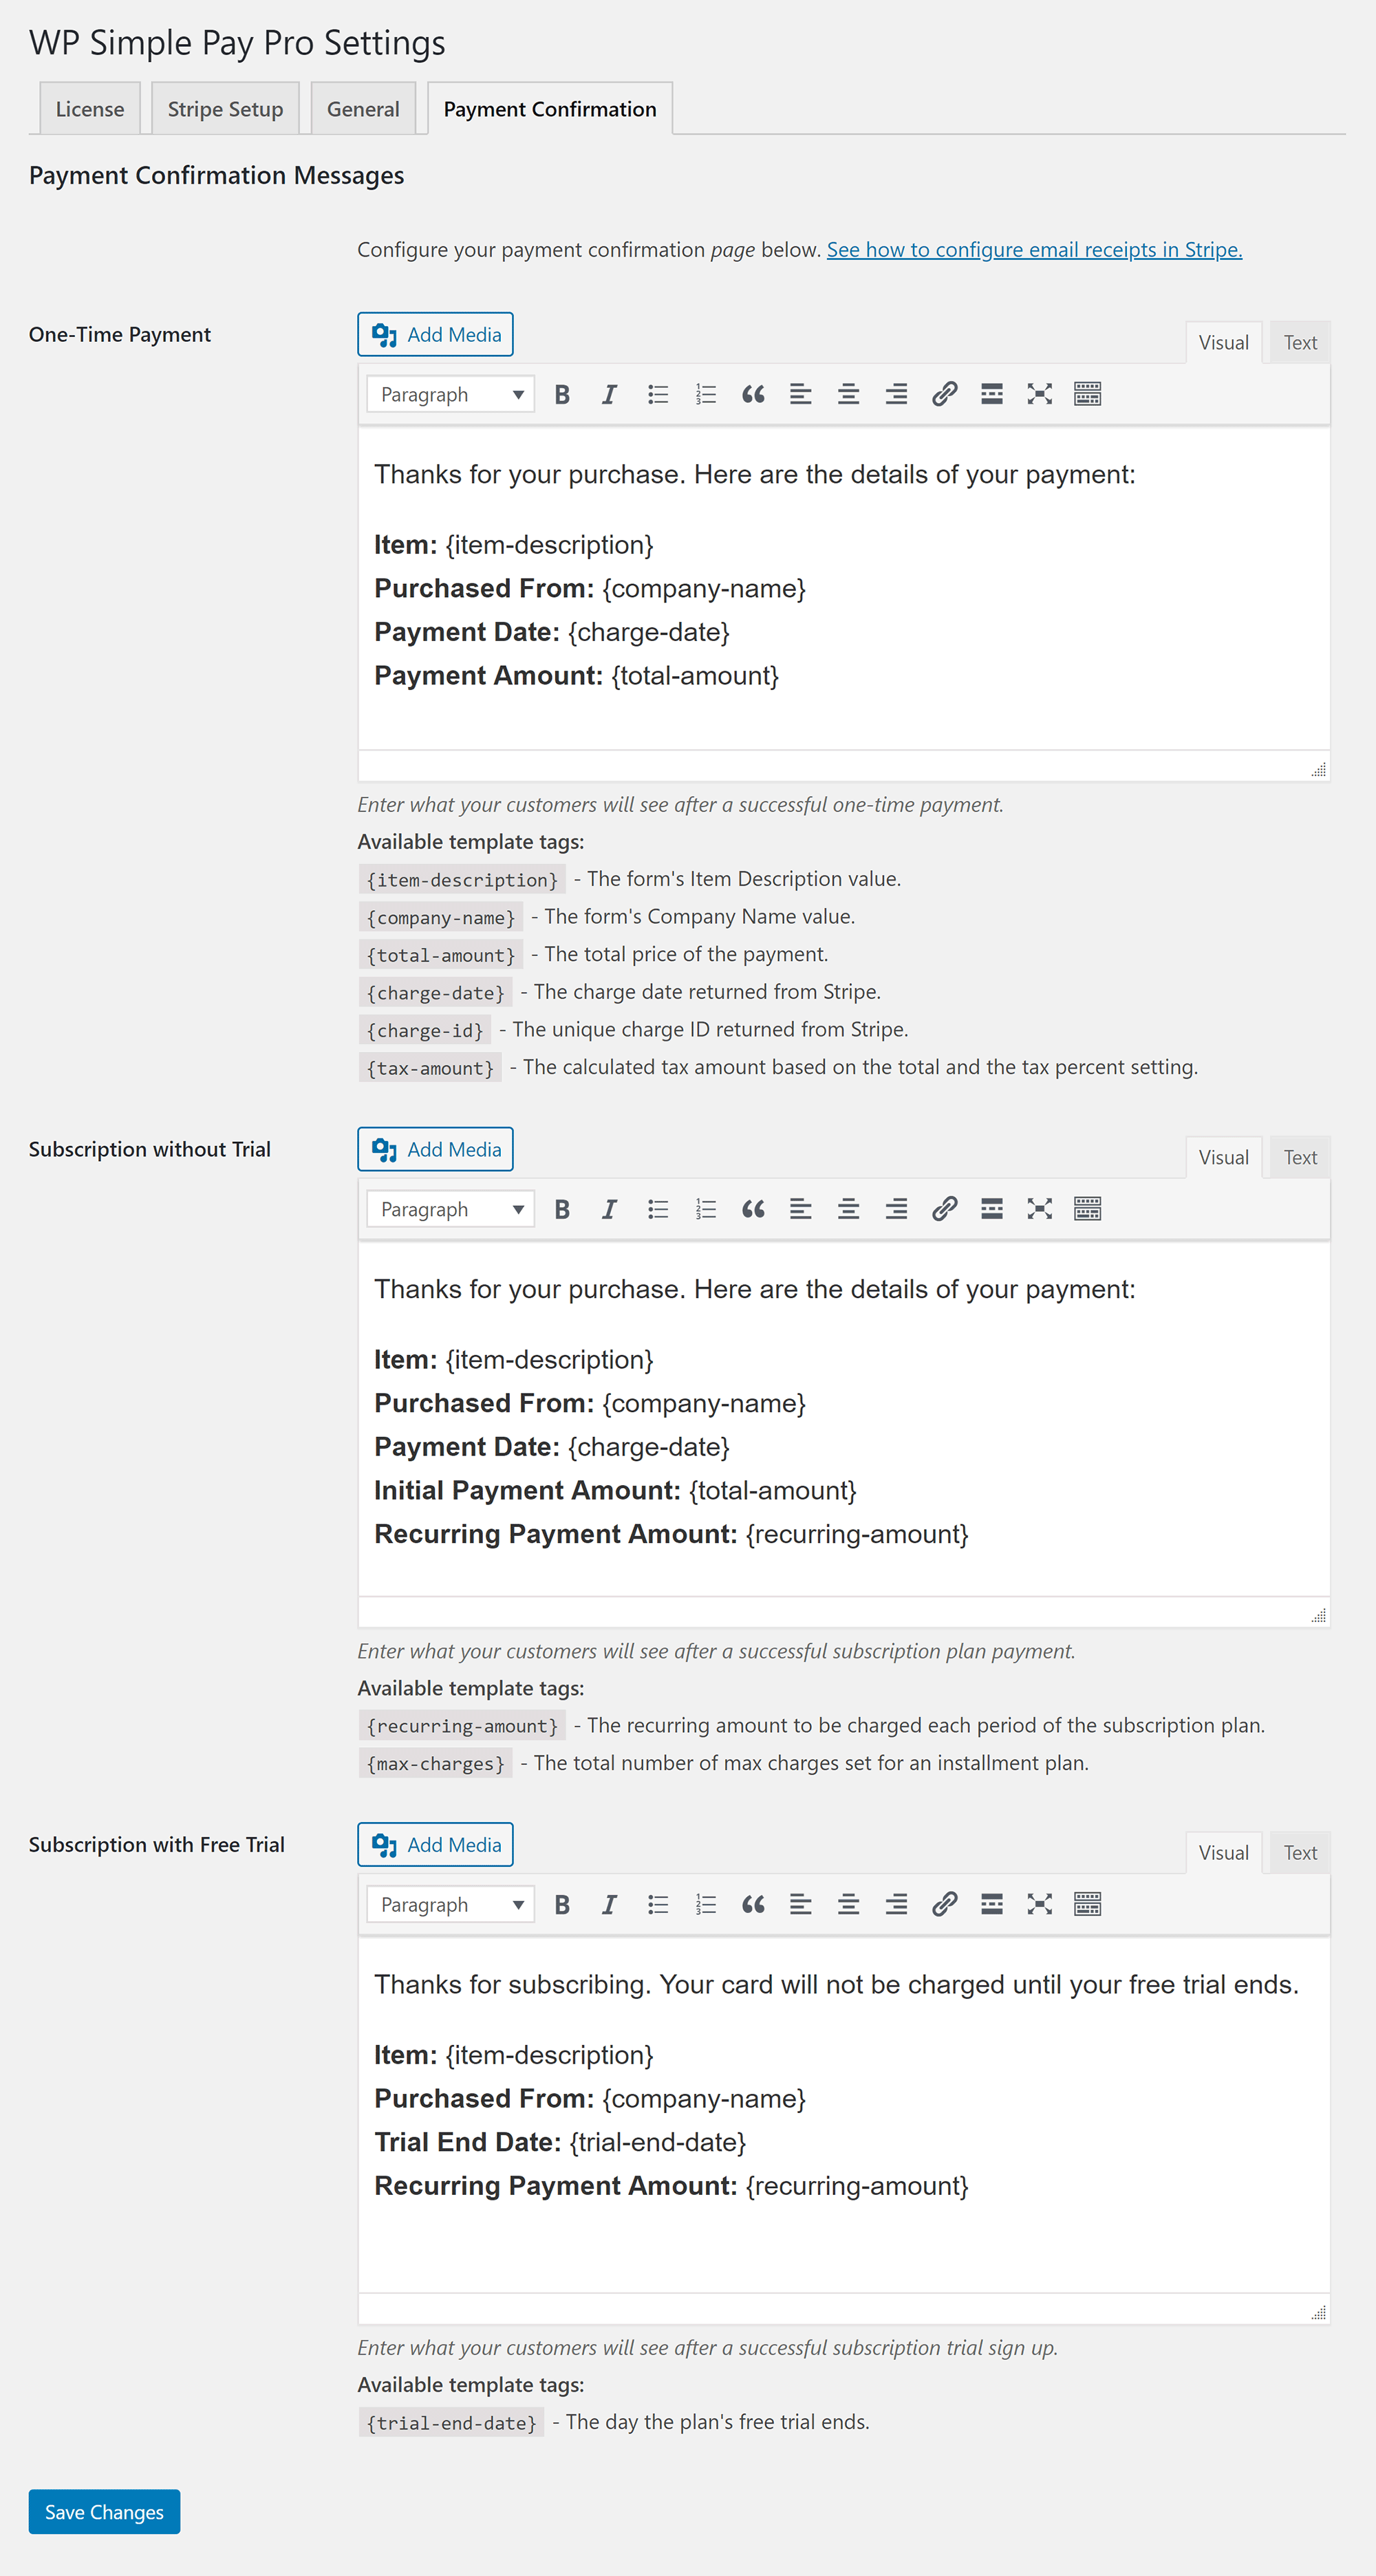
The last settings page lets you customise payment confirmation messages for one-time payments, subscriptions without trials and subscriptions with free trials.
Multiple template tags are available to help you to shape these confirmation messages.
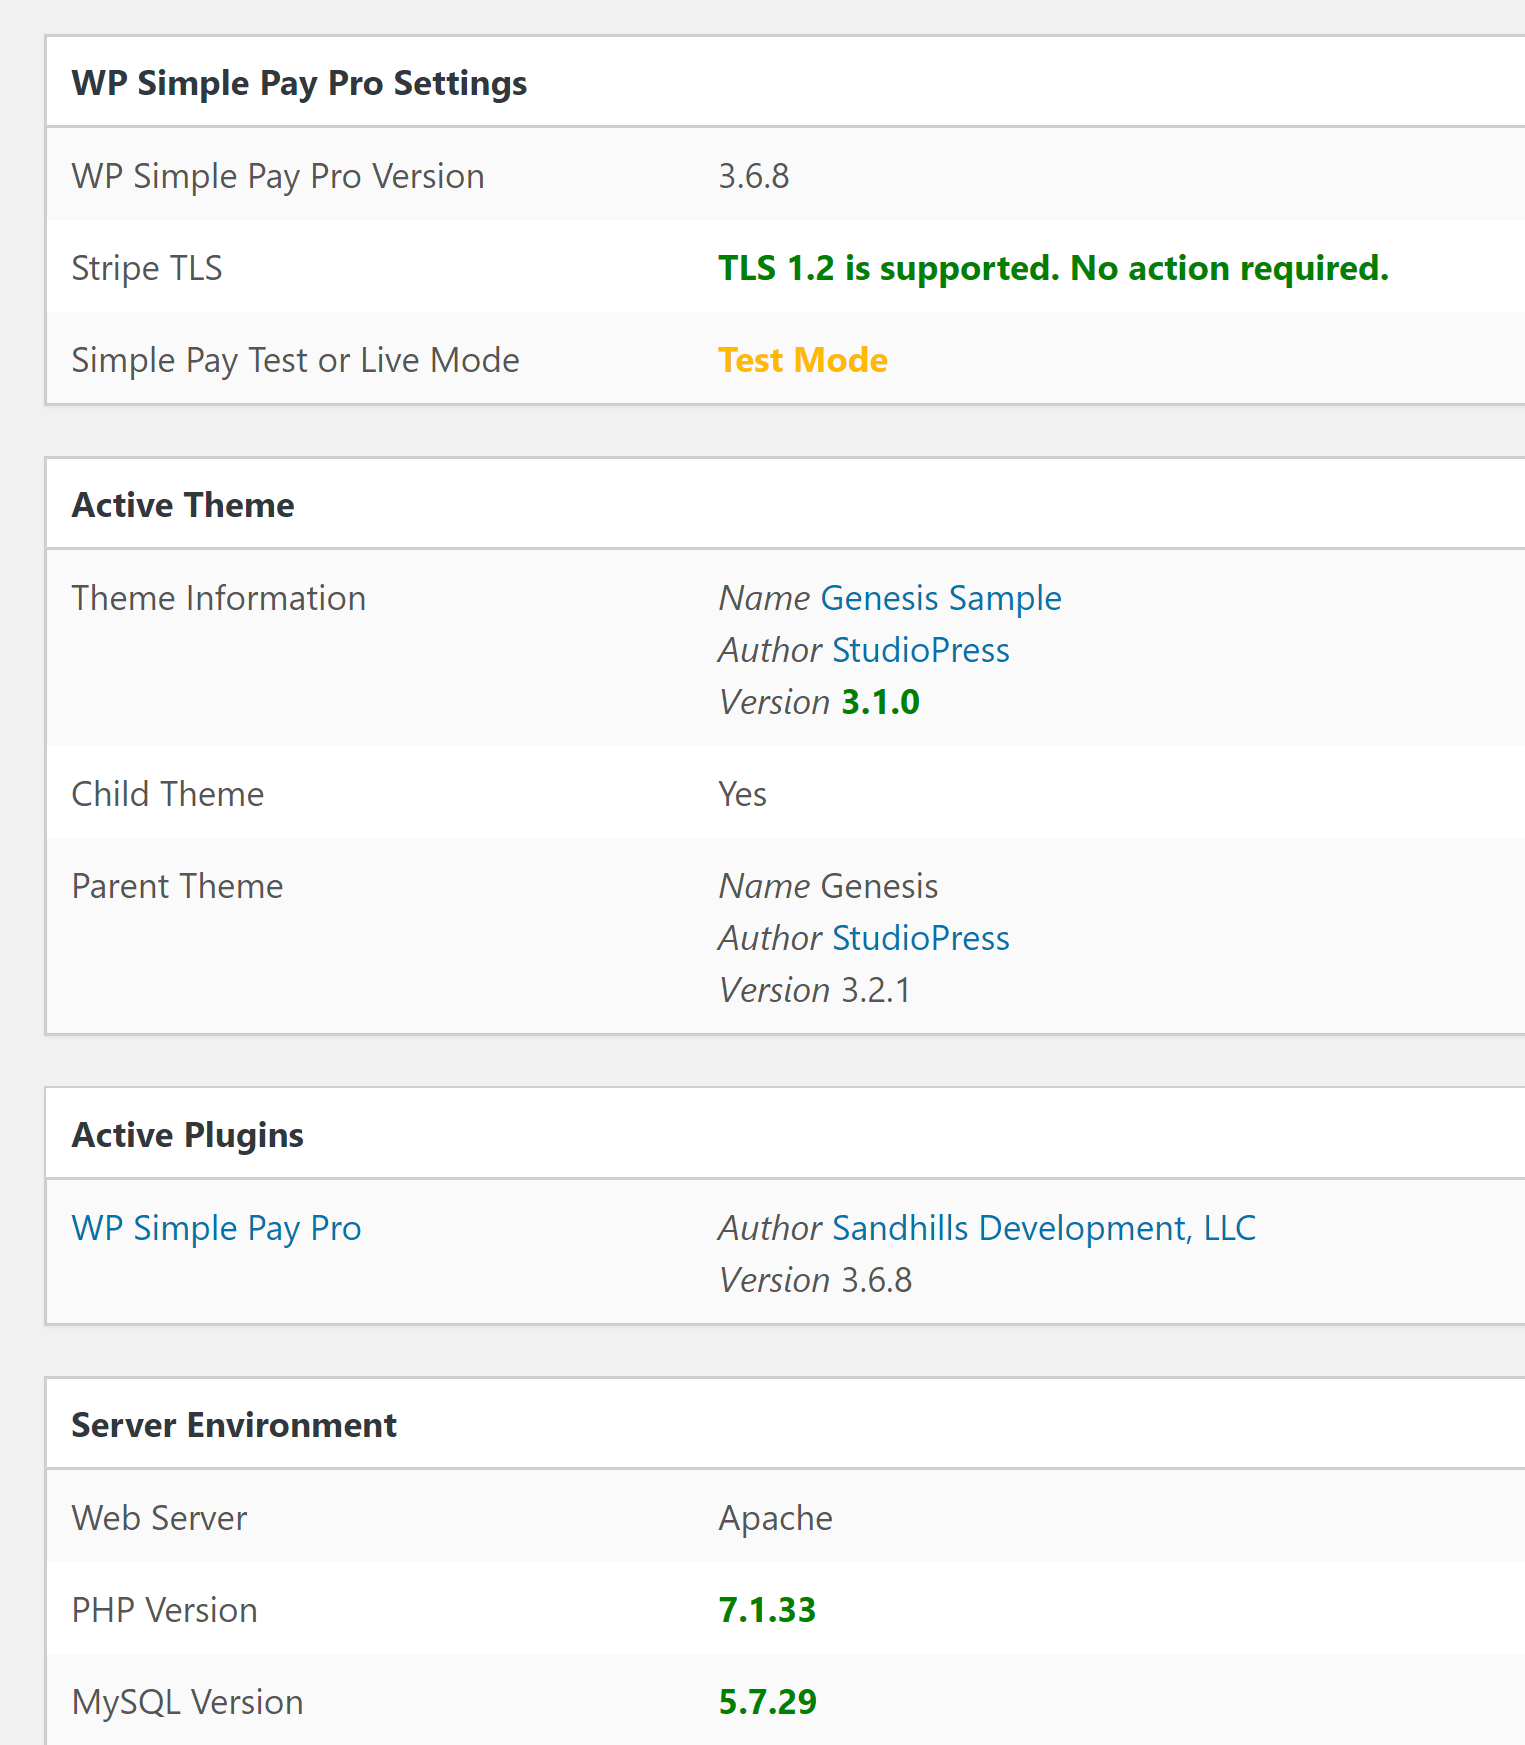
As you may recall, the WP Simple Pay admin menu also links to a system report page.
This page gives you a complete report on your WordPress installation, plugin settings and server environment. I recommend checking it after you have created your forms to ensure your hosting setup is optimised for WP Simple Pay.
Overall, the settings area of WP Simple Pay is easy to navigate, as there are only a few key settings you need to adjust.
WP Simple Pay Pricing
WP Simple Pay Lite is 100% free to use and lets you create an unlimited number of payment forms.
If you upgrade to the full version, you gain access to many additional features, such as the drag-and-drop design controls, custom fields, coupon codes, and support for Apple Pay and Google Pay.
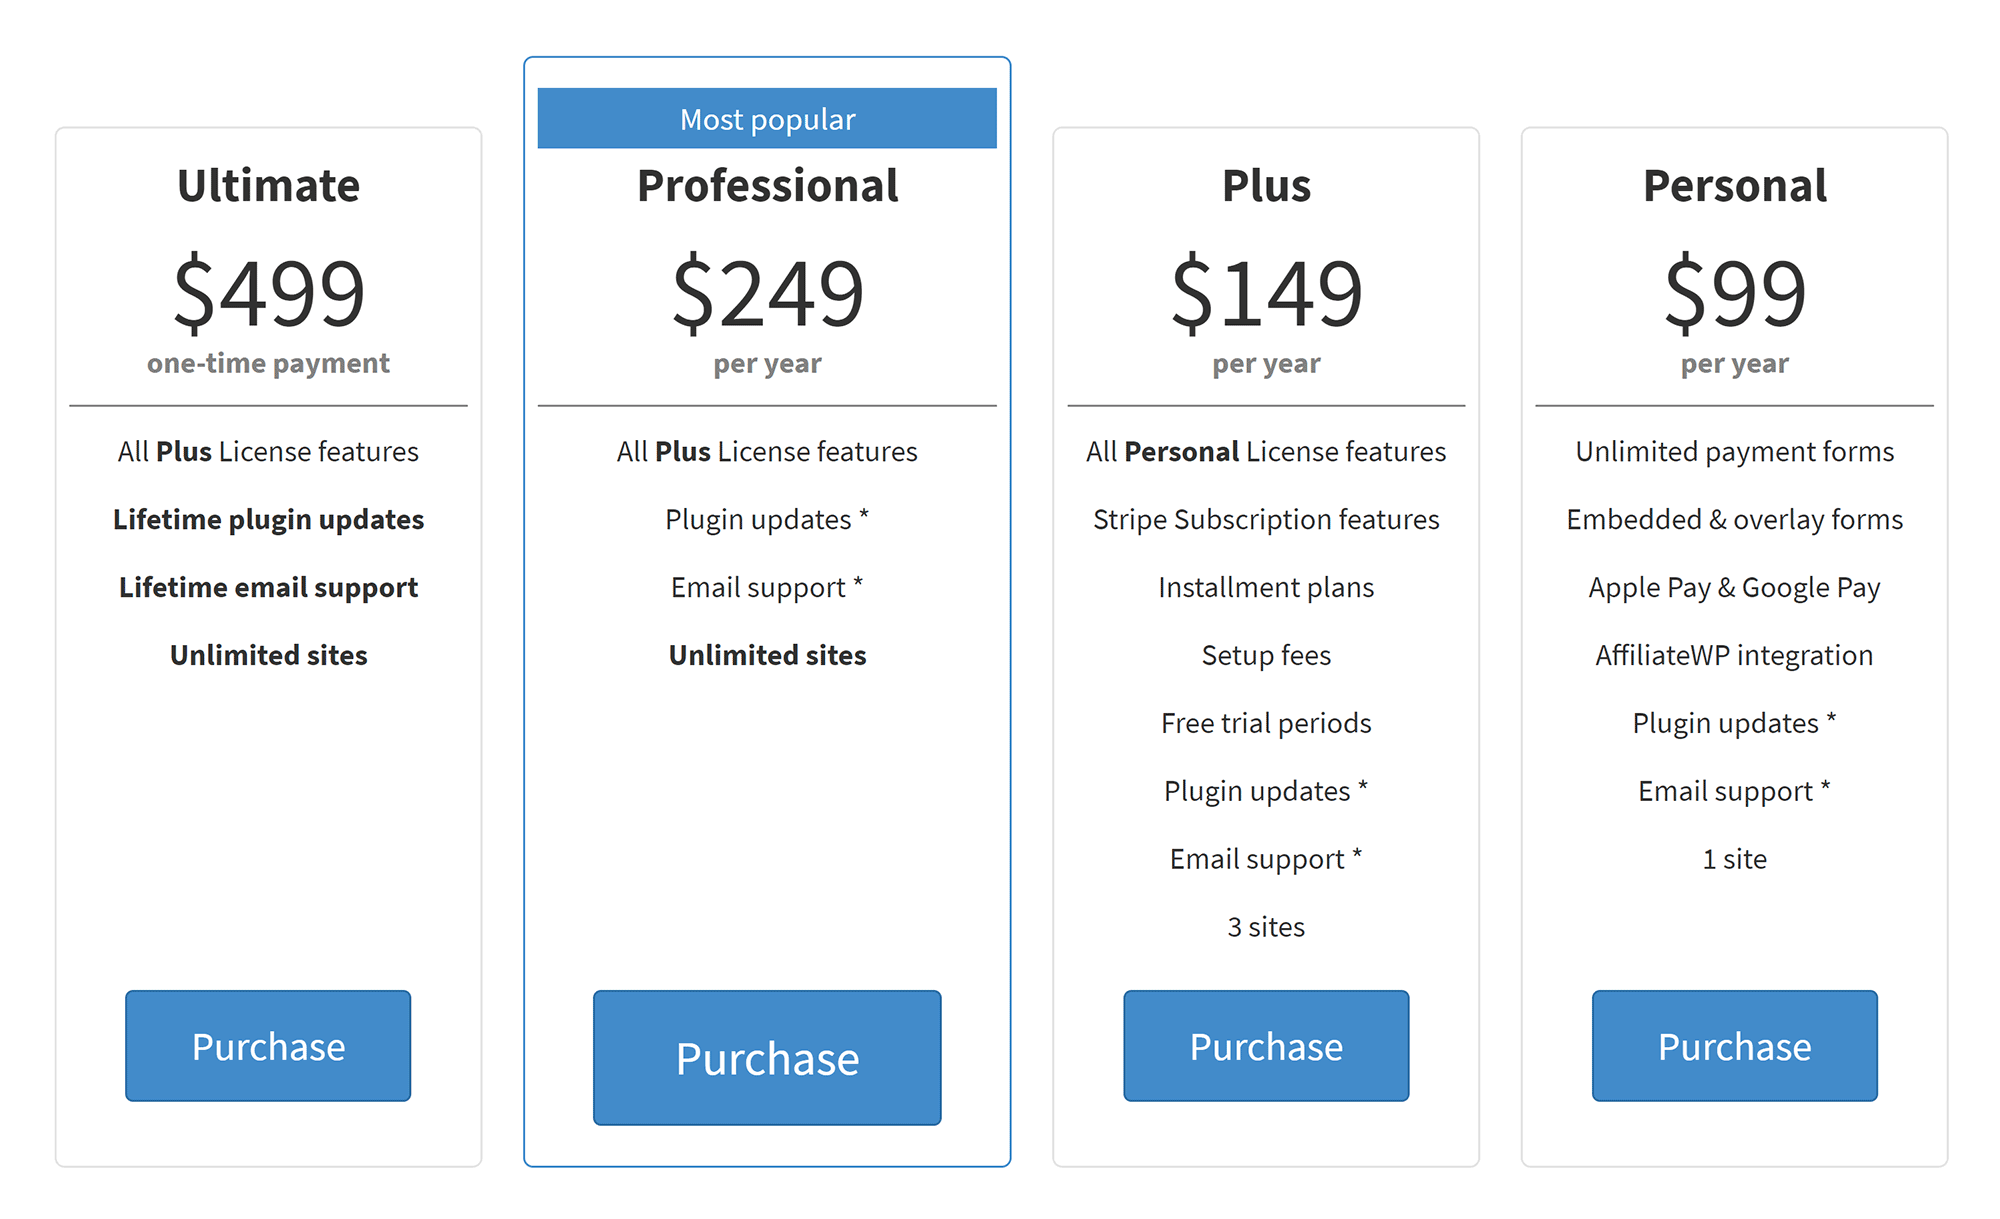
The personal license costs $99 a year, and gives you support and updates for one website. If you upgrade to the plus license, at $149 a year, you’ll increase website usage to three websites. You also add support for subscription payments and installment plans.
The $249-a-year professional plan has the same features as the plus license, but removes the website usage restriction. You can also remove the yearly renewal cost by purchasing WP Simple Pay with a one-time payment of $499.
WP Simple Pay has a helpful documentation area that explains how you use the plugin, but all premium WP Simple Pay customers receive priority support via email.
All premium plans come with a 30-day 100% money-back guarantee. Therefore, if you later find that WP Simple Pay can’t do exactly what you need, you can get a full refund.

The $149 plus license unlocks all features of WP Simple Pay, but, if subscriptions aren’t important to you, you may want to just purchase the $99 personal license.
Go with the cheaper $99 plan if you’re unsure, as you can upgrade your license from the account area at any time and just pay the difference.
Final Thoughts
The developers have, for the most part, done a fantastic job of striking the right balance between simplicity and functionality. You can use the plugin to create Stripe payment forms in just a few minutes, but a few additional options here and there would be welcomed.
WP Simple Pro Lite should be sufficient for those of you who just want a simple Stripe payment solution for your website.
WP Simple Pay Pro unlocks many additional features that will help you to create more complex forms and professional payment setups that offer subscriptions.
Used/using WP Simple Pay? Thoughts?


All comments are held for moderation. We'll only publish comments that are on topic and adhere to our Commenting Policy.