
How to Start a Blog – In 10 Easy-to-Follow, Simple Steps – In Less Than 30 Minutes!
Welcome to our beginner’s guide to starting a blog — right from the basics! We’ll walk you through ten easy-to-follow steps, from considering your options to creating a visually and technically superb site, and publishing your very first post.
By end of this guide, you’ll have chosen a platform for your blog, registered a domain name, and signed up with a web host. You’ll have also found a suitable theme for your blog and published your first piece of content.
Along the way, we’ll give you all of the information you’ll need to make informed decisions about your would-be blog, such as which web host to choose and whether or not you should use WordPress.
Let’s get started!
Start a Blog Today in 10 Steps
If you follow these 10 steps, there’s no reason why you shouldn’t be able to have your very own blog online in less than 30 minutes.
1) Choose a Blogging Platform
When it comes to starting a blog, the first step is choosing the right blogging platform. Thankfully, there are plenty of options to consider and lots of competition in this space. However, for reasons we’ll cover in just a second, WordPress is our recommended choice for starting a blog.
Not only is the WordPress software used by around 26 percent of the top million websites, but it’s also the platform of choice for companies such as The New Yorker and Sony Music. So, if you start a blog using WordPress, you’ll be in great company.
Benefits of Starting a Blog with WordPress.org
More importantly, the WordPress software is straightforward to use, highly customizable, and easily enhanced through its huge selection of themes and plugins. We’ll help you to choose a theme for your WordPress blog later on in this guide, and, thanks to the wealth of free and paid themes, you should have no trouble finding the perfect design for your blog.

Another benefit of choosing the WordPress blogging platform is it’s free to use. There are, however, some costs involved in starting and running a blog, which we’ll get to next. You also have a great deal of freedom over how you configure your blog and what content you can publish if you choose WordPress.
If you ever want to expand your blog and turn it into another type of website, such as an ecommerce store or a membership site with paid content, you’ll have no problem doing so with WordPress, thanks to its library of plugins. Tutorials, guides and advice on starting and running your blog with WordPress aren’t in short supply either, ensuring you’re able to find help whenever you need it.
Furthermore, WordPress is highly scalable, ensuring your blog will run smoothly from its first post to its one thousandth and beyond.
WordPress.org vs WordPress.com
Just for clarity, when we talk about choosing WordPress as your blogging platform, we’re referring to the self-hosted version of the software provided by the WordPress.org website, rather than the hosted service available through the WordPress.com site. Opting for the former has many benefits, including complete ownership of, and creative freedom over, your blog, as well as many other advantages, which are covered in our WordPress.com and WordPress.org comparison video.
What about Free Blogging Platforms?
As mentioned, while the blogging platform available from WordPress.org is free to use, you’ll need to pay a web host to keep your blog online. So, why not choose a totally free blogging platform, such as Medium or Blogger instead?
Well, the main reason to avoid free blogging platforms is they’ll limit the options for what you can do with your blog — mainly, in terms of publishing content and customizing the design of your site. Although free to use, they usually make their money back by displaying adverts to your readers.
Also, by choosing the WordPress.org software and making your own hosting arrangements (which we’ll cover next), you retain greater ownership of your blog and its content, rather than being bound by the terms and services of a free blogging platform. This can be an especially attractive prospect if you plan to monetize your blog in some way, as there’ll be fewer rules and restrictions in this area.
Furthermore, rather than being a commercial blogging platform that can be sold, merged, or closed down, WordPress is an open source software application that’s looked after and maintained by hundreds of contributors from around the world. You own your WordPress blog, so even if the WordPress Foundation went bust your blog would continue to function as normal.
Hopefully, you see the benefits of choosing WordPress as your blogging platform, so let’s move on to the next step in our guide on how to start a blog.
2) Register a Domain Name
If a self-hosted WordPress blog sounds like the right platform for you, the next step is to register a domain name and choose a web host that will get your blog online.
How to Choose a Domain Name for Your Blog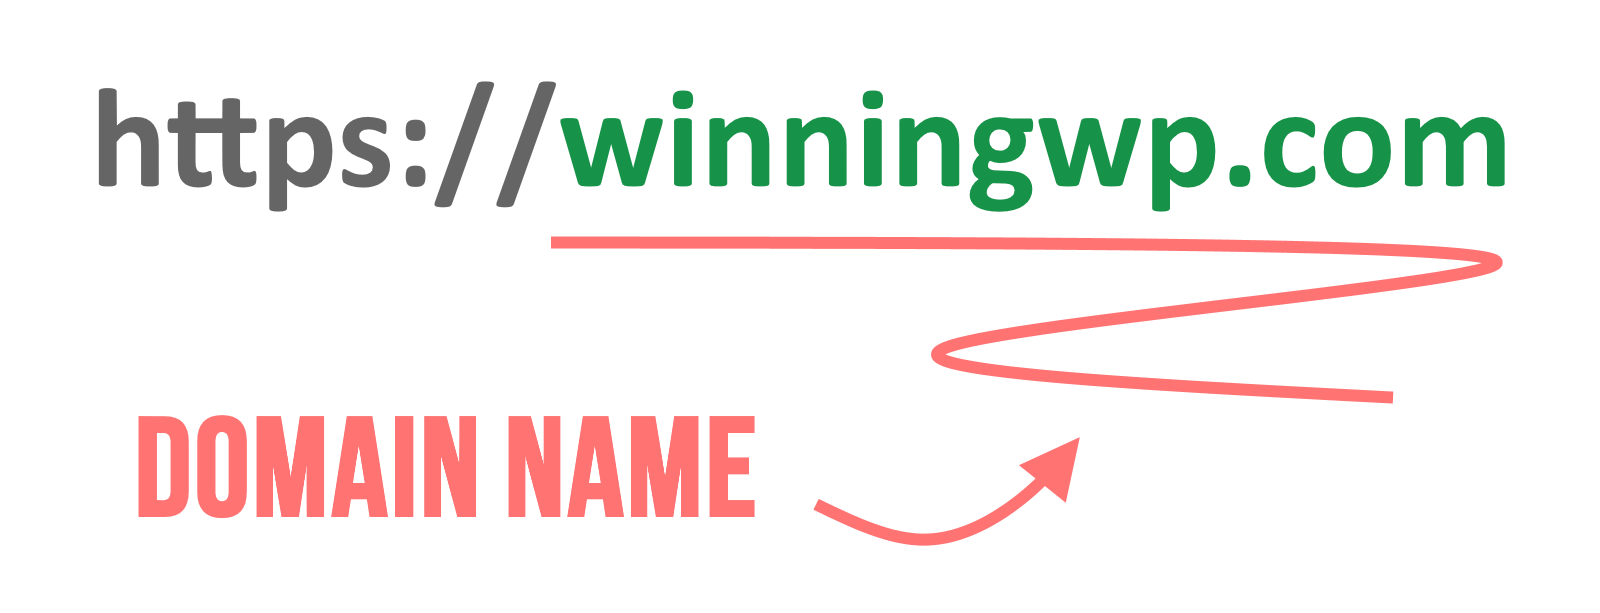
A domain name is best described as the address of your blog or website on the internet, such as WinningWP.com. Although you can change the domain name of your blog in the future, doing so isn’t a decision you’ll want to take lightly. Moving over to a new domain name has the potential to confuse your regular visitors, decrease your visibility in search engines such as Google, and void any links pointing to your blog.
Even if you don’t have big goals for your blog, it’s definitely worth spending some time considering its domain name. Some tips include opting for something brandable, keeping it short and simple, and choosing a suitable domain name extension, such as .com.
For more advice, our guide to choosing the best possible domain name has lots of tips to ensure you make the right decision. The best domain name generators can also help to provide you with some inspiration for your blog.
Registering Your Domain Name
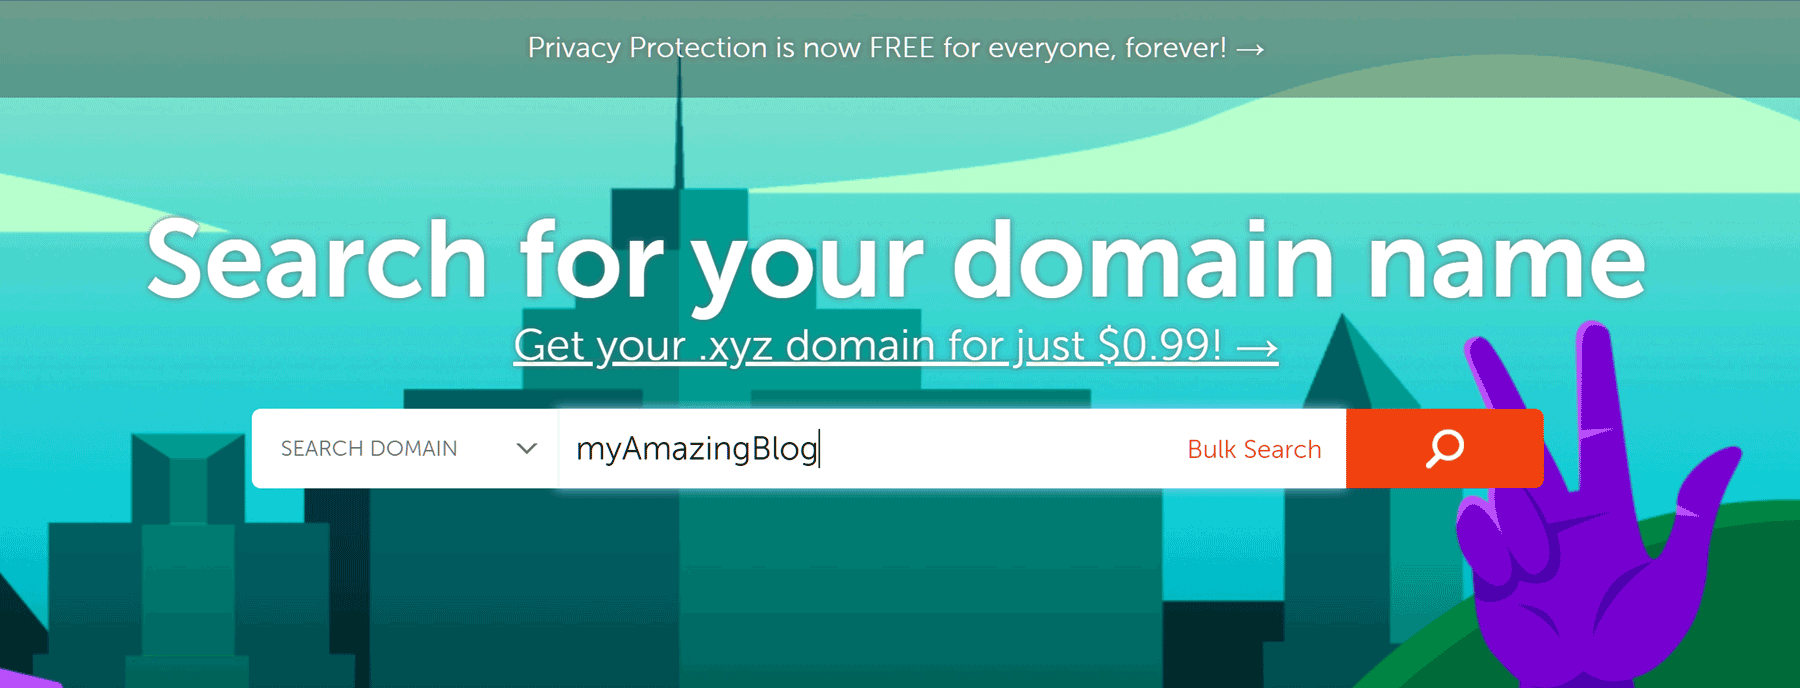
NameCheap.com is one place where you can register a domain name.
Once you’ve decided on a domain name for your blog, you’ll need to register that name. There are two main options for doing so: Using a domain registrar or letting the web host you sign up with take care of it for you. Both options have their pros and cons, but, to keep things simple, registering your domain name through your web host is the recommended approach.
3) Choose a Web Host for Your Blog
A web host will let you install the WordPress software on their servers, and then make your website or blog publicly available to anyone connected to the internet. As the quality of the web host will determine how often your blog goes offline and how quickly or slowly it loads, it’s vital you choose the best service you can afford. Your web host will often be your first port of call should anything go wrong with your blog, so choosing a company with a reputation for good customer service is important too.
Our Recommended Web Host for New Bloggers
When it comes to choosing a web host for your new WordPress blog, SiteGround get our recommendation. Not only do they offer great value hosting packages, but they also deliver impressive levels of availability and fast loading times to ensure your website is online and doesn’t frustrate visitors with long delays.
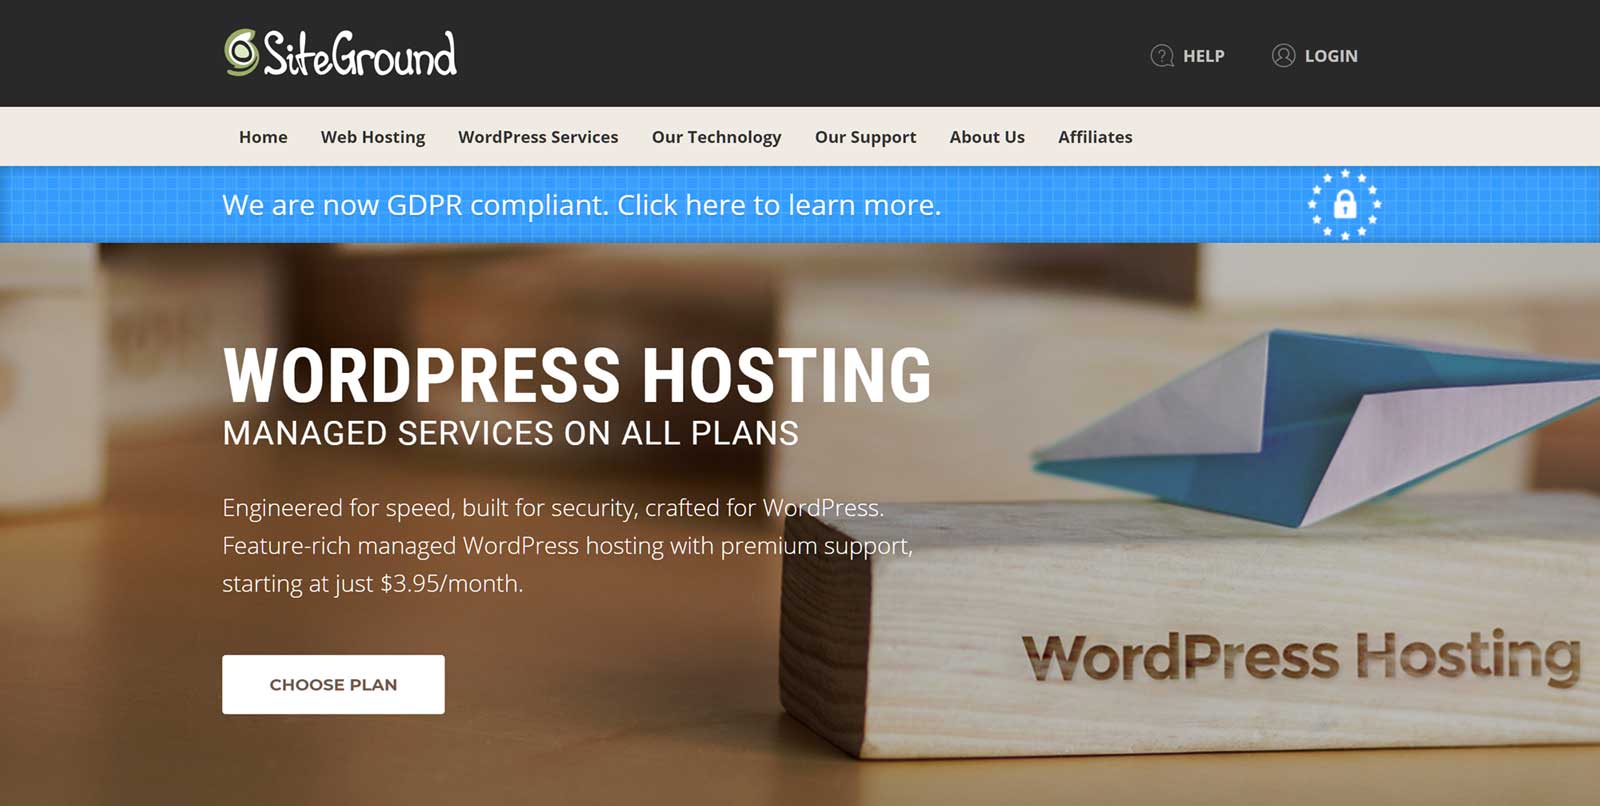
SiteGround are our recommended web host for starting a new WordPress blog.
There are slightly cheaper web hosts, such as Bluehost or GoDaddy, but compared with SiteGround they aren’t as fast or as capable of handling as many visitors.
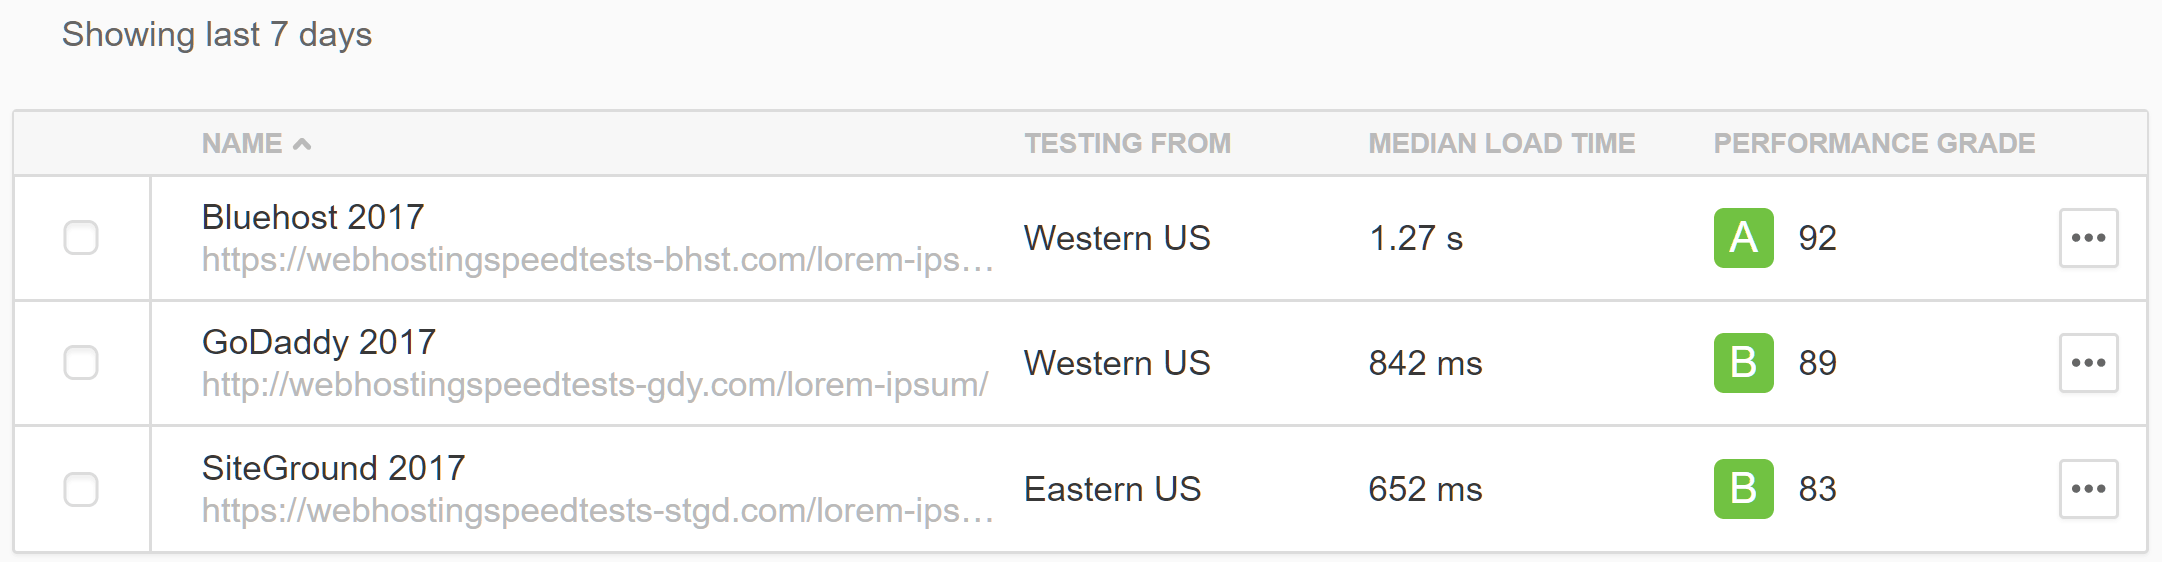
Our tests show that SiteGround’s plans are faster than comparable web hosting plans from Bluehost and GoDaddy.
SiteGround are also renowned for high levels of customer support, especially for those using WordPress. They’ll take care of registering the domain name for your blog when you sign up too — not to mention installing the WordPress software for you. Their WordPress hosting is scalable, so they’ll be able to handle the traffic as your audience grows.
What About Managed WordPress Hosting?
If you have big plans for your blog, or expect it to receive lots of visitors from the outset, then you may want to consider investing in managed WordPress hosting, as opposed to shared web hosting. The fees are higher, but you get access to higher-powered servers that deliver faster loading times and have the ability to handle more simultaneous visitors to your blog.
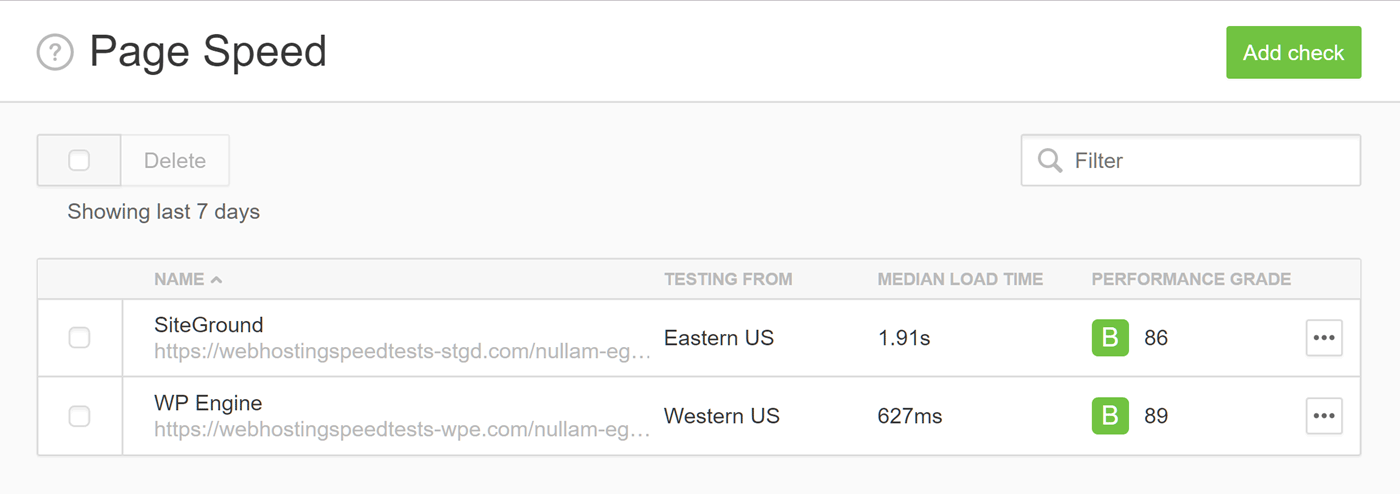
In our tests, WP Engine managed web hosting outperformed the SiteGround shared hosting plan.
If you want to know more about this type of service, including how to determine when it’s worth paying extra for upgraded hosting, our guide to managed WordPress hosting explains all. Our head-to-head comparison of WP Engine and SiteGround includes data on the differences in loading times that you could experience by upgrading to high-performance hosting.
However, for most readers starting their first WordPress blog, the plans from SiteGround should suffice.
4) Signing up with SiteGround Web Hosting
SiteGround offer a number of web hosting plans, but for those at the beginning of their blogging journey the entry-level StartUp plan is a great value option.
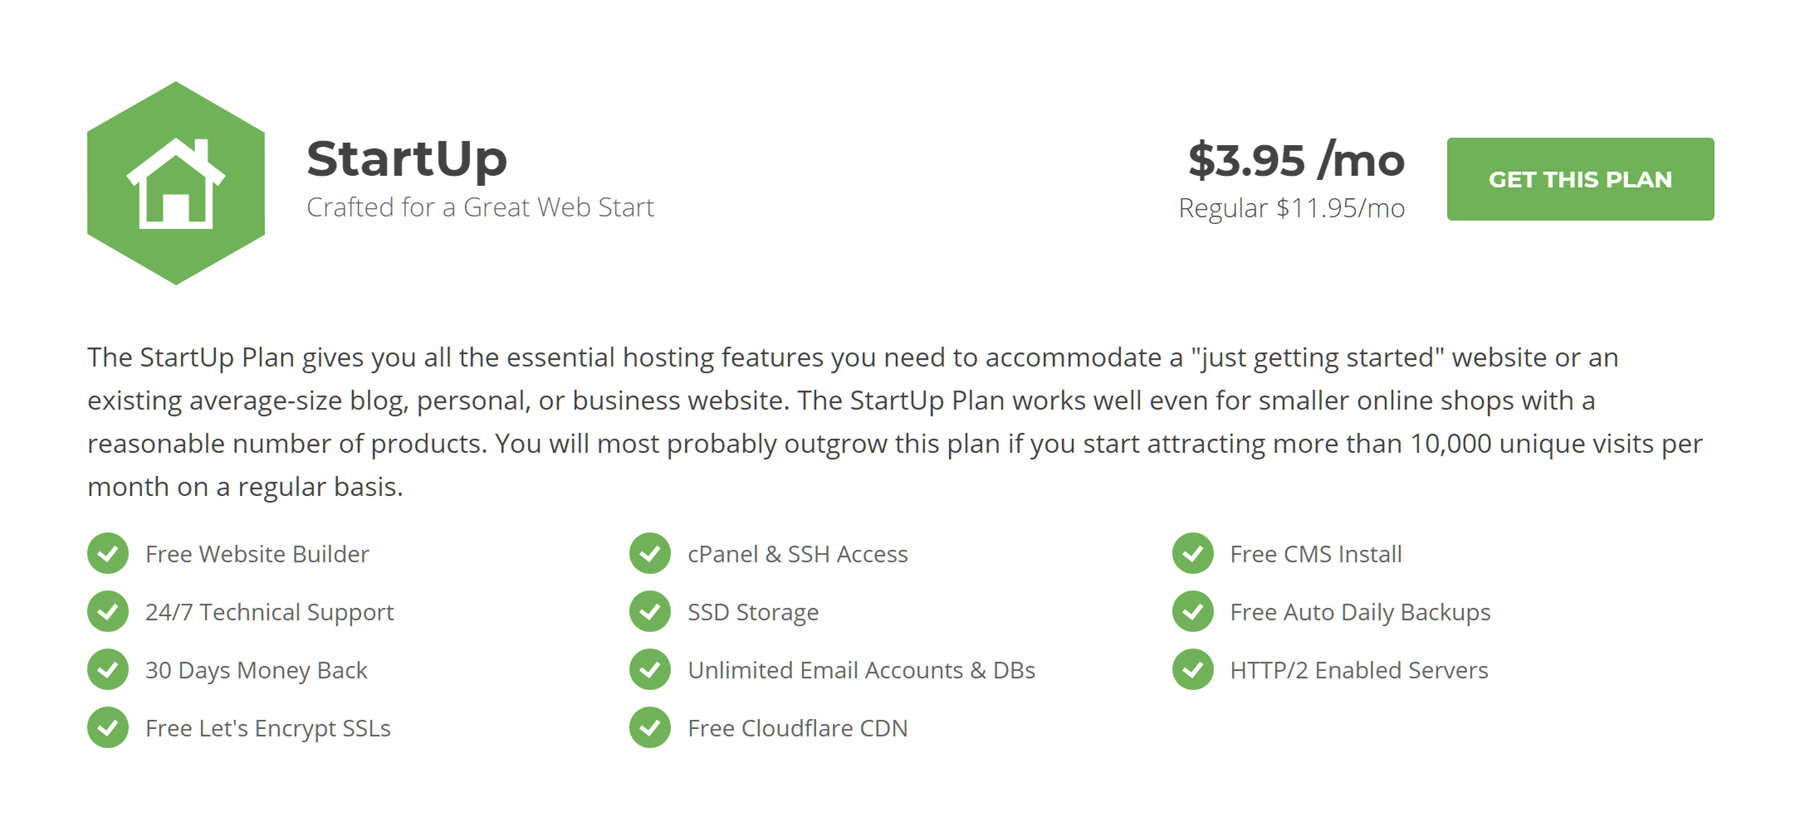
The SiteGround entry-level StartUp plan is a great choice for new blogs.
Signing up is easy, and the introductory pricing means you’ll pay just $3.95 per month for your first invoice. With 12, 24, and 36-month invoice options available, the savings could be huge compared with paying monthly and being charged the $11.95 standard fee. After clicking on the Get Started button, you can enter the domain name you’d like to use for your blog and let SiteGround register it for you. If you’ve already registered a domain name, enter it into the same field.
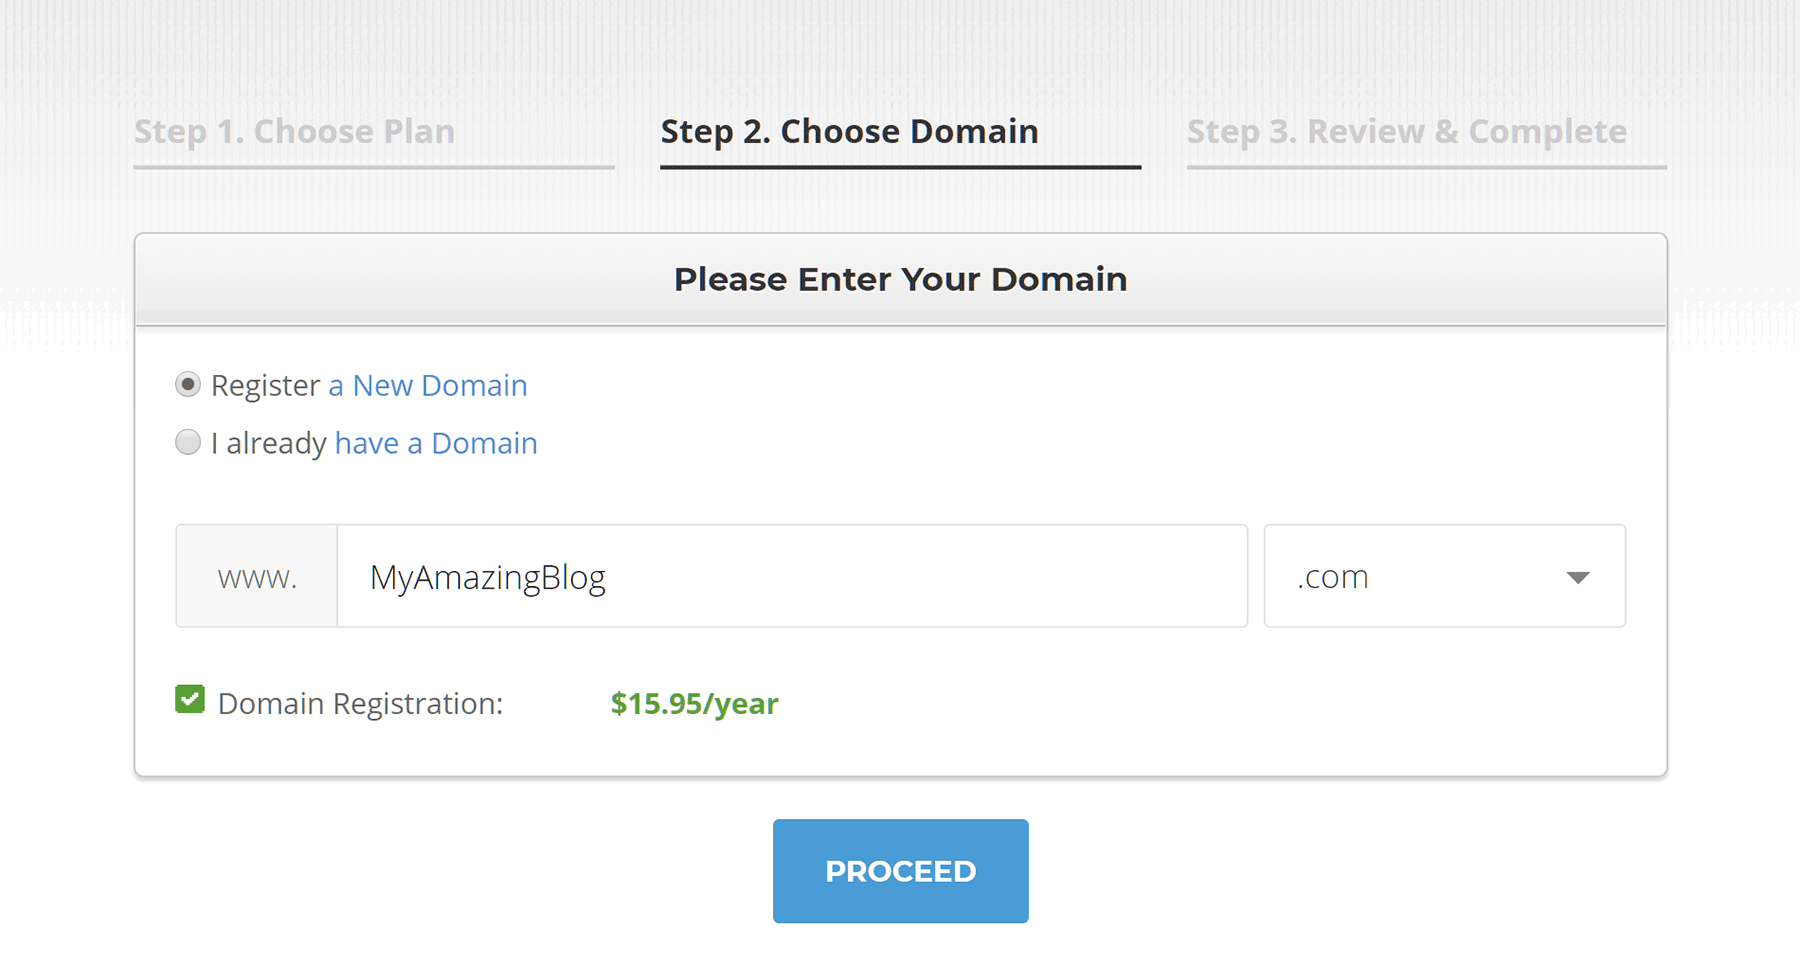
You can register a new domain name or transfer an existing one with SiteGround.
In the next step of the SiteGround registration process, you can enter your personal information and payment details before choosing a data center and billing period. Choosing a data center closest to where you expect the majority of your audience to be based will deliver the fastest loading times for those visitors. Current SiteGround data center locations include Chicago (USA), Amsterdam (NL), Singapore (SG) and London (UK).
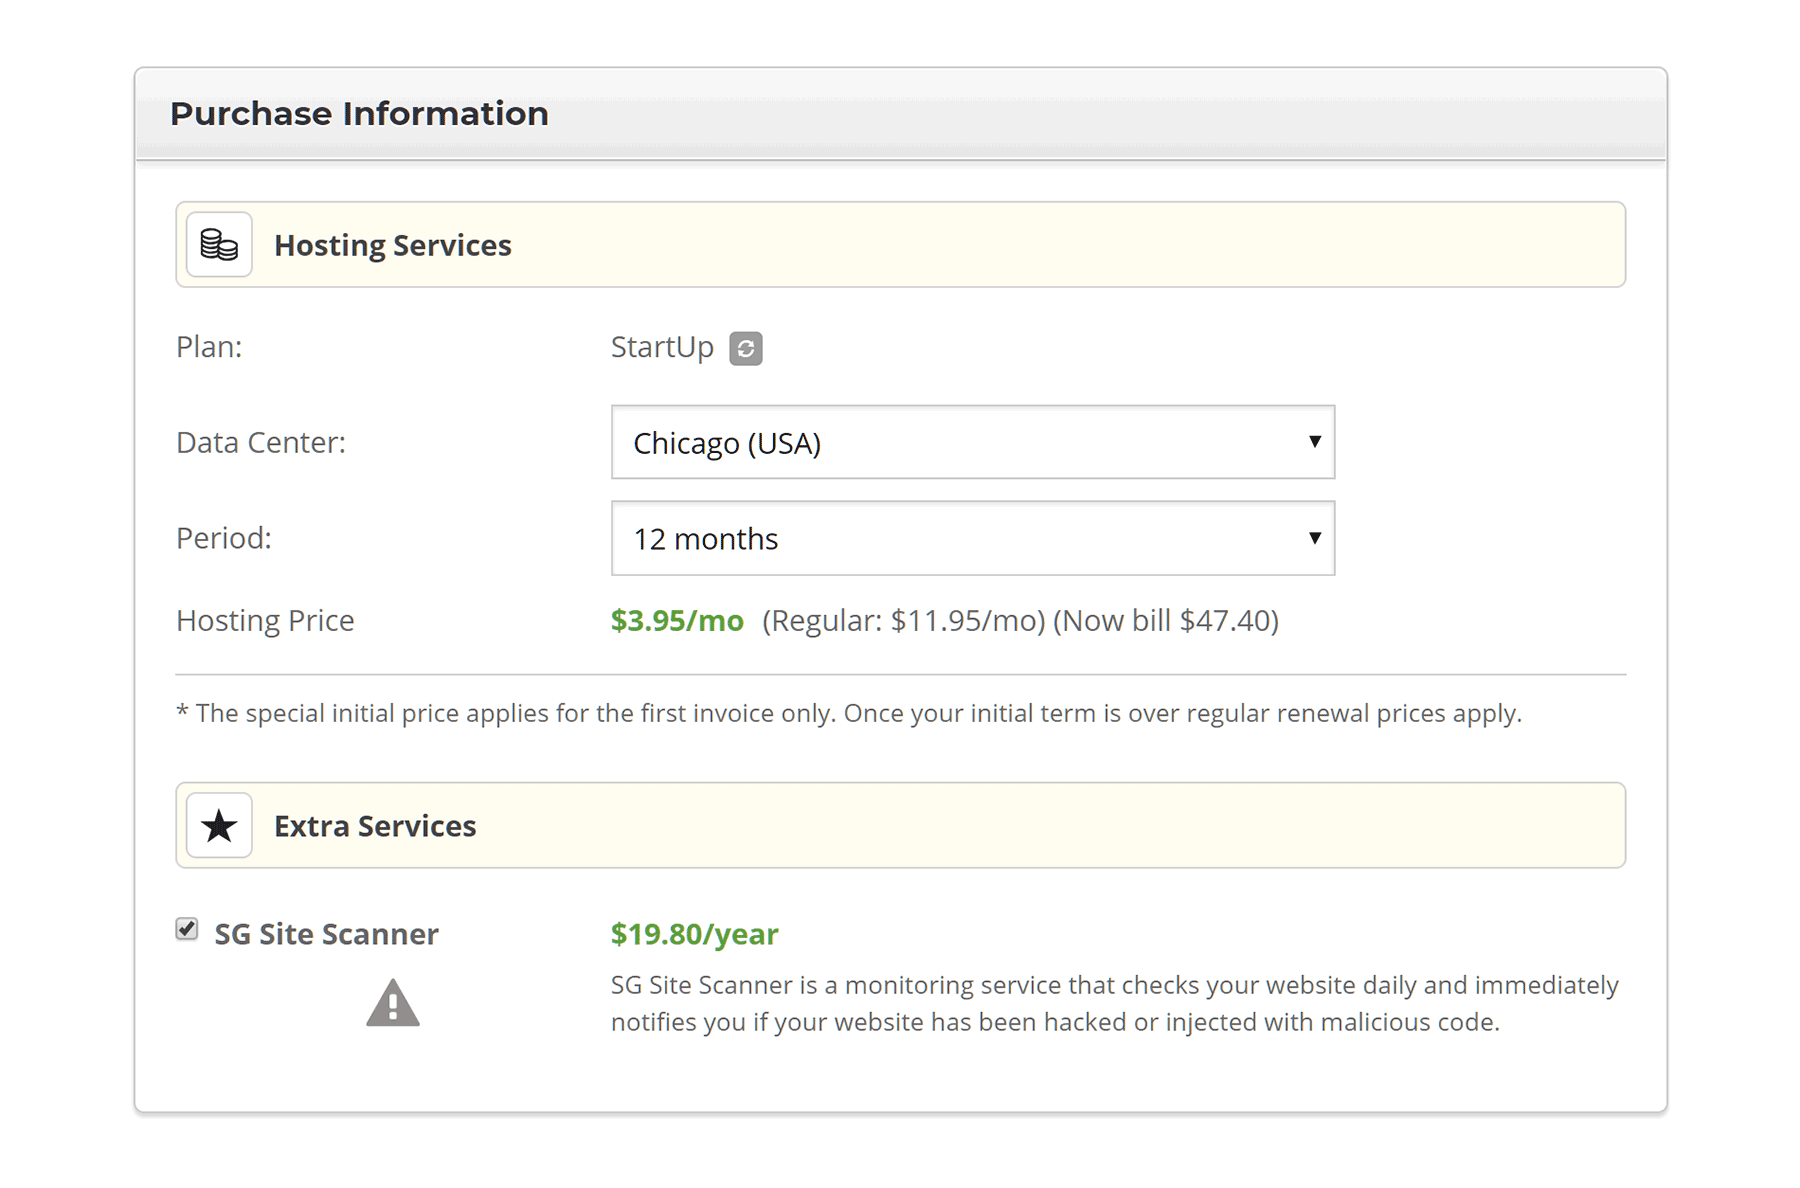
Paying in advance can help you to save money on web hosting.
As mentioned, new SiteGround customers are charged $3.95 per month for their first invoice, instead of the usual $11.95. Choosing to pay for 12 months, or even 24 or 36 months upfront, gets you access to the reduced $3.95 monthly fee for a longer period than just the first month. SiteGround also waive the $14.95 setup fee for those paying for more than a month upfront.
For example, choosing the 24-month option will cost you $94.80 up front. So, compared with paying monthly, whereby you’ll make 23 payments of $11.95 for the same period, plus the first month at $3.95, and a $14.95 setup fee, coming to $293.75, you’ll save $198.95 over those two years.
There’s also the SG Site Scanner optional extra for $19.80 per year, which will help to keep your blog secure. However, if you’re starting your blog on a budget, you may want to skip this upgrade to keep costs as low as possible.
After paying, you’ll receive an email from SiteGround with your account details. You’re now well on your way to launching your blog.

SiteGround should email you almost instantly to let you know your account is ready.
5) Install the WordPress Blogging Platform Software
One option for getting WordPress installed on your web hosting server is to contact the help desk staff via live chat or telephone and request that this task is taken care of. However, as we’ll see in this section of our guide, doing it yourself using the SiteGround WordPress installer is very straightforward.
How to Install WordPress with SiteGround
If you want to install WordPress yourself, log in to your SiteGround account dashboard at https://ua.siteground.com/
Click on the My Accounts tab.
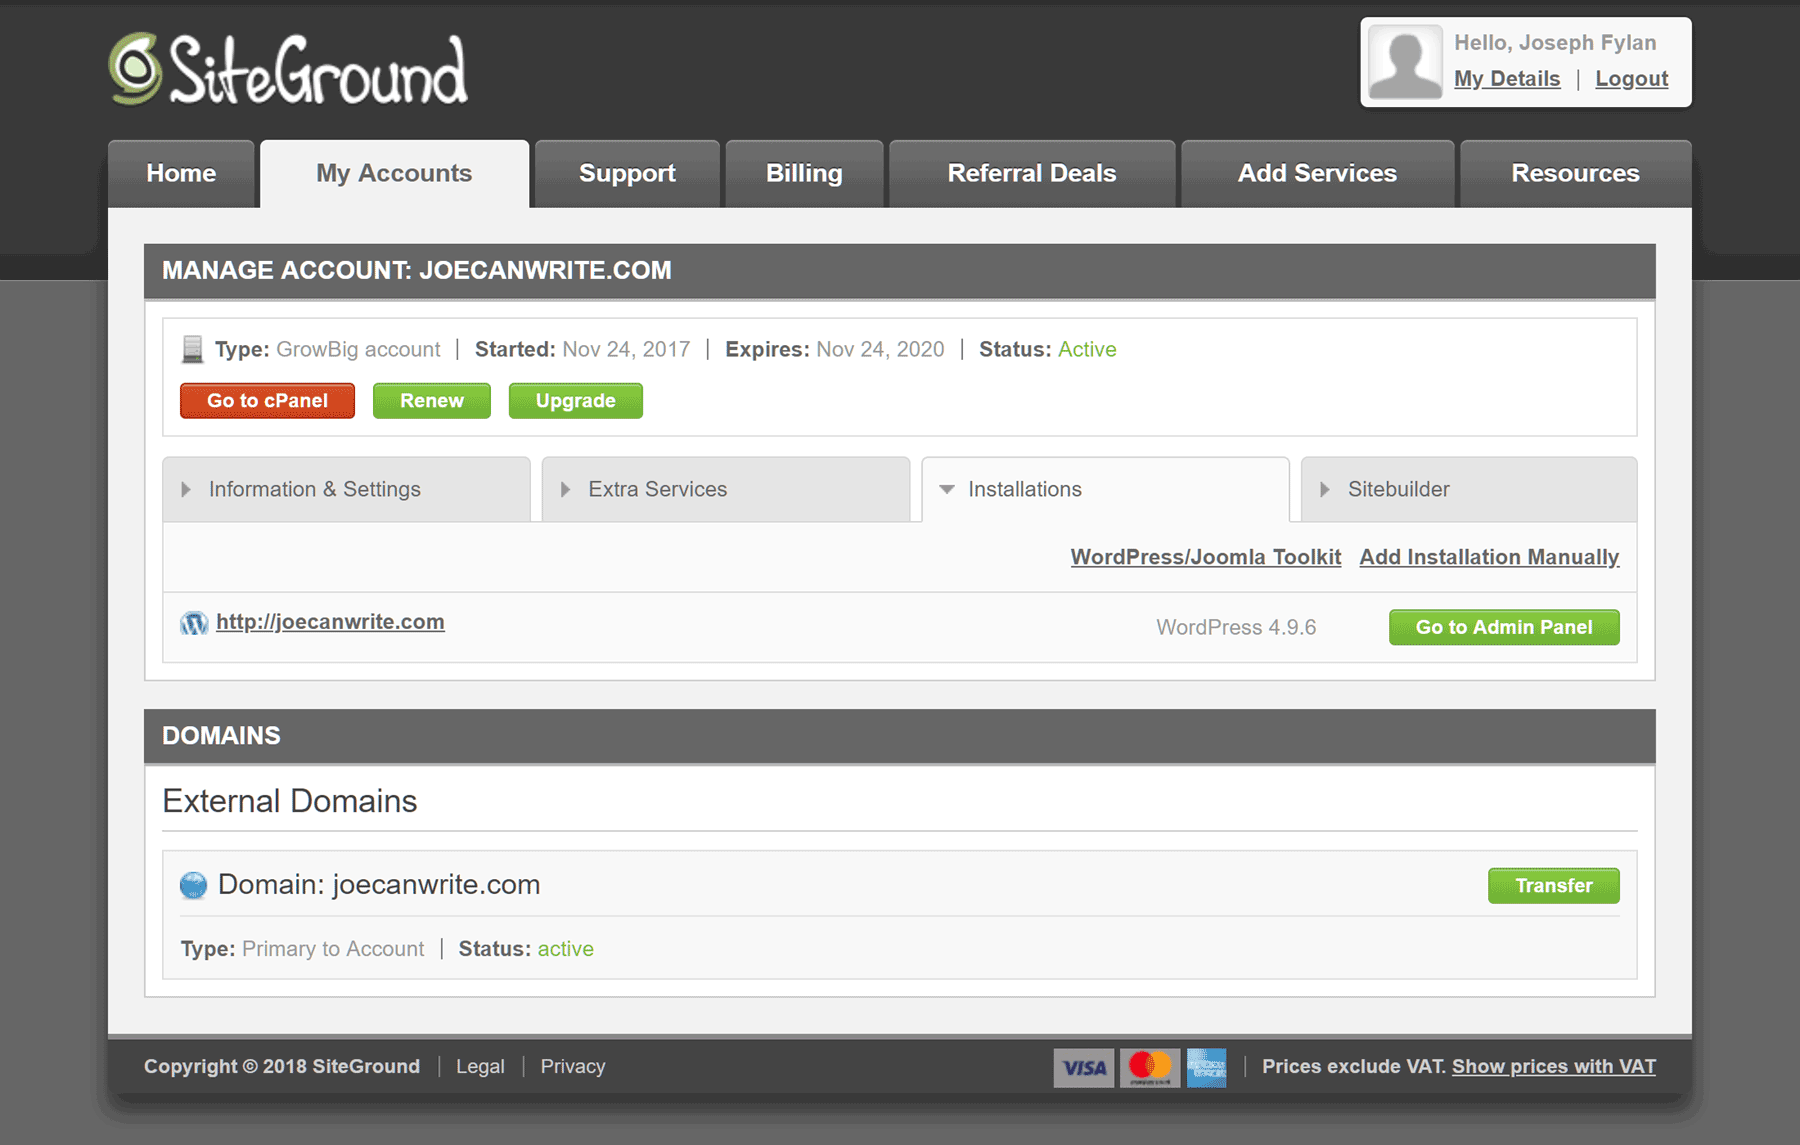
Click on the My Accounts tab to get started.
Click on the red Go to cPanel button.
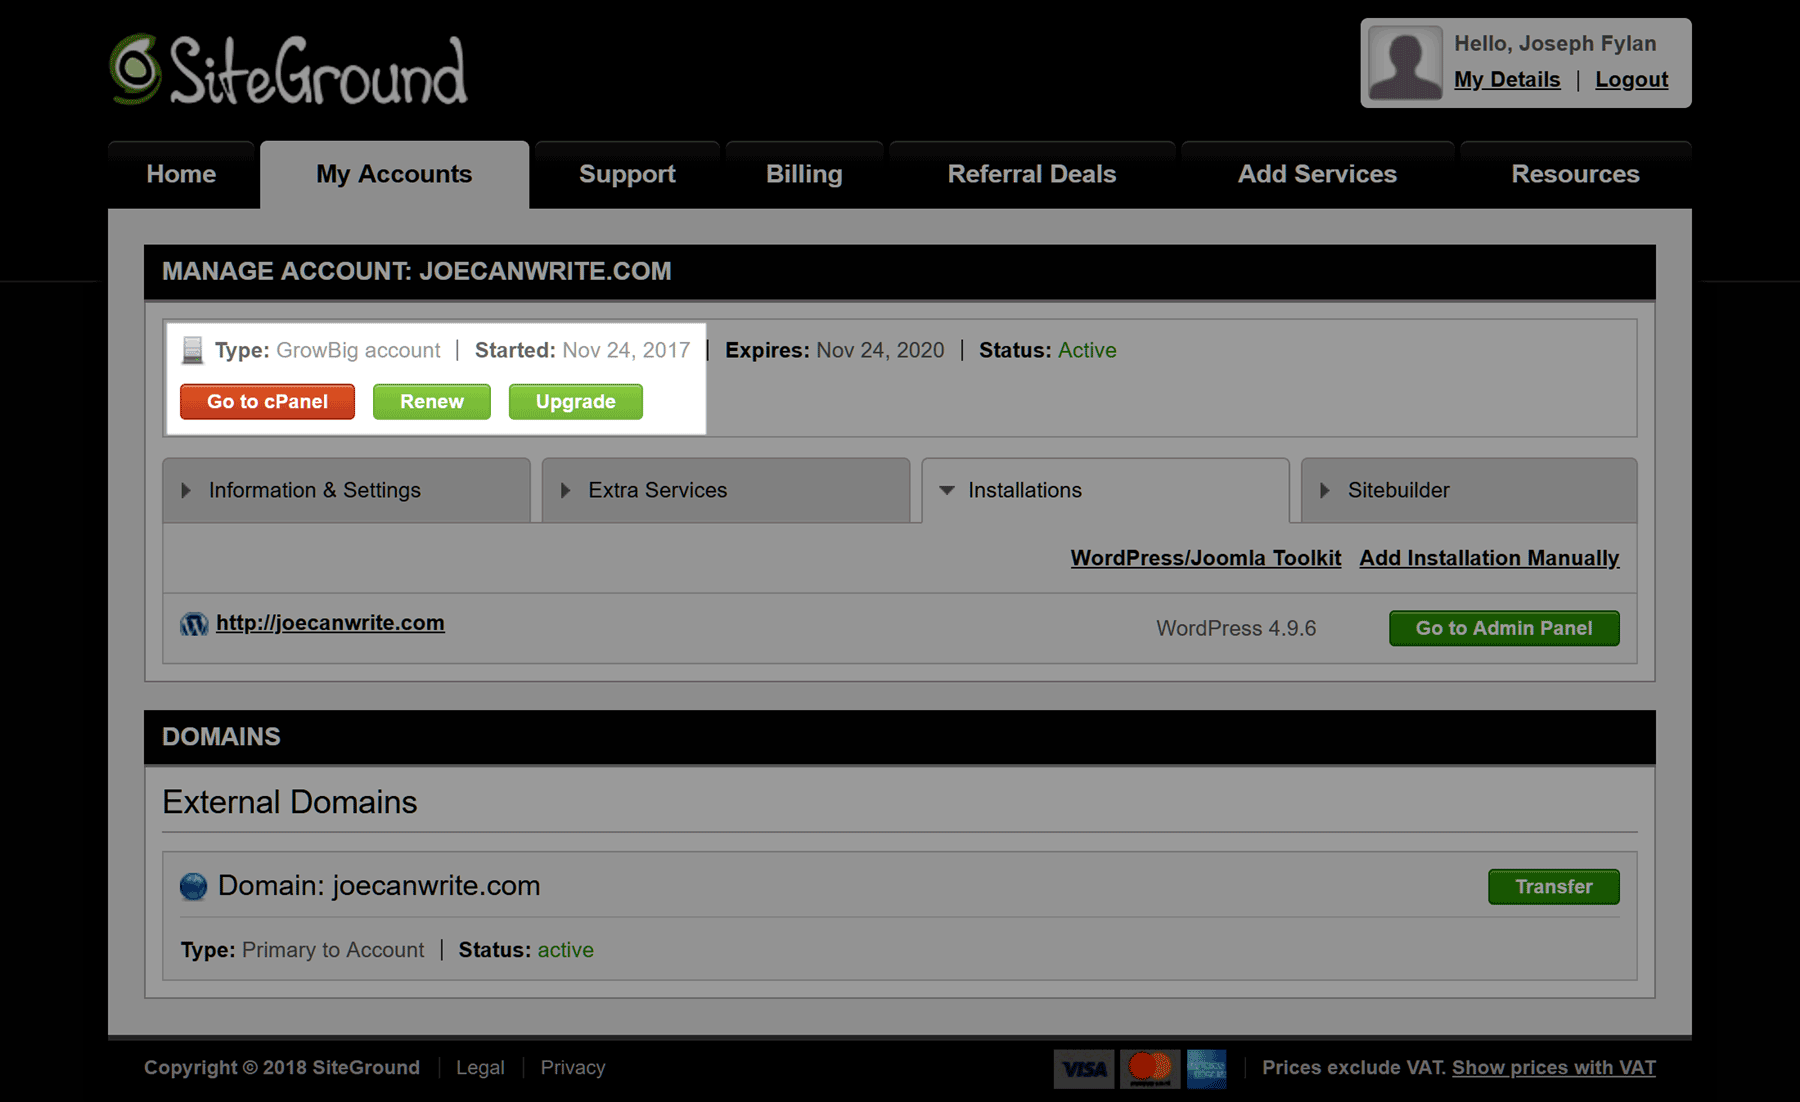
Click the red button to launch the cPanel.
From cPanel, click on the WordPress Installer option.
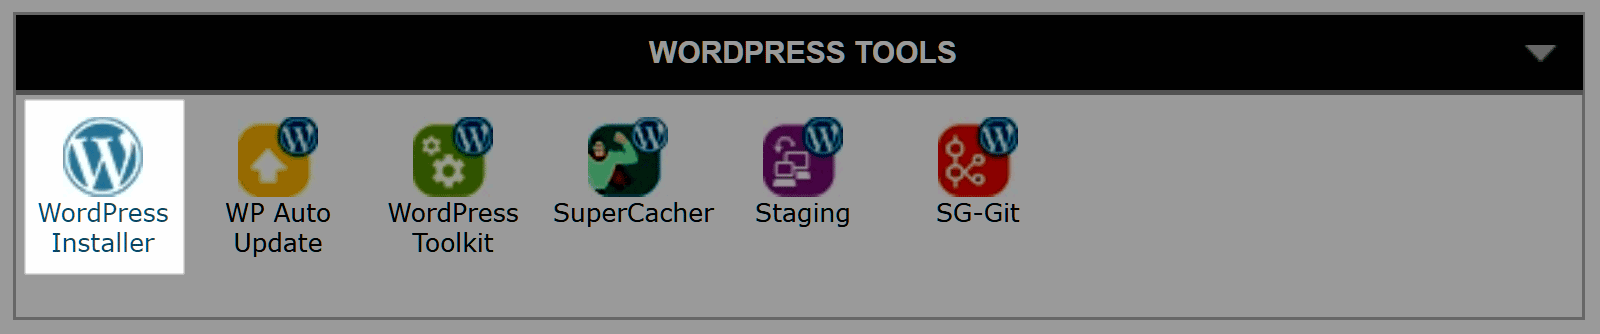
Use the cPanel WordPress Installer to start installing WordPress.
Then click on the Install Now link.
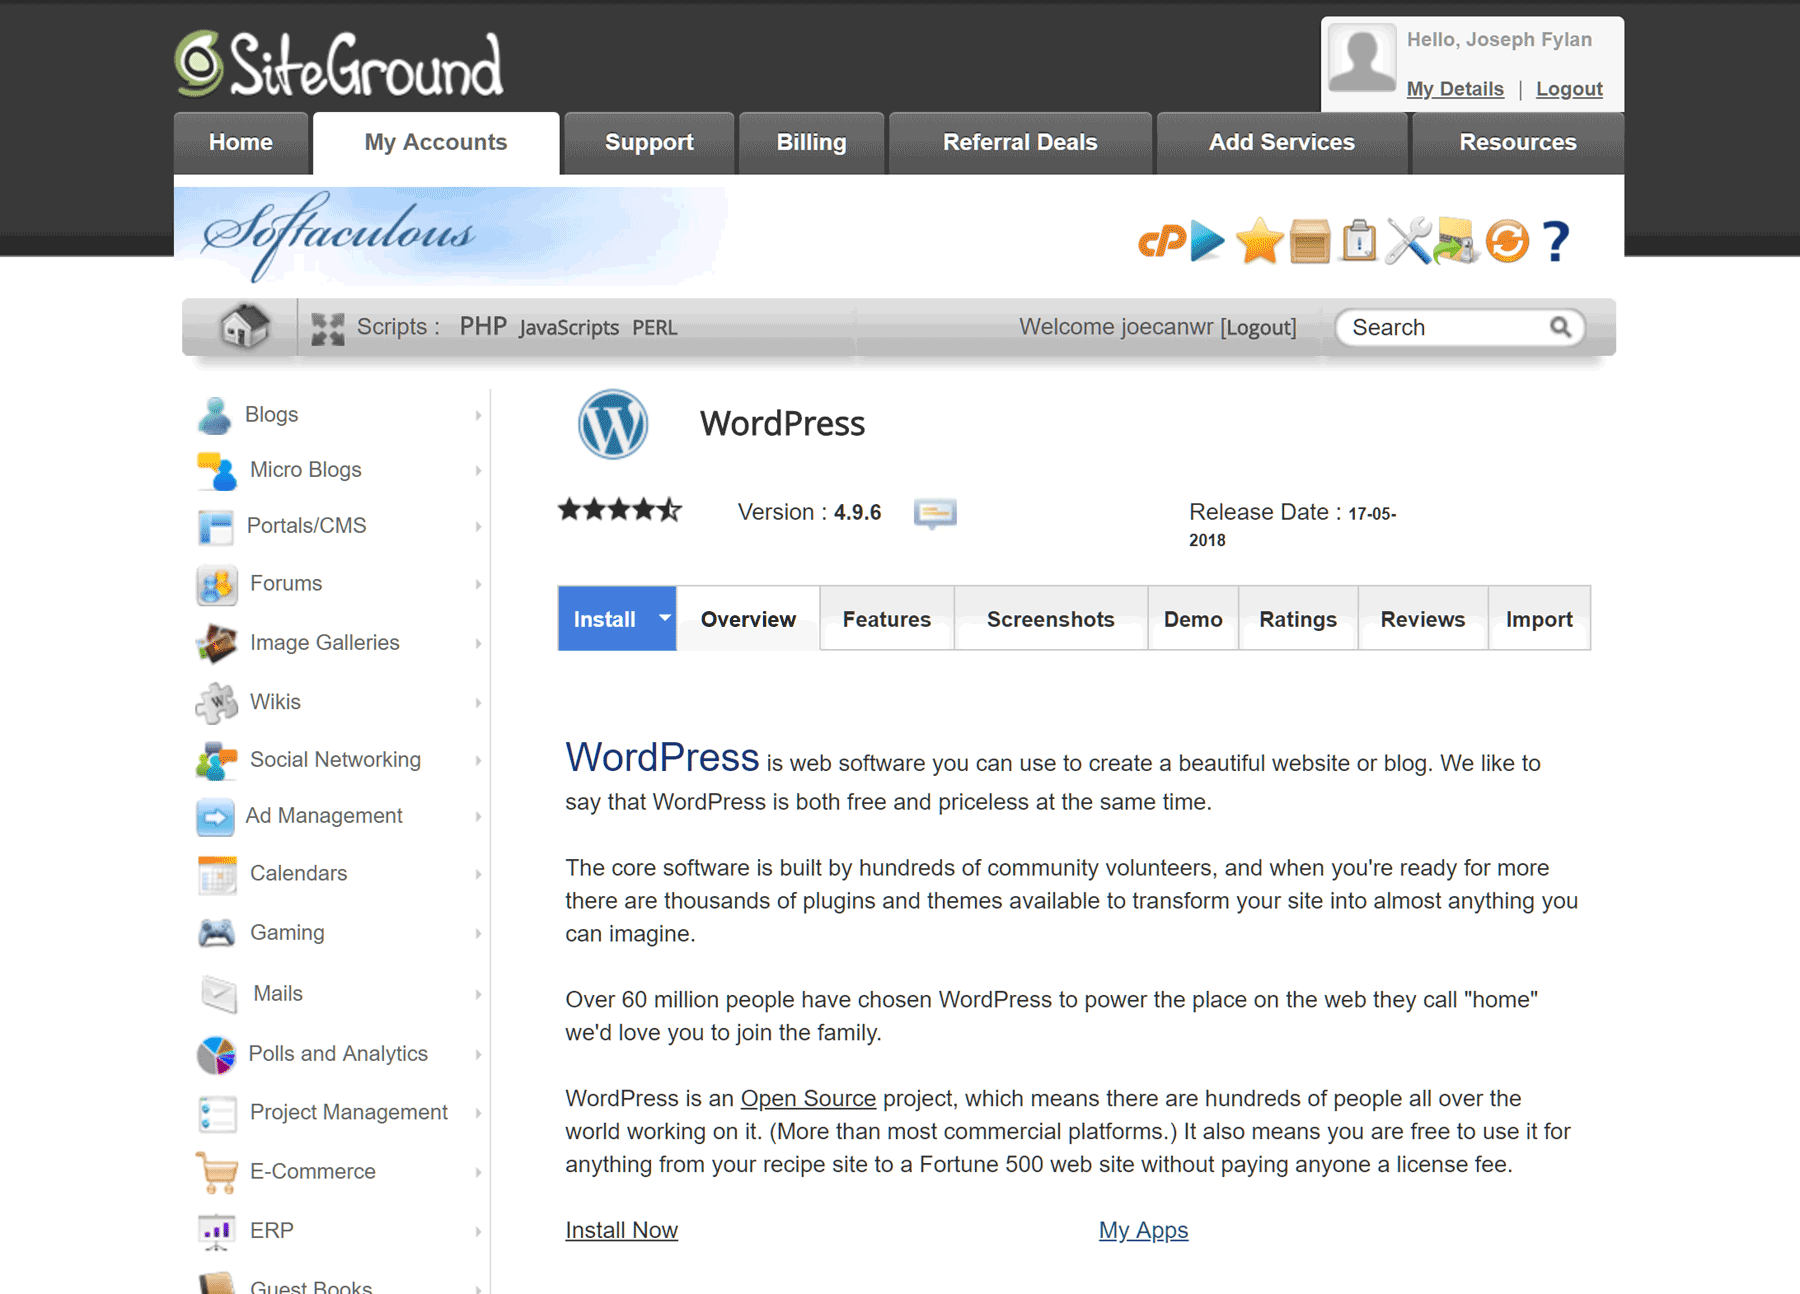
Clicking on the Install Now link starts the installation process.
From the next screen, check your domain name is displayed in the Choose Domain dropdown menu, before pressing the Quick Install button.
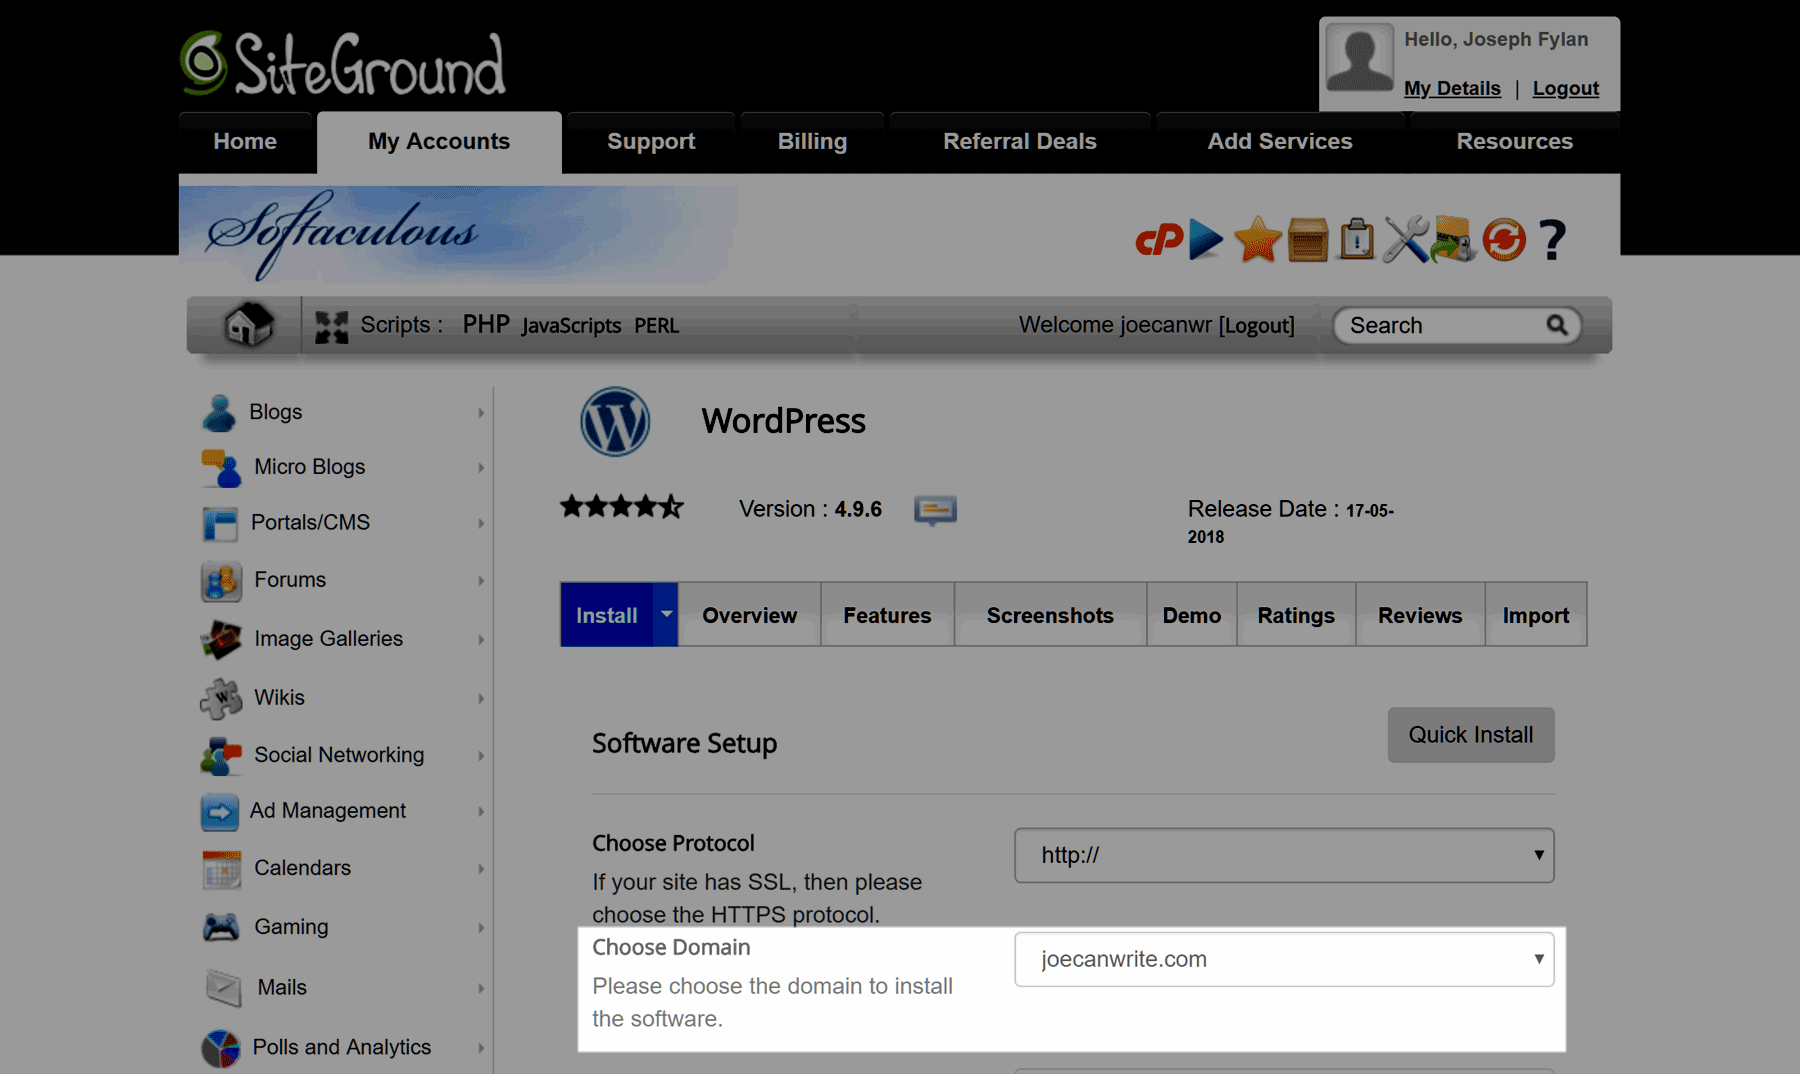
Check that your domain name is displayed in the dropdown menu.
After pressing the Quick Install button, scroll down the same page and enter a username and password for your WordPress blog. Also, provide an email address where these details will be sent for future reference. As the username and password are the details that are entered to access the control panel for your WordPress blog, it’s important you choose security-focused options that won’t be easy for anyone to guess. Click the Install button when you’re ready.
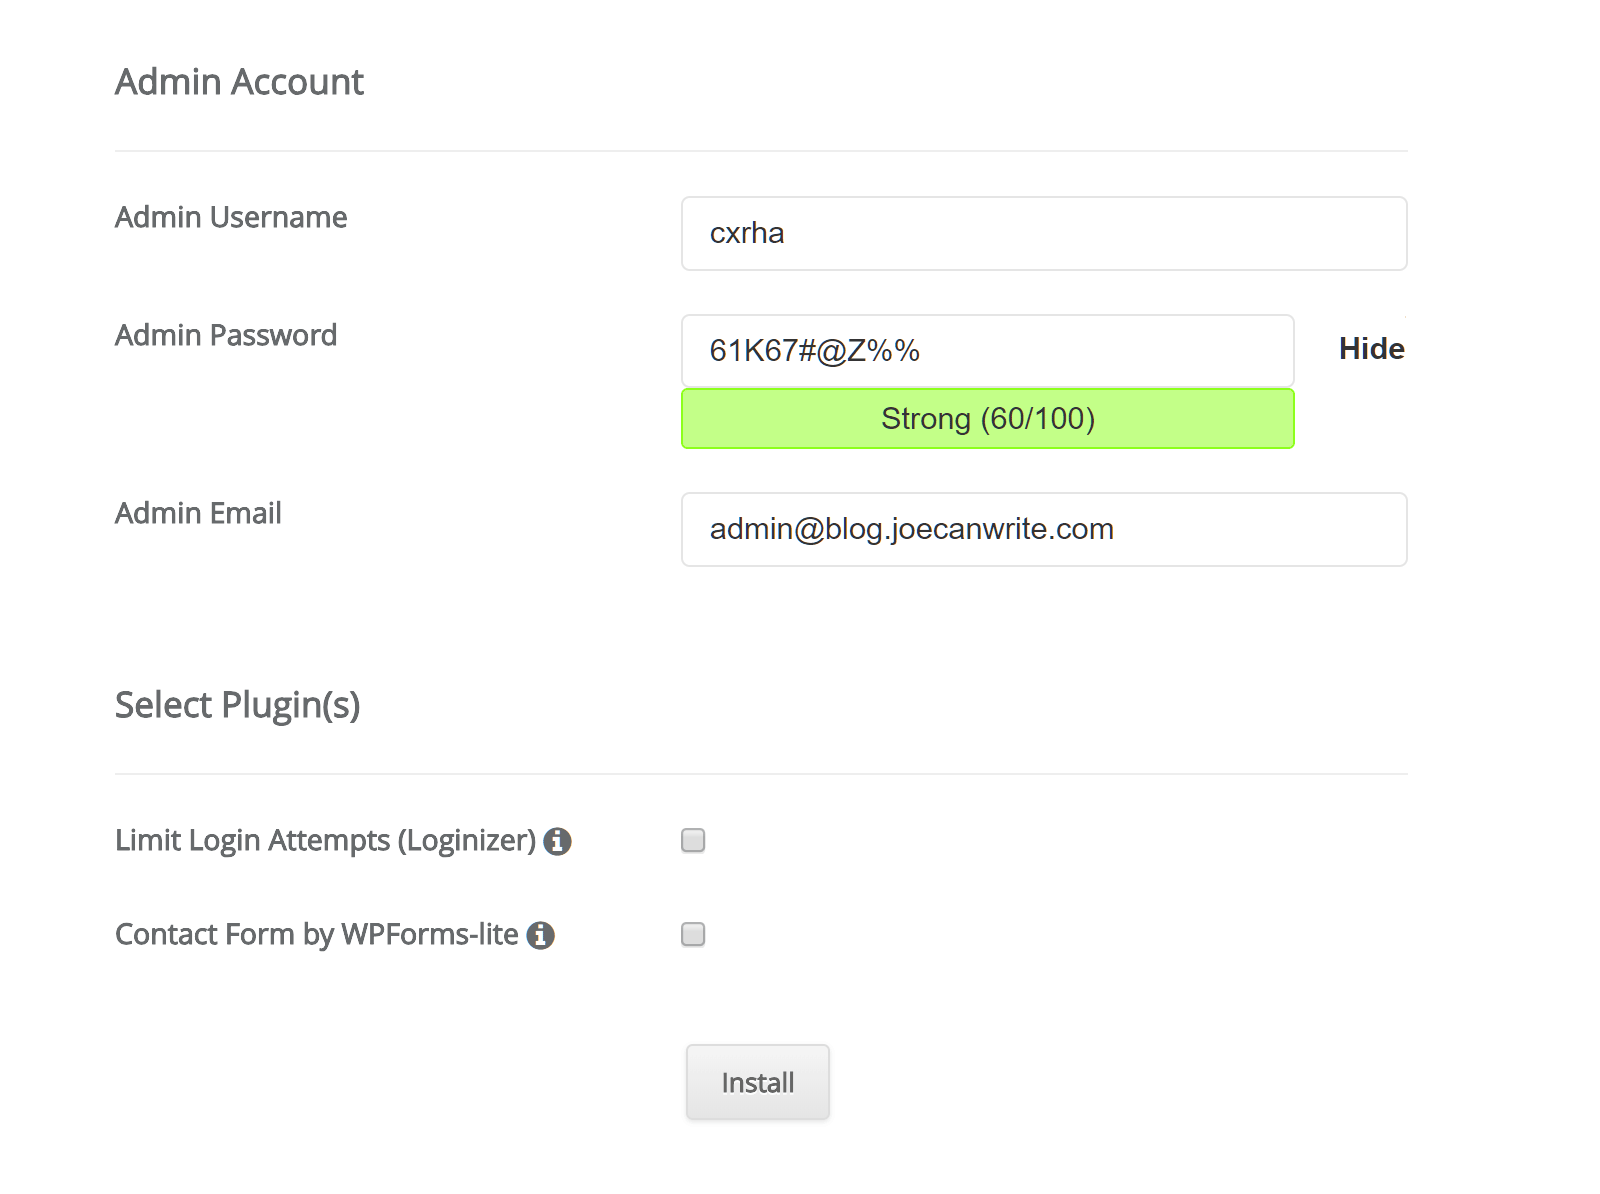
Enter the account and login details for your WordPress blog.
Once the installation is complete, the login details for your blog will be displayed.

The WordPress installation process should be completed in a few minutes.
6) Log in to Your New WordPress Blog
After logging in to your new blog, you’ll be able to explore the WordPress dashboard.
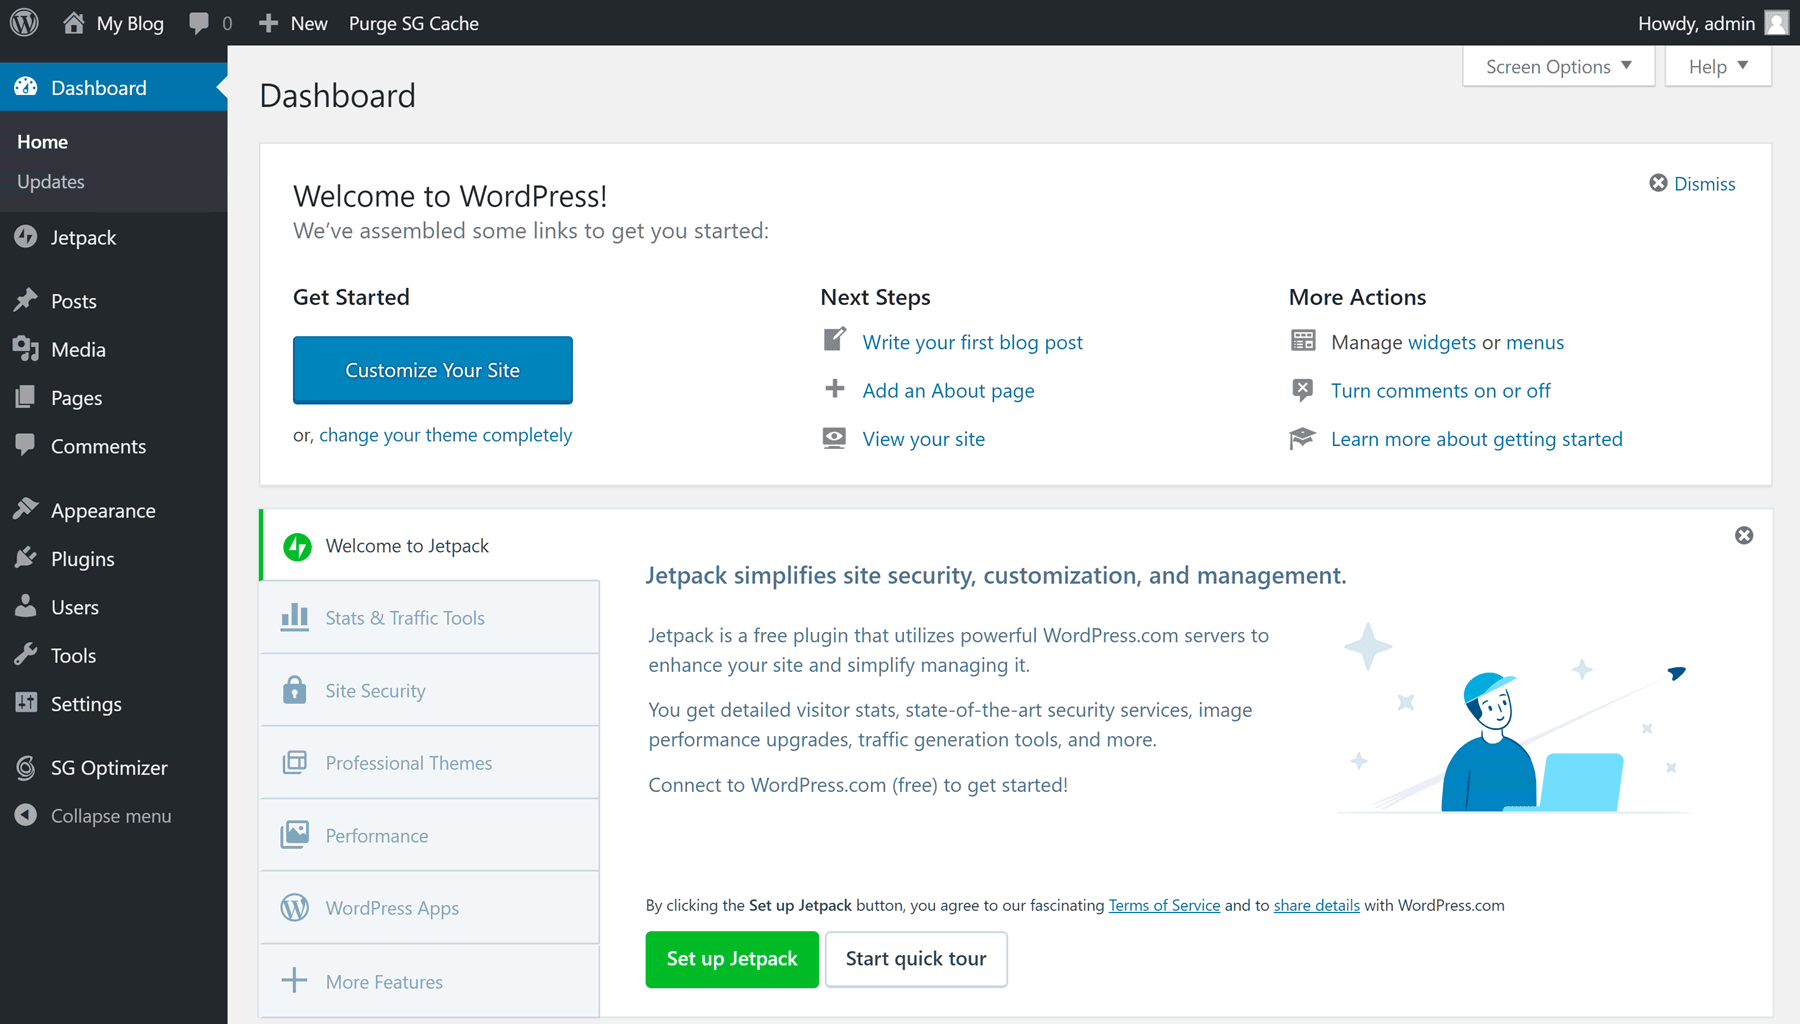
The WordPress dashboard or admin area.
By default, new WordPress websites hosted with SiteGround have the latest free theme from the WordPress.org team activated, as well as the Jetpack plugin and a plugin from SiteGround that will help to improve the performance of your blog.
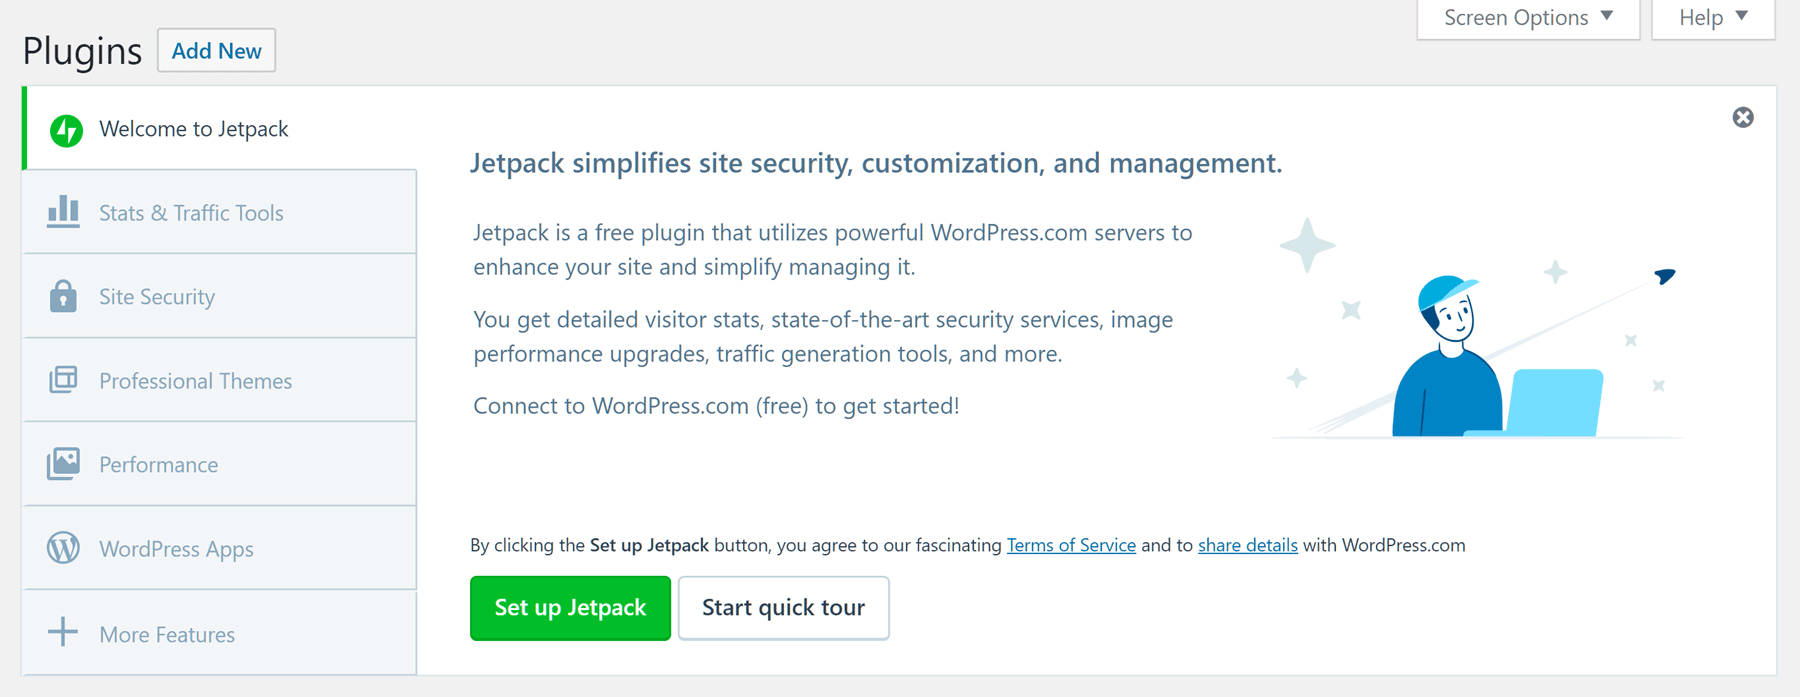
The Jetpack suite of tools for WordPress is installed and activated by default.
Jetpack is a suite of tools with free and paid options that enhance your website or blog, so it’s worth keeping this plugin activated on your site.
7) Find and Install a Great Blogging Theme
With WordPress installed, it’s time to start thinking about the design of your blog. As mentioned, by default the latest free theme from the WordPress.org team will be activated on your new blog. However, there are thousands of free and paid WordPress themes to choose from.
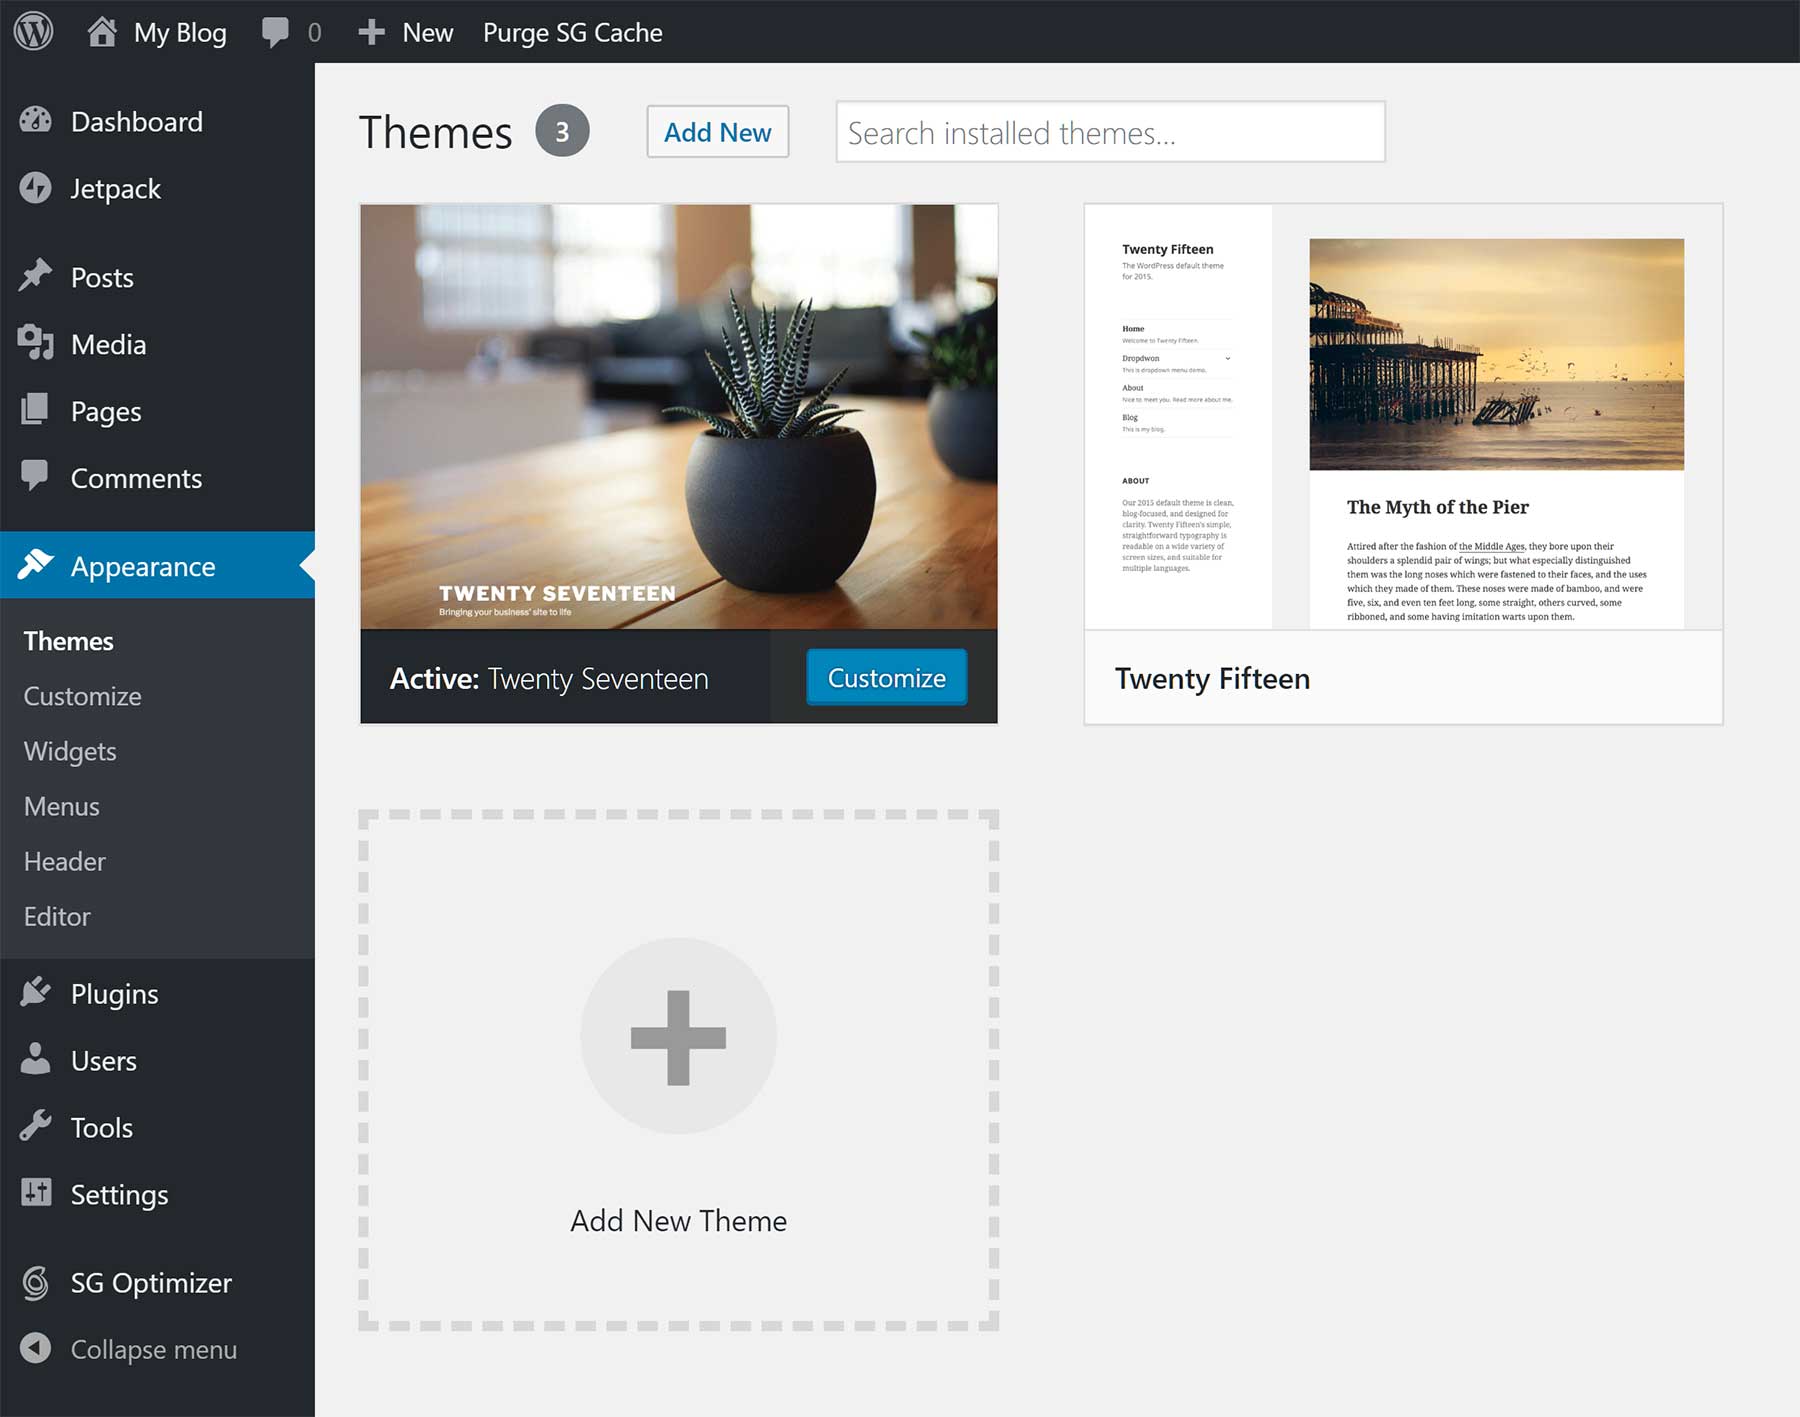
WordPress comes with a small selection of pre-installed themes.
Before you start searching for the perfect theme, it’s a good idea to think about the topic of your blog, the type of content you’ll be publishing, and any design features you’d like access to. If you’d like to view the free themes that are available, log in to your WordPress website and visit the Themes dashboard by clicking on the Appearance menu, then the Themes link.
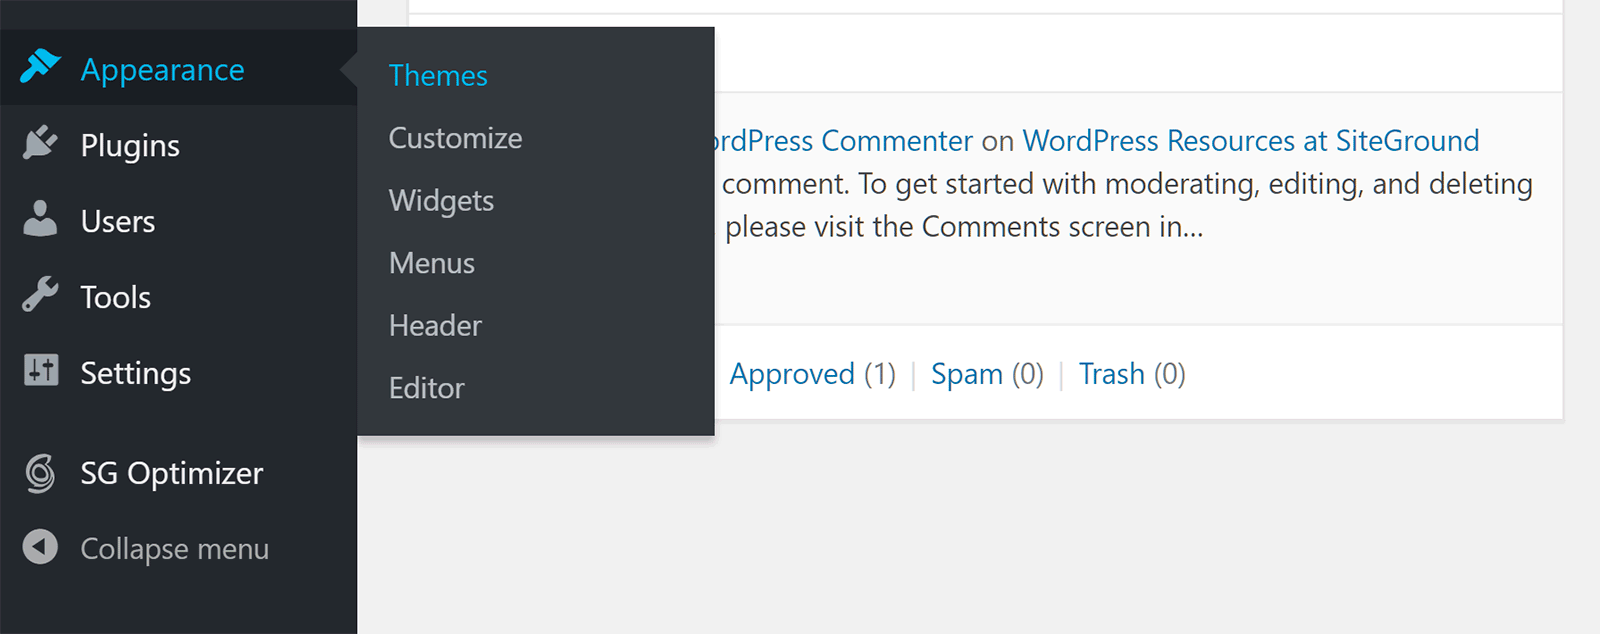
Click on the Themes menu item to find more WordPress themes.
Browsing the Best Free WordPress Themes
Clicking on the Add New Theme box will let you browse the thousands of free options in the WordPress.org official theme directory.
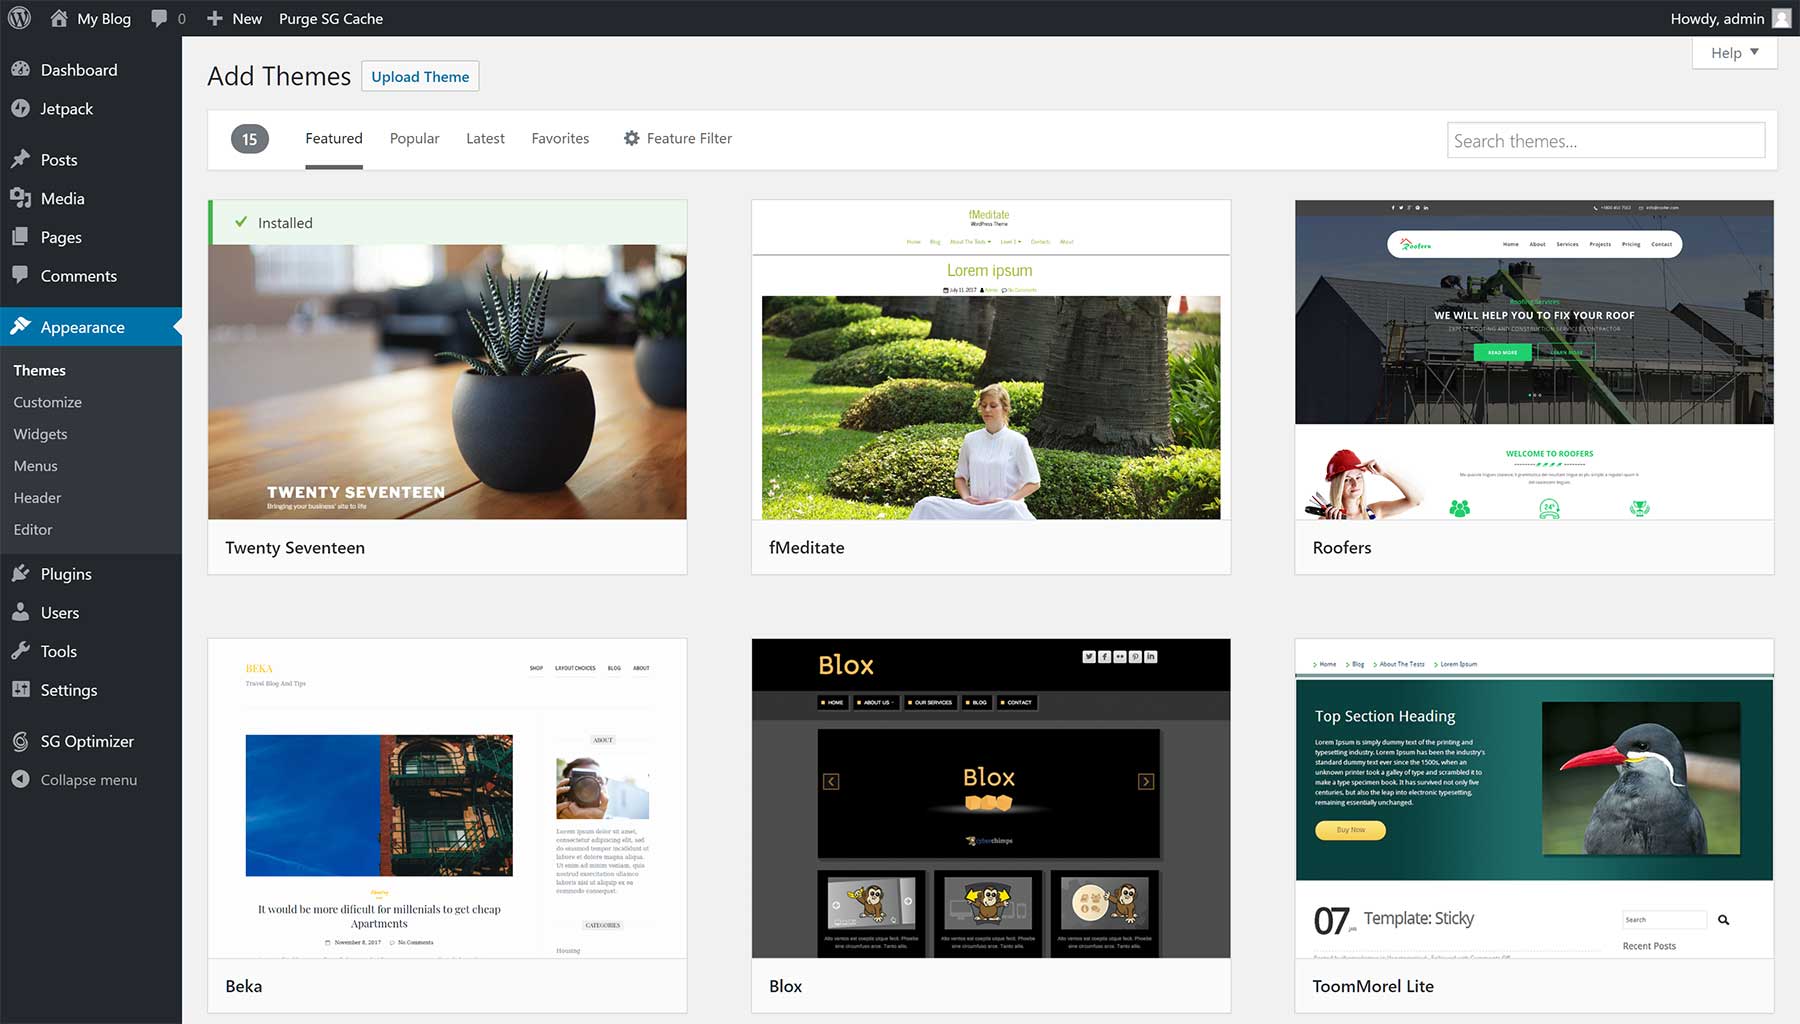
Browse the free WordPress themes from your blog dashboard.
These themes have been checked to ensure they meet basic guidelines, giving you peace of mind when making a decision. Downloading free WordPress themes from other sources isn’t recommended, as the same assurances can’t be made.
When browsing the themes, you can use the toolbar to view the latest or most popular themes, and filter the selection to narrow the results.
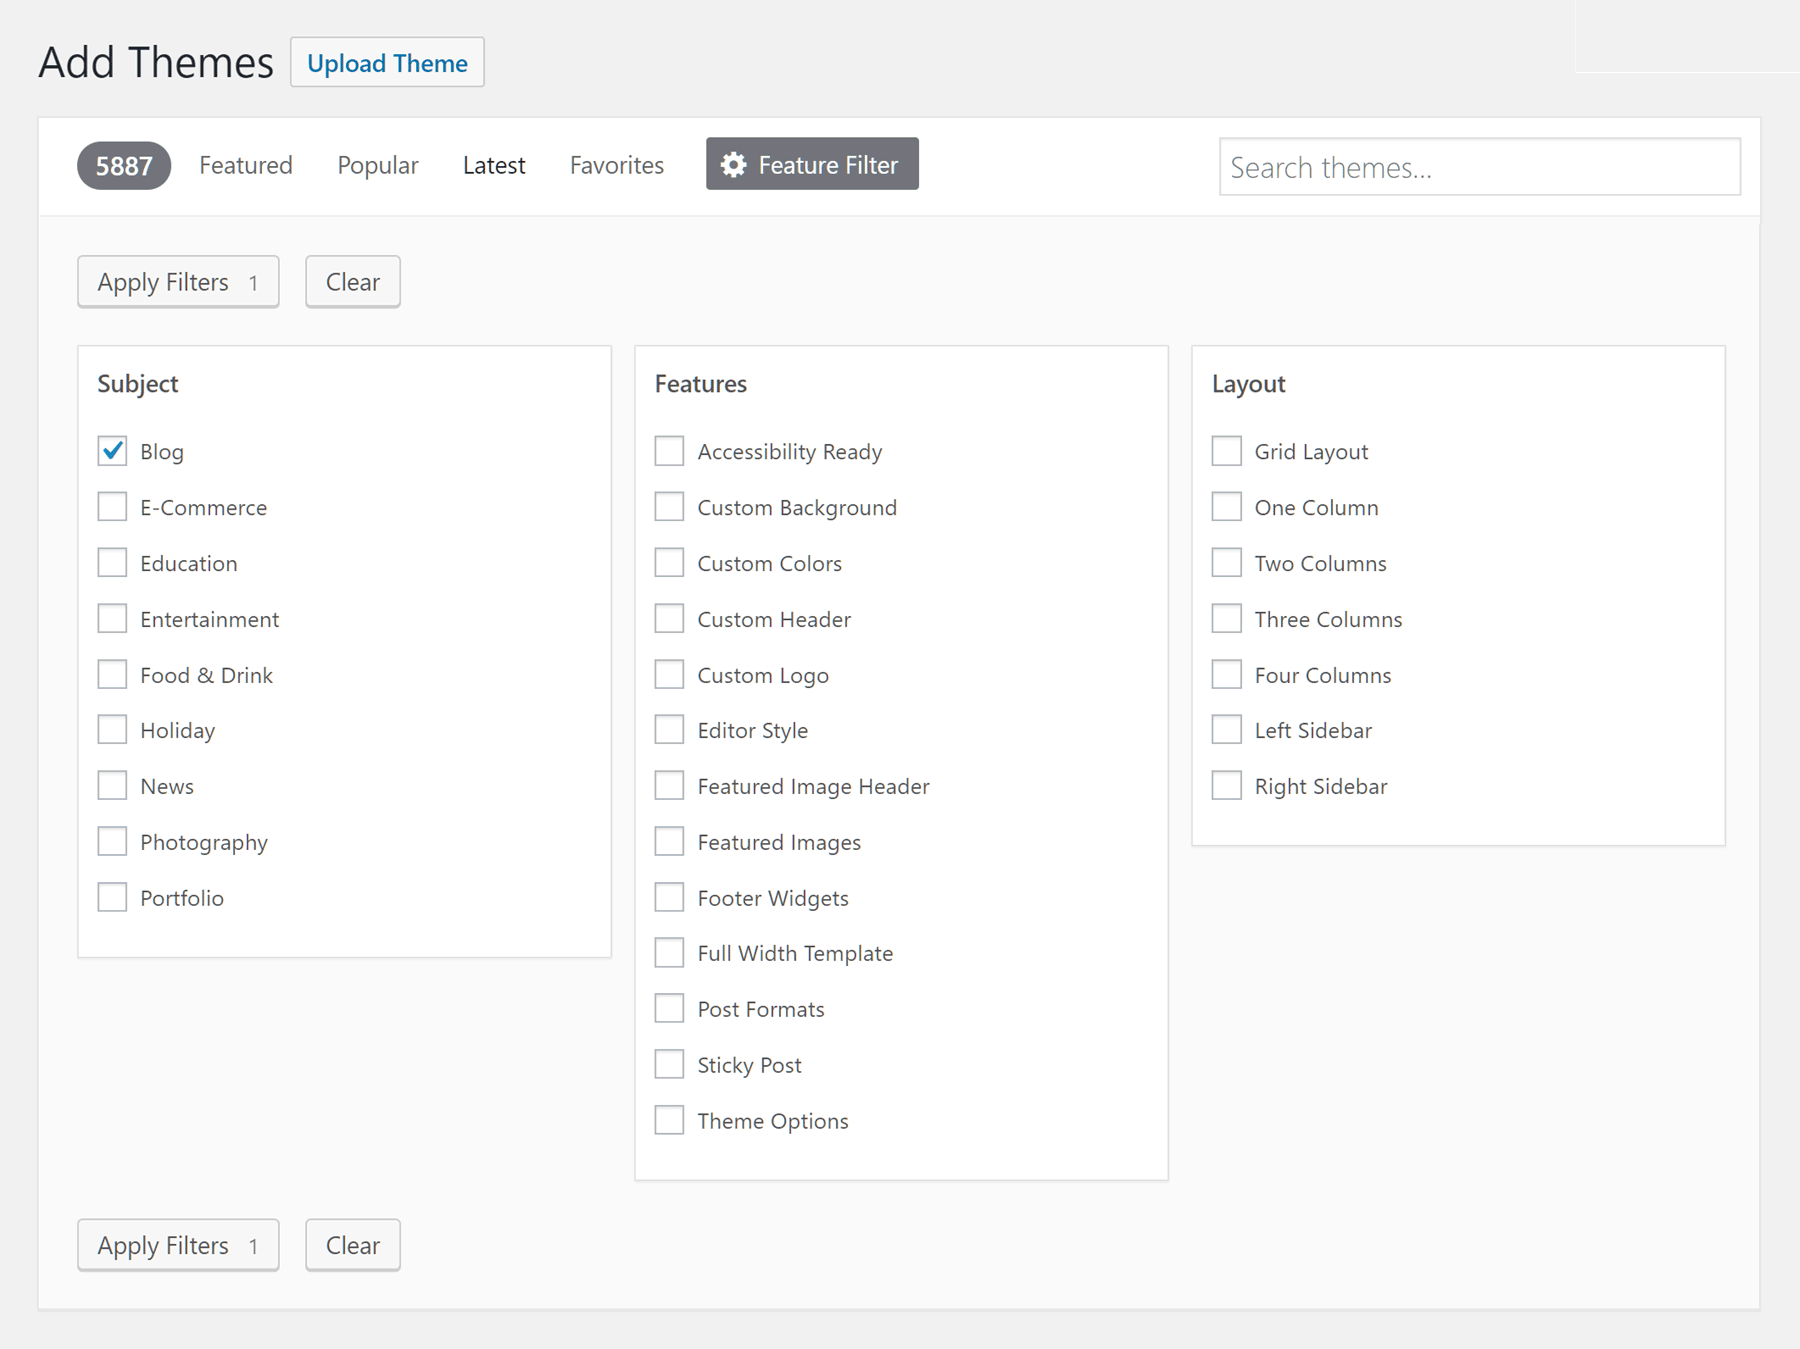
Use the filter to find the themes that meet your requirements.
Once you’ve applied the filters, you should have access to some great looking themes that are suitable for your blog. If any designs catch your eye, clicking on the Preview button will let you explore the theme in more detail. It’s worth pointing out that the demos aren’t very inspiring, and often don’t reveal the full potential of a theme.

You can view the WordPress theme demos to see the themes in action.
If possible, it’s a good idea to visit the webpage created for the theme by its developers to get a better sense of what the theme can do. Sometimes, a URL for the full demo is published in the theme description. Alternatively, a quick Google search can often help you to find the websites for any free themes you’re interested in.

Sometimes, a link to a more useful demo is included in the theme description.
Once you’ve found a free theme you’re happy with, you can click on the Install button to apply it to your blog. Depending on the theme, there may be a walkthrough guide to help you to get started.
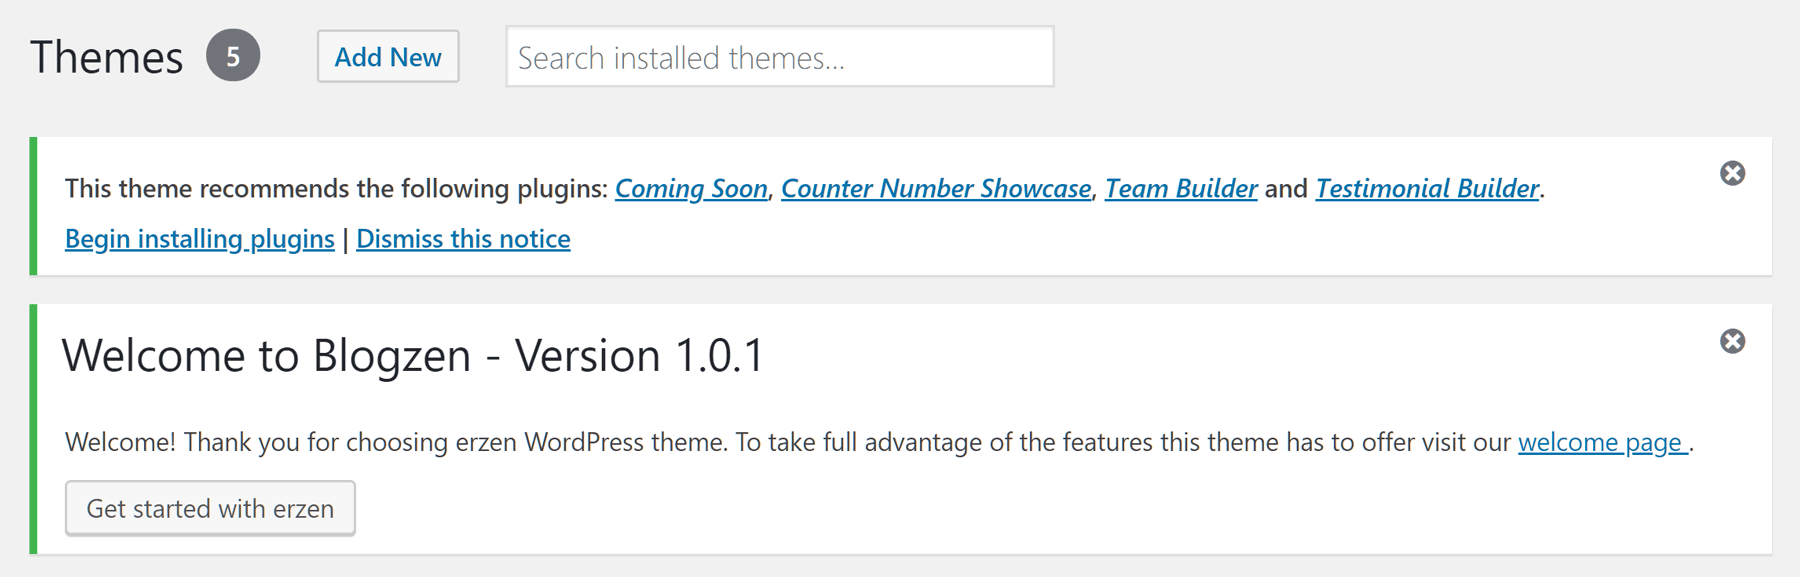
Follow the instructions to set up the theme.
Finding a Good Paid Blogging Theme
Although there are thousands of free themes available, many WordPress bloggers choose to purchase a premium theme. If you check out the best paid WordPress blogging themes, you should see there’s often a big improvement in design quality and theme features compared with the free options.
Not only do you get more with a premium theme, but you also get access to support from the theme developer. Having someone to turn to should a problem arise can make the $50-to-$100 investment for a premium theme worthwhile.
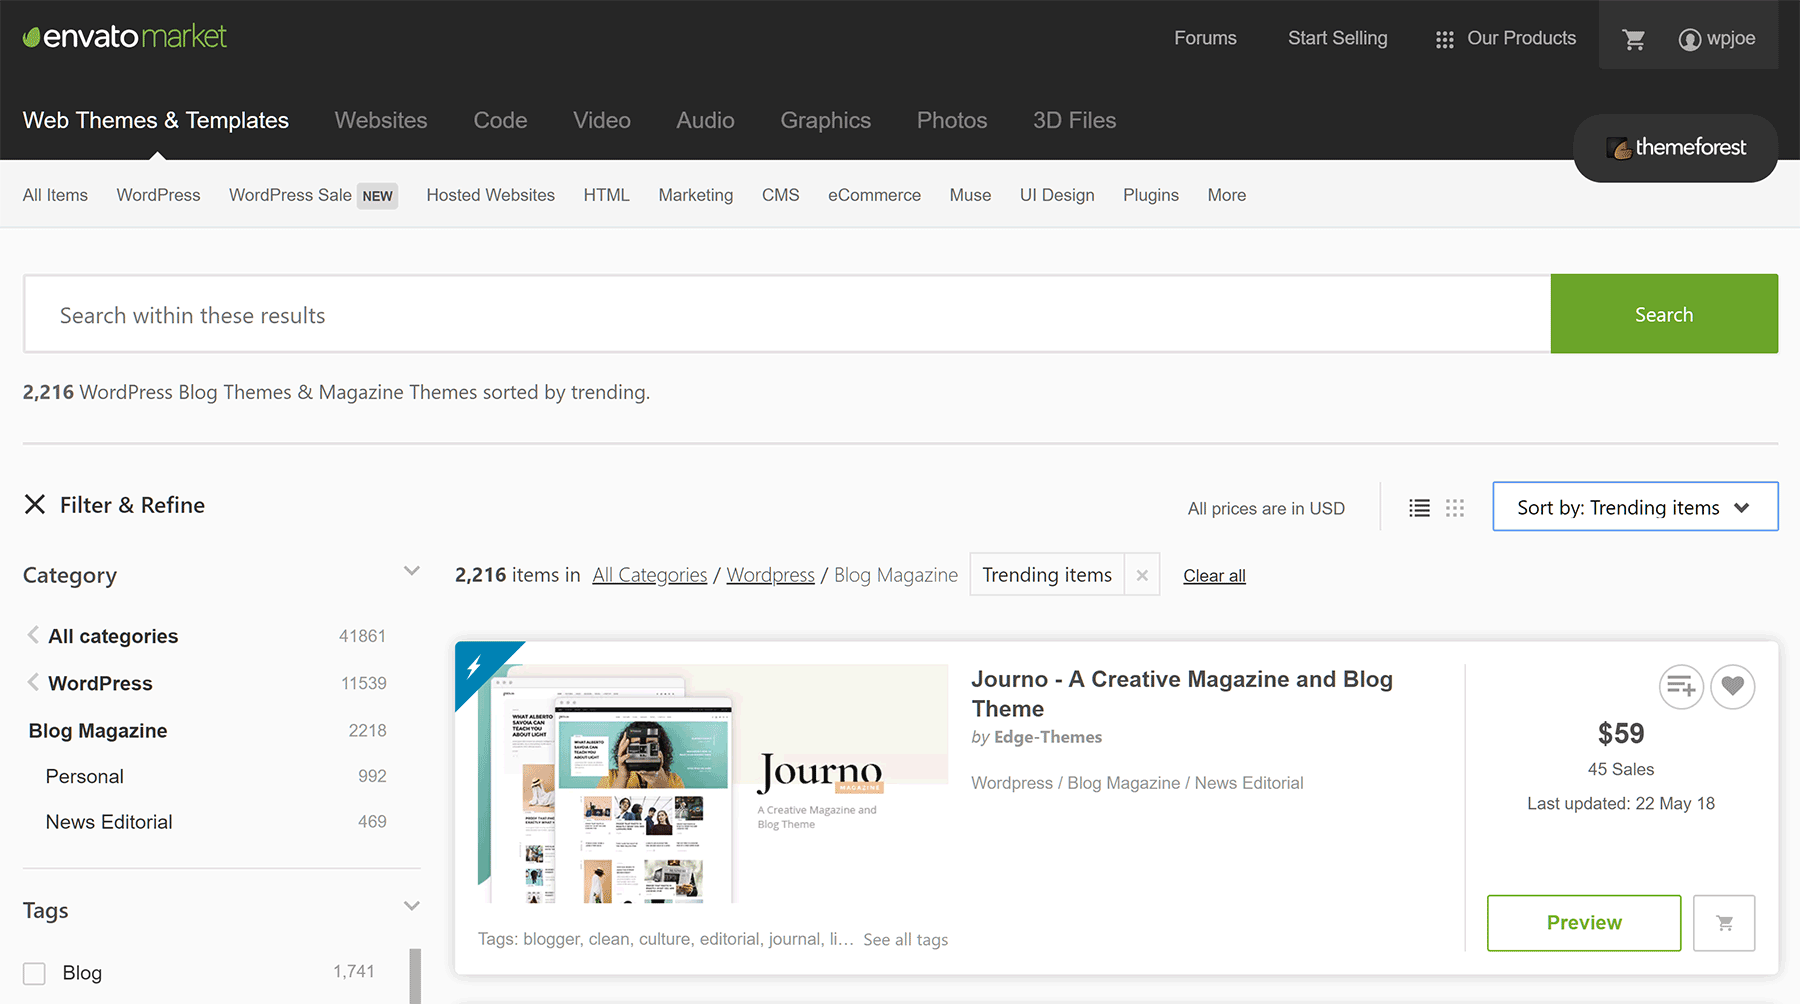
There are thousands of WordPress themes for sale at the ThemeForest marketplace.
You can view our full list of reputable places to purchase top-quality WordPress themes and start your search. Before you begin, keep in mind how you plan to use the theme to avoid ending up with one that has an impressive demo but isn’t a good match for your requirements.
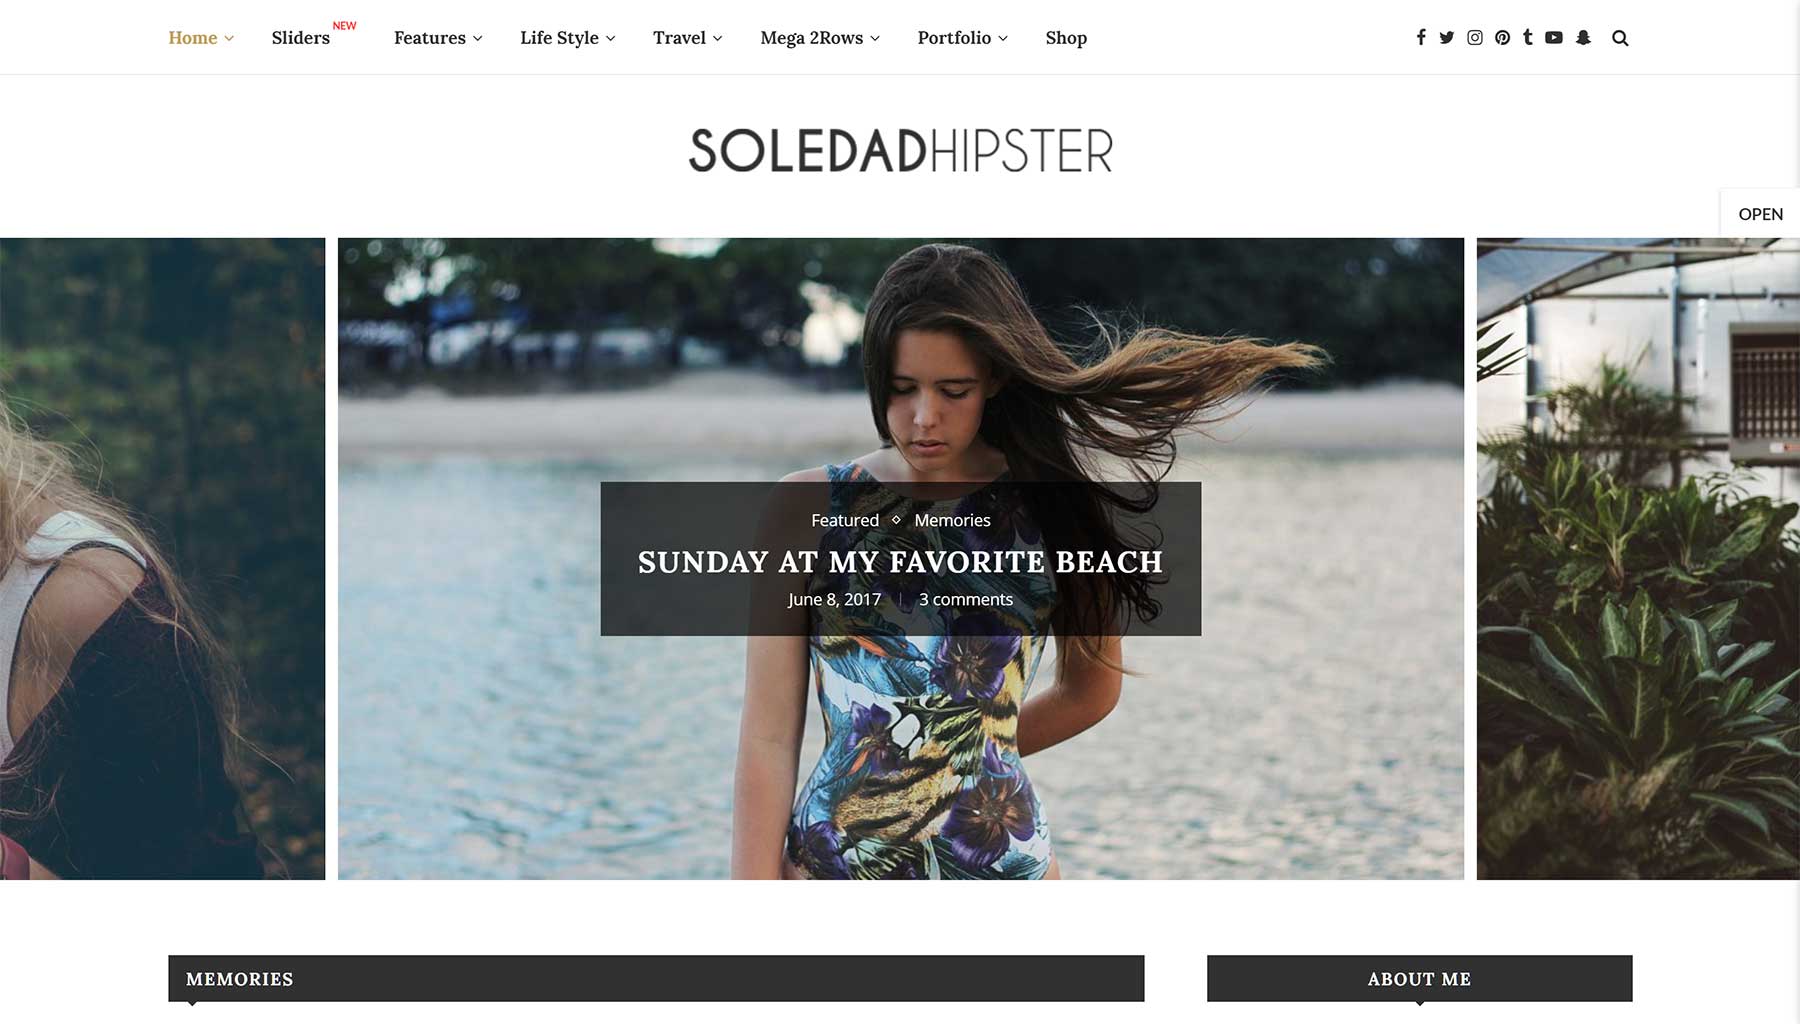
The popular Soledad blogging theme has an impressive design, but is it right for your blog?
For example, a demo with full-screen video backgrounds can look cool, but if you don’t have any suitable video content or a need for this type of feature another theme may be a better choice.
Another option is to choose a freemium WordPress theme. This type of theme is available for free with limited features, with a premium upgrade available for when you’re ready to invest in your blog and unlock its full capabilities.
Installing a Premium WordPress Theme
If you do decide on a premium theme, the process of installing it on your blog is slightly more complicated than when using a free theme from the official WordPress directory. First, you’ll need to download the theme files, which are provided after you complete the purchase. Then, you’ll have to upload the files to your WordPress dashboard.
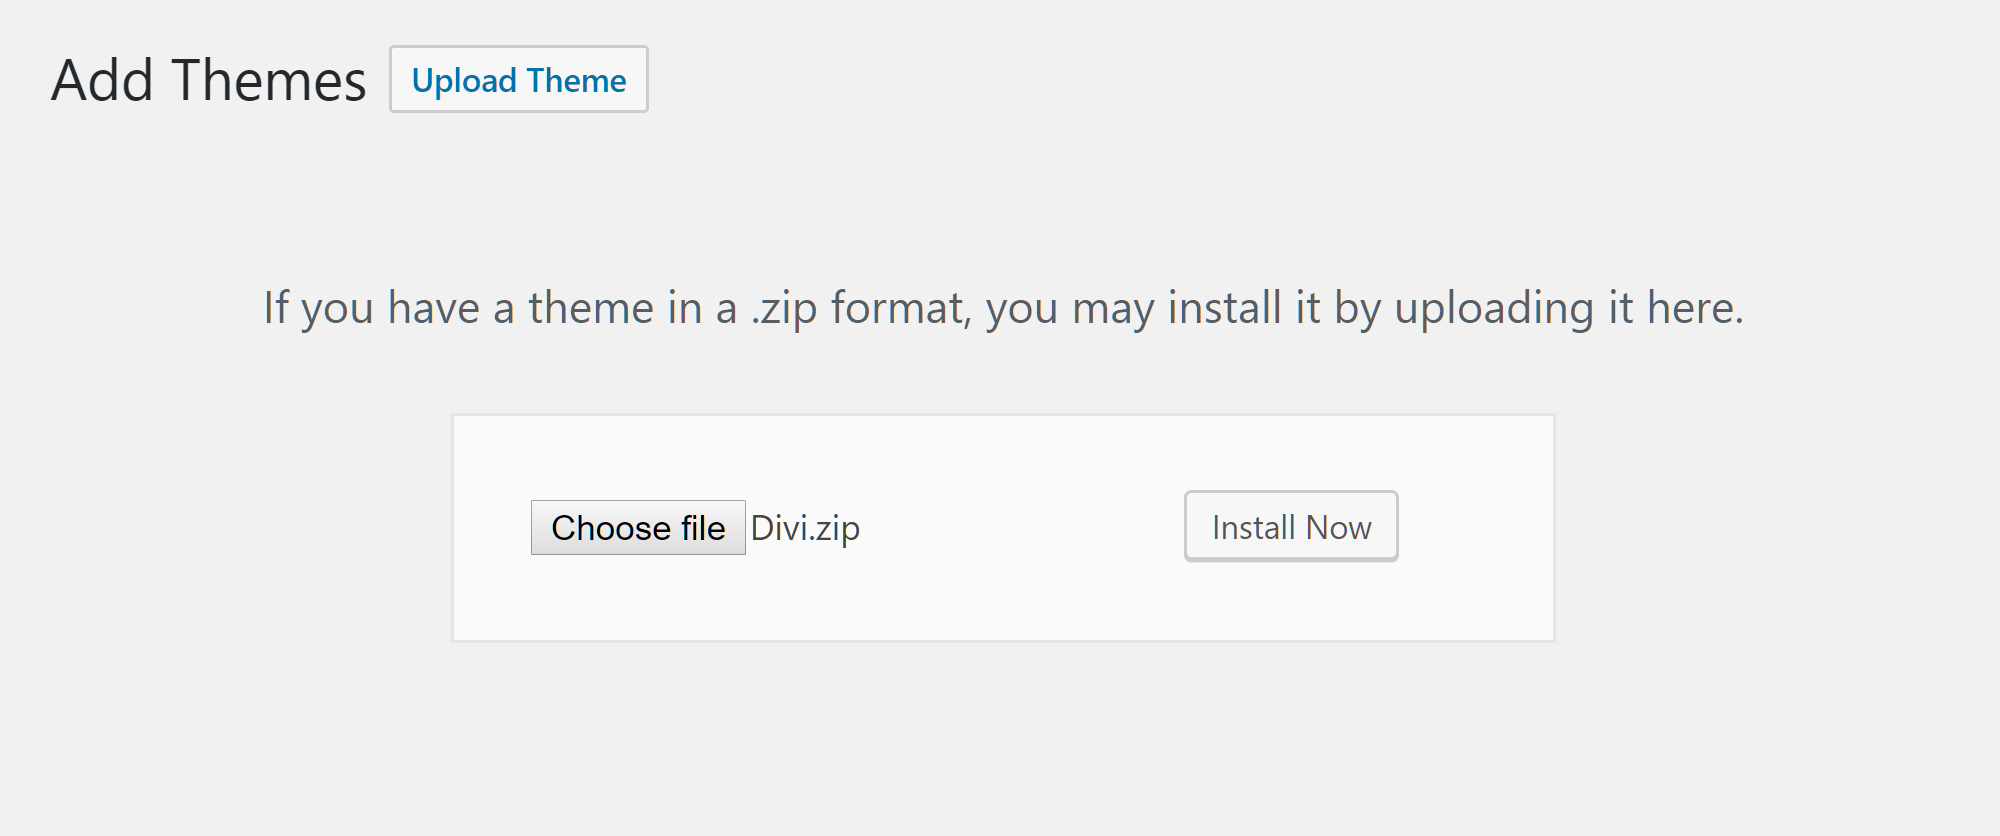
WordPress theme files can be uploaded through your dashboard.
To complete the upload, log in to your WordPress dashboard, click on the Appearance menu, and then the Themes link. After clicking on the Add New button, and then the Upload Theme button, you can use the Choose file button to find the files you downloaded from the theme shop. More detailed instructions should be available from the company you purchased the theme from.
Changing Themes in the Future
Although uploading a new theme is very straightforward, switching themes on an established blog can be time consuming. Because of the different ways themes are created, the transition process may run smoothly, or you may well end up having to adjust the formatting of all your published blog posts to get them back to looking how they once did.
Therefore, it’s best to find a theme you’re happy with before you start blogging, rather than waiting until a later date.
8) Configure Your New WordPress Blog
With WordPress up and running and a theme installed, it’s time to run through a few of the basic WordPress settings.
First up, head to the General settings page for your blog by clicking on the General item under the Settings menu.

Click on the General item under the Settings menu to configure your blog.
From this page, you can enter the title of your blog, as well as a tagline or short description. You can also change the date and time format from the same page if necessary.
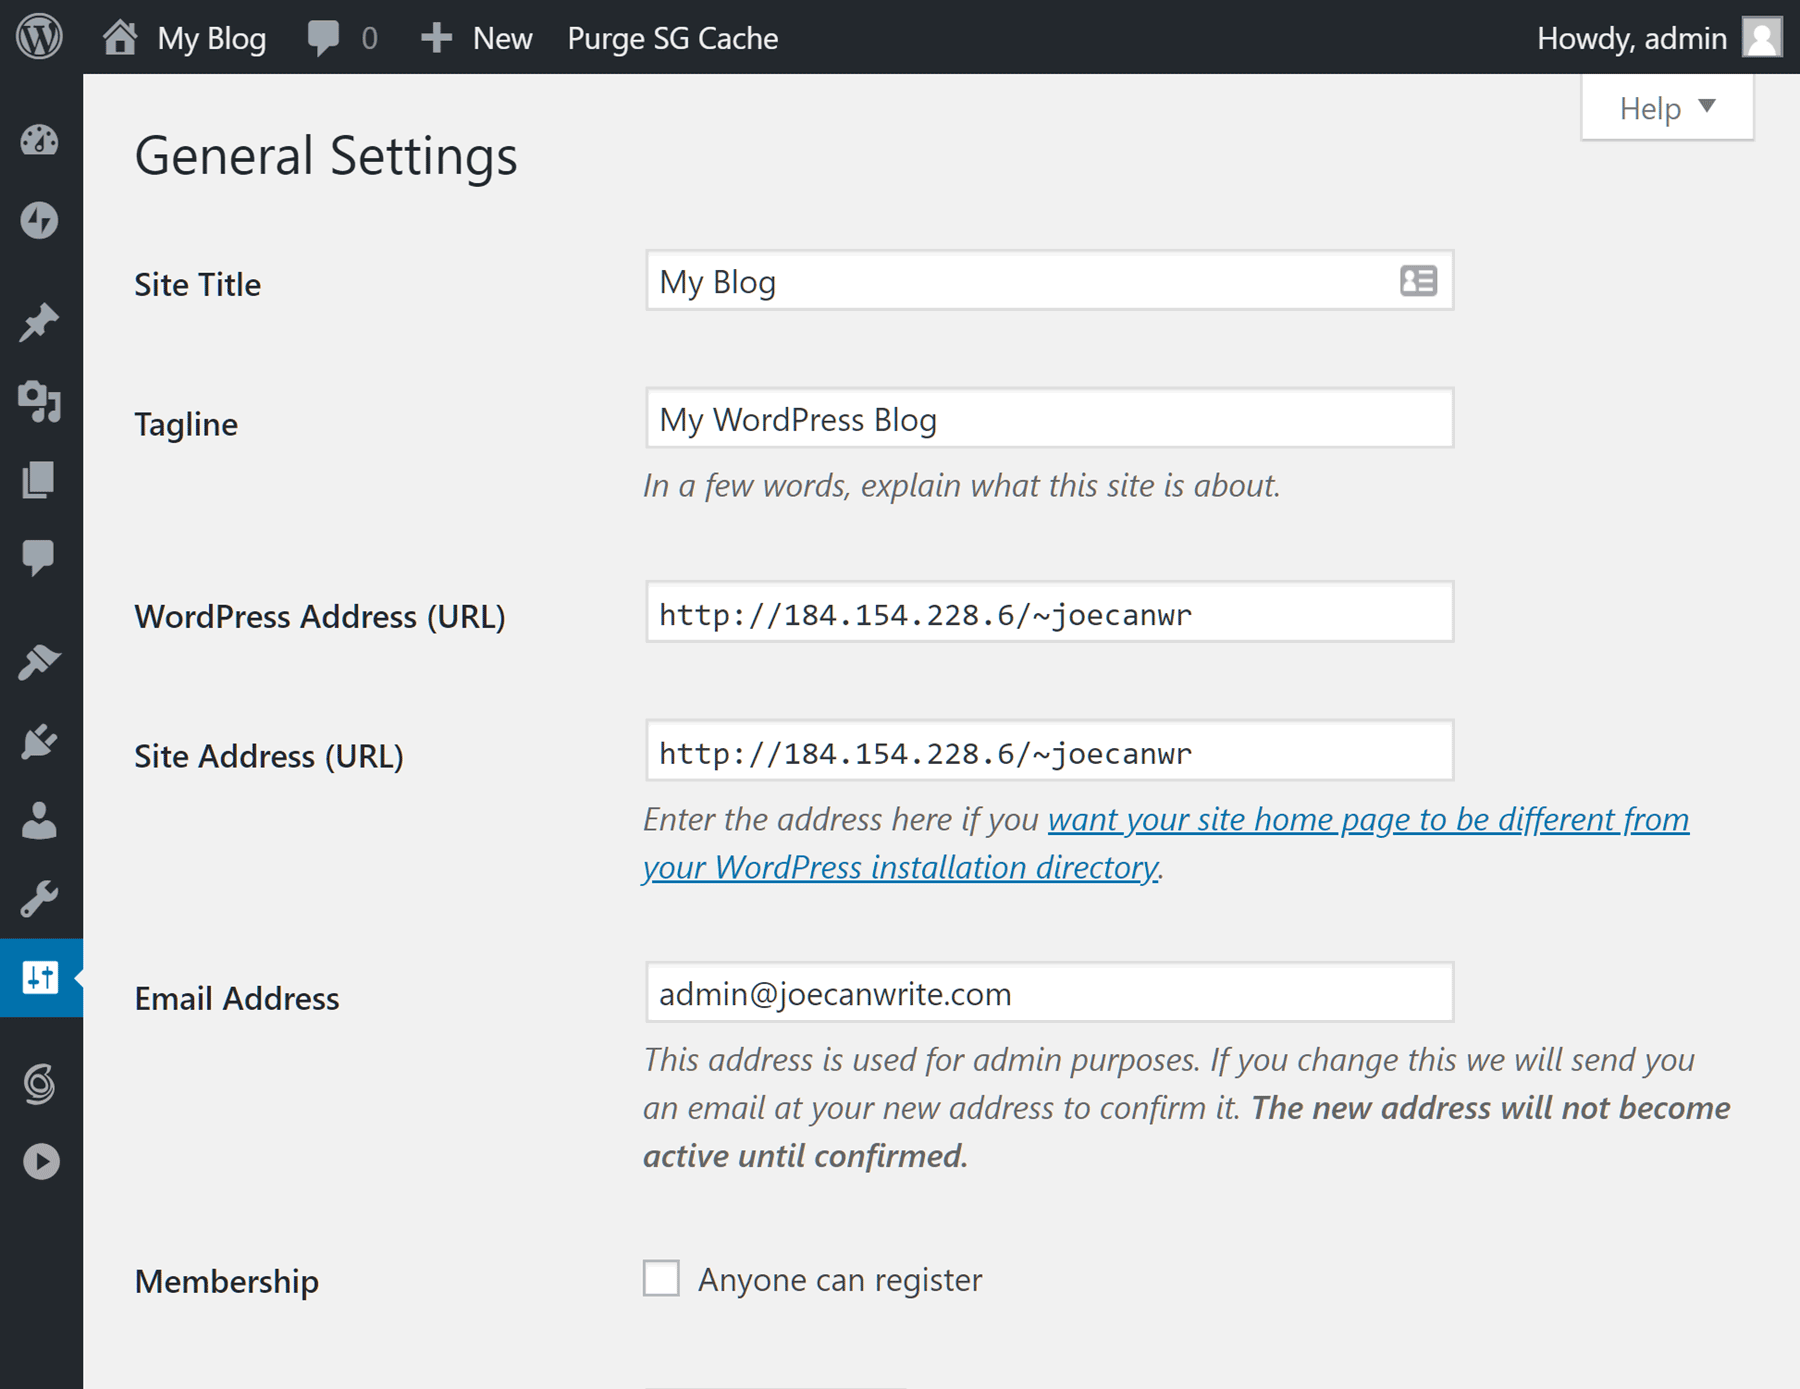
These are the General Settings for a WordPress blog or website.
The Reading settings page is worth visiting too. From here, you can choose whether to display a static homepage or your most recent blog posts on the front of your site. By default, when someone arrives at the homepage of your site, your latest blog posts are displayed, with the newest post displayed first.
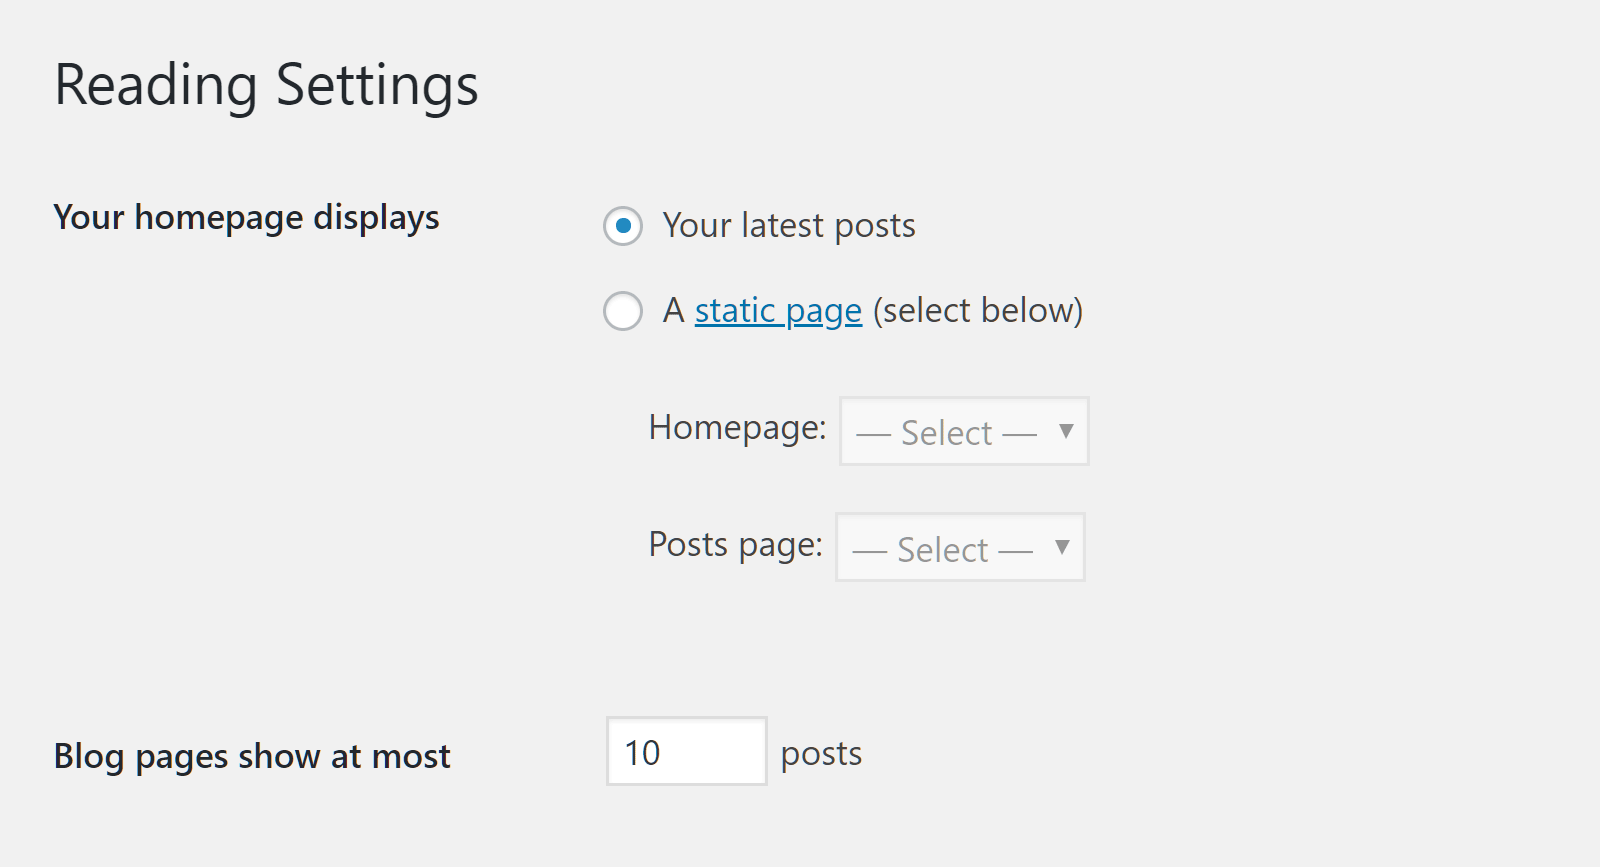
By default, WordPress will display your latest posts on the homepage of your blog.
However, it’s possible to display a fixed homepage or welcome page instead. To do so, first create a new page that you’d like to display on your WordPress site.
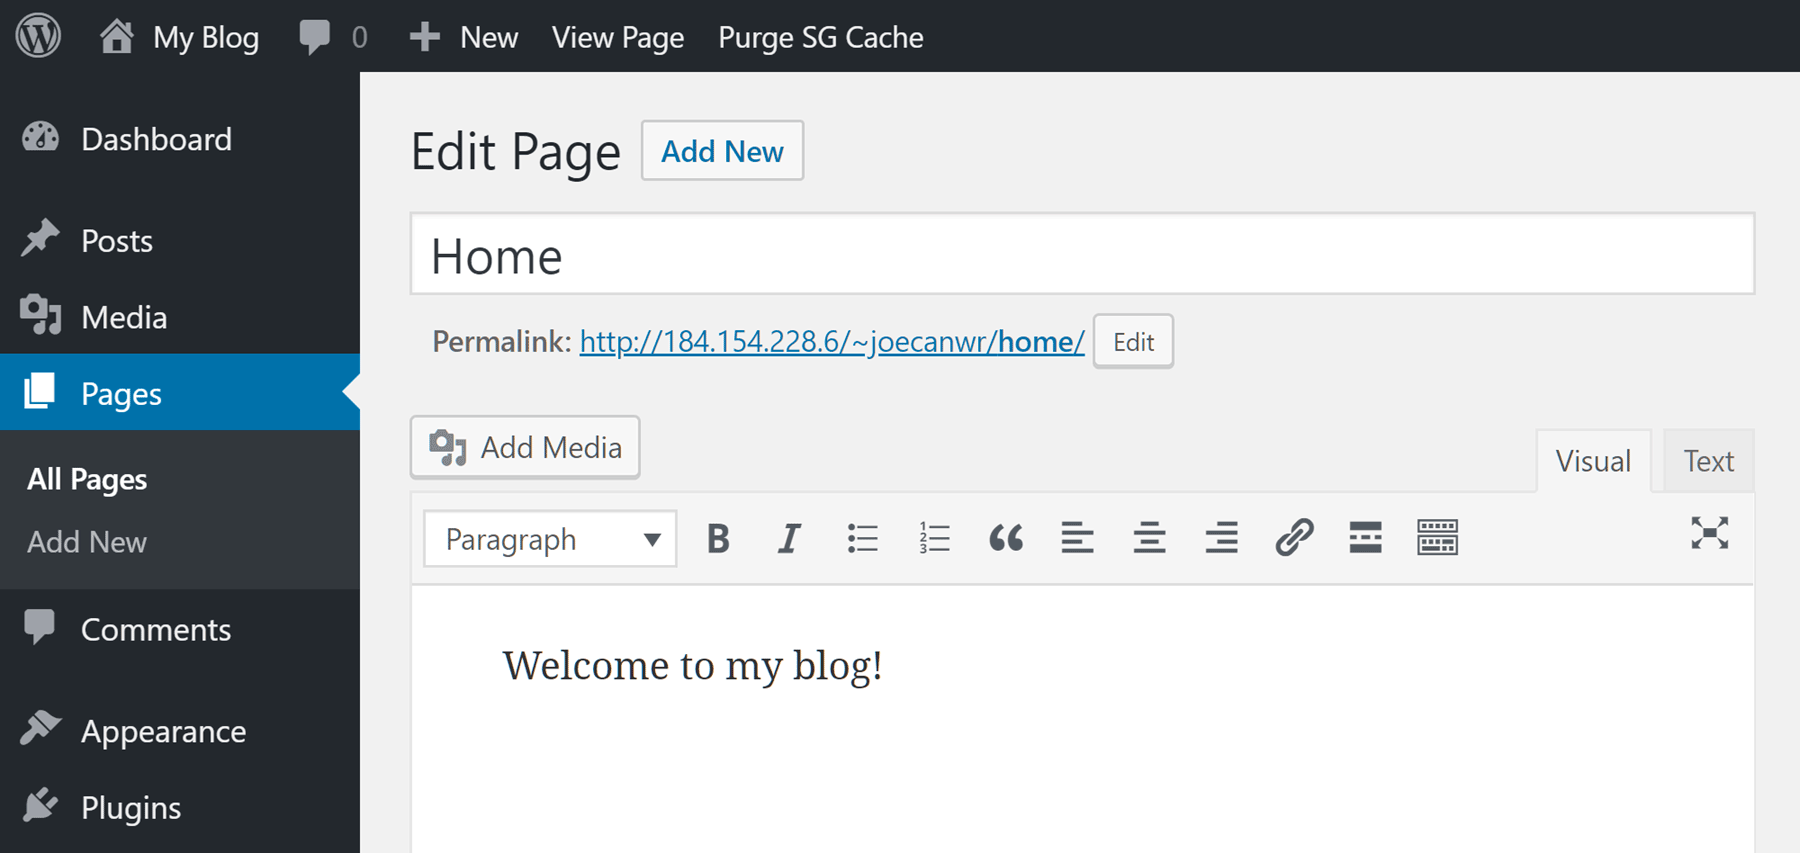
Creating a new page in WordPress is very straightforward.
You can then change the Reading settings to display that page by selecting it from the Homepage dropdown menu. You should also create a blank page called Blog, and then select that page from the Posts dropdown menu.
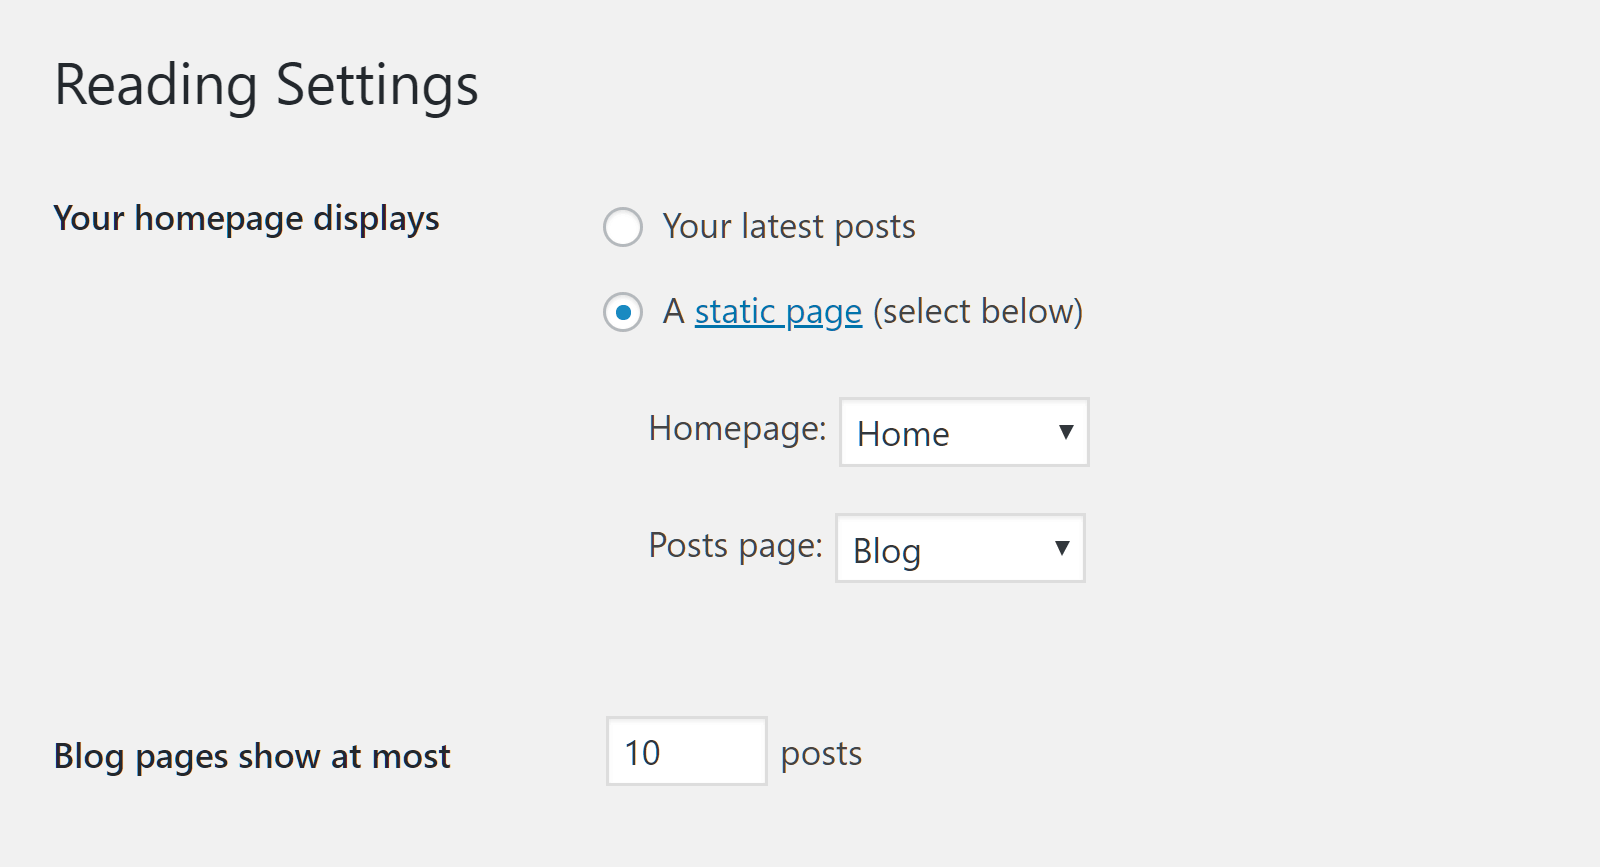
Now, your blog will display a page as its homepage and posts in the blog section.
Doing so will allow visitors to access your latest blog posts by going to the appropriate URL, such as https://wordpress.org/blog/.
Another setting to configure before moving on to creating your first blog post is the Permalinks options. From the Permalinks page, located under the Settings menu, you can set the URL structure for your blog and its posts.
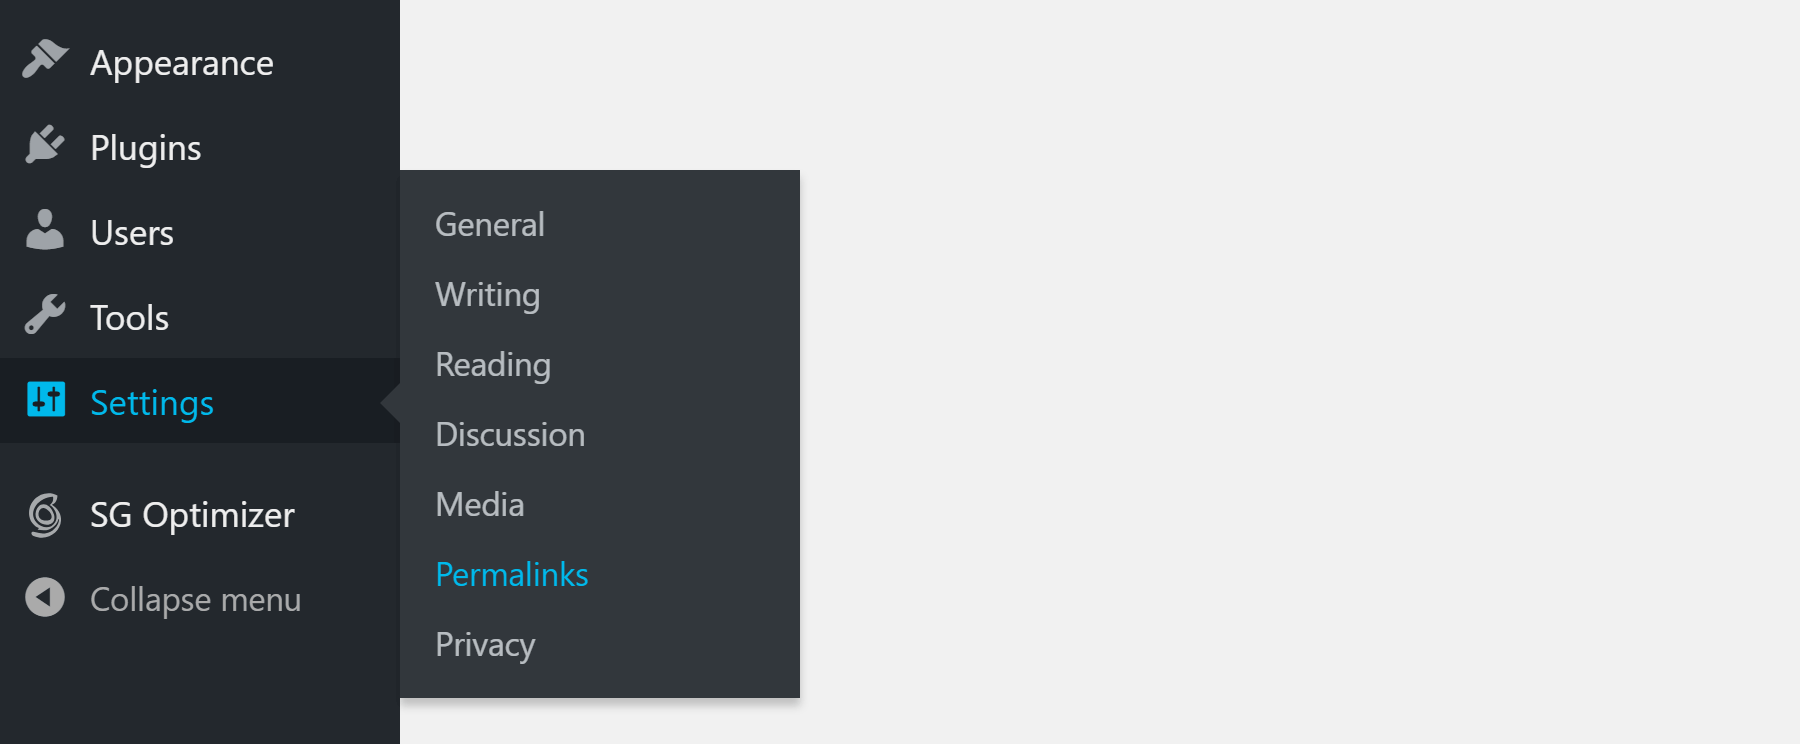
Click on the Permalinks item on the Settings menu to configure your site URLs.
The Permalinks settings affect the address or URL of your content. By default, the date of publication is included in the blog post URL.

By default, WordPress blog post URLs include the post publication date.
While this is fine, choosing the Post Name option makes the URL for each post look less cluttered and easier to read.

Choosing the Permalinks Post Name option makes the post URLs easier to read.
9) Customize the Appearance of Your Blog
Another useful feature of WordPress is the blog and website Customizer tool. Through this interface, you can personalize many aspects of your blog. However, the level of customization available will depend on the theme you’ve chosen. For example, a basic free theme may simply let you change a few colors on your site, while a highly customizable paid theme could give you full control over the fonts, layouts, headers and other elements of your blog.
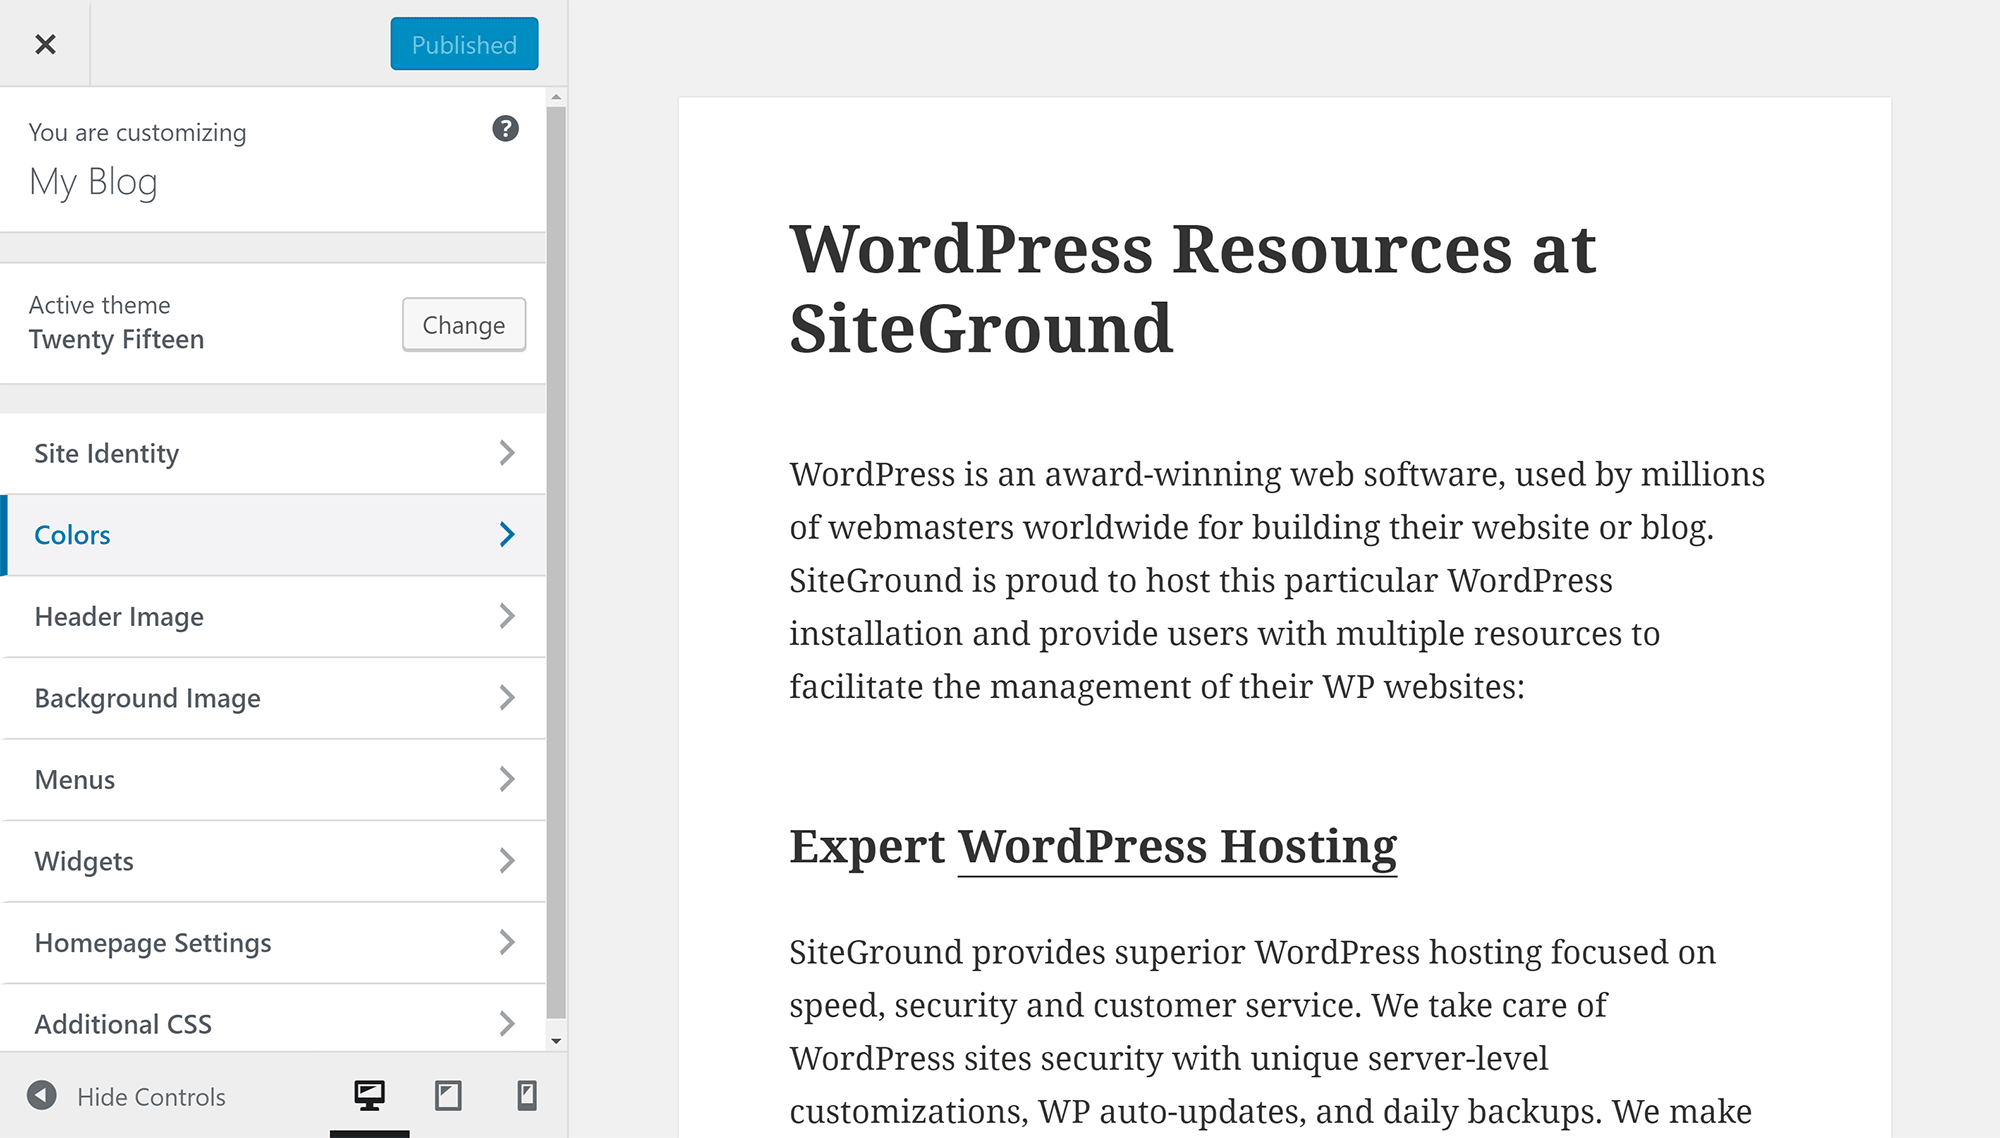
Depending on your theme, you can personalize your blog to varying degrees through the WordPress Customizer.
To access the WordPress Customizer, log in to your WordPress dashboard and click on Customizer from the Appearance menu.
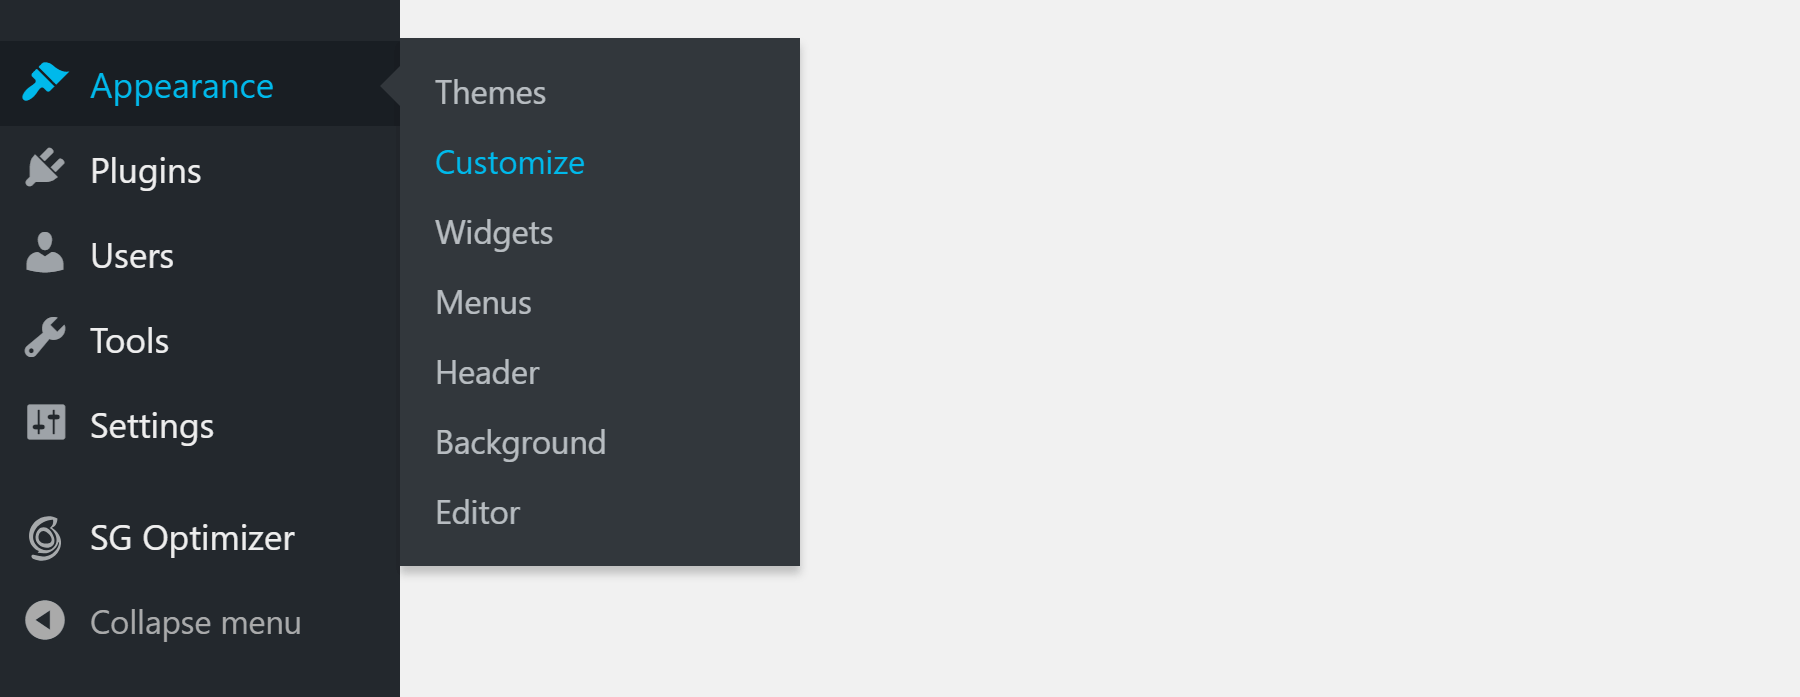
The Customizer can be found by clicking on the Customize options of the Appearance menu.
10) Create Your First Blog Post and Essential Pages
With WordPress installed and configured, and a suitable theme activated, it’s time to create your first blog post.
Get started by clicking on the New button on the WordPress admin toolbar, and then Post.

Clicking on the New Post menu item loads the WordPress Editor.
Giving your blog post a title and some content are the main requirements for publishing a new post.
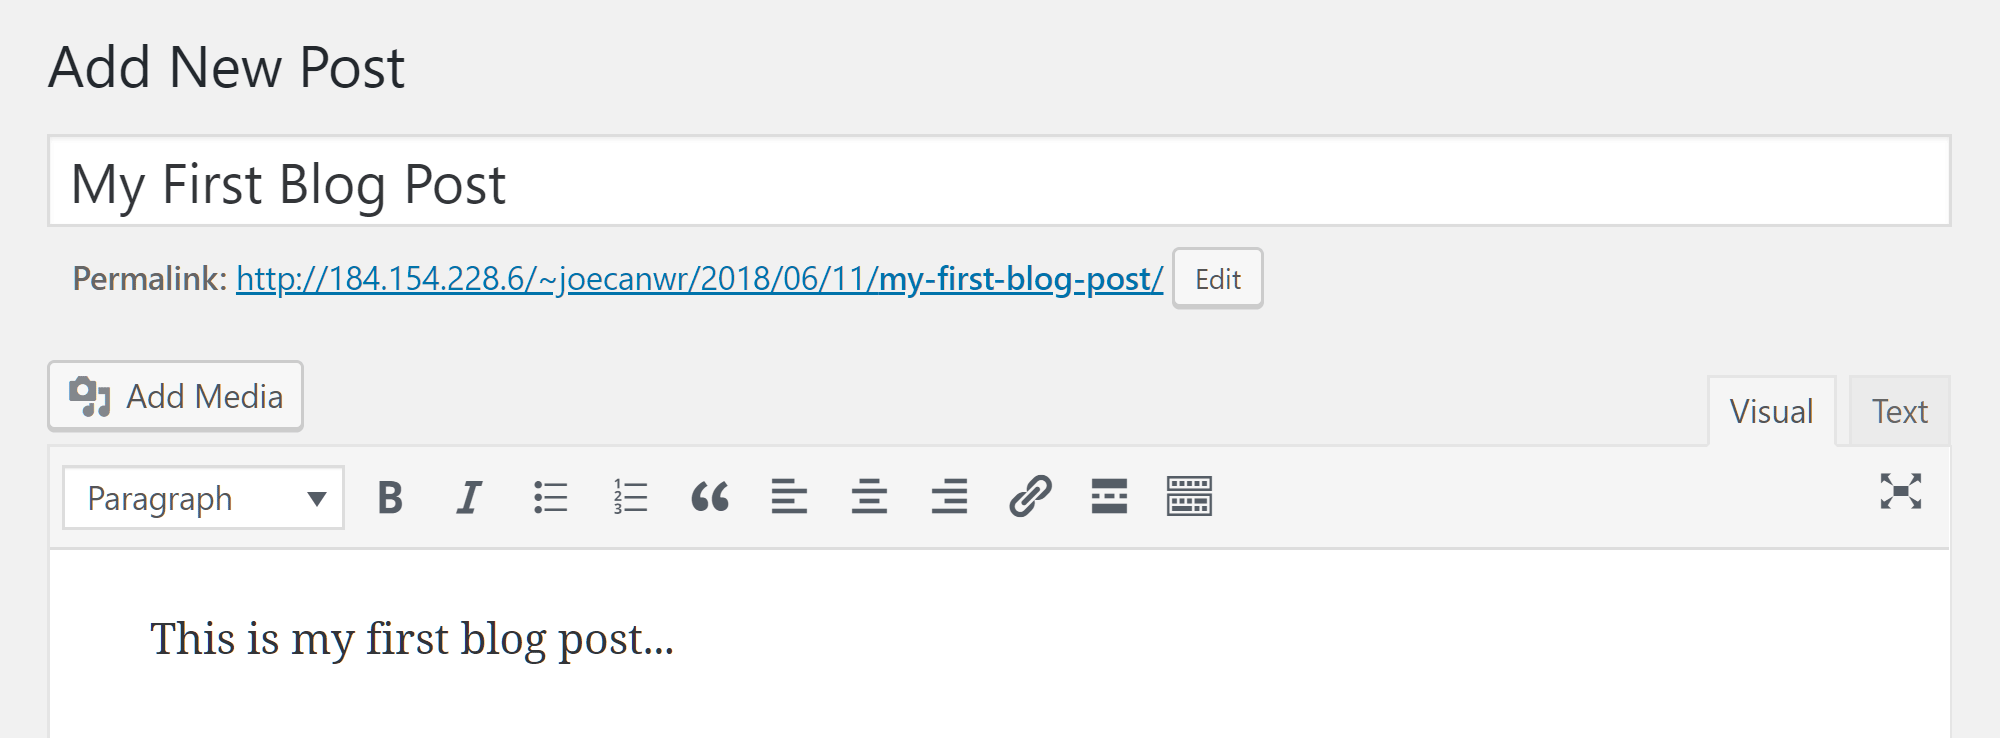
The WordPress Editor lets you create posts for your blog.
However, you can also assign a category and add tags to your post. Our video on the differences between WordPress categories and tags will help you to use this feature properly. But, in short, each post should have one of your categories assigned to it and two-to-four tags to help your readers find more of your related content.
Adding a featured image to your post is an option too. Typically, this image will be displayed as the header image for your blog post, although this depends on your choice of theme. Good places to find royalty-free images for your blog include Pixabay, Pexels, and Unsplash.
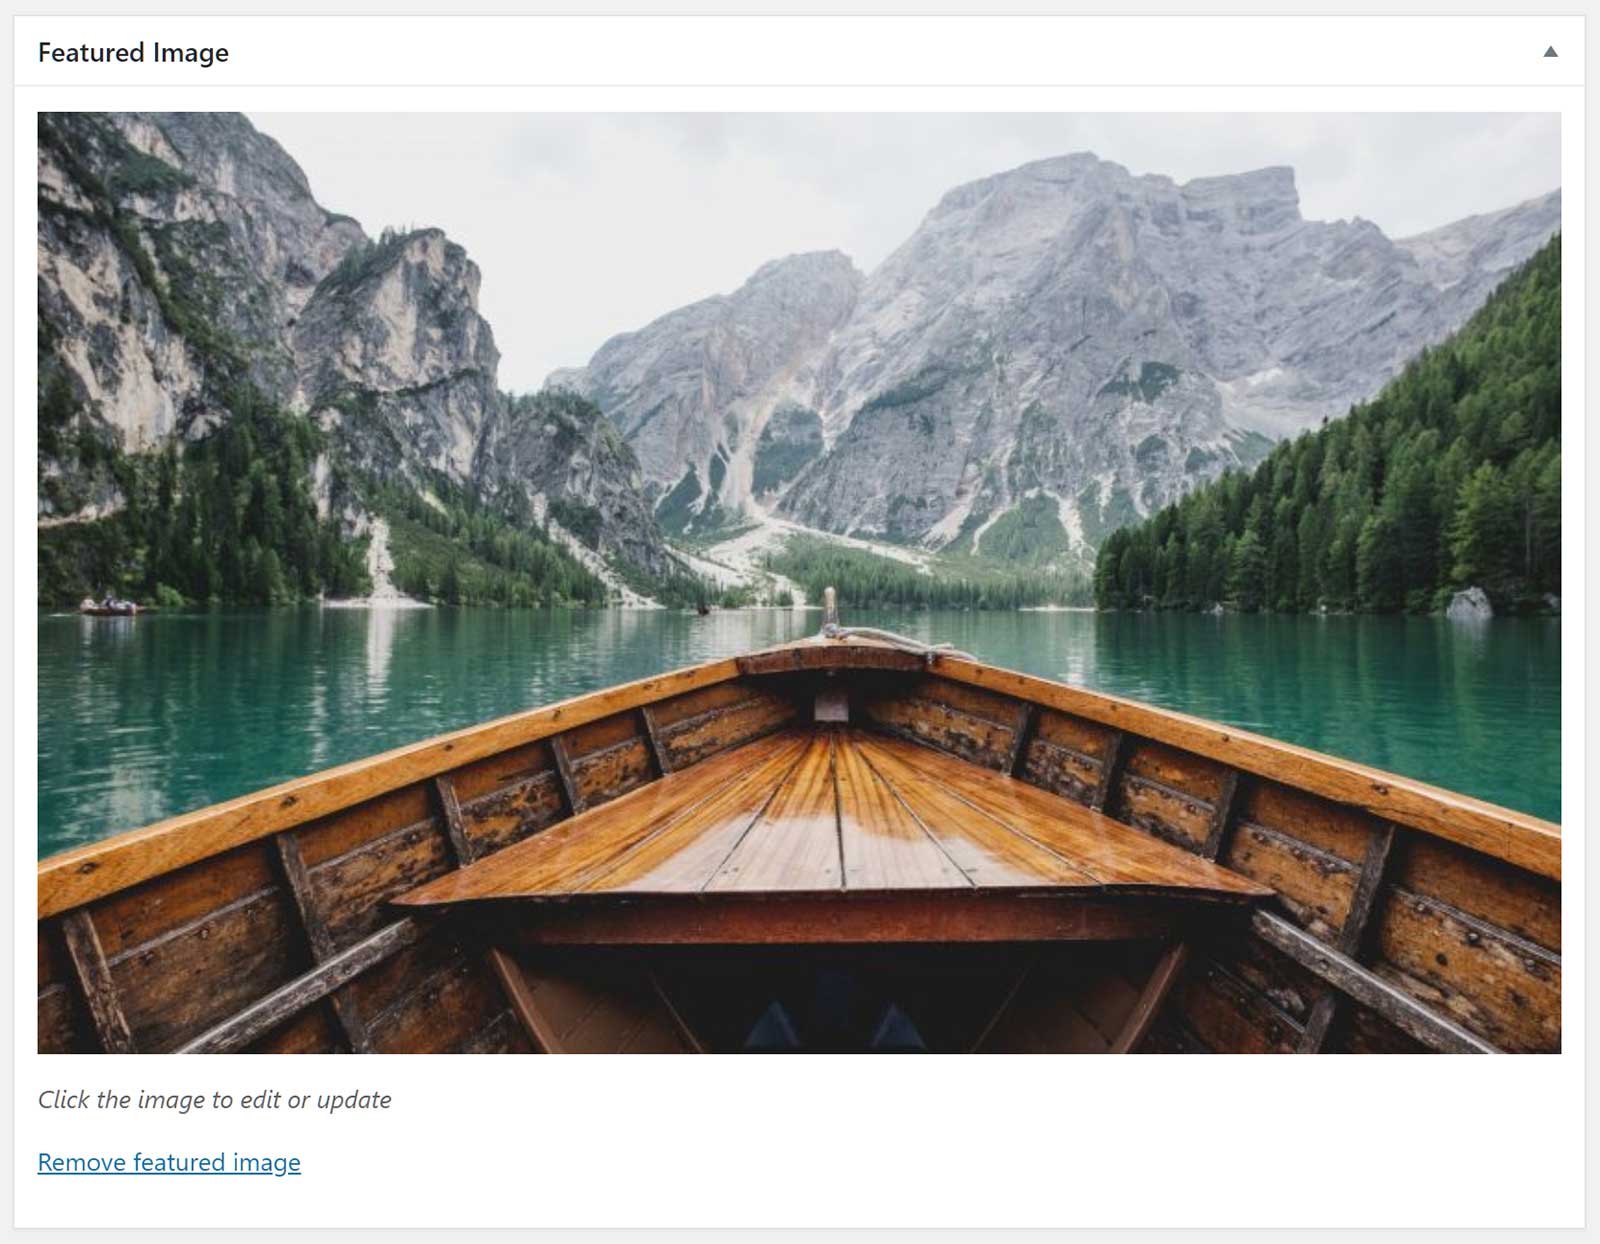
Each blog post can have its own featured image.
At any point, you can click on the Preview button in the top right-hand corner of the screen to see how your post will look when it’s published. Then, when you’re ready, you can click the Publish button to add your first post to your blog.
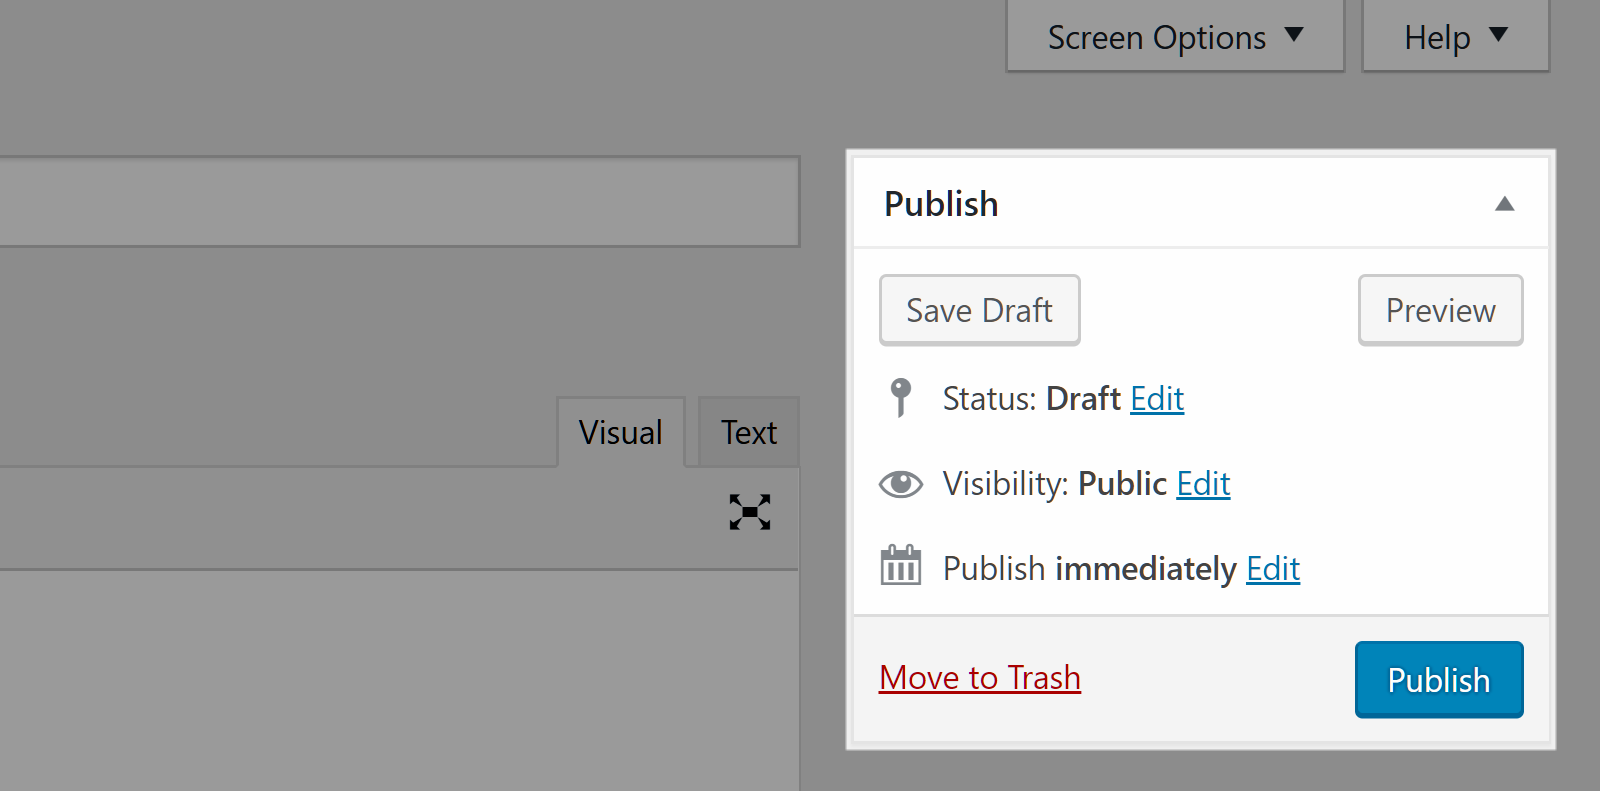
Click on the Preview or Publish button to view your blog post.
Although your blog is now up and running, and available to the world, there are still some tasks you should put on your to-do list. These include completing your user profile, installing some useful plugins and creating an about page.
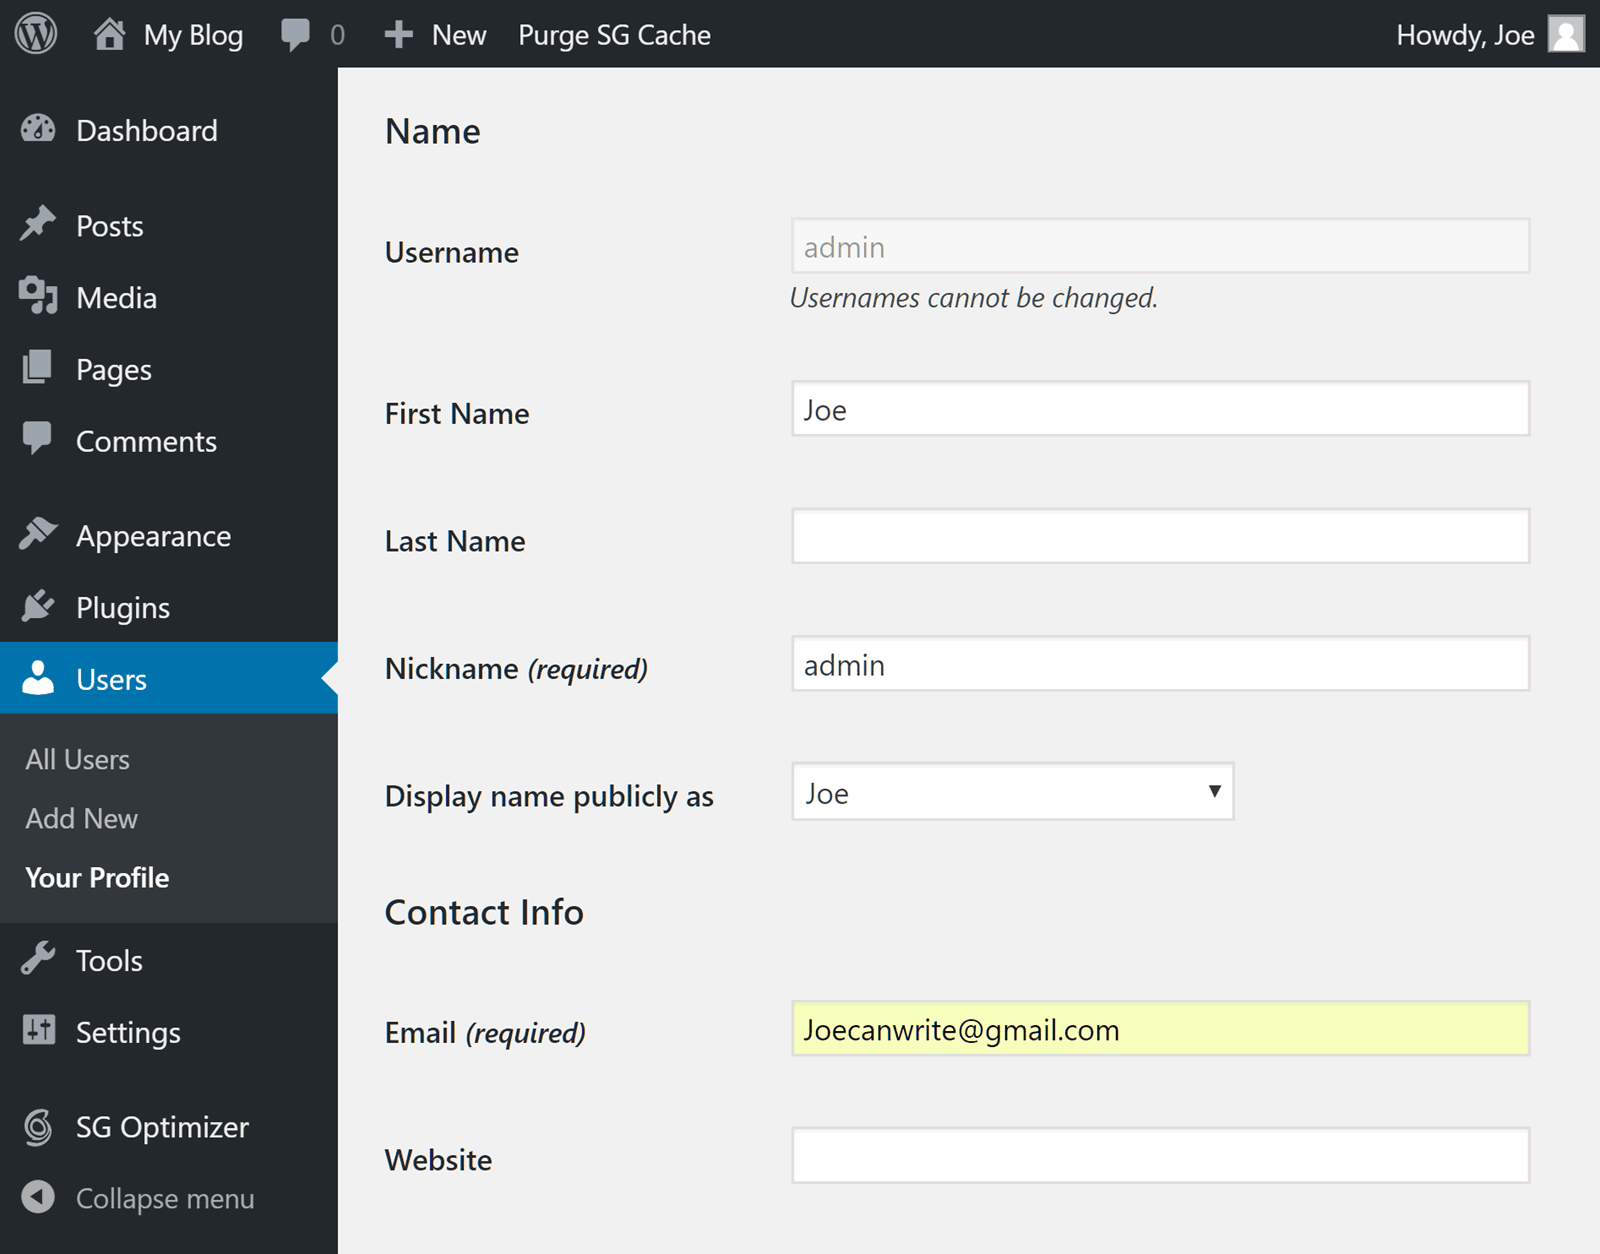
The display name can be configured through the User Profile page.
You can change your display name, among other things, on the User Profile page of your blog.
Our video on the ten things to do after installing WordPress can guide you in the right direction.
Final Thoughts
If you’ve followed the steps in our guide on how to start a blog, your new WordPress blog should be online and available to the world.
Oh, and before you go, be sure to check out our extensive range of tutorials and guides. Good luck, and keep learning!
If you have any questions on starting a blog, feel free to leave a comment below.


All comments are held for moderation. We'll only publish comments that are on topic and adhere to our Commenting Policy.