
How to download, edit and upload an htaccess file on a Mac without changing any of your computer’s settings

From redirects to controlling IP access, the htaccess file is an incredibly useful tool for achieving all kinds of modifications, tweaks and improvements to your website – the majority of which have, of course, already been expertly covered by Jeff Starr in the excellent htaccess made easy. But how to make such edits? Or, more specifically, how to gain access to the htaccess file itself? Well, what with this being a dot-file (making the file hidden from view on most machines), it is — as you’ll already no doubt be aware — a particularly tricky file to deal with. Changing the visibility settings of your FTP client is usually pretty simple (some, like FileZilla and Transmit, etc, will even show hidden files by default), however, as anybody who’s ever tried to do so will testify, changing the file-visibility settings on your computer (the most sensible place to make edits to files*) is usually anything but simple with a Mac – the most commonly used method being to boot up the dreaded Terminal and run a bunch scary commands…
An altogether easier way:
There is, however, another way of dealing with this particularly troublesome file that negates the headache of having to change your Mac’s file-visibility settings altogether (note: while the following method appears quite long-winded, once you’ve done it once you’ll see how easy/simple it is). Let’s take a look:
Step 1.
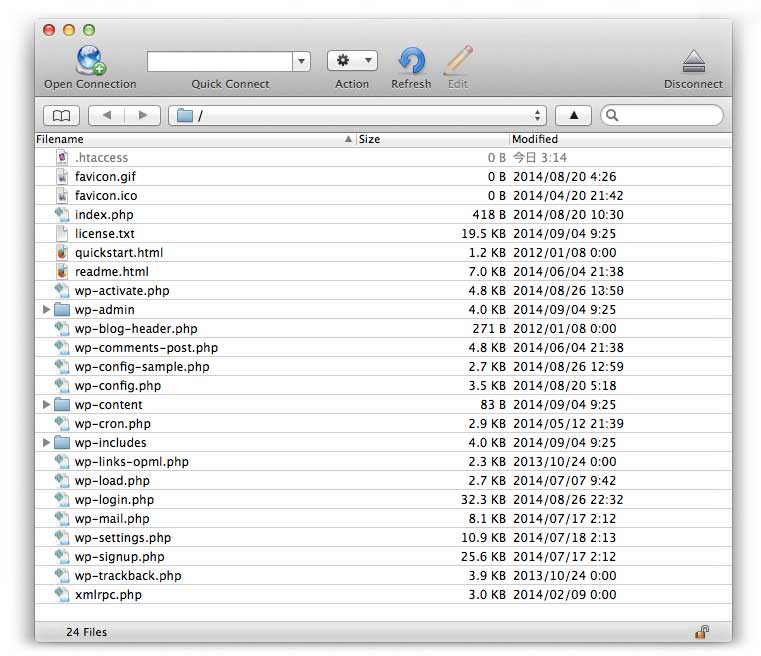
Open Cyberduck (an extremely popular FTP client for Macs — give it a try if you haven’t already) and connect to your server with your usual FTP/SFTP details. Find the directory that contains the htaccess file you want to edit and select ‘View Hidden Files’ in the drop-down menu under ‘View’. You should then see the .htaccess file appear in the directory. Like so:
Step 2.
Create a new folder somewhere on your computer (like the desktop, for example) and give it a name (we’ll call ours ‘htaccess file edits’). Note: don’t skip this step because you’ll later on have a hidden dot file in this folder — better to have an invisible file somewhere specific so that you can simply delete it later by deleting the folder it’s contained in! Now, head back to Cyberduck and right-click (i.e. control-click since we’re using a Mac) on the .htaccess file and then select ‘Download As…’ from the resulting drop-down menu. Then, most importantly, delete the ‘.’ from the file name (i.e. so that the file is now called simply ‘htaccess’ and NOT ‘.htaccess’) and click the little downward-facing triangle to the right of the download box to expand the options and navigate to your new folder. Like so:
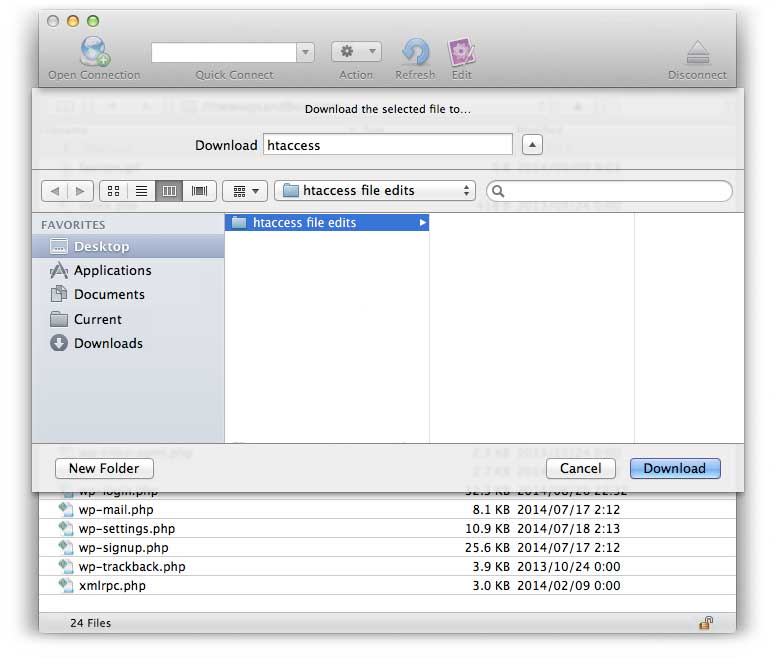
…after navigating to the folder in which you wish to download the file, hit ‘Download’.
Step 3.
Navigate to your newly downloaded htaccess file (which, since it no longer has the dot in front of its file name, should now be visible in the folder you created in the above step) and, first things first, make a backup of it by simply copying the file (tip: rename the new file to avoid confusing the two files later – we’ll rename ours ‘htaccess – original – backup’).
Step 4.
Next, using a Text Editor (like TextWrangler) (NOT a Word Processor!), make your desired htaccess edits to the original file and then, when you’re done editing and happy with the new file, save it.
Step 5.
Now, in addition to simply saving it on top of the original file, go back to the ‘File’ menu and select ‘Save As’ – and change the file name from ‘htaccess.txt’ to ‘.htaccess’ (i.e. remove the ‘.txt’ at the end and add the ‘.’ to the beginning), and hit ‘Save’. You’ll then be confronted with a message that reads ‘Names that begin with a dot “.” are reserved for the system.‘. Choose ‘Use “.”‘.
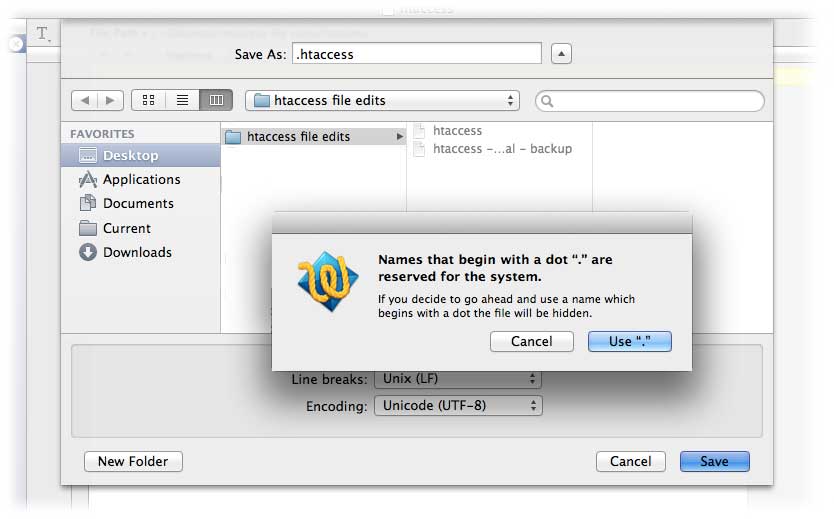
(note we’re using TextWrangler here — if you’re using a different text editor you may have a different message appear)
Step 6.
Good stuff. You’re now ready to upload your edited .htaccess file — which will now be invisible on your computer: luckily the folder it’s in is visible, so we still know where it is even if we can no longer actually see it!
Step 7.
Now, head back to Cyberduck and select ‘File’ → ‘Upload’. Navigate to the folder containing your hidden .htaccess file and select the ‘Show Hidden Files‘ checkbox at the bottom of the window.
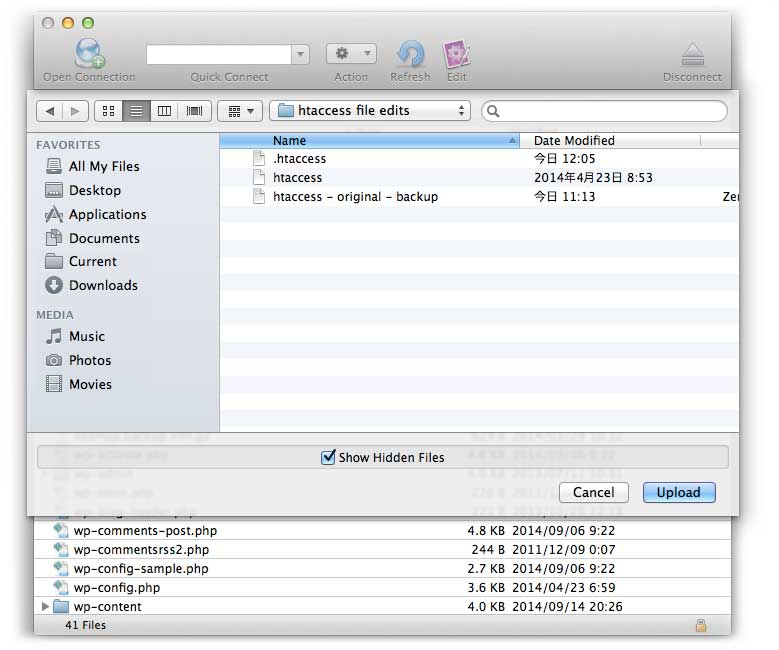
You should now see — and be able to select — your .htaccess file. Click ‘Upload’ and continue to overwrite the old .htaccess file when prompted.
Step 8.
Lastly, feel free to now delete the folder you created in step. 2 containing your hidden .htaccess file — remembering to first move the copy/backup of the originally downloaded htaccess file for later reference (should you ever need it).
Congratulations! You’ve now managed to download, edit and upload your .htaccess file without having to change any of the file-visibility settings on your Mac!
*alternatively, you could, of course, simply edit the file live on the server, however, this isn’t a method I’d generally recommend because without downloading and making a backup of it first there’s no way to revert to a previous version should you make a mistake!
Know of any other handy tips for editing/dealing with htaccess files?


All comments are held for moderation. We'll only publish comments that are on topic and adhere to our Commenting Policy.